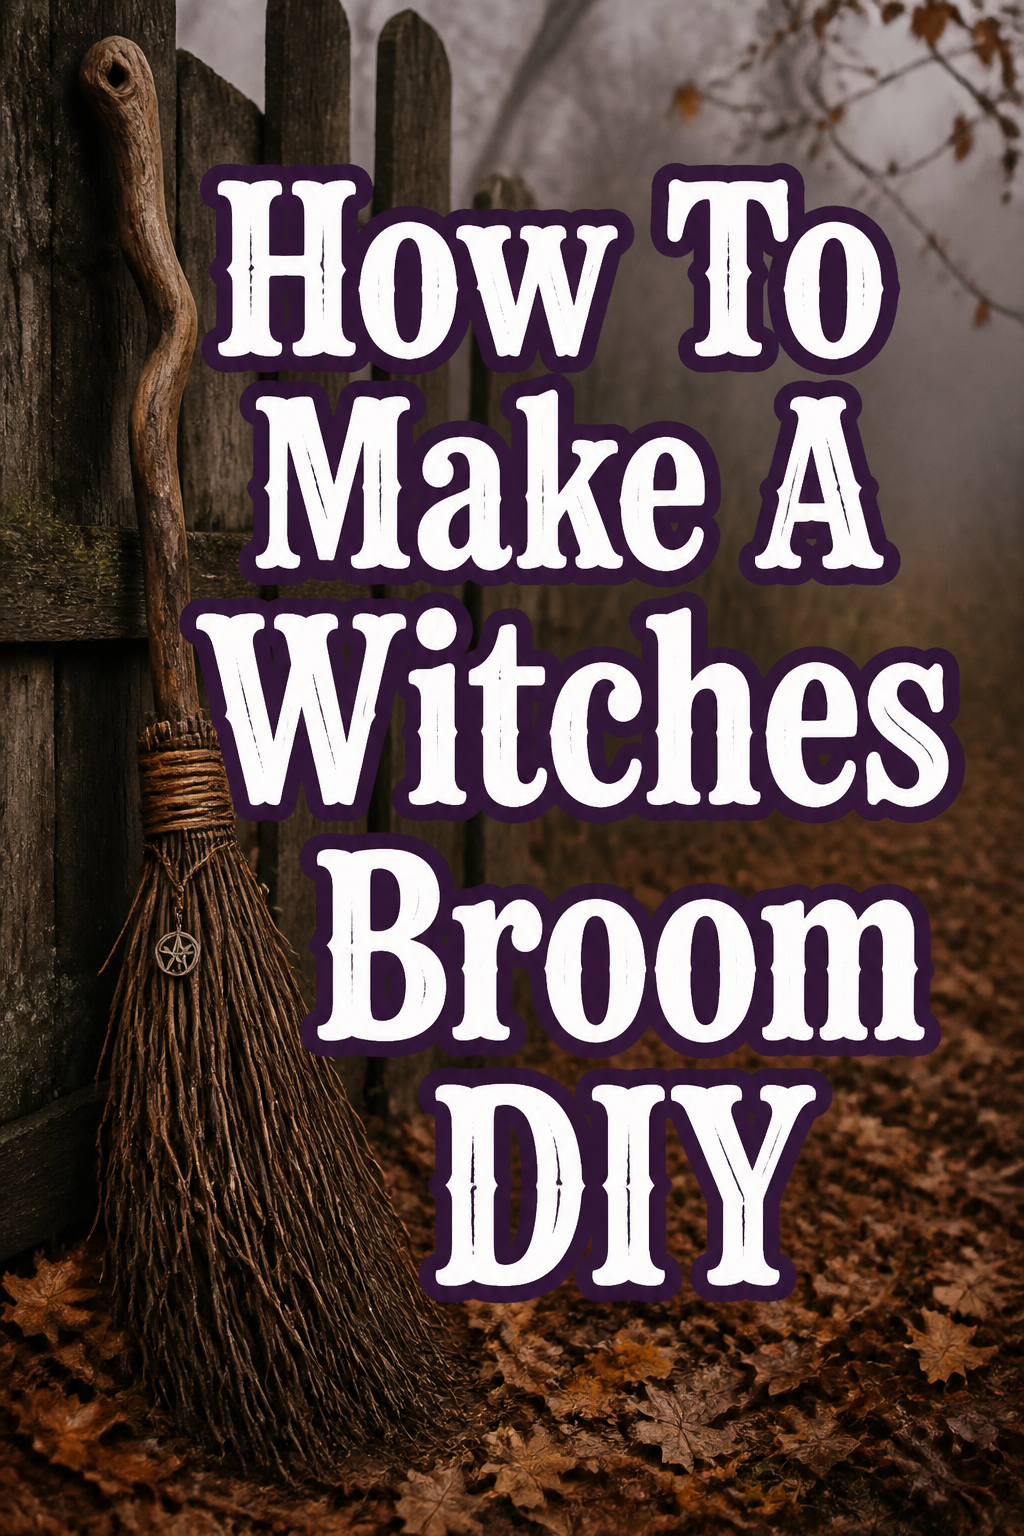
🧹 How To Make A Witches Broom DIY

Beginner-friendly templates, step-by-step guides,
and weekly project ideas in your inbox.
There’s something truly special about crafting with your own hands, especially when it taps into a bit of age-old magic.
I remember gathering branches as a child, dreaming of soaring through the night sky on my very own broomstick.
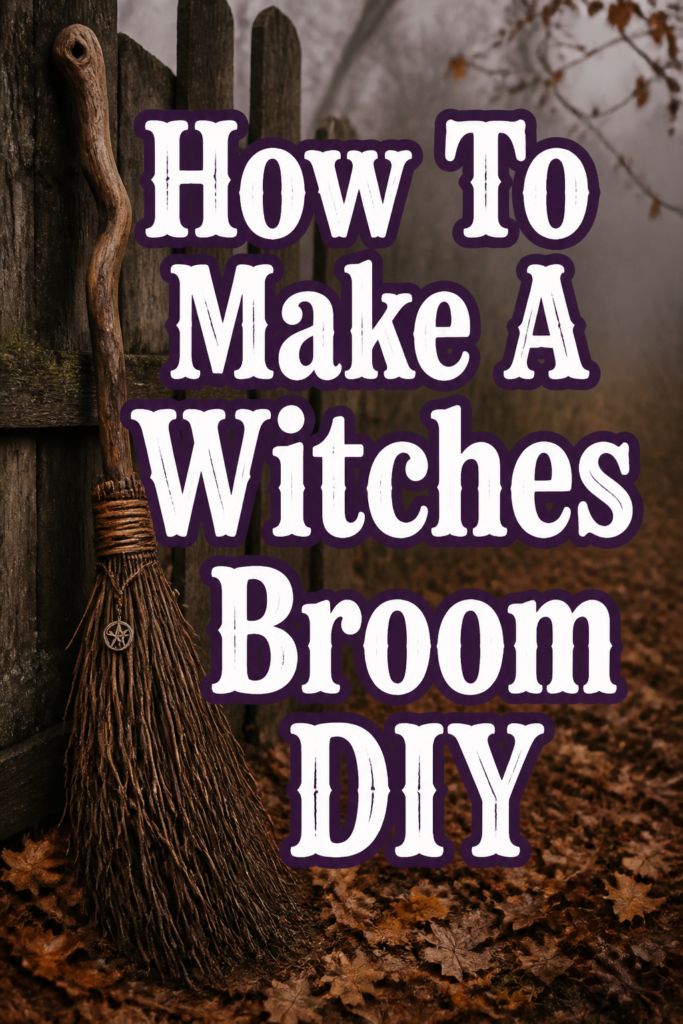
This guide will help you create a beautiful, authentic witches broom, perfect for decor, costume, or just for the joy of making.
Quick Overview
You’re about to embark on a delightful journey, transforming natural elements into a timeless symbol of magic and folklore.
By the end of this project, you’ll have a unique, handcrafted broom that reflects your personal touch and a little bit of your spirit.
- Time needed: 4-8 hours (spread over a few days for drying/sourcing)
- Difficulty: Intermediate (requires patience and some physical effort)
- What you’ll need: A sturdy staff, natural bristles, strong binding material, and basic tools.
Step-by-Step Instructions
Step 1: Gather Your Core Materials
Find the perfect staff for your broom. Look for a sturdy branch, roughly 4-6 feet long and 1-2 inches thick at its base.
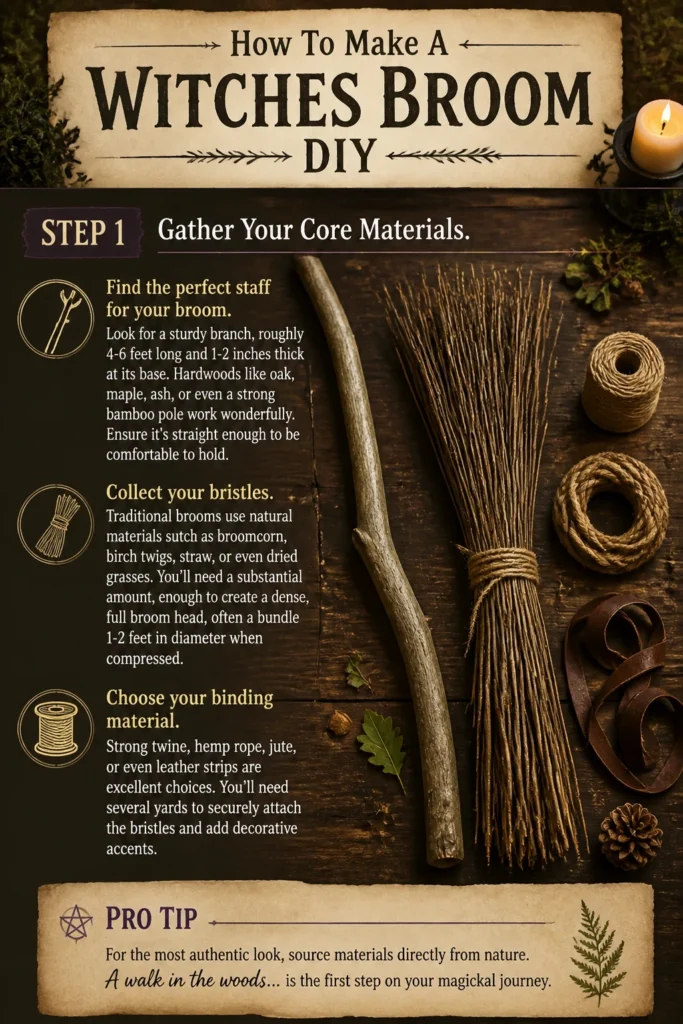
Hardwoods like oak, maple, ash, or even a strong bamboo pole work wonderfully. Ensure it’s straight enough to be comfortable to hold.
Collect your bristles. Traditional brooms use natural materials such as broomcorn, birch twigs, straw, or even dried grasses.
You’ll need a substantial amount, enough to create a dense, full broom head, often a bundle 1-2 feet in diameter when compressed.
Choose your binding material. Strong twine, hemp rope, jute, or even leather strips are excellent choices.
You’ll need several yards to securely attach the bristles and add decorative accents.
Pro Tip: For the most authentic look, source materials directly from nature. A walk in the woods can provide both your staff and bristles, connecting you deeply to the crafting process. Always gather responsibly and sustainably.
Step 2: Prepare the Broom Staff
Clean your chosen staff thoroughly. Remove any loose bark, dirt, or debris with a stiff brush and water.
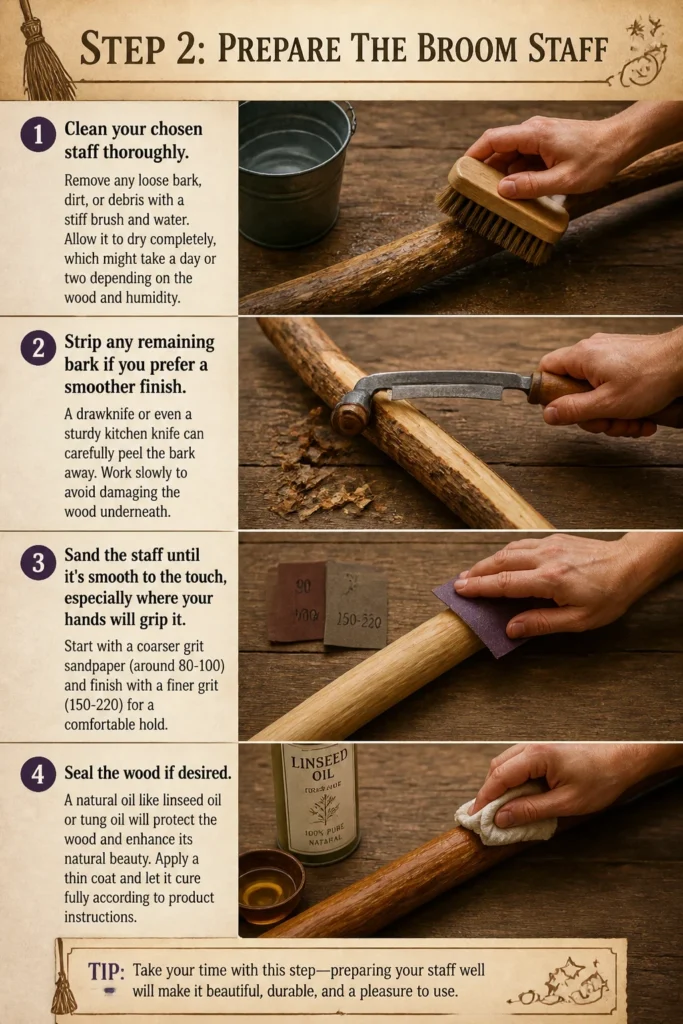
Allow it to dry completely, which might take a day or two depending on the wood and humidity.
Strip any remaining bark if you prefer a smoother finish. A drawknife or even a sturdy kitchen knife can carefully peel the bark away.
Work slowly to avoid damaging the wood underneath.
Sand the staff until it’s smooth to the touch, especially where your hands will grip it.
Start with a coarser grit sandpaper (around 80-100) and finish with a finer grit (150-220) for a comfortable hold.
Seal the wood if desired. A natural oil like linseed oil or tung oil will protect the wood and enhance its natural beauty.
Apply a thin coat and let it cure fully according to product instructions.
Step 3: Prepare the Bristle Material
Sort your collected bristles. Discard any brittle, broken, or overly weak pieces.
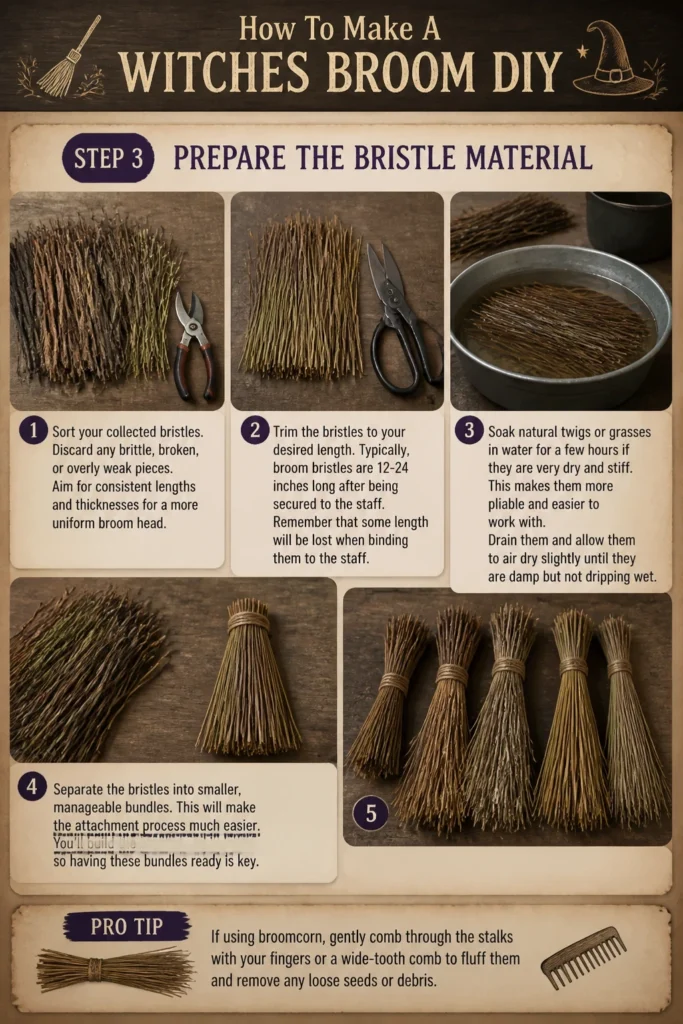
Aim for consistent lengths and thicknesses for a more uniform broom head.
Trim the bristles to your desired length. Typically, broom bristles are 12-24 inches long after being secured to the staff.
Remember that some length will be lost when binding them to the staff.
Soak natural twigs or grasses in water for a few hours if they are very dry and stiff. This makes them more pliable and easier to work with.
Drain them and allow them to air dry slightly until they are damp but not dripping wet.
Separate the bristles into smaller, manageable bundles. This will make the attachment process much easier.
You’ll build the broom head in layers, so having these bundles ready is key.
Pro Tip: If using broomcorn, gently fan out the ends of each stalk before binding. This helps create a fuller, more traditional broom shape.
Step 4: Attach the First Layer of Bristles
Begin by gathering a small bundle of prepared bristles, about 1-2 inches in diameter.
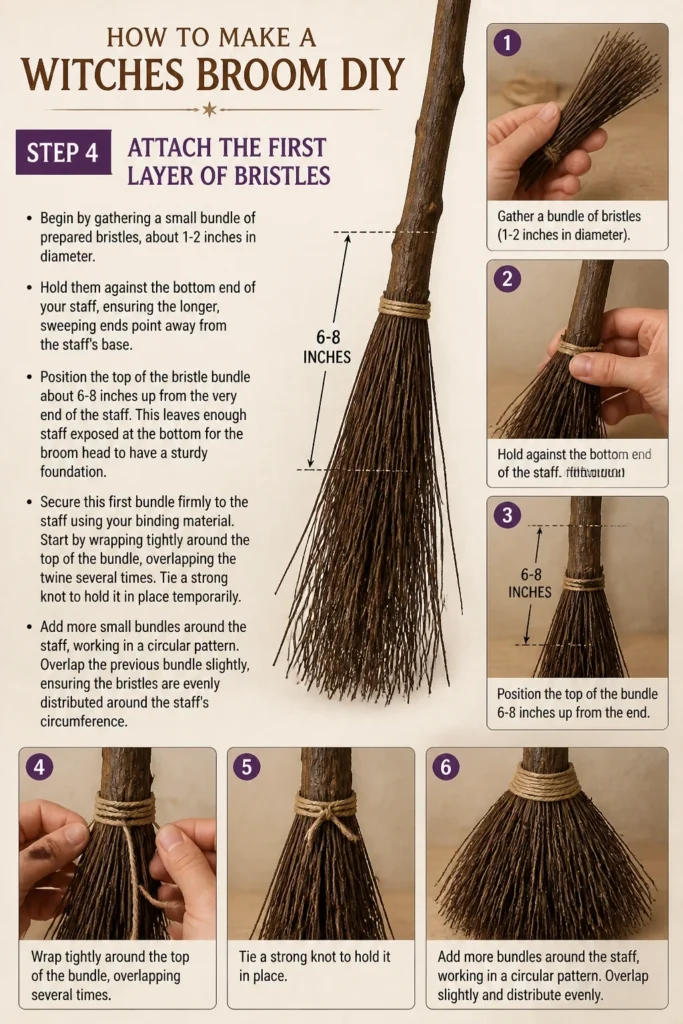
Hold them against the bottom end of your staff, ensuring the longer, sweeping ends point away from the staff’s base.
Position the top of the bristle bundle about 6-8 inches up from the very end of the staff.
This leaves enough staff exposed at the bottom for the broom head to have a sturdy foundation.
Secure this first bundle firmly to the staff using your binding material. Start by wrapping tightly around the top of the bundle, overlapping the twine several times.
Tie a strong knot to hold it in place temporarily.
Add more small bundles around the staff, working in a circular pattern.
Overlap the previous bundle slightly, ensuring the bristles are evenly distributed around the staff’s circumference.
Step 5: Build Up the Broom Head with More Layers
Continue adding bundles of bristles, working your way up the staff about 8-12 inches from the very bottom.
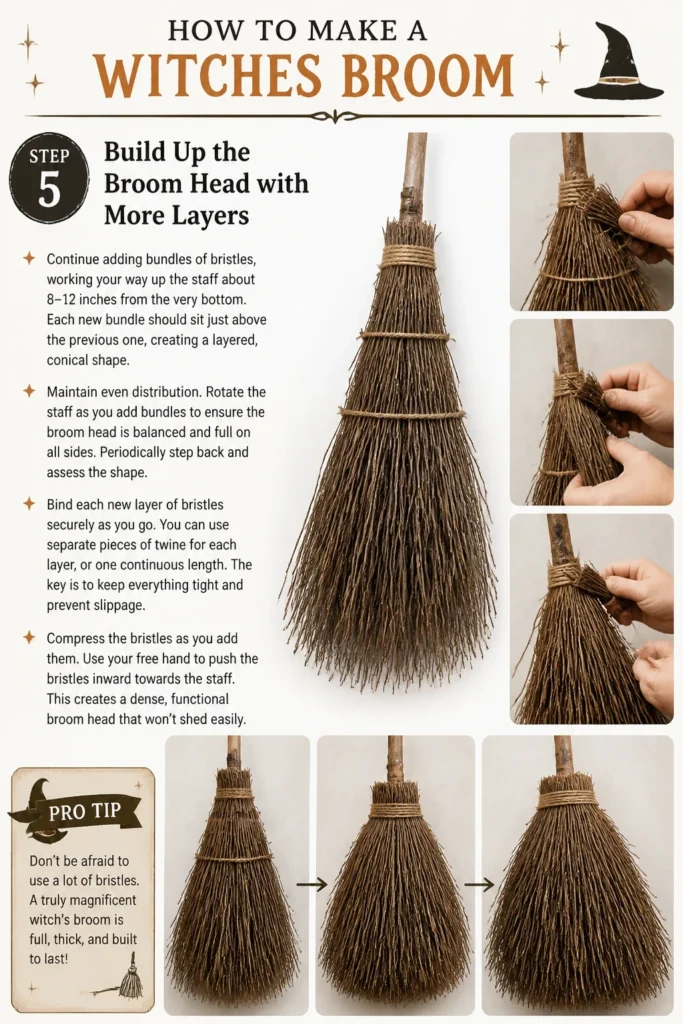
Each new bundle should sit just above the previous one, creating a layered, conical shape.
Maintain even distribution. Rotate the staff as you add bundles to ensure the broom head is balanced and full on all sides.
Periodically step back and assess the shape.
Bind each new layer of bristles securely as you go. You can use separate pieces of twine for each layer, or one continuous length.
The key is to keep everything tight and prevent slippage.
Compress the bristles as you add them. Use your free hand to push the bristles inward towards the staff.
This creates a dense, functional broom head that won’t shed easily.
Pro Tip: Don’t be afraid to use a lot of bristles. A truly magnificent broom is generously full, offering both visual impact and sweeping effectiveness. More bristles mean a sturdier, more impressive broom.
Step 6: Secure All Bristles with Final Binding
Begin your final, robust binding from the top of your bristle attachment point.
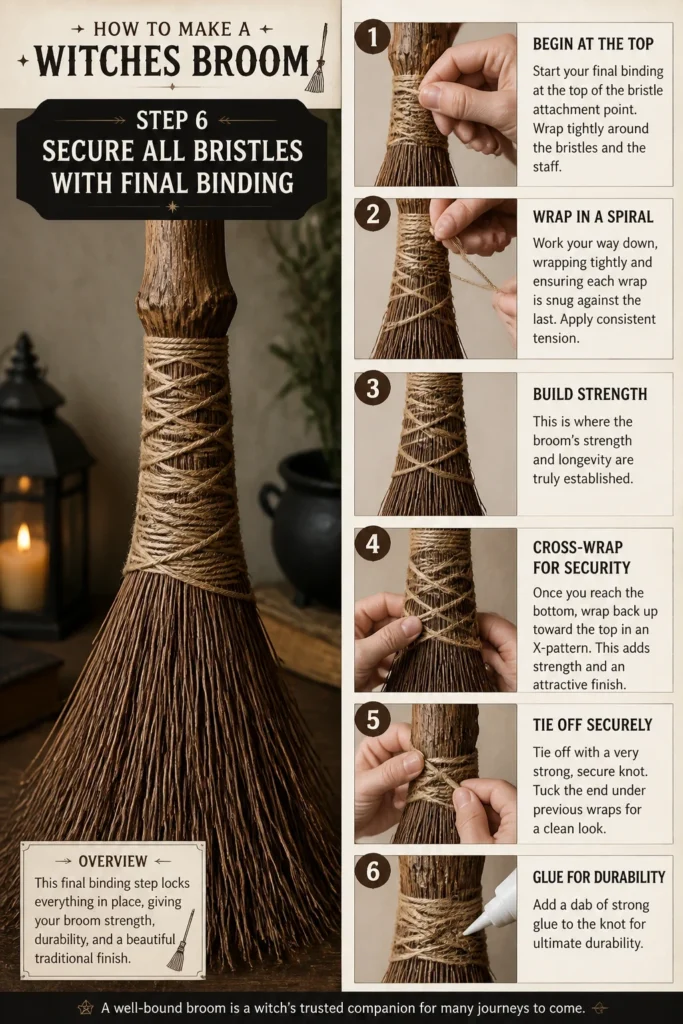
Wrap your chosen binding material (jute, hemp, or strong twine) tightly around all the bristles and the staff.
Work your way down in a spiral pattern, ensuring each wrap is snug against the last. Apply consistent tension.
This is where the broom’s strength and longevity are truly established.
Cross-wrap the binding for extra security. Once you reach the bottom of the bristle attachment, you can wrap back up towards the top in an X-pattern.
This traditional method adds both strength and an attractive finish.
Tie off the binding with a very strong, secure knot. You can tuck the end under previous wraps for a clean look.
Consider adding a dab of strong glue to the knot for ultimate durability.
Step 7: Trim and Shape the Broom Head
Lay your broom on a flat surface or hold it upright.
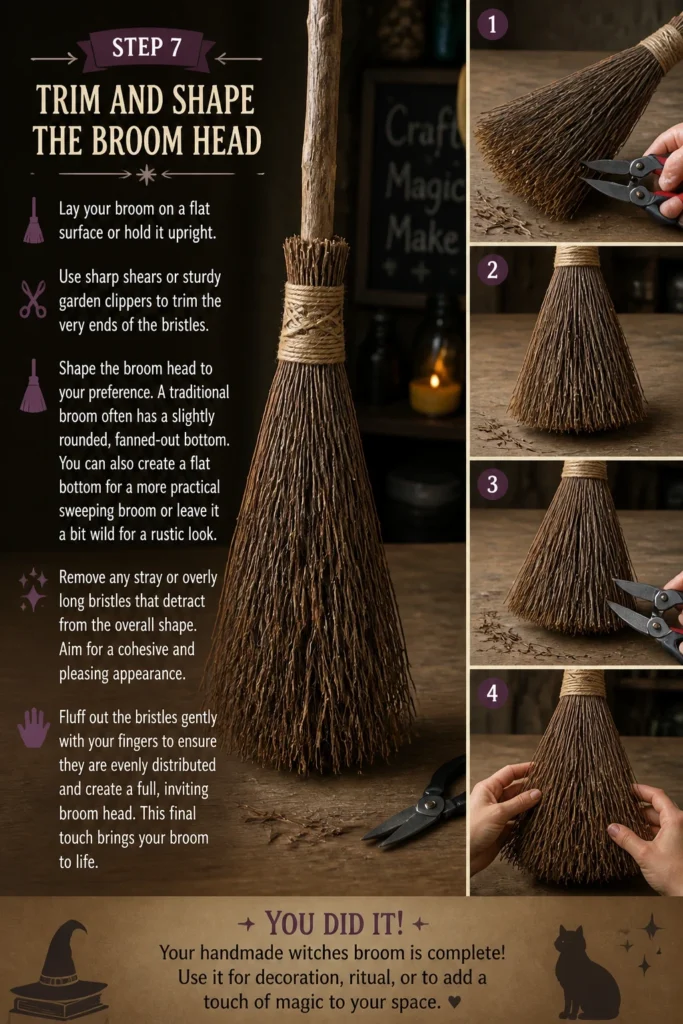
Use sharp shears or sturdy garden clippers to trim the very ends of the bristles.
Shape the broom head to your preference. A traditional broom often has a slightly rounded, fanned-out bottom.
You can also create a flat bottom for a more practical sweeping broom or leave it a bit wild for a rustic look.
Remove any stray or overly long bristles that detract from the overall shape.
Aim for a cohesive and pleasing appearance.
Fluff out the bristles gently with your fingers to ensure they are evenly distributed and create a full, inviting broom head.
This final touch brings your broom to life.
Step 8: Add Decorative Touches (Optional)
Personalize your broom with ribbons, charms, or beads. Weave colorful ribbons into the binding or tie them around the staff.
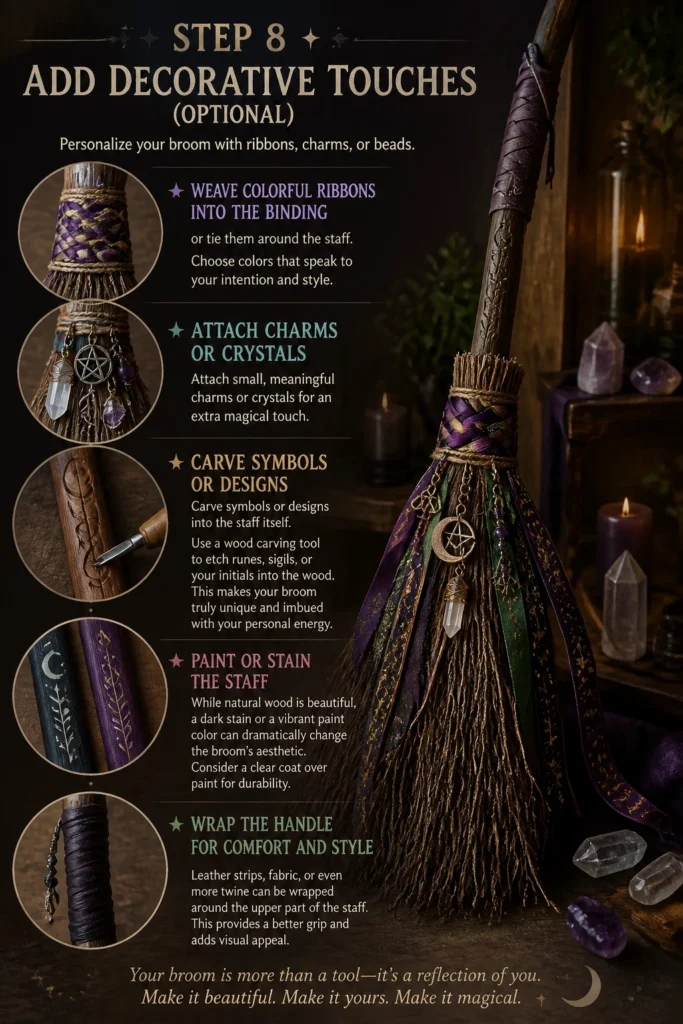
Attach small, meaningful charms or crystals for an extra magical touch.
Carve symbols or designs into the staff itself. Use a wood carving tool to etch runes, sigils, or your initials into the wood.
This makes your broom truly unique and imbued with your personal energy.
Paint or stain the staff. While natural wood is beautiful, a dark stain or a vibrant paint color can dramatically change the broom’s aesthetic.
Consider a clear coat over paint for durability.
Wrap the handle for comfort and style. Leather strips, fabric, or even more twine can be wrapped around the upper part of the staff.
This provides a better grip and adds visual appeal.
Common Mistakes to Avoid
Using a Weak Staff
Choosing a staff that is too thin or made of brittle wood can lead to disappointment. A weak staff might snap during use or even during the binding process.
Always opt for a strong, well-seasoned hardwood branch or a thick bamboo pole that can withstand pressure.
Insufficient Bristle Material
Underestimating the amount of bristles needed results in a sparse, ineffective, and less visually appealing broom. A skimpy broom head won’t sweep well and looks unfinished.
Gather more bristles than you think you’ll need; it’s always better to have too much than too little.
Loose Binding
Poorly secured bristles will quickly unravel, fall out, or shift, rendering your broom useless. The binding is the structural heart of your broom.
Ensure every wrap is tight and consistent, and use strong knots that won’t easily come undone.
Neglecting Preparation
Skipping steps like cleaning, stripping, or sanding the staff can lead to splinters, an uncomfortable grip, or a less durable broom. Unprepared bristles can be difficult to work with.
Take the time for proper preparation; it makes the entire crafting process smoother and the final product superior.
Troubleshooting
Bristles Keep Slipping
If your bristles are sliding down the staff or rotating, your binding isn’t tight enough, or the staff might be too smooth.
Unwrap a section and re-bind with more tension. You can also roughen the staff slightly with sandpaper where the bristles attach to create more friction.
Broom Head Looks Uneven
An uneven broom head usually means you haven’t distributed the bristle bundles consistently around the staff.
Carefully untie the binding (if possible) and re-position bundles, ensuring even coverage as you work in layers. Trim excessively long sections to create a more balanced shape.
Binding Material Breaks
If your twine or rope snaps during binding, it’s likely too weak for the tension you’re applying, or it has a flaw.
Switch to a stronger material like hemp rope or thicker jute. If using natural fibers, check for any frayed spots before you start wrapping.
Key Takeaways
- Sourcing quality materials, especially a sturdy staff and abundant bristles, is fundamental.
- Thorough preparation of both the staff and bristles ensures a smoother crafting experience and a better final product.
- Layering and tightly binding the bristles are crucial for a dense, durable, and effective broom head.
- Consistent tension in your binding material prevents slippage and maintains the broom’s integrity.
- Personalizing your broom with carvings, wraps, or charms makes it uniquely yours and adds character.
- Patience and attention to detail throughout each step will result in a beautiful, long-lasting handmade broom.
Frequently Asked Questions
Can I use synthetic bristles?
While you certainly can use synthetic materials like plastic broom refills, natural bristles offer an authentic look and feel. Natural materials also align better with the traditional, earthy essence of a witches broom.
How long will a DIY broom last?
With proper construction and care, a DIY witches broom can last for many years, especially if used primarily for decoration or light sweeping. The longevity depends heavily on the quality of materials and the tightness of your binding.
What if my staff isn’t perfectly straight?
A slightly crooked staff can add character and a rustic charm to your broom. Don’t feel pressured to find a perfectly straight piece. Embrace the natural imperfections; they tell a story.
Can children help make a broom?
Children can definitely assist with many steps, such as gathering materials, sorting bristles, and adding decorative touches. Adult supervision is essential for tasks involving sharp tools or very tight binding.
Our Top Recommended Finds
- Natural Jute Twine: Strong, biodegradable, and provides an earthy, rustic look for binding.
- Heavy-Duty Garden Clippers: Essential for trimming branches, bristles, and shaping the broom head precisely.
- Linseed Oil: A fantastic natural sealer for your wooden staff, protecting it and bringing out its natural grain.
Embrace Your Inner Crafter
You’ve now learned how to transform simple elements into a magical creation. This process is more than just making an object; it’s about connecting with ancient traditions and expressing your creativity.
Why not try making a smaller, decorative broom next, perhaps for a seasonal altar or as a gift?
Gather your materials and begin your crafting adventure today. The satisfaction of holding your very own handmade witches broom is truly enchanting.
Beginner-friendly templates, step-by-step guides,
and weekly project ideas in your inbox.