💍 How To Make A Fake Nose Ring

Beginner-friendly templates, step-by-step guides,
and weekly project ideas in your inbox.
Thinking about a nose piercing but not ready for the commitment?
Making a fake nose ring is a fantastic way to experiment with your look without any pain or permanence.
I’ve personally tried countless methods, from simple paper clips to intricate wire designs, and I’m excited to share the best, most practical techniques with you.
Quick Overview
This guide will walk you through creating a realistic, comfortable fake nose ring using common household items or inexpensive craft supplies.
- Time needed: 15-30 minutes
- Difficulty: Beginner
- What you’ll need: Craft wire or a paper clip, small pliers, wire cutters, a ruler, and rubbing alcohol.
Step-by-Step Instructions
Step 1: Gather Your Materials
Start by collecting everything you’ll need before you begin. Having your tools ready makes the process smooth and enjoyable.
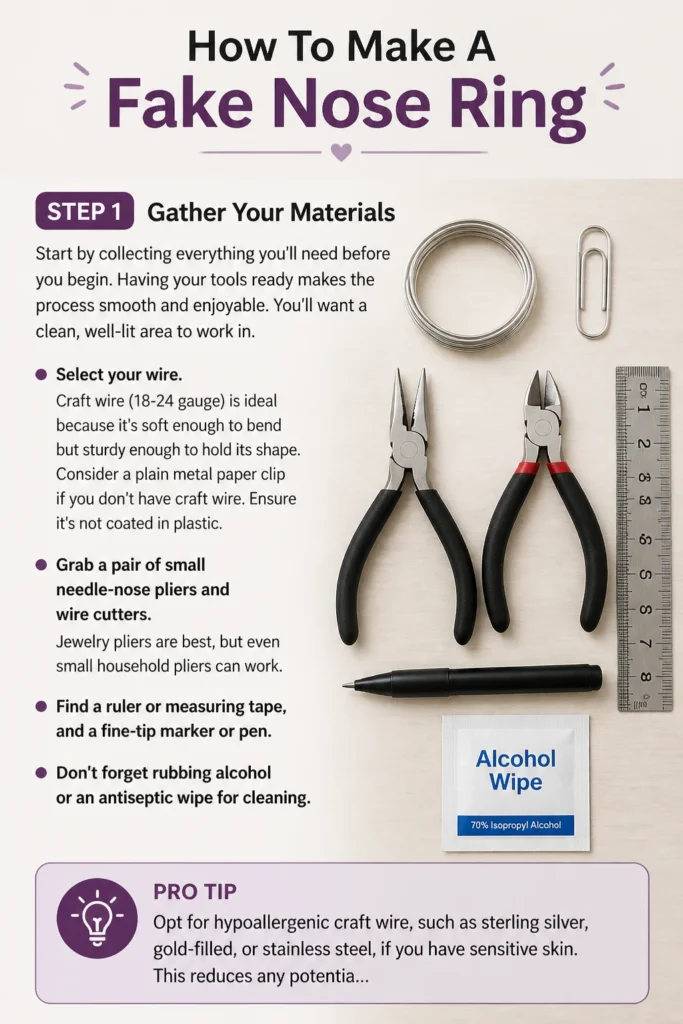
You’ll want a clean, well-lit area to work in.
- Select your wire. Craft wire (18-24 gauge) is ideal because it’s soft enough to bend but sturdy enough to hold its shape.
- Consider a plain metal paper clip if you don’t have craft wire. Ensure it’s not coated in plastic.
- Grab a pair of small needle-nose pliers and wire cutters. Jewelry pliers are best, but even small household pliers can work.
- Find a ruler or measuring tape, and a fine-tip marker or pen.
- Don’t forget rubbing alcohol or an antiseptic wipe for cleaning.
Pro Tip: Opt for hypoallergenic craft wire, such as sterling silver, gold-filled, or stainless steel, if you have sensitive skin. This reduces any potential irritation from prolonged contact.
Step 2: Prepare Your Workspace
A tidy workspace helps you focus and prevents losing small pieces of wire.
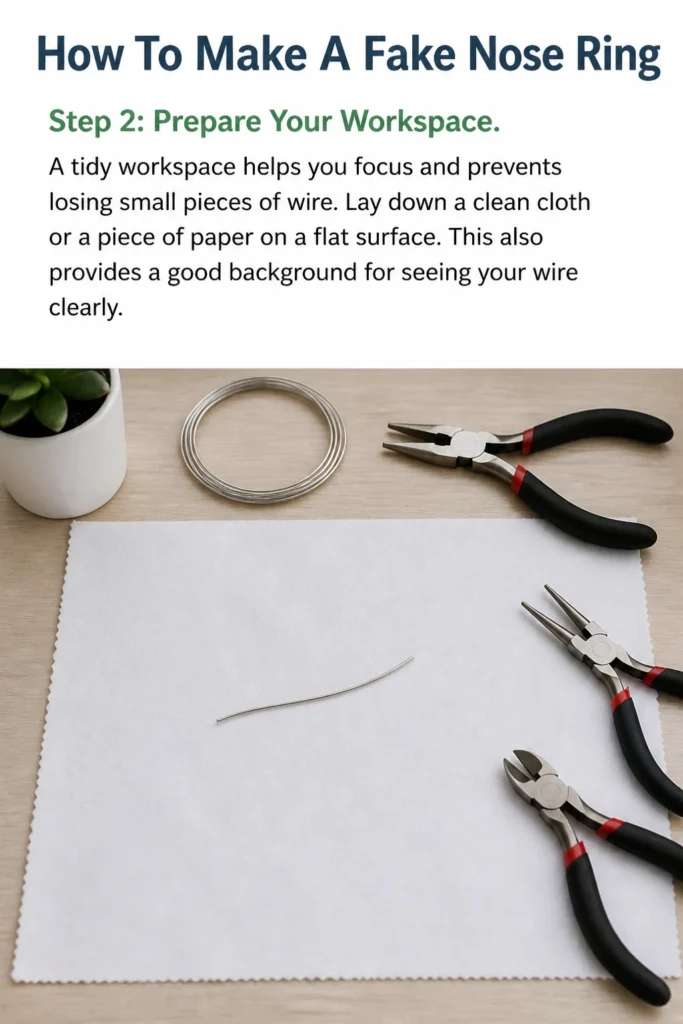
Lay down a clean cloth or a piece of paper on a flat surface.
This also provides a good background for seeing your wire clearly.
Step 3: Choose Your Base Material
Your choice of material will influence the final look and feel of your fake nose ring.
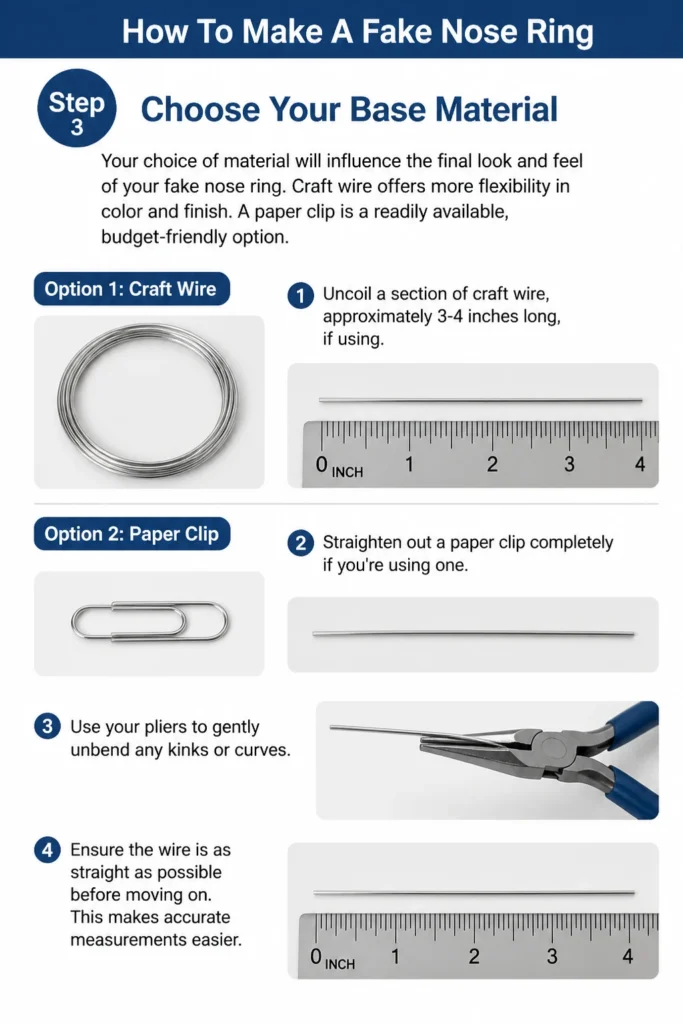
Craft wire offers more flexibility in color and finish.
A paper clip is a readily available, budget-friendly option.
- Uncoil a section of craft wire, approximately 3-4 inches long, if using. This length gives you plenty to work with without being unwieldy.
- Straighten out a paper clip completely if you’re using one. Use your pliers to gently unbend any kinks or curves.
- Ensure the wire is as straight as possible before moving on. This makes accurate measurements easier.
Step 4: Measure and Mark
Accurate measurement is key to creating a comfortable and realistic fake nose ring.
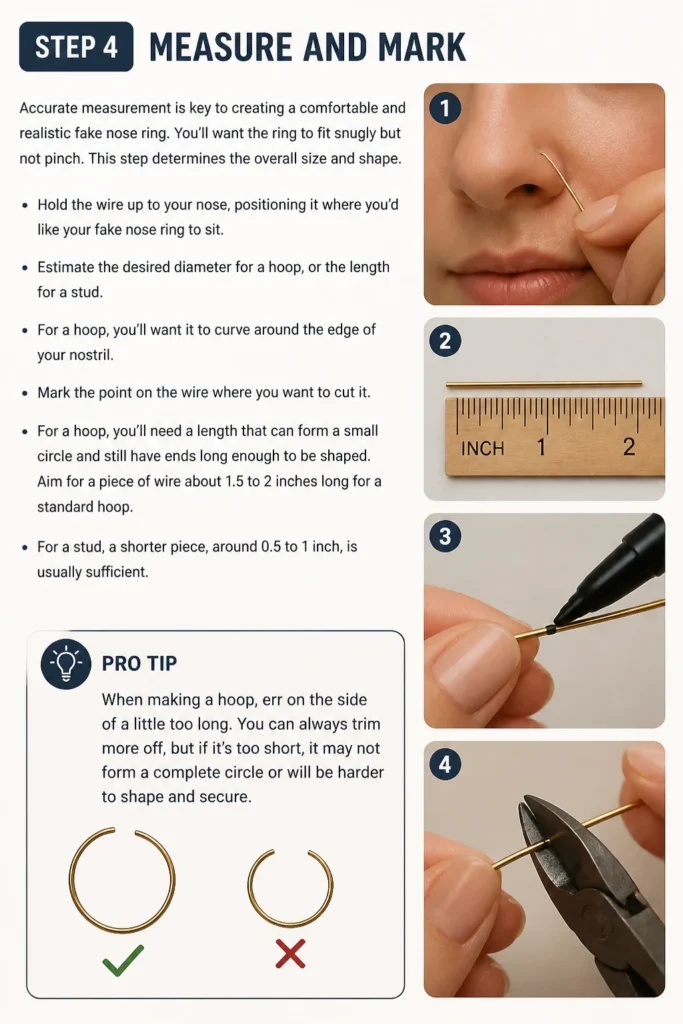
You’ll want the ring to fit snugly but not pinch.
This step determines the overall size and shape.
- Hold the wire up to your nose, positioning it where you’d like your fake nose ring to sit.
- Estimate the desired diameter for a hoop, or the length for a stud. For a hoop, you’ll want it to curve around the edge of your nostril.
- Mark the point on the wire where you want to cut it. For a hoop, you’ll need a length that can form a small circle and still have ends long enough to be shaped.
- Aim for a piece of wire about 1.5 to 2 inches long for a standard hoop. For a stud, a shorter piece, around 0.5 to 1 inch, is usually sufficient.
Pro Tip: When making a hoop, err on the side of cutting the wire a little longer. You can always trim excess, but you can’t add more.
Step 5: Cut and Shape the Ring/Stud
This is where your fake nose ring truly begins to take form.
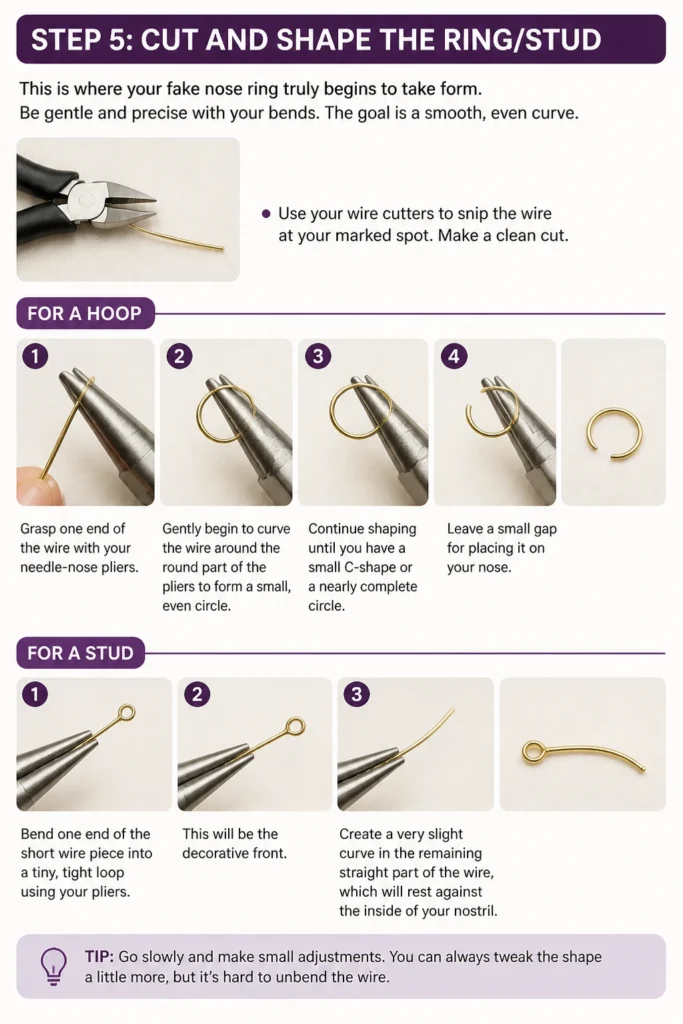
Be gentle and precise with your bends.
The goal is a smooth, even curve.
- Use your wire cutters to snip the wire at your marked spot. Make a clean cut.
- For a hoop: Grasp one end of the wire with your needle-nose pliers. Gently begin to curve the wire around the round part of the pliers to form a small, even circle.
- Continue shaping until you have a small C-shape or a nearly complete circle. Leave a small gap for placing it on your nose.
- For a stud: Bend one end of the short wire piece into a tiny, tight loop using your pliers. This will be the decorative front.
- Create a very slight curve in the remaining straight part of the wire, which will rest against the inside of your nostril.
Step 6: Refine and Smooth Edges
Safety and comfort are paramount when placing anything near your skin.
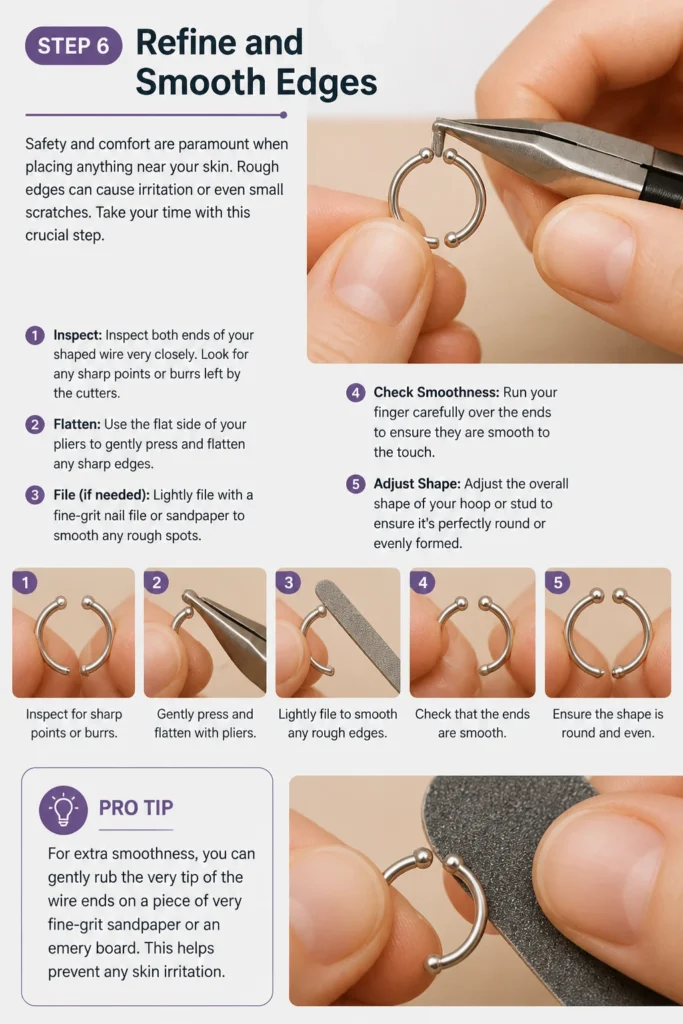
Rough edges can cause irritation or even small scratches.
Take your time with this crucial step.
- Inspect both ends of your shaped wire very closely. Look for any sharp points or burrs left by the cutters.
- Use the flat side of your pliers to gently press and flatten any sharp edges. You can also lightly file them with a fine-grit nail file or sandpaper if available.
- Ensure the ends are smooth to the touch. Run your finger carefully over them to check.
- Adjust the overall shape of your hoop or stud to ensure it’s perfectly round or evenly formed.
Pro Tip: For extra smoothness, you can gently rub the very tip of the wire ends on a piece of very fine-grit sandpaper or an emery board. This helps prevent any skin irritation.
Step 7: Clean and Sanitize
Hygiene is incredibly important, even for a fake nose ring.
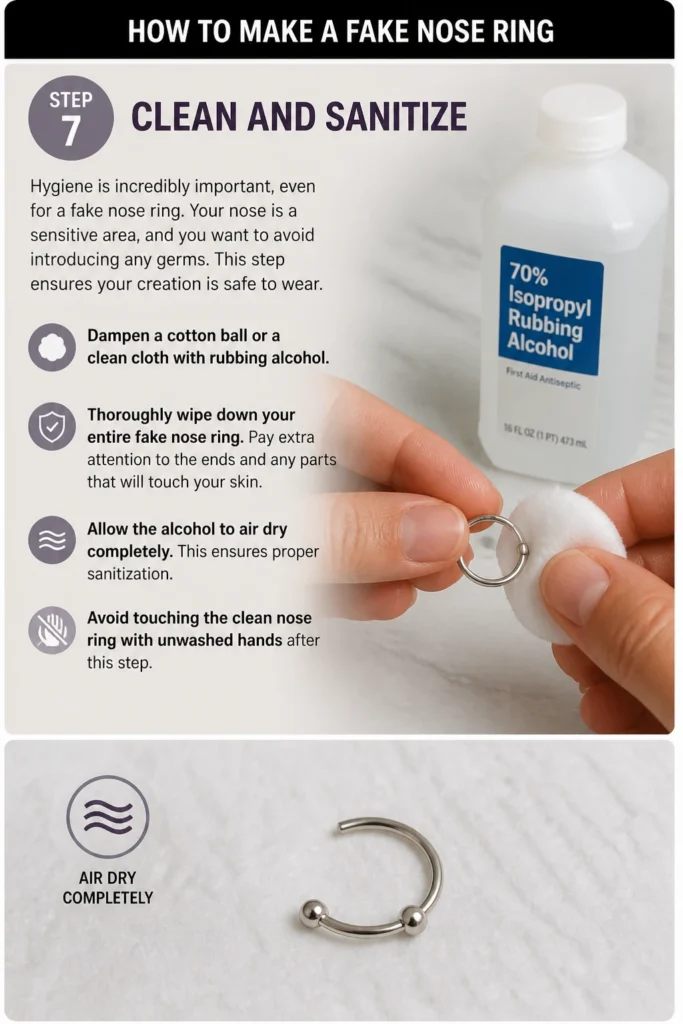
Your nose is a sensitive area, and you want to avoid introducing any germs.
This step ensures your creation is safe to wear.
- Dampen a cotton ball or a clean cloth with rubbing alcohol.
- Thoroughly wipe down your entire fake nose ring. Pay extra attention to the ends and any parts that will touch your skin.
- Allow the alcohol to air dry completely. This ensures proper sanitization.
- Avoid touching the clean nose ring with unwashed hands after this step.
Step 8: Test and Adjust for Fit
Now comes the exciting part: trying on your new accessory!
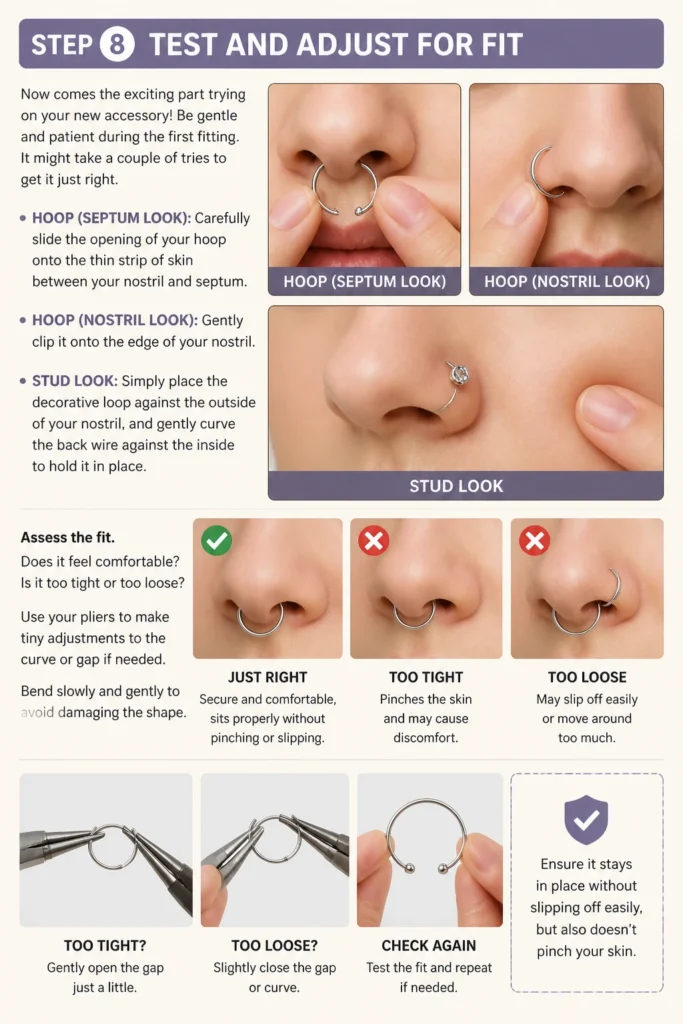
Be gentle and patient during the first fitting.
It might take a couple of tries to get it just right.
- Carefully slide the opening of your hoop onto the thin strip of skin between your nostril and septum (for a septum ring look) or gently clip it onto the edge of your nostril (for a nostril ring look).
- For a stud, simply place the decorative loop against the outside of your nostril, and gently curve the back wire against the inside to hold it in place.
- Assess the fit. Does it feel comfortable? Is it too tight or too loose?
- Use your pliers to make tiny adjustments to the curve or gap if needed. Bend slowly and gently to avoid damaging the shape.
- Ensure it stays in place without slipping off easily, but also doesn’t pinch your skin.
Step 9: Optional: Add Embellishments
Personalize your fake nose ring to make it truly unique.
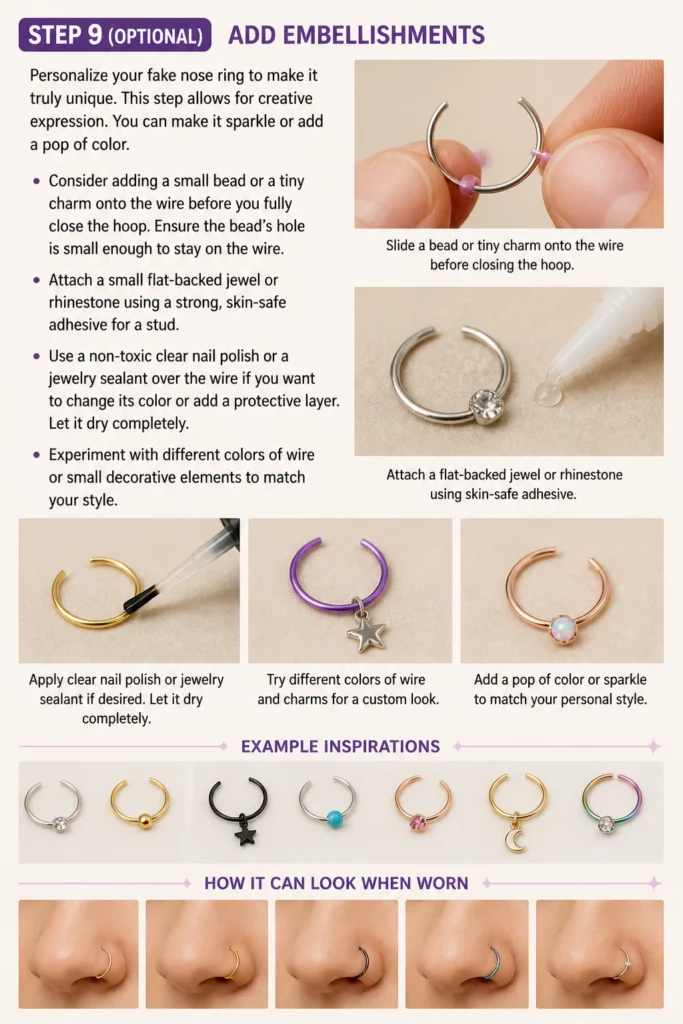
This step allows for creative expression.
You can make it sparkle or add a pop of color.
- Consider adding a small bead or a tiny charm onto the wire before you fully close the hoop. Ensure the bead’s hole is small enough to stay on the wire.
- Attach a small flat-backed jewel or rhinestone using a strong, skin-safe adhesive for a stud.
- Use a non-toxic clear nail polish or a jewelry sealant over the wire if you want to change its color or add a protective layer. Let it dry completely.
- Experiment with different colors of wire or small decorative elements to match your style.
Common Mistakes to Avoid
Using Unsuitable Materials
Some wires, like those from electronics or certain craft wires, might contain nickel or other irritants. These can cause allergic reactions or skin discoloration, especially with prolonged contact.
Always choose hypoallergenic craft wire or ensure your paper clip is plain, uncoated metal. Safety should be your top priority when making something for your body.
Leaving Sharp Edges
Forgetting to smooth the cut ends of your wire is a major oversight. Sharp edges can scratch your skin, cause discomfort, and even lead to minor cuts.
Always take the time to carefully file or flatten the wire ends. Run your finger over them to confirm they are completely smooth before wearing your fake nose ring.
Making It Too Tight or Too Loose
An improperly sized fake nose ring will either be uncomfortable or constantly fall off. If it’s too tight, it will pinch and can restrict circulation.
If it’s too loose, it won’t stay in place. Adjust the fit carefully until it feels secure yet comfortable against your skin, allowing for slight movement without falling.
Skipping the Cleaning Step
Introducing unsterilized materials to your nasal area can lead to skin irritation or minor infections. Even if the wire looks clean, it can carry bacteria from handling or storage.
Always sanitize your fake nose ring with rubbing alcohol before its first wear and periodically thereafter. This simple step protects your skin’s health.
Troubleshooting
Fake Nose Ring Keeps Falling Off
If your fake nose ring is too loose, it won’t grip your skin properly and will easily slip. This often happens if the curve isn’t tight enough or the wire is too long.
Use your needle-nose pliers to gently tighten the curve of the hoop or to shorten the length of the back wire on a stud. Make very small adjustments and test the fit repeatedly until it feels secure.
It Feels Uncomfortable or Pinches
Discomfort usually stems from the fake nose ring being too tight or having an uneven shape. Sharp edges are another common culprit for pinching or irritation.
Carefully widen the gap or slightly relax the curve with your pliers. Re-check all edges for smoothness. If discomfort persists, remove it and reshape more gently, ensuring symmetrical curves.
Looks Unnatural or Too Big
Sometimes the initial shaping might result in a fake nose ring that appears bulky or doesn’t sit flush against your nose. This can happen if the wire gauge is too thick or the diameter is too large.
Try using a thinner gauge wire (22-24 gauge) for a more delicate look. For an existing piece, gently compress the hoop slightly to reduce its diameter, or if it’s a stud, ensure the back wire is curved closely to your nostril.
Key Takeaways
- Material choice matters: Opt for hypoallergenic wire to prevent skin irritation.
- Smoothness is critical: Always file or flatten wire ends to avoid scratches and discomfort.
- Measure twice, cut once: Accurate sizing ensures a realistic and comfortable fit.
- Sanitize before wear: Clean your fake nose ring with alcohol to maintain hygiene.
- Practice makes perfect: Don’t be discouraged if your first attempt isn’t flawless; refining your technique is part of the fun.
- Experiment with styles: Once you master the basics, try different shapes, sizes, and embellishments.
Frequently Asked Questions
Is it safe to wear a fake nose ring all day?
Yes, generally it’s safe to wear a fake nose ring all day, provided you’ve used hypoallergenic materials and smoothed all edges. Remove it before sleeping or engaging in strenuous activities to prevent accidental dislodgement or irritation.
Can I make a fake nose ring look like a stud instead of a hoop?
Absolutely! To make a fake nose stud, create a tiny loop at one end of a short piece of wire for the visible “gem” or “ball.” Then, gently curve the remaining wire to sit snugly against the inside of your nostril to hold the stud in place.
How do I clean my fake nose ring?
To clean your fake nose ring, simply wipe it down with a cotton ball soaked in rubbing alcohol or an antiseptic wipe. Allow it to air dry completely before wearing it again. Regular cleaning helps keep it hygienic and prevents skin issues.
What if I don’t have jewelry pliers?
While jewelry pliers are ideal, you can improvise with other small pliers you might have around the house, such as needle-nose pliers from a toolkit. For cutting, small wire cutters or even strong nail clippers can work in a pinch, but be cautious with their sharpness.
Our Top Recommended Finds
- 22-Gauge Hypoallergenic Craft Wire: Perfect for delicate shaping and minimizing skin reactions.
- Mini Needle-Nose Pliers Set: Essential for precise bending and shaping, often including cutters.
- Rubbing Alcohol (Isopropyl Alcohol): A must-have for sanitizing your finished fake nose ring.
Unleash Your Inner Stylist
Creating your own fake nose ring is more than just a craft; it’s a step into exploring new facets of your personal style without any permanent changes.
You now have the skills to craft a custom accessory that truly reflects your mood and aesthetic.
Don’t hesitate to gather your materials today and start experimenting with different designs.
Beginner-friendly templates, step-by-step guides,
and weekly project ideas in your inbox.