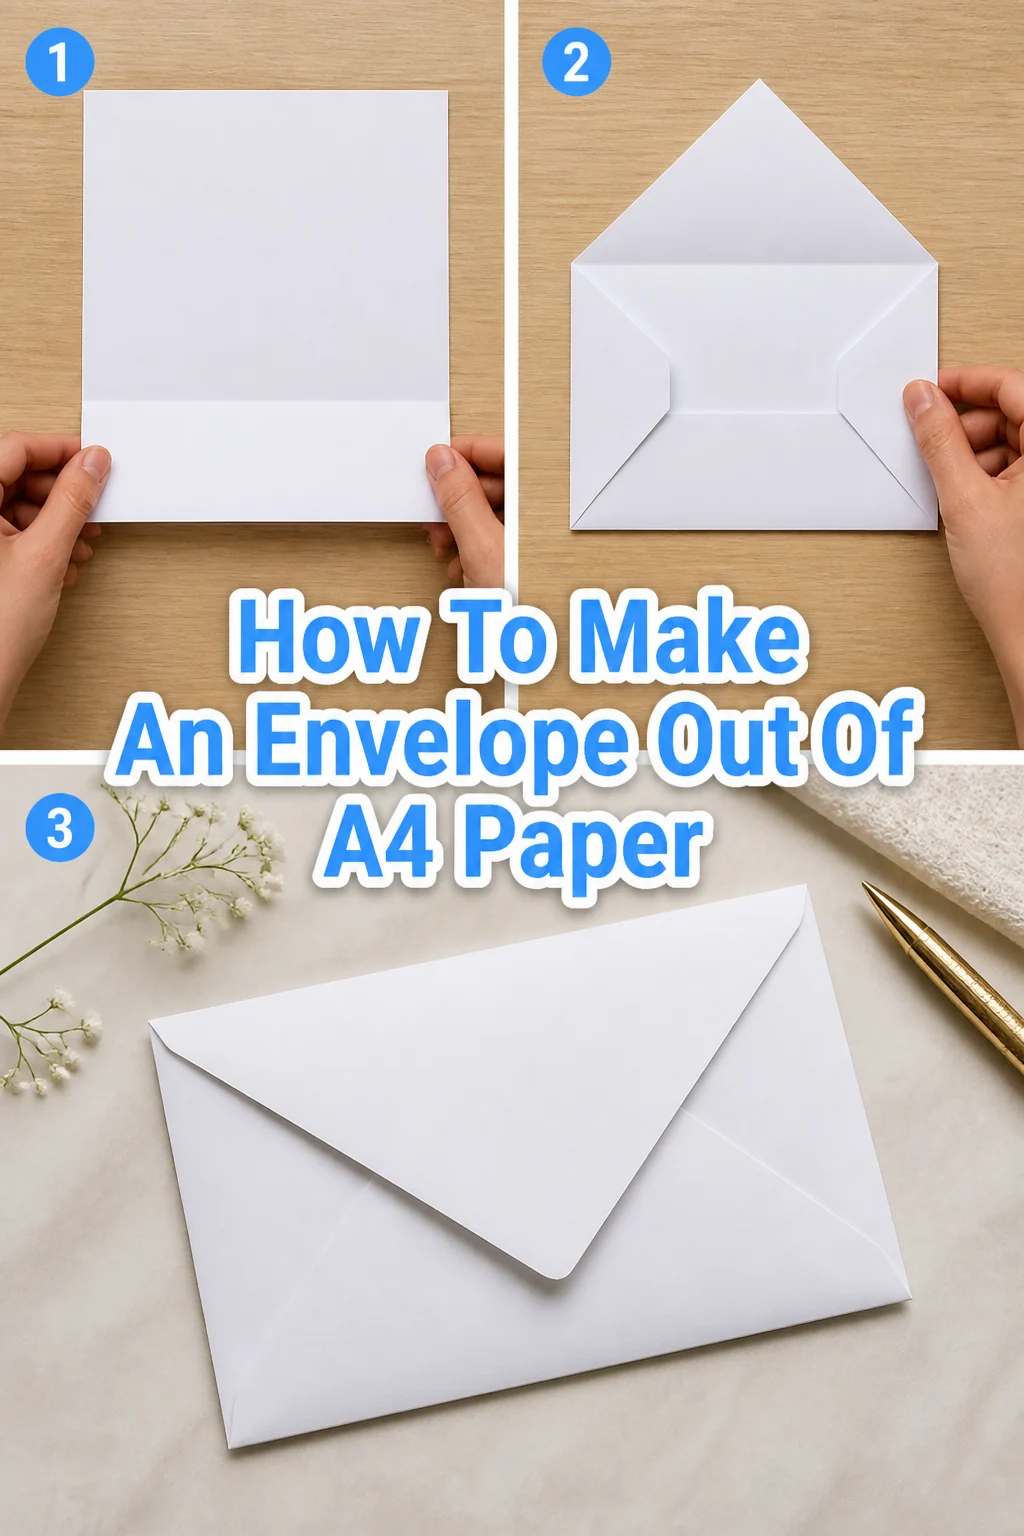
✉️ How To Make An Envelope Out Of A4 Paper

Beginner-friendly templates, step-by-step guides,
and weekly project ideas in your inbox.
I remember standing in my kitchen ten minutes before a birthday party, staring at a completed card and a completely empty box of envelopes.
I grabbed a single sheet of white printer paper and started folding, hoping to create something that didn’t look like a middle-school note.
That first attempt was a bit of a disaster, but after years of sending handmade mail, I have perfected a folding technique that is both sturdy and elegant.

Quick Overview
This guide will show you how to transform a standard sheet of A4 paper into a functional envelope without needing any specialized origami skills.
- Time needed: 3 to 5 minutes
- Difficulty: Beginner
- What you’ll need: One sheet of A4 paper, a glue stick or tape, and a flat surface
Step-by-Step Instructions
Step 1: Position Your Paper
Place your A4 sheet on a flat, clean surface in a landscape orientation.
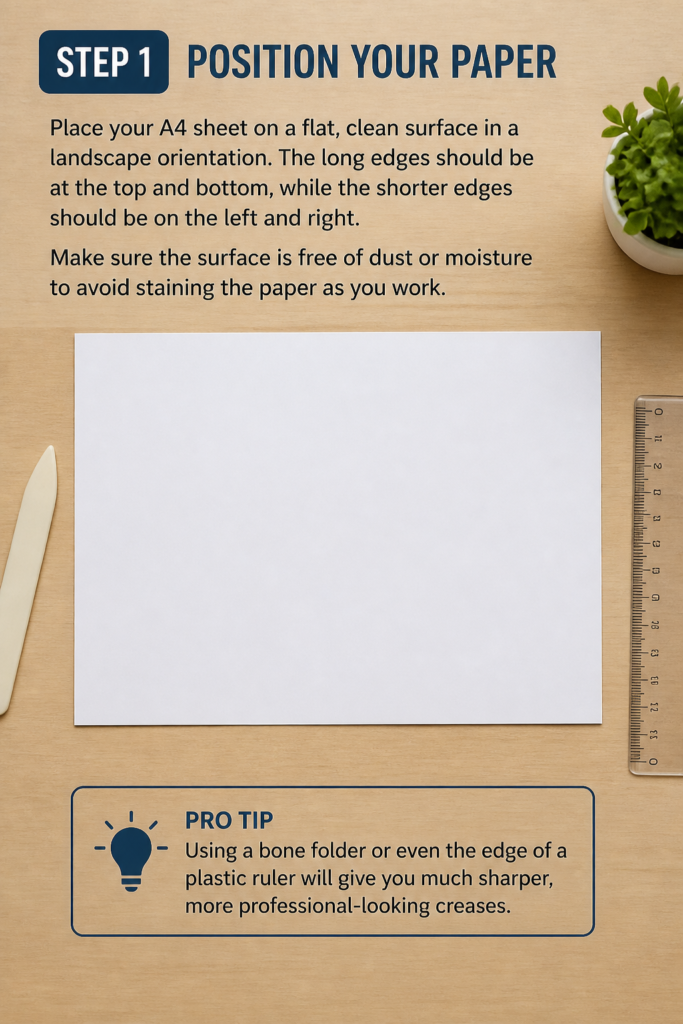
The long edges should be at the top and bottom, while the shorter edges should be on the left and right.
Make sure the surface is free of dust or moisture to avoid staining the paper as you work.
Pro Tip: Using a bone folder or even the edge of a plastic ruler will give you much sharper, more professional-looking creases.
Step 2: Create the Bottom Fold
Bring the bottom edge of the paper up toward the top, but do not fold it exactly in half.
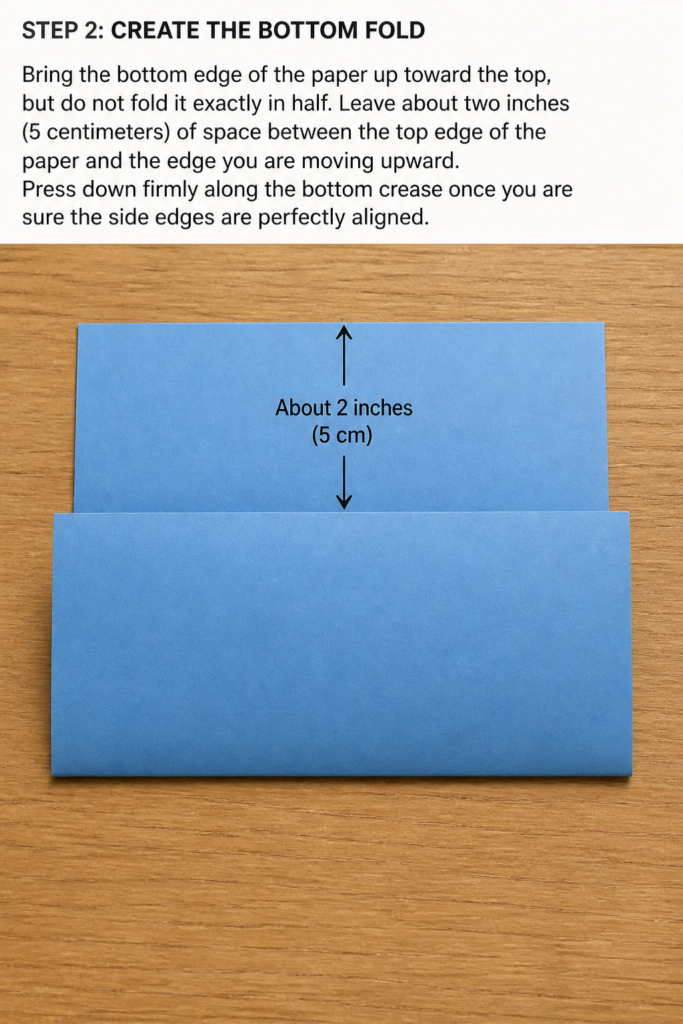
Leave about two inches (5 centimeters) of space between the top edge of the paper and the edge you are moving upward.
Press down firmly along the bottom crease once you are sure the side edges are perfectly aligned.
Step 3: Fold the Side Flaps
Take the left edge of the paper and fold it inward by about half an inch (1.5 centimeters).
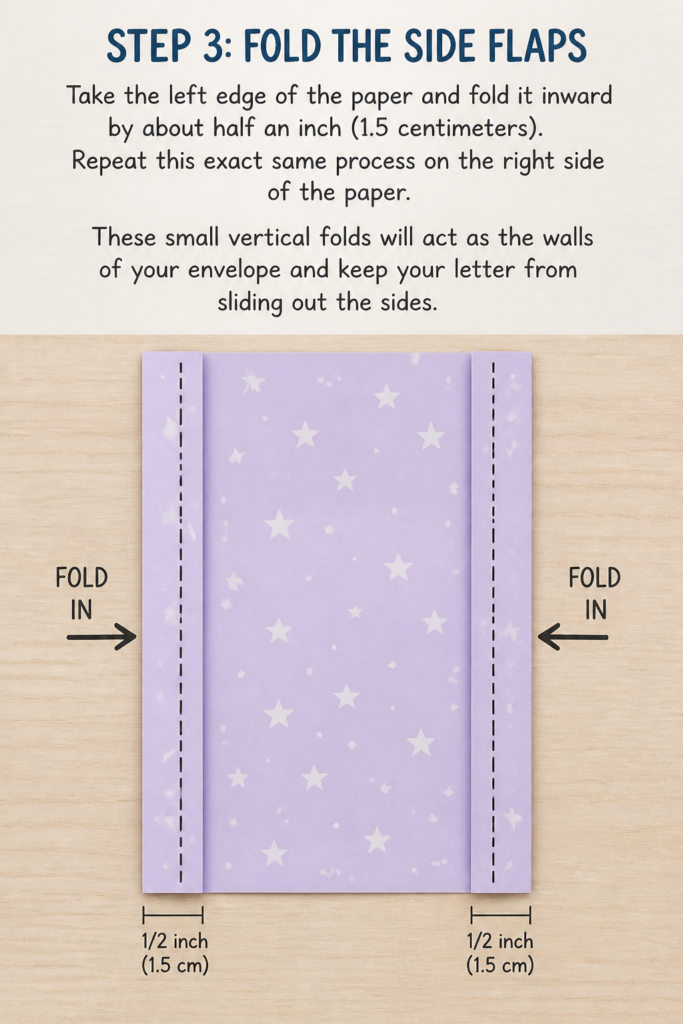
Repeat this exact same process on the right side of the paper.
These small vertical folds will act as the “walls” of your envelope and keep your letter from sliding out the sides.
Step 4: Shape the Top Flap
Look at the top section of the paper that you left unfolded in Step 2.
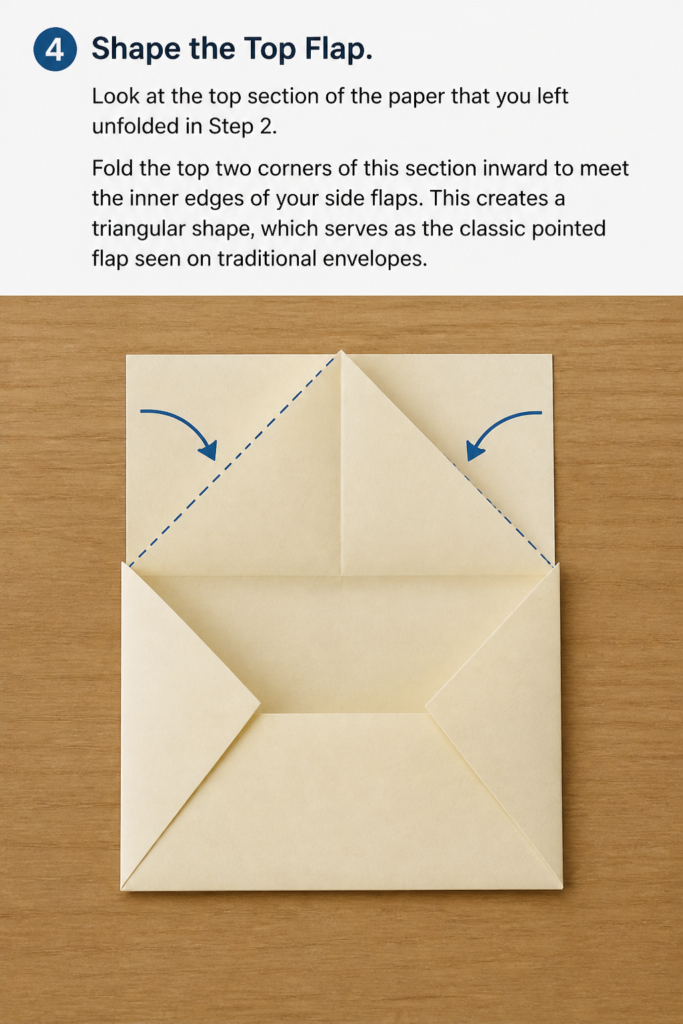
Fold the top two corners of this section inward to meet the inner edges of your side flaps.
This creates a triangular shape, which serves as the classic pointed flap seen on traditional envelopes.
Step 5: Cut or Fold the Excess
Open the side flaps you created in Step 3 briefly to see where they overlap with the bottom section.
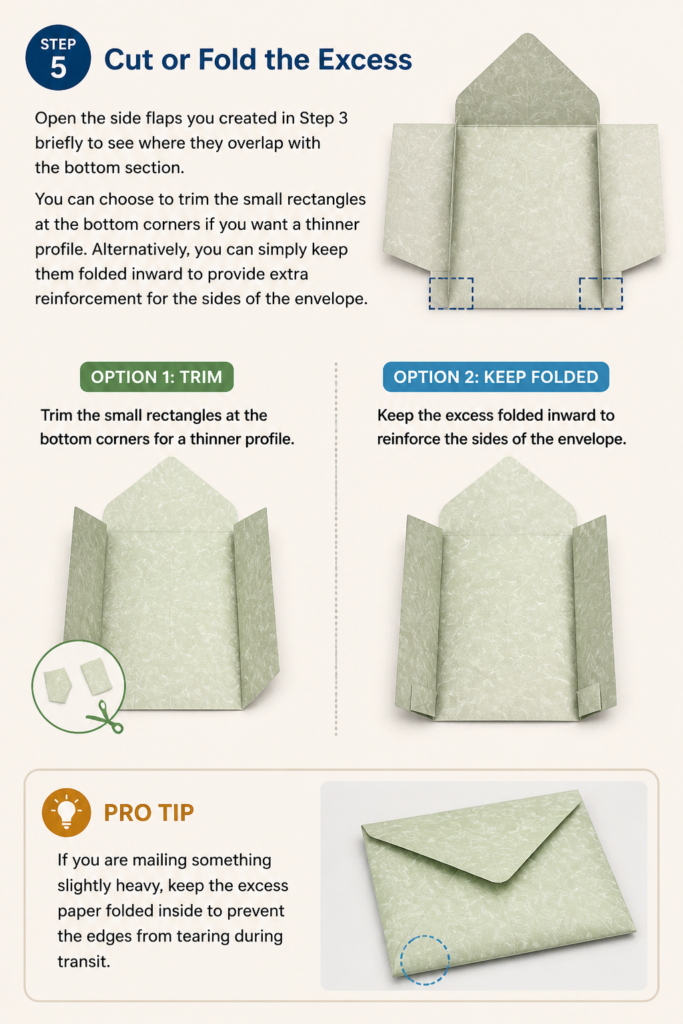
You can choose to trim the small rectangles at the bottom corners if you want a thinner profile.
Alternatively, you can simply keep them folded inward to provide extra reinforcement for the sides of the envelope.
Pro Tip: If you are mailing something slightly heavy, keep the excess paper folded inside to prevent the edges from tearing during transit.
Step 6: Apply the Adhesive
Run a glue stick along the inner edges of the side flaps you created.
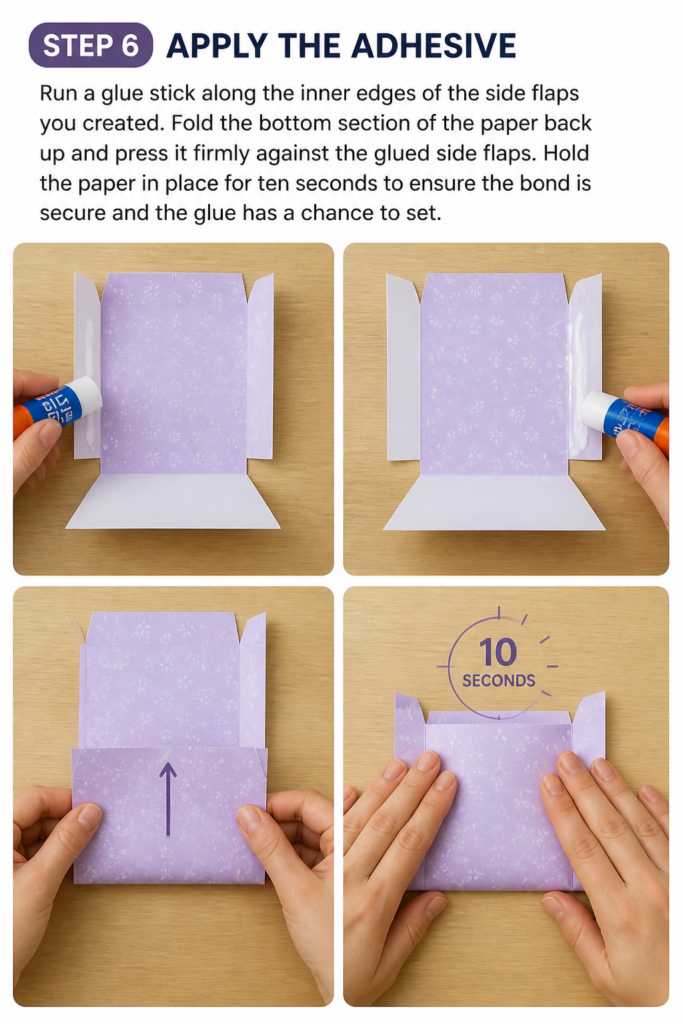
Fold the bottom section of the paper back up and press it firmly against the glued side flaps.
Hold the paper in place for ten seconds to ensure the bond is secure and the glue has a chance to set.
Step 7: Final Creasing and Tucking
Fold the top triangular flap down over the opening of the envelope.
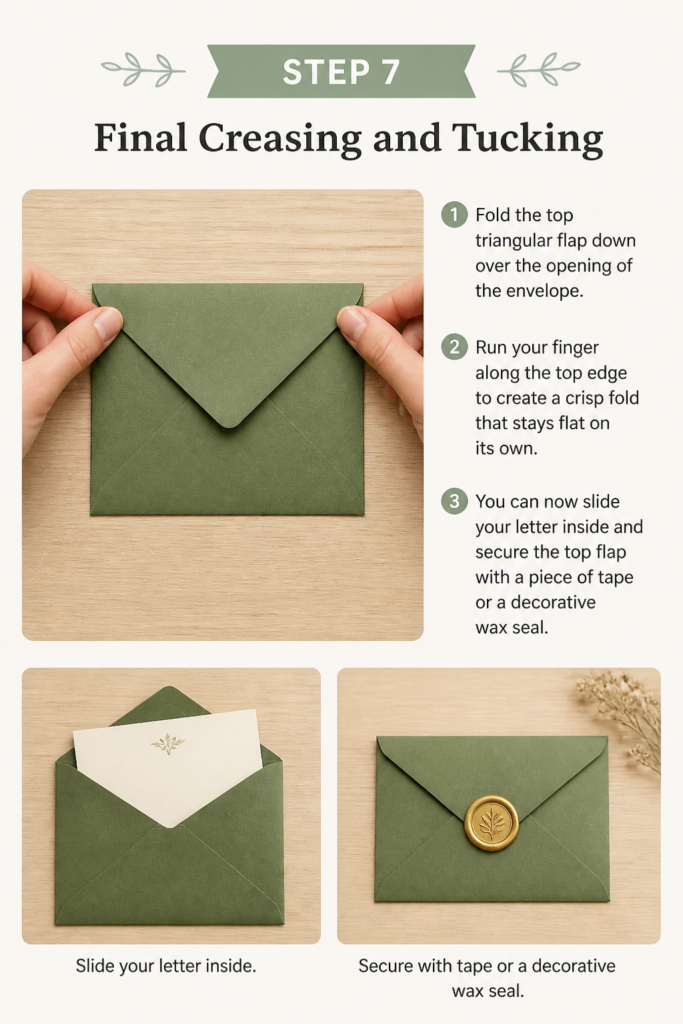
Run your finger along the top edge to create a crisp fold that stays flat on its own.
You can now slide your letter inside and secure the top flap with a piece of tape or a decorative wax seal.
Common Mistakes to Avoid
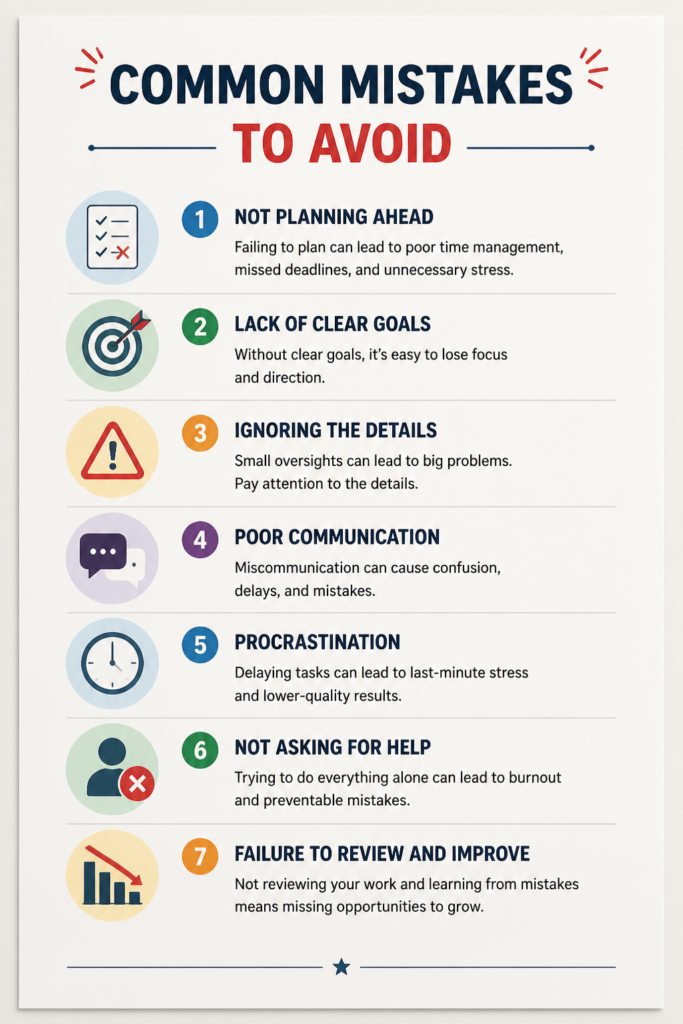
Using Heavy Cardstock
While thick paper feels premium, it often resists the tight folds required for a small envelope. If the paper is too heavy, the creases may crack or the glue might not hold the tension of the folds. Stick to standard 80gsm or 100gsm paper for the best results.
Misaligning the Side Flaps
If your side folds are not perfectly parallel to the edges of the paper, the envelope will look crooked. A crooked envelope is harder to seal and might not fit into a standard mailbox easily. Always double-check that the distance from the edge is consistent from top to bottom before pressing the crease.
Over-Applying Liquid Glue
Liquid school glue contains a lot of water which can cause A4 paper to wrinkle or “wave.” This makes the finished product look messy and DIY in a bad way. Use a dry glue stick or double-sided tape to keep the paper flat and professional.
Forgetting the Insert Size
People often forget that the envelope needs to be slightly larger than the item going inside. If you fold the side flaps too wide, your card might not fit. Always place your card on the paper first to use it as a guide for where the folds should go.
Troubleshooting
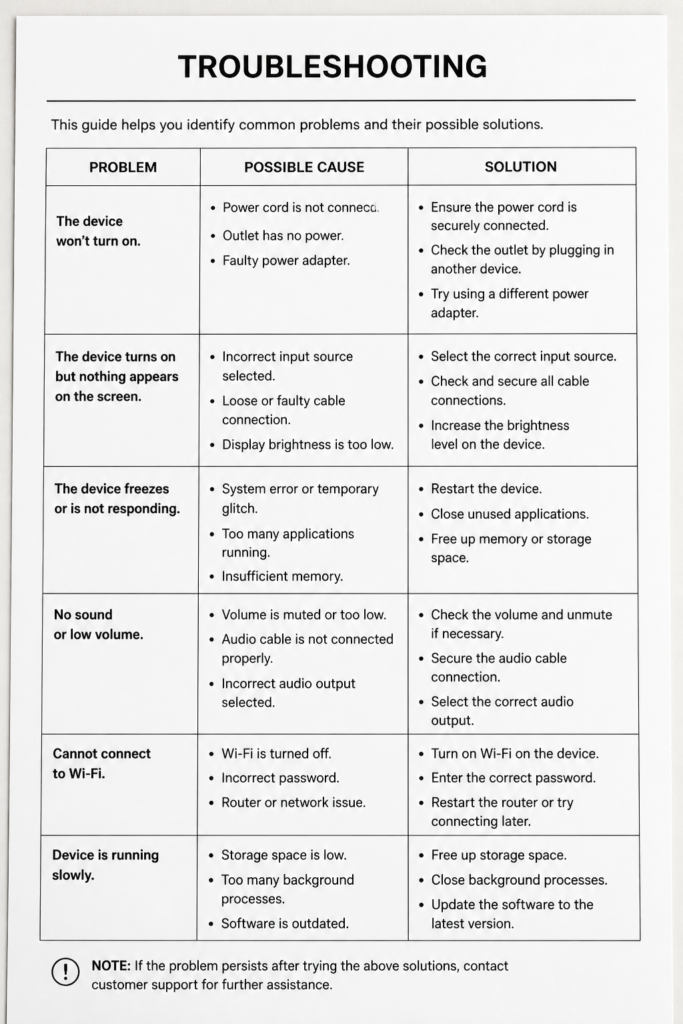
The Flap Won’t Stay Closed
If your top flap keeps popping open, the crease might be too shallow. Re-fold the flap and use a heavy object or a dedicated folding tool to compress the fibers of the paper. You can also use a small sticker or a dot of glue to keep it down once the letter is inside.
The Paper Tears at the Corners
This usually happens when you try to fold too many layers of paper at once. If you notice the paper starting to stress or rip, try trimming away the hidden internal flaps. Reducing the bulk at the corners allows the paper to bend more naturally without snapping.
The Envelope is Too Small for the Letter
If you find the envelope is just a few millimeters too tight, don’t force the letter in. You can often gain extra room by unfolding the side flaps and re-folding them closer to the very edge of the paper. Even a tiny adjustment of two millimeters can make the difference between a fit and a tear.
Key Takeaways
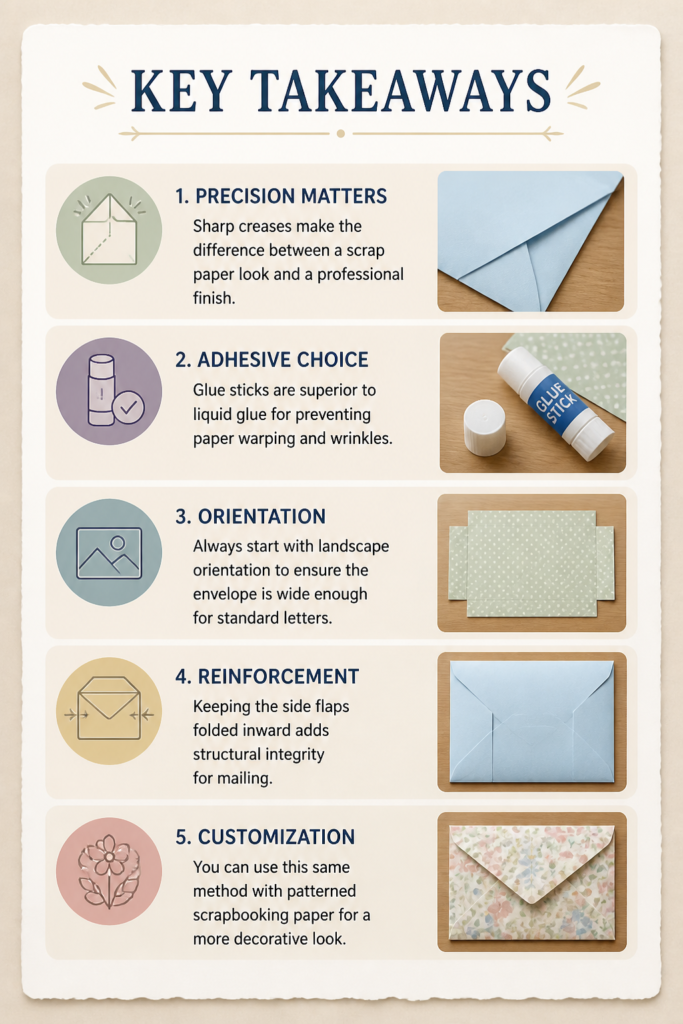
- Precision matters: Sharp creases make the difference between a “scrap paper” look and a professional finish.
- Adhesive choice: Glue sticks are superior to liquid glue for preventing paper warping and wrinkles.
- Orientation: Always start with landscape orientation to ensure the envelope is wide enough for standard letters.
- Reinforcement: Keeping the side flaps folded inward adds structural integrity for mailing.
- Customization: You can use this same method with patterned scrapbooking paper for a more decorative look.
Frequently Asked Questions
Can I send a handmade A4 envelope through the regular mail?
Yes, you can send handmade envelopes as long as they are securely sealed and have a clear address and stamp. Make sure the paper is not so thin that it might rip in the sorting machines. If you are worried, use a piece of clear tape across the entire bottom and side seams for extra strength.
What is the best way to seal the envelope without glue?
Washi tape is a fantastic alternative to glue because it adds a decorative element while staying secure. You can also use a classic wax seal if you want a vintage aesthetic. If you are in a pinch, a simple piece of clear office tape will do the job perfectly well.
Will a standard 5×7 card fit in an A4 envelope?
An A4 sheet folded using this method usually creates an envelope that is roughly 4.5 by 6 inches. A 5×7 card will likely be too large for this specific fold. For a 5×7 card, you may need to use a larger sheet of paper like A3 or follow a different folding pattern that uses more of the paper’s surface area.
Can I use magazine pages instead of A4 paper?
Magazine pages work beautifully for this project because they are already the correct weight and often have interesting colors. Just be sure to choose a page that isn’t too “busy” where the address needs to go. You can always glue a small white rectangle on the front to make the recipient’s address legible.
Our Top Recommended Finds
- Precision Bone Folder: This tool helps you create those razor-sharp creases that make your envelope look like it was bought from a stationery store.
- Acid-Free Glue Stick: Using acid-free adhesive ensures that your envelope won’t yellow over time, which is important for letters you want the recipient to keep.
- Washi Tape Set: A variety pack of tapes allows you to seal your envelopes with different colors and patterns for every occasion.
Take Your Stationery To The Next Level
Now that you have mastered the basic A4 envelope, you can start experimenting with different paper textures and colors.
Handmade envelopes add a personal touch that store-bought options simply cannot match.
Try making a batch of ten envelopes today so you always have them on hand when you finish writing a letter.
You might even find that the process of folding is a relaxing, meditative way to spend a few minutes of your afternoon.
Once you feel comfortable with this fold, look into more complex origami closures to really impress your pen pals.
Beginner-friendly templates, step-by-step guides,
and weekly project ideas in your inbox.