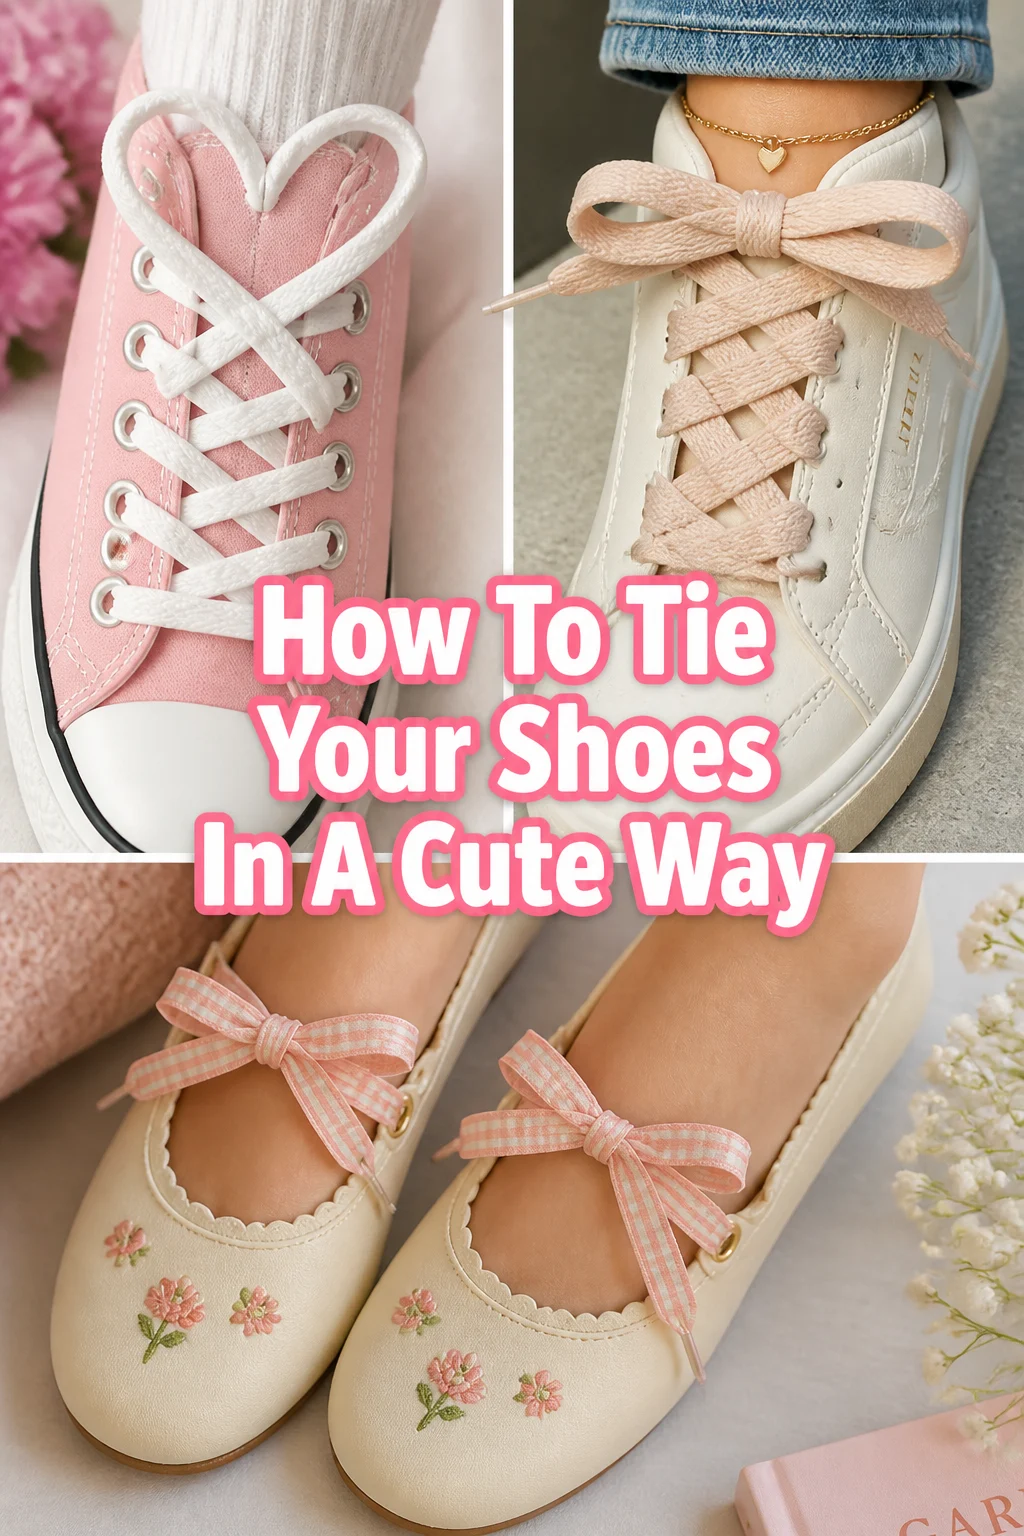
🎀 How To Tie Your Shoes In A Cute Way

Beginner-friendly templates, step-by-step guides,
and weekly project ideas in your inbox.
Your shoes are the foundation of your entire outfit and can change your whole vibe.
I spent years working in boutique retail where we customized sneakers to make them look more feminine and stylish for displays.
This guide comes from countless hours of trial and error to find the perfect balance between a secure fit and a beautiful, “cute” aesthetic.

Quick Overview
This method focuses on the “Satin Ribbon Bow” style, which works beautifully for sneakers, oxfords, and even some casual boots.
- Time needed: 5 to 10 minutes
- Difficulty: Beginner
- What you’ll need: A pair of shoes, wide flat laces or satin ribbons, and a little patience.
Step-by-Step Instructions
Step 1: Select Your Perfect Laces
Choose a pair of laces that complement the color and material of your shoes.
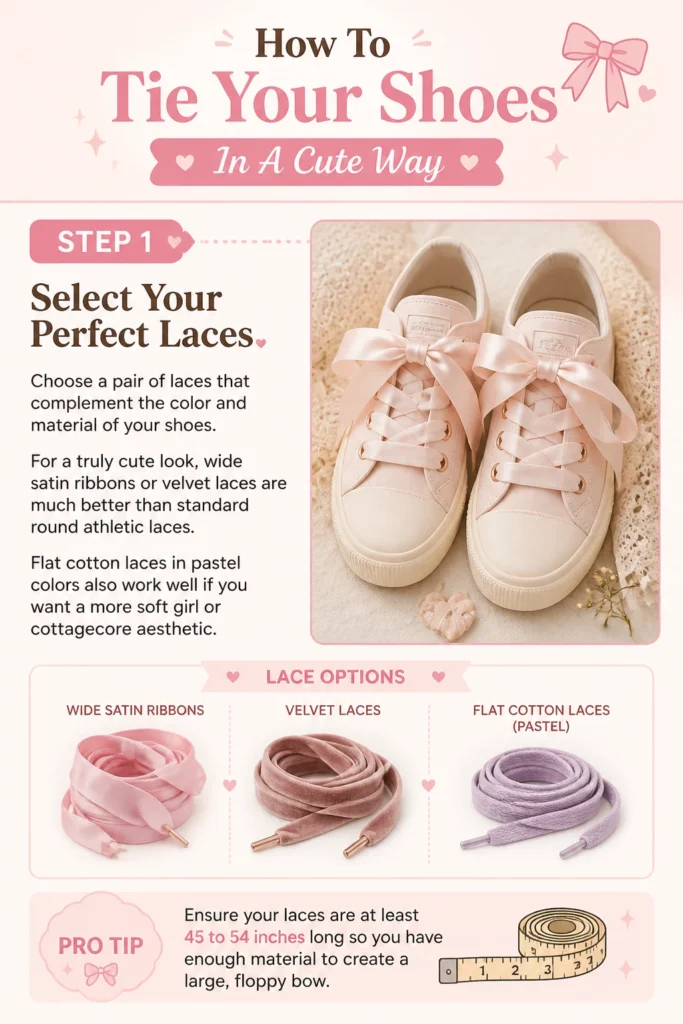
For a truly cute look, wide satin ribbons or velvet laces are much better than standard round athletic laces.
Flat cotton laces in pastel colors also work well if you want a more “soft girl” or “cottagecore” aesthetic.
Pro Tip: Ensure your laces are at least 45 to 54 inches long so you have enough material to create a large, floppy bow.
Step 2: Prepare the Canvas
Remove the old, dingy laces from your shoes entirely before you begin.
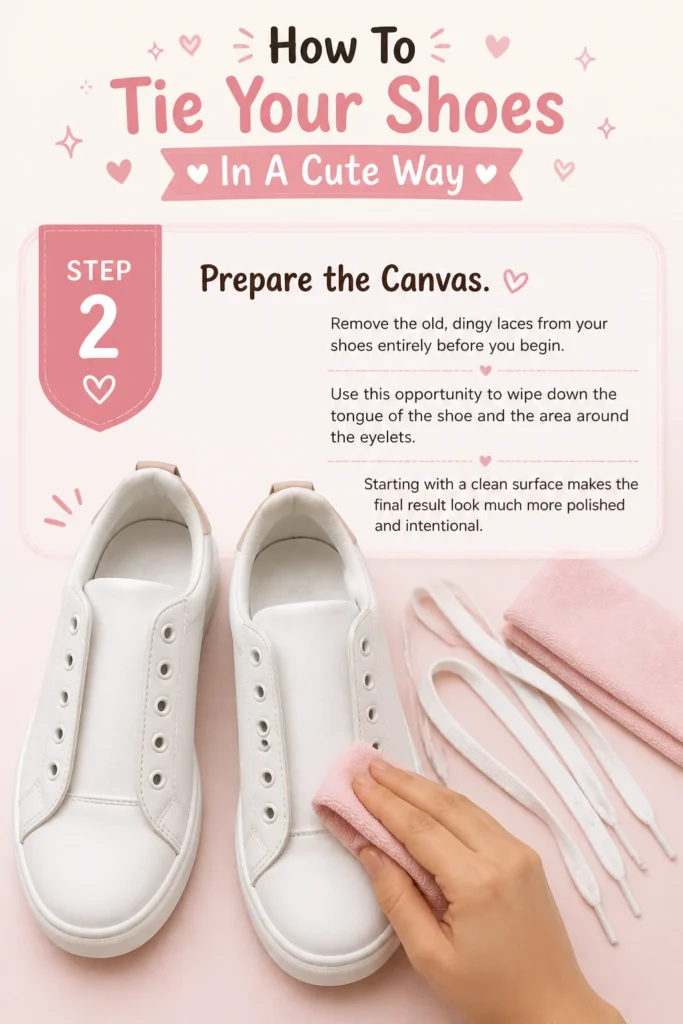
Use this opportunity to wipe down the tongue of the shoe and the area around the eyelets.
Starting with a clean surface makes the final result look much more polished and intentional.
Step 3: Create the Bottom Bar
Thread the lace through the bottom two eyelets so that the lace sits on top of the eyelets, creating a horizontal bar.
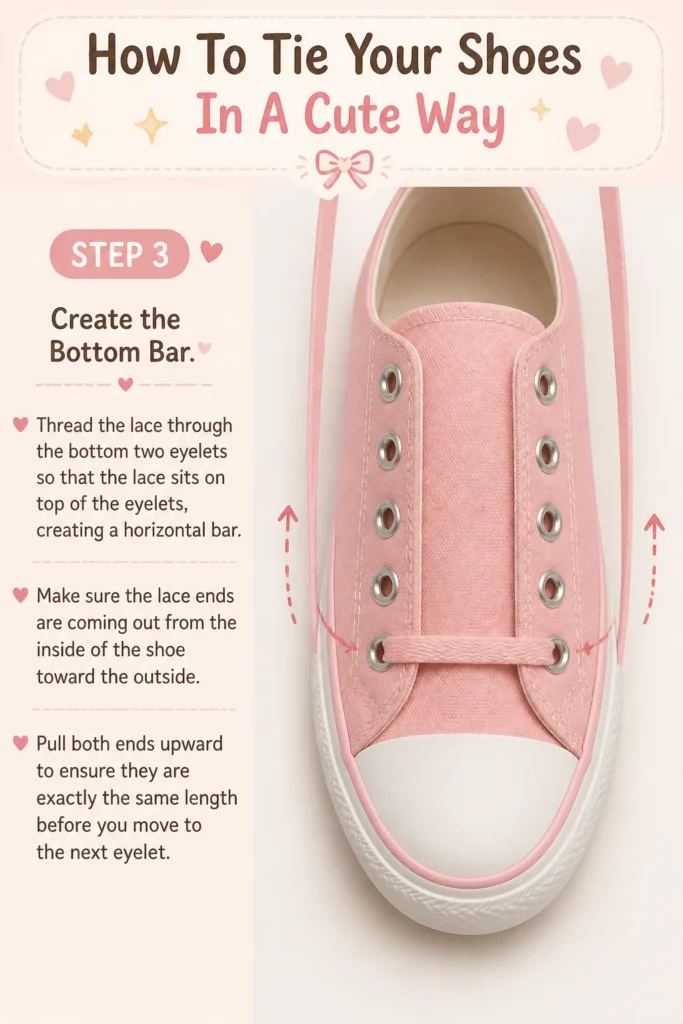
Make sure the lace ends are coming out from the inside of the shoe toward the outside.
Pull both ends upward to ensure they are exactly the same length before you move to the next eyelet.
Step 4: Lace with a Straight Bar Pattern
Cross the right lace over to the next eyelet on the left side, but thread it from the inside out.
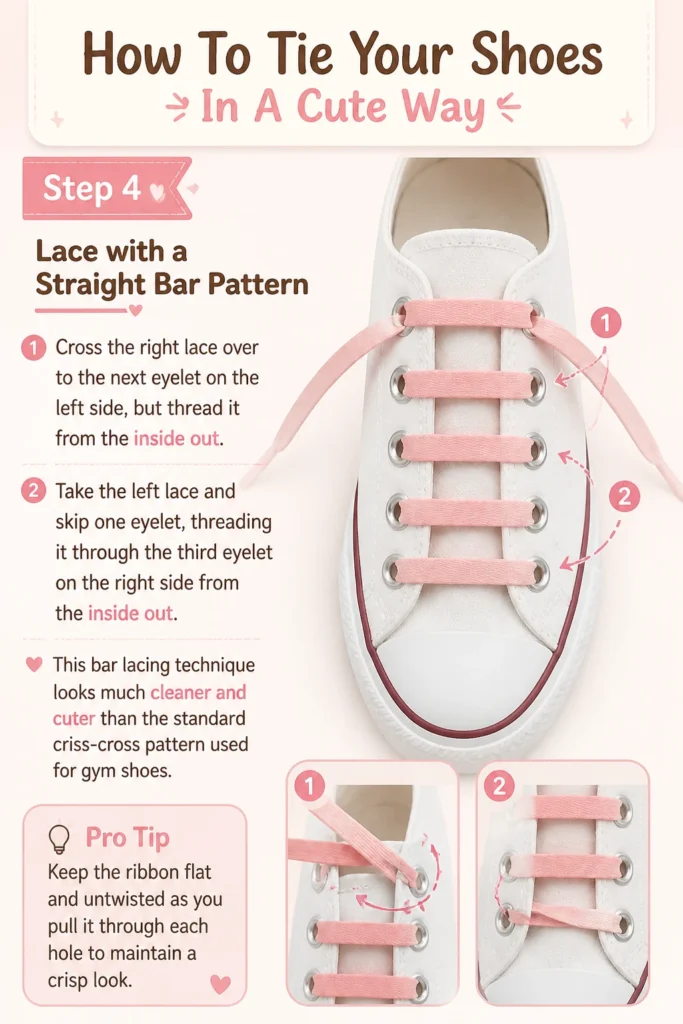
Take the left lace and skip one eyelet, threading it through the third eyelet on the right side from the inside out.
This “bar lacing” technique looks much cleaner and “cuter” than the standard criss-cross pattern used for gym shoes.
Pro Tip: Keep the ribbon flat and untwisted as you pull it through each hole to maintain a crisp look.
Step 5: Form the Bunny Ears
Create two large loops with the remaining lace once you reach the top eyelets.
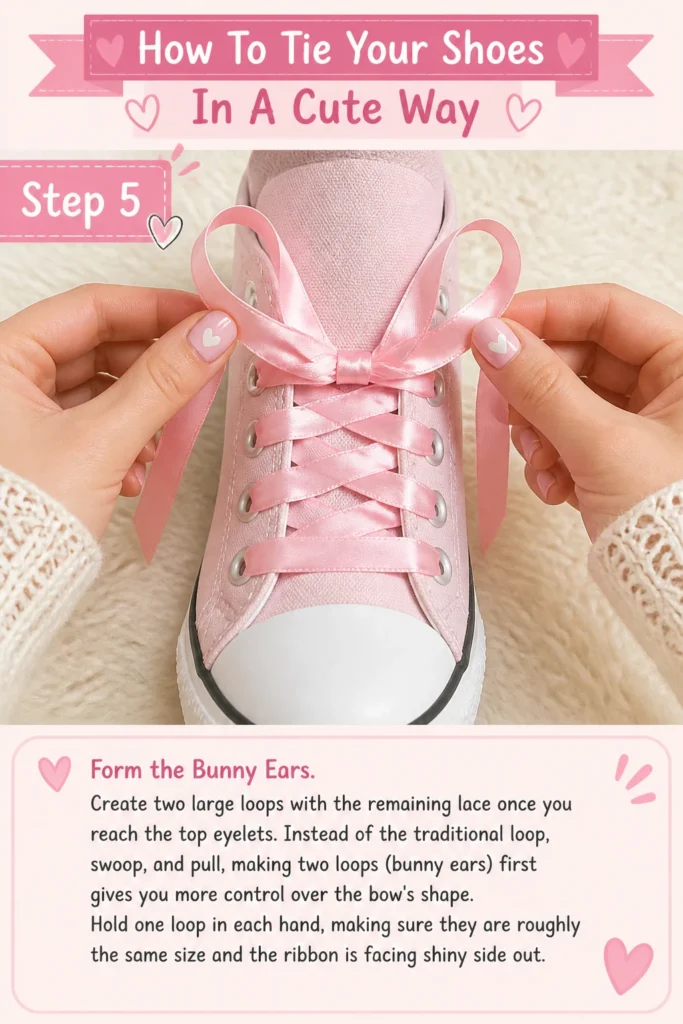
Instead of the traditional “loop, swoop, and pull,” making two loops (bunny ears) first gives you more control over the bow’s shape.
Hold one loop in each hand, making sure they are roughly the same size and the ribbon is facing “shiny side out.”
Step 6: Cross and Tuck
Cross the left loop over the right loop to create a small “O” shape at the base near the shoe tongue.
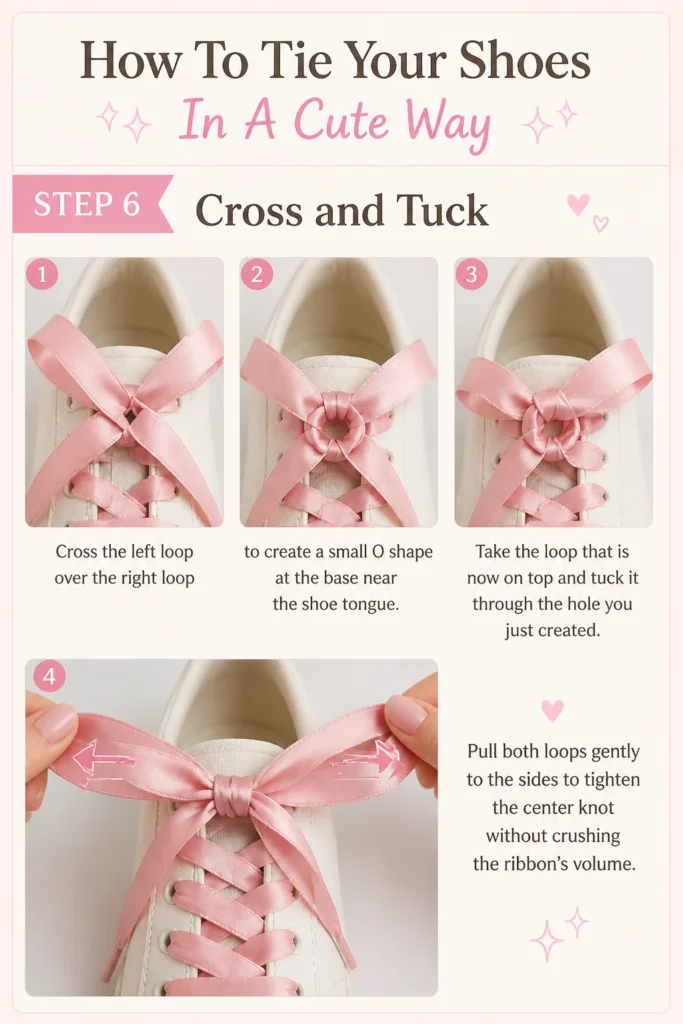
Take the loop that is now on top and tuck it through the hole you just created.
Pull both loops gently to the sides to tighten the center knot without crushing the ribbon’s volume.
Step 7: Adjust the Loop Volume
Tweak the size of the loops by pulling on the “ears” or the “tails” of the bow.
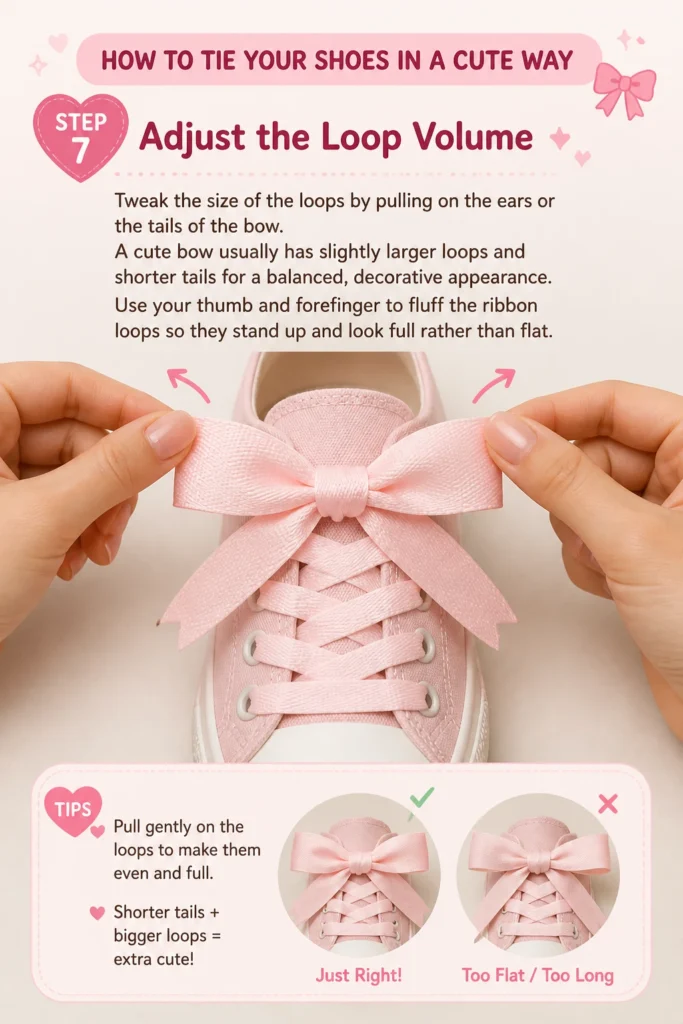
A cute bow usually has slightly larger loops and shorter tails for a balanced, decorative appearance.
Use your thumb and forefinger to “fluff” the ribbon loops so they stand up and look full rather than flat.
Step 8: Secure the Final Look
Press down on the center knot with your thumb to lock it in place.
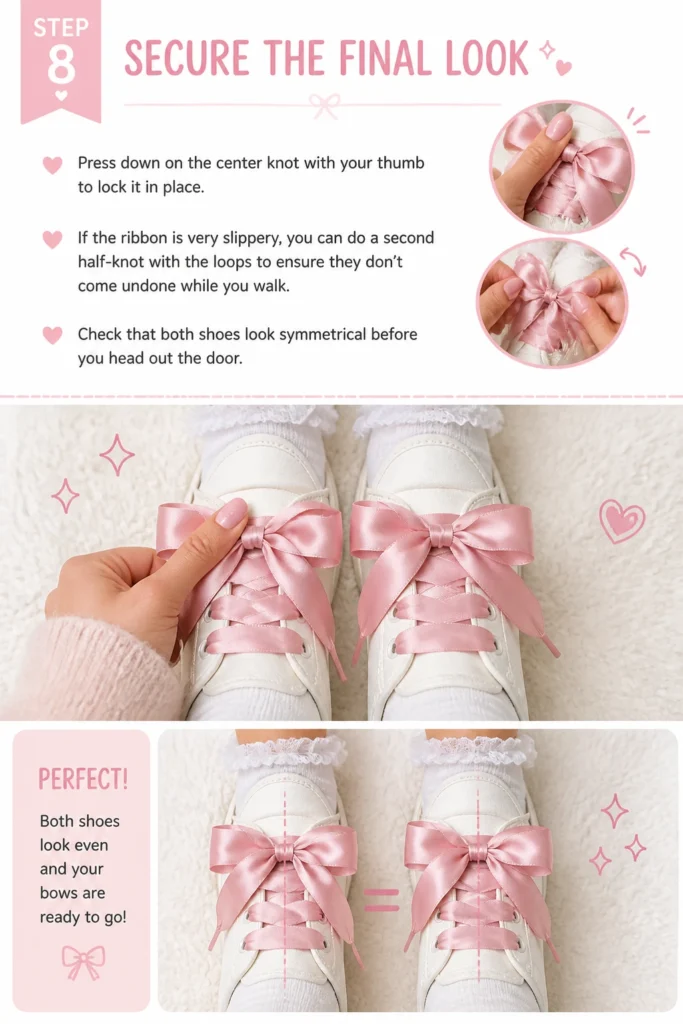
If the ribbon is very slippery, you can do a second “half-knot” with the loops to ensure they don’t come undone while you walk.
Check that both shoes look symmetrical before you head out the door.
Common Mistakes to Avoid
The Vertical Granny Knot
One of the most common issues is when the bow sits vertically (up and down) instead of horizontally across the shoe.
This happens if you cross the loops in the wrong direction during the final step.
If your bow looks crooked, untie it and try crossing the right loop over the left instead of the left over the right.
Twisted Ribbon syndrome
Satin and velvet laces are prone to twisting inside the eyelets, which makes the lacing look messy.
If the lace twists, it loses its ability to reflect light and looks like a regular string.
Always use a finger to hold the ribbon flat against the shoe as you pull it through each eyelet.
Ignoring Lace Length
Using laces that are too short will result in tiny, strained loops that don’t look cute at all.
Conversely, laces that are too long will leave you with “tails” that drag on the ground and get dirty.
Measure your existing laces and add about 6 inches if you want that oversized, aesthetic bow look.
Troubleshooting
The Bow Keeps Slipping Untied
Satin is notoriously slippery and often comes undone after just a few minutes of walking.
To fix this, lightly mist the center knot with a tiny bit of hairspray to add some “grip.”
You can also try the “Parisian Knot” which involves wrapping the loop around the center twice instead of once.
The Eyelets are Too Small
If you bought thick ribbon and it won’t fit through the eyelets, don’t force it and risk tearing the material.
Wrap a small piece of clear scotch tape around the end of the ribbon to create a temporary “aglet” or hard tip.
This makes it much easier to thread through tight spaces without fraying the fabric.
Uneven Loop Sizes
Sometimes one side of the bow looks perfect while the other side is small and cramped.
This usually means your laces weren’t centered when you started the very first bar at the bottom.
Unhook the laces back to the second eyelet and re-center them before continuing upward.
Key Takeaways
- Material matters: Use satin, velvet, or wide flat laces for a more decorative and “cute” appearance.
- Stay flat: Keep the laces from twisting at every eyelet to maintain a professional, clean look.
- Bar lacing: Use horizontal bars instead of criss-cross patterns for a more high-end sneaker aesthetic.
- Bunny ears: Use the two-loop method to gain better control over the final shape and size of your bow.
- Symmetry is key: Always compare both shoes to ensure the loops and tails are the same length.
- Secure the knot: Use hairspray or a double-wrap technique if your ribbons feel too silky to stay tied.
Frequently Asked Questions
Can I use actual gift-wrapping ribbon for my shoes?
You can use it for photos or a short event, but standard gift ribbon isn’t durable enough for daily wear.
It will likely tear at the eyelets or fray within an hour of walking.
Look for “double-faced satin” ribbon at a craft store, which is much stronger and finished on both sides.
What is the best way to clean ribbon laces?
Ribbon laces should never go in the washing machine as they will tangle and lose their sheen.
Hand wash them in a bowl of warm water with a drop of gentle dish soap.
Lay them flat on a towel to air dry, and iron them on a very low heat setting if they get wrinkled.
Does this work for boots with hooks instead of eyelets?
Yes, but you have to be more careful about the tension so the ribbon doesn’t slip off the hooks.
Try to cross the ribbon tightly behind each hook to create enough friction to hold the pattern.
A velvet ribbon is often better for boots because the texture helps it stay on the hooks more securely.
How do I stop the ends of my ribbons from fraying?
If you cut your own ribbons to size, the ends will start to unravel almost immediately.
Carefully pass the cut edge of the ribbon near a lighter flame for a split second to melt the fibers.
This creates a hard, sealed edge that prevents any further fraying.
Our Top Recommended Finds
- Double-Faced Satin Ribbon: Look for 5/8 inch or 7/8 inch widths for the best visual impact on sneakers.
- Clear Aglet Tips: You can buy heat-shrink tubing to create professional-looking tips on the ends of your custom laces.
- Fabric Stiffener Spray: A light coating on your finished bows can help them maintain their “fluffy” shape all day long.
Elevate Your Footwear Style Today
Changing the way you tie your shoes is the easiest and cheapest way to refresh your wardrobe.
Once you master the satin bow, you can start experimenting with different colors to match your seasonal outfits.
Try swapping your standard white laces for a soft lavender or a dusty rose ribbon this afternoon.
You will be surprised at how many compliments you get on such a small, thoughtful detail.
Take a few minutes to practice the bunny ear technique until it becomes second nature.
Your shoes deserve to look just as cute as the rest of your ensemble.
Beginner-friendly templates, step-by-step guides,
and weekly project ideas in your inbox.