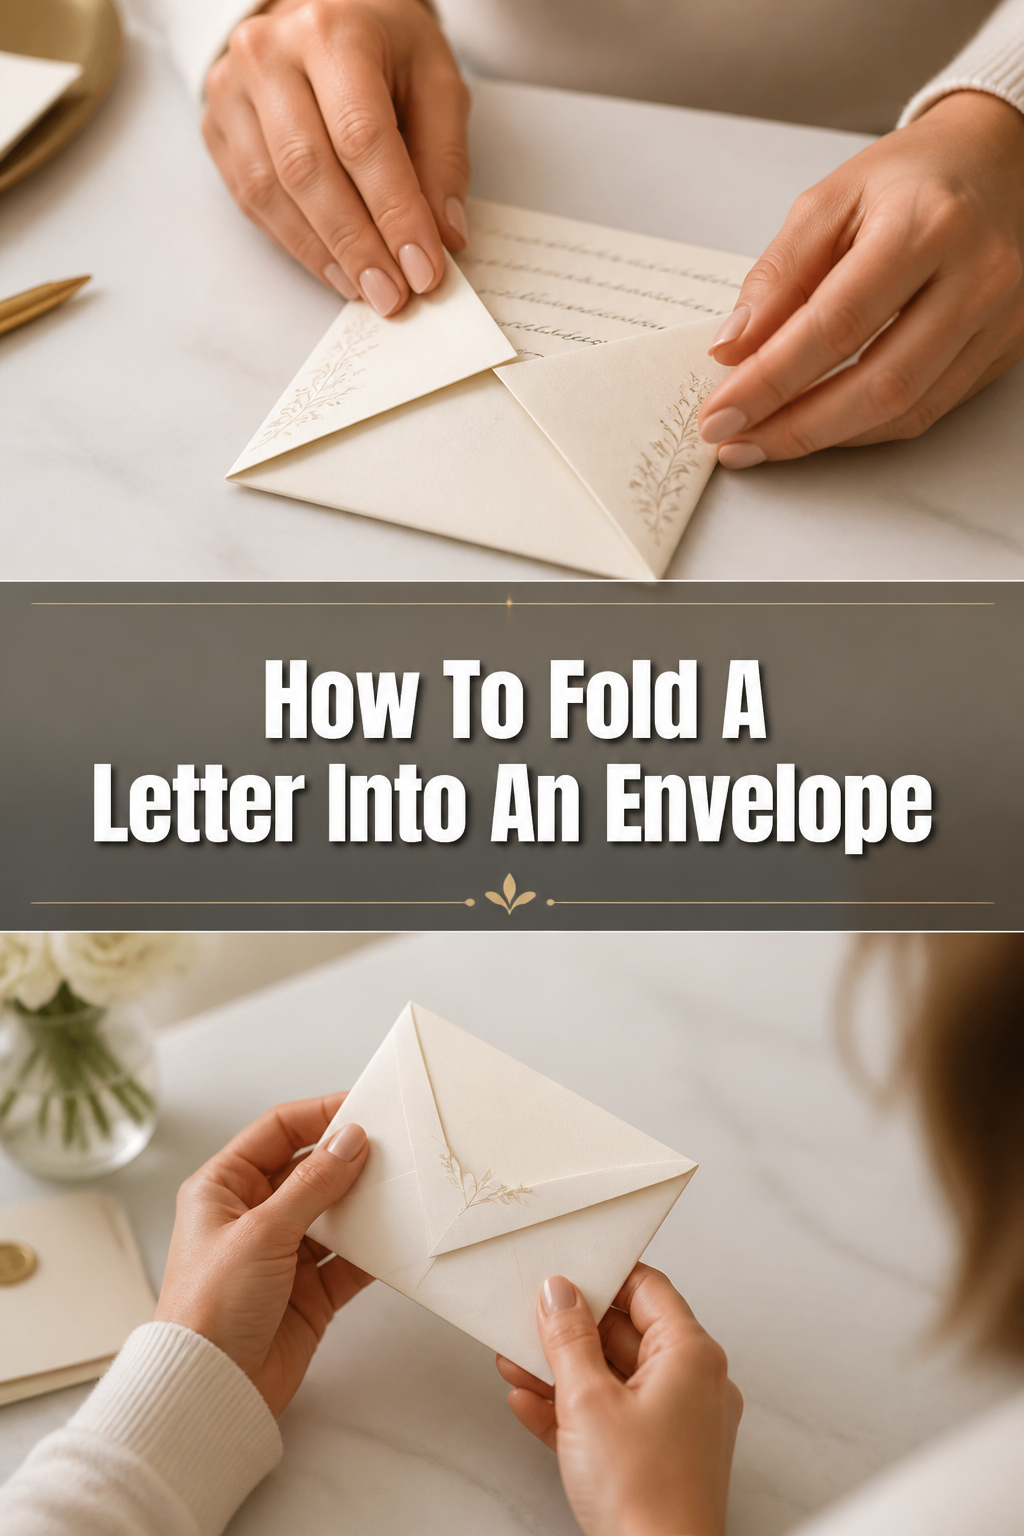
✉️ How To Fold A Letter Into An Envelope

Beginner-friendly templates, step-by-step guides,
and weekly project ideas in your inbox.
Sending a physical letter remains a thoughtful and personal gesture in our digital world.
The simple act of folding your message neatly into an envelope can seem trivial, but a well-presented letter makes a positive impression.
Having sent countless letters over the years for both personal and professional correspondence, I’ve refined the techniques that ensure a crisp, professional fold every time.
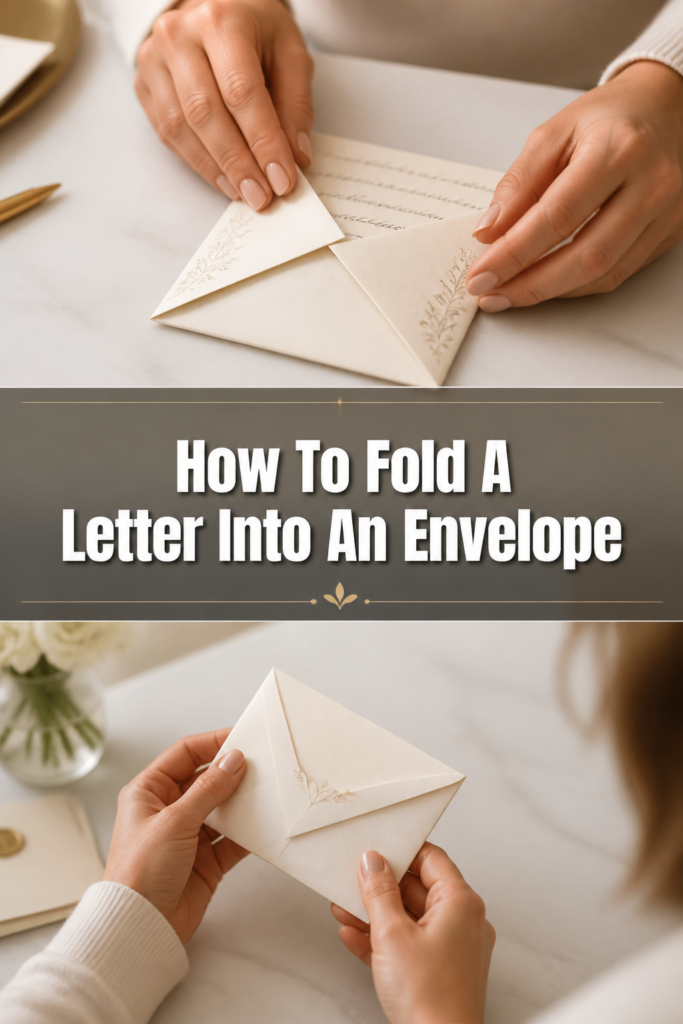
Quick Overview
This guide will show you how to fold any standard letter or document with precision, preparing it perfectly for its journey.
You will learn various folding methods suitable for different envelope sizes and purposes, ensuring your message arrives looking its best.
- Time needed: 2-5 minutes per letter
- Difficulty: Beginner
- What you’ll need: A letter, an envelope, a flat surface
Step-by-Step Instructions
The following steps will walk you through the most common and effective folding techniques.
We’ll cover methods suitable for standard business envelopes (often called #10 envelopes) and smaller personal envelopes.
Always ensure your hands are clean and dry before you begin to prevent smudges or creases.
Step 1: Prepare Your Workspace and Letter
A clean, flat surface is essential for achieving crisp folds.
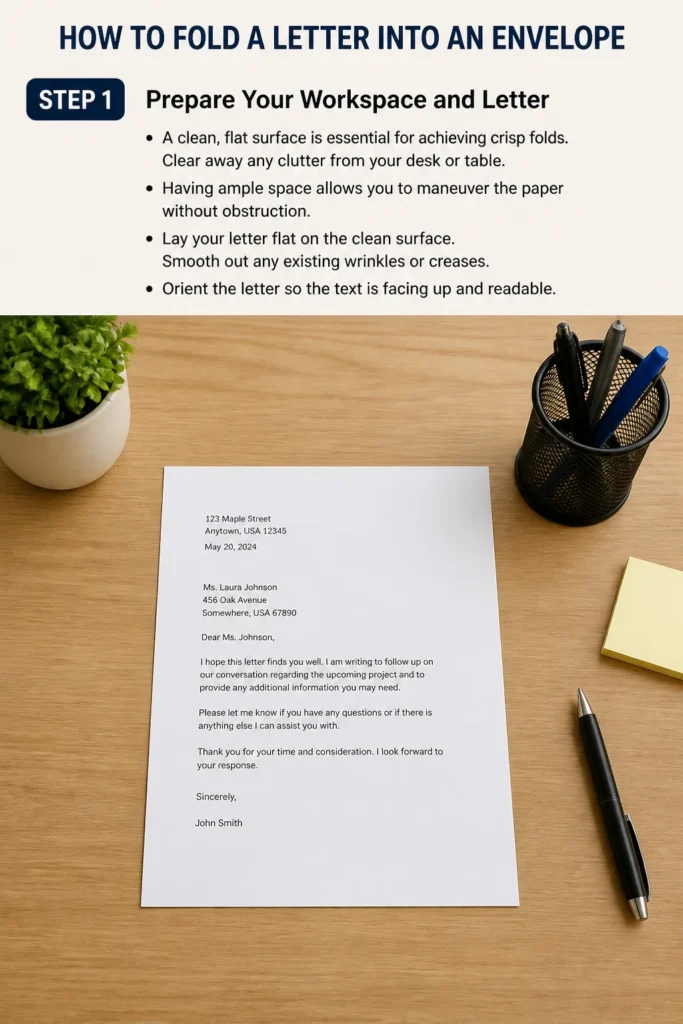
Clear away any clutter from your desk or table.
Having ample space allows you to maneuver the paper without obstruction.
- Lay your letter flat on the clean surface.
- Smooth out any existing wrinkles or creases.
- Orient the letter so the text is facing up and readable.
Step 2: Choose Your Folding Method
The type of envelope you are using dictates the best folding technique.
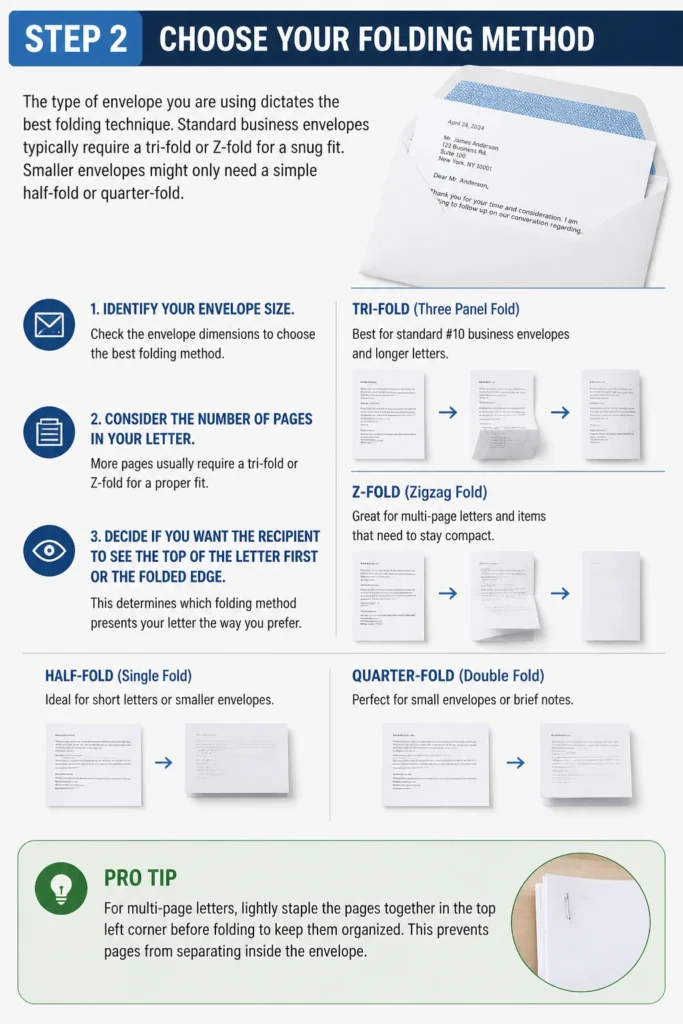
Standard business envelopes typically require a “tri-fold” or “Z-fold” for a snug fit.
Smaller envelopes might only need a simple half-fold or quarter-fold.
- Identify your envelope size.
- Consider the number of pages in your letter.
- Decide if you want the recipient to see the top of the letter first or the folded edge.
Pro Tip: For multi-page letters, lightly staple the pages together in the top left corner before folding to keep them organized. This prevents pages from separating inside the envelope.
Step 3: The Standard Tri-Fold (For #10 Business Envelopes)
This is the most common method for business correspondence, fitting perfectly into a standard #10 envelope.
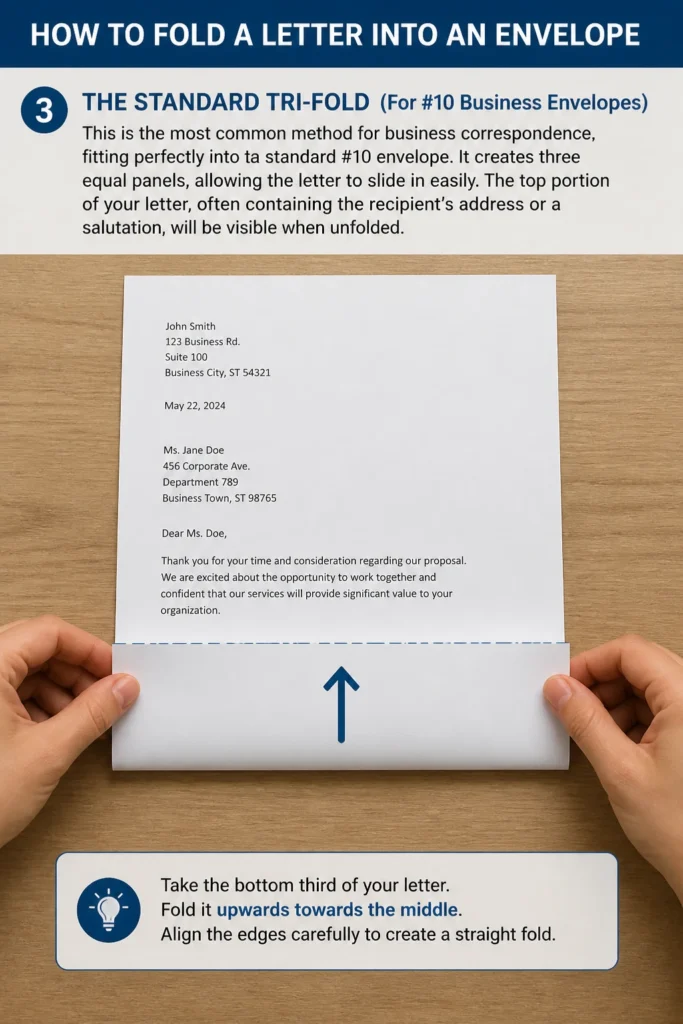
It creates three equal panels, allowing the letter to slide in easily.
The top portion of your letter, often containing the recipient’s address or a salutation, will be visible when unfolded.
- Take the bottom third of your letter.
- Fold it upwards towards the middle.
- Align the edges carefully to create a straight fold.
Step 4: Complete the Tri-Fold
Once the bottom third is folded, you’ll complete the tri-fold by bringing the top section down.
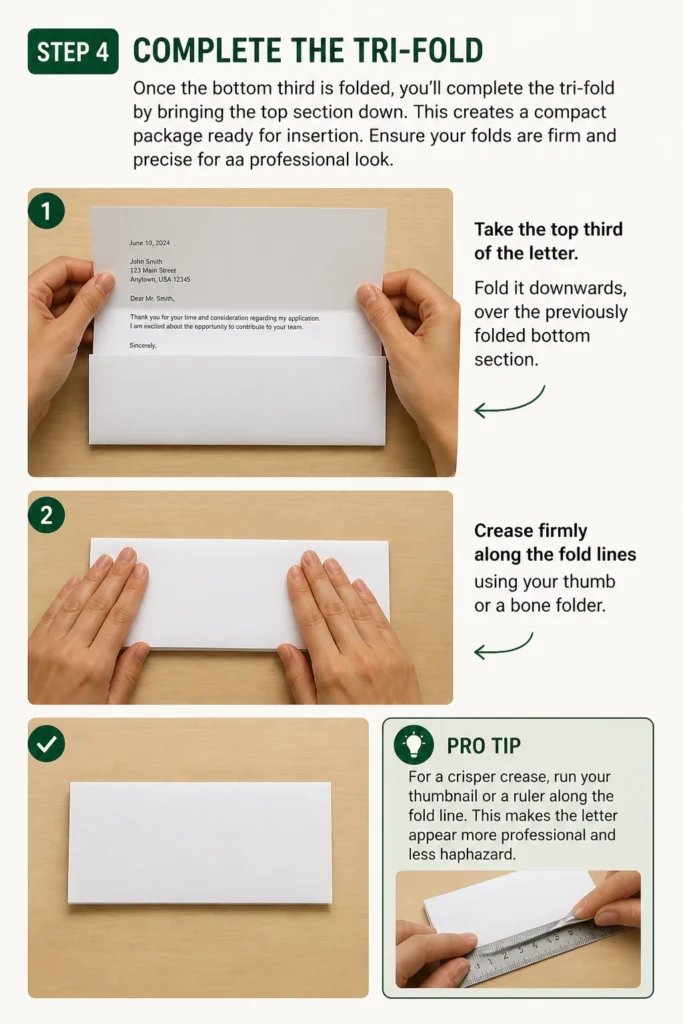
This creates a compact package ready for insertion.
Ensure your folds are firm and precise for a professional look.
- Take the top third of the letter.
- Fold it downwards, over the previously folded bottom section.
- Crease firmly along the fold lines using your thumb or a bone folder.
Pro Tip: For a crisper crease, run your thumbnail or a ruler along the fold line. This makes the letter appear more professional and less haphazard.
Step 5: The Z-Fold (For #10 Business Envelopes with Window)
A Z-fold is ideal when your envelope has a window and you want the recipient’s address, printed on the letter itself, to show through.
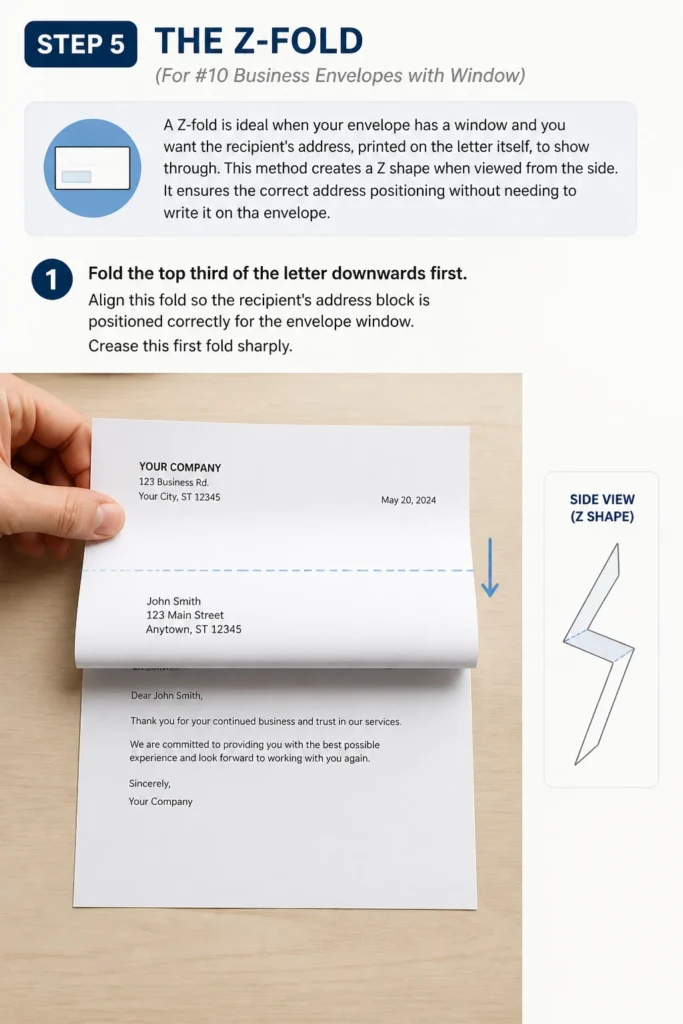
This method creates a “Z” shape when viewed from the side.
It ensures the correct address positioning without needing to write it on the envelope.
- Fold the top third of the letter downwards first.
- Align this fold so the recipient’s address block is positioned correctly for the envelope window.
- Crease this first fold sharply.
Step 6: Complete the Z-Fold
After the first fold, you will bring the bottom section up to complete the “Z.”
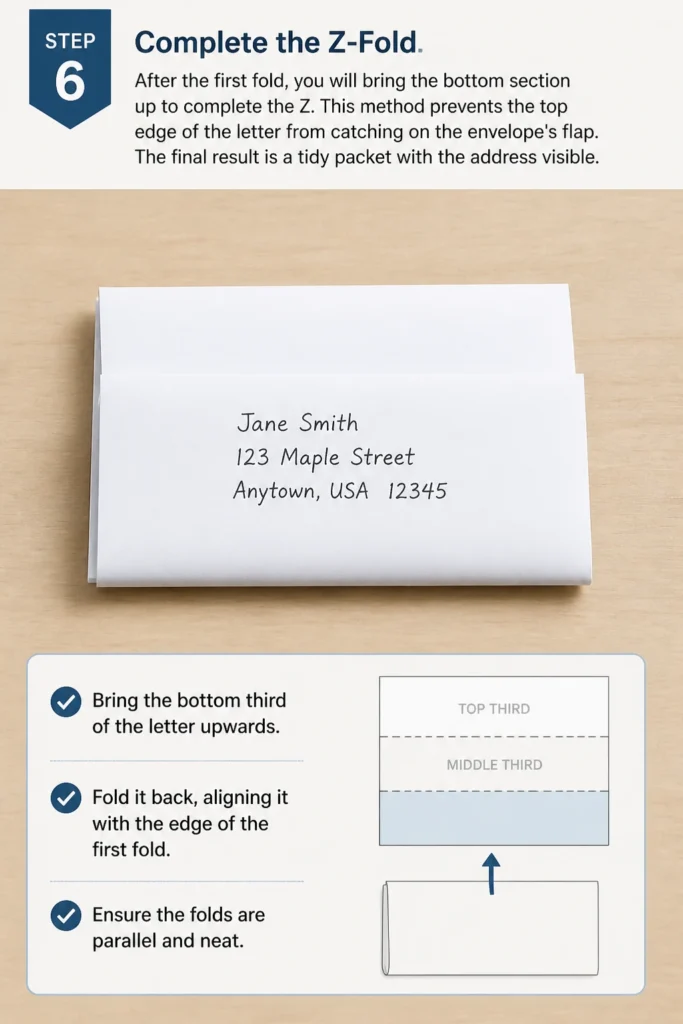
This method prevents the top edge of the letter from catching on the envelope’s flap.
The final result is a tidy packet with the address visible.
- Bring the bottom third of the letter upwards.
- Fold it back, aligning it with the edge of the first fold.
- Ensure the folds are parallel and neat.
Step 7: The Half-Fold (For Smaller Envelopes)
For smaller, personal-sized envelopes, a simple half-fold is often sufficient.
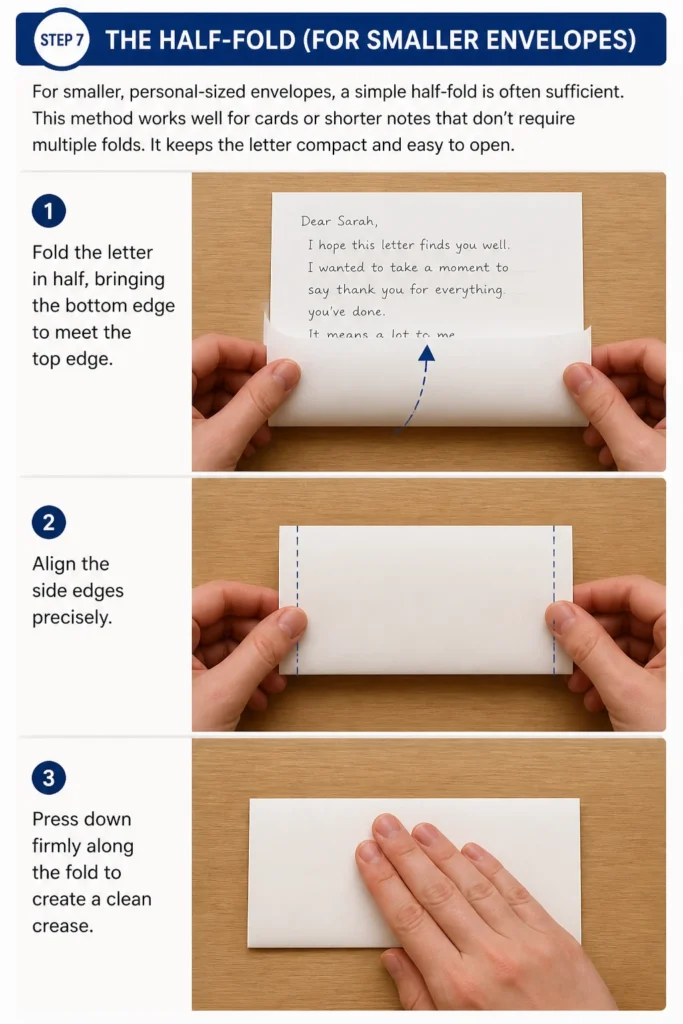
This method works well for cards or shorter notes that don’t require multiple folds.
It keeps the letter compact and easy to open.
- Fold the letter in half, bringing the bottom edge to meet the top edge.
- Align the side edges precisely.
- Press down firmly along the fold to create a clean crease.
Step 8: The Quarter-Fold (For Very Small Envelopes or Cards)
If your envelope is particularly small, a quarter-fold might be necessary.
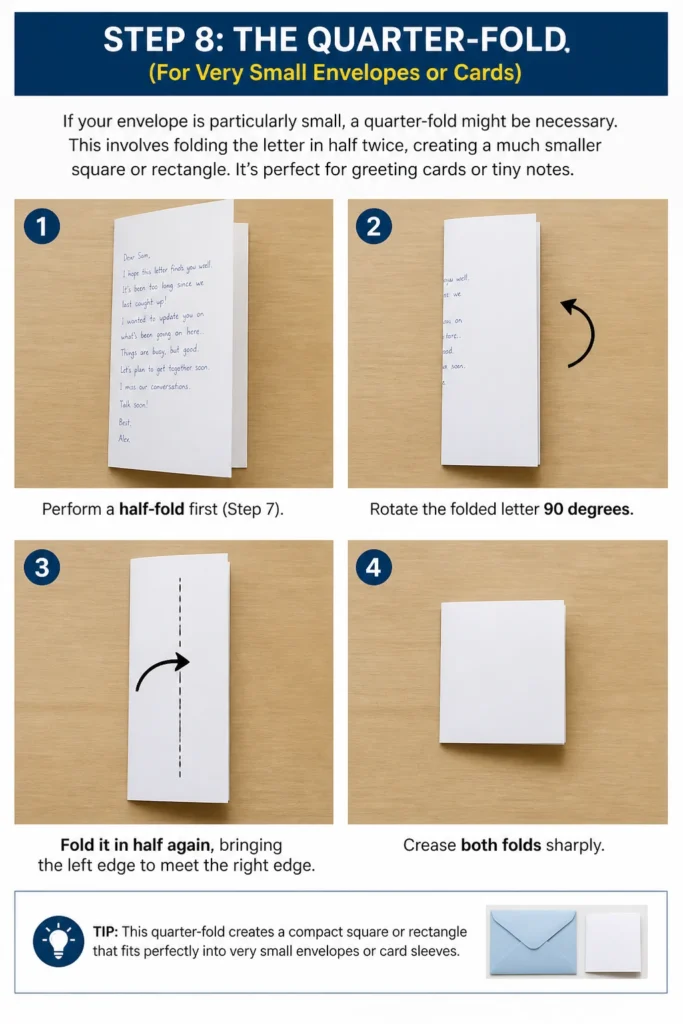
This involves folding the letter in half twice, creating a much smaller square or rectangle.
It’s perfect for greeting cards or tiny notes.
- Perform a half-fold first (Step 7).
- Rotate the folded letter 90 degrees.
- Fold it in half again, bringing the left edge to meet the right edge.
- Crease both folds sharply.
Step 9: Insert the Letter into the Envelope
Once your letter is perfectly folded, the next step is to carefully slide it into the envelope.
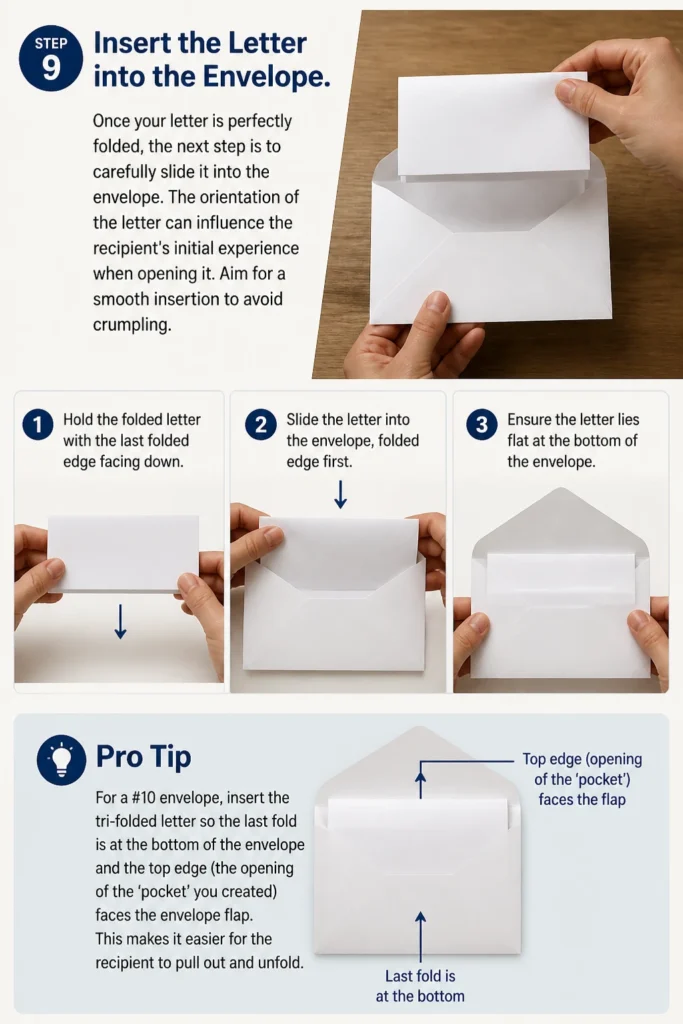
The orientation of the letter can influence the recipient’s initial experience when opening it.
Aim for a smooth insertion to avoid crumpling.
- Hold the folded letter with the last folded edge facing down.
- Slide the letter into the envelope, folded edge first.
- Ensure the letter lies flat at the bottom of the envelope.
Pro Tip: For a #10 envelope, insert the tri-folded letter so the last fold is at the bottom of the envelope and the top edge (the opening of the ‘pocket’ you created) faces the envelope flap. This makes it easier for the recipient to pull out and unfold.
Common Mistakes to Avoid
Even a simple task like folding a letter can go wrong if you’re not careful.
Avoiding these common pitfalls will ensure your letter always looks its best.
Uneven Folds
Folding a letter without proper alignment can result in a lopsided or messy appearance.
This looks unprofessional and can make the letter difficult to insert into the envelope.
Always take a moment to align edges precisely before creasing to ensure straight, even folds.
Over-Creasing or Under-Creasing
Pressing too hard can weaken the paper fibers, potentially tearing the letter, especially with thinner paper.
Conversely, not creasing enough leaves soft, rounded folds that look untidy and can unfold inside the envelope.
Apply firm but controlled pressure, using a bone folder or ruler for crispness without damage.
Incorrect Orientation for Window Envelopes
When using a window envelope, folding the letter incorrectly means the address won’t show through the window.
This leads to the letter being returned or delayed, or requiring you to write the address on the envelope anyway.
Always double-check that the recipient’s address block is perfectly aligned with the envelope window before sealing.
Forgetting to Smooth Out the Letter
Inserting a wrinkled or crumpled letter, even if folded correctly, diminishes its presentation.
The recipient will immediately notice the lack of care.
Always start with a flat, smooth sheet of paper to ensure a clean, crisp final product.
Troubleshooting
Sometimes, despite your best efforts, you might encounter small issues.
Here are solutions to common problems you might face when folding a letter.
Letter Too Big for the Envelope
If your folded letter feels too bulky or wide for the envelope, it likely means your folds aren’t tight enough or the folding method isn’t optimal.
Ensure you are using the correct folding technique (e.g., tri-fold for #10 envelopes) and that each crease is as firm and precise as possible.
You may need to gently trim a tiny sliver off one edge of the letter if it’s still too wide, but only as a last resort and very carefully.
Letter Gets Stuck When Inserting
A letter getting caught on the envelope flap or sides often happens if the leading edge isn’t smooth or if the envelope is slightly damaged.
Try inserting the letter with the last folded edge (the one that forms the “bottom” of the folded packet) going in first.
Ensure the envelope opening is fully extended and not creased, and gently guide the letter in without forcing it.
Folds Are Not Straight
Uneven or crooked folds can occur if you don’t align the paper edges correctly before creasing.
Always take a moment to perfectly match the edges and corners before pressing down.
If you notice an error early, gently unfold the paper and refold it with more precision, using your flat surface and possibly a ruler as a guide.
Key Takeaways
- Always work on a clean, flat surface to ensure pristine results.
- Match your folding method to the envelope size for a perfect fit.
- Tri-fold or Z-fold are best for standard #10 business envelopes.
- Align edges carefully before creasing to achieve straight, professional folds.
- Use firm, controlled pressure for crisp creases without damaging the paper.
- Insert the letter folded-edge first into the envelope for smooth entry.
Frequently Asked Questions
Can I fold multiple pages together?
Yes, you can fold multiple pages together, especially if they are stapled. For 2-3 pages, a standard tri-fold or Z-fold usually works fine. For more pages, consider a larger envelope or a simpler half-fold to prevent excessive bulk that could tear the envelope.
What’s the best way to fold a letter for a small greeting card envelope?
For small greeting card envelopes, the quarter-fold is often the most suitable. This involves folding the letter in half lengthwise, then in half again widthwise, creating a compact square or rectangle that fits snugly.
How do I prevent my letter from unfolding inside the envelope?
The best way to prevent unfolding is to create very crisp, firm creases. Use a bone folder, the back of a spoon, or your thumbnail to press down firmly along each fold line. Ensure the folded letter fits snugly but not tightly within the envelope.
Should the letter be face up or face down when I start folding?
For most methods, you should start with the letter face up, so the text is visible. This allows you to easily align specific sections, like the address block for a window envelope, and ensures the top of the letter appears first when the recipient unfolds it.
Our Top Recommended Finds
- Bone Folder: Essential for creating super crisp, professional creases without damaging paper.
- Letter Opener: A simple tool that helps recipients open envelopes cleanly, reflecting well on your presentation.
- Quality Stationery Paper: Using slightly heavier, good quality paper enhances the tactile experience and makes your letter feel more substantial.
Mastering the Art of Correspondence
Folding a letter correctly is a small detail that contributes significantly to the overall presentation of your message.
It shows care, professionalism, and respect for your recipient.
By applying these straightforward techniques, you ensure your letters always make the best possible impression.
Take these steps and elevate your written communication today.
Beginner-friendly templates, step-by-step guides,
and weekly project ideas in your inbox.