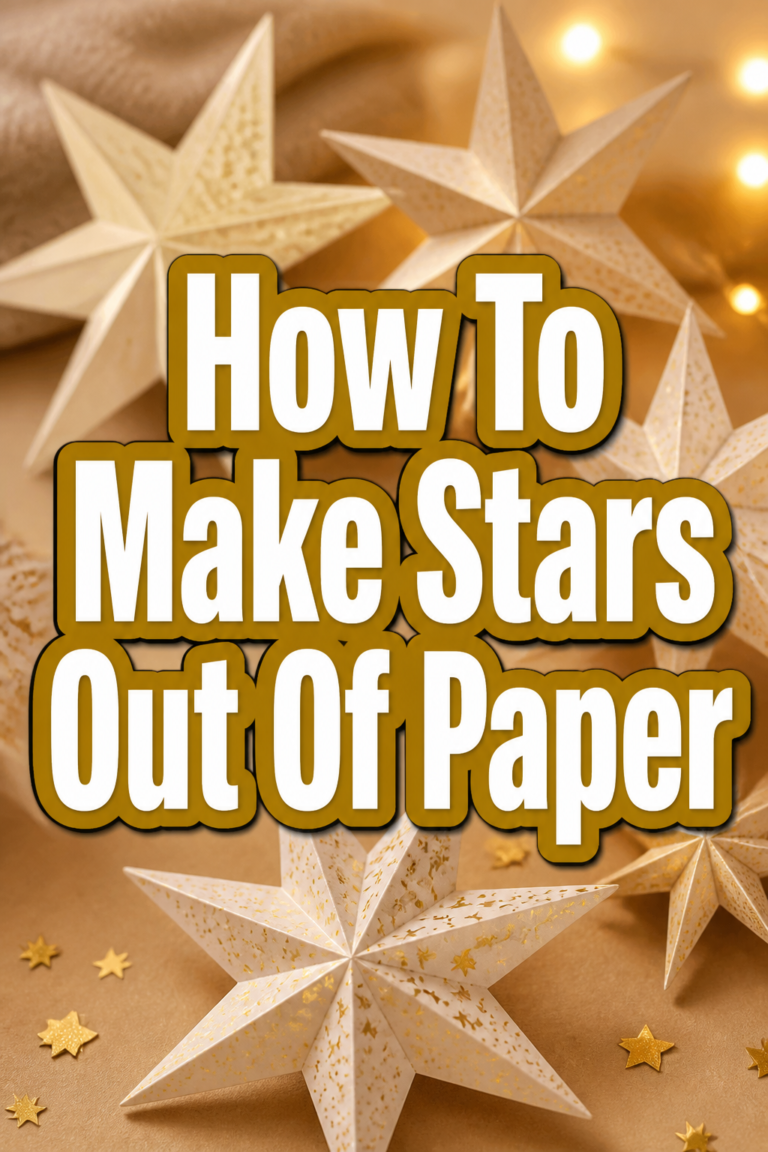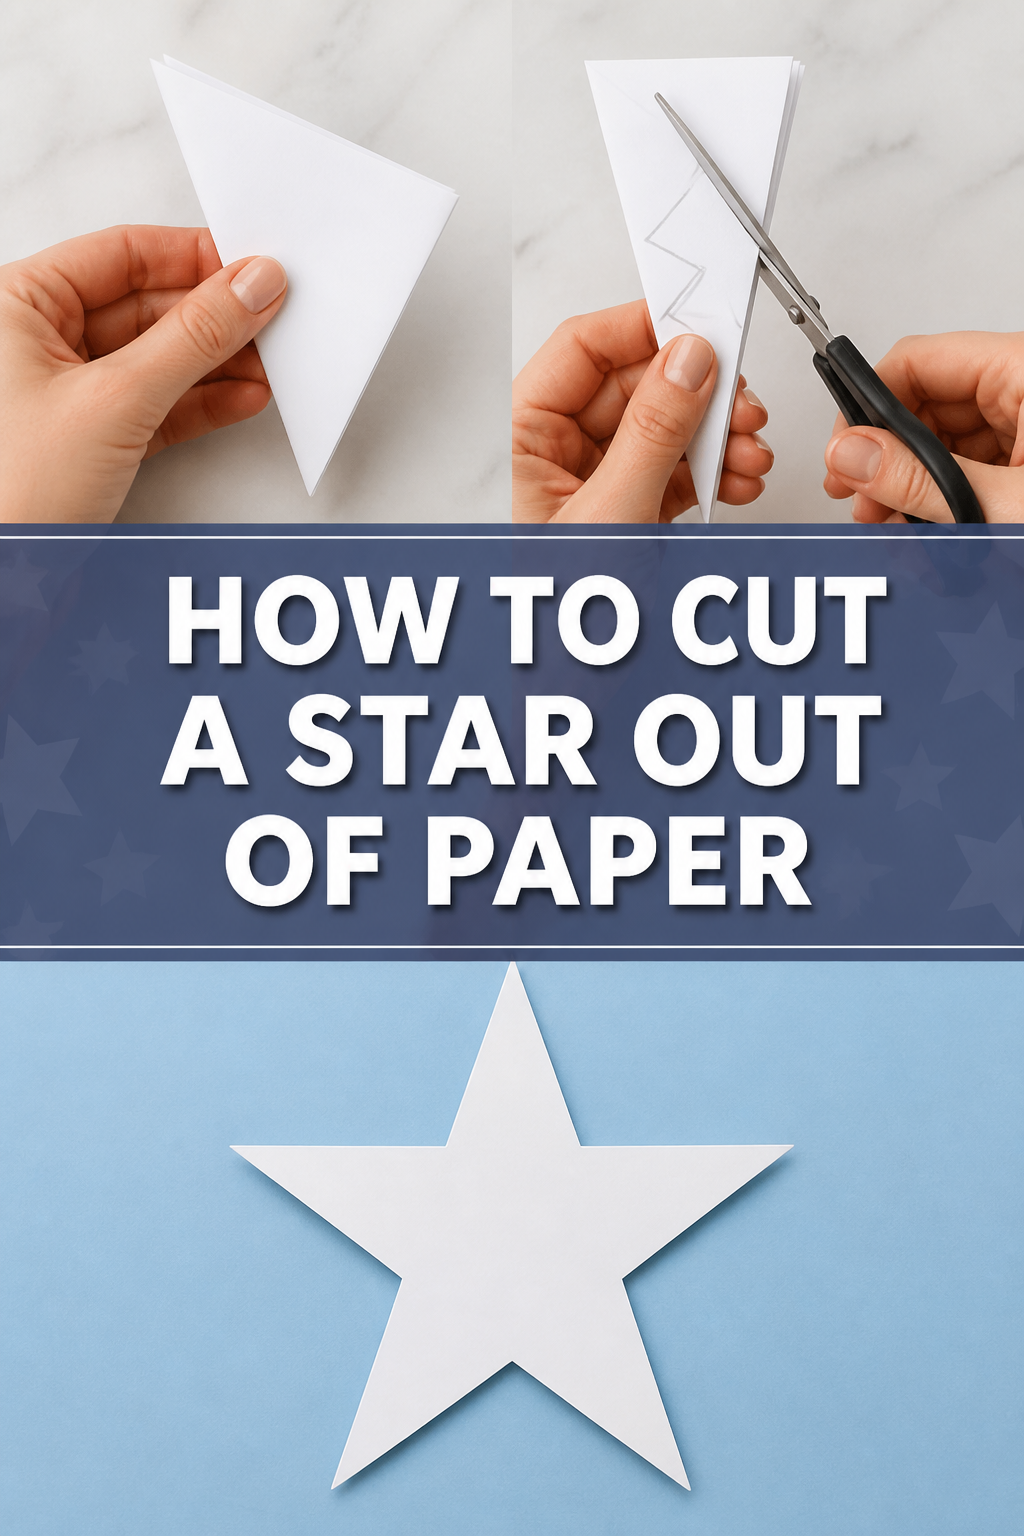
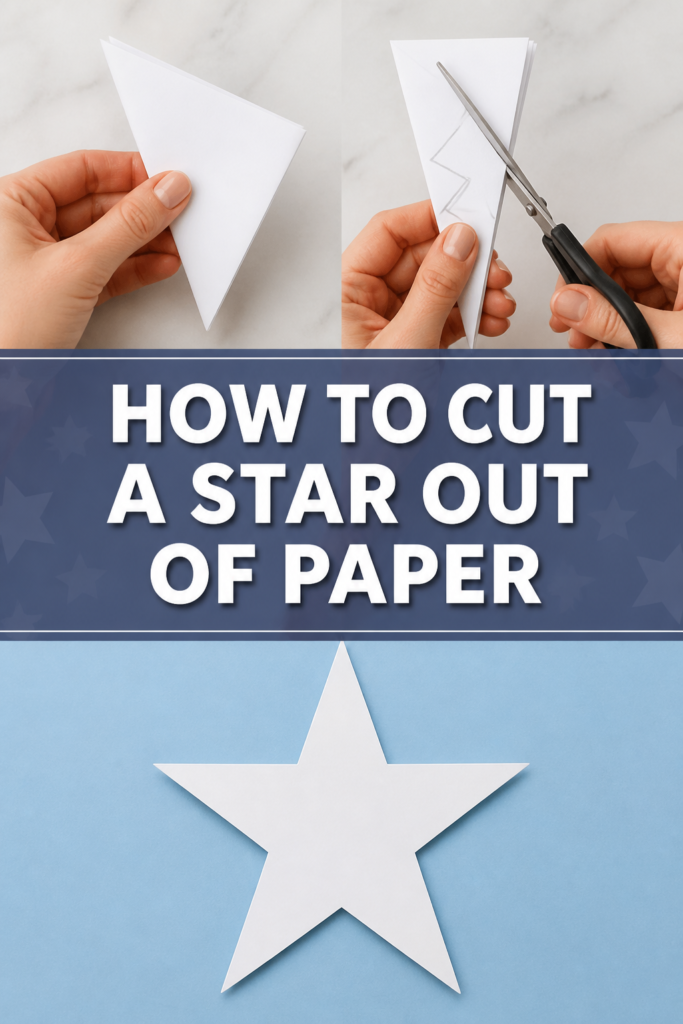
⭐ How To Cut A Star Out Of Paper

Beginner-friendly templates, step-by-step guides,
and weekly project ideas in your inbox.
Creating a perfect paper star can seem tricky at first glance.
I remember my first attempts often looked more like an abstract blob than a crisp five-point shape.
Through practice and refining a simple folding technique, I’ve found a method that reliably produces beautiful stars every time, and I’m excited to share it with you.
Quick Overview
This guide will walk you through the precise steps to fold and cut a symmetrical five-point star from a single sheet of paper. You’ll master a versatile skill useful for decorations, crafts, and gifts.
- Time needed: 10-20 minutes (depending on practice)
- Difficulty: Beginner
- What you’ll need: Paper, scissors, pencil, ruler (optional)
Step-by-Step Instructions
Step 1: Choose Your Paper
Select a piece of paper that suits your project. Standard printer paper works wonderfully for practice.
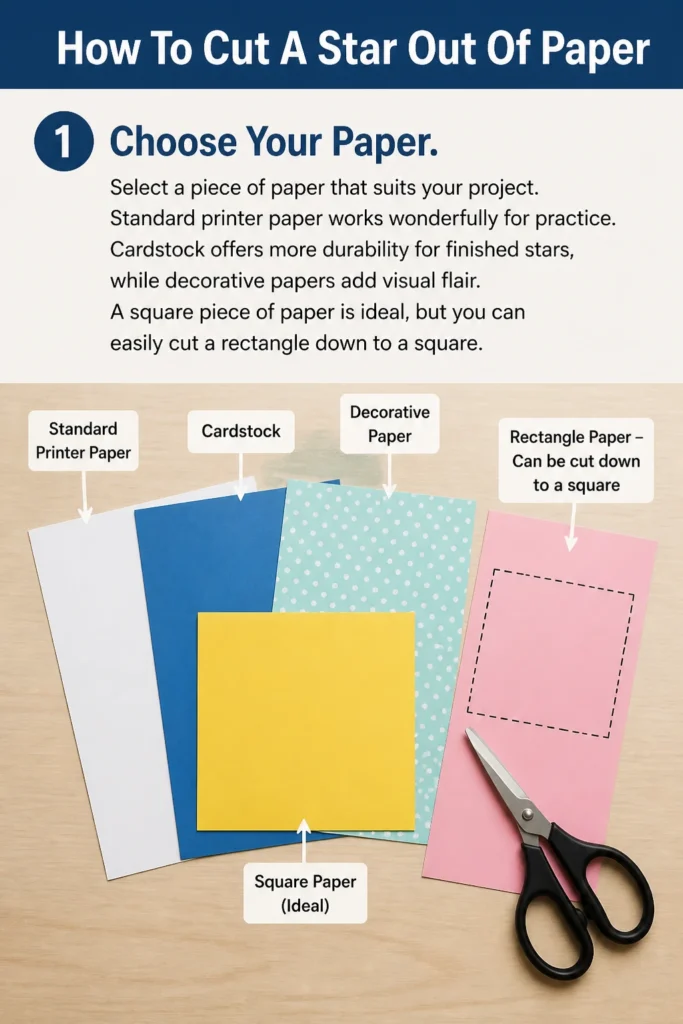
Cardstock offers more durability for finished stars, while decorative papers add visual flair.
A square piece of paper is ideal, but you can easily cut a rectangle down to a square.
Step 2: Create a Perfect Square (If Needed)
Fold one corner of your rectangular paper diagonally until the top edge aligns perfectly with the side edge.
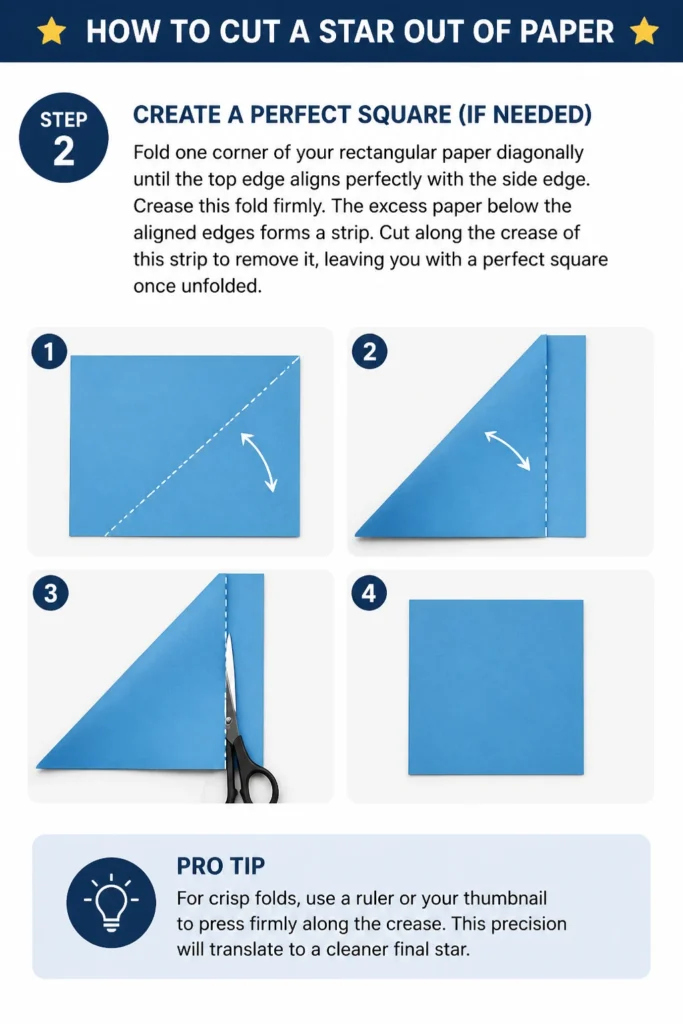
Crease this fold firmly. The excess paper below the aligned edges forms a strip.
Cut along the crease of this strip to remove it, leaving you with a perfect square once unfolded.
Pro Tip: For crisp folds, use a ruler or your thumbnail to press firmly along the crease. This precision will translate to a cleaner final star.
Step 3: Fold the Square in Half Diagonally
Take your square piece of paper.
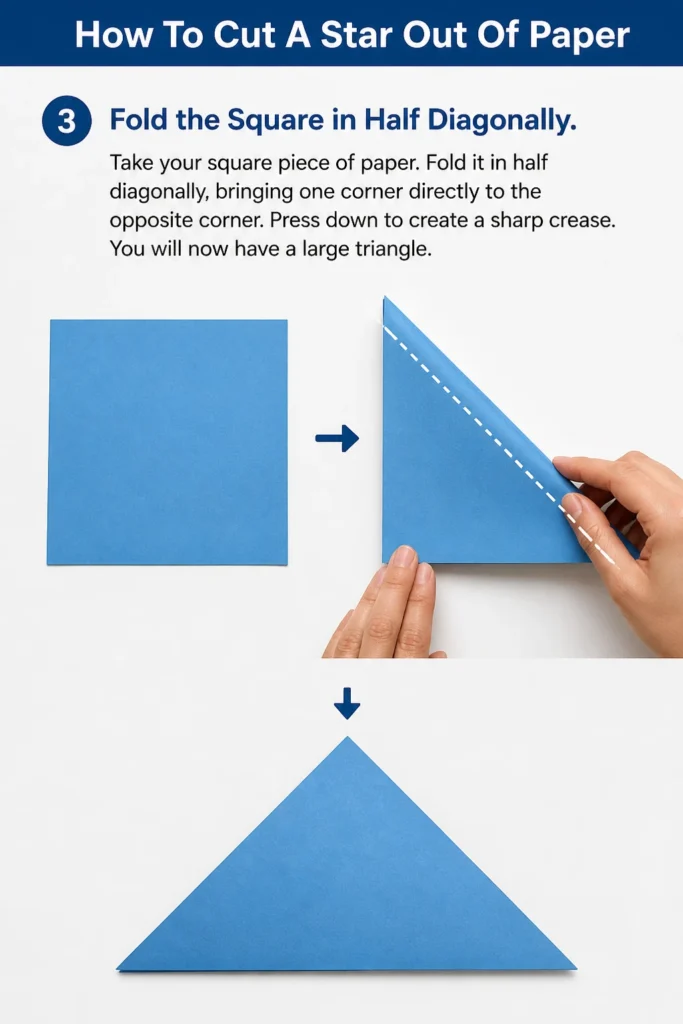
Fold it in half diagonally, bringing one corner directly to the opposite corner.
Press down to create a sharp crease. You will now have a large triangle.
Step 4: Fold in Half Again
Fold this large triangle in half again, bringing one point of the longest side to the other point.
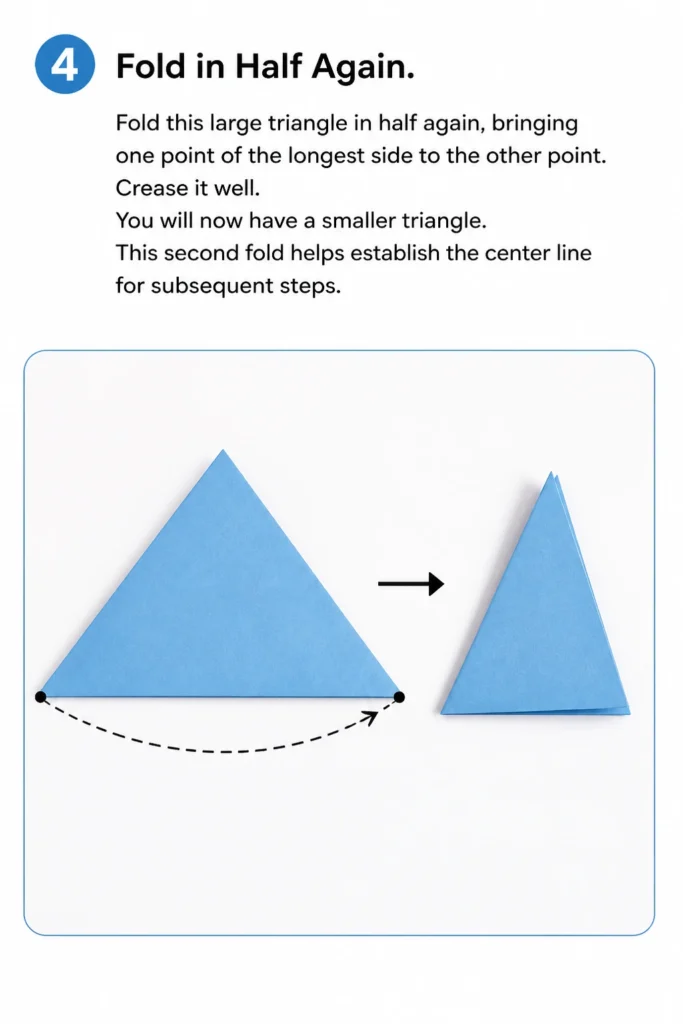
Crease it well. You will now have a smaller triangle.
This second fold helps establish the center line for subsequent steps.
Step 5: Mark the Center Point of the Longest Edge
Locate the longest edge of your smallest triangle.
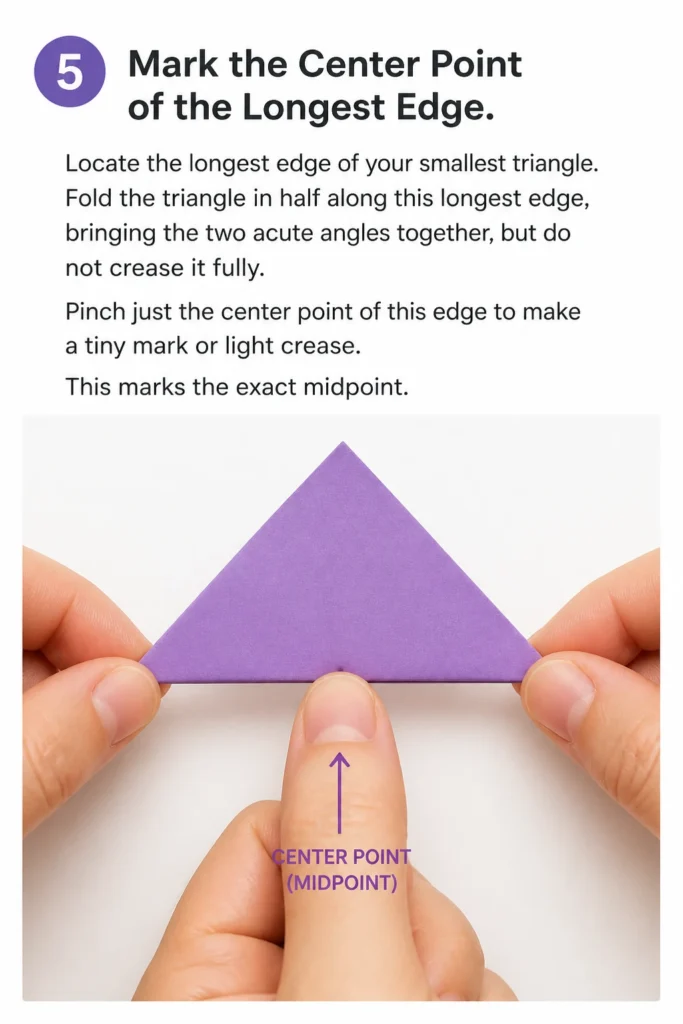
Fold the triangle in half along this longest edge, bringing the two acute angles together, but do not crease it fully.
Pinch just the center point of this edge to make a tiny mark or light crease. This marks the exact midpoint.
Step 6: Bring One Corner to the Center Mark
Unfold the triangle from the previous step.
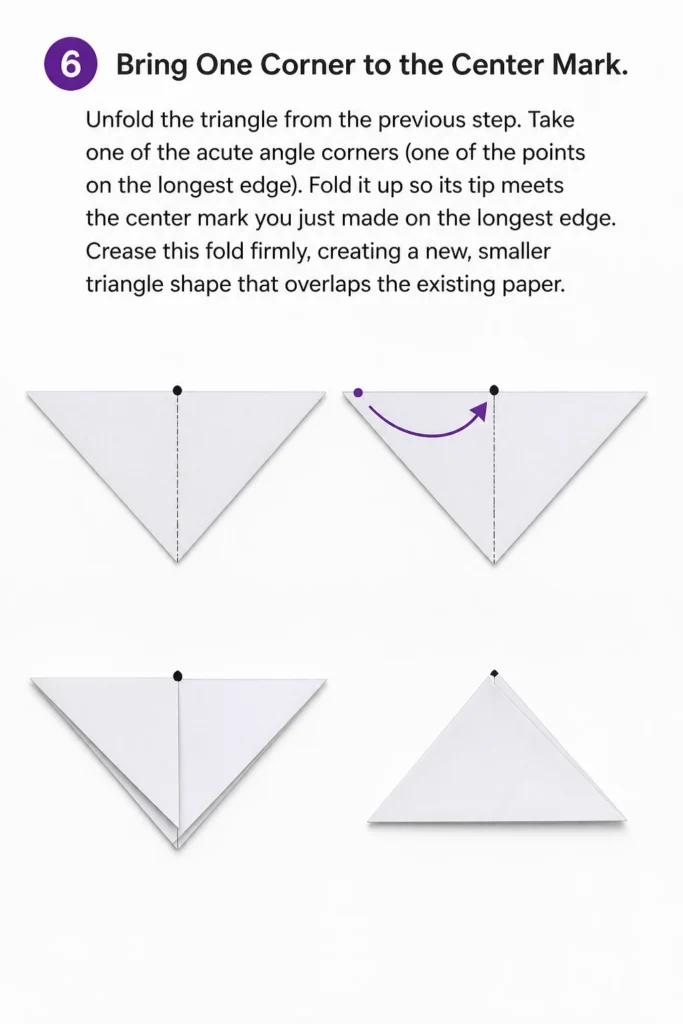
Take one of the acute angle corners (one of the points on the longest edge).
Fold it up so its tip meets the center mark you just made on the longest edge.
Crease this fold firmly, creating a new, smaller triangle shape that overlaps the existing paper.
Step 7: Fold the Opposite Corner Over
Take the other acute angle corner from the original longest edge.
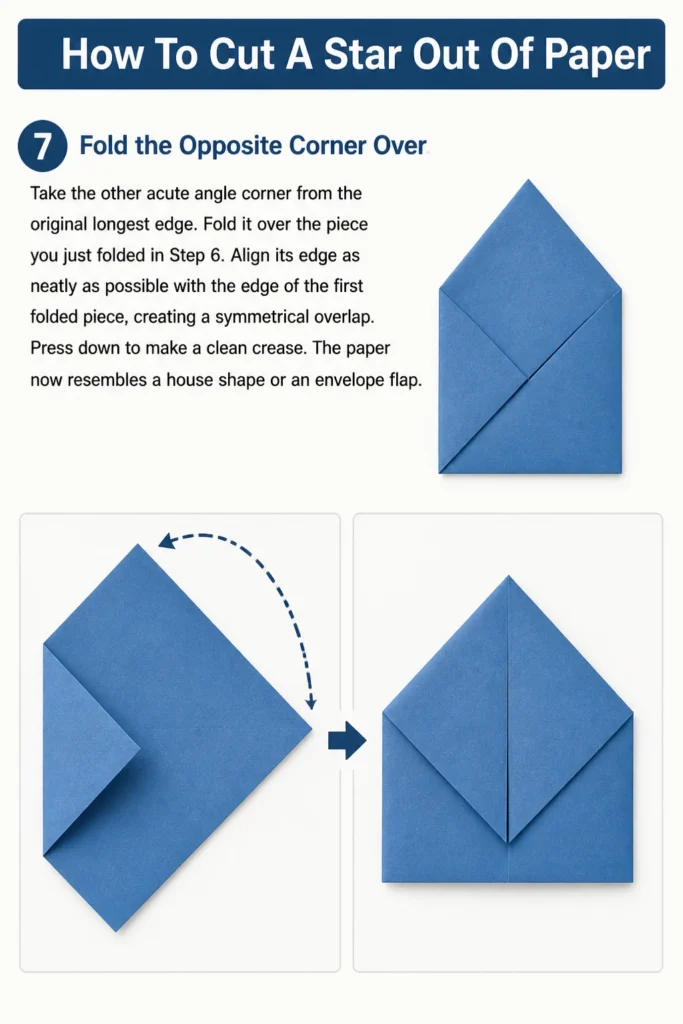
Fold it over the piece you just folded in Step 6.
Align its edge as neatly as possible with the edge of the first folded piece, creating a symmetrical overlap.
Press down to make a clean crease. The paper now resembles a house shape or an envelope flap.
Step 8: Fold the Remaining Section Back
Look at the bottom edge of your folded paper. There should be a section of paper extending beyond the “house” shape.
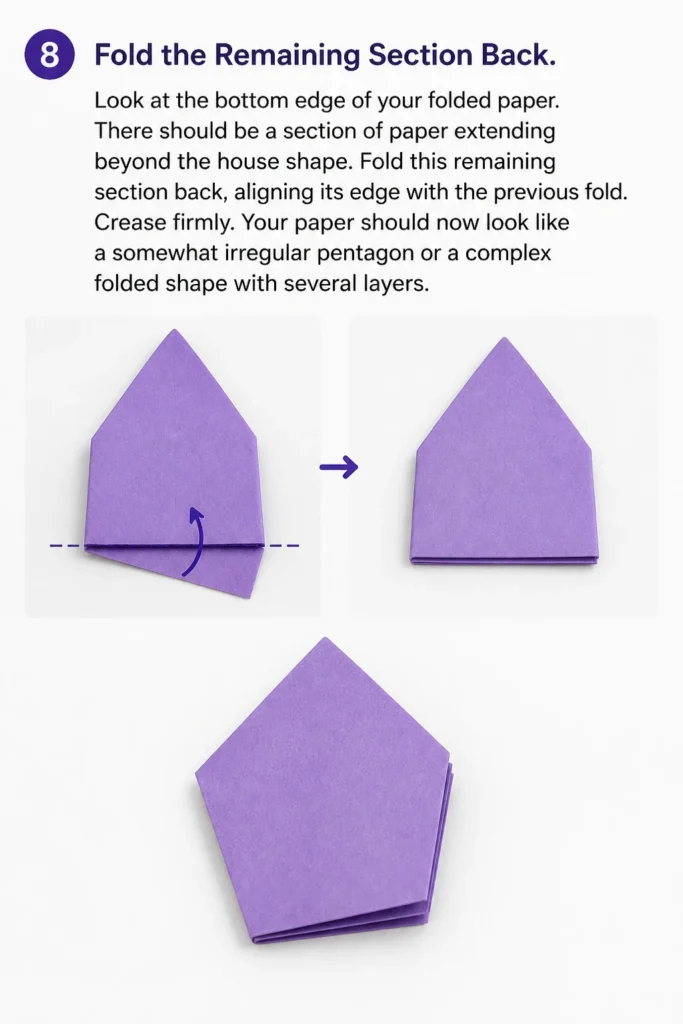
Fold this remaining section back, aligning its edge with the previous fold.
Crease firmly. Your paper should now look like a somewhat irregular pentagon or a complex folded shape with several layers.
Step 9: Fold in Half Along the Center Line
Locate the central vertical crease you made in Step 4 (or imagine the line that would divide your current shape symmetrically).
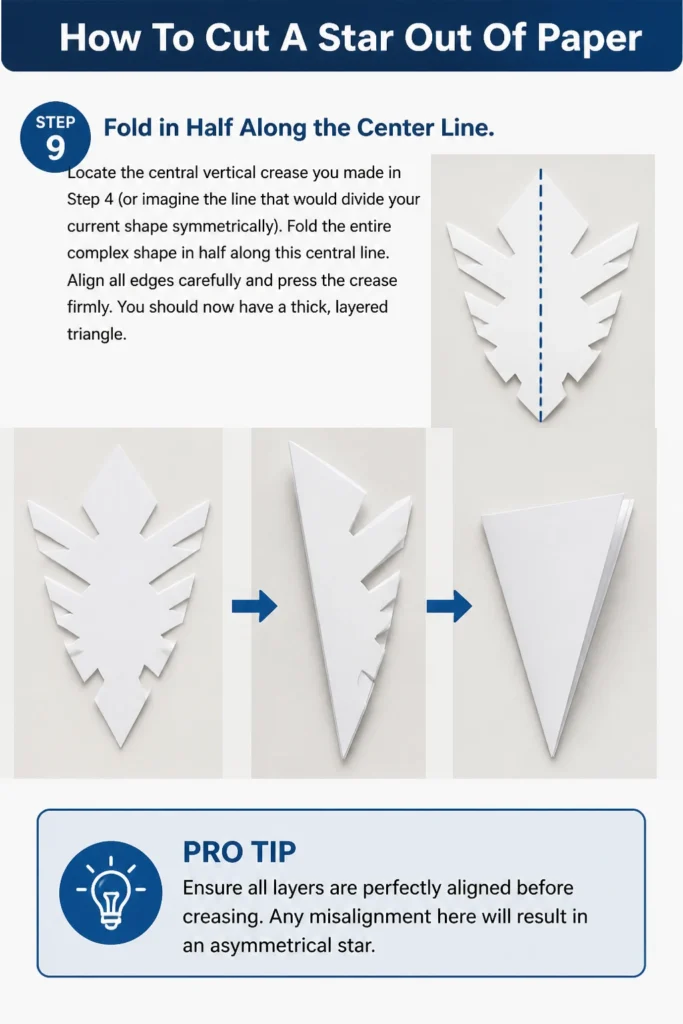
Fold the entire complex shape in half along this central line.
Align all edges carefully and press the crease firmly. You should now have a thick, layered triangle.
Pro Tip: Ensure all layers are perfectly aligned before creasing. Any misalignment here will result in an asymmetrical star.
Step 10: Make the Star Cut
Identify the open side of your folded triangle (where all the paper layers are loose).
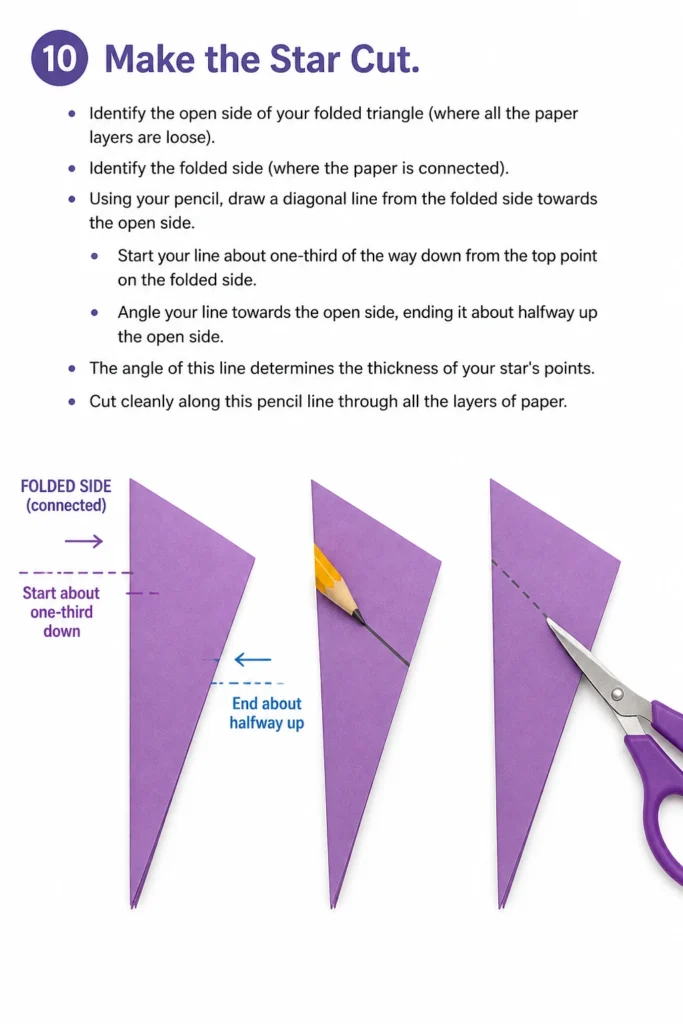
Identify the folded side (where the paper is connected).
Using your pencil, draw a diagonal line from the folded side towards the open side. Start your line about one-third of the way down from the top point on the folded side.
Angle your line towards the open side, ending it about halfway up the open side. The angle of this line determines the thickness of your star’s points.
Cut cleanly along this pencil line through all the layers of paper.
Step 11: Unfold Your Star
Carefully unfold the cut paper.
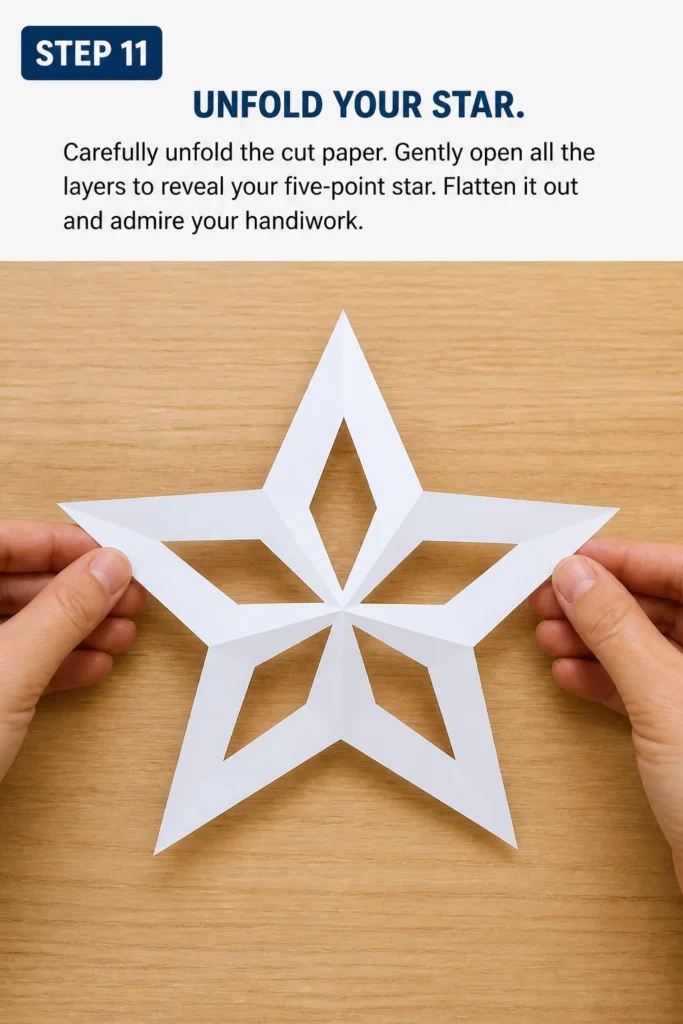
Gently open all the layers to reveal your five-point star.
Flatten it out and admire your handiwork.
Common Mistakes to Avoid
Uneven Initial Square
Starting with a square that isn’t perfectly square will lead to an asymmetrical star. The initial folds rely on precise 90-degree angles and equal sides.
Always take the time to cut your square accurately. If you’re cutting from a rectangle, ensure the folded edge aligns precisely before cutting off the excess strip.
Flimsy or Misaligned Folds
Weak or imprecise creases throughout the folding process can cause the paper to shift when cutting. This results in points that don’t match up.
Press down firmly on every fold with your fingers or a bone folder. Take your time to align edges perfectly before making a crease.
Cutting Too Much or Too Little
The final diagonal cut is crucial. Cutting too steeply will result in very thin, sharp points that are prone to tearing.
Cutting with too shallow an angle will create broad, stubby points. Experiment with the angle on scrap paper to find your preferred star shape.
Not Aligning Layers Before the Final Cut
When you fold the shape in half in Step 9, it’s easy for the many layers of paper to slip out of alignment. If they aren’t stacked perfectly, your cut won’t be even across all layers.
Before cutting, double-check that all edges are flush and hold them firmly. This ensures each point of the star is the same length and shape.
Troubleshooting
Star Points are Uneven
This usually happens due to slight misalignments in your initial folds or if the final cut wasn’t perfectly straight through all layers. Go back to Step 3 or 9.
Ensure each fold is crisp and accurate. When making the final cut, use sharp scissors and apply even pressure to slice through all paper layers simultaneously without tearing.
Star Looks Lopsided or Not Symmetrical
A lopsided star often indicates that your initial square wasn’t perfect, or one of the early diagonal folds wasn’t precise.
Revisit Step 2 and 3. Make sure your square is exact and that the first two diagonal folds truly bring opposite corners together without any overhang.
Paper Tears While Cutting
Tearing can occur if your scissors are dull or if you’re trying to cut too many thick layers of paper at once. Very thin or delicate paper can also tear easily.
Use sharp, clean scissors. For thicker cardstock, you might need stronger craft scissors. Consider using slightly thicker paper for practice to minimize tearing.
Key Takeaways
- Always start with a perfectly cut square for the best results.
- Precision in folding is paramount; sharp, accurate creases lead to symmetrical stars.
- The final diagonal cut determines the star’s point sharpness and overall shape.
- Practice on scrap paper to get a feel for the folding and cutting angles.
- Sharp scissors are essential for clean, tear-free cuts through multiple layers.
- Take your time with each step; rushing often leads to mistakes.
Frequently Asked Questions
Can I make different sized stars with this method?
Absolutely! The size of your star is determined by the size of your initial square of paper. A larger square will yield a larger star, and a smaller square will create a smaller one. The folding method remains identical regardless of scale.
What type of paper is best for cutting stars?
Standard printer paper (70-90 gsm) is excellent for practice and everyday stars. For sturdier stars, use cardstock (160-250 gsm). Decorative papers like scrapbook paper or origami paper also work well, offering color and pattern variations.
How do I make a star with more or fewer points?
This specific method is designed for a five-point star. Creating stars with a different number of points (e.g., four or six) requires a different initial folding sequence. The principle of folding and making a single cut remains, but the preliminary folds change significantly.
My star looks a bit rough on the edges, how can I make it cleaner?
Rough edges usually come from dull scissors or an unsteady hand during the cut. Ensure your scissors are sharp and make one smooth, continuous cut. Practicing on scrap paper can help you achieve a cleaner, more confident cut.
Our Top Recommended Finds
- Craft Scissors: A good pair of sharp, comfortable craft scissors makes all the difference for clean cuts. Look for ones with stainless steel blades.
- Bone Folder: This tool helps create incredibly crisp creases, especially useful when working with thicker paper or for making many stars.
- Variety Pack of Construction Paper: Perfect for practicing different sizes and colors, and generally more affordable than specialty paper.
Unfold Your Creative Potential
You’ve just mastered a fundamental paper craft skill that opens up a world of creative possibilities.
Whether for holiday decorations, party favors, or simply a fun afternoon activity, these paper stars add a touch of handmade charm.
Now, grab some paper and scissors, and start cutting your own constellation of stars today!
Beginner-friendly templates, step-by-step guides,
and weekly project ideas in your inbox.