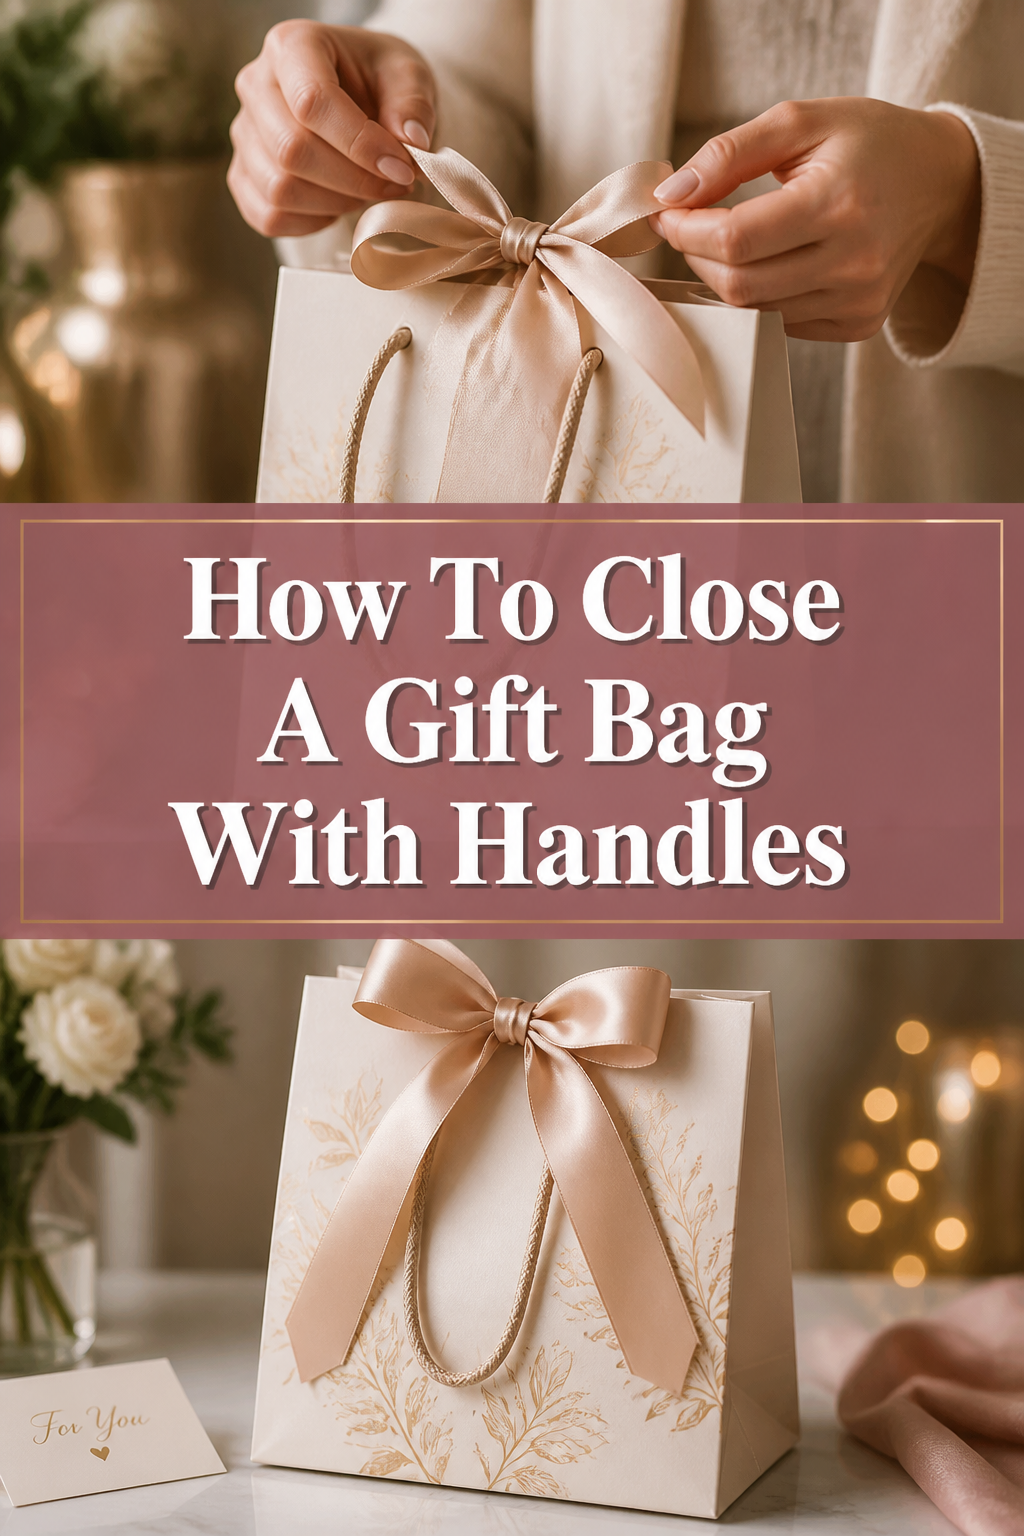
🎁 How To Close A Gift Bag With Handles
There’s a subtle art to presentation. A beautifully wrapped gift bag, securely closed and artfully arranged, speaks volumes before the present is even revealed. I’ve spent countless hours perfecting gift presentations for every occasion, from birthdays to holidays. Learning how to properly close a gift bag with handles transforms a simple container into a thoughtful package.
This guide shares my tried-and-true methods, ensuring your gifts always look their best. You’ll gain the confidence to create stunning, secure gift presentations every time. Let’s make every gift-giving moment truly special.
Quick Overview
You are about to master several techniques for closing gift bags with handles, ensuring your gifts are presented beautifully and securely.
- Time needed: 5-15 minutes (depending on method and desired flair)
- Difficulty: Beginner
- What you’ll need: Gift bag with handles, tissue paper, your gift, optional: ribbon, tape, gift tag, hole punch, scissors.
Step-by-Step Instructions
The perfect gift bag closure often depends on the bag’s size, the gift’s weight, and your desired aesthetic. Here are several approaches, from simple to sophisticated.
Step 1: Prepare Your Gift Bag and Contents
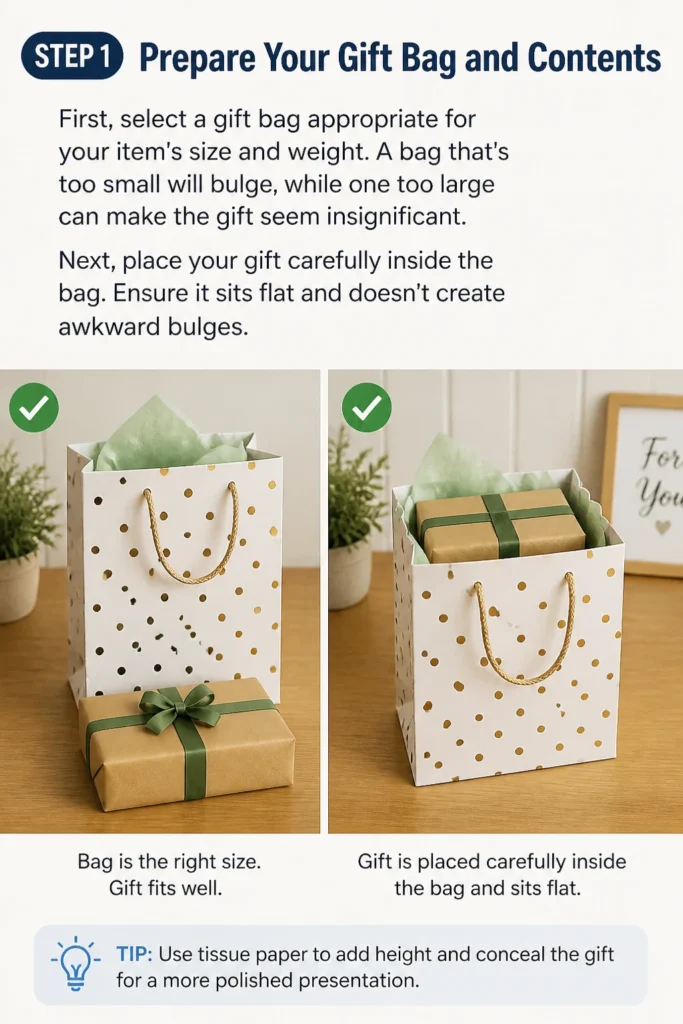
First, select a gift bag appropriate for your item’s size and weight. A bag that’s too small will bulge, while one too large can make the gift seem insignificant.
Next, place your gift carefully inside the bag. Ensure it sits flat and doesn’t create awkward bulges.
Step 2: Add the Foundation of Tissue Paper
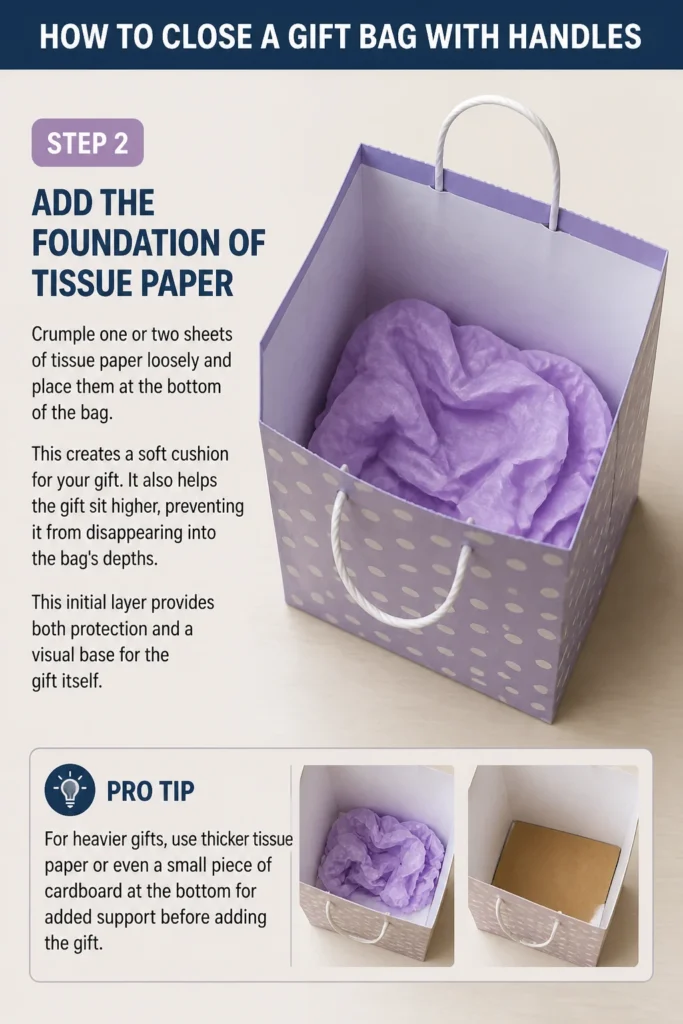
Crumple one or two sheets of tissue paper loosely and place them at the bottom of the bag. This creates a soft cushion for your gift. It also helps the gift sit higher, preventing it from disappearing into the bag’s depths.
This initial layer provides both protection and a visual base for the gift itself.
Pro Tip: For heavier gifts, use thicker tissue paper or even a small piece of cardboard at the bottom for added support before adding the gift.
Step 3: Conceal and Cushion with More Tissue Paper
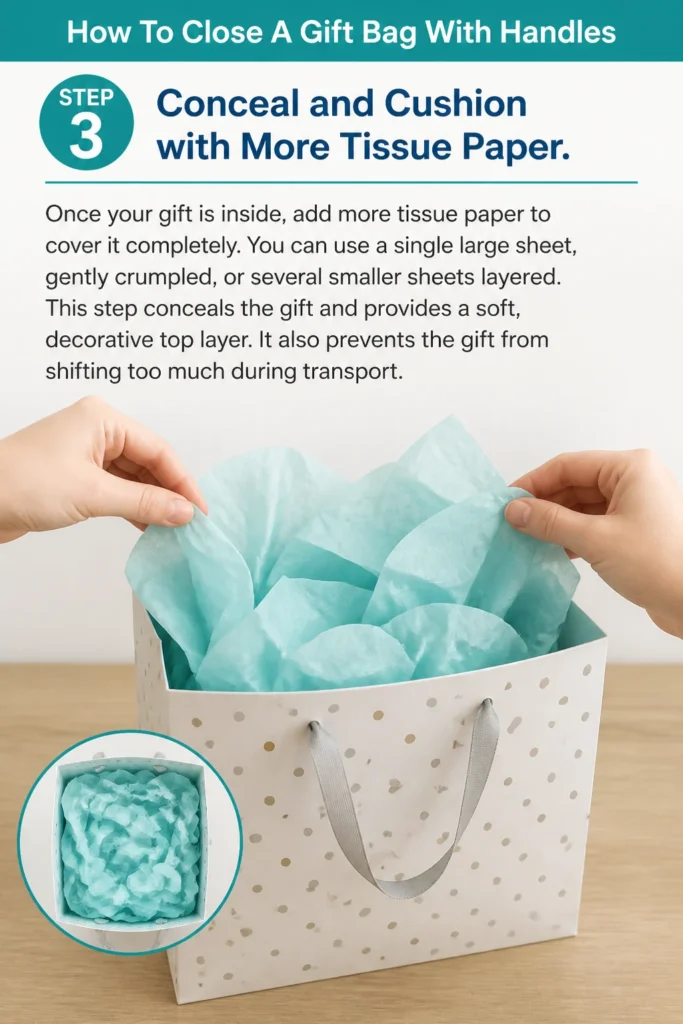
Once your gift is inside, add more tissue paper to cover it completely. You can use a single large sheet, gently crumpled, or several smaller sheets layered.
This step conceals the gift and provides a soft, decorative top layer. It also prevents the gift from shifting too much during transport.
Step 4: Create Volume and Visual Appeal with Tissue Paper
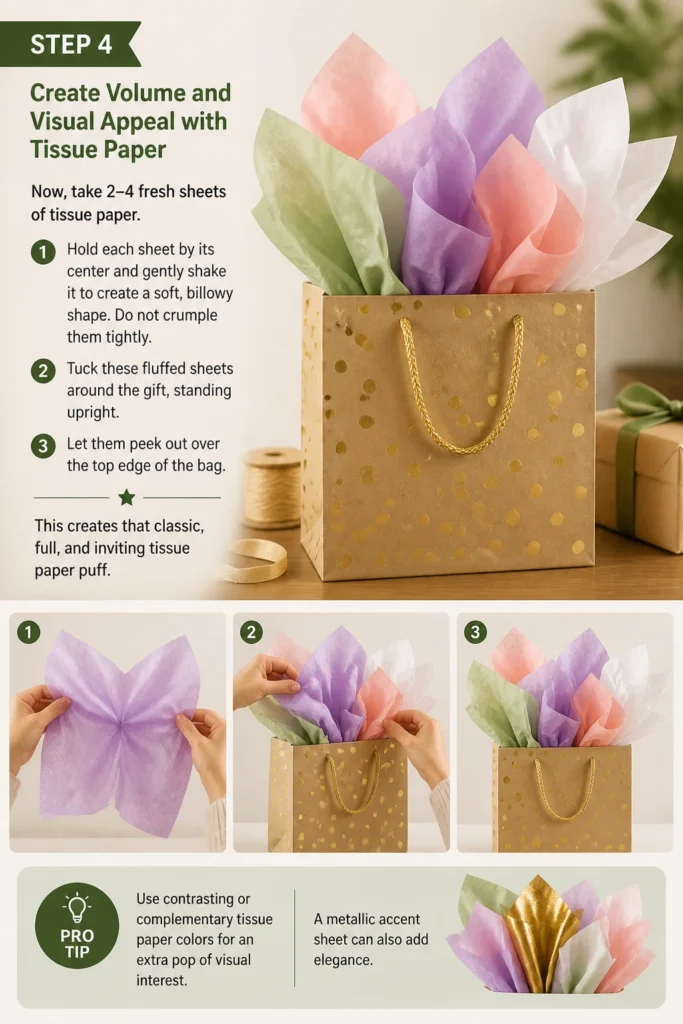
Now, take 2-4 fresh sheets of tissue paper. Hold each sheet by its center and gently shake it to create a soft, billowy shape. Do not crumple them tightly.
Tuck these fluffed sheets around the gift, standing upright. Let them peek out over the top edge of the bag. This creates that classic, full, and inviting tissue paper “puff.”
Pro Tip: Use contrasting or complementary tissue paper colors for an extra pop of visual interest. A metallic accent sheet can also add elegance.
Step 5: Master the Basic Tissue Paper Scrunch Closure
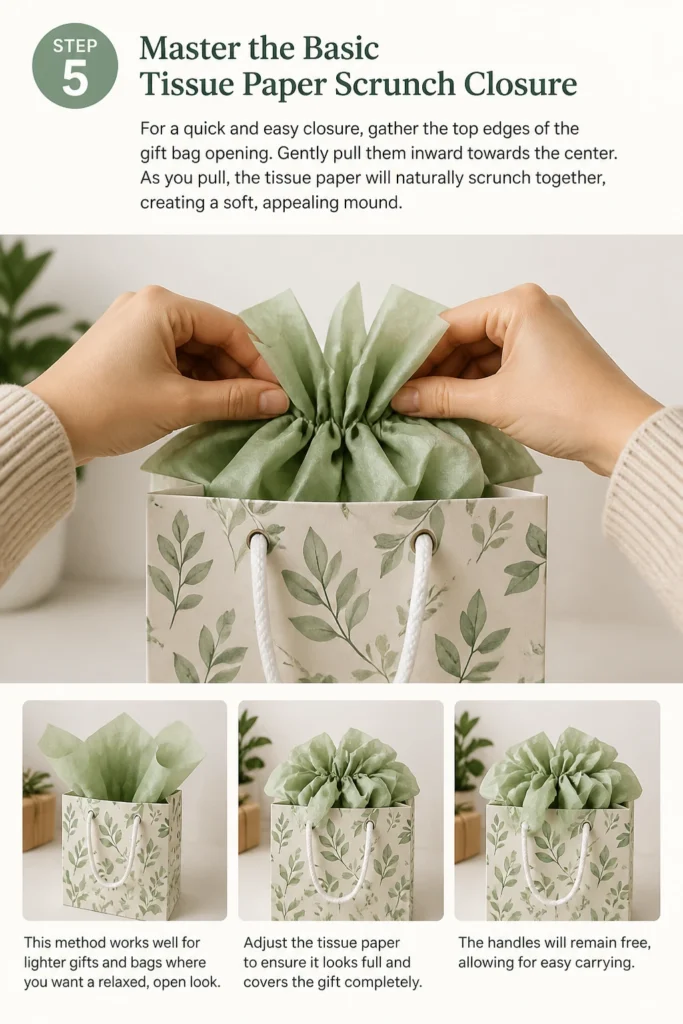
For a quick and easy closure, gather the top edges of the gift bag opening. Gently pull them inward towards the center.
As you pull, the tissue paper will naturally scrunch together, creating a soft, appealing mound. This method works well for lighter gifts and bags where you want a relaxed, open look.
Adjust the tissue paper to ensure it looks full and covers the gift completely. The handles will remain free, allowing for easy carrying.
Step 6: Execute the Simple Ribbon Tie Closure
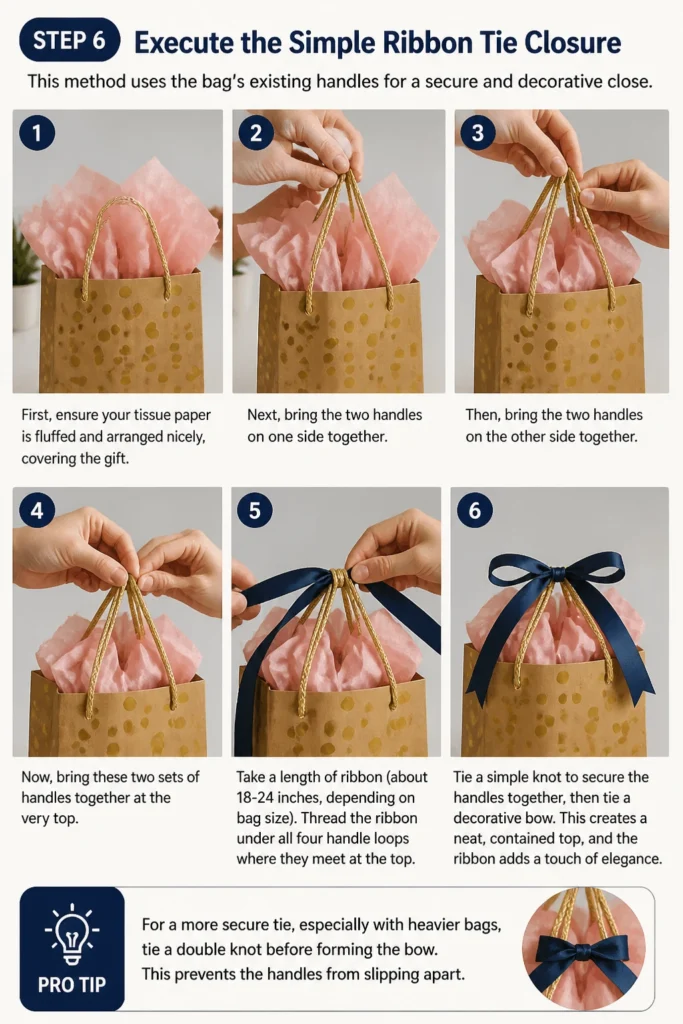
This method uses the bag’s existing handles for a secure and decorative close. First, ensure your tissue paper is fluffed and arranged nicely, covering the gift.
Next, bring the two handles on one side together, then bring the two handles on the other side together. Now, bring these two sets of handles together at the very top.
Take a length of ribbon (about 18-24 inches, depending on bag size). Thread the ribbon under all four handle loops where they meet at the top.
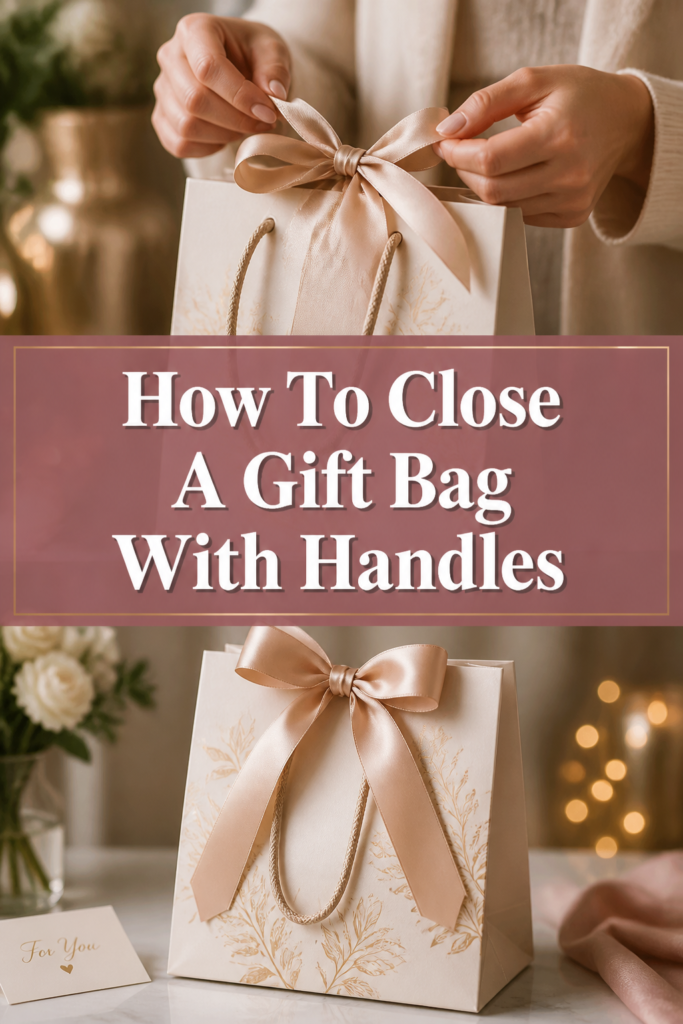
Tie a simple knot to secure the handles together, then tie a decorative bow. This creates a neat, contained top, and the ribbon adds a touch of elegance.
Pro Tip: For a more secure tie, especially with heavier bags, tie a double knot before forming the bow. This prevents the handles from slipping apart.
Step 7: Implement the Secure Hole Punch & Ribbon Closure
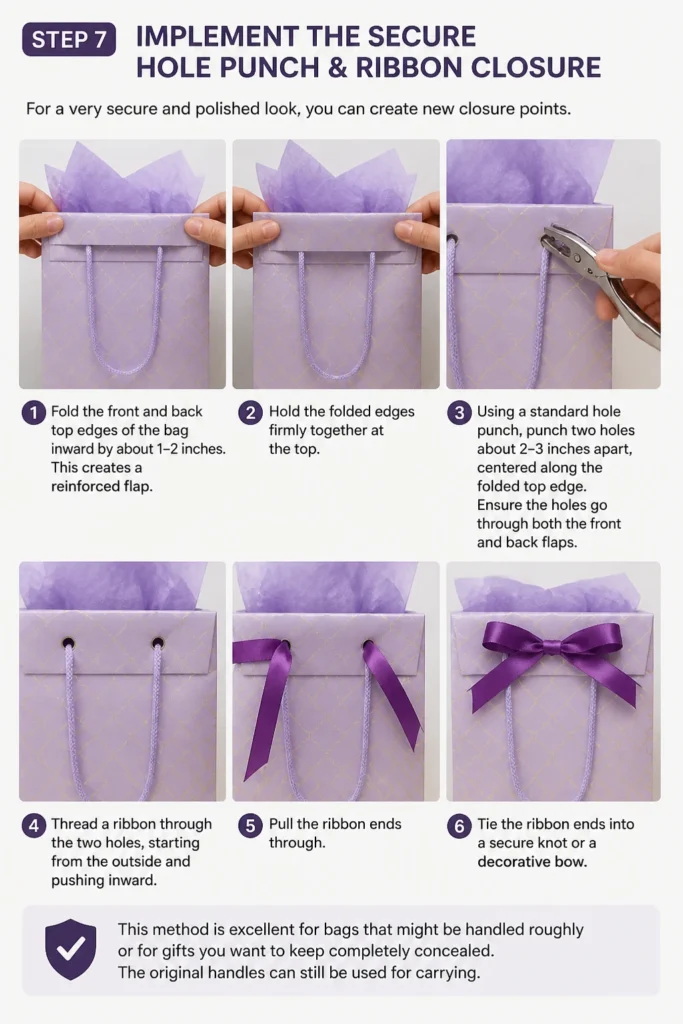
For a very secure and polished look, you can create new closure points. First, fold the front and back top edges of the bag inward by about 1-2 inches. This creates a reinforced flap.
Hold the folded edges firmly together at the top. Using a standard hole punch, punch two holes about 2-3 inches apart, centered along the folded top edge. Ensure the holes go through both the front and back flaps.
Thread a ribbon through the two holes, starting from the outside and pushing inward. Pull the ribbon ends through.
Tie the ribbon ends into a secure knot or a decorative bow. This method is excellent for bags that might be handled roughly or for gifts you want to keep completely concealed. The original handles can still be used for carrying.
Step 8: Achieve a Clean, Taped Flap Closure
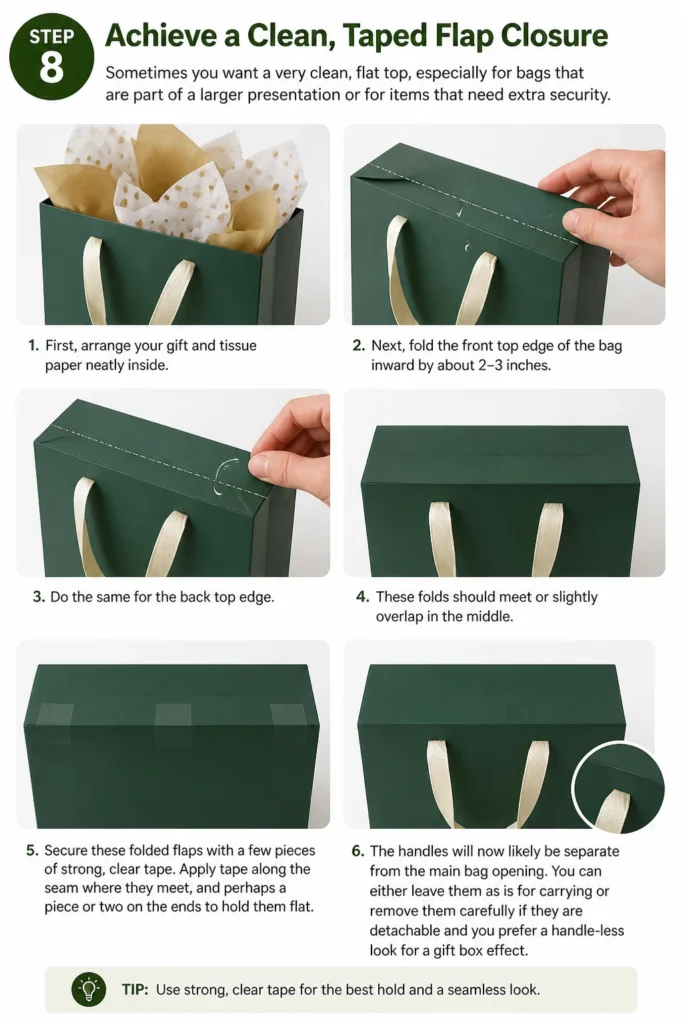
Sometimes you want a very clean, flat top, especially for bags that are part of a larger presentation or for items that need extra security. First, arrange your gift and tissue paper neatly inside.
Next, fold the front top edge of the bag inward by about 2-3 inches. Do the same for the back top edge. These folds should meet or slightly overlap in the middle.
Secure these folded flaps with a few pieces of strong, clear tape. Apply tape along the seam where they meet, and perhaps a piece or two on the ends to hold them flat.
The handles will now likely be separate from the main bag opening. You can either leave them as is for carrying or remove them carefully if they are detachable and you prefer a handle-less look for a gift box effect.
Step 9: Add Finishing Touches and Personalization
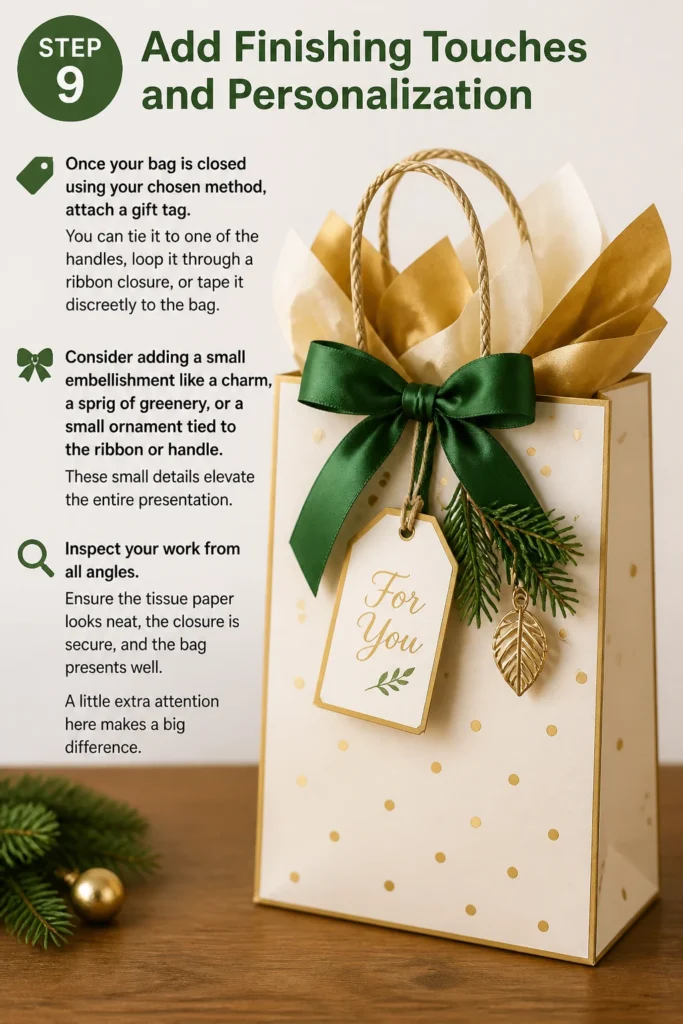
Once your bag is closed using your chosen method, attach a gift tag. You can tie it to one of the handles, loop it through a ribbon closure, or tape it discreetly to the bag.
Consider adding a small embellishment like a charm, a sprig of greenery, or a small ornament tied to the ribbon or handle. These small details elevate the entire presentation.
Inspect your work from all angles. Ensure the tissue paper looks neat, the closure is secure, and the bag presents well. A little extra attention here makes a big difference.
Common Mistakes to Avoid
Even with the best intentions, a few common pitfalls can detract from your gift bag’s presentation. Knowing what to avoid will save you time and frustration.
Overstuffing the Bag
Trying to squeeze too much into a gift bag is a common error. This strains the bag’s seams, makes the handles difficult to close, and often results in a lumpy, unattractive package. It also risks tearing the bag during transport.
Always choose a bag that comfortably accommodates your gift with room for tissue paper. If in doubt, size up. A slightly larger bag with ample tissue paper always looks better than a bursting one.
Using Too Little or Too Much Tissue Paper
Too little tissue paper leaves the gift exposed and makes the bag look empty and unfinished. It lacks the visual appeal and cushioning. Conversely, cramming in too much tissue paper makes the bag look overstuffed and messy, obscuring any effort to close it neatly.
Aim for a balance where the gift is completely covered, and the tissue paper creates a soft, voluminous puff above the gift, just peeking over the bag’s edge. This provides both concealment and aesthetic appeal.
Ignoring the Bag’s Structural Integrity
Gift bags, especially those with handles, have a certain structure. Pulling handles too aggressively or forcing a closure can rip the bag or detach the handles. Using a bag that’s too flimsy for a heavy gift also leads to structural failure.
Always support the bottom of the bag when lifting, especially if the gift is heavy. Be gentle when manipulating the top edges and handles for closure. Reinforce the bottom with cardboard if needed for very heavy items.
Tying Handles Too Tightly or Loosely
When using the handles as part of the closure, an overly tight knot can tear the handle holes or distort the bag’s shape. A knot that’s too loose will allow the bag to gape open, defeating the purpose of the closure.
Aim for a snug but not straining tie. The goal is to keep the bag closed without damaging it. Test the security of the knot by gently shaking the bag before presenting it.
Troubleshooting
Even with careful planning, minor issues can arise. Here’s how to quickly address common gift bag dilemmas.
Bag Keeps Opening
If your bag keeps gapping open, the primary closure method might not be secure enough for the bag’s material or the gift’s weight. Sometimes, the bag material is stiff and resists staying closed.
Try reinforcing your closure. If you used a simple scrunch, add a small piece of clear tape to hold the scrunched edges together. For a ribbon tie, ensure your knot is firm, or consider using the hole punch method for a more robust seal. A well-placed gift tag tied securely can also help hold the top together.
Handles Break or Detach
Broken or detached handles are often a sign of an overloaded bag or rough handling. This can be frustrating, especially when you’re ready to present the gift.
If a handle breaks, you have a few options. If only one handle loop has detached, you might be able to re-thread it through its original hole, using a small piece of tape on the inside to secure it. If both handles are gone or badly damaged, you can remove the remaining handle and switch to a handle-less closure method, such as the taped flap or the hole punch with ribbon. Alternatively, carry the bag from the bottom or place it into a larger, sturdier bag.
Tissue Paper Looks Messy or Flat
A messy or flat tissue paper arrangement diminishes the overall presentation. This usually happens if the tissue is crumpled too tightly or not fluffed enough.
Gently remove the tissue paper and re-fluff each sheet individually. Hold the tissue paper by its center and let it naturally drape and puff out before placing it back into the bag. For a fuller look, add one or two extra sheets. Ensure the outermost sheets are arranged to create soft, appealing folds that frame the gift.
Key Takeaways
Mastering the art of gift bag closure enhances your gift-giving experience and presentation.
- Select the right bag size: Always ensure the bag comfortably fits the gift with room for tissue.
- Layer tissue paper strategically: Use initial sheets for cushioning, then fluffed sheets for volume and concealment.
- Choose your closure method wisely: Simple scrunch, ribbon tie, hole punch, or taped flap each offer different levels of security and style.
- Reinforce as needed: Don’t hesitate to use tape or a stronger knot for added security, especially with heavier gifts.
- Personalize with finishing touches: A well-placed gift tag or embellishment elevates the entire presentation.
- Practice makes perfect: Experiment with different techniques to find what works best for various bags and gifts.
Frequently Asked Questions
Here are some common questions about closing gift bags, providing quick answers to common concerns.
How much tissue paper is enough for a standard gift bag?
For a standard medium-sized gift bag, you typically need 4-6 sheets of tissue paper. Two sheets for the base and covering the gift, and 2-4 sheets fluffed for volume and presentation at the top. Adjust this based on the bag’s size and the gift’s dimensions.
Can I reuse gift bags with handles?
Absolutely! Reusing gift bags is an excellent way to be eco-friendly. Inspect the bag for tears, creases, or worn handles before reusing. If the handles are frayed, you might need to reinforce them or use a ribbon closure method that bypasses the original handles.
What if my bag doesn’t have handles? How do I close it?
If your bag is handle-less, you’ll need to rely on folding and securing the top. You can fold the top edge down several times to create a roll, then secure it with decorative tape, stickers, or a decorative clip. The hole punch and ribbon method also works beautifully for handle-less bags, creating new points for closure.
Should I use tape to close a gift bag?
Tape can be a useful tool for closing a gift bag, especially for security or to achieve a very clean, flat top. Use clear, strong tape discreetly on the inside folds or along seams. Avoid using too much visible tape, as it can detract from the aesthetic. Tape is excellent for reinforcing a simple tissue scrunch or for the taped flap closure method.
Our Top Recommended Finds
To make your gift-giving even more seamless and stylish, consider these essential items.
- Assorted Tissue Paper Packs: Having a variety of colors and patterns on hand ensures you always have the perfect match for any gift bag. Look for packs with metallic or glitter options for extra sparkle.
- Quality Ribbon Collection: A selection of satin, grosgrain, and curling ribbons in various widths and colors allows for endless creative closure options. Ribbon adds elegance and a finishing touch.
- Decorative Hole Punch Set: Beyond the standard circle, a set with star or heart-shaped punches can add a charming detail to your ribbon closures, making your bags truly unique.
Mastering the Art of Presentation: Your Next Steps
You’ve now explored various practical ways to close a gift bag with handles, transforming a simple container into a beautifully presented gift. Each method offers a unique blend of security and style. Remember, the true beauty lies in the thoughtful details and the care you put into the presentation.
Now, it’s your turn to put these techniques into practice. Experiment with different ribbons, tissue paper colors, and closure styles. Don’t be afraid to mix and match. Your next gift-giving occasion is the perfect opportunity to showcase your newfound skills. Go forth and create stunning, memorable gift presentations today!