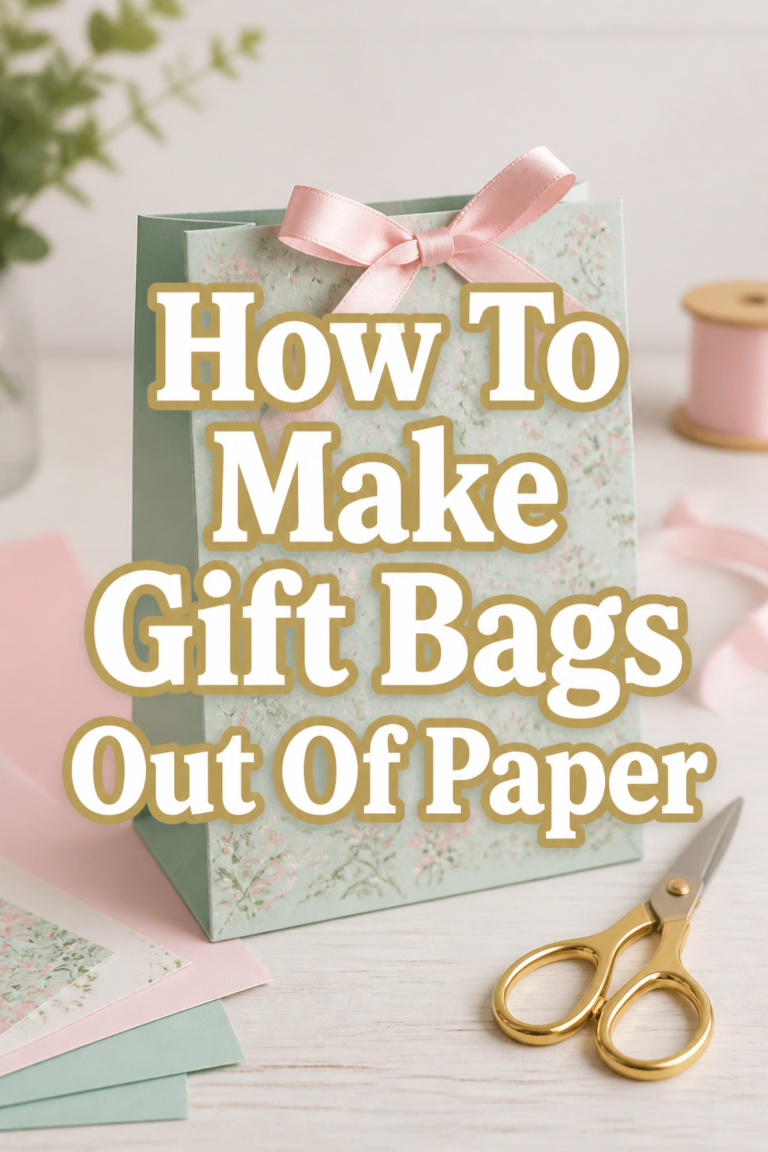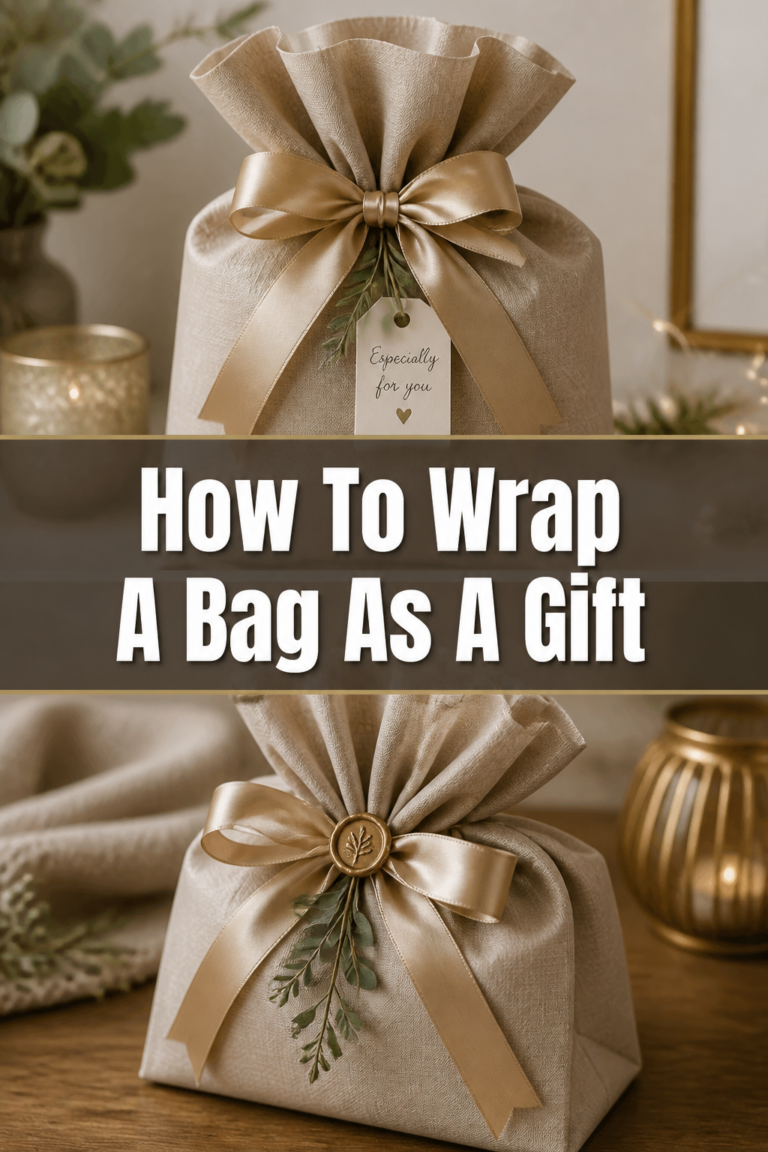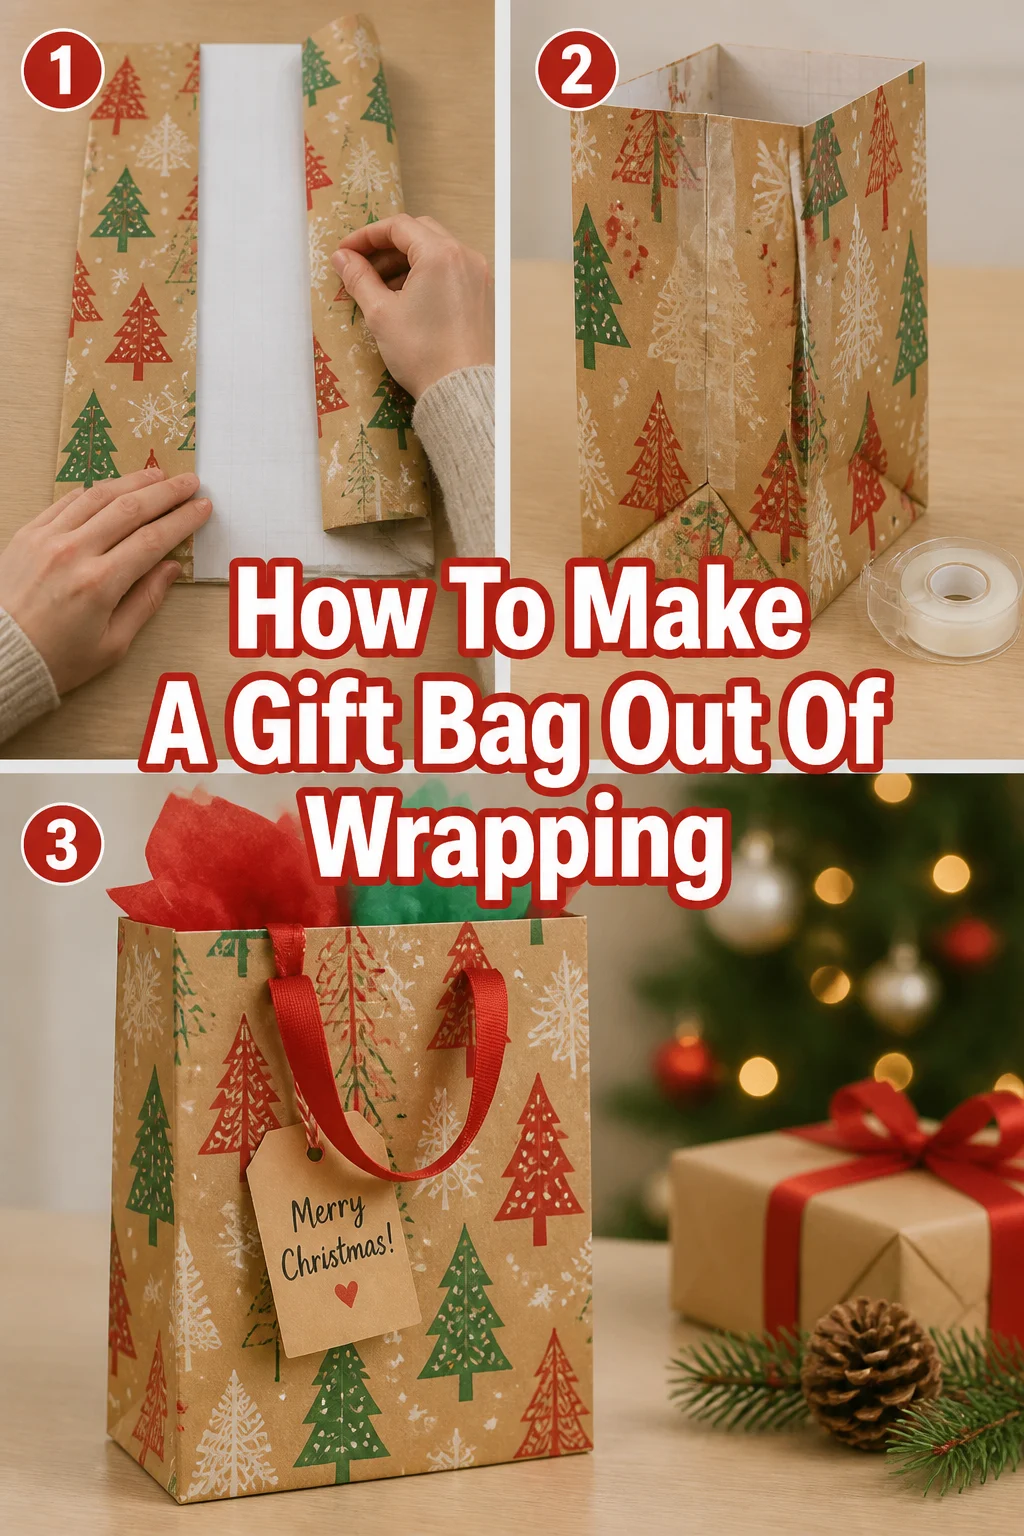
🎁 How To Make A Gift Bag Out Of Wrapping

Beginner-friendly templates, step-by-step guides,
and weekly project ideas in your inbox.
I remember the first time I needed a gift bag but had none on hand. Panic set in quickly, as the gift was awkwardly shaped and a simple wrap wouldn’t do. That’s when I learned the magic of transforming ordinary wrapping paper into a custom gift bag.
It saved the day, and now I want to share this incredibly useful skill with you. This guide will walk you through creating a beautiful, sturdy gift bag, ensuring your presents are always perfectly presented.

Quick Overview
You’re about to transform a flat sheet of wrapping paper into a functional and attractive gift bag. This DIY project is not only cost-effective but also adds a personal touch to any present.
You’ll finish with a custom-sized bag, ready to hold your special gift.
- Time needed: 20-40 minutes (depending on experience)
- Difficulty: Beginner
- What you’ll need: Wrapping paper, scissors, double-sided tape or glue, a ruler, a pencil, and string/ribbon for handles.
Step-by-Step Instructions
Step 1: Gather Your Materials and Prepare Your Workspace
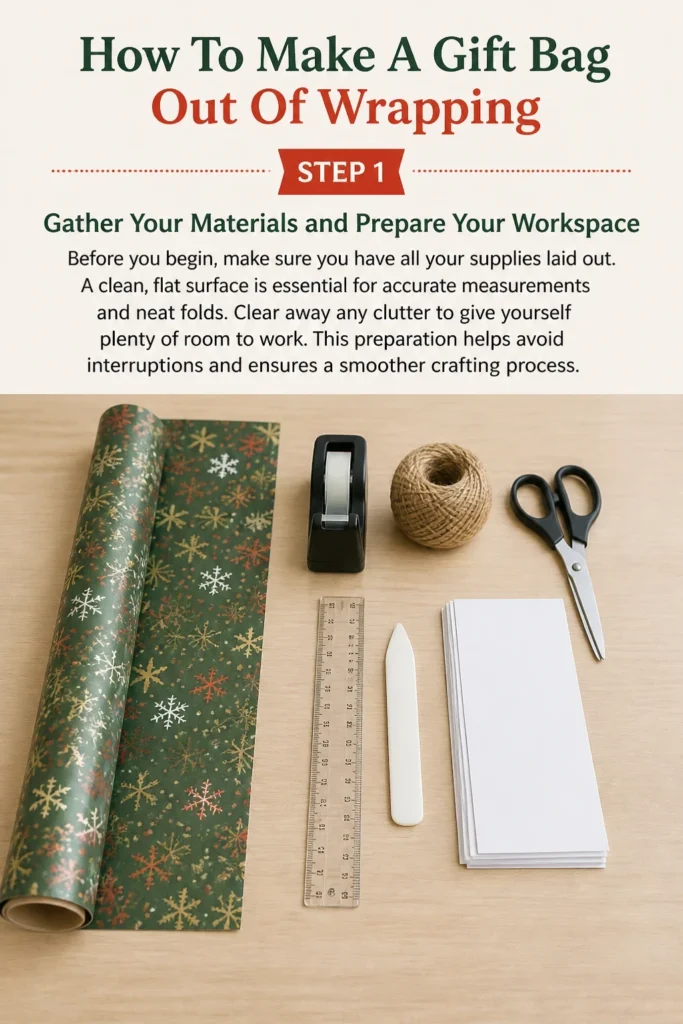
Before you begin, make sure you have all your supplies laid out. A clean, flat surface is essential for accurate measurements and neat folds. Clear away any clutter to give yourself plenty of room to work.
This preparation helps avoid interruptions and ensures a smoother crafting process.
Step 2: Measure and Cut Your Wrapping Paper
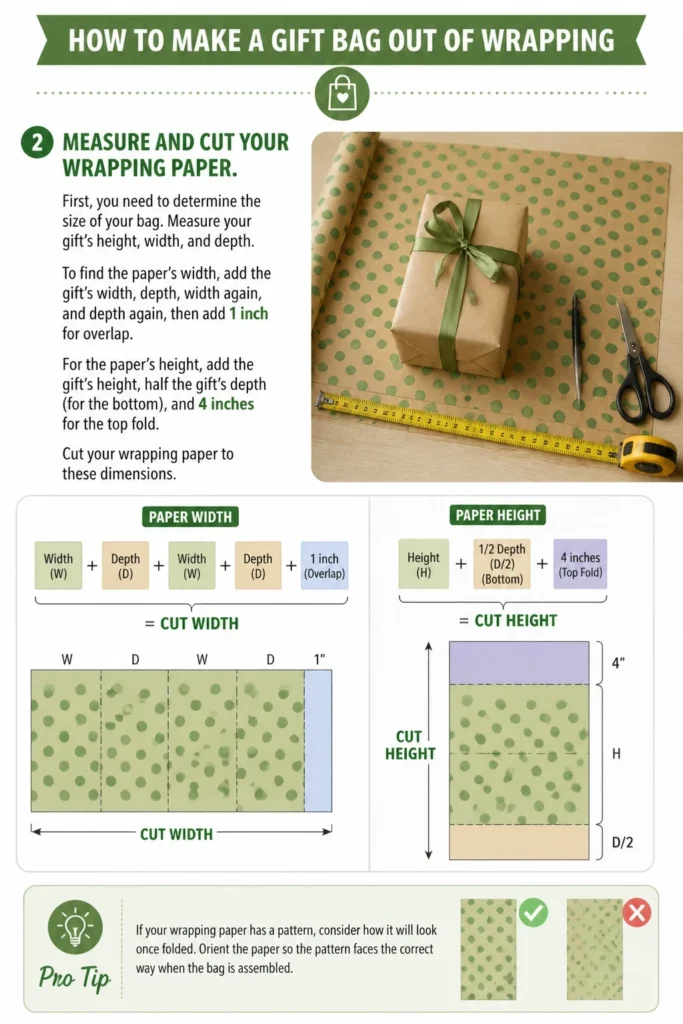
First, you need to determine the size of your bag. Measure your gift’s height, width, and depth. To find the paper’s width, add the gift’s width, depth, width again, and depth again, then add 1 inch for overlap.
For the paper’s height, add the gift’s height, half the gift’s depth (for the bottom), and 4 inches for the top fold. Cut your wrapping paper to these dimensions.
Pro Tip: If your wrapping paper has a pattern, consider how it will look once folded. Orient the paper so the pattern faces the correct way when the bag is assembled.
Step 3: Create the Main Body of the Bag
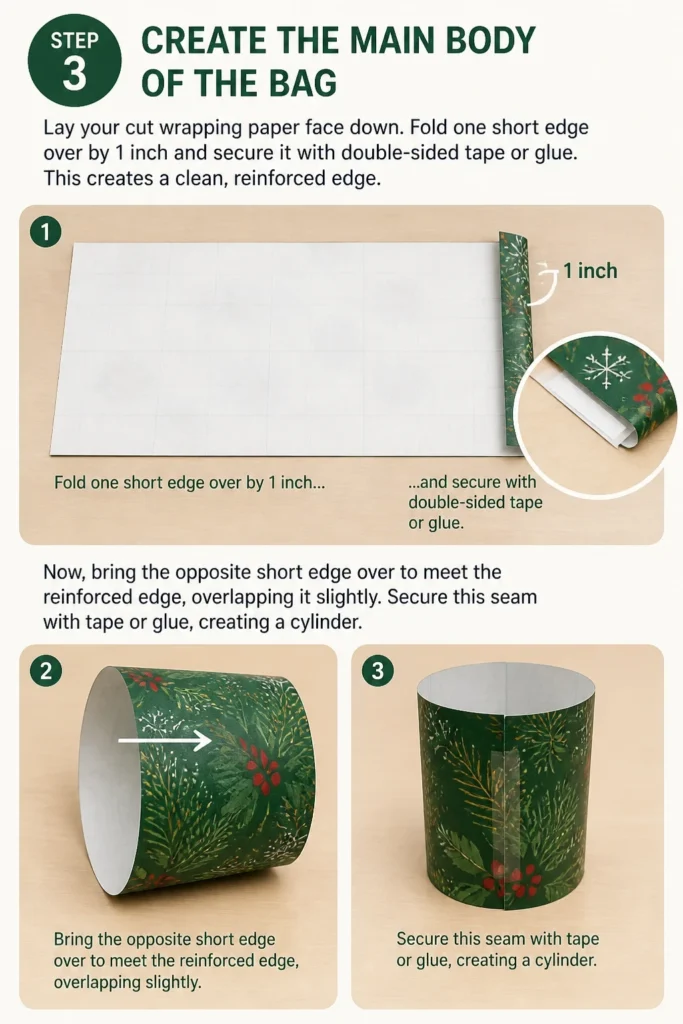
Lay your cut wrapping paper face down. Fold one short edge over by 1 inch and secure it with double-sided tape or glue. This creates a clean, reinforced edge.
Now, bring the opposite short edge over to meet the reinforced edge, overlapping it slightly. Secure this seam with tape or glue, creating a cylinder.
Step 4: Form the Bottom Flap
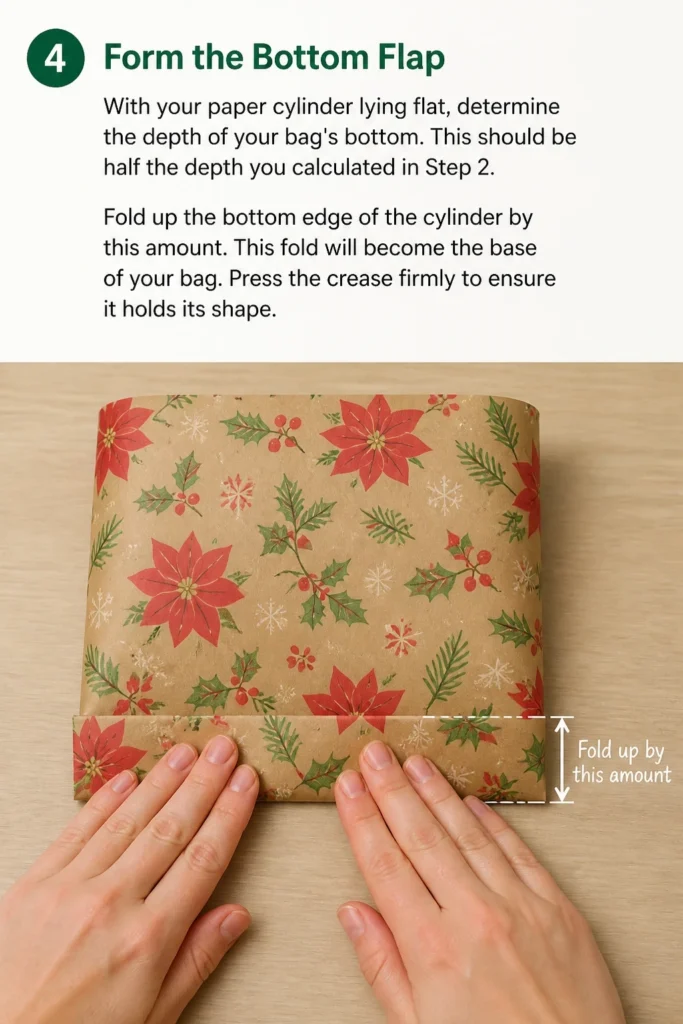
With your paper cylinder lying flat, determine the depth of your bag’s bottom. This should be half the depth you calculated in Step 2. Fold up the bottom edge of the cylinder by this amount.
This fold will become the base of your bag. Press the crease firmly to ensure it holds its shape.
Step 5: Fold the Bottom Gussets
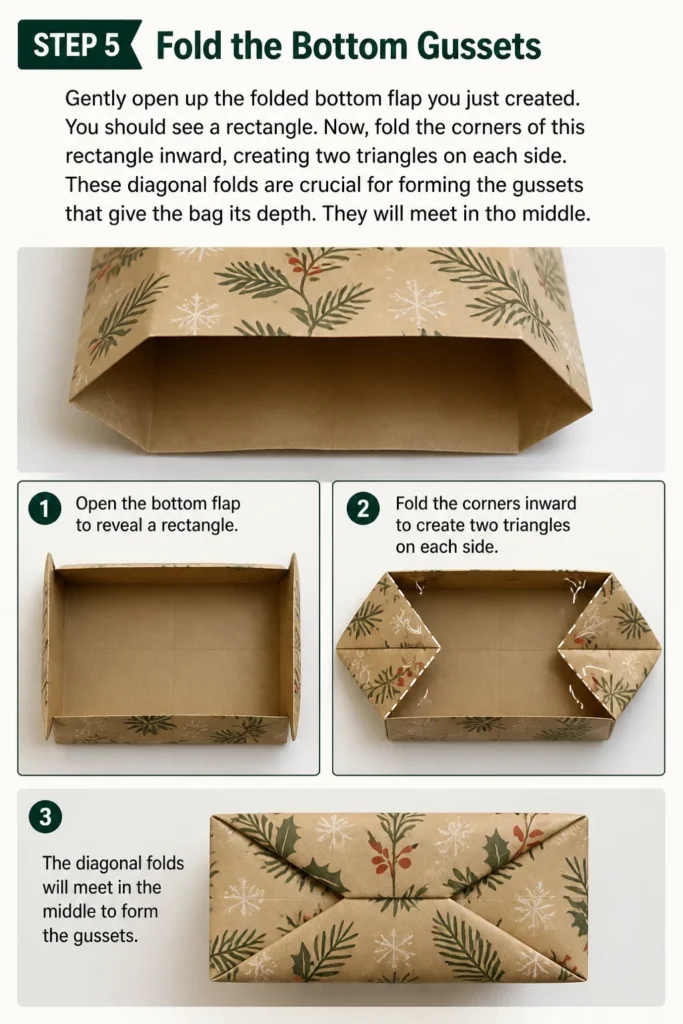
Gently open up the folded bottom flap you just created. You should see a rectangle. Now, fold the corners of this rectangle inward, creating two triangles on each side.
These diagonal folds are crucial for forming the gussets that give the bag its depth. They will meet in the middle.
Step 6: Secure the Bottom
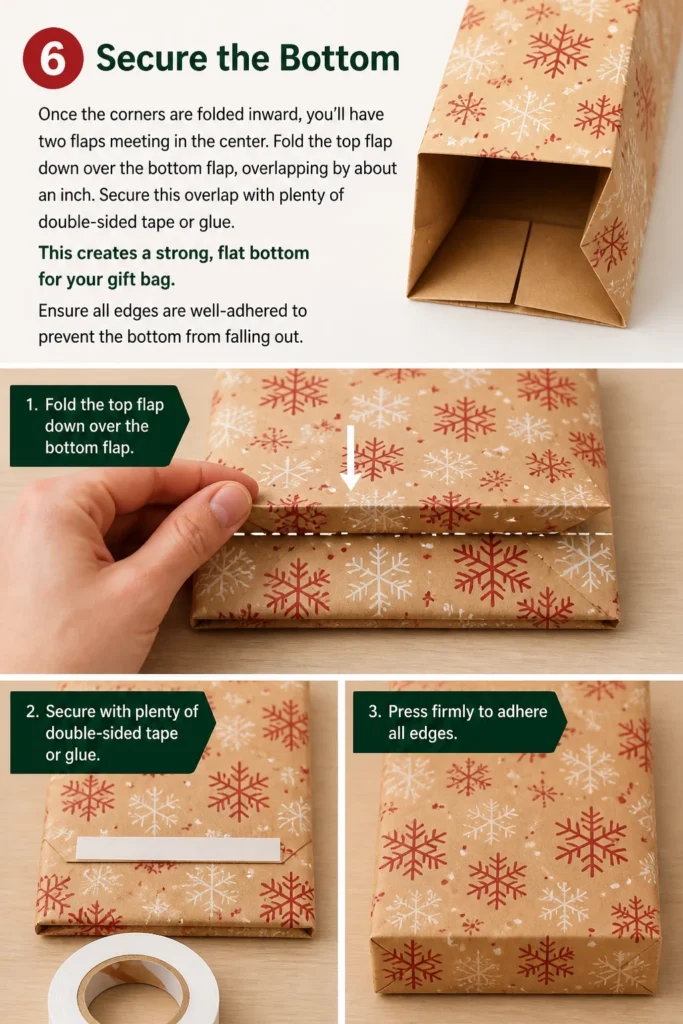
Once the corners are folded inward, you’ll have two flaps meeting in the center. Fold the top flap down over the bottom flap, overlapping by about an inch. Secure this overlap with plenty of double-sided tape or glue.
This creates a strong, flat bottom for your gift bag. Ensure all edges are well-adhered to prevent the bottom from falling out.
Step 7: Create the Side Gussets
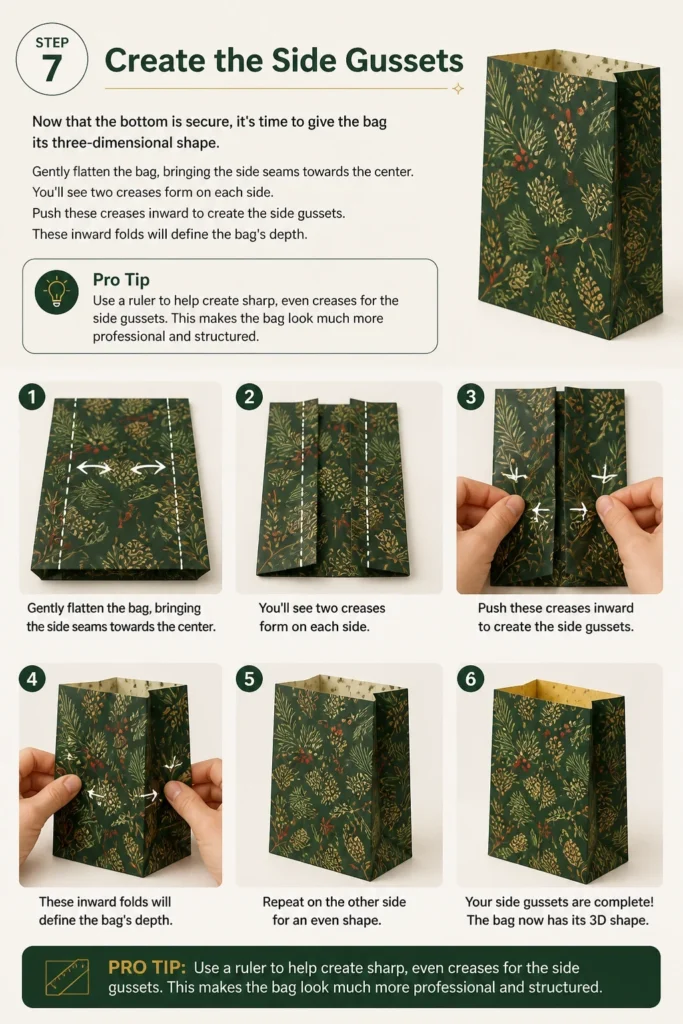
Now that the bottom is secure, it’s time to give the bag its three-dimensional shape. Gently flatten the bag, bringing the side seams towards the center. You’ll see two creases form on each side.
Push these creases inward to create the side gussets. These inward folds will define the bag’s depth.
Pro Tip: Use a ruler to help create sharp, even creases for the side gussets. This makes the bag look much more professional and structured.
Step 8: Reinforce the Top Edge
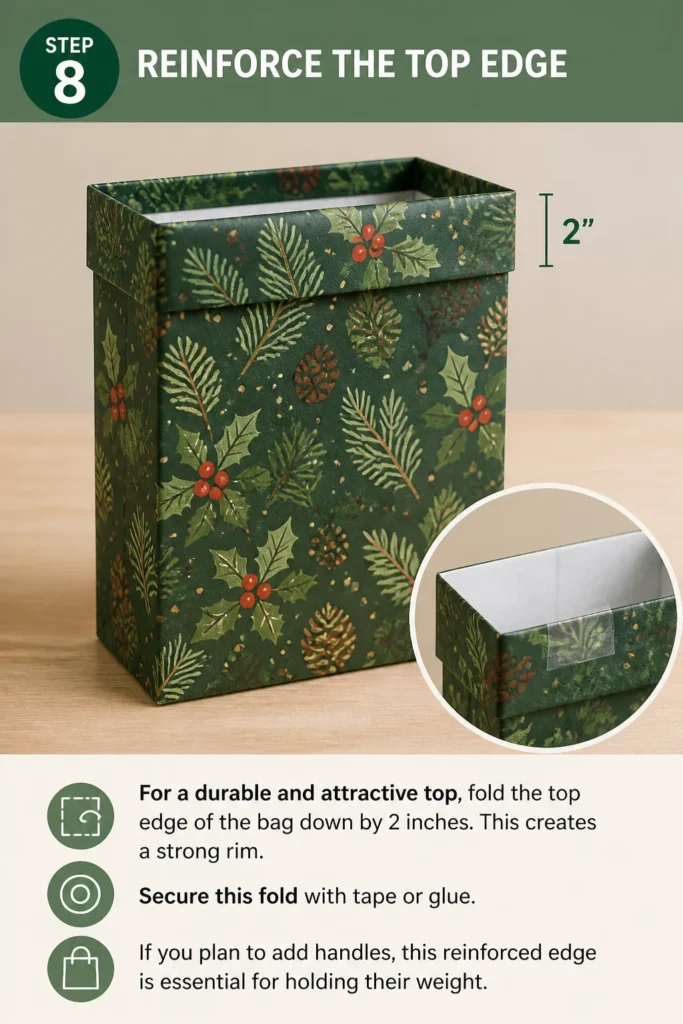
For a durable and attractive top, fold the top edge of the bag down by 2 inches. This creates a strong rim. Secure this fold with tape or glue.
If you plan to add handles, this reinforced edge is essential for holding their weight.
Step 9: Punch Holes and Add Handles (Optional)
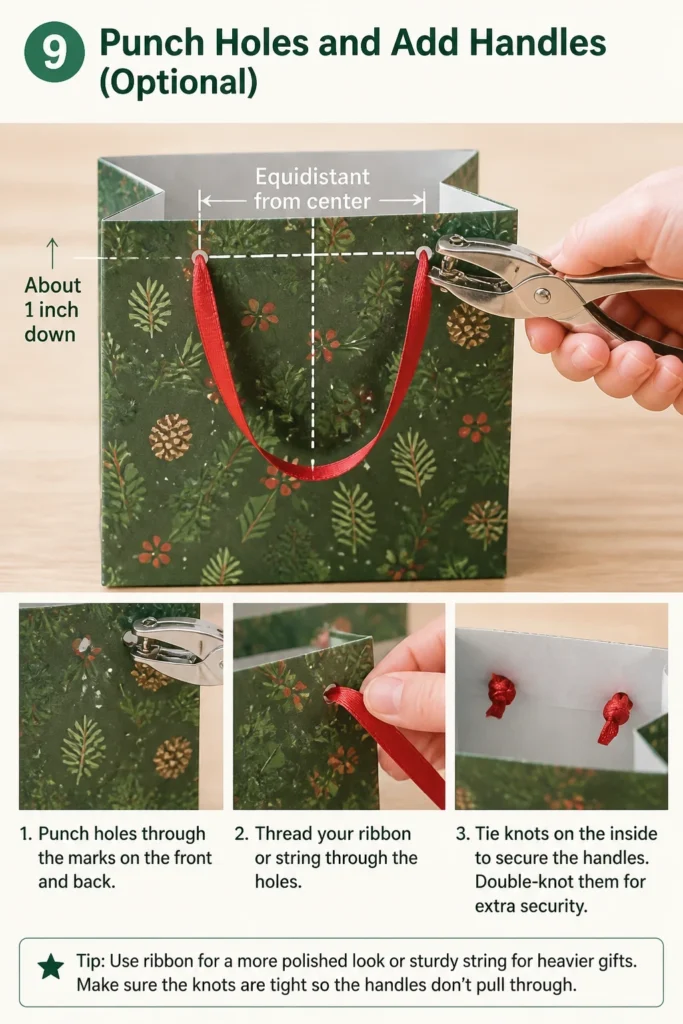
If you want handles, mark two spots on the front and two on the back of the reinforced top edge, equidistant from the center and about 1 inch down. Punch holes through these marks using a hole punch.
Thread your ribbon or string through the holes, tying knots on the inside to secure the handles. Double-knot them for extra security.
Step 10: Fill Your Bag and Admire Your Work
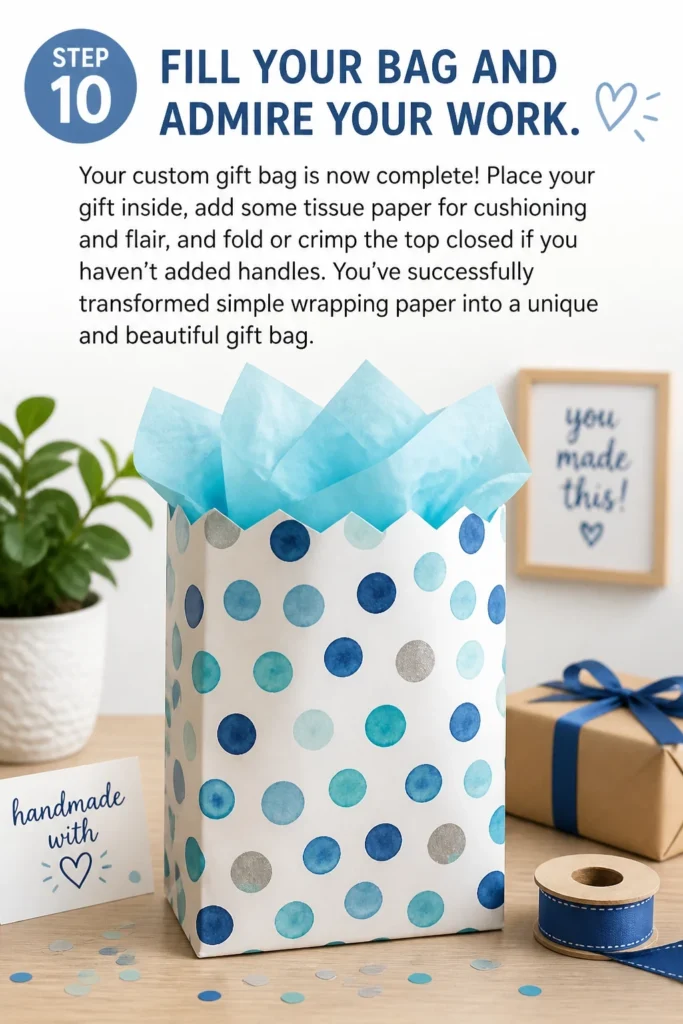
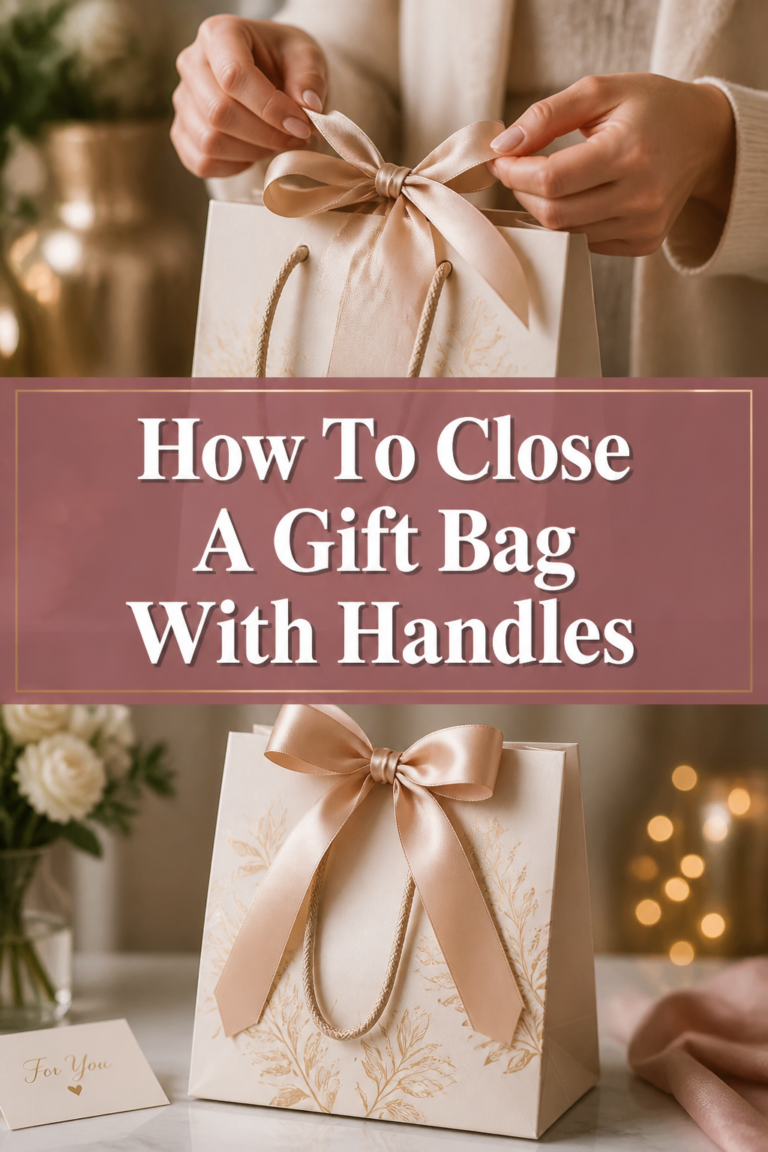
Your custom gift bag is now complete! Place your gift inside, add some tissue paper for cushioning and flair, and fold or crimp the top closed if you haven’t added handles.
You’ve successfully transformed simple wrapping paper into a unique and beautiful gift bag.
Common Mistakes to Avoid
Inaccurate Measurements
One of the biggest pitfalls is not measuring your gift correctly or miscalculating the paper dimensions. If your paper is too small, your bag won’t fit the gift. If it’s too large, the bag will look sloppy. Always double-check your measurements before cutting.
Take your time and use a ruler and pencil for precision.
Weak Adhesion
Using too little tape or glue, or choosing a low-quality adhesive, can lead to your bag falling apart. The bottom is particularly vulnerable. Ensure you use strong double-sided tape or a reliable craft glue.
Apply enough adhesive to create a secure bond, especially on the bottom and side seams.
Uneven Folds and Creases
Hasty or uneven folds can make your gift bag look amateurish. The crispness of the creases directly impacts the bag’s structure and appearance. Take your time with each fold.
Use a ruler or bone folder to help create sharp, straight lines, making your bag look professionally made.
Ignoring Paper Grain
Wrapping paper has a grain, much like fabric. Folding against the grain can make the paper tear or crease unevenly. While less critical for simple bags, being mindful of the paper’s direction can result in cleaner, stronger folds.
Try a small test fold if you’re unsure about the paper’s flexibility.
Troubleshooting
Bag Doesn’t Stand Upright
If your bag collapses or won’t stand on its own, the most likely culprit is an improperly secured or uneven bottom. Revisit Step 6 and ensure the bottom flaps are fully adhered and flat.
Sometimes, reinforcing the inside corners of the bottom with extra tape can also help provide stability. Make sure your side gussets are pushed in sharply.
Handles Pull Out Easily
Weak handle attachment is a common issue. If your handles are tearing through the paper or coming undone, the top reinforcement might not be strong enough, or the knots are too small.
Try reinforcing the punch holes with clear packing tape on the inside before threading the ribbon. Use larger, more secure knots for the handles.
Bag Looks Wrinkled or Messy
Wrinkles often occur from rushing the folding process or using paper that’s too thin. For a cleaner look, always work on a flat, smooth surface.
Smooth out the paper as you go, pressing down firmly on each fold. Consider using a slightly thicker wrapping paper for better structural integrity and fewer wrinkles.
Key Takeaways
- Accurate measurements are the foundation of a well-proportioned gift bag.
- Strong adhesive is crucial for the bag’s durability, especially at the bottom and seams.
- Sharp, even folds create a professional and sturdy finished product.
- Reinforcing the top edge is vital if you plan to add handles to your bag.
- This DIY method offers a personalized and cost-effective alternative to store-bought bags.
- Practice makes perfect; your bags will get better with each attempt.
Frequently Asked Questions
Can I make a gift bag without a hole punch?
Yes, absolutely! Instead of punching holes for handles, you can simply fold the top of the bag over your gift and secure it with a decorative sticker, a piece of ribbon tied around the top, or even a clothespin. You can also skip handles entirely and just use the bag as an open-top container with tissue paper.
What kind of wrapping paper works best?
Sturdier wrapping paper, like that with a slight thickness or a matte finish, generally works best as it holds its shape better. Very thin or flimsy paper might tear easily or wrinkle. However, even standard wrapping paper can work well if you are careful with your folds and generous with your adhesive.
How do I make a gift bag for a very large or oddly shaped item?
For very large items, you’ll need a larger piece of wrapping paper and possibly a stronger adhesive or even cardboard inserts for the bottom to add extra support. For oddly shaped items, measure the widest and deepest points, ensuring your calculated dimensions accommodate the bulk. You might need to adjust the height to allow for more paper to fold over the top.
Can I reuse my homemade gift bags?
Yes, with careful handling, homemade gift bags can absolutely be reused. The durability will depend on the strength of your paper and adhesive, as well as how gently the bag is opened and stored. Encourage the recipient to save it for their next gift-giving occasion!
Our Top Recommended Finds
- Double-Sided Tape Dispenser: Makes applying adhesive quick and mess-free, ensuring neat seams.
- Craft Scissors: A sharp pair of scissors ensures clean, straight cuts without jagged edges.
- Bone Folder: This tool helps create incredibly crisp, professional-looking creases on all your folds.
Unwrap Your Creative Potential
You now have all the knowledge and steps to transform a simple sheet of wrapping paper into a thoughtful, custom gift bag. This skill isn’t just practical; it’s a wonderful way to add a personal touch to every present you give. Imagine the delight when someone realizes the effort you put into their gift’s presentation.
Don’t wait for the next gift-giving emergency. Gather your supplies today and try making your first custom gift bag. You might be surprised at how enjoyable and rewarding the process is. Once you master this, consider experimenting with different papers or embellishments. Your gift-giving will never be the same!
Beginner-friendly templates, step-by-step guides,
and weekly project ideas in your inbox.