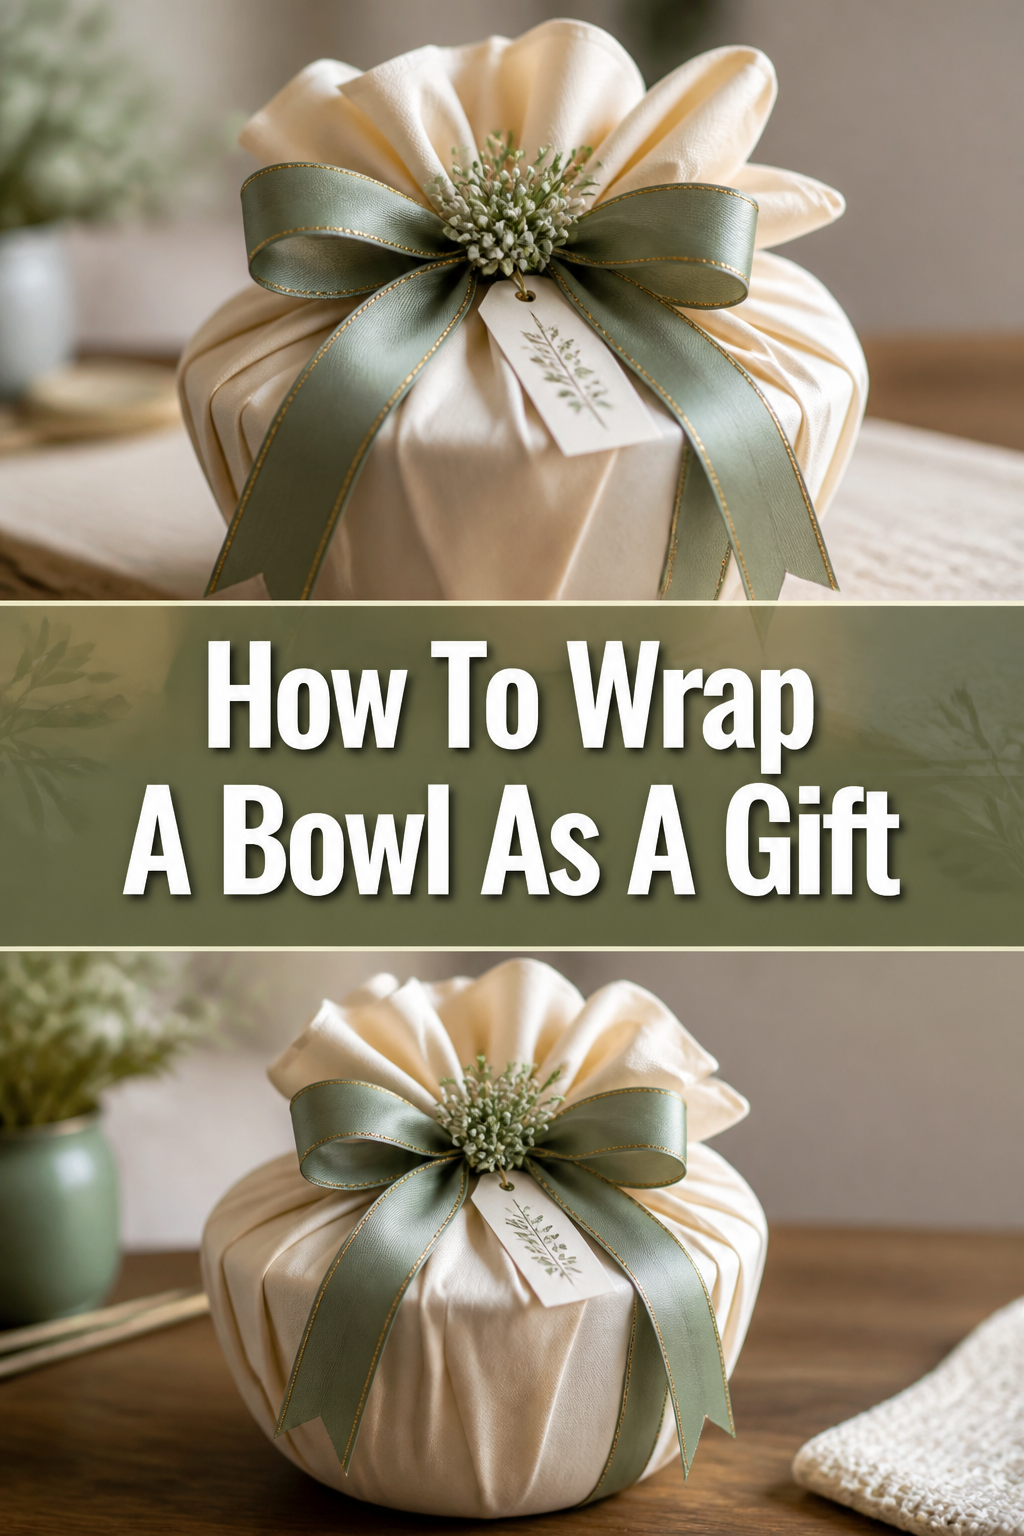
🎁 How To Wrap A Bowl As A Gift
Presenting a gift is an art, and a beautifully wrapped bowl truly elevates the gesture. It shows care and thought, transforming a simple item into a memorable experience. I’ve learned through many gifting occasions that the presentation can be just as impactful as the gift itself. This guide shares the practical steps I use to ensure every bowl I gift looks stunning and arrives safely.
Quick Overview
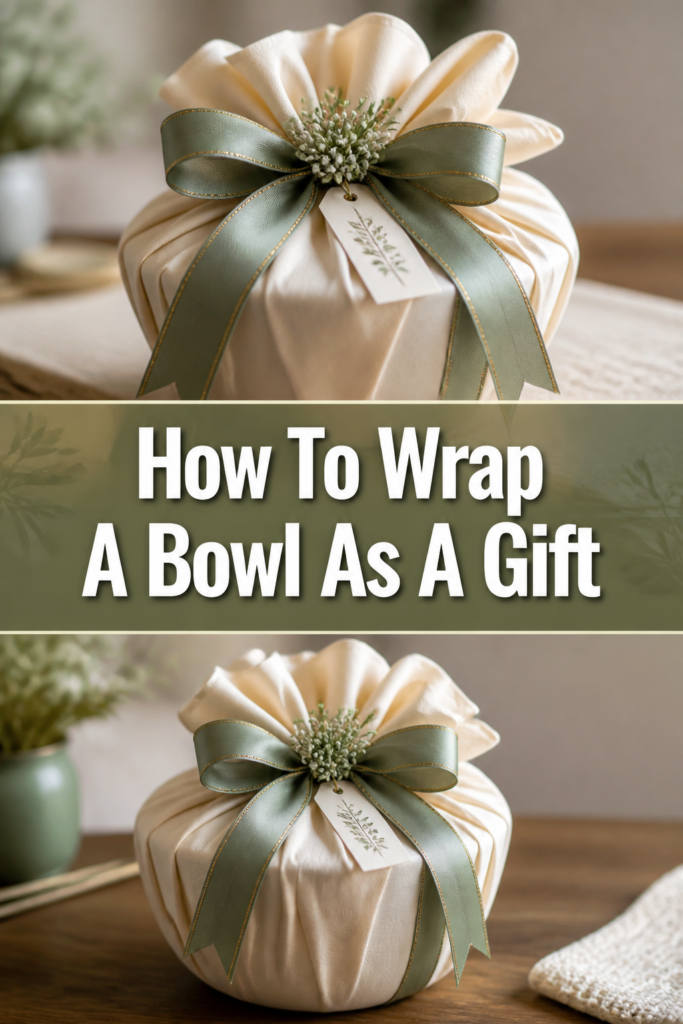
This guide will walk you through transforming a humble bowl into an elegantly presented gift, ready to delight your recipient. You will learn techniques for protection, neat wrapping, and adding personal flair.
- Time needed: 15-30 minutes (depending on complexity)
- Difficulty: Beginner to Intermediate
- What you’ll need: Wrapping paper or fabric, tape, scissors, padding, ribbon
Step-by-Step Instructions
Step 1: Gather Your Essential Materials
Before you begin, lay out everything you’ll need. This prevents interruptions and makes the process smoother. A clear workspace is always a good starting point.
Collect a sturdy, flat surface to work on. This ensures your wrapping is neat and even.
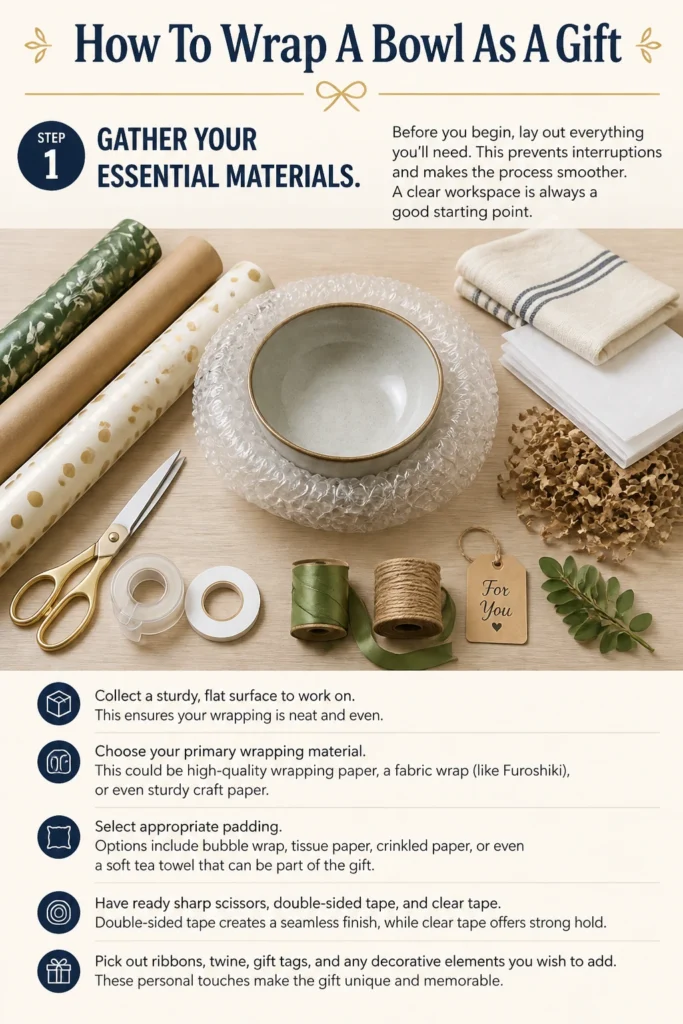
Choose your primary wrapping material. This could be high-quality wrapping paper, a fabric wrap (like Furoshiki), or even sturdy craft paper.
Select appropriate padding. Options include bubble wrap, tissue paper, crinkled paper, or even a soft tea towel that can be part of the gift.
Have ready sharp scissors, double-sided tape, and clear tape. Double-sided tape creates a seamless finish, while clear tape offers strong hold.
Pick out ribbons, twine, gift tags, and any decorative elements you wish to add. These personal touches make the gift unique.
Pro Tip: Always have more wrapping paper or fabric than you think you’ll need. It’s better to trim excess than to run short mid-wrap.
Step 2: Prepare the Bowl for Wrapping
Proper preparation protects the bowl and ensures a smooth, even surface for wrapping. This step is crucial for fragile items.
Clean the bowl thoroughly. Remove any dust, fingerprints, or price tags. A clean bowl ensures a pristine presentation.
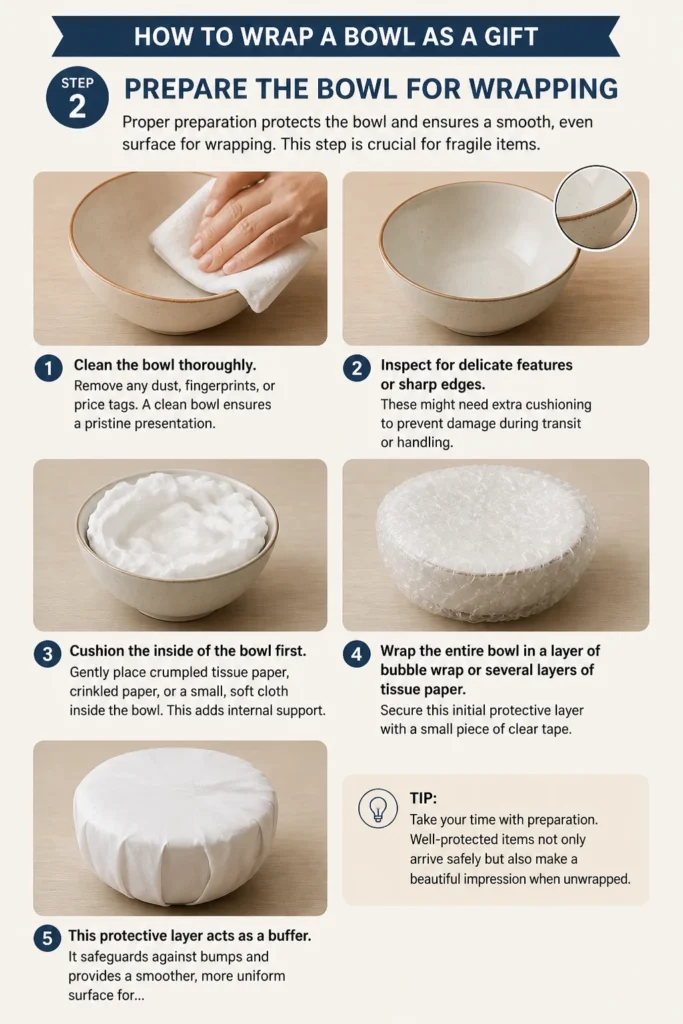
Inspect for delicate features or sharp edges. These might need extra cushioning to prevent damage during transit or handling.
Cushion the inside of the bowl first. Gently place crumpled tissue paper, crinkled paper, or a small, soft cloth inside the bowl. This adds internal support.
Wrap the entire bowl in a layer of bubble wrap or several layers of tissue paper. Secure this initial protective layer with a small piece of clear tape.
This protective layer acts as a buffer. It safeguards against bumps and provides a smoother, more uniform surface for your decorative wrap.
Step 3: Measure and Cut Your Wrapping Material
Accurate measurement prevents waste and ensures you have enough material for a clean wrap. This step is key to avoiding frustration later.
Place the prepared bowl upside down in the center of your chosen wrapping paper or fabric. Ensure it’s stable.
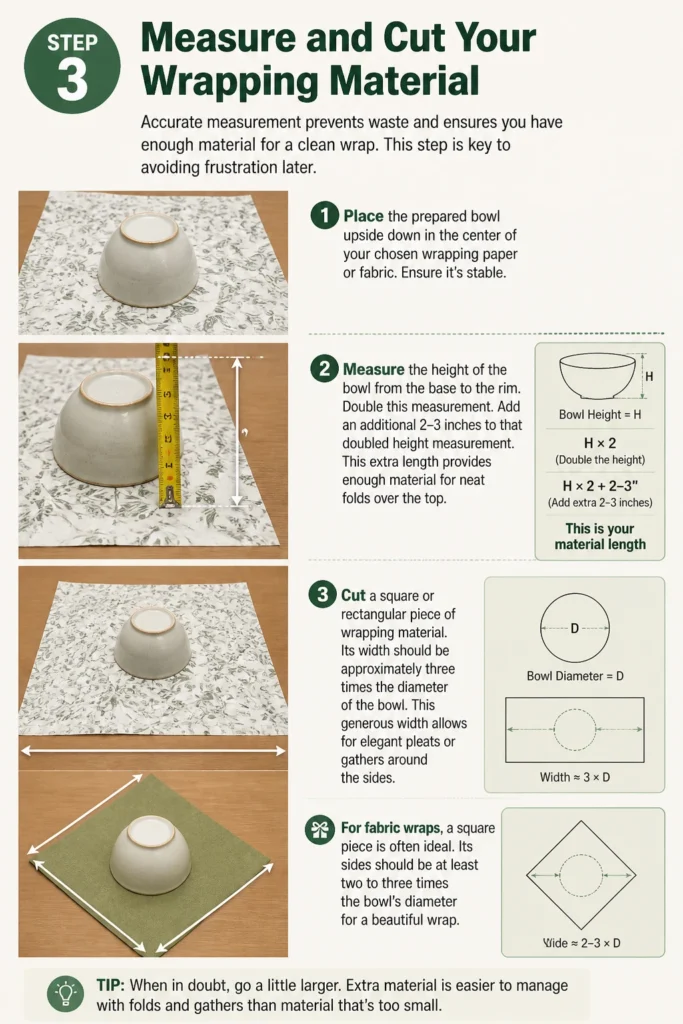
Measure the height of the bowl from the base to the rim. Double this measurement.
Add an additional 2-3 inches to that doubled height measurement. This extra length provides enough material for neat folds over the top.
Cut a square or rectangular piece of wrapping material. Its width should be approximately three times the diameter of the bowl. This generous width allows for elegant pleats or gathers around the sides.
For fabric wraps, a square piece is often ideal. Its sides should be at least two to three times the bowl’s diameter for a beautiful Furoshiki style.
Step 4: Position and Begin the Base Wrap (Paper)
Getting the initial placement right sets the foundation for a professional-looking wrap. This is where the magic starts.
Lay your cut wrapping paper face down on your clean workspace. Position it diagonally if you prefer a diamond shape, or straight if you prefer a square presentation.
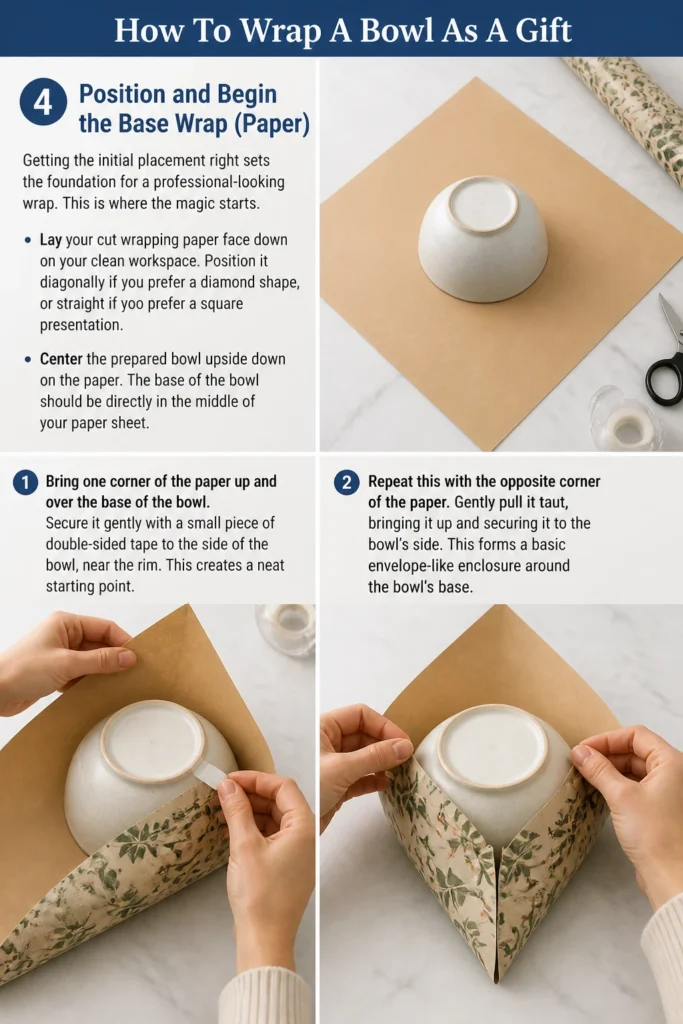
Center the prepared bowl upside down on the paper. The base of the bowl should be directly in the middle of your paper sheet.
Bring one corner of the paper up and over the base of the bowl. Secure it gently with a small piece of double-sided tape to the side of the bowl, near the rim. This creates a neat starting point.
Repeat this with the opposite corner of the paper. Gently pull it taut, bringing it up and securing it to the bowl’s side. This forms a basic envelope-like enclosure around the bowl’s base.
Step 5: Create Elegant Pleats and Folds
This is the most crucial step for wrapping a round object like a bowl. It transforms flat paper into a beautifully contoured shape.
Work your way around the bowl, starting from one of the secured corners. Take a small section of the paper from the side.
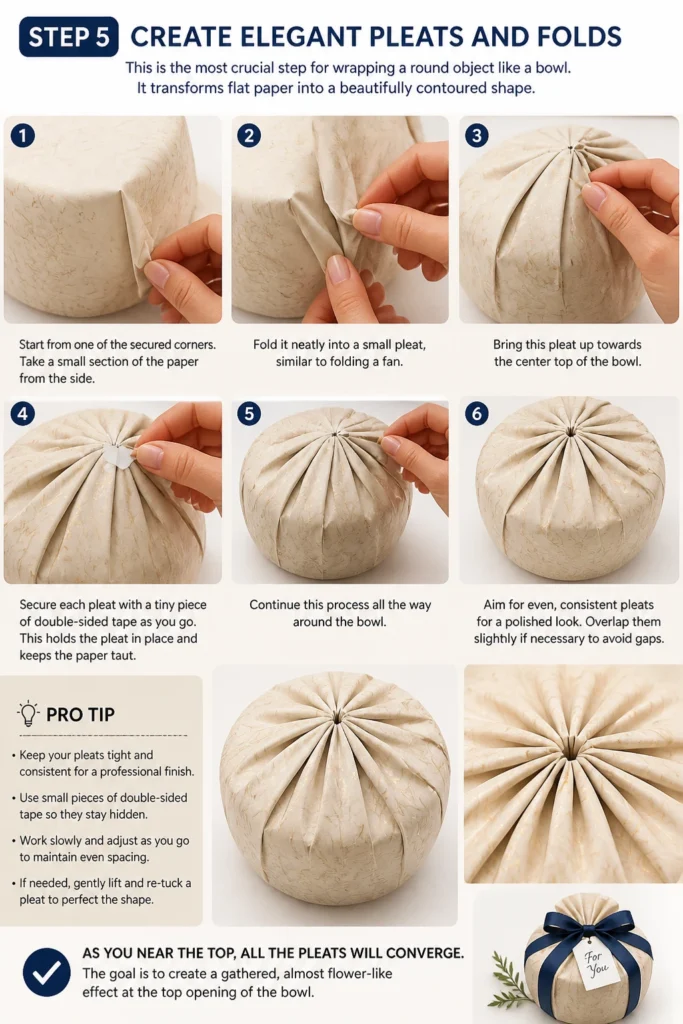
Fold it neatly into a small pleat, similar to folding a fan. Bring this pleat up towards the center top of the bowl.
Secure each pleat with a tiny piece of double-sided tape as you go. This holds the pleat in place and keeps the paper taut.
Continue this process all the way around the bowl. Aim for even, consistent pleats for a polished look. Overlap them slightly if necessary to avoid gaps.
As you near the top, all the pleats will converge. The goal is to create a gathered, almost flower-like effect at the top opening of the bowl.
Pro Tip: For very stiff paper, gently score the paper where you plan to make a fold. This creates a cleaner crease and makes pleating easier.
Step 6: Secure the Top and Add Ribbons
Once all the pleats are made, securing them neatly is the next step to a finished look. This also introduces your decorative elements.
Gather all the pleats tightly together at the very top, where they meet. Ensure they are as close-knit as possible.
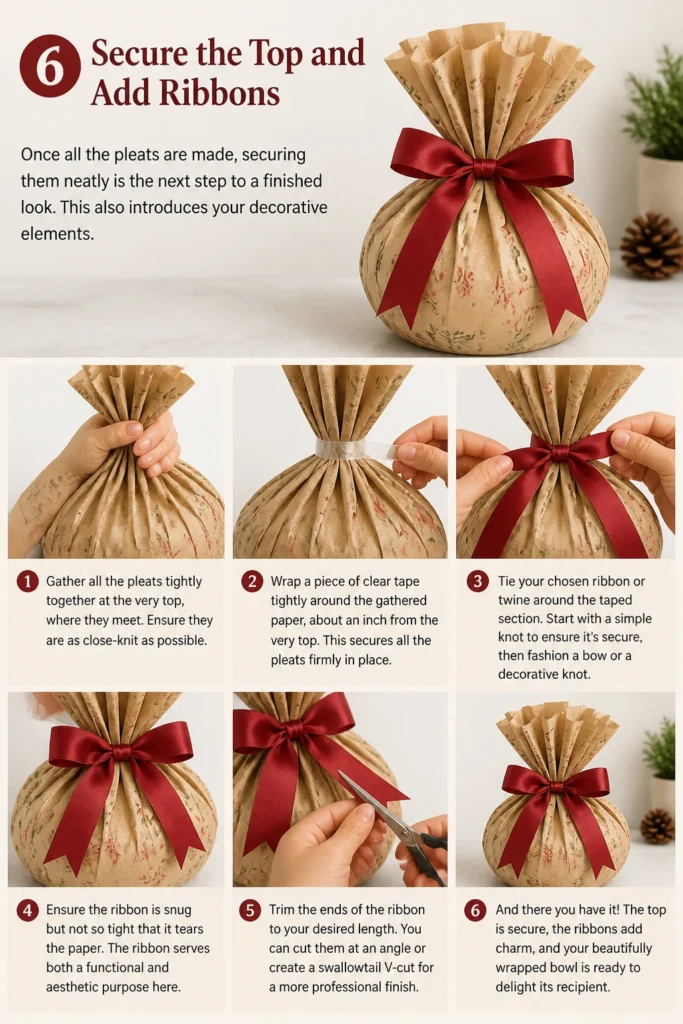
Wrap a piece of clear tape tightly around the gathered paper, about an inch from the very top. This secures all the pleats firmly in place.
Tie your chosen ribbon or twine around the taped section. Start with a simple knot to ensure it’s secure, then fashion a bow or a decorative knot.
Ensure the ribbon is snug but not so tight that it tears the paper. The ribbon serves both a functional and aesthetic purpose here.
Trim the ends of the ribbon to your desired length. You can cut them at an angle or create a swallowtail V-cut for a more professional finish.
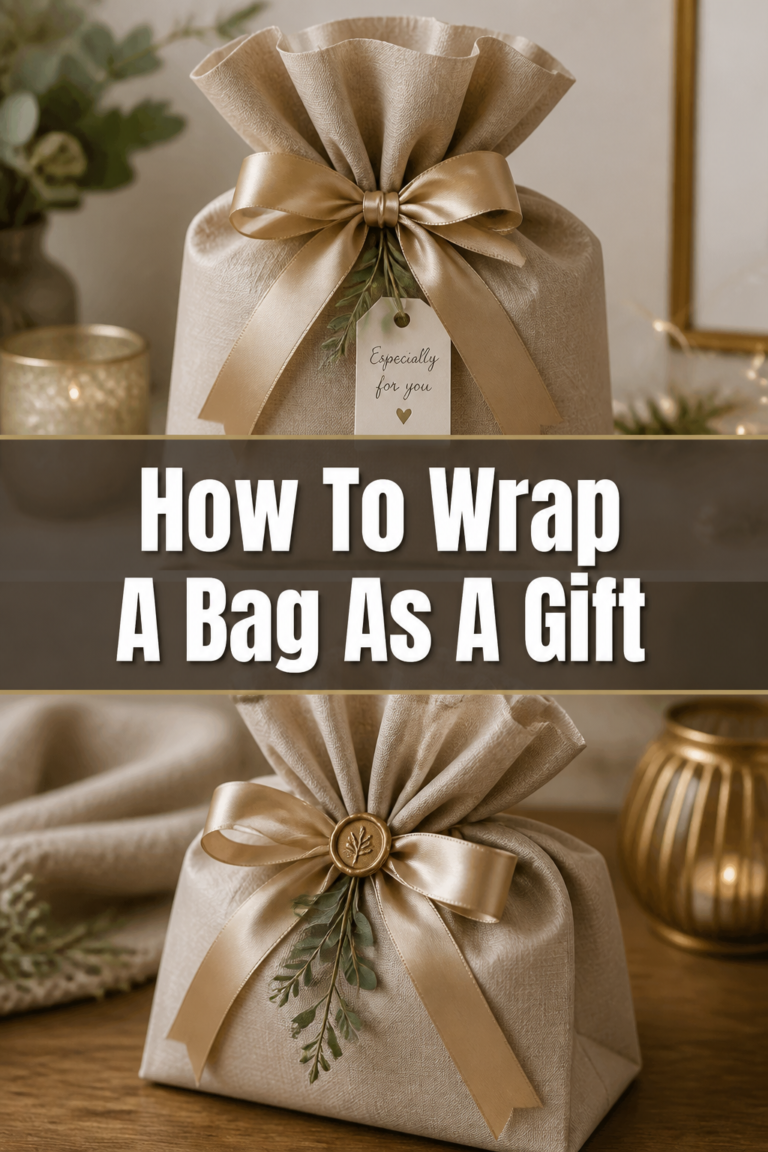
Step 7: The Fabric Wrap (Furoshiki Style Alternative)
For an eco-friendly and elegant option, consider a Furoshiki-style fabric wrap. This method requires no tape and is reusable.
Choose a square piece of fabric. Silk, cotton, or linen work beautifully. Its size should be generous, at least three times the bowl’s diameter.
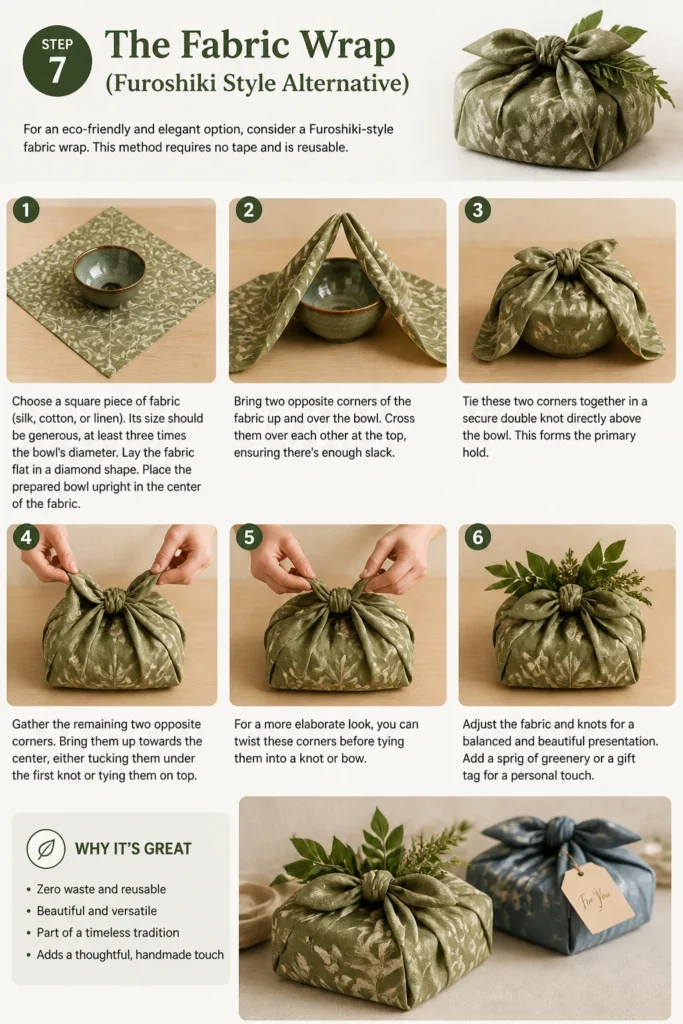
Lay the fabric flat in a diamond shape. Place the prepared bowl upright in the center of the fabric.
Bring two opposite corners of the fabric up and over the bowl. Cross them over each other at the top, ensuring there’s enough slack.
Tie these two corners together in a secure double knot directly above the bowl. This forms the primary hold.
Gather the remaining two opposite corners. Bring them up towards the center, either tucking them under the first knot or tying them on top.
For a more elaborate look, you can twist these remaining corners before tying. This creates decorative loops or a handle-like structure. Secure with a knot.
Adjust the fabric so it drapes nicely around the bowl. The beauty of Furoshiki is its versatility and elegant simplicity.
Step 8: Add Finishing Touches and a Gift Tag
Personalizing your gift makes it even more special. These small details show extra thought and care.
Attach a gift tag to the ribbon or fabric knot. You can write a heartfelt message or simply the recipient’s name.
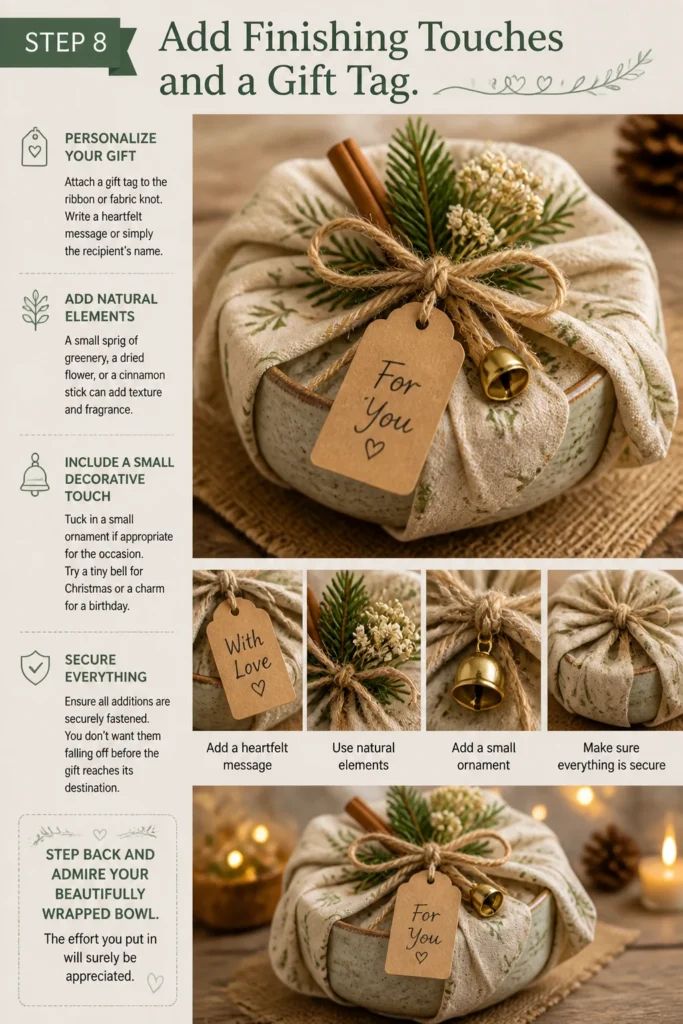
Consider adding natural elements. A small sprig of greenery, a dried flower, or a cinnamon stick can add texture and fragrance.
Tuck in a small decorative ornament if appropriate for the occasion. This could be a tiny bell for Christmas or a charm for a birthday.
Ensure all additions are securely fastened. You don’t want them falling off before the gift reaches its destination.
Step back and admire your beautifully wrapped bowl. The effort you put in will surely be appreciated.
Common Mistakes to Avoid
Insufficient Padding
Forgetting to adequately pad the bowl is a common oversight. This leaves the gift vulnerable to chips, cracks, or even shattering during transport. Always prioritize protection, especially for fragile items. Ensure there’s enough cushioning inside the bowl and around its exterior before the decorative wrap.
Skimping on Material Size
Using a piece of wrapping paper or fabric that is too small leads to a rushed, untidy, and incomplete wrap. You’ll end up with gaps, exposed edges, or an inability to create proper pleats. Always measure generously; it’s easier to trim excess than to try and stretch too little material.
Ignoring the Bowl’s Unique Shape
Trying to wrap an irregularly shaped bowl as if it were a simple box will result in awkward bulges and uneven folds. Each bowl, with its curves and unique dimensions, requires a tailored approach. Take the time to understand its contours and adapt your pleating and folding techniques accordingly.
Over-Complicating the Design
Sometimes, less is more. Adding too many ribbons, bows, or embellishments can make the gift look cluttered and detract from the bowl itself. Aim for elegance and simplicity. A few well-chosen accents often make a stronger impact than an excessive display.
Troubleshooting
Paper Tears Easily
If your wrapping paper is tearing while you’re folding or securing it, the paper might be too thin or you might be pulling too tightly. Try using a slightly thicker, higher-quality wrapping paper next time. When folding, apply gentle, even pressure rather than sharp tugs. You can also reinforce delicate areas with a hidden strip of clear tape on the underside before folding.
Awkward Bulges and Gaps
Bulges and gaps often occur when the initial pleats aren’t uniform or when there isn’t enough material to cover smoothly. To fix this, carefully unsecure the problematic pleats. Re-fold them, ensuring each pleat is of a similar size and that they slightly overlap to eliminate gaps. If the issue is persistent, you might need to re-cut a larger piece of wrapping paper.
Ribbon Slips Off
A ribbon that keeps slipping off usually means it wasn’t secured tightly enough, or the surface it’s tied around is too smooth. Ensure you tie a firm double knot immediately after gathering the paper or fabric. For extra security, you can place a tiny dab of hot glue (once cool) or a small piece of double-sided tape underneath the knot. This provides extra grip without being visible.
Key Takeaways
- Always prioritize padding and protection for fragile bowls.
- Measure your wrapping material generously to avoid frustration and ensure a polished finish.
- Mastering consistent pleats is key to neatly wrapping round objects.
- Double-sided tape creates a cleaner, more professional presentation.
- Personalize your gift with thoughtful ribbons, tags, and natural embellishments.
- Consider fabric wraps (Furoshiki) for an elegant, eco-friendly alternative.
Frequently Asked Questions
Can I wrap a bowl without a box?
Absolutely, this entire guide focuses on wrapping a bowl directly without a box. The techniques of internal and external padding, combined with careful pleating, allow for a beautiful and secure presentation without needing an additional container.
What’s the best material for fragile bowls?
For fragile bowls, start with ample bubble wrap or several layers of soft tissue paper as the primary protective layer. For the decorative wrap, sturdier wrapping paper or a thicker fabric (like linen or heavy cotton) provides more structure and less chance of tearing than very thin paper.
How do I wrap an irregularly shaped bowl?
Irregularly shaped bowls can be a fun challenge. Focus on the internal padding to fill any voids and create a more uniform exterior. When pleating, allow for more flexibility in the size and direction of your folds, adapting them to the bowl’s unique contours. Fabric wraps are often more forgiving for unusual shapes.
Can I reuse wrapping materials?
Yes, reusing wrapping materials is a wonderful eco-friendly practice. Fabric wraps (Furoshiki) are designed for reuse and can even become part of the gift. High-quality wrapping paper can sometimes be carefully unfolded and stored for future use, especially if you used tape sparingly.
Our Top Recommended Finds
- High-Quality Double-Sided Tape: Essential for seamless, professional-looking folds and securing pleats without visible tape.
- Eco-Friendly Fabric Wrap Sets: Perfect for a sustainable and elegant Furoshiki-style gift presentation, often coming in beautiful patterns.
- Assorted Satin Ribbon Pack: Offers a variety of colors and widths to match any gift or occasion, adding that final luxurious touch.
Elevate Your Gift-Giving Experience
Wrapping a bowl as a gift is more than just covering an object; it’s about enhancing the joy of giving and receiving. Each fold, each ribbon, adds to the anticipation and shows the recipient how much you care. Now that you have these practical steps, embrace the creativity and personal touch that comes with thoughtful presentation.
Don’t let another special occasion pass without showcasing your gifts in their best light. Try these techniques on your next gift, and watch the delight on your loved one’s face as they unwrap something truly special. Consider applying these skills to other challenging shapes, transforming every gift into a beautifully wrapped treasure.