🖼️ How To Project An Image On The Wall

Beginner-friendly templates, step-by-step guides,
and weekly project ideas in your inbox.
Imagine transforming any blank wall into a giant screen for movies, presentations, or even art. It’s a fantastic way to enhance entertainment or make a big impact. I’ve personally set up countless projections for backyard movie nights and creative art displays, learning all the best tricks along the way.
This guide shares everything I’ve learned, ensuring you can easily achieve a clear, vibrant projection. You’ll gain the confidence to set up your own impressive visual experiences.
Quick Overview
Ready to turn your wall into a dynamic display? This guide will walk you through setting up a projector, optimizing your image, and troubleshooting common issues. You’ll soon be enjoying your content on a grand scale.
- Time needed: 30-60 minutes (initial setup)
- Difficulty: Beginner
- What you’ll need: Projector, device to project from (laptop, phone, streaming stick), HDMI cable (or adapter), power source, a blank wall
Step-by-Step Instructions
Step 1: Choose Your Projection Surface
The first thing you need is a suitable wall. A smooth, light-colored wall works best, ideally white or a very pale neutral color. Darker walls will absorb more light, making your image appear dimmer.
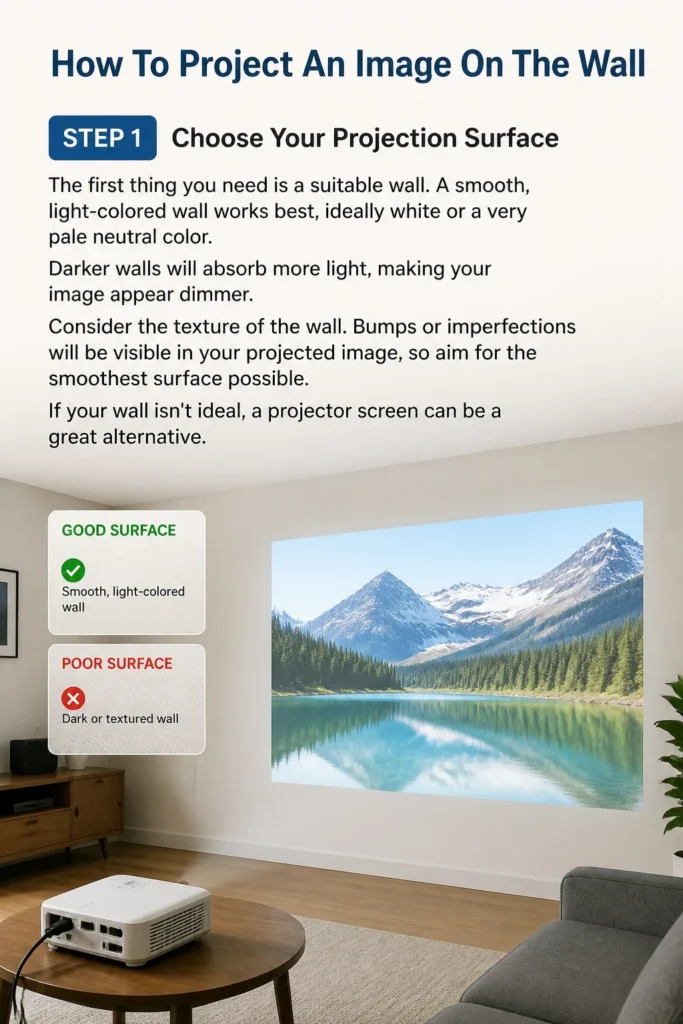
Consider the texture of the wall. Bumps or imperfections will be visible in your projected image, so aim for the smoothest surface possible. If your wall isn’t ideal, a projector screen can be a great alternative.
Step 2: Position Your Projector
Place your projector on a stable, flat surface. This could be a table, a shelf, or a dedicated projector stand. The distance from the wall will determine the size of your image.
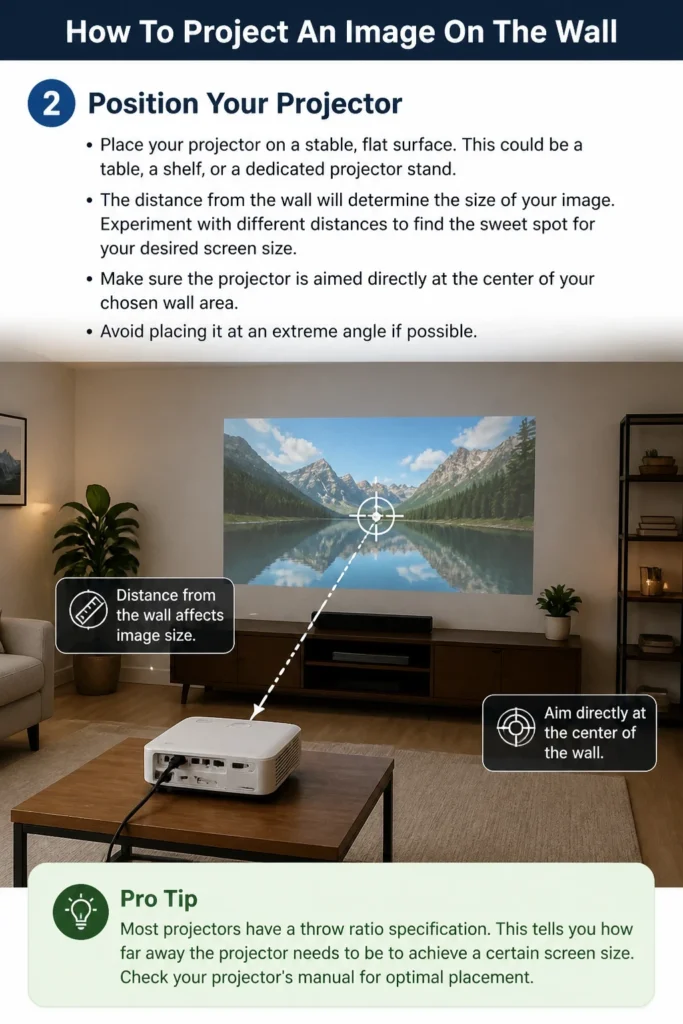
Experiment with different distances to find the sweet spot for your desired screen size. Make sure the projector is aimed directly at the center of your chosen wall area. Avoid placing it at an extreme angle if possible.
Pro Tip: Most projectors have a “throw ratio” specification. This tells you how far away the projector needs to be to achieve a certain screen size. Check your projector’s manual for optimal placement.
Step 3: Connect Your Devices
Connect your input device to the projector. For most modern projectors, an HDMI cable is the standard. Connect one end to your laptop, streaming stick, gaming console, or other source device.
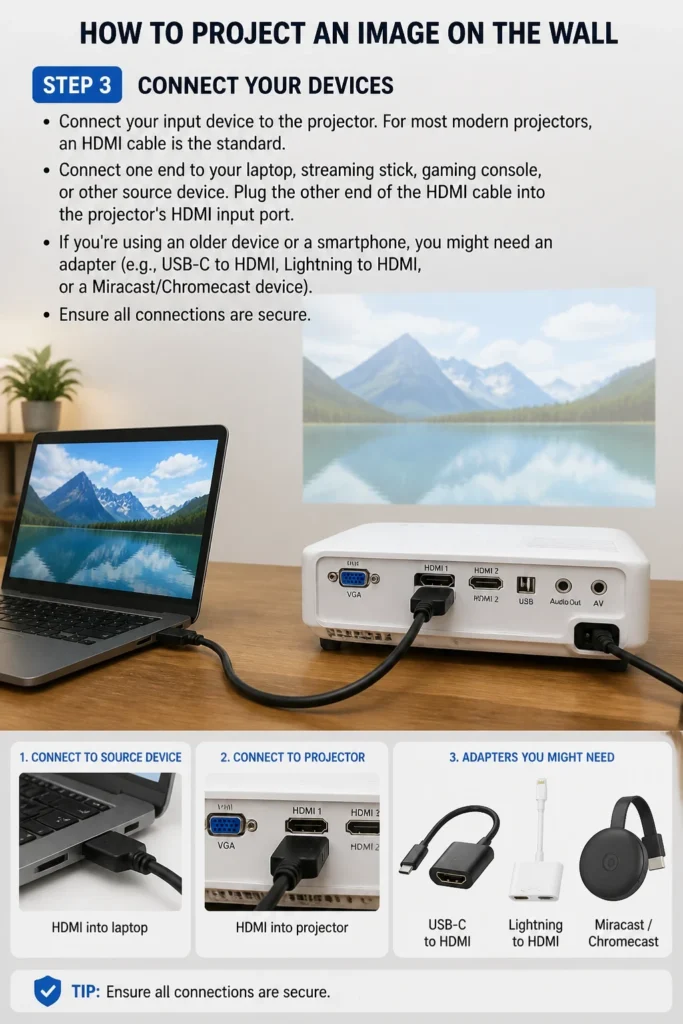
Plug the other end of the HDMI cable into the projector’s HDMI input port. If you’re using an older device or a smartphone, you might need an adapter (e.g., USB-C to HDMI, Lightning to HDMI, or a Miracast/Chromecast device). Ensure all connections are secure.
Step 4: Power On and Select Input
Plug your projector into a power outlet and turn it on. You’ll usually find a power button on the projector itself or its remote control. Wait for the projector to fully boot up.
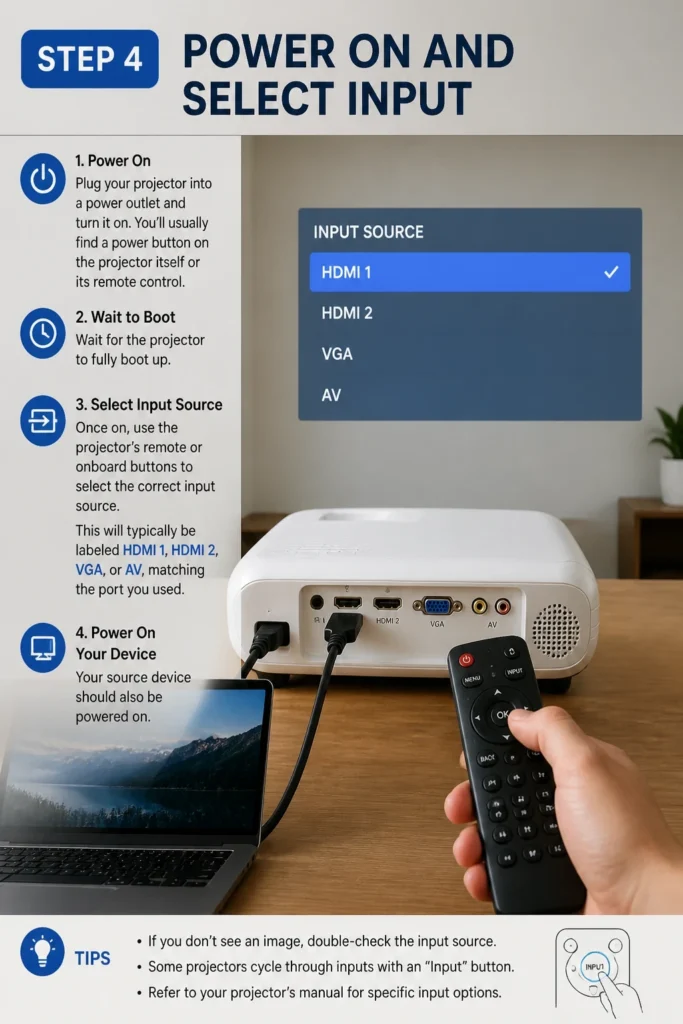
Once on, use the projector’s remote or onboard buttons to select the correct input source. This will typically be labeled “HDMI 1,” “HDMI 2,” “VGA,” or “AV,” matching the port you used. Your source device should also be powered on.
Step 5: Focus the Image
Once you see an image on the wall, it might look blurry. Locate the focus ring or knob on your projector lens. Gently turn this ring until the image becomes sharp and clear.
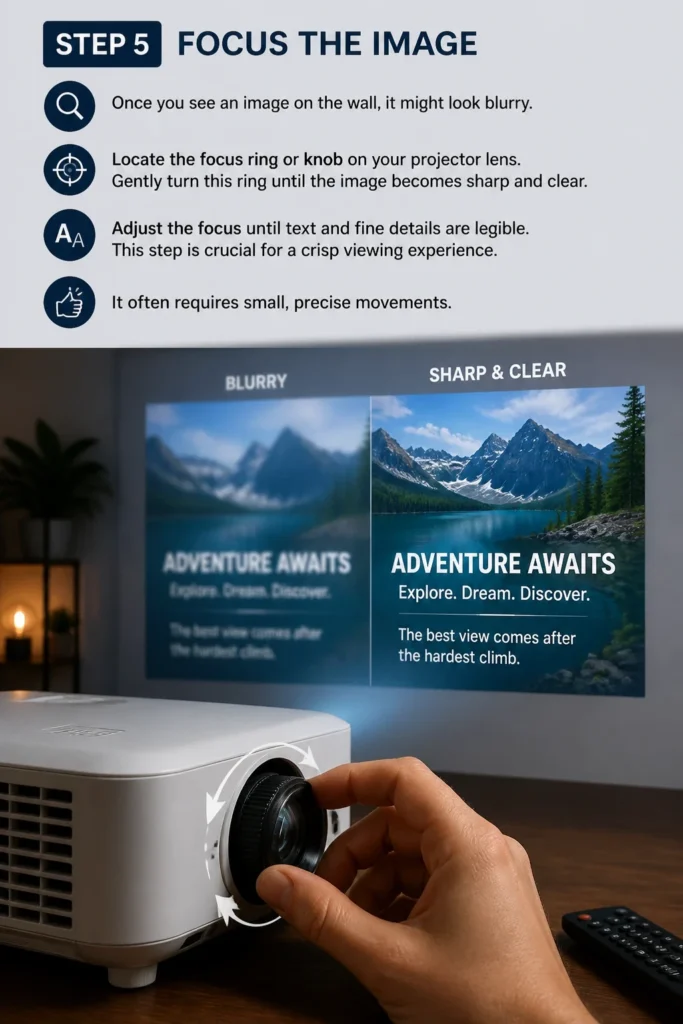
Adjust the focus until text and fine details are legible. This step is crucial for a crisp viewing experience. It often requires small, precise movements.
Step 6: Adjust Keystone Correction
If your projector isn’t perfectly perpendicular to the wall, the image might appear trapezoidal (wider at the top or bottom). This is where keystone correction comes in. Most projectors have a digital keystone correction feature.
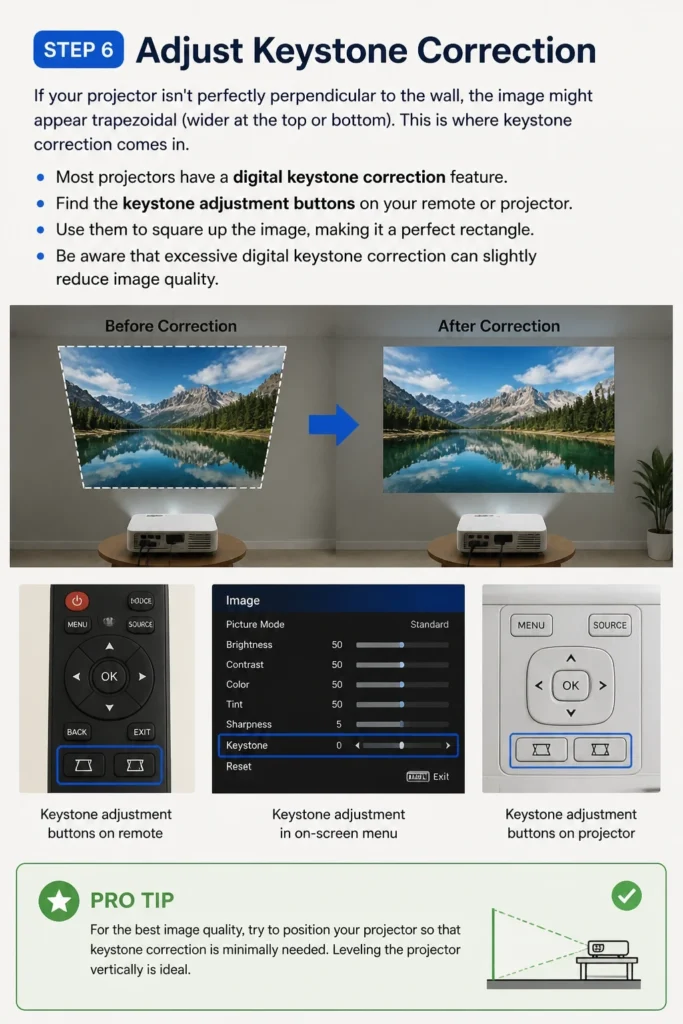
Find the keystone adjustment buttons on your remote or projector. Use them to square up the image, making it a perfect rectangle. Be aware that excessive digital keystone correction can slightly reduce image quality.
Pro Tip: For the best image quality, try to position your projector so that keystone correction is minimally needed. Leveling the projector vertically is ideal.
Step 7: Optimize Brightness and Contrast
With the image focused and squared, you can fine-tune its appearance. Access your projector’s menu settings. Look for options like “Brightness,” “Contrast,” and “Color.”
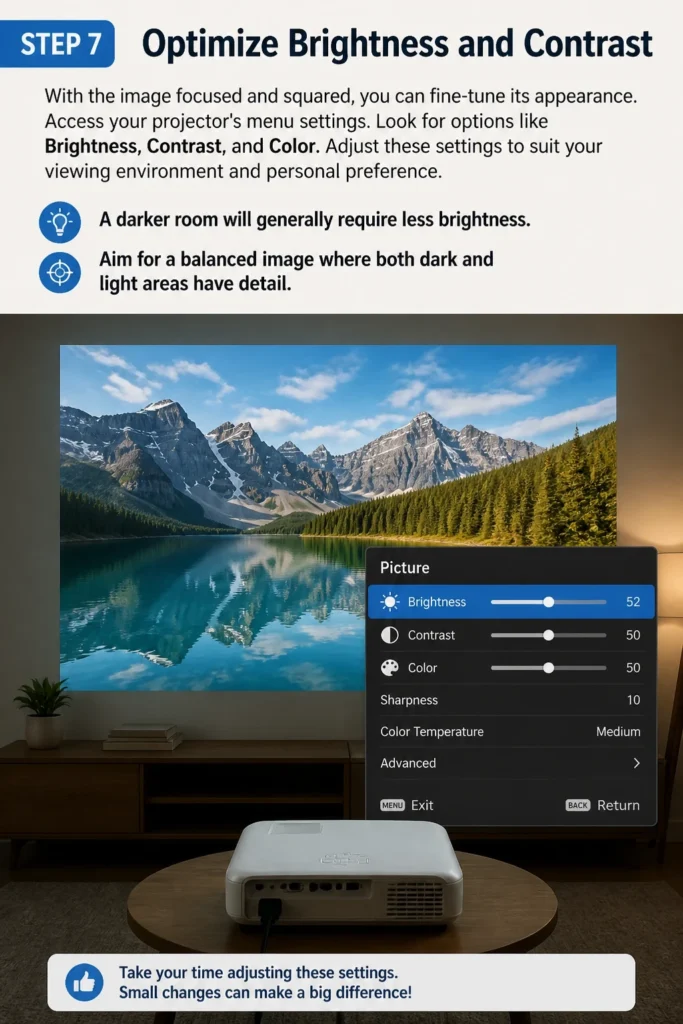
Adjust these settings to suit your viewing environment and personal preference. A darker room will generally require less brightness. Aim for a balanced image where both dark and light areas have detail.
Step 8: Set Up Audio
Many projectors have built-in speakers, but their quality is often basic. For a truly immersive experience, you’ll want external audio. Connect external speakers directly to your source device (laptop, streaming stick) via its audio output jack (3.5mm or optical).
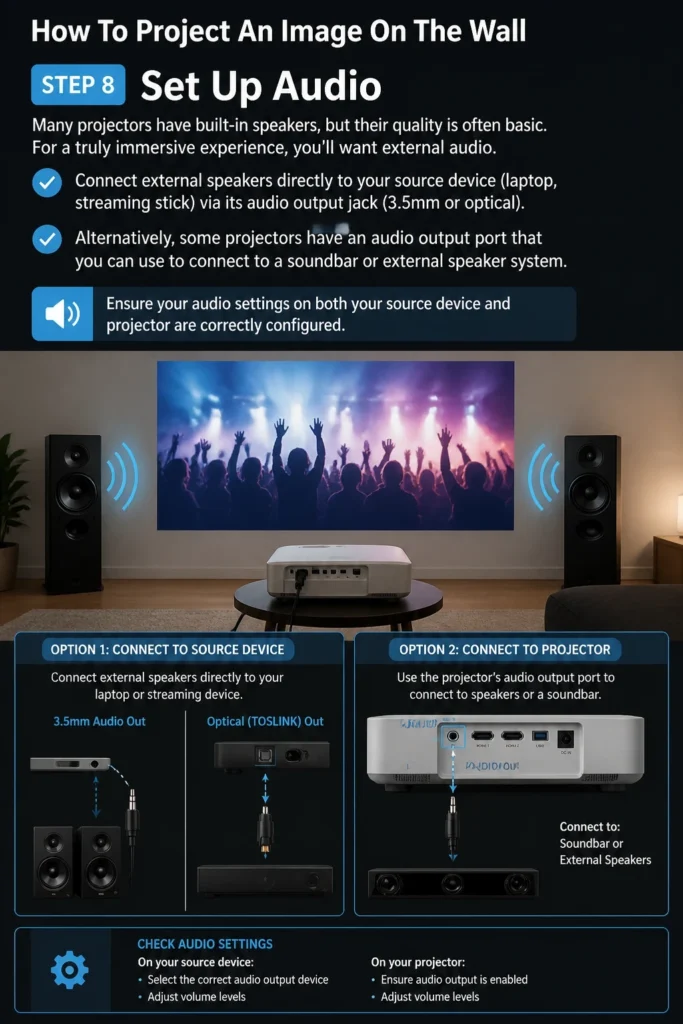
Alternatively, some projectors have an audio output port that you can use to connect to a soundbar or external speaker system. Ensure your audio settings on both your source device and projector are correctly configured.
Step 9: Dim the Lights
Projectors perform best in a dark environment. Turn off or dim any room lights that are shining on your projection surface. Close curtains or blinds to block out ambient light.
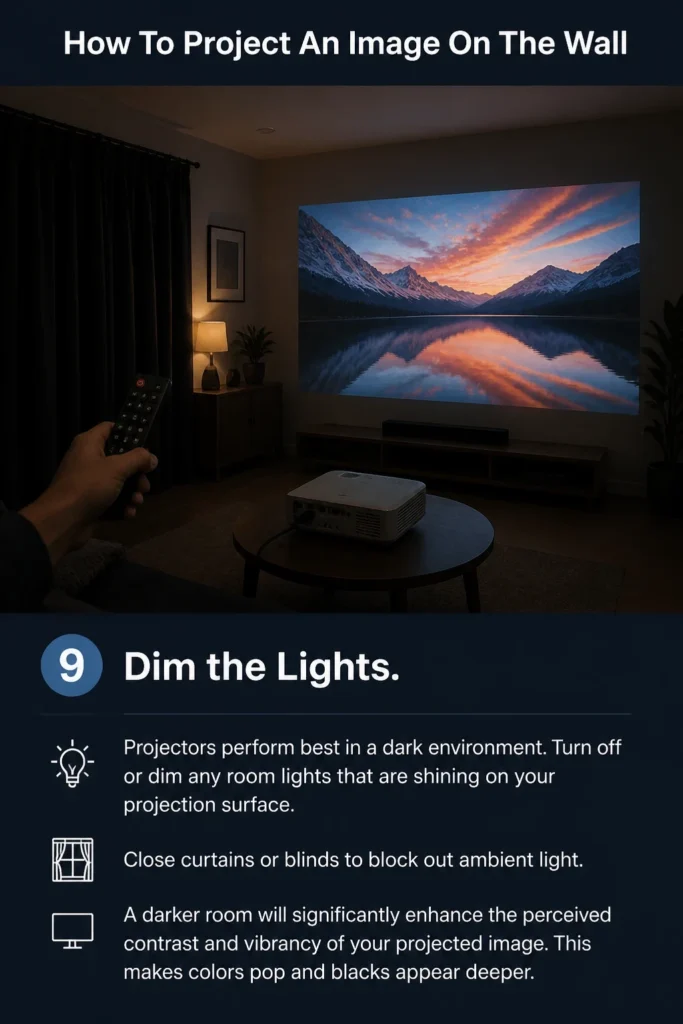
A darker room will significantly enhance the perceived contrast and vibrancy of your projected image. This makes colors pop and blacks appear deeper.
Common Mistakes to Avoid
Ignoring Room Lighting
Projecting in a brightly lit room is a common pitfall. Ambient light washes out the image, making it look dull and faded. Even powerful projectors struggle in direct sunlight or bright room lighting.
Always dim the lights or project in a dark room. This ensures your image is vibrant and has good contrast, making the most of your projector’s capabilities.
Incorrect Projector Placement
Placing the projector too close, too far, or at a severe angle can lead to problems. Too close means a small image; too far means a dim, stretched image. Extreme angles require heavy keystone correction, which can degrade image quality.
Take the time to position your projector carefully. Aim for a direct throw onto the wall, adjusting distance to get your desired screen size without straining the lens or needing excessive digital correction.
Forgetting Audio Considerations
Many users connect their projector, get a great picture, and then realize the sound is weak or nonexistent. Projector built-in speakers are often minimal. Relying solely on them can lead to a disappointing experience.
Plan for external audio from the start. Connect speakers directly to your source device or use the projector’s audio output. This elevates the entire viewing experience.
Neglecting Focus and Keystone
A blurry or trapezoidal image is frustrating to watch. Some users overlook these critical adjustments, thinking the projector is faulty or the wall is the problem. These settings are essential for a professional-looking display.
Always fine-tune the focus until the image is razor-sharp. Use keystone correction sparingly to square up the image, but prioritize direct placement to minimize its use for the best clarity.
Troubleshooting
No Image on the Wall
If your projector is on but nothing appears on the wall, first check all cable connections. Ensure your HDMI or other video cable is securely plugged into both the source device and the projector.
Next, verify that you’ve selected the correct input source on your projector. Cycle through the input options using the remote or projector buttons until the image appears. Also, check if your source device is powered on and sending a signal.
Image is Blurry or Out of Focus
A blurry image is almost always a focus issue. Locate the focus ring or slider on your projector’s lens. Slowly turn or move it in both directions until the image on the wall becomes perfectly sharp.
Sometimes, a projector might shift slightly, causing it to lose focus. A quick adjustment should resolve this. Ensure the projector lens itself is clean and free of dust or smudges.
Image is Trapezoidal (Not Rectangular)
This is a keystone issue. Your projector is likely not perfectly perpendicular to the wall. Use the keystone correction function on your projector (usually found on the remote or in the menu settings).
Adjust the keystone horizontally and/or vertically until the image forms a perfect rectangle. While digital keystone works, try to physically adjust the projector’s angle first for optimal image quality.
Image is Too Dim or Washed Out
A dim or washed-out image usually points to ambient light or projector settings. First, ensure the room is as dark as possible by turning off lights and closing curtains.
Then, check your projector’s brightness and contrast settings in its menu. You might need to increase brightness or adjust the contrast to make the image more vibrant. Also, ensure your projector is not in an “Eco” or “Lamp Save” mode if you need maximum brightness.
Key Takeaways
- Optimal Surface: Always choose a smooth, light-colored wall or a dedicated projector screen for the best image quality.
- Strategic Placement: Position your projector directly facing the wall at an appropriate distance to minimize keystone correction and optimize image size.
- Secure Connections: Double-check all cable connections, especially HDMI, and ensure the correct input source is selected on the projector.
- Fine-Tune Visuals: Master the focus and keystone adjustments to achieve a sharp, perfectly rectangular image.
- Enhance Audio: Plan for external speakers to complement your visual experience, as built-in projector speakers are often limited.
- Control Light: Dim ambient lighting to maximize image contrast and vibrancy, making your projected image truly stand out.
Frequently Asked Questions
Can I project an image from my phone?
Yes, you absolutely can project from your phone. You’ll typically need an adapter (like a USB-C to HDMI or Lightning to HDMI) to connect your phone to the projector’s HDMI input. Alternatively, many modern projectors support wireless casting technologies like Miracast or Chromecast, allowing you to mirror your phone’s screen wirelessly.
Do I need a special wall paint for projection?
While a dedicated projector screen paint exists, it’s not strictly necessary for casual use. A plain white or very light gray wall with a smooth, matte finish works wonderfully. The key is a non-reflective, uniform surface. Special paints can enhance gain and color accuracy, but they are an upgrade, not a requirement.
How far away should the projector be from the wall?
The ideal distance depends on your projector’s throw ratio and the desired image size. Every projector has different specifications. Generally, the further back you place the projector, the larger the image will be. Consult your projector’s manual or use an online throw distance calculator for precise measurements for your specific model.
Can I use a projector outside during the day?
Projecting outside during the day is challenging due to bright ambient sunlight. Most consumer projectors are not powerful enough to produce a visible image in direct daylight. For outdoor daytime use, you would need a very high-lumen projector (typically expensive) or a highly specialized screen designed to reject ambient light. Nighttime projection works best outdoors.
Our Top Recommended Finds
- Portable Projector Screen: Great for uneven walls or outdoor movie nights, offering a consistent, high-quality surface.
- Long HDMI Cable: Provides flexibility in projector placement, allowing you to connect devices from a greater distance.
- Bluetooth Soundbar: Significantly upgrades audio quality, connecting wirelessly to many source devices for an immersive sound experience.
Your Canvas Awaits: Start Projecting Today
Transforming a simple wall into a dynamic display is easier than you think. You now have all the knowledge to set up your projector, fine-tune the image, and troubleshoot any hiccups. It’s a fantastic way to bring movies, games, and presentations to life on a grand scale.
Why wait to experience the magic of a large-screen projection? Gather your gear, pick your favorite content, and turn your ordinary wall into an extraordinary viewing experience. Dive in and enjoy the immersive world you can create!
Beginner-friendly templates, step-by-step guides,
and weekly project ideas in your inbox.