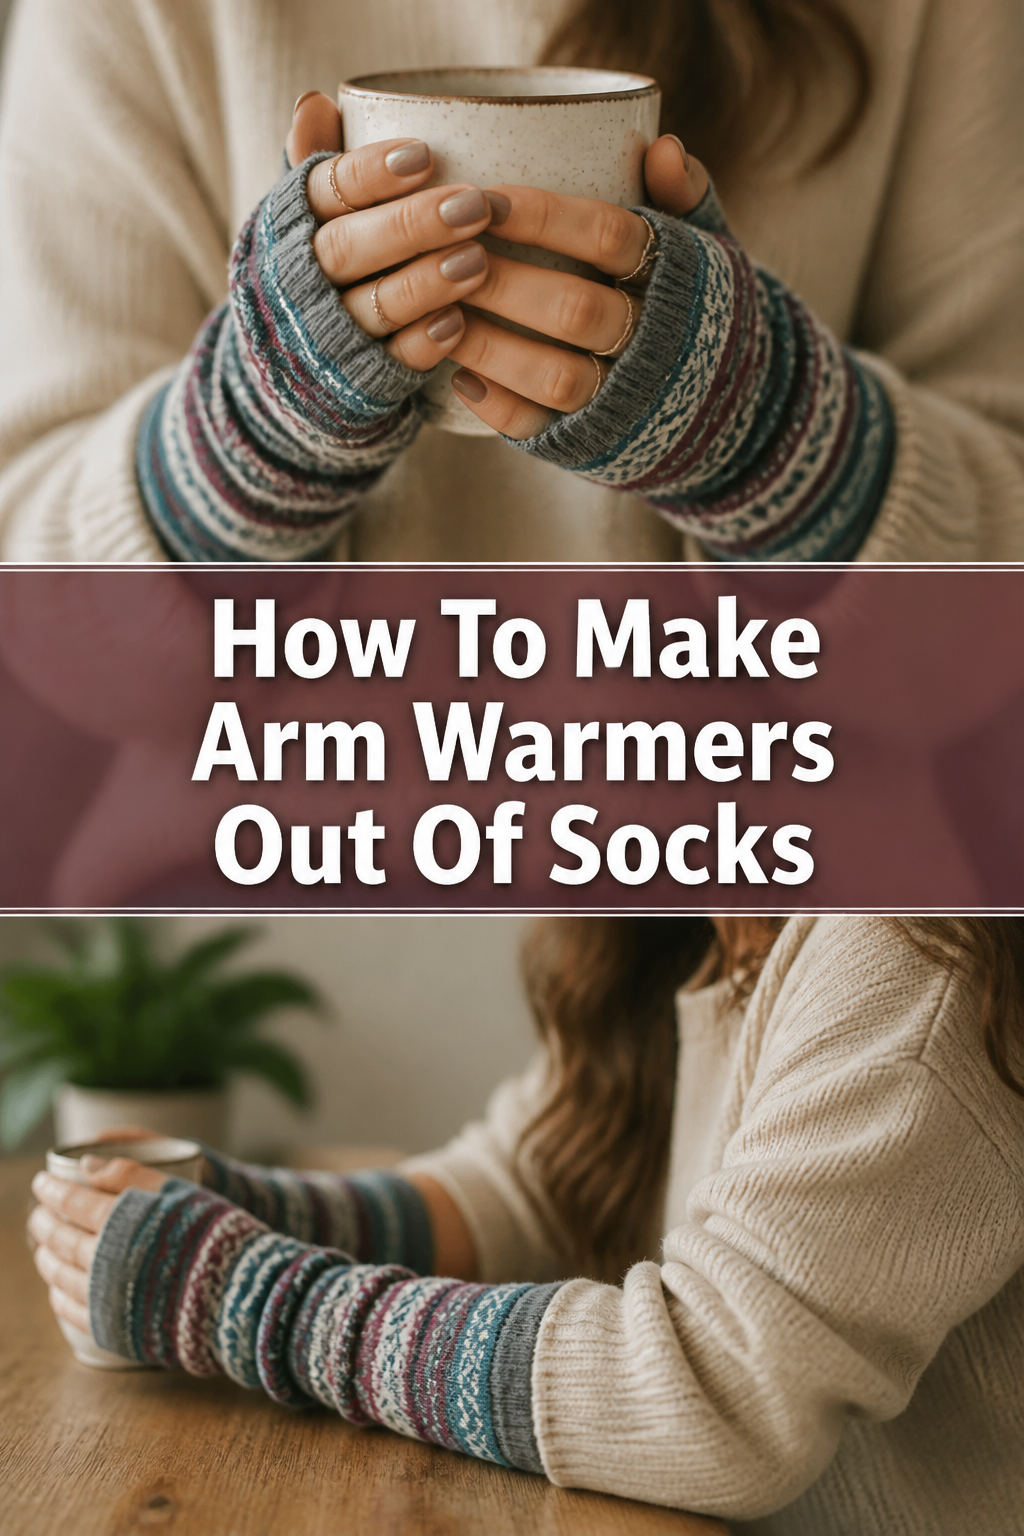
🧤 How To Make Arm Warmers Out Of Socks

Beginner-friendly templates, step-by-step guides,
and weekly project ideas in your inbox.
Have a drawer full of lonely socks missing their partners? Or perhaps you simply crave a cozy, stylish accessory for those chilly days? This simple DIY project lets you transform those forgotten foot coverings into fantastic arm warmers.
I remember discovering this trick years ago, turning my pile of mismatched socks into a fun, practical wardrobe addition. It’s incredibly satisfying to create something useful and fashionable from items you already own.
Quick Overview
This guide will walk you through turning old socks into comfortable and customizable arm warmers. You’ll learn how to measure, cut, and finish your new accessories, making them perfect for layering or adding a unique touch to any outfit.
- Time needed: 30-60 minutes
- Difficulty: Beginner
- What you’ll need: Socks, sharp scissors, a needle and thread (or sewing machine), pins, and optional embellishments.
Step-by-Step Instructions
Step 1: Gather Your Supplies
Before you begin, make sure you have everything ready. This includes your chosen socks, a pair of sharp fabric scissors, and either a hand-sewing kit or a sewing machine. Pins are helpful for marking and holding fabric.
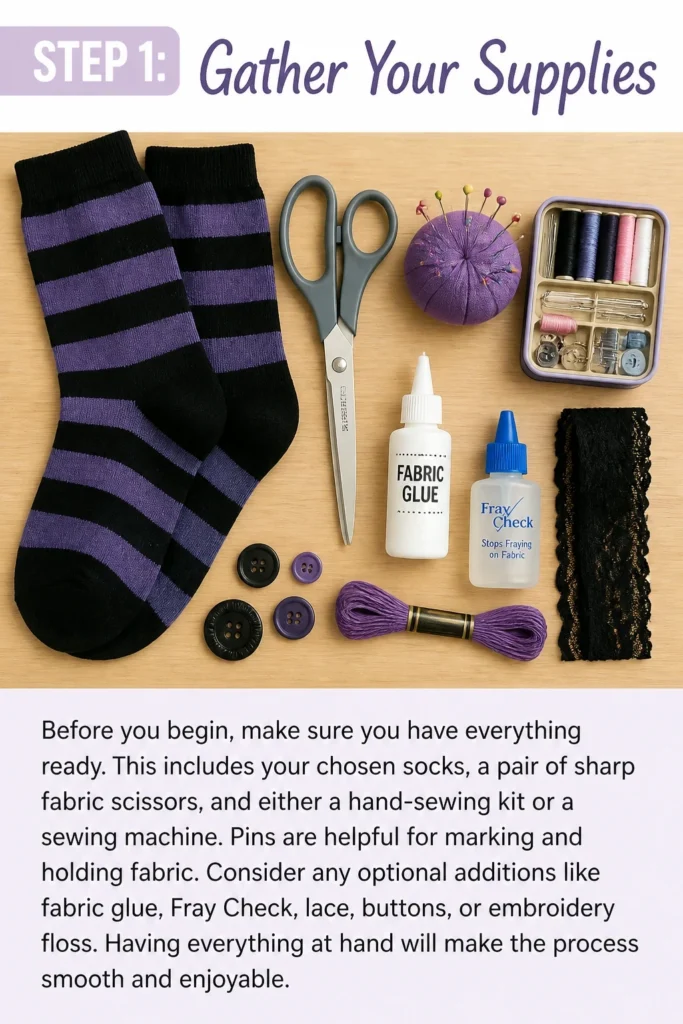
Consider any optional additions like fabric glue, Fray Check, lace, buttons, or embroidery floss. Having everything at hand will make the process smooth and enjoyable.
Step 2: Choose Your Socks Wisely
The type of sock you select significantly impacts your arm warmers. Look for socks that are clean, dry, and free of holes or excessive wear. Crew socks, knee-highs, or even thigh-high socks work best.
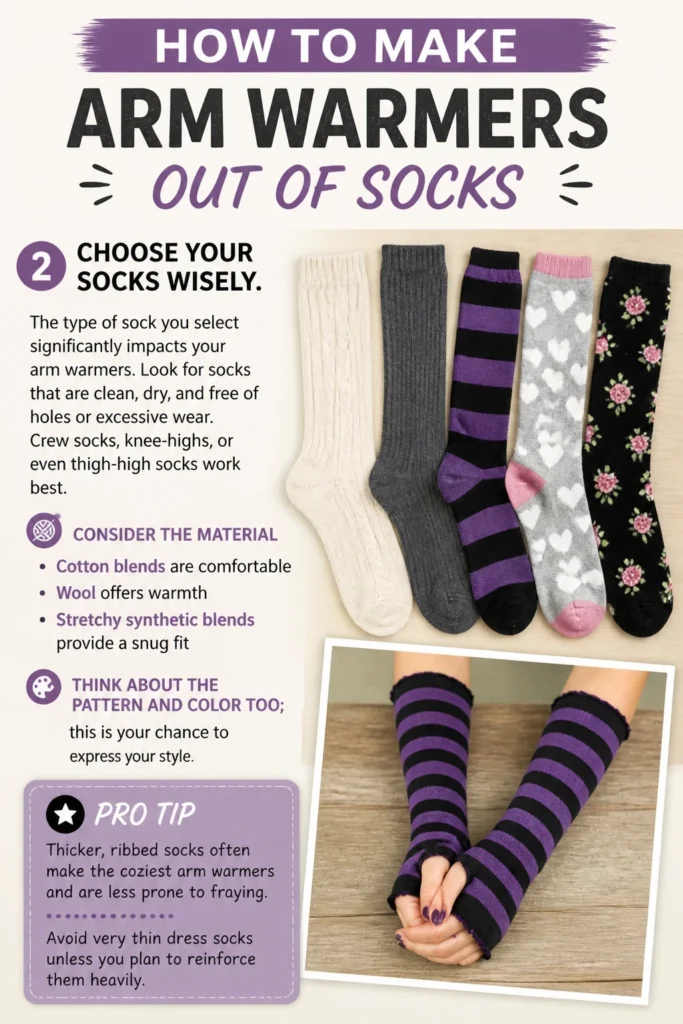
Consider the material: cotton blends are comfortable, wool offers warmth, and stretchy synthetic blends provide a snug fit. Think about the pattern and color too; this is your chance to express your style.
Pro Tip: Thicker, ribbed socks often make the coziest arm warmers and are less prone to fraying. Avoid very thin dress socks unless you plan to reinforce them heavily.
Step 3: Prepare the Socks
Lay your chosen socks flat on a clean, hard surface. Smooth out any wrinkles or folds. This ensures accurate measurements and even cuts.
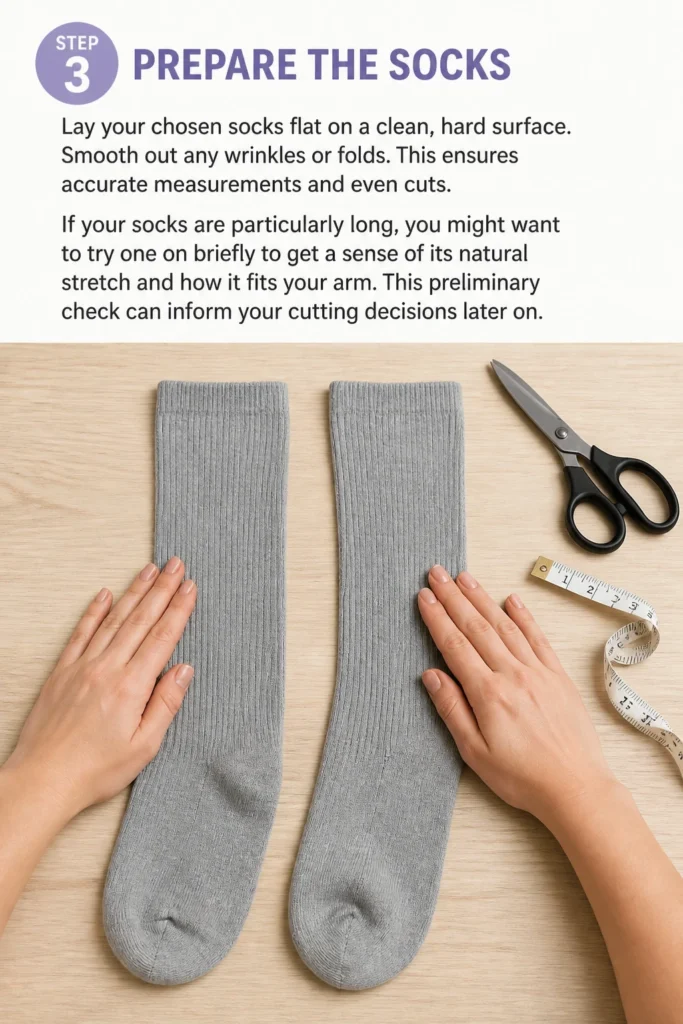
If your socks are particularly long, you might want to try one on briefly to get a sense of its natural stretch and how it fits your arm. This preliminary check can inform your cutting decisions later on.
Step 4: Mark Your Cuts
Take one sock and place it flat. You’ll need to mark three key areas: where the arm warmer will end at your wrist, where it will end at your bicep, and the placement for your thumbhole.
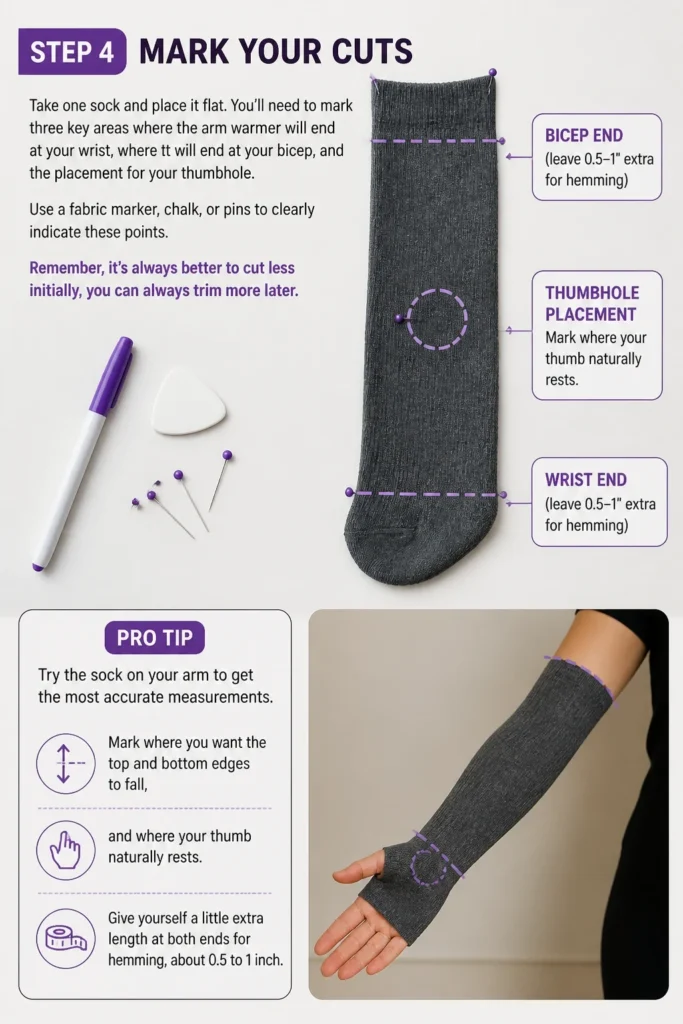
Use a fabric marker, chalk, or pins to clearly indicate these points. Remember, it’s always better to cut less initially; you can always trim more later.
Pro Tip: Try the sock on your arm to get the most accurate measurements. Mark where you want the top and bottom edges to fall, and where your thumb naturally rests. Give yourself a little extra length at both ends for hemming, about 0.5 to 1 inch.
Step 5: Make the Initial Cuts
Carefully cut off the foot portion of the sock, just above the heel. This will be the bottom opening of your arm warmer. Ensure your cut is straight and even.
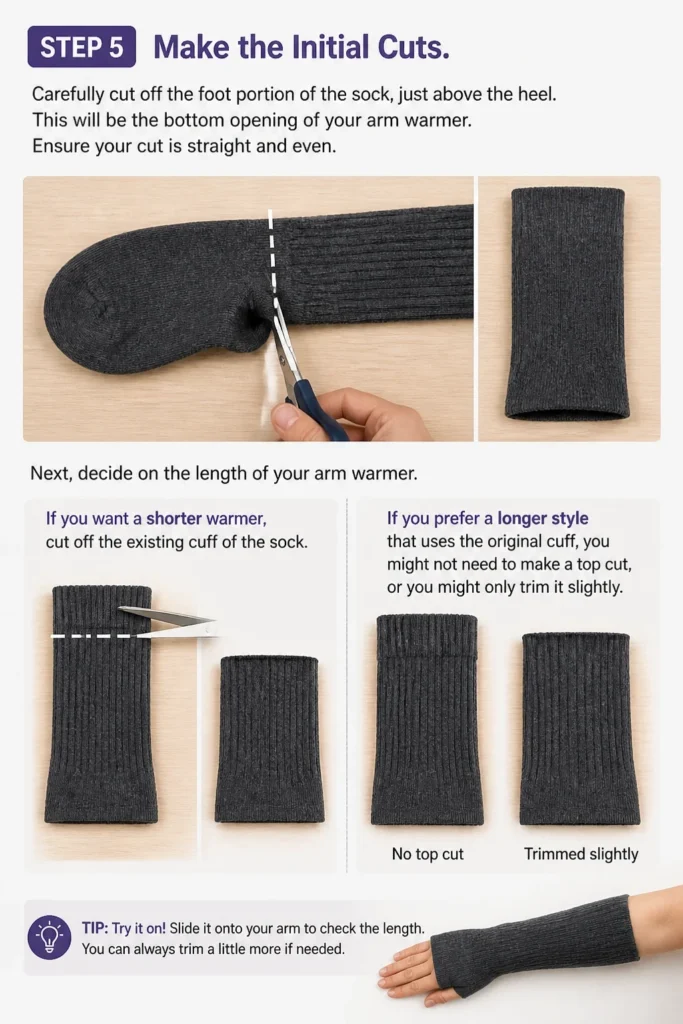
Next, decide on the length of your arm warmer. If you want a shorter warmer, cut off the existing cuff of the sock. If you prefer a longer style that uses the original cuff, you might not need to make a top cut, or you might only trim it slightly.
Step 6: Create the Thumbhole
This is a crucial step for functionality. With the sock still flat, fold it in half lengthwise. Locate the spot where your thumb naturally protrudes when wearing the arm warmer.
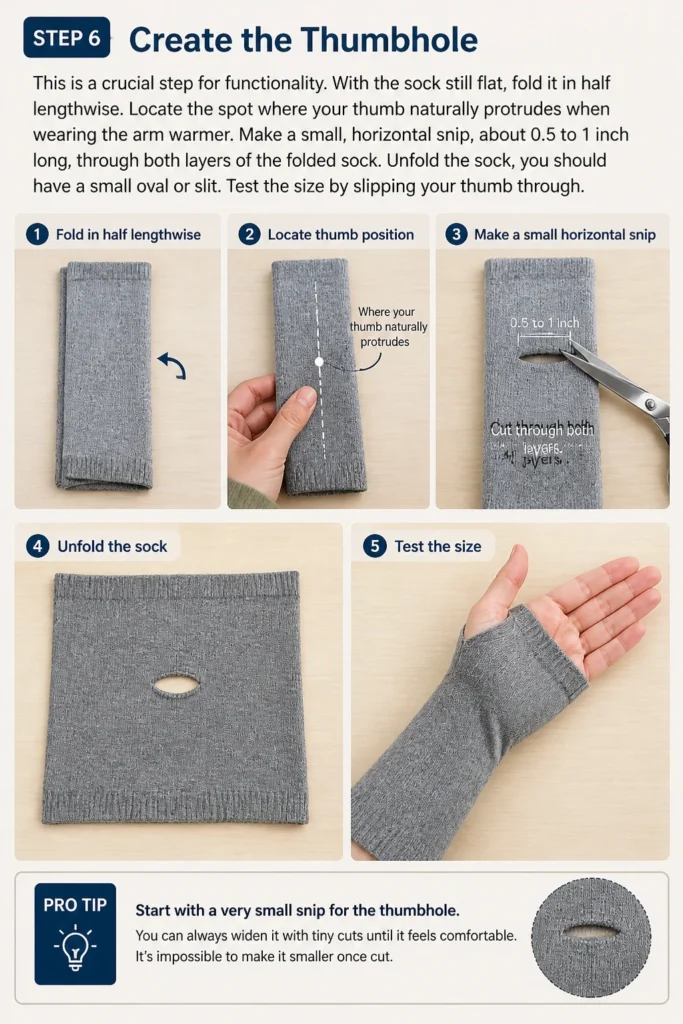
Make a small, horizontal snip, about 0.5 to 1 inch long, through both layers of the folded sock. Unfold the sock; you should have a small oval or slit. Test the size by slipping your thumb through.
Pro Tip: Start with a very small snip for the thumbhole. You can always widen it with tiny cuts until it feels comfortable. It’s impossible to make it smaller once cut.
Step 7: Finish the Edges (No-Sew Option)
If you prefer not to sew, there are still ways to prevent fraying and give your arm warmers a neat finish. Fabric glue or a product like Fray Check can be applied along the raw edges.
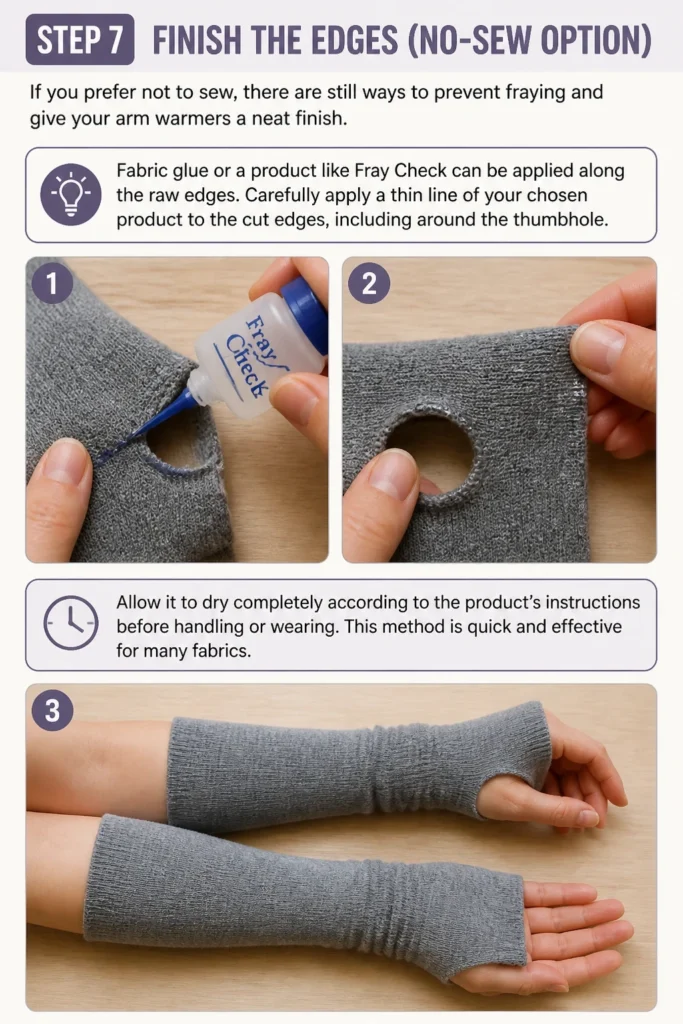
Carefully apply a thin line of your chosen product to the cut edges, including around the thumbhole. Allow it to dry completely according to the product’s instructions before handling or wearing. This method is quick and effective for many fabrics.
Step 8: Finish the Edges (Sewing Option)
For a more durable and professional finish, sewing the edges is recommended. You can hand-sew a simple hem or use a sewing machine. Turn the raw edges of your arm warmers inward by about 0.5 inches.
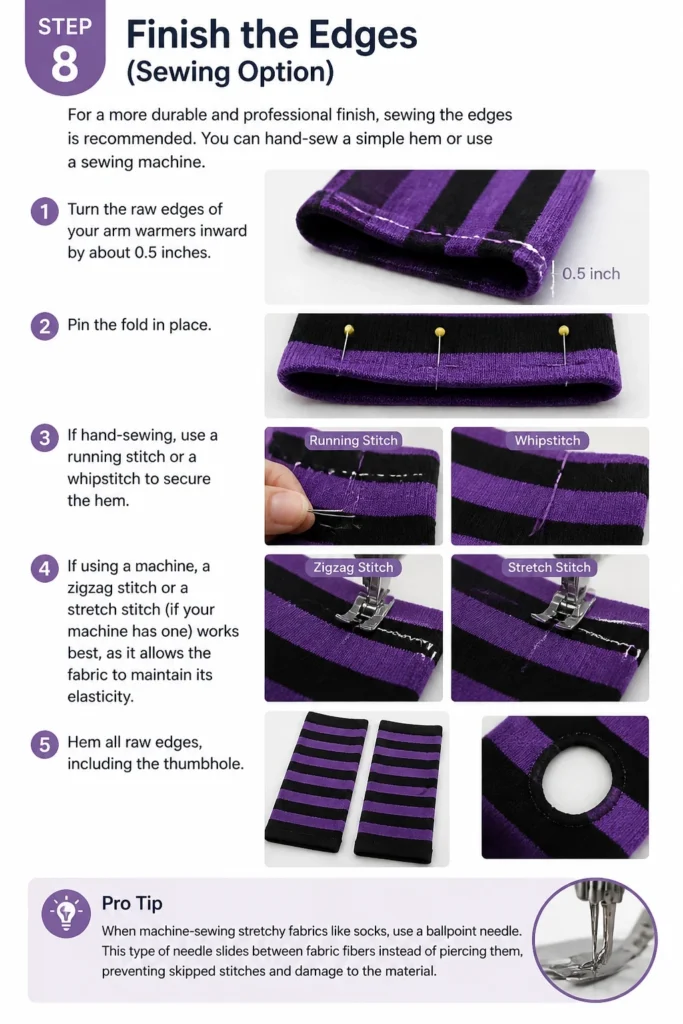
Pin the fold in place. If hand-sewing, use a running stitch or a whipstitch to secure the hem. If using a machine, a zigzag stitch or a stretch stitch (if your machine has one) works best, as it allows the fabric to maintain its elasticity. Hem all raw edges, including the thumbhole.
Pro Tip: When machine-sewing stretchy fabrics like socks, use a ballpoint needle. This type of needle slides between fabric fibers instead of piercing them, preventing skipped stitches and damage to the material.
Step 9: Try Them On & Adjust
Once the edges are finished and dry, try on your new arm warmers. Check the fit around your wrist, forearm, and bicep. Ensure the thumbhole is comfortable and allows for natural movement.
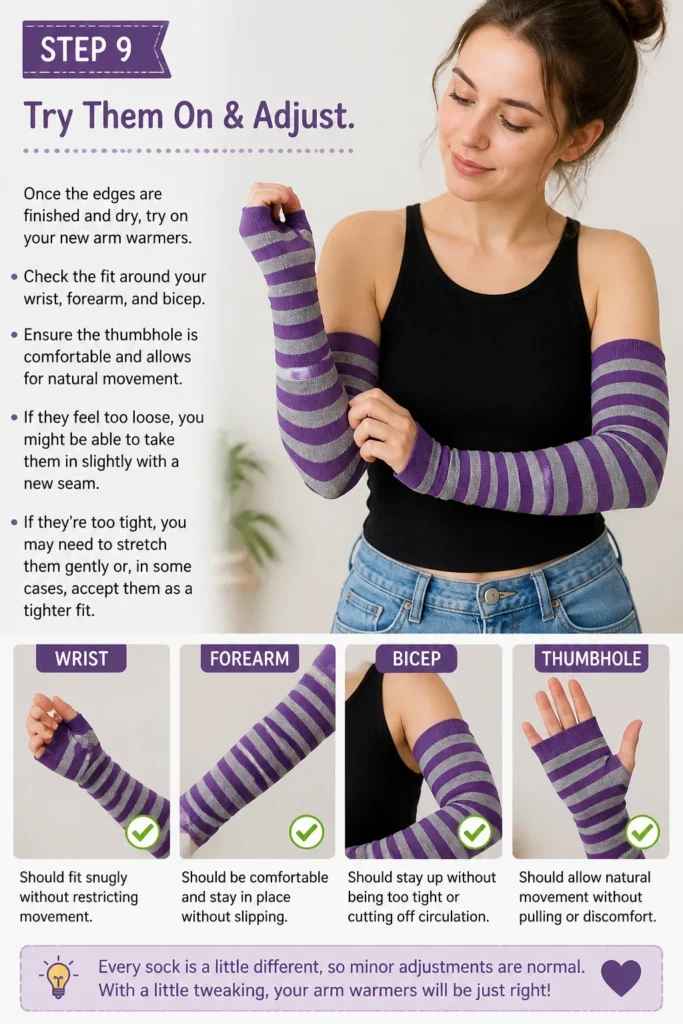
If they feel too loose, you might be able to take them in slightly with a new seam. If they’re too tight, you may need to stretch them gently or, in some cases, accept them as a tighter fit.
Step 10: Embellish (Optional)
Now for the fun part: personalizing your arm warmers! This is where you can truly make them unique. Consider adding decorative buttons along the side or near the cuff.
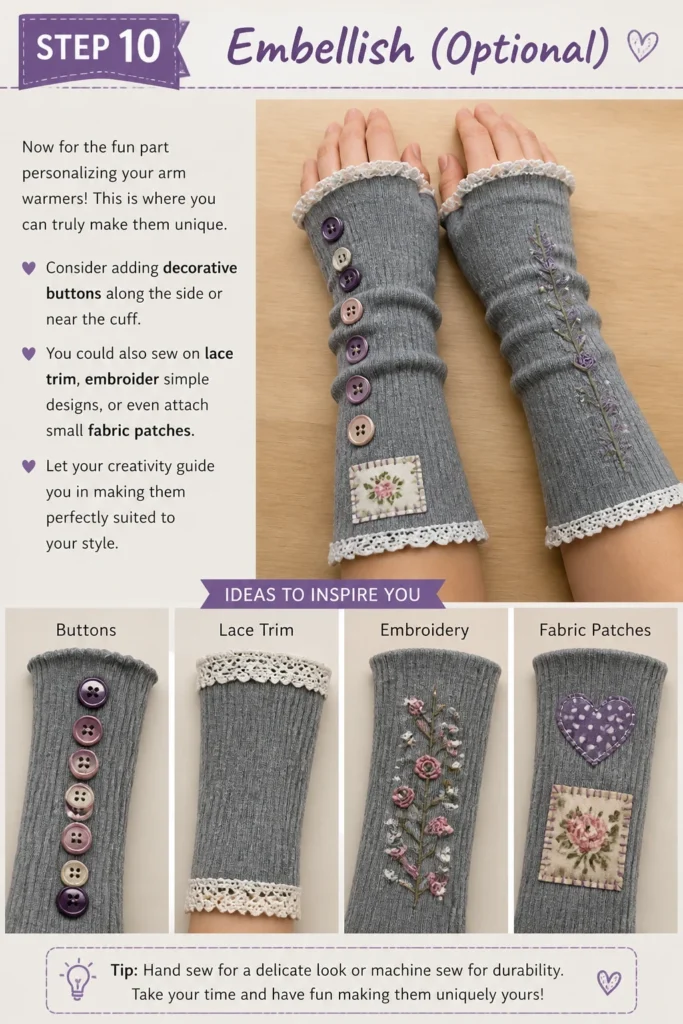
You could also sew on lace trim, embroider simple designs, or even attach small fabric patches. Let your creativity guide you in making them perfectly suited to your style.
Common Mistakes to Avoid
Cutting Too Much Too Soon
A common pitfall is being overly enthusiastic with the scissors. Once fabric is cut, it cannot be put back. Always measure twice and cut once.
It’s far easier to trim a little more off if your arm warmers are too long than to try and salvage a pair that ended up too short. Start with generous measurements and adjust gradually.
Ignoring Sock Material
Not all socks are created equal when it comes to crafting. Some materials, like thin cotton or rayon, fray heavily when cut. Others, like thick knits or fleece, might not fray at all.
Understand your sock material before deciding on your finishing method. A sock that frays easily absolutely needs a sewn hem or Fray Check application for durability.
Uneven Thumbholes
A lopsided or poorly placed thumbhole can make your arm warmers uncomfortable and look unprofessional. Rushing this step often leads to frustration.
Take your time when marking and cutting the thumbhole. Fold the sock neatly and make a small, precise snip. Test its comfort before making any further adjustments.
Skipping Edge Finishing
While it might seem like an extra step, finishing the raw edges is crucial for the longevity and appearance of your arm warmers. Unfinished edges can unravel quickly, especially after washing.
Whether you choose to sew a hem or use fabric glue, taking this extra step ensures your arm warmers look great and last for many wears to come. It truly makes a difference.
Troubleshooting
Arm Warmers Feel Too Tight/Loose
If your finished arm warmers feel too tight, you can try gently stretching the fabric, especially if they are a knit material. Wetting them slightly and stretching while damp can help.
If they are too loose, you might be able to add a new seam along the inner arm to take them in. Alternatively, for a slightly looser fit, consider adding elastic to the top or bottom hem for a more secure grip.
Edges Fraying
If you notice the edges starting to fray after wear or washing, don’t despair. You can reinforce them. For minor fraying, apply Fray Check directly to the affected areas.
For more significant fraying, you may need to re-hem the edges. Carefully trim off the frayed threads and then either hand-sew a new, slightly wider hem or use your sewing machine to secure the edge.
Thumbhole is Uncomfortable
An uncomfortable thumbhole can be irritating. If it’s too small, carefully make tiny snips to widen it until it feels right. Be very conservative with your cuts.
If the thumbhole’s edge is rough or irritating, you can reinforce it with a small, hand-sewn blanket stitch around the perimeter. This adds a soft, finished edge that can improve comfort.
Key Takeaways
- Socks are incredibly versatile materials for upcycling into new accessories.
- Accurate measuring and careful cutting are paramount for a successful project.
- Always choose a finishing method for your edges to ensure durability and a polished look.
- Don’t be afraid to personalize your arm warmers with embellishments to reflect your style.
- This project is an excellent entry point for beginner crafters and sewers.
- Reusing old socks is a fun and sustainable way to refresh your wardrobe.
Frequently Asked Questions
Can I use any type of sock?
While you can technically use any sock, some types work better than others. Crew socks, knee-highs, and thigh-highs are ideal due to their length. Socks made of cotton, wool, or stretchy blends are generally good choices. Avoid very delicate or overly thin socks that might not hold up to cutting and wear.
Do I have to sew the edges?
Sewing the edges provides the most durable and professional finish, but it’s not strictly mandatory. For non-fraying fabrics like fleece or some knits, you might be able to leave the edges raw. For most other materials, using fabric glue or Fray Check is an excellent no-sew alternative to prevent unraveling.
How do I wash them?
You should wash your new arm warmers according to the care instructions of the original socks. If you used fabric glue or Fray Check, ensure it’s fully cured before washing. Hand washing and air drying are often the gentlest methods, helping to preserve the integrity of your finished edges.
What if my socks are different sizes?
If your socks are slightly different sizes, try to match them as closely as possible for a pair of arm warmers. If the difference is significant, you might end up with one arm warmer that fits tighter or looser. In such cases, consider making individual arm warmers from unmatched socks, embracing the unique look.
Our Top Recommended Finds
- Sharp Fabric Scissors: Essential for clean, precise cuts that prevent fraying and make the job much easier.
- Fabric Glue / Fray Check: A fantastic no-sew solution for finishing edges and ensuring your arm warmers last.
- Basic Hand Sewing Kit: Perfect for creating durable hems and adding custom embellishments with ease.
Your New Favorite Accessory Awaits
Making arm warmers out of socks is a wonderfully rewarding project. It’s a creative way to give new life to old items, reduce waste, and add a personalized touch to your wardrobe. Each pair you make will be uniquely yours, reflecting your style and ingenuity.
Why wait? Grab those lonely socks from your drawer today and transform them into something cozy and chic. You’ll be amazed at what you can create with just a few simple steps and a little imagination.
Beginner-friendly templates, step-by-step guides,
and weekly project ideas in your inbox.