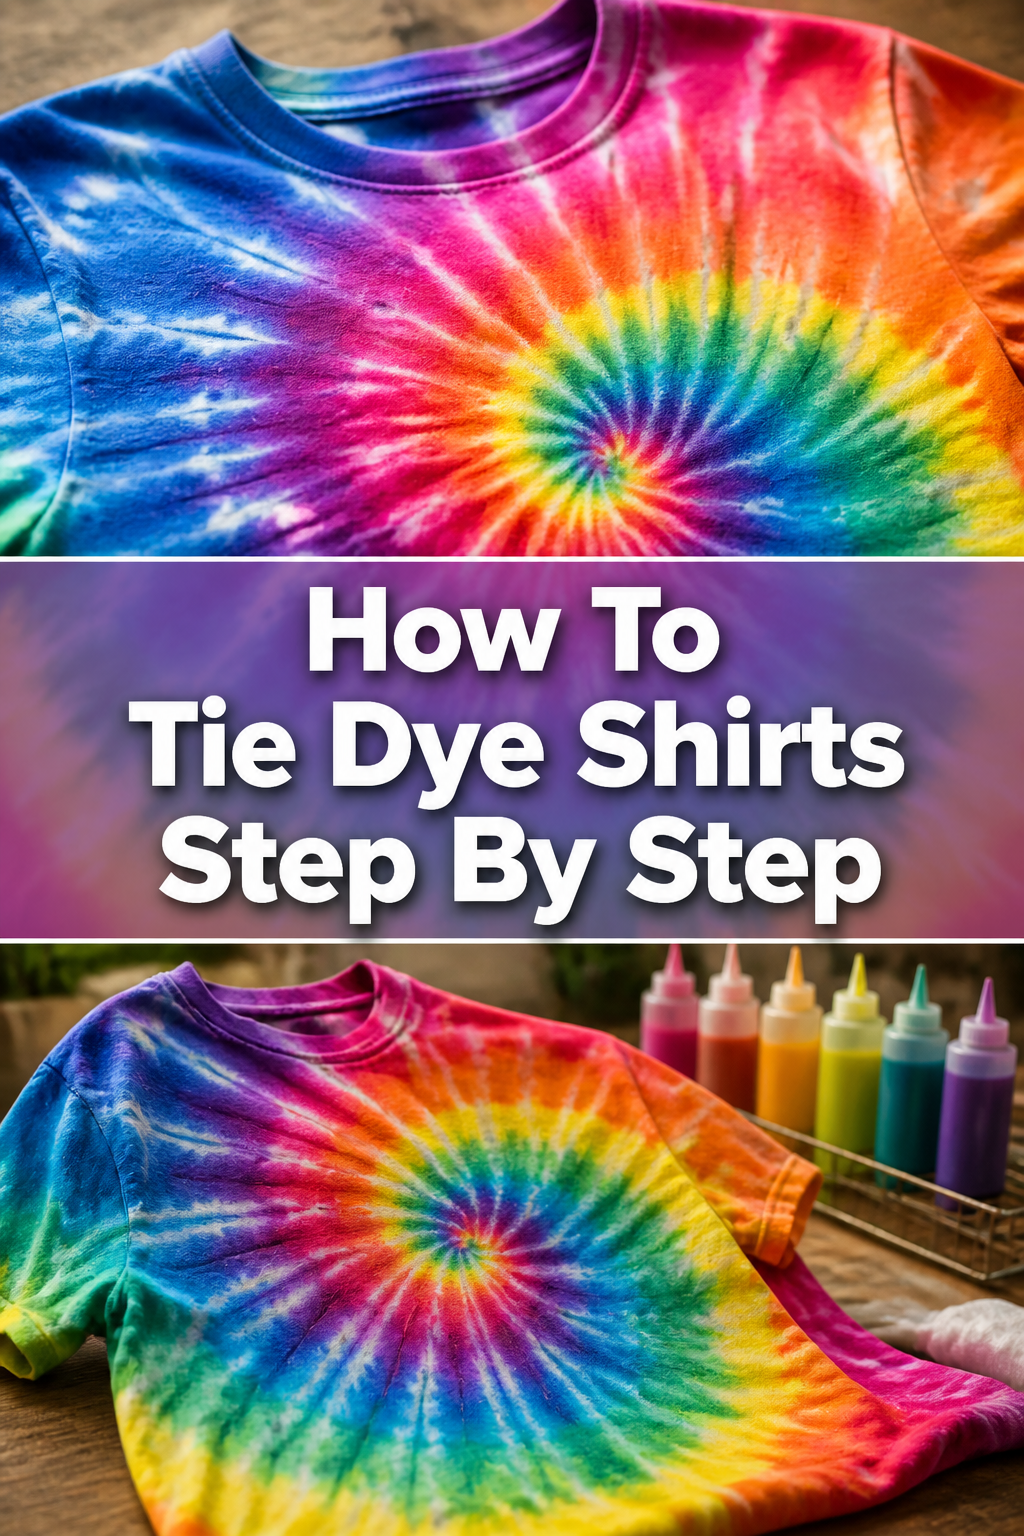
🎨 How To Tie Dye Shirts Step By Step

Beginner-friendly templates, step-by-step guides,
and weekly project ideas in your inbox.
Tie-dye is a vibrant art form that transforms ordinary fabric into a wearable masterpiece.
I remember making my first tie-dye shirt in summer camp, a slightly messy but incredibly exciting process that yielded a unique design.
This guide shares practical, hands-on experience to help you create stunning tie-dye shirts with confidence.
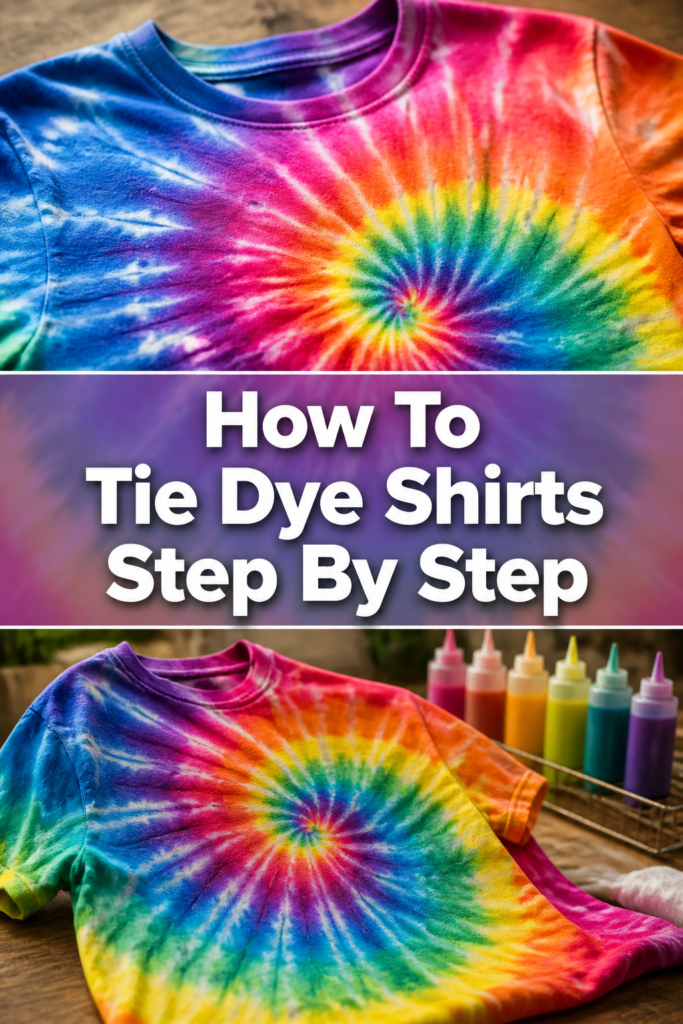
Quick Overview
You’re about to embark on a fun, creative journey that ends with a custom-designed shirt.
By following these steps, you’ll learn the techniques to achieve beautiful, lasting tie-dye patterns.
- Time needed: 2-4 hours active work, 24 hours dye curing, plus washing time.
- Difficulty: Beginner
- What you’ll need: White cotton shirt, tie-dye kit or individual dyes, rubber bands, gloves, plastic wrap.
Step-by-Step Instructions
Step 1: Gather Your Supplies
Before you begin, ensure you have everything within reach. A little preparation goes a long way in making the process smooth and enjoyable.
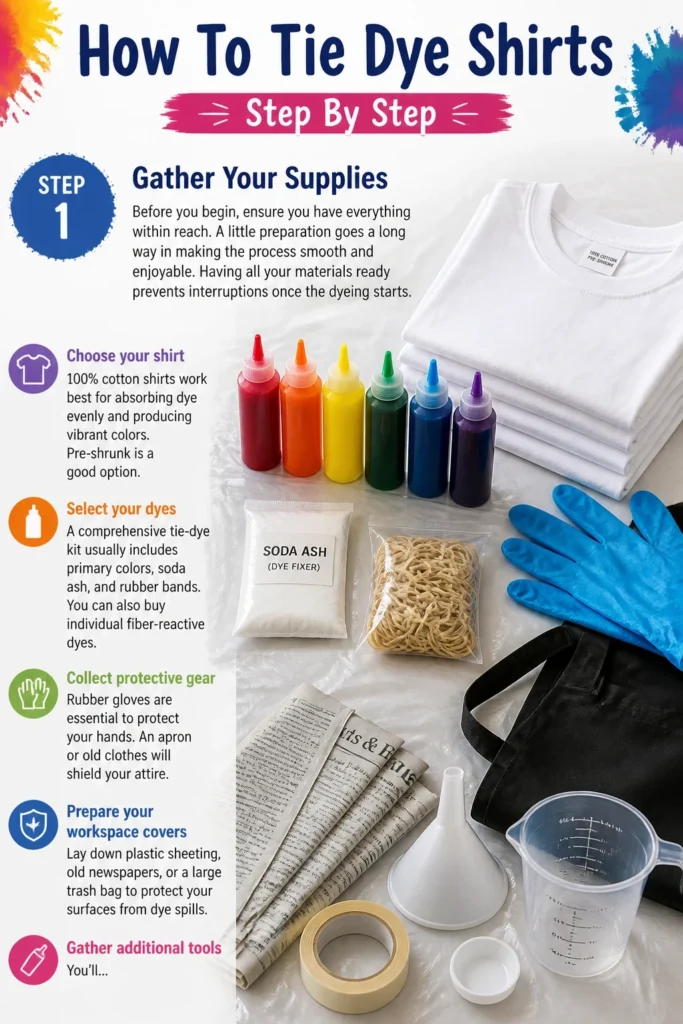
Having all your materials ready prevents interruptions once the dyeing starts.
- Choose your shirt: 100% cotton shirts work best for absorbing dye evenly and producing vibrant colors. Pre-shrunk is a good option.
- Select your dyes: A comprehensive tie-dye kit usually includes primary colors, soda ash, and rubber bands. You can also buy individual fiber-reactive dyes.
- Collect protective gear: Rubber gloves are essential to protect your hands. An apron or old clothes will shield your attire.
- Prepare your workspace covers: Lay down plastic sheeting, old newspapers, or a large trash bag to protect your surfaces from dye spills.
- Gather additional tools: You’ll need rubber bands or string for tying, plastic squeeze bottles for dye application, and plastic wrap or bags for curing.
Pro Tip: Invest in a good quality tie-dye kit. These kits often include soda ash, which is crucial for making fiber-reactive dyes bond permanently with fabric, resulting in brighter, longer-lasting colors.
Step 2: Pre-Wash Your Shirt
This crucial step ensures your shirt is ready to absorb the dye effectively. Skipping it can lead to uneven color distribution.
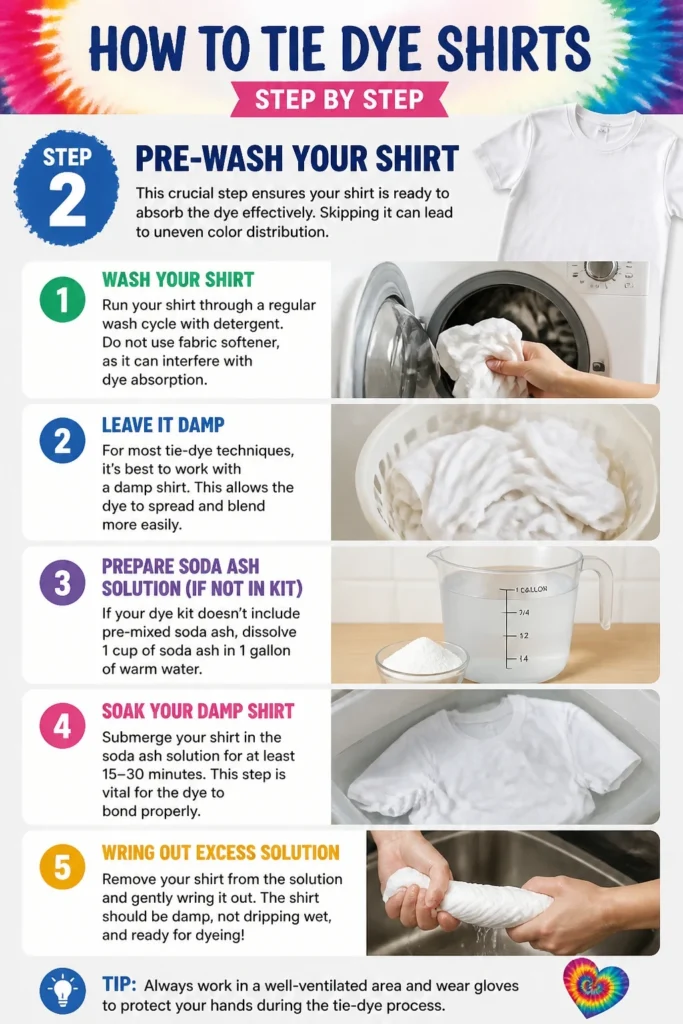
Pre-washing removes any sizing, oils, or dirt that might repel the dye.
- Wash your shirt: Run your shirt through a regular wash cycle with detergent. Do not use fabric softener, as it can interfere with dye absorption.
- Leave it damp: For most tie-dye techniques, it’s best to work with a damp shirt. This allows the dye to spread and blend more easily.
- Prepare soda ash solution (if not in kit): If your dye kit doesn’t include pre-mixed soda ash, dissolve 1 cup of soda ash in 1 gallon of warm water.
- Soak your damp shirt: Submerge your shirt in the soda ash solution for at least 15-30 minutes. This step is vital for the dye to bond properly.
- Wring out excess solution: After soaking, wring out the shirt thoroughly so it’s damp but not dripping wet.
Step 3: Create Your Folds & Twists
This is where your creativity truly begins. The way you fold, twist, or scrunch your shirt determines the final pattern.
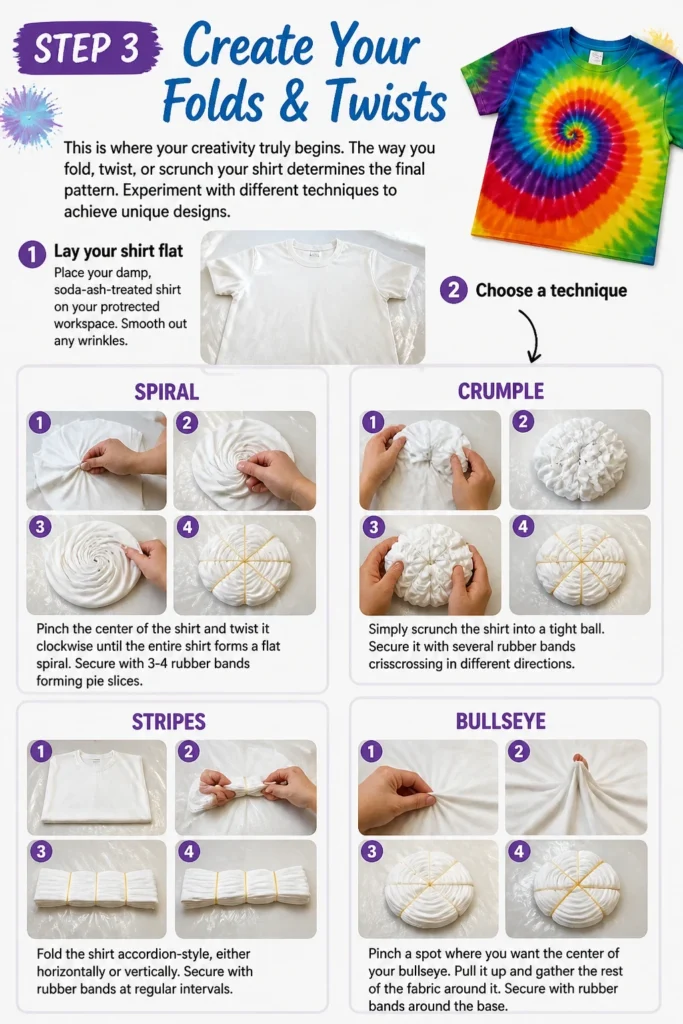
Experiment with different techniques to achieve unique designs.
- Lay your shirt flat: Place your damp, soda-ash-treated shirt on your protected workspace. Smooth out any wrinkles.
- Choose a technique:
- Spiral: Pinch the center of the shirt and twist it clockwise until the entire shirt forms a flat spiral. Secure with 3-4 rubber bands forming pie slices.
- Crumple: Simply scrunch the shirt into a tight ball. Secure it with several rubber bands crisscrossing in different directions.
- Stripes: Fold the shirt accordion-style, either horizontally or vertically. Secure with rubber bands at regular intervals.
- Bullseye: Pinch a spot where you want the center of your bullseye. Pull it up and secure rubber bands around it at increasing intervals down the length.
- Secure tightly: Use rubber bands or string to hold your folds or twists firmly in place. Tighter ties generally create more white space in the design.
Pro Tip: For a more defined pattern, ensure your folds and ties are very tight. Looser ties will result in more blended, less distinct designs. Don’t be afraid to experiment!
Step 4: Prepare and Apply the Dye
This step brings your design to life with color. Work carefully to avoid unwanted color mixing.
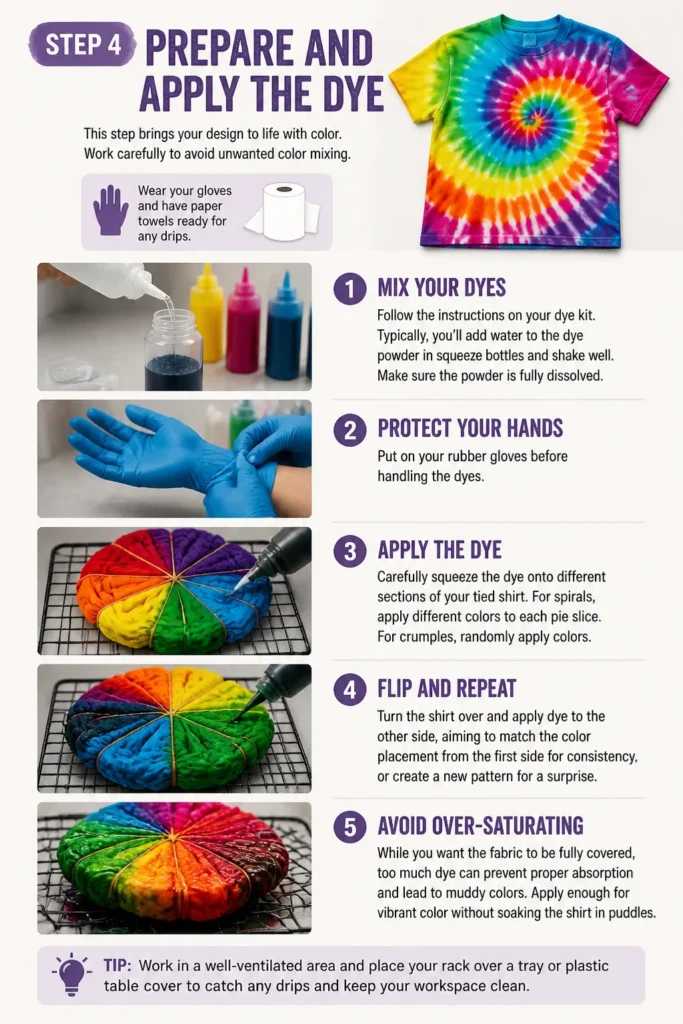
Wear your gloves and have paper towels ready for any drips.
- Mix your dyes: Follow the instructions on your dye kit. Typically, you’ll add water to the dye powder in squeeze bottles and shake well. Make sure the powder is fully dissolved.
- Protect your hands: Put on your rubber gloves before handling the dyes.
- Apply the dye: Carefully squeeze the dye onto different sections of your tied shirt. For spirals, apply different colors to each “pie slice.” For crumples, randomly apply colors.
- Flip and repeat: Turn the shirt over and apply dye to the other side, aiming to match the color placement from the first side for consistency, or create a new pattern for a surprise.
- Avoid over-saturating: While you want good coverage, don’t drench the shirt. Too much dye can lead to muddy colors when they bleed together excessively.
Step 5: Let It Cure
The curing process is essential for the dye to chemically bond with the fabric fibers. Patience here pays off in vibrant, permanent colors.
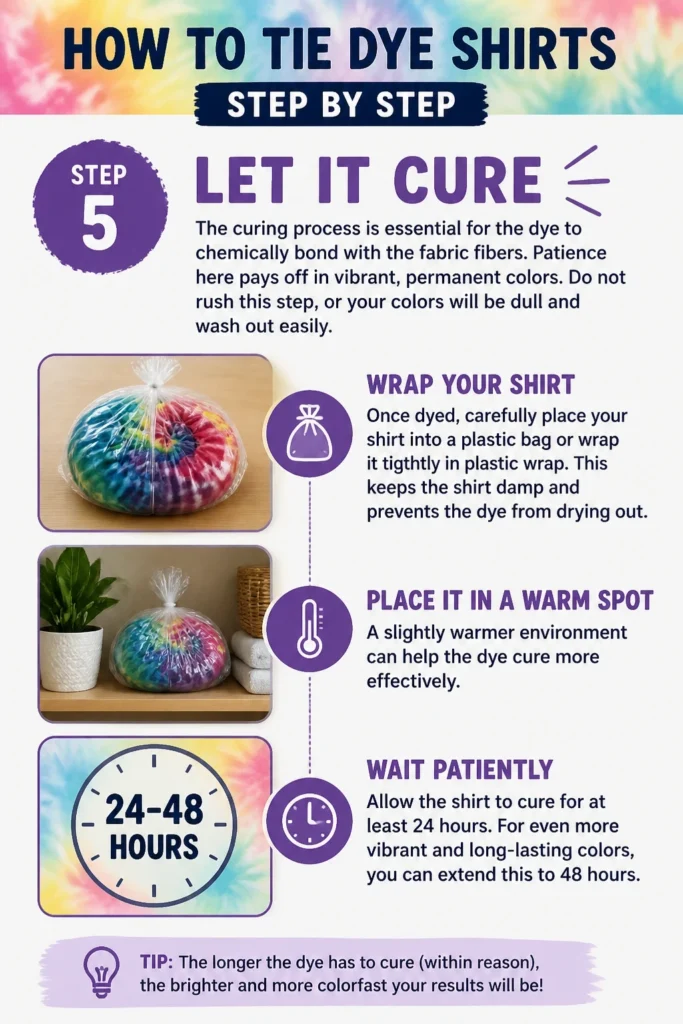
Do not rush this step, or your colors will be dull and wash out easily.
- Wrap your shirt: Once dyed, carefully place your shirt into a plastic bag or wrap it tightly in plastic wrap. This keeps the shirt damp and prevents the dye from drying out.
- Place it in a warm spot: A slightly warmer environment can help the dye cure more effectively.
- Wait patiently: Allow the shirt to cure for at least 24 hours. For even more vibrant and long-lasting colors, you can extend this to 48 hours.
Step 6: Rinse & Wash
This final stage removes excess dye and reveals your finished design. It’s exciting to see the pattern emerge.
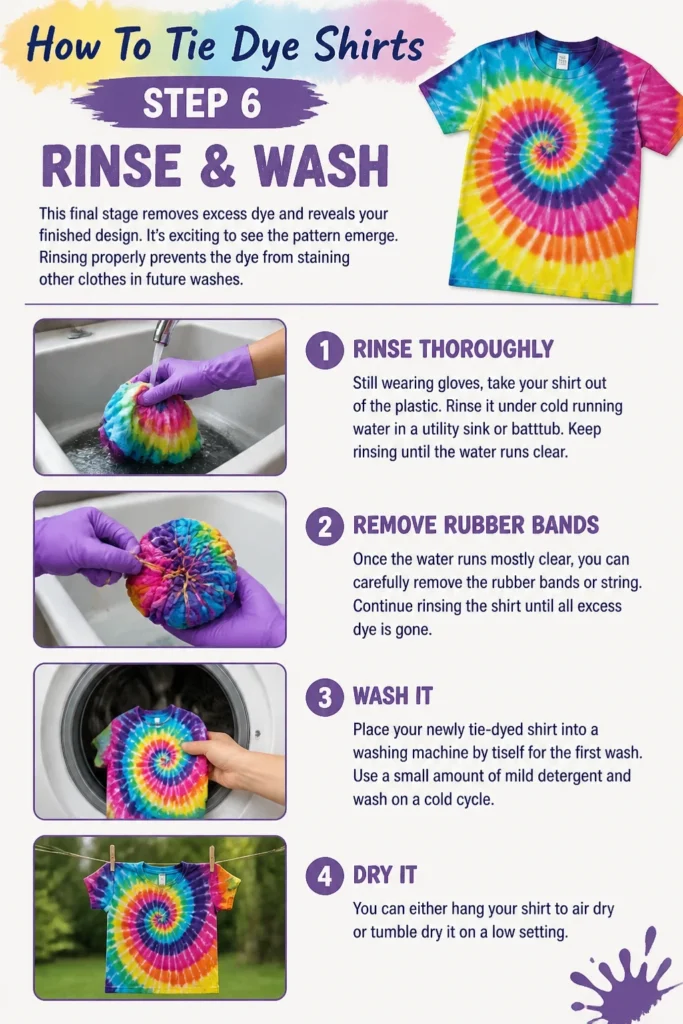
Rinsing properly prevents the dye from staining other clothes in future washes.
- Rinse thoroughly: Still wearing gloves, take your shirt out of the plastic. Rinse it under cold running water in a utility sink or bathtub. Keep rinsing until the water runs clear.
- Remove rubber bands: Once the water runs mostly clear, you can carefully remove the rubber bands or string. Continue rinsing the shirt until all excess dye is gone.
- Wash it: Place your newly tie-dyed shirt into a washing machine by itself for the first wash. Use a small amount of mild detergent and wash on a cold cycle.
- Dry it: You can either hang your shirt to air dry or tumble dry it on a low setting.
Step 7: Enjoy Your Creation
Your unique, hand-crafted tie-dye shirt is now ready to wear! Show off your artistic skills.
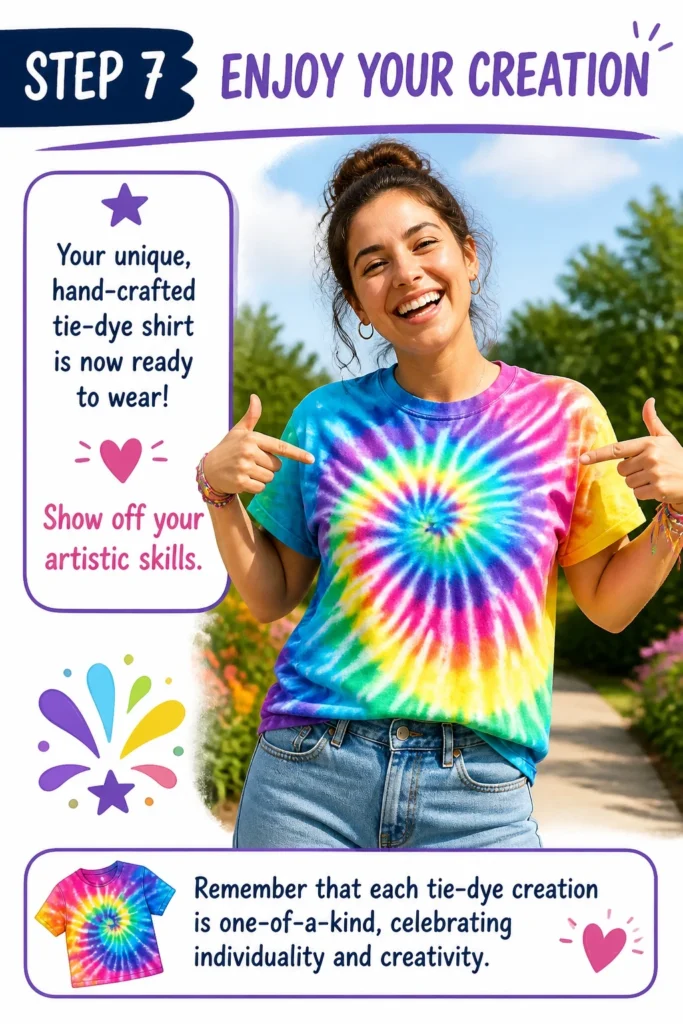
Remember that each tie-dye creation is one-of-a-kind, celebrating individuality and creativity.
Common Mistakes to Avoid
Not Pre-Washing Your Shirt
Many people skip pre-washing, thinking it’s an unnecessary step. However, new fabrics often have “sizing” chemicals or oils from manufacturing.
These substances can act as a barrier, preventing the dye from properly adhering to the fibers, leading to patchy or faded results.
Always wash your shirt with detergent and no fabric softener before applying dye to ensure maximum absorbency and vibrant colors.
Using Too Much Water in Dye Mix
When mixing powdered dyes, it’s tempting to add more water to make the dye last longer. But diluting the dye too much will result in pale, washed-out colors.
The dye-to-water ratio is crucial for color intensity.
Stick to the recommended ratios provided with your dye kit to achieve the vibrant hues you’re hoping for.
Rushing the Cure Time
After applying the dye, it needs time to chemically bond with the fabric. This is called curing or batching.
Removing the plastic wrap and rinsing too early means the dye hasn’t had enough time to set, leading to significant color loss during the first wash.
Always allow a minimum of 24 hours for curing, and even up to 48 hours for the most intense and permanent results.
Over-Dyeing or Muddy Colors
Applying too much dye, or allowing too many colors to overlap excessively, can lead to a muddy, brown, or blackish mess.
When primary colors mix in large quantities, they can neutralize each other.
Apply colors thoughtfully, leaving some white space or ensuring complementary colors are placed strategically to avoid over-saturation and maintain clear, distinct hues.
Troubleshooting
Colors Bleed Too Much
If your tie-dye design looks like a big blur with colors running into each other excessively, it usually means the shirt was too wet when you applied the dye, or you used too much dye.
Ensure your shirt is damp, not soaking wet, after the soda ash soak. Also, apply dye carefully without over-saturating specific areas.
Tighter ties can also help create more distinct boundaries, reducing bleed.
Dye Didn’t Take Well (Pale Colors)
If your colors appear very light or have washed out significantly, several factors might be at play. The most common reason is skipping the soda ash pre-soak, which is essential for fiber-reactive dyes to bond.
Another cause could be insufficient curing time, or using old/expired dyes.
Always use fresh fiber-reactive dyes, pre-soak in soda ash, and allow a full 24-48 hours for curing to achieve vibrant, lasting results.
Unexpected White Spots
Finding large, unexpected white areas on your finished shirt typically indicates that the rubber bands or ties were too tight, or you didn’t apply enough dye to those specific areas.
While some white space is often desired, excessive white can be disappointing. Next time, try loosening some ties slightly or ensure you’re thoroughly saturating all folded areas with dye, especially at the edges of tied sections.
Key Takeaways
- Always pre-wash your shirt and use a soda ash pre-soak for vibrant, lasting colors.
- Work with a damp shirt for easier folding and better dye penetration.
- Tight ties create more defined patterns and white spaces.
- Apply dyes carefully, avoiding over-saturation to prevent muddy colors.
- Allow a full 24-48 hours for the dye to cure for optimal results.
- Rinse thoroughly with cold water until it runs clear before the first wash.
Frequently Asked Questions
What kind of shirts work best for tie-dye?
The best shirts for tie-dye are made from 100% natural fibers, especially cotton. Cotton absorbs dye exceptionally well, leading to bright, vivid colors. Rayon, linen, and hemp also work, but avoid synthetic fabrics like polyester, which do not hold fiber-reactive dyes effectively.
How long does tie-dye last on a shirt?
When done correctly with fiber-reactive dyes and proper curing, tie-dye can last for many years, often as long as the shirt itself. The colors should remain vibrant through numerous washes, though some very minor fading might occur over a long period, similar to any dyed garment.
Can I tie-dye other fabrics besides shirts?
Absolutely! You can tie-dye almost any item made from 100% natural fibers. This includes socks, bandanas, tote bags, pillowcases, bed sheets, and even denim. Just ensure the fabric is suitable for fiber-reactive dyes for the best results.
Is tie-dye safe for kids?
Yes, tie-dye can be a fun and safe activity for kids, with proper supervision. Use non-toxic, kid-friendly dyes, and ensure children wear gloves and old clothes. Set up a well-ventilated workspace and guide them through the steps, especially when handling dyes and rinsing.
Our Top Recommended Finds
- Tulip One-Step Tie-Dye Kit: This kit is perfect for beginners, including pre-measured dyes, soda ash, gloves, and rubber bands in one convenient package.
- Gildan Heavy Cotton T-Shirts: Known for their durability and excellent dye absorption, these 100% cotton shirts are an ideal canvas for tie-dye projects.
- Plastic Drop Cloths: Essential for protecting your workspace, a large plastic drop cloth ensures easy cleanup and prevents dye from staining surfaces.
Start Your Tie-Dye Adventure Today
You now have all the knowledge and steps to create your very own tie-dye masterpiece.
Embrace the process, enjoy the colors, and don’t be afraid to experiment with different patterns and color combinations.
Grab your supplies, pick a sunny afternoon, and transform a plain shirt into a vibrant expression of your creativity!
Beginner-friendly templates, step-by-step guides,
and weekly project ideas in your inbox.