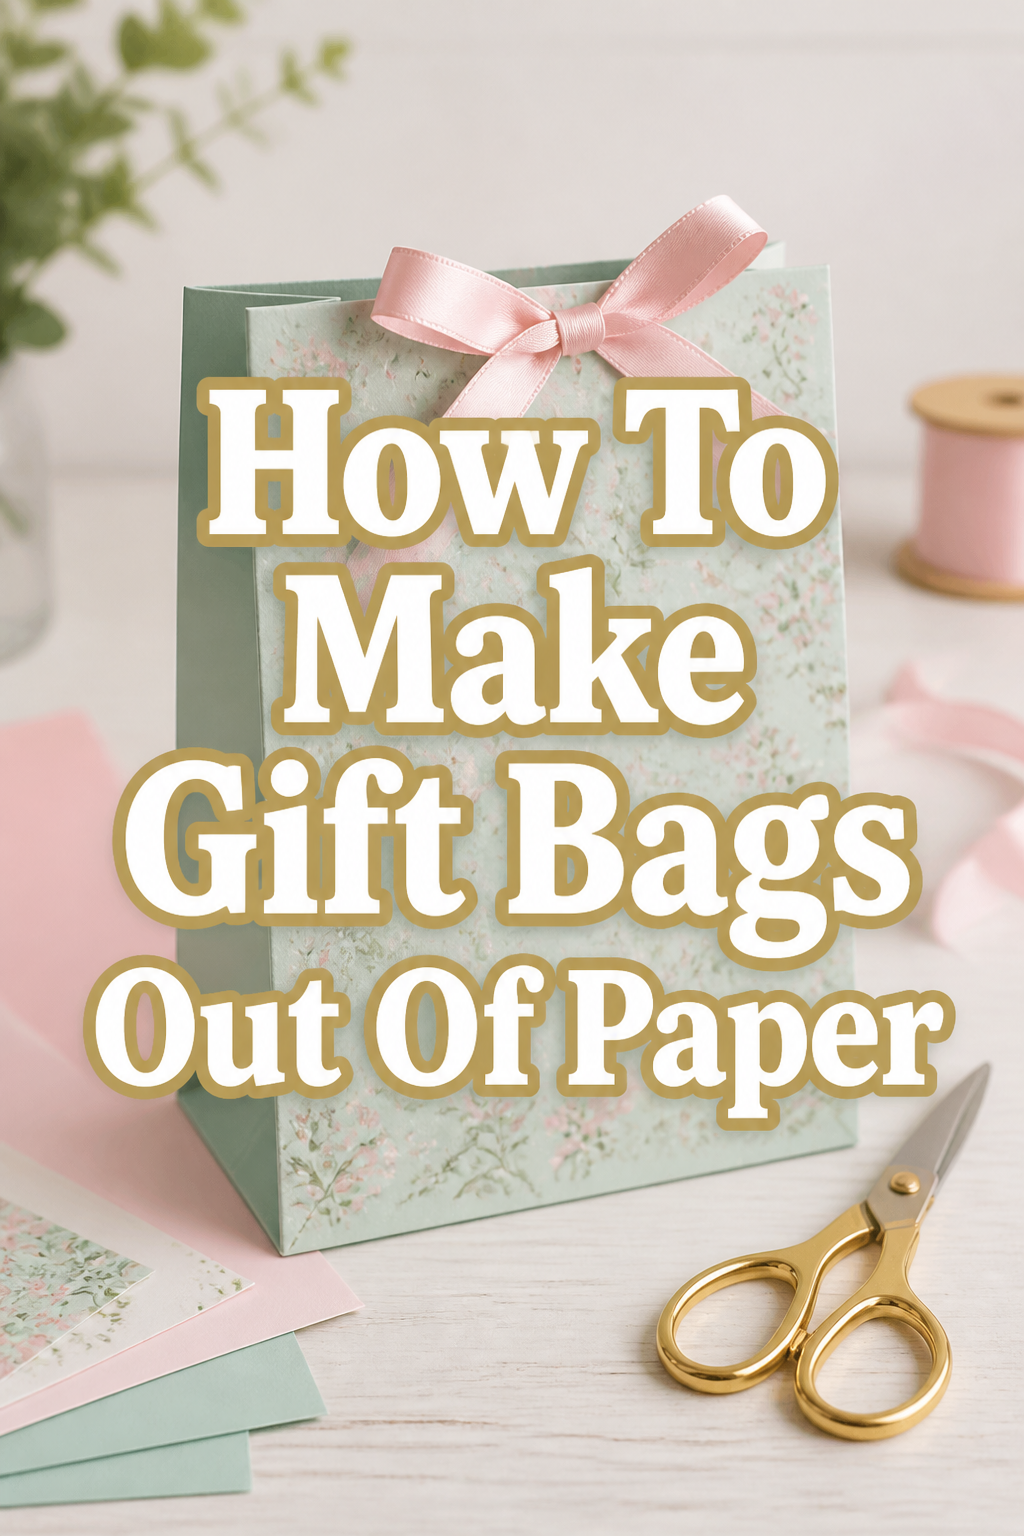
🎁 How To Make Gift Bags Out Of Paper
There’s something truly special about a handmade gift, and presenting it in a custom-made gift bag adds an extra layer of thoughtfulness.
I’ve spent countless hours crafting these bags for birthdays, holidays, and just-because moments, always finding joy in the personal touch they bring.
This guide shares my tried-and-true method, ensuring your gifts stand out beautifully without much fuss.
Quick Overview
You’re about to create charming, sturdy gift bags from simple paper, perfect for any occasion. This project lets you customize colors and patterns to match your gift and recipient perfectly.
- Time needed: 20-40 minutes per bag (depending on experience)
- Difficulty: Beginner
- What you’ll need: Craft paper, ruler, pencil, scissors, glue stick or double-sided tape, hole punch, ribbon or string.
Step-by-Step Instructions
Step 1: Choose Your Paper and Prepare Your Workspace
Select sturdy craft paper, wrapping paper, or even scrapbook paper. The size of your paper will determine the size of your finished bag.
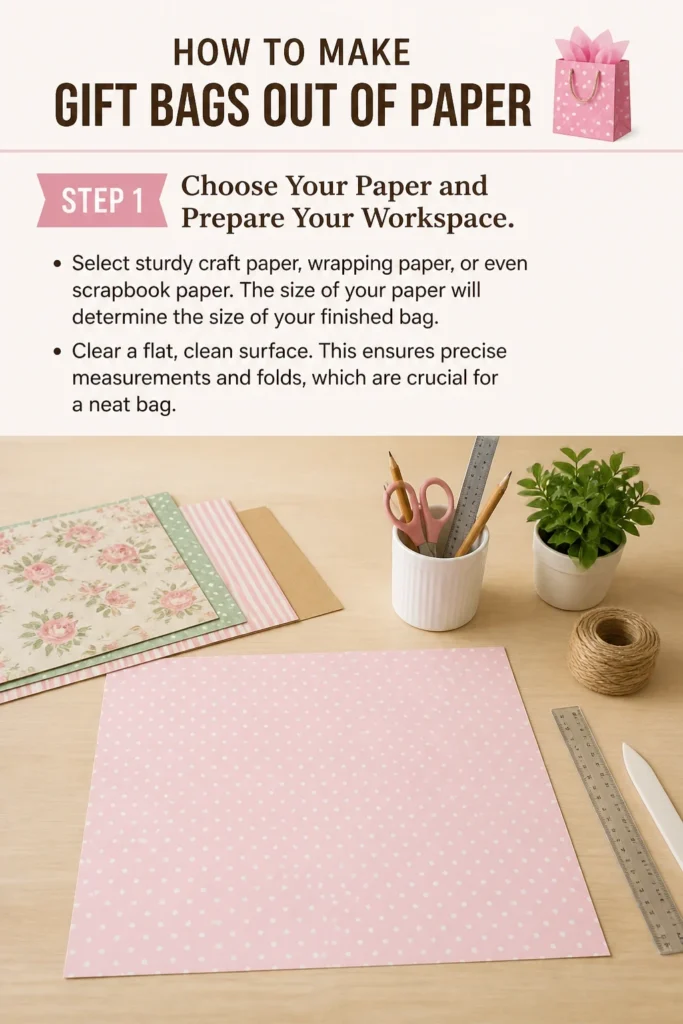
Clear a flat, clean surface. This ensures precise measurements and folds, which are crucial for a neat bag.
Step 2: Measure and Mark the Paper
Lay your chosen paper flat with the decorative side facing down. Use a ruler and pencil for all markings.
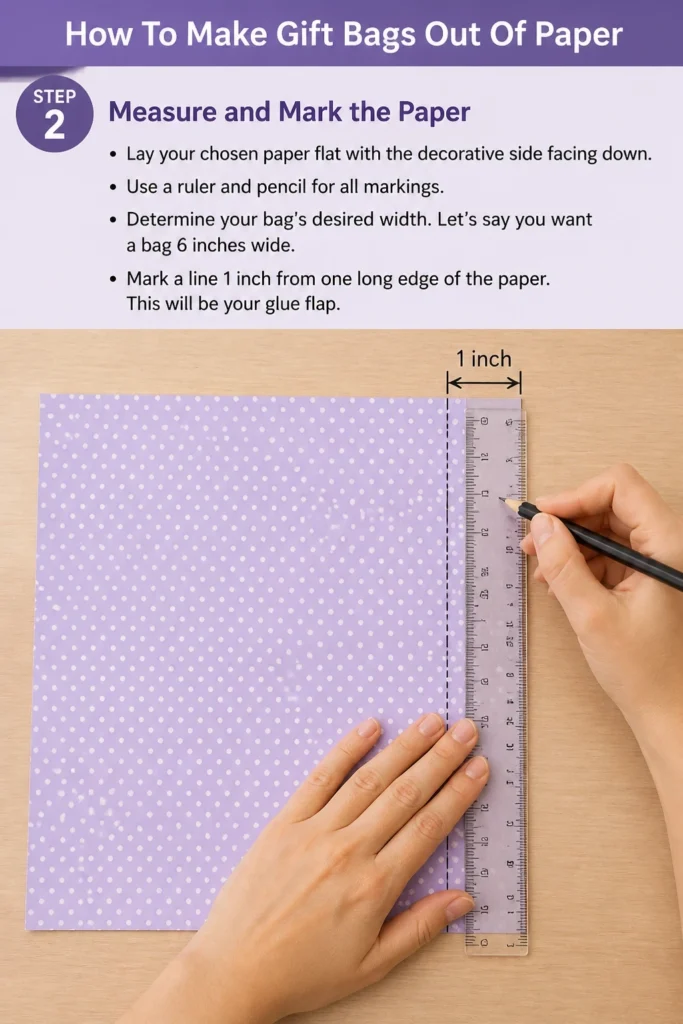
Determine your bag’s desired width. Let’s say you want a bag 6 inches wide. Mark a line 1 inch from one long edge of the paper. This will be your glue flap.
Step 3: Create the Bag’s Body
Fold the paper along the 1-inch mark you just made. This flap will secure the bag’s side.
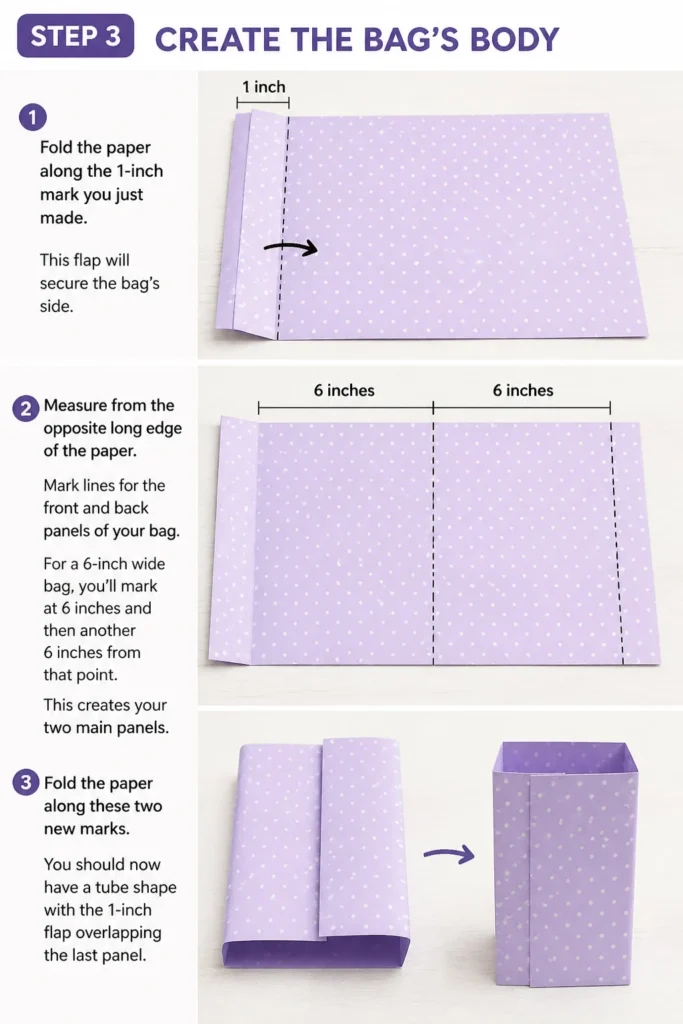
Measure from the opposite long edge of the paper. Mark lines for the front and back panels of your bag. For a 6-inch wide bag, you’ll mark at 6 inches and then another 6 inches from that point. This creates your two main panels.
Fold the paper along these two new marks. You should now have a tube shape with the 1-inch flap overlapping the last panel.
Step 4: Secure the Side Seam
Apply glue or double-sided tape to the 1-inch flap you created in Step 2.
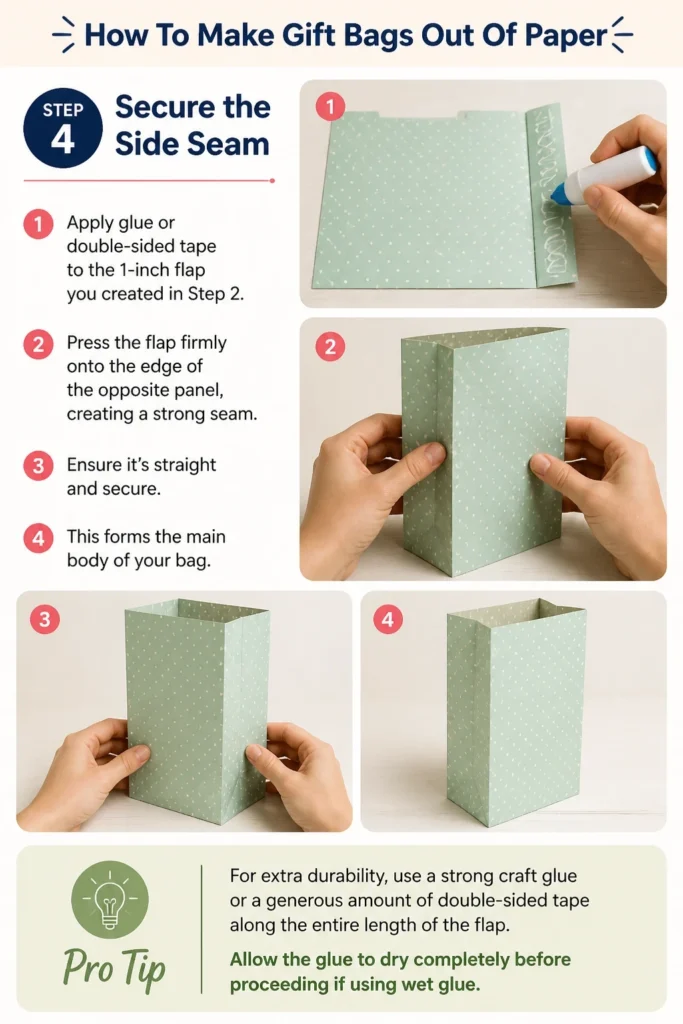
Press the flap firmly onto the edge of the opposite panel, creating a strong seam. Ensure it’s straight and secure. This forms the main body of your bag.
Pro Tip: For extra durability, use a strong craft glue or a generous amount of double-sided tape along the entire length of the flap. Allow the glue to dry completely before proceeding if using wet glue.
Step 5: Form the Bag’s Bottom
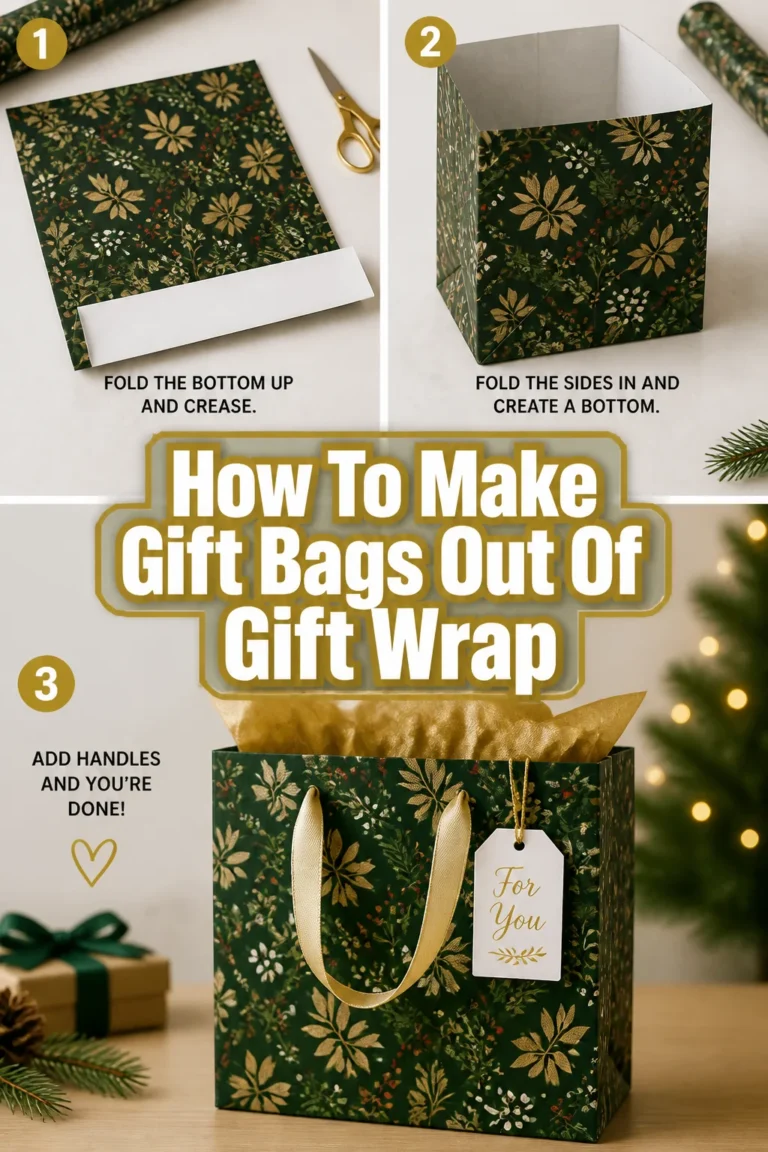
Decide how deep you want the bag’s base to be. A common depth is 2-3 inches for a medium bag. Fold up the bottom edge of your paper tube by this amount.
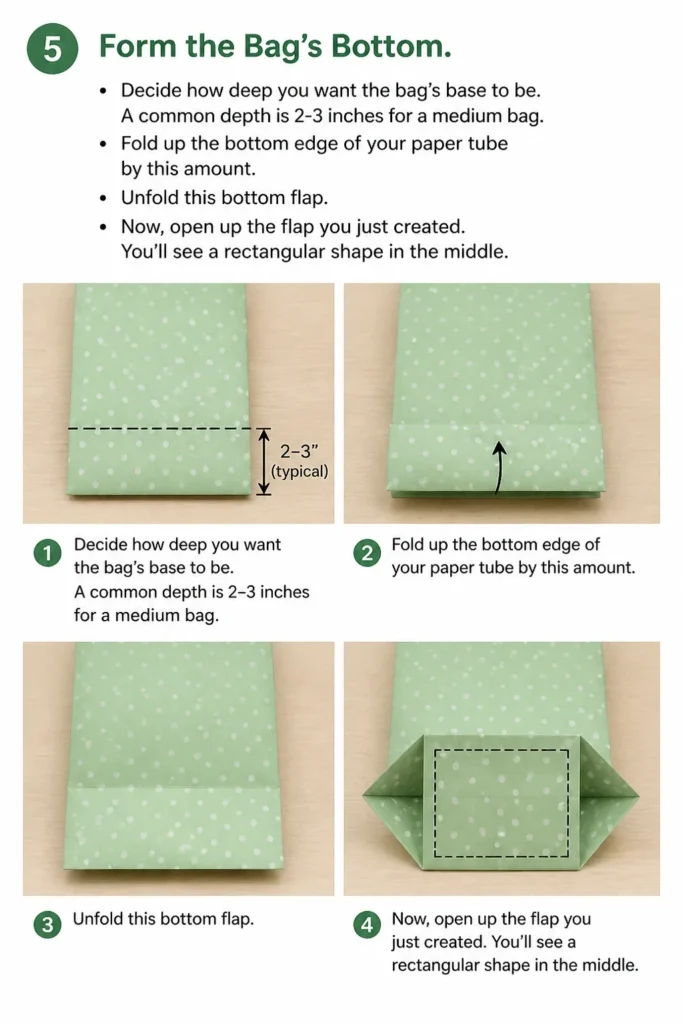
Unfold this bottom flap. Now, open up the flap you just created. You’ll see a rectangular shape in the middle.
Step 6: Create the Bottom Flaps
Fold the two side edges of this rectangular bottom flap inwards towards the center crease. They should meet or almost meet in the middle.
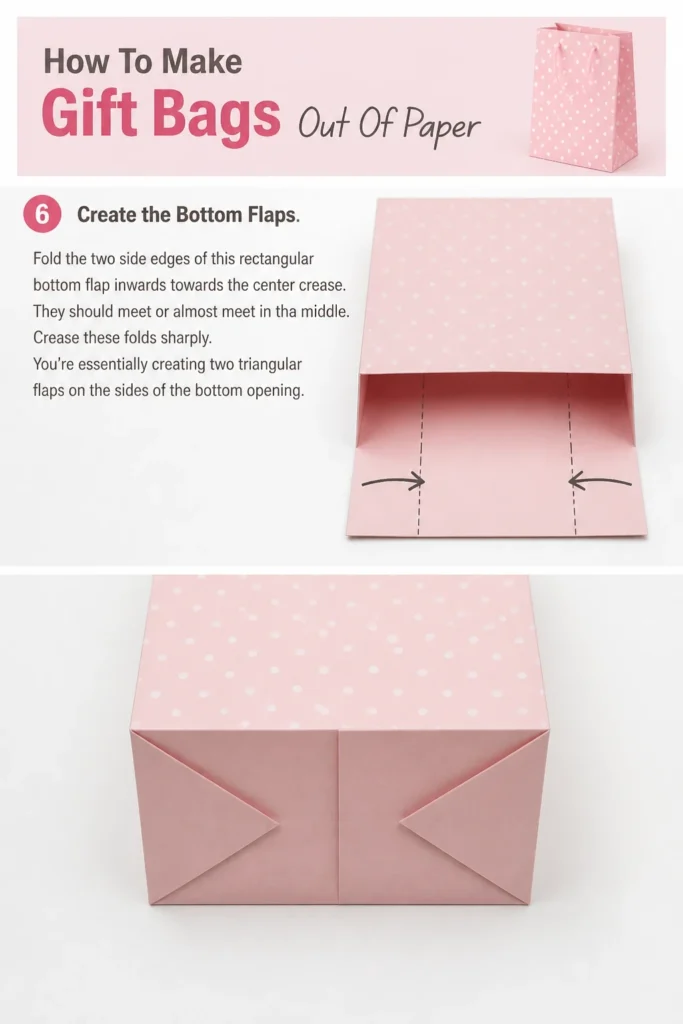
Crease these folds sharply. You’re essentially creating two triangular flaps on the sides of the bottom opening.
Step 7: Secure the Bag’s Base
Fold the top and bottom edges of the bottom flap you opened in Step 5 inwards. They should overlap significantly in the middle.
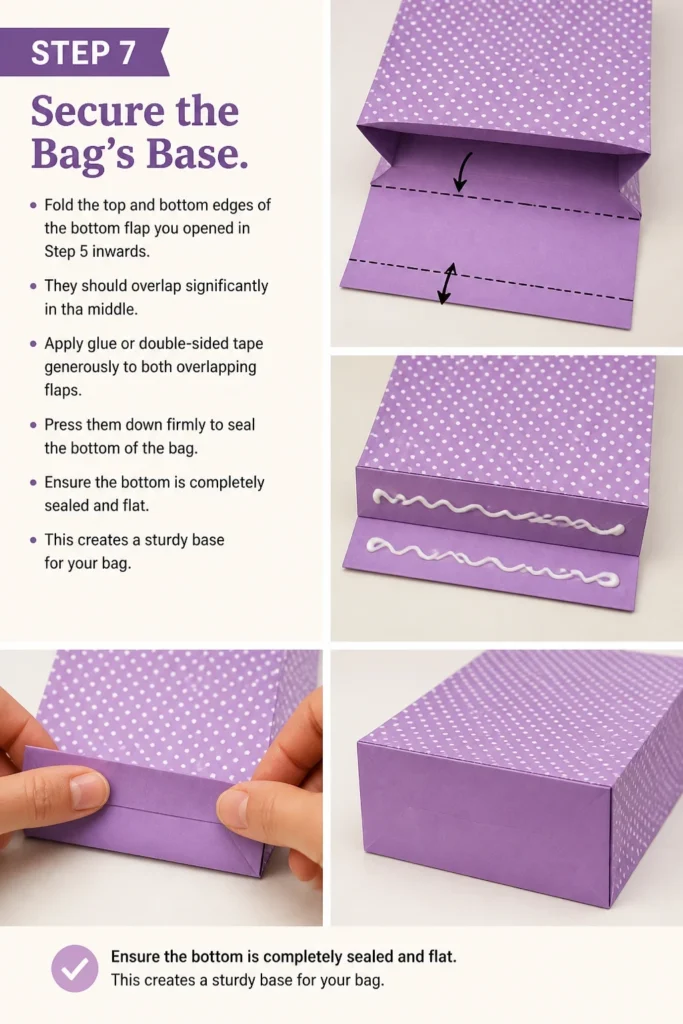
Apply glue or double-sided tape generously to both overlapping flaps. Press them down firmly to seal the bottom of the bag.
Ensure the bottom is completely sealed and flat. This creates a sturdy base for your bag.
Step 8: Shape the Bag
Gently push in the side creases of your bag. These are the folds that will give your bag its depth and structure.
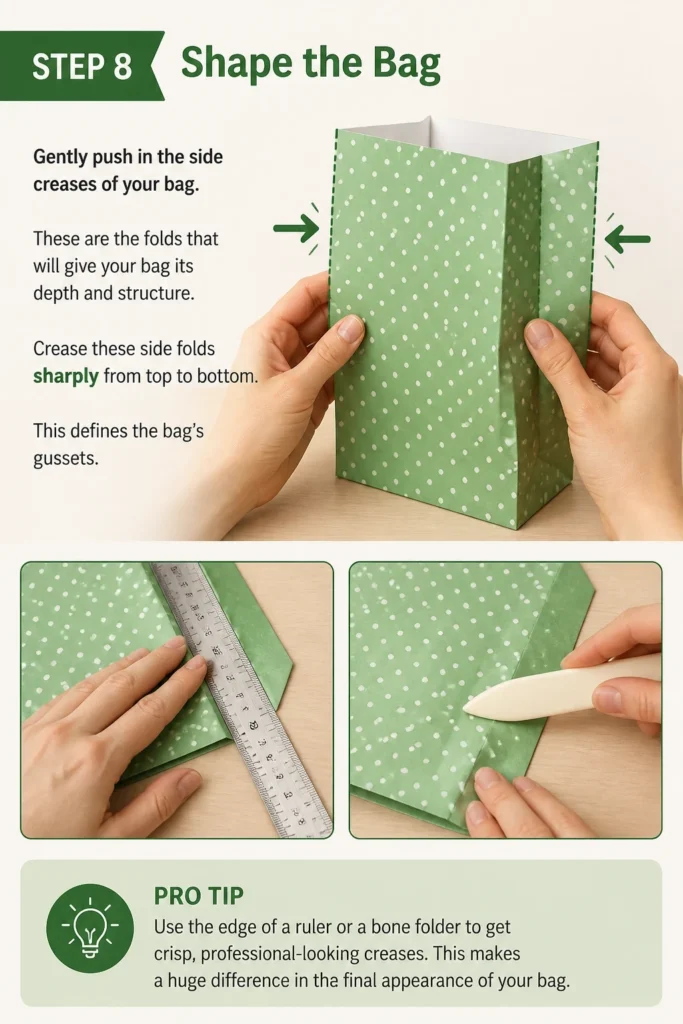
Crease these side folds sharply from top to bottom. This defines the bag’s gussets.
Pro Tip: Use the edge of a ruler or a bone folder to get crisp, professional-looking creases. This makes a huge difference in the final appearance of your bag.
Step 9: Add Handles
Fold down the top edge of your bag by about 1 inch. This creates a reinforced top rim.
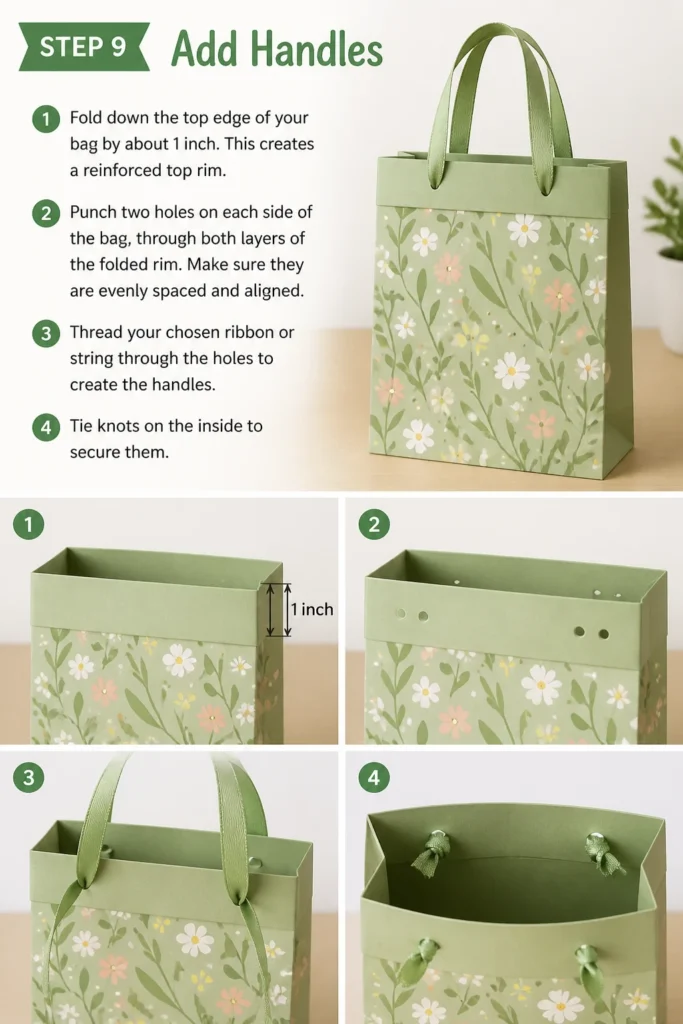
Punch two holes on each side of the bag, through both layers of the folded rim. Make sure they are evenly spaced and aligned.
Thread your chosen ribbon or string through the holes to create the handles. Tie knots on the inside to secure them.
Step 10: Personalize Your Bag
Decorate your finished gift bag with stickers, stamps, drawings, or tags. Add a personal touch that suits the recipient and occasion.
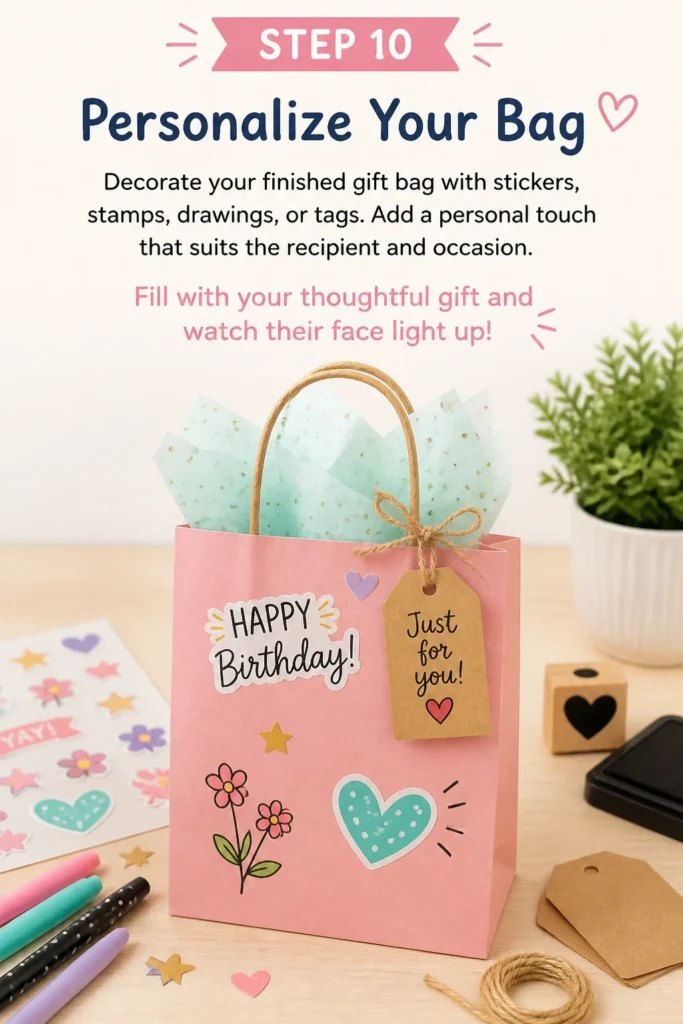
Fill with your thoughtful gift and watch their face light up!
Common Mistakes to Avoid
Using Flimsy Paper
Attempting to make a gift bag with very thin paper, like standard printer paper, often results in a weak and easily torn bag. The paper won’t hold its shape when filled, and handles might rip out. Always opt for cardstock, craft paper, or heavy-duty wrapping paper for better durability and a professional finish.
Inaccurate Measurements
Skipping precise measurements or making uneven folds leads to a crooked, lopsided bag. If your initial panel measurements aren’t exact, the bag won’t form a neat rectangle or stand upright. Take your time with the ruler and pencil, double-checking all dimensions before making permanent creases.
Insufficient Glue or Tape
Not using enough adhesive on the seams, particularly the side and bottom flaps, is a common pitfall. This can cause the bag to fall apart when holding a gift, especially if it has some weight. Be generous with your glue stick or double-sided tape, ensuring full coverage on all overlapping surfaces for a strong, lasting bond.
Rushing the Creasing
Rushing through the folding and creasing stages can leave you with soft, rounded edges instead of crisp lines. This makes the bag look unfinished and less professional. Take the time to press down firmly on each fold, using a bone folder or the edge of a ruler to achieve sharp, defined creases. This structural integrity is key to a well-made bag.
Troubleshooting
Bag Doesn’t Stand Upright
If your bag wobbles or collapses, the base might not be flat or the side gussets aren’t sharply creased. Re-examine the bottom flaps to ensure they are fully adhered and flat. Then, reinforce the side creases by pressing them firmly again, potentially using a ruler to sharpen the fold from top to bottom. A sturdy base and defined sides are essential for stability.
Handles Rip Out Easily
When handles tear, it often means the top rim wasn’t reinforced enough, or the holes were punched too close to the edge. Ensure you’ve folded down the top edge of the bag by at least an inch, creating a double layer of paper. Punch your holes a bit further in from the edge, giving the paper more material to support the ribbon’s pull. You can also add small reinforcement stickers around the holes for extra strength.
Side Seam Comes Apart
A separating side seam indicates insufficient adhesive or not enough drying time. If you used a glue stick, apply more thoroughly and press firmly for at least 30 seconds. If using liquid glue, ensure it’s completely dry before putting any stress on the seam. Double-sided tape is generally very reliable for instant adhesion, but ensure it covers the entire flap.
Key Takeaways
- Choosing the right paper thickness is crucial for a durable and attractive gift bag.
- Accurate measuring and precise folding are the foundation of a professional-looking finished product.
- Reinforce all seams and the top rim for strength, especially where handles will be attached.
- Don’t be afraid to personalize your bag with decorations to make it truly unique.
- Practice makes perfect; each bag you make will improve your technique and speed.
- A well-made paper gift bag adds a heartfelt touch that store-bought options can’t match.
Frequently Asked Questions
Can I make these bags without a hole punch?
Yes, you can! Instead of punching holes for ribbon handles, you can simply fold down the top edge of the bag twice for extra reinforcement. Then, use a strong adhesive to attach paper handles made from strips of the same craft paper. You could also use a sharp pair of scissors to carefully snip small holes, though a punch provides cleaner results.
What’s the best type of glue to use?
For most paper types, a strong glue stick or double-sided adhesive tape works perfectly. Glue sticks are easy to use and less messy, while double-sided tape offers instant, strong adhesion. If you’re working with heavier cardstock or want maximum durability, a craft glue like PVA (white school glue) can be effective, but requires clamping or holding the seams while it dries.
How do I make a bag for an unusually shaped gift?
For odd shapes, consider making a bag with a wider base and less height, or vice versa. The key is to measure your gift first. Add a few inches to its height, width, and depth to determine the dimensions for your paper. You might need to adjust the proportions of your initial paper sheet or the depth of your bottom fold to accommodate the unique item.
Can I reuse these paper gift bags?
Absolutely! One of the great benefits of handmade paper bags is their reusability. If they are gently opened and handled, they can be folded flat and stored for future use. Encourage recipients to reuse them, promoting a more sustainable approach to gift-giving. The durability largely depends on the paper chosen and the care taken during use.
Our Top Recommended Finds
- Heavyweight Craft Paper Assortment: Provides a variety of colors and patterns in a sturdy thickness, perfect for durable bags.
- Precision Scoring Tool and Ruler Set: Helps create perfectly straight and crisp folds, elevating the look of your handmade bags.
- Strong Double-Sided Adhesive Tape: Offers quick, clean, and secure seams without the waiting time of liquid glues.
Craft Your Next Masterpiece
Making your own gift bags is a rewarding project that adds immense personal value to any present.
It’s a practical skill that lets your creativity shine, transforming simple paper into something truly special.
Gather your materials today and start folding; you’ll be amazed at what you can create!