🎀 How To Make A Bow With Ribbon Tutorial

Beginner-friendly templates, step-by-step guides,
and weekly project ideas in your inbox.
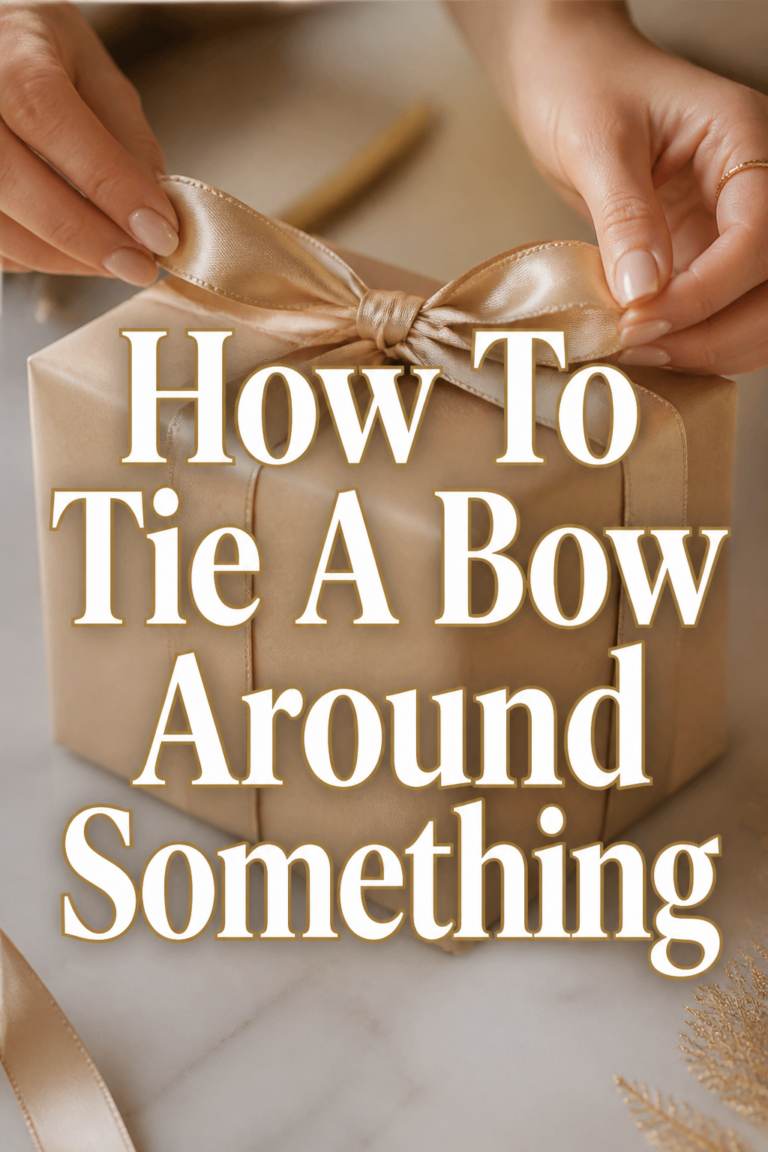
Crafting a beautiful bow from ribbon adds a personal touch to any gift, decoration, or accessory.
It transforms a simple strip of fabric into something elegant and eye-catching.
Having tied countless bows for gifts, wreaths, and even hair accessories, I can assure you this guide will make you a bow-making pro.
Quick Overview
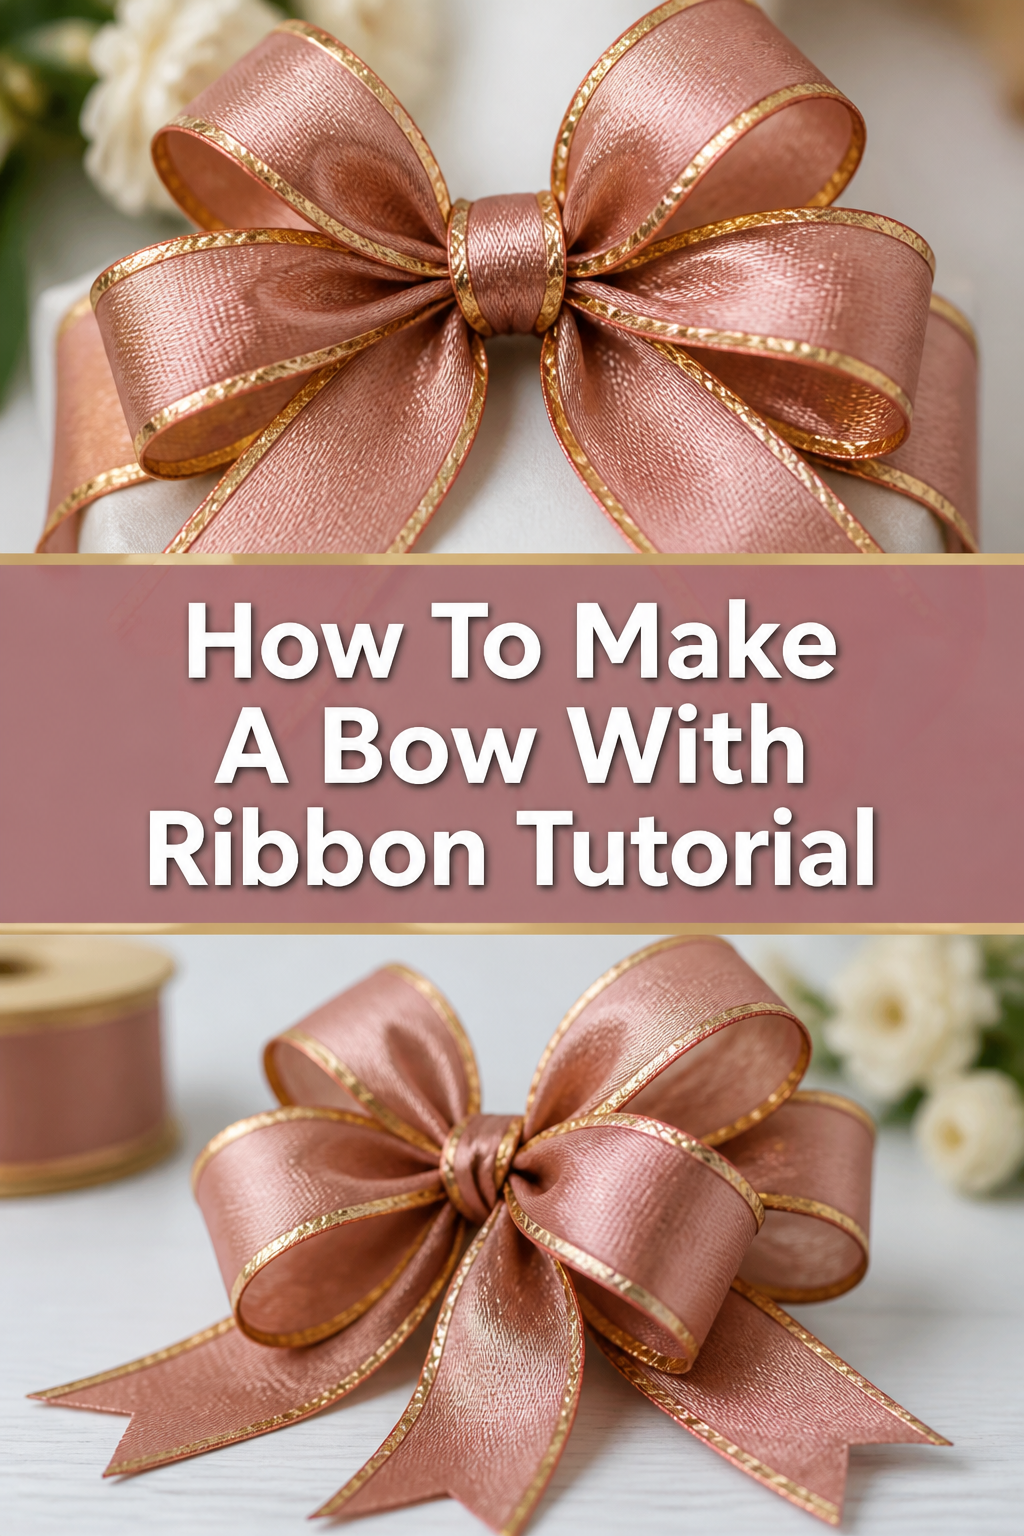
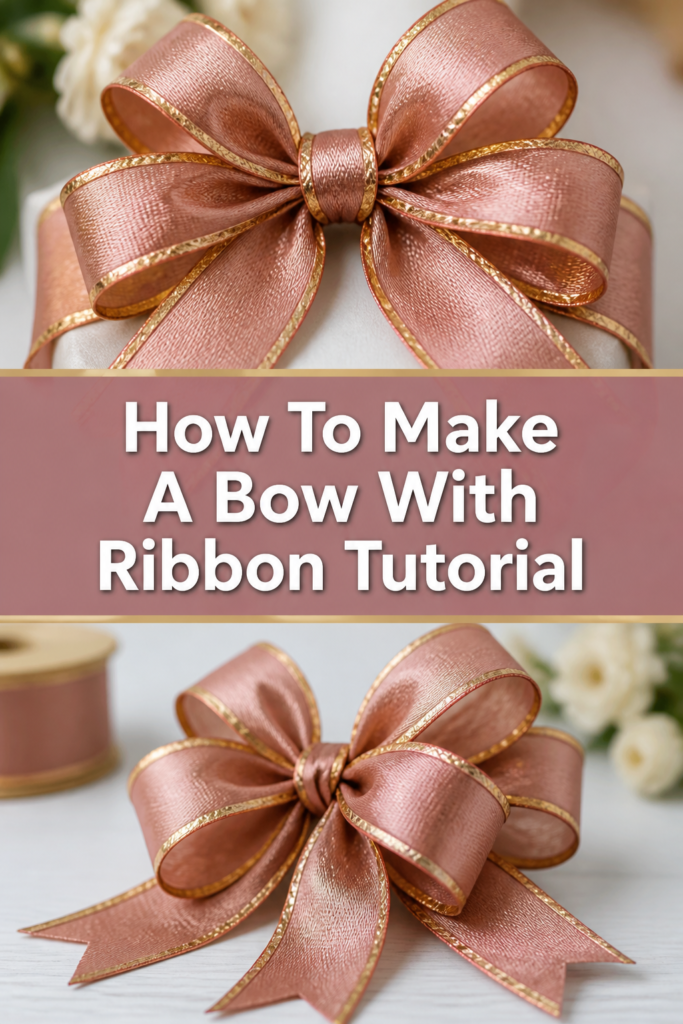
This tutorial will guide you through creating a classic, elegant ribbon bow from scratch.
You’ll learn the fundamental techniques that apply to various ribbon types and bow styles.
By the end, you’ll have a perfectly formed bow ready for any project.
- Time needed: 10-20 minutes (once you get the hang of it)
- Difficulty: Beginner
- What you’ll need: Ribbon, sharp scissors, optional floral wire or thin craft wire
Step-by-Step Instructions
Step 1: Gather Your Materials
Before you begin, ensure you have all your supplies ready and within reach.
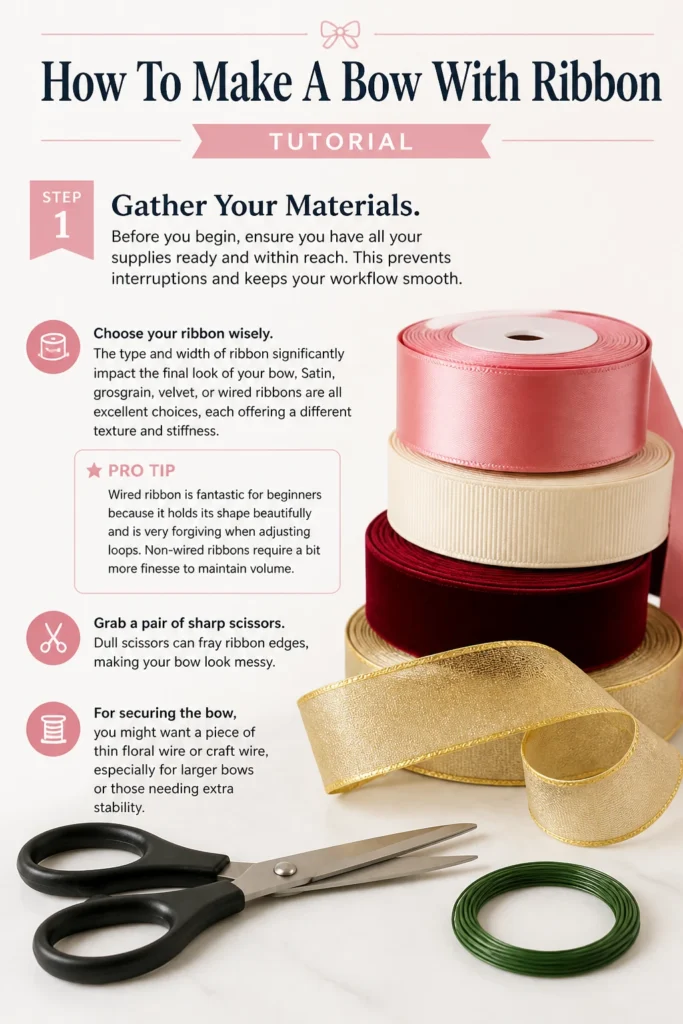
This prevents interruptions and keeps your workflow smooth.
Choose your ribbon wisely. The type and width of ribbon significantly impact the final look of your bow.
Satin, grosgrain, velvet, or wired ribbons are all excellent choices, each offering a different texture and stiffness.
Pro Tip: Wired ribbon is fantastic for beginners because it holds its shape beautifully and is very forgiving when adjusting loops. Non-wired ribbons require a bit more finesse to maintain volume.
Grab a pair of sharp scissors. Dull scissors can fray ribbon edges, making your bow look messy.
For securing the bow, you might want a piece of thin floral wire or craft wire, especially for larger bows or those needing extra stability.
Step 2: Measure and Cut Your Ribbon
Determining the right length of ribbon is crucial for a well-proportioned bow.
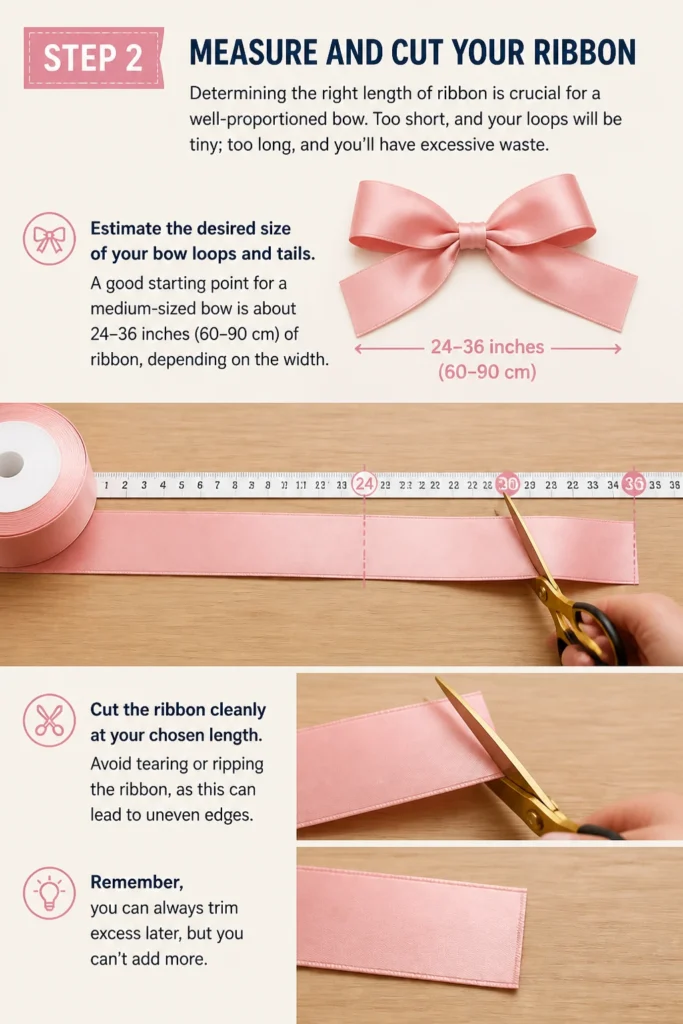
Too short, and your loops will be tiny; too long, and you’ll have excessive waste.
Estimate the desired size of your bow loops and tails.
A good starting point for a medium-sized bow is about 24-36 inches (60-90 cm) of ribbon, depending on the width.
Cut the ribbon cleanly at your chosen length. Avoid tearing or ripping the ribbon, as this can lead to uneven edges.
Remember, you can always trim excess later, but you can’t add more.
Step 3: Create the First Loop
This is where your bow starts to take shape.
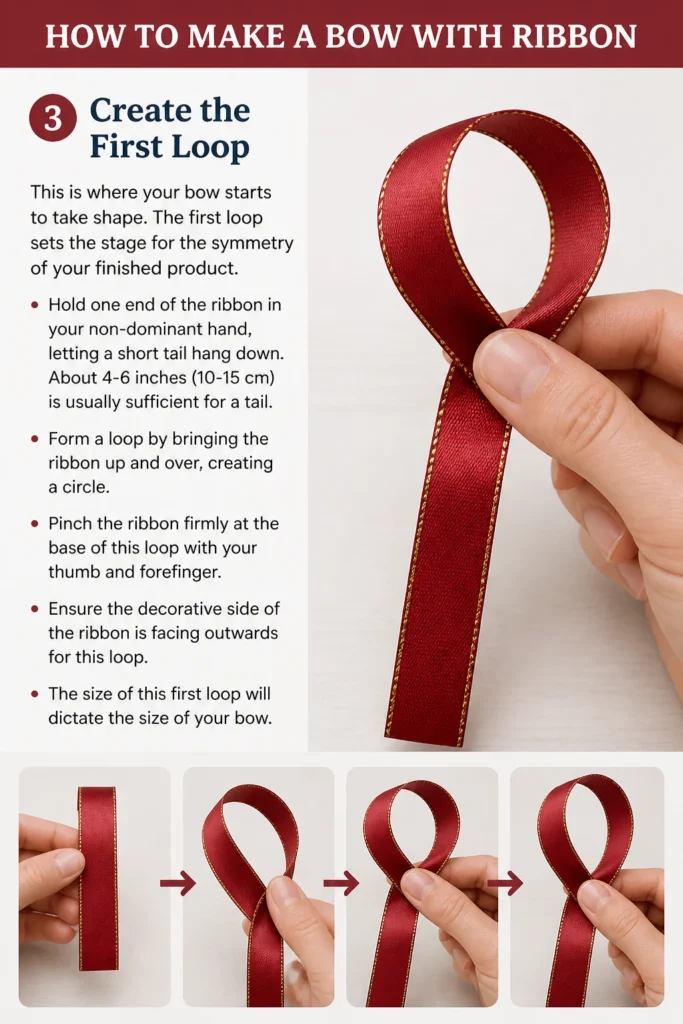
The first loop sets the stage for the symmetry of your finished product.
Hold one end of the ribbon in your non-dominant hand, letting a short “tail” hang down.
About 4-6 inches (10-15 cm) is usually sufficient for a tail.
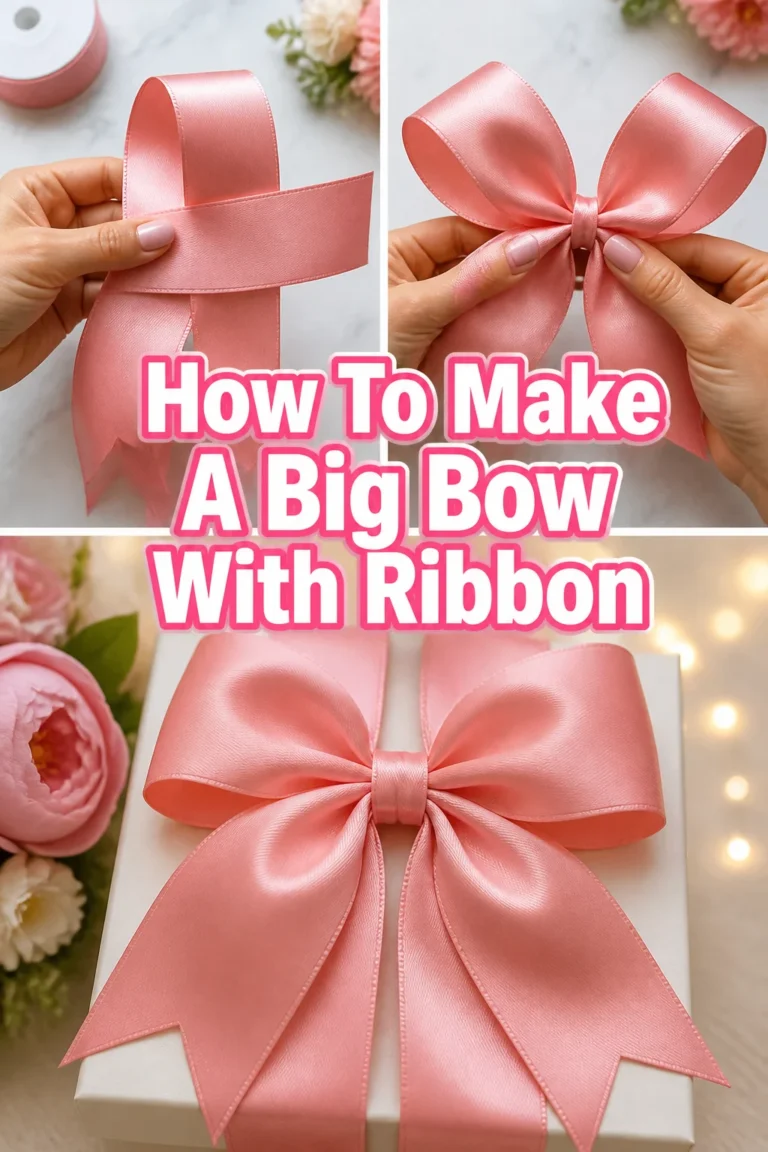
Form a loop by bringing the ribbon up and over, creating a circle.
Pinch the ribbon firmly at the base of this loop with your thumb and forefinger.
Ensure the decorative side of the ribbon is facing outwards for this loop.
The size of this first loop will dictate the size of your bow.
Step 4: Form the Second Loop
Symmetry is key to a beautiful bow.
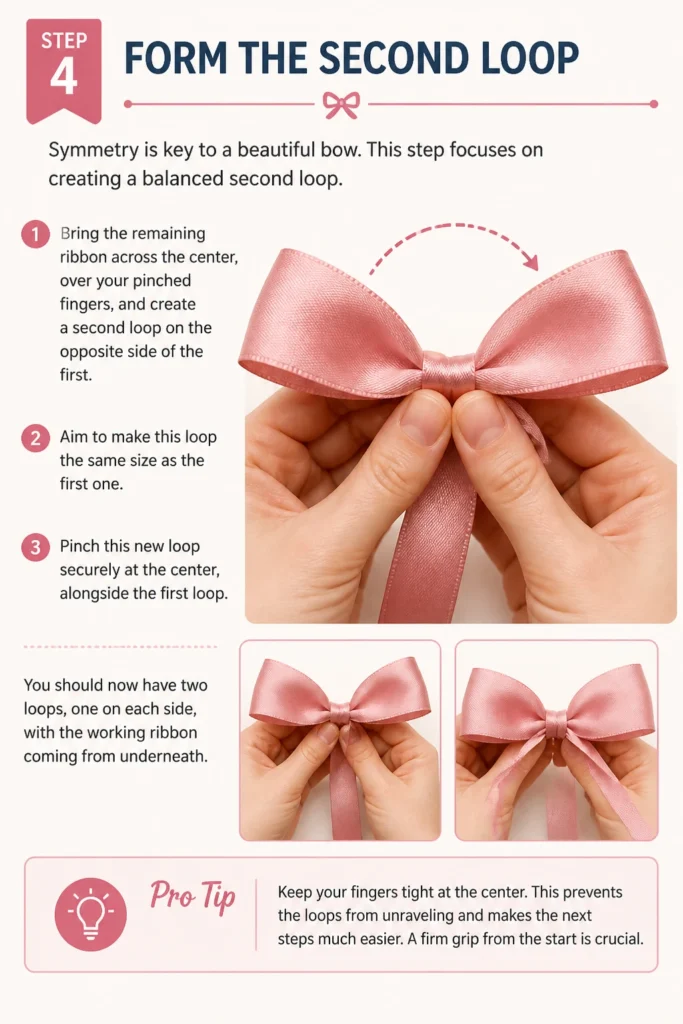
This step focuses on creating a balanced second loop.
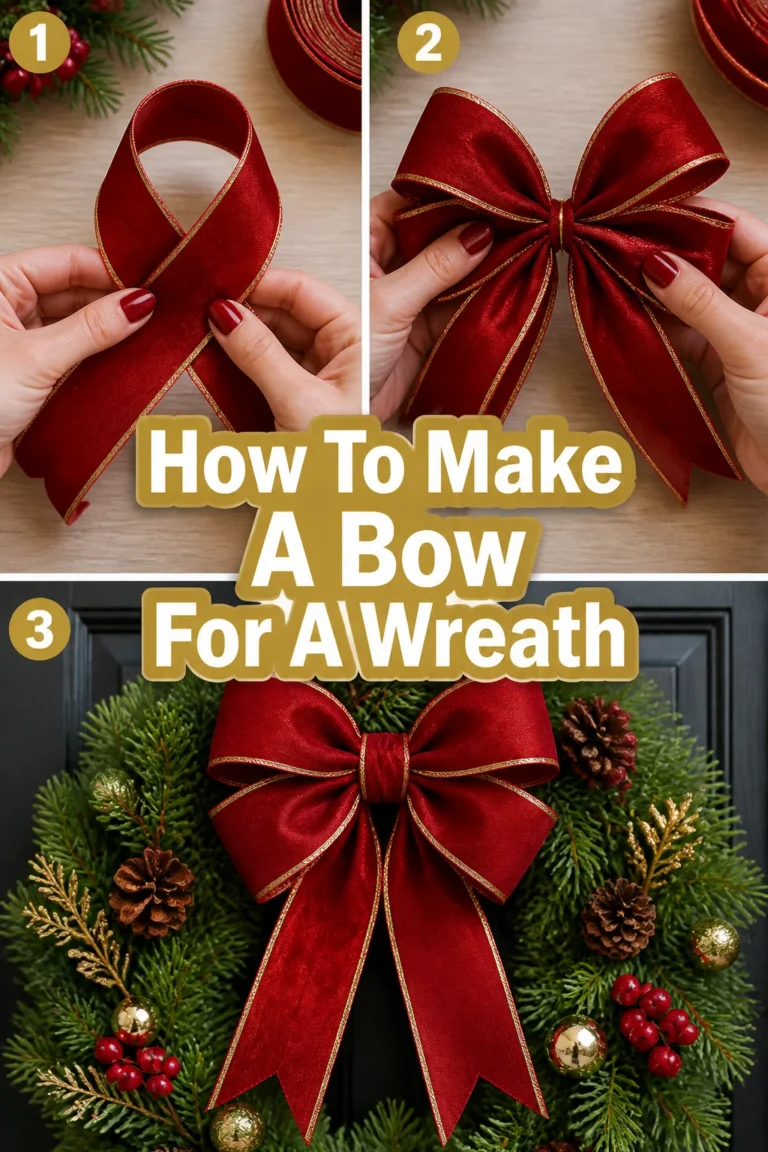
Bring the remaining ribbon across the center, over your pinched fingers, and create a second loop on the opposite side of the first.
Aim to make this loop the same size as the first one.
Pinch this new loop securely at the center, alongside the first loop.
You should now have two loops, one on each side, with the working ribbon coming from underneath.
Pro Tip: Keep your fingers tight at the center. This prevents the loops from unraveling and makes the next steps much easier. A firm grip from the start is crucial.
Step 5: Cross and Secure the Center
This is the moment your loops become a unified bow.
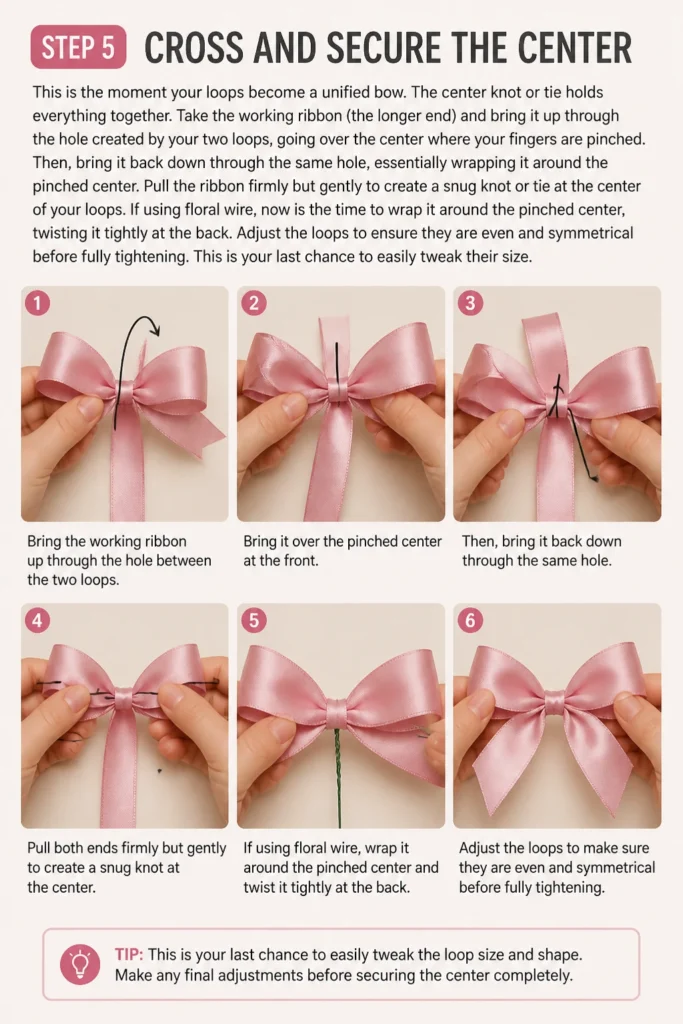
The center knot or tie holds everything together.
Take the working ribbon (the longer end) and bring it up through the hole created by your two loops, going over the center where your fingers are pinched.
Then, bring it back down through the same hole, essentially wrapping it around the pinched center.
Pull the ribbon firmly but gently to create a snug knot or tie at the center of your loops.
If using floral wire, now is the time to wrap it around the pinched center, twisting it tightly at the back.
Adjust the loops to ensure they are even and symmetrical before fully tightening.
This is your last chance to easily tweak their size.
Step 6: Tighten and Adjust
A well-tightened bow holds its shape and looks polished.
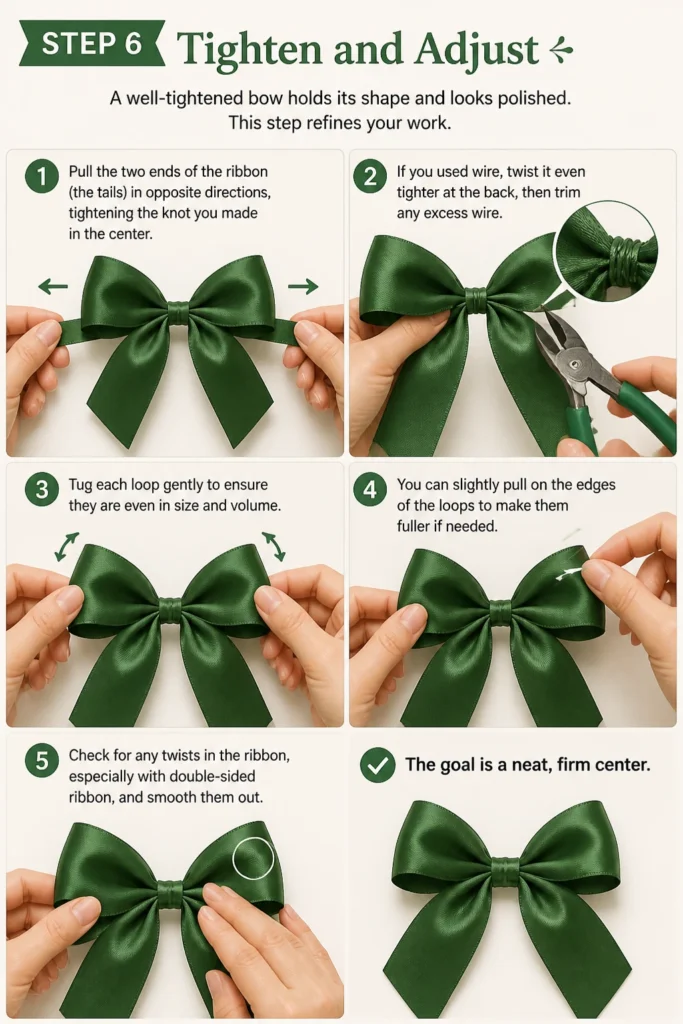
This step refines your work.
Pull the two ends of the ribbon (the tails) in opposite directions, tightening the knot you made in the center.
If you used wire, twist it even tighter at the back, then trim any excess wire.
Gently Tug each loop to ensure they are even in size and volume.
You can slightly pull on the edges of the loops to make them fuller if needed.
Check for any twists in the ribbon, especially with double-sided ribbon, and smooth them out.
The goal is a neat, firm center.
Step 7: Trim the Ends
Finished tails add elegance and prevent fraying.
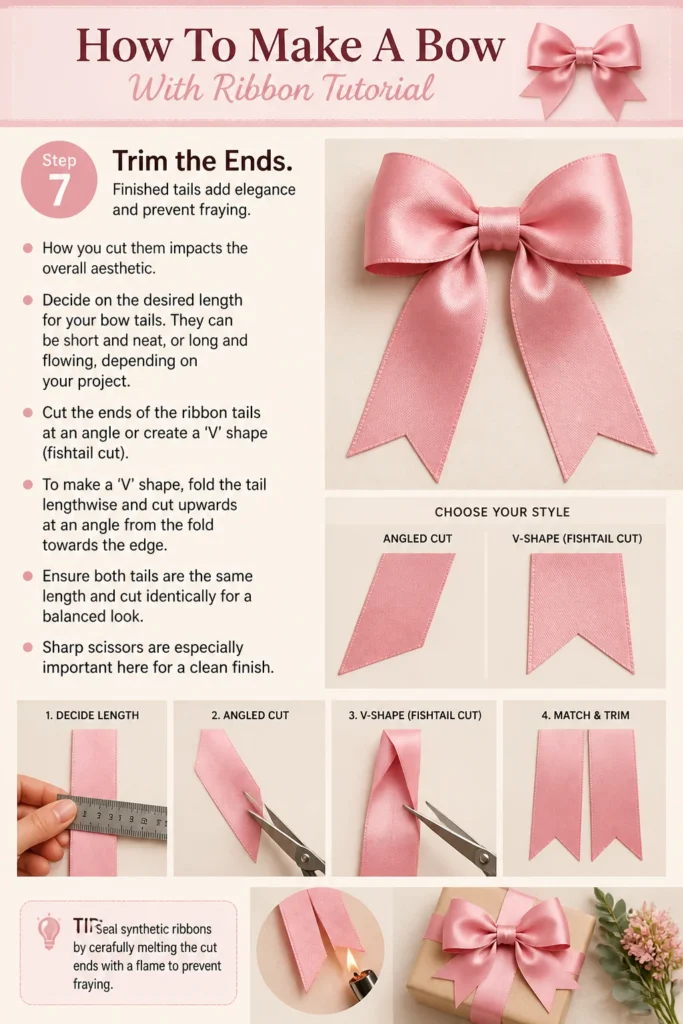
How you cut them impacts the overall aesthetic.
Decide on the desired length for your bow tails.
They can be short and neat, or long and flowing, depending on your project.
Cut the ends of the ribbon tails at an angle or create a ‘V’ shape (fishtail cut).
To make a ‘V’ shape, fold the tail lengthwise and cut upwards at an angle from the fold towards the edge.
Ensure both tails are the same length and cut identically for a balanced look.
Sharp scissors are especially important here for a clean finish.
Step 8: Fluff and Finish
The final touch makes your bow truly shine.
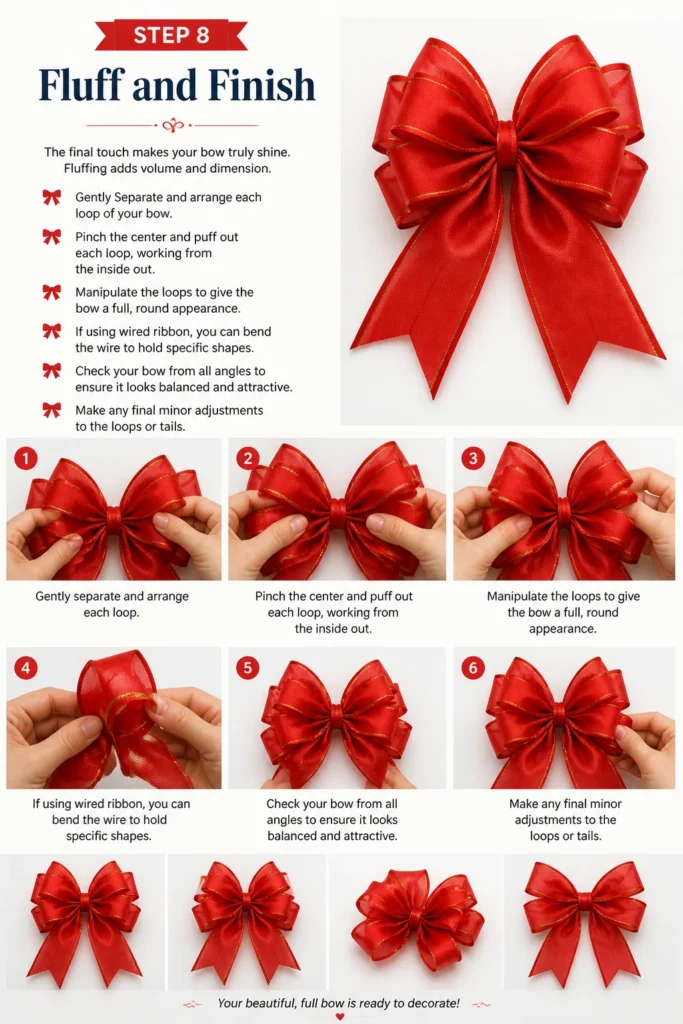
Fluffing adds volume and dimension.
Gently Separate and arrange each loop of your bow.
Pinch the center and puff out each loop, working from the inside out.
Manipulate the loops to give the bow a full, round appearance.
If using wired ribbon, you can bend the wire to hold specific shapes.
Check your bow from all angles to ensure it looks balanced and attractive.
Make any final minor adjustments to the loops or tails.
Common Mistakes to Avoid
Uneven Loops
A common pitfall for beginners is creating loops that aren’t the same size. This makes the bow look lopsided and unprofessional.
To avoid this, always compare your loops as you form them in Step 3 and Step 4. Hold them up against each other and adjust before tightening the center.
Loose Center Knot
If the center of your bow isn’t tight enough, the loops will sag, and the bow won’t hold its shape. It will look flimsy and easily come undone.
Ensure you pull the ribbon or wire very firmly when securing the center in Step 5 and Step 6. Don’t be afraid to apply a good amount of tension to create a secure knot or twist.
Wrong Ribbon Choice
Using a ribbon that’s too flimsy or too stiff can make bow-making difficult and the results disappointing. For instance, a very thin satin might not hold volume well, while a super thick, non-wired ribbon can be hard to manipulate.
Start with a medium-weight ribbon, ideally wired grosgrain or a good quality satin, especially when you’re just learning. As you gain experience, you’ll better understand how different ribbons behave.
Troubleshooting
Bow Looks Lopsided
Even after adjusting, sometimes a bow can still appear a bit off-kilter. This usually stems from uneven tension or loop size during the initial stages.
Loosen the center knot slightly if possible, and re-adjust each loop by gently pulling or pushing the ribbon until they appear balanced. Then, re-tighten the center firmly. Sometimes, a slight twist of the entire bow can also correct a minor tilt.
Ribbon Frays Easily
If your ribbon edges are fraying as you work, it can ruin the clean look of your bow. This is often due to dull scissors or the ribbon type itself.
Always use very sharp fabric scissors specifically for ribbon or fabric. For ribbons prone to fraying (like some satins or organzas), you can lightly seal the cut ends with a tiny dab of clear fabric glue or by briefly passing them near a flame (use extreme caution and only for synthetic ribbons).
Bow Doesn’t Hold Shape
A bow that collapses or sags after you’ve fluffed it often indicates a lack of structure or insufficient tightening at the center.
If you’re using non-wired ribbon, consider using a stiffer ribbon next time or adding a piece of floral wire through the back of the center knot for extra support. For any ribbon, ensure the center is extremely tight. You can also lightly spray the finished bow with hairspray to add a bit of stiffness, especially for fabric-based ribbons.
Key Takeaways
- Always choose a ribbon that suits your project and skill level; wired ribbon is beginner-friendly.
- Measure your ribbon carefully to ensure adequate length for loops and tails.
- Maintain a firm grip on the ribbon’s center throughout the looping process to prevent unraveling.
- Strive for symmetry by making each loop the same size as you form it.
- Tighten the center knot or wire securely to ensure the bow holds its shape.
- Trim tails with sharp scissors, using an angle or ‘V’ cut for a professional finish.
- Fluff your finished bow by gently separating and shaping the loops for maximum volume.
Frequently Asked Questions
What’s the best ribbon for bows?
For beginners, wired ribbon (like wired grosgrain or wired satin) is highly recommended. The wire edges allow you to shape and hold the loops perfectly. For a softer look, double-faced satin or velvet ribbons are beautiful but require a bit more practice to maintain structure.
How do I make a double bow?
To make a double bow, simply repeat the looping process. After forming your first two loops, instead of tying off, continue to create a second set of loops, slightly larger or smaller, behind or in front of the first set. Then, secure all layers together at the center before fluffing.
Can I make a bow without cutting the ribbon?
Yes, you can make a bow directly from a spool, especially useful for wrapping gifts. You’d create the loops and center knot while the ribbon is still attached to the spool, then cut it only after the bow is formed and you’ve determined the tail length. This helps reduce waste.
How do I attach a bow to a gift/hair clip?
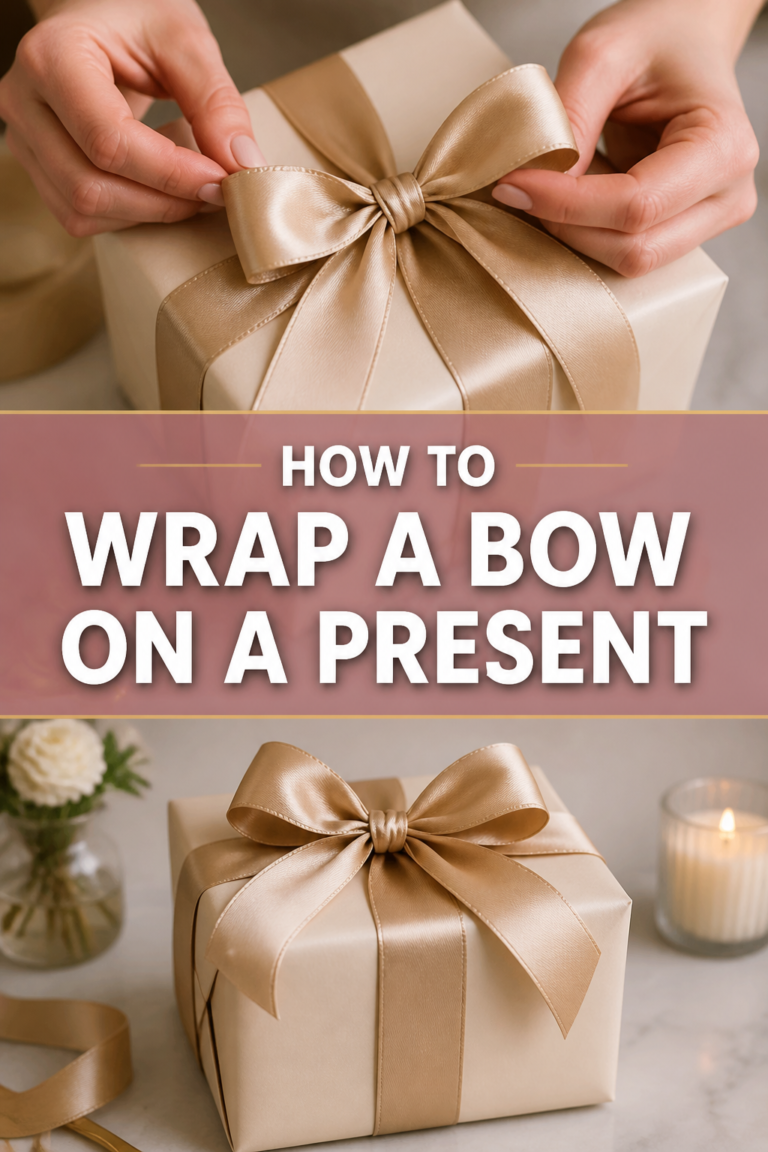
For gifts, you can tie the bow directly around the package, or attach it with double-sided tape or a dot of hot glue. For hair clips, hot glue is ideal. If you used floral wire to secure the center, you can twist the excess wire around a hair clip or use it to attach the bow to a wreath or other decoration.
Our Top Recommended Finds
- Wired Grosgrain Ribbon Assortment: Excellent for beginners, these ribbons offer a good balance of stiffness and flexibility, making them easy to shape and hold.
- High-Quality Fabric Scissors: A sharp pair of scissors ensures clean cuts, preventing fraying and giving your bows a professional edge. Look for ones designed for fabric.
- Thin Floral Wire or Craft Wire: Essential for securing larger bows or for adding structure to softer ribbons, making your bows more durable and shapely.
Unleash Your Inner Craftsperson
You now possess the foundational skills to create beautiful, handcrafted bows.
This simple technique opens up a world of creative possibilities, from gift wrapping to home decor.
Don’t stop here; experiment with different ribbon types, colors, and widths to discover your favorite styles.
Pick up some ribbon today and start practicing. Each bow you make will be better than the last, adding a touch of handmade charm to everything you do.
Beginner-friendly templates, step-by-step guides,
and weekly project ideas in your inbox.