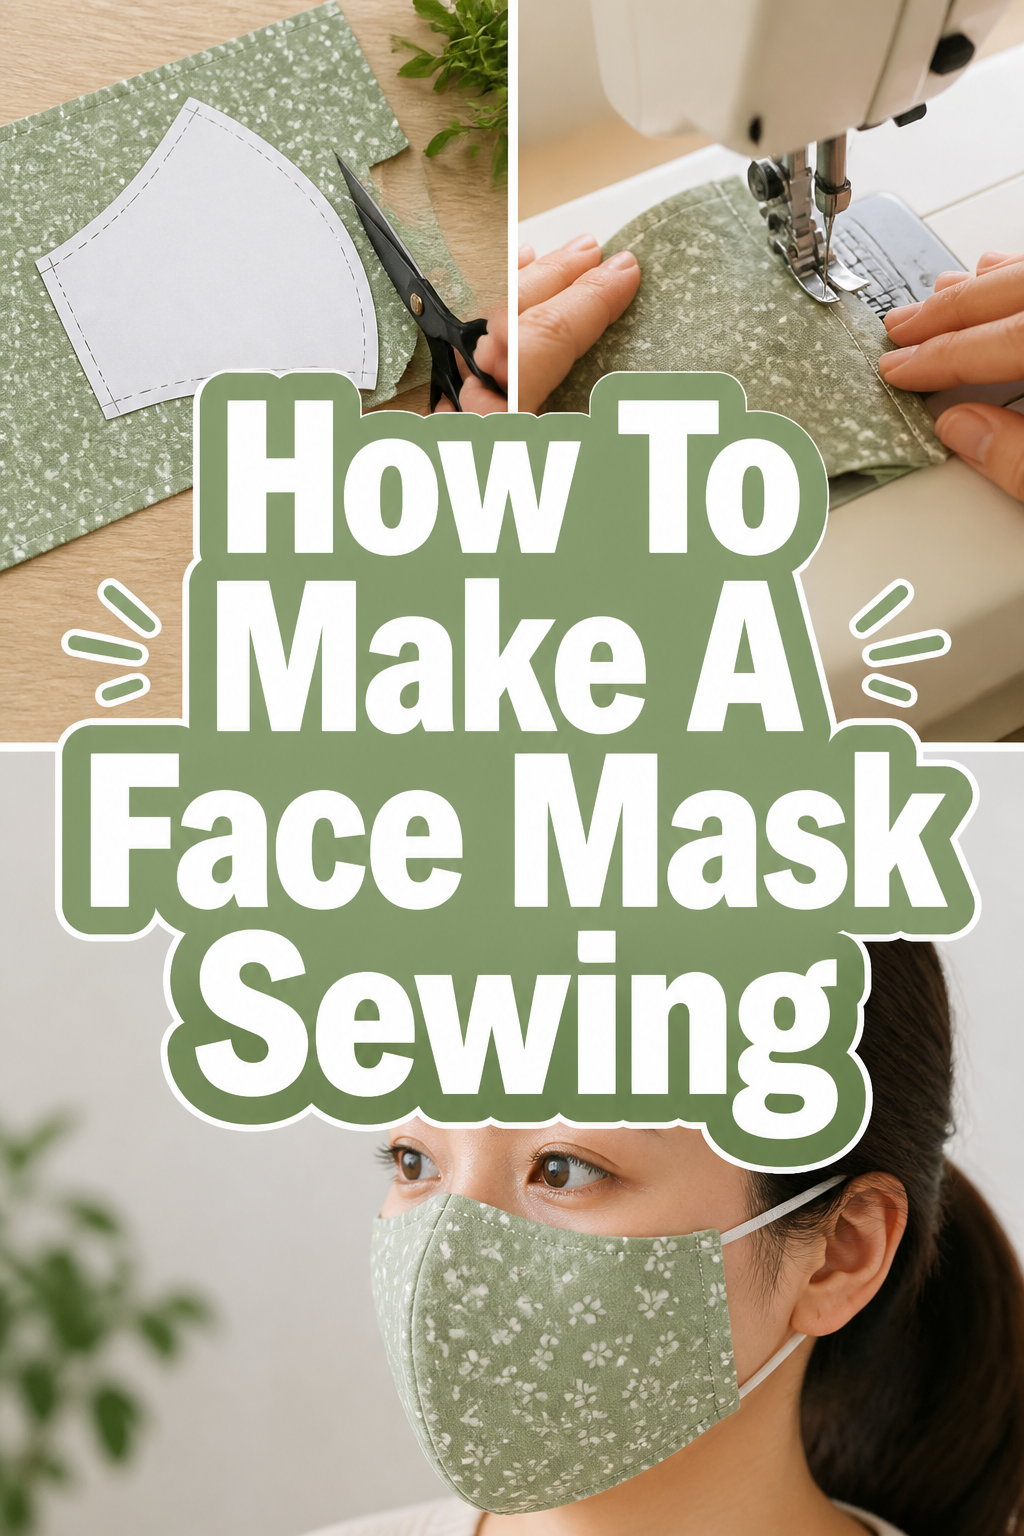
🧵 How To Make A Face Mask Sewing
Learning to sew a face mask can feel like a big step, but it’s a rewarding skill to master. I remember my first attempt, carefully cutting fabric and threading my machine, feeling a real sense of accomplishment when it was done.
This guide shares that hands-on experience, breaking down each part into simple, manageable steps.
You’ll gain the confidence to create your own comfortable and protective masks.
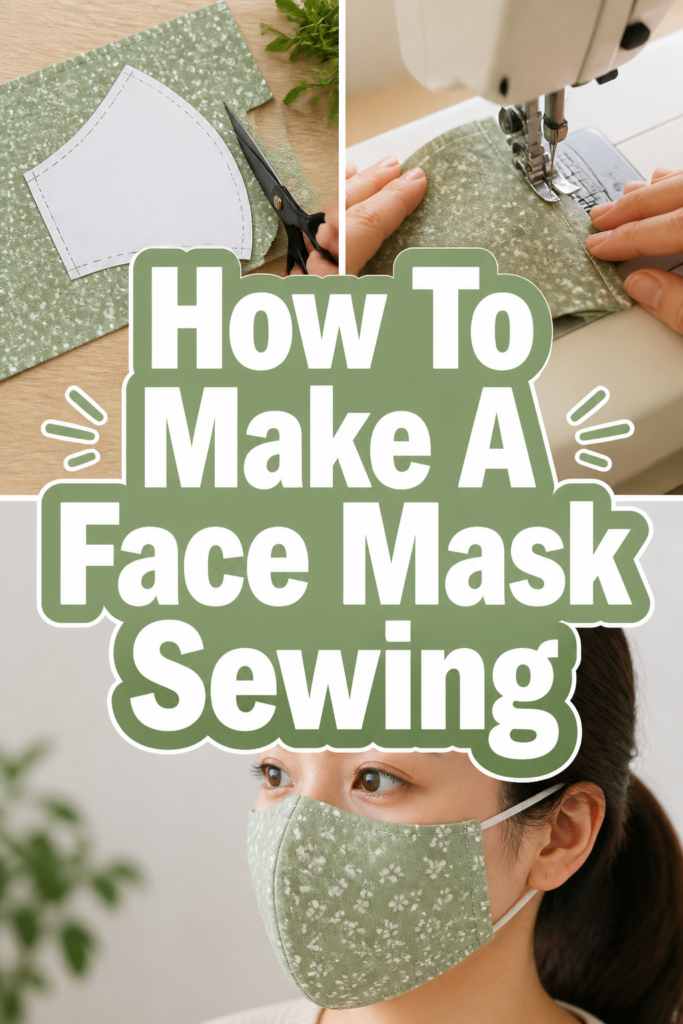
Quick Overview
You’ll learn to sew a functional and reusable face mask, perfect for everyday wear. This project helps you practice basic sewing skills while creating something truly useful.
- Time needed: 1-2 hours for your first mask, faster with practice
- Difficulty: Beginner
- What you’ll need: Cotton fabric, elastic, thread, basic sewing tools
Step-by-Step Instructions
Step 1: Gather Your Materials and Prepare Your Space
Before you begin, collect all necessary items. This ensures a smooth and uninterrupted sewing process. A tidy workspace also helps prevent errors and keeps your tools organized.
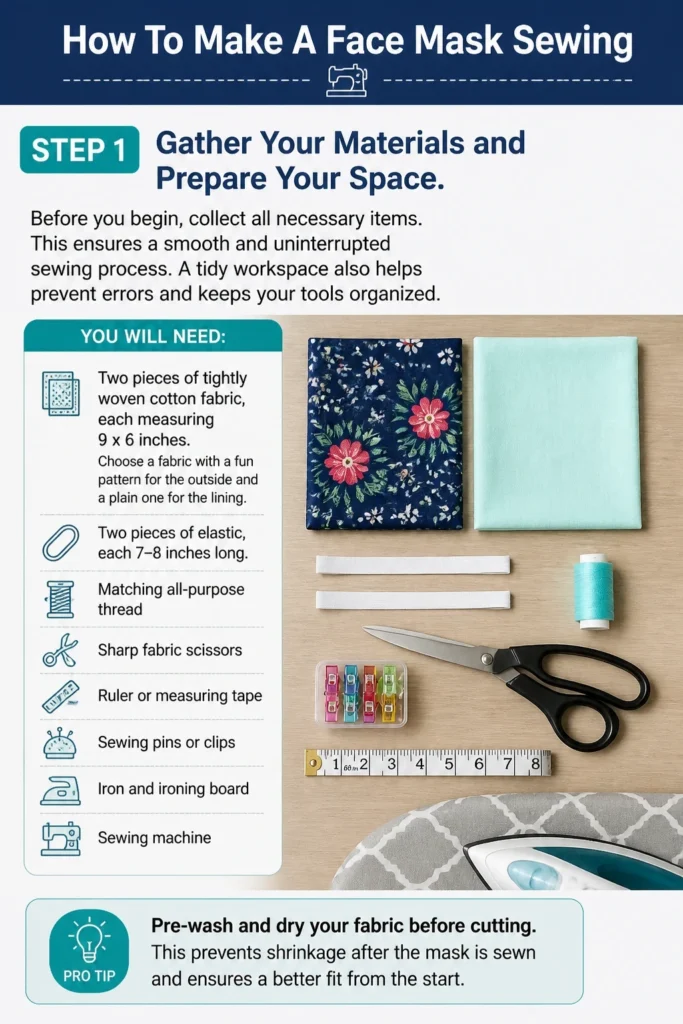
You will need two pieces of tightly woven cotton fabric, each measuring 9×6 inches. Choose a fabric with a fun pattern for the outside and a plain one for the lining.
Gather two pieces of elastic, each 7-8 inches long. You’ll also need matching all-purpose thread, sharp fabric scissors, a ruler or measuring tape, sewing pins or clips, an iron and ironing board, and a sewing machine.
Pro Tip: Pre-wash and dry your fabric before cutting. This prevents shrinkage after the mask is sewn and ensures a better fit from the start.
Step 2: Cut Your Fabric Pieces
Lay your pre-washed and ironed fabric flat. Use your ruler and fabric scissors to accurately cut two rectangles, each 9 inches wide by 6 inches tall.
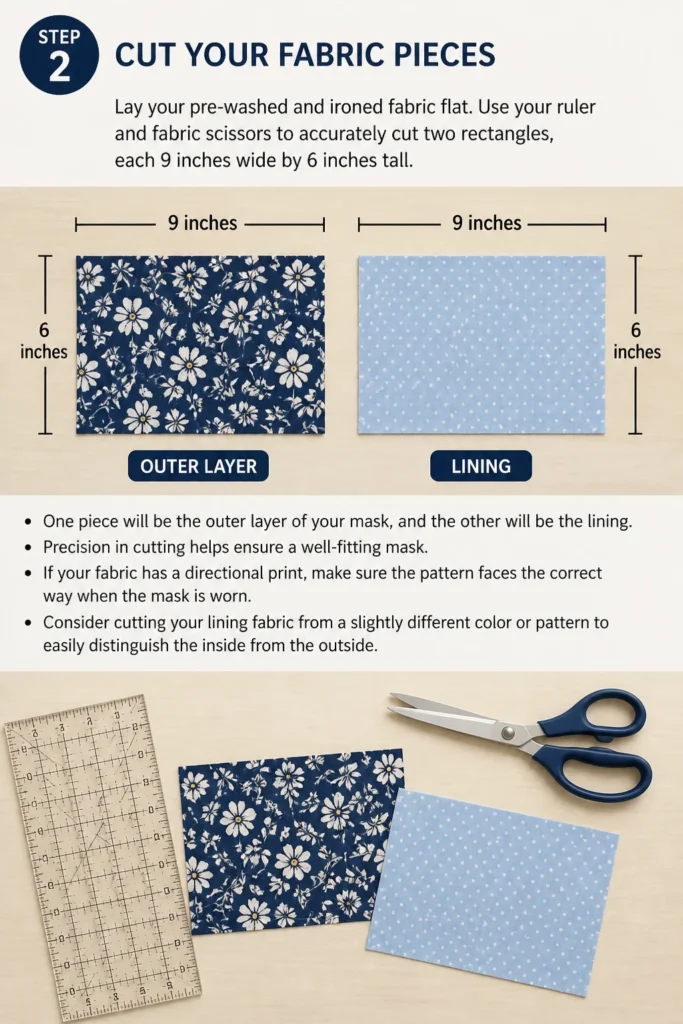
One piece will be the outer layer of your mask, and the other will be the lining. Precision in cutting helps ensure a well-fitting mask.
If your fabric has a directional print, make sure the pattern faces the correct way when the mask is worn. Consider cutting your lining fabric from a slightly different color or pattern to easily distinguish the inside from the outside.
Step 3: Prepare the Pleats
This step creates the contour and flexibility of the mask, allowing it to fit snugly over your face. Take one of your fabric rectangles, which will be the outer layer.
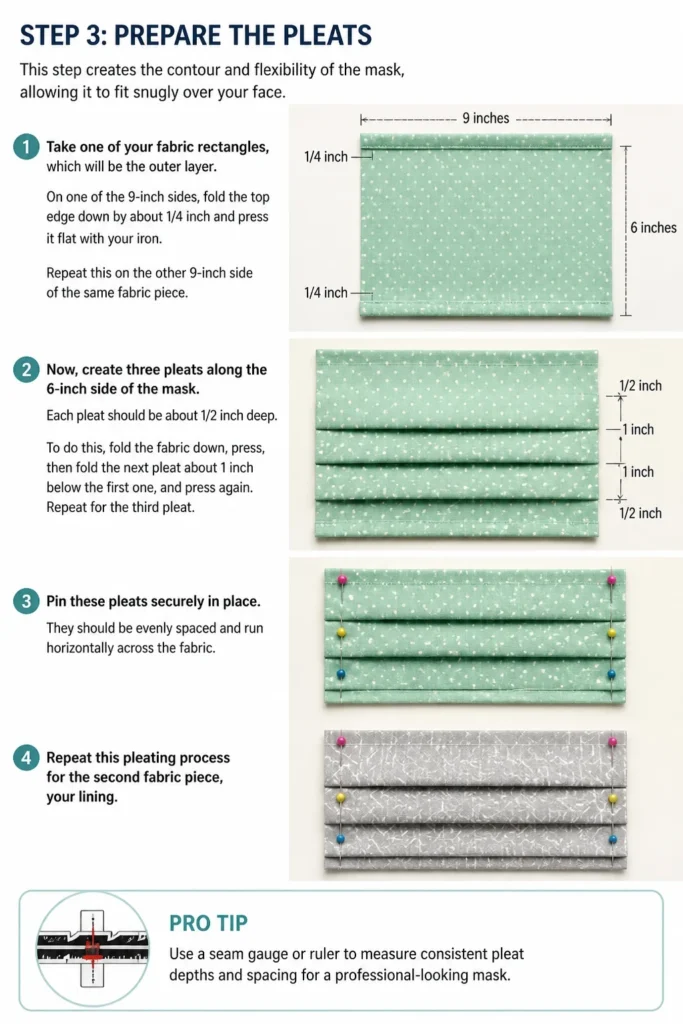
On one of the 9-inch sides, fold the top edge down by about 1/4 inch and press it flat with your iron. Repeat this on the other 9-inch side of the same fabric piece.
Now, create three pleats along the 6-inch side of the mask. Each pleat should be about 1/2 inch deep. To do this, fold the fabric down, press, then fold the next pleat about 1 inch below the first one, and press again. Repeat for the third pleat.
Pin these pleats securely in place. They should be evenly spaced and run horizontally across the fabric. Repeat this pleating process for the second fabric piece, your lining.
Pro Tip: Use a seam gauge or ruler to measure your pleat depths and spacing precisely. Even pleats make for a much neater and more comfortable mask.
Step 4: Attach the Elastic Loops
Now it’s time to add the ear loops. Take one of your 7-8 inch elastic pieces. On the outer fabric piece, pin one end of the elastic to the top corner of a 6-inch side, on the right side of the fabric.
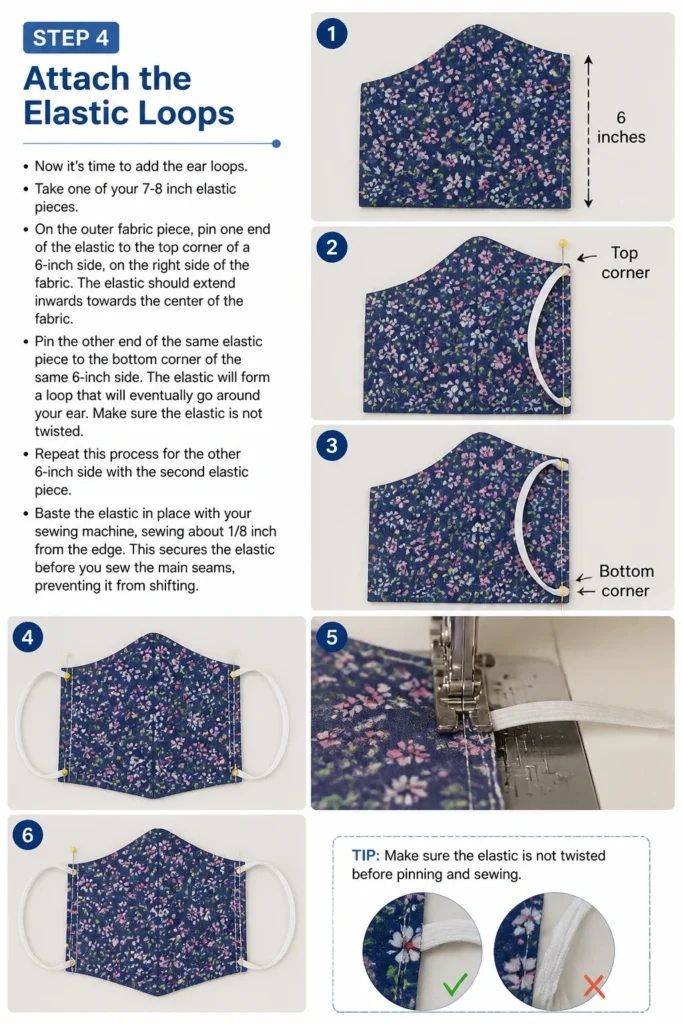
The elastic should extend inwards towards the center of the fabric. Pin the other end of the same elastic piece to the bottom corner of the same 6-inch side.
The elastic will form a loop that will eventually go around your ear. Make sure the elastic is not twisted. Repeat this process for the other 6-inch side with the second elastic piece.
Baste the elastic in place with your sewing machine, sewing about 1/8 inch from the edge. This secures the elastic before you sew the main seams, preventing it from shifting.
Step 5: Sew the Main Mask Layers Together
With the elastic basted, it’s time to join the two fabric pieces. Place your outer fabric piece and your lining fabric piece right sides together.
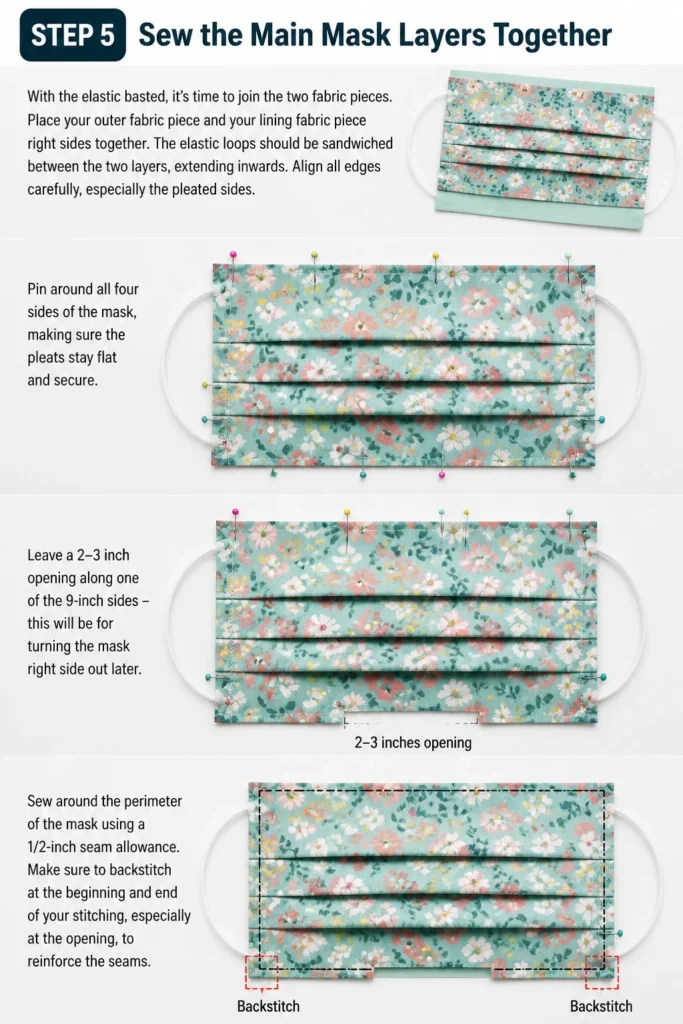
The elastic loops should be sandwiched between the two layers, extending inwards. Align all edges carefully, especially the pleated sides.
Pin around all four sides of the mask, making sure the pleats stay flat and secure. Leave a 2-3 inch opening along one of the 9-inch sides – this will be for turning the mask right side out later.
Sew around the perimeter of the mask using a 1/2-inch seam allowance. Make sure to backstitch at the beginning and end of your stitching, especially at the opening, to reinforce the seams.
Step 6: Finish and Turn
After sewing, trim the corners of your mask. Clip them diagonally close to the stitching, being careful not to cut the stitches themselves. This reduces bulk in the corners, making them sharper when turned.
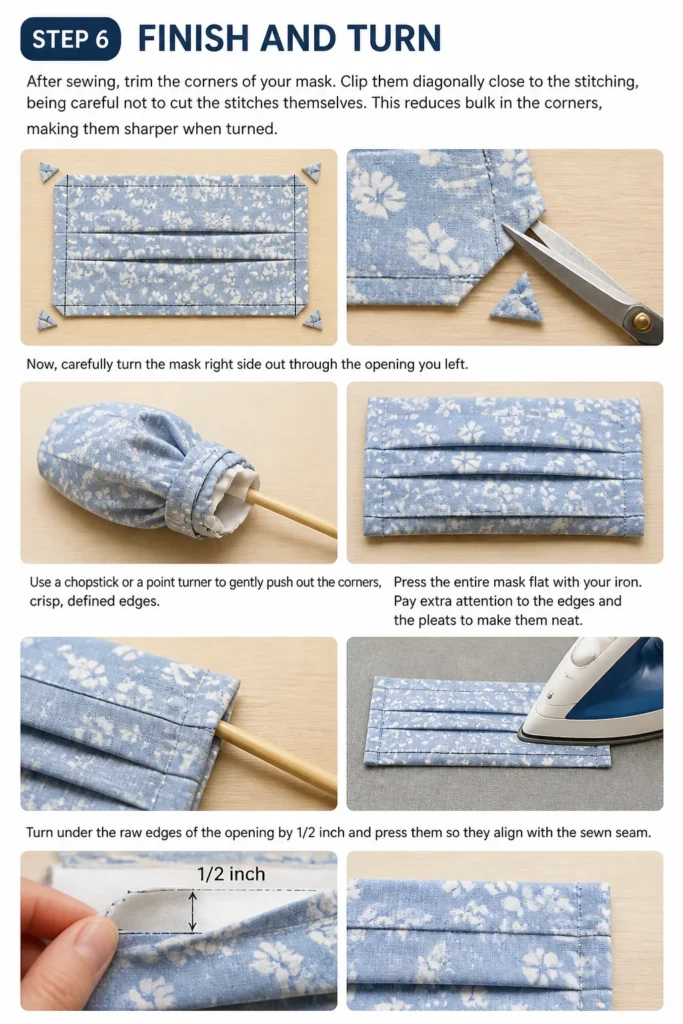
Now, carefully turn the mask right side out through the opening you left. Use a chopstick or a point turner to gently push out the corners, achieving crisp, defined edges.
Press the entire mask flat with your iron. Pay extra attention to the edges and the pleats to make them neat. Turn under the raw edges of the opening by 1/2 inch and press them so they align with the sewn seam.
Step 7: Topstitch and Finalize
This final stitching step secures the opening and gives your mask a professional, finished look. Topstitch around the entire perimeter of the mask, about 1/8 inch from the edge.
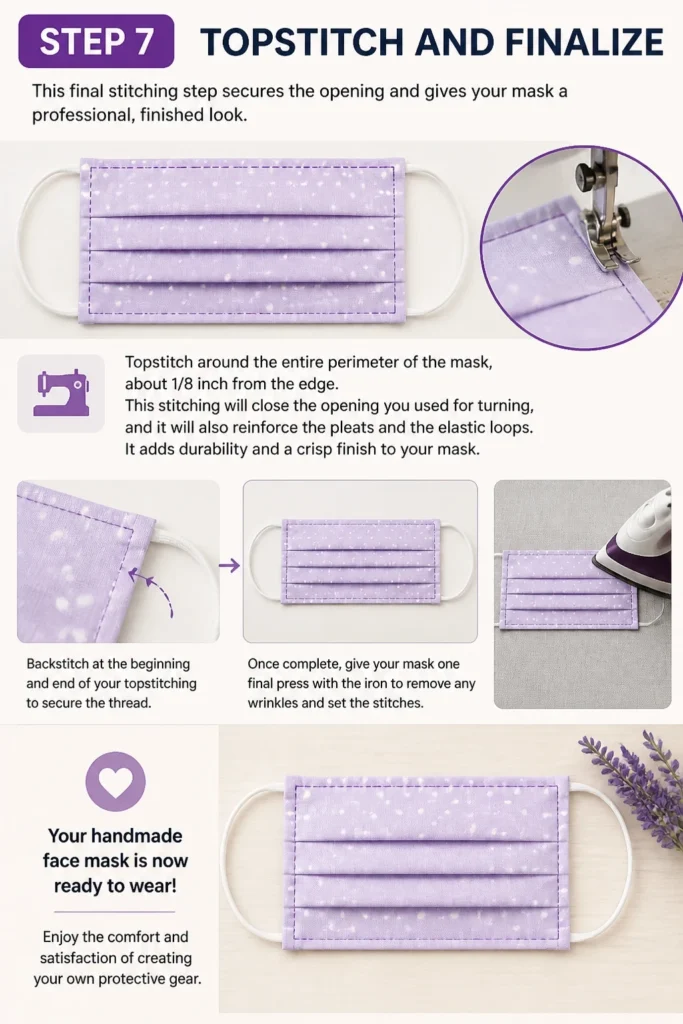
This stitching will close the opening you used for turning, and it will also reinforce the pleats and the elastic loops. It adds durability and a crisp finish to your mask.
Backstitch at the beginning and end of your topstitching to secure the thread. Once complete, give your mask one final press with the iron to remove any wrinkles and set the stitches.
Your handmade face mask is now ready to wear! Enjoy the comfort and satisfaction of creating your own protective gear.
Common Mistakes to Avoid
Incorrect Fabric Choice
Using fabrics that are too thin, too thick, or have a loose weave can compromise the mask’s effectiveness. Thin fabrics offer less filtration, while very thick ones can be hard to breathe through and difficult to sew. Always choose tightly woven cotton for both comfort and protection.
Skipping Pressing Steps
Pressing fabric at various stages of sewing might seem like an extra step, but it’s crucial for professional results. Skipping pressing leads to wavy seams, uneven pleats, and a generally unkempt appearance. An iron is your best friend for crisp edges and flat seams.
Uneven Pleats or Seams
Inconsistent pleat depths or seam allowances can make the mask lopsided or ill-fitting. Take your time to measure and pin accurately. Use a seam gauge and a ruler to ensure all your pleats are uniform and your stitching lines are straight.
Wrong Elastic Length
Elastic that is too short will pull uncomfortably on the ears, while elastic that is too long will cause the mask to gape. Measure your elastic carefully, and consider trying on the mask (or holding it to your face) before making final attachments. Adjust the length based on personal comfort, especially if making masks for different people.
Troubleshooting
Mask Feels Too Tight or Too Loose
If your mask doesn’t fit quite right, the elastic length is often the culprit. If it’s too tight, you can carefully snip the elastic and add a small extension piece, or replace the elastic with a longer one. For a loose mask, you can shorten the elastic by sewing a new loop or replacing it with a shorter piece.
Seams are Puckered or Uneven
Puckered seams often result from fabric tension, thread tension, or not pressing frequently enough. Try adjusting your sewing machine’s tension settings. Also, ensure you are not pulling the fabric through the machine, but letting the feed dogs do the work. Pressing each seam immediately after sewing helps flatten it out.
Pleats Don’t Lie Flat
Pleats that won’t stay flat can be frustrating. This usually happens if they weren’t pressed sufficiently or pinned securely before sewing. Go back and re-press the pleats with plenty of steam. You might also want to baste them in place with a long stitch before sewing the main seams to ensure they remain perfectly aligned.
Key Takeaways
- Always pre-wash and iron your fabric for accurate cutting and to prevent future shrinkage.
- Precision in cutting and measuring your fabric and elastic ensures a well-fitting mask.
- Pressing at each stage of the sewing process is vital for neat, professional results.
- Securely pin your pleats and elastic before sewing to prevent shifting.
- Topstitching around the mask’s perimeter adds durability and a finished appearance.
- Don’t be afraid to adjust elastic length for a comfortable, personalized fit.
Frequently Asked Questions
Can I hand sew a face mask?
Yes, you can absolutely hand sew a face mask. It will take more time and require careful, even stitches, but the process is largely the same. Use a strong backstitch for durability, especially on seams and where elastic is attached.
What type of fabric is best for a face mask?
Tightly woven cotton fabric, like quilting cotton or bed sheets with a high thread count, is generally recommended. It offers a good balance of breathability and filtration. Avoid stretchy fabrics or loose weaves.
How often should I wash my fabric face mask?
It’s best to wash your fabric face mask after each use. Treat it like an article of clothing that comes into close contact with your face and breath. Machine washing with regular detergent and drying on high heat is usually sufficient.
Can I add a filter pocket to this mask design?
Yes, you can easily modify this design to include a filter pocket. Instead of sewing the lining and outer fabric completely closed, leave a larger opening on one of the 9-inch sides. Finish the edges of this opening with a small hem, creating an internal pocket where you can insert a filter material.
Our Top Recommended Finds
- Good Quality Cotton Fabric: Investing in high-thread-count quilting cotton ensures both comfort and effective filtration for your mask.
- Adjustable Elastic Cord: This allows you to customize the ear loop length even after the mask is sewn, providing a perfect fit for anyone.
- Rotary Cutter and Mat: For precise, quick fabric cutting, a rotary cutter with a self-healing mat is a game-changer, especially when making multiple masks.
Your Next Creative Project Awaits
You’ve just created a useful, personalized face mask, mastering fundamental sewing techniques along the way. This project builds a strong foundation for many other creative endeavors.
Consider exploring more advanced mask patterns, adding embroidery, or even moving on to simple pouches and tote bags. The skills you’ve honed here are incredibly versatile.
Keep practicing, keep creating, and enjoy the satisfaction of making things with your own hands. Start another mask today, perhaps experimenting with a new fabric or a slightly different elastic for a custom fit.