How To Put Tissue Paper In A Gift Bag

Beginner-friendly templates, step-by-step guides,
and weekly project ideas in your inbox.
🎁 How To Put Tissue Paper In A Gift Bag
I remember my first attempt at using tissue paper in a gift bag; it looked more like a crumpled mess than a thoughtful presentation.
Years of gift-giving and packaging have taught me the simple tricks to achieve that perfect, professional look every time.
This guide will share those secrets, ensuring your gifts always make a stunning first impression.

Quick Overview
This guide will walk you through the simple steps to elegantly arrange tissue paper in any gift bag, transforming your gift presentation.
- Time needed: 5-10 minutes
- Difficulty: Beginner
- What you’ll need: Gift bag, tissue paper, your gift
Step-by-Step Instructions
Step 1: Gather Your Materials
Before you begin, ensure you have everything you need within reach. A well-organized workspace makes the process much smoother and more enjoyable.
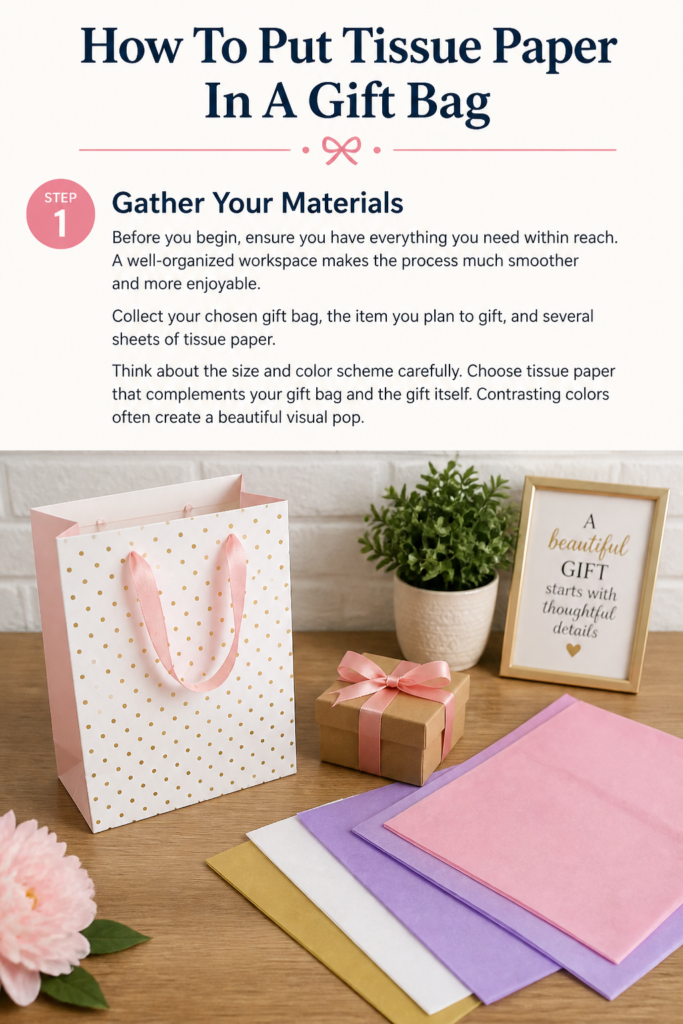
Collect your chosen gift bag, the item you plan to gift, and several sheets of tissue paper. Think about the size and color scheme carefully.
Choose tissue paper that complements your gift bag and the gift itself. Contrasting colors often create a beautiful visual pop.
Step 2: Prepare Your Gift
The condition of your gift before it goes into the bag is just as important as the tissue paper itself. Ensure it’s ready for presentation.
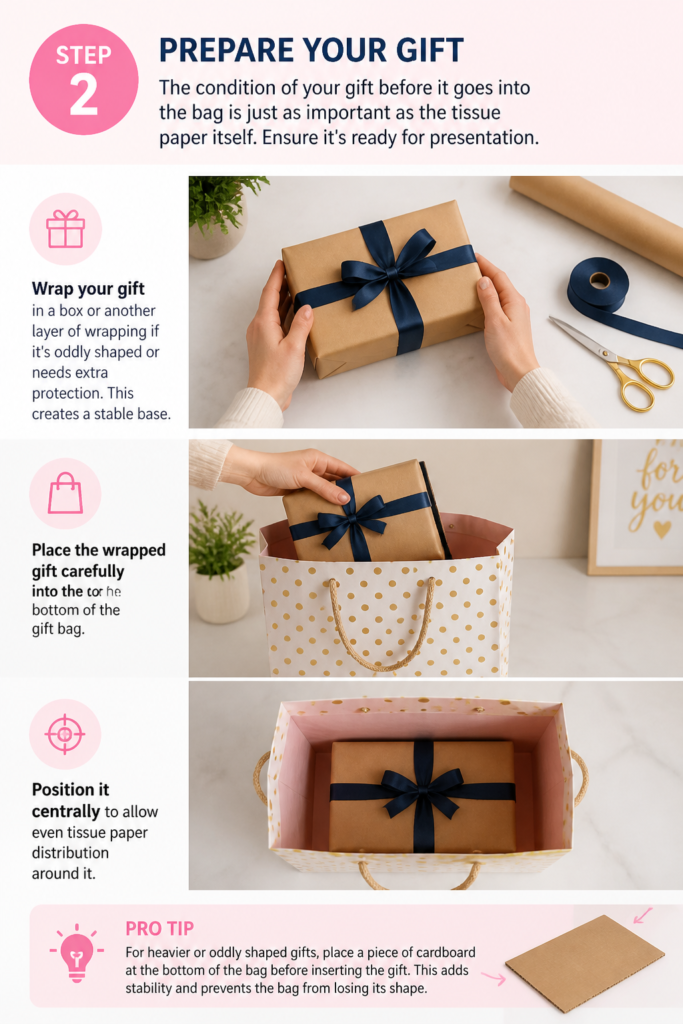
Wrap your gift in a box or another layer of wrapping if it’s oddly shaped or needs extra protection. This creates a stable base.
Place the wrapped gift carefully into the bottom of the gift bag. Position it centrally to allow even tissue paper distribution around it.
Pro Tip: For heavier or oddly shaped gifts, place a piece of cardboard at the bottom of the bag before inserting the gift. This adds stability and prevents the bag from losing its shape.
Step 3: Determine Tissue Paper Quantity
The number of tissue paper sheets you use significantly impacts the final look. Too little can appear sparse, while too much can overwhelm the bag.
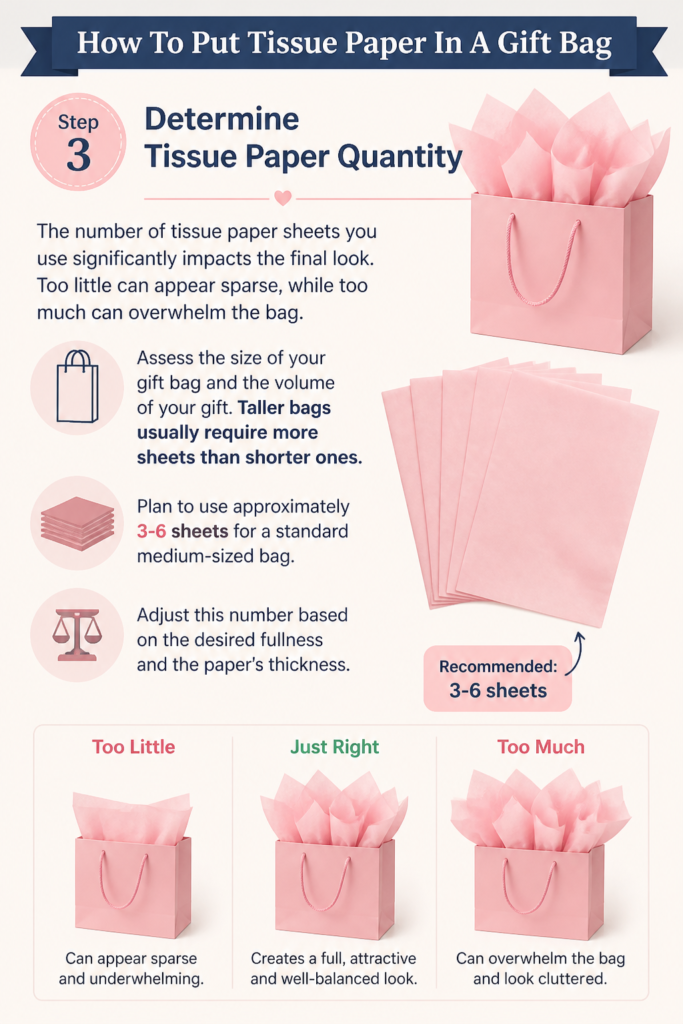
Assess the size of your gift bag and the volume of your gift. Taller bags usually require more sheets than shorter ones.
Plan to use approximately 3-6 sheets for a standard medium-sized bag. Adjust this number based on the desired fullness and the paper’s thickness.
Step 4: Prepare the First Tissue Paper Sheet (Flat Base)
The first sheet of tissue paper creates a soft, foundational layer around your gift, covering any visible gaps and providing a clean base.
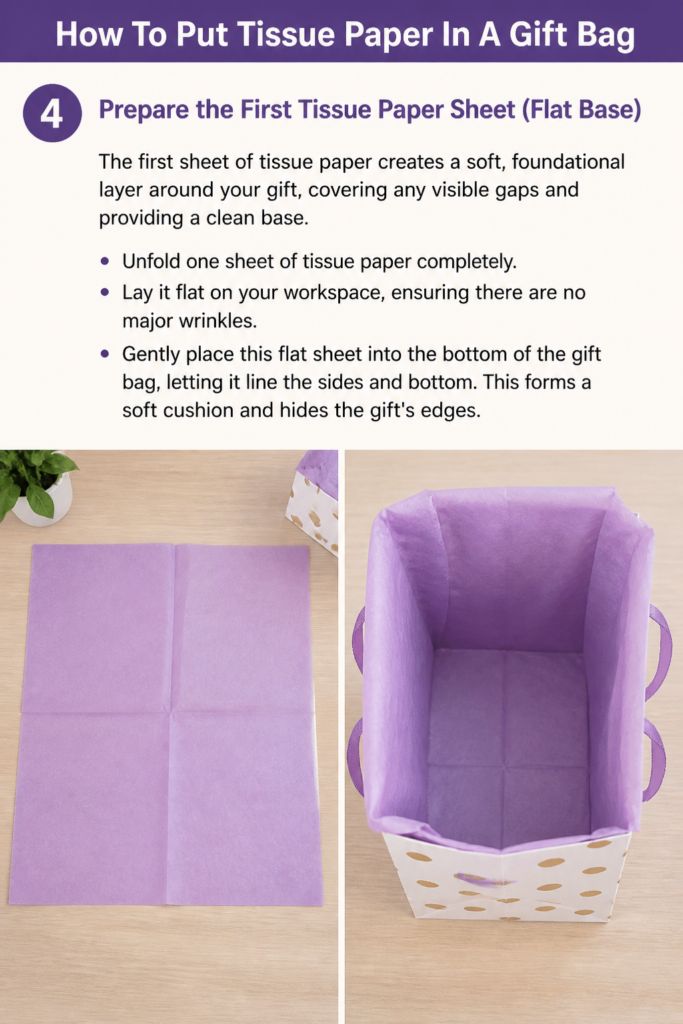
Unfold one sheet of tissue paper completely. Lay it flat on your workspace, ensuring there are no major wrinkles.
Gently place this flat sheet into the bottom of the gift bag, letting it line the sides and bottom. This forms a soft cushion and hides the gift’s edges.
Step 5: Create the Foundation Puff
This technique adds volume and structure, making the tissue paper appear fuller and more luxurious. It’s a crucial step for a polished finish.
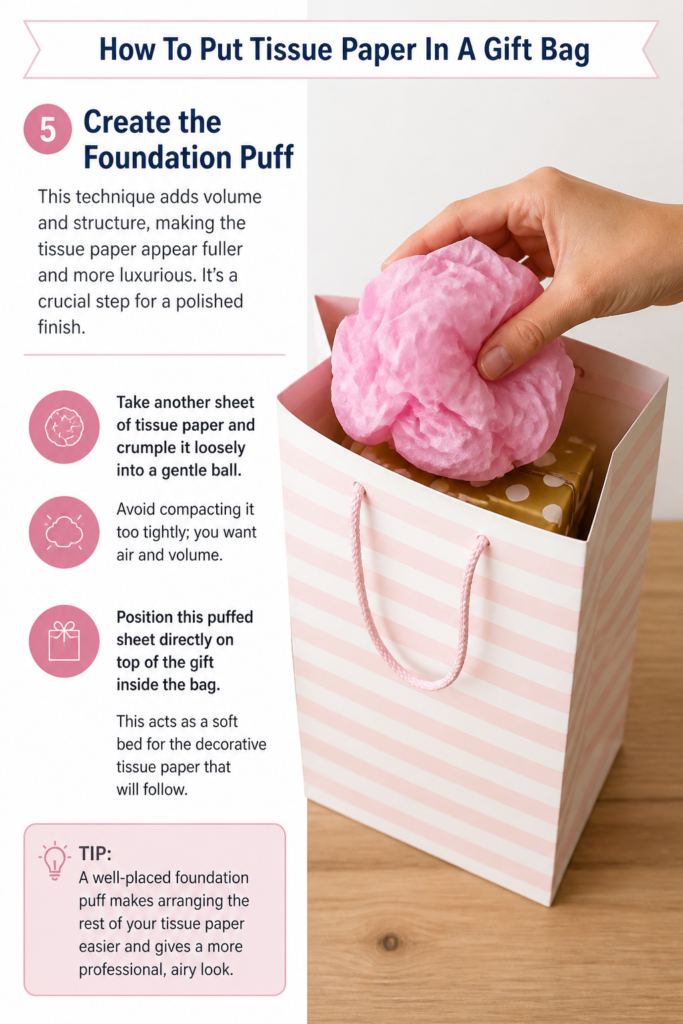
Take another sheet of tissue paper and crumple it loosely into a gentle ball. Avoid compacting it too tightly; you want air and volume.
Position this puffed sheet directly on top of the gift inside the bag. This acts as a soft bed for the decorative tissue paper that will follow.
Step 6: Master the Signature Puff Technique
This is where the magic happens, creating the iconic, elegant tissue paper display that stands tall above the gift bag. It’s surprisingly simple once you know how.
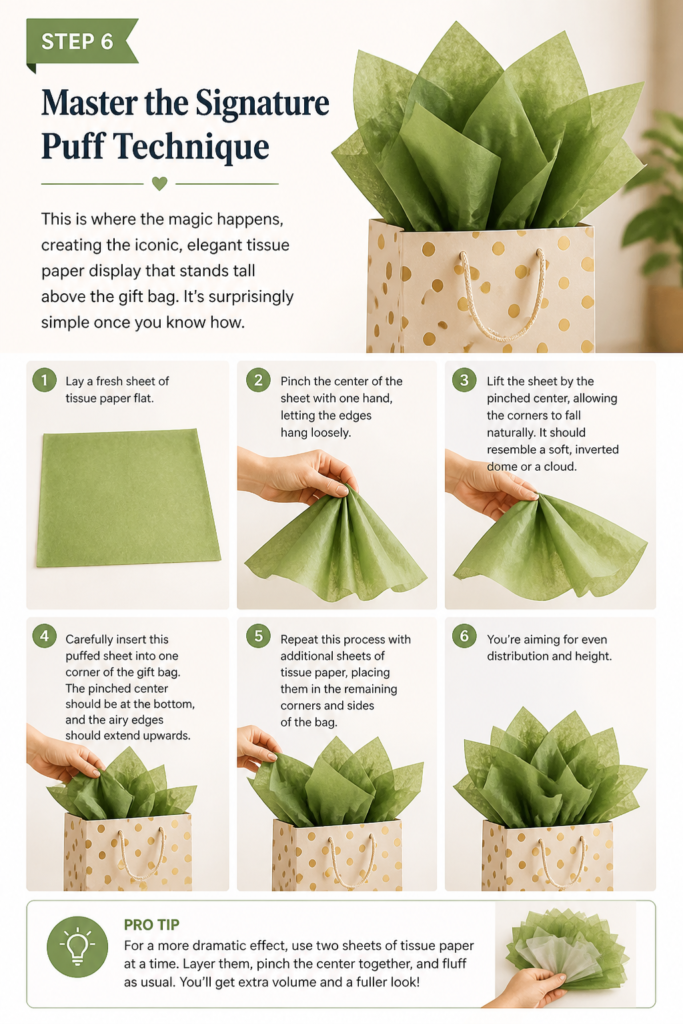
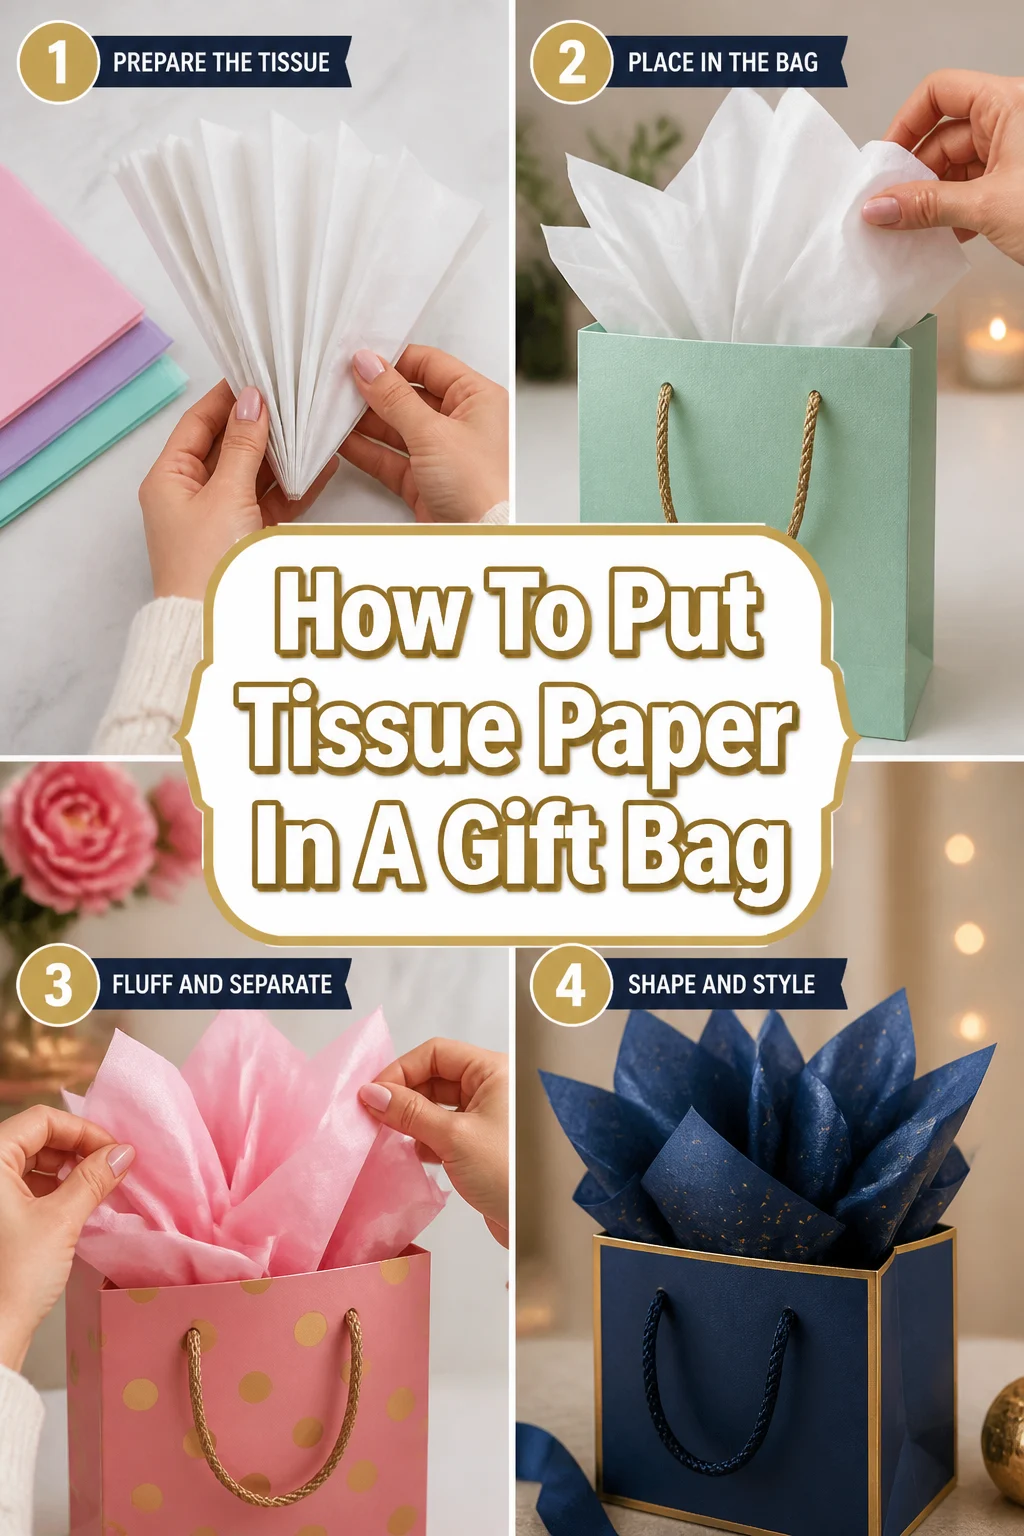
Lay a fresh sheet of tissue paper flat. Pinch the center of the sheet with one hand, letting the edges hang loosely.
Lift the sheet by the pinched center, allowing the corners to fall naturally. It should resemble a soft, inverted dome or a cloud.
Carefully insert this puffed sheet into one corner of the gift bag. The pinched center should be at the bottom, and the airy edges should extend upwards.
Repeat this process with additional sheets of tissue paper, placing them in the remaining corners and sides of the bag. You’re aiming for even distribution and height.
Pro Tip: For a more dramatic effect, use two sheets of tissue paper together when creating each puff. This adds extra fullness and opacity, especially with lighter colors.
Step 7: Adjust for Balance and Symmetry
Once all your puffed sheets are in place, take a moment to refine their arrangement. This ensures a harmonious and aesthetically pleasing presentation.
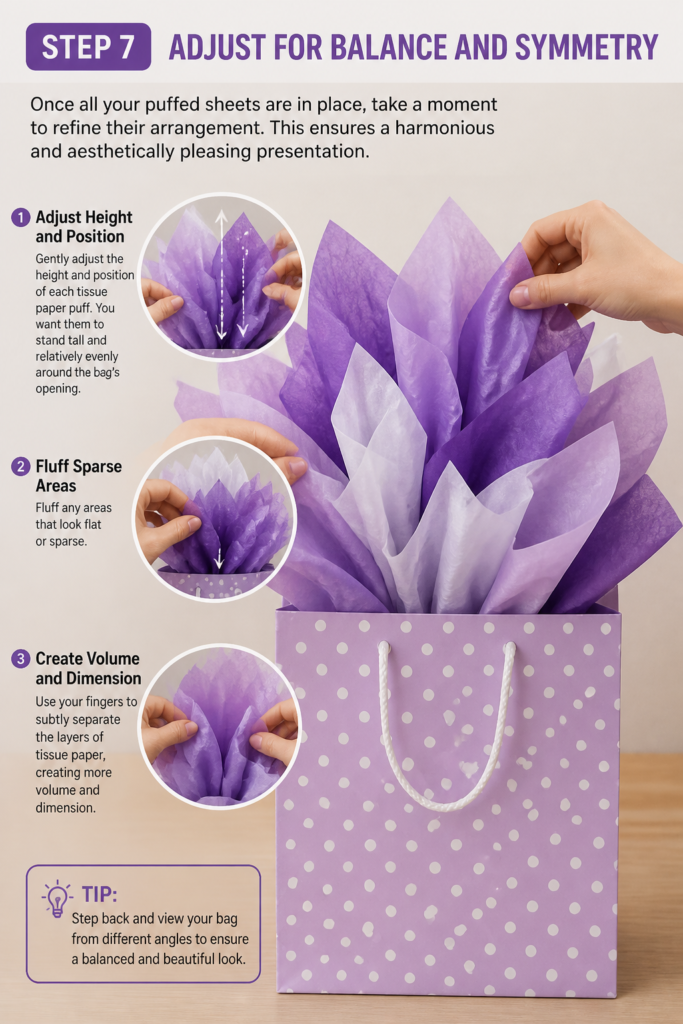
Gently adjust the height and position of each tissue paper puff. You want them to stand tall and relatively evenly around the bag’s opening.
Fluff any areas that look flat or sparse. Use your fingers to subtly separate the layers of tissue paper, creating more volume and dimension.
Step 8: Add a Pop of Color (Optional)
Introducing an accent color can elevate your gift bag from nice to truly stunning. This simple addition adds depth and visual interest.
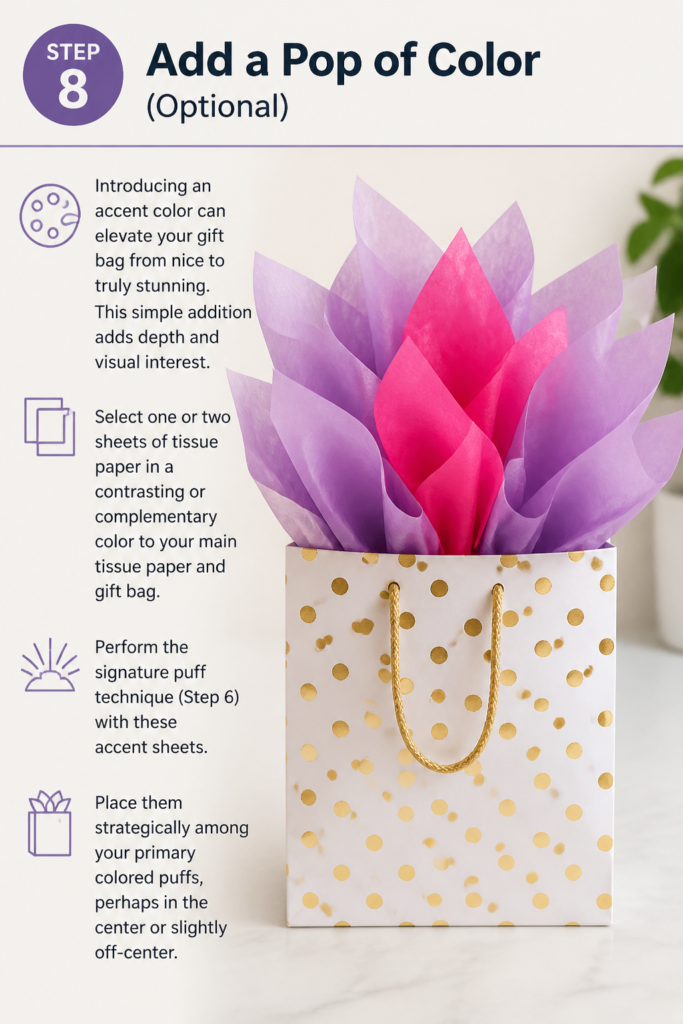
Select one or two sheets of tissue paper in a contrasting or complementary color to your main tissue paper and gift bag.
Perform the signature puff technique (Step 6) with these accent sheets. Place them strategically among your primary colored puffs, perhaps in the center or slightly off-center.
Step 9: Final Touches and Refinement
The last step involves a quick check and any minor adjustments to ensure everything looks perfect. A few seconds here can make all the difference.
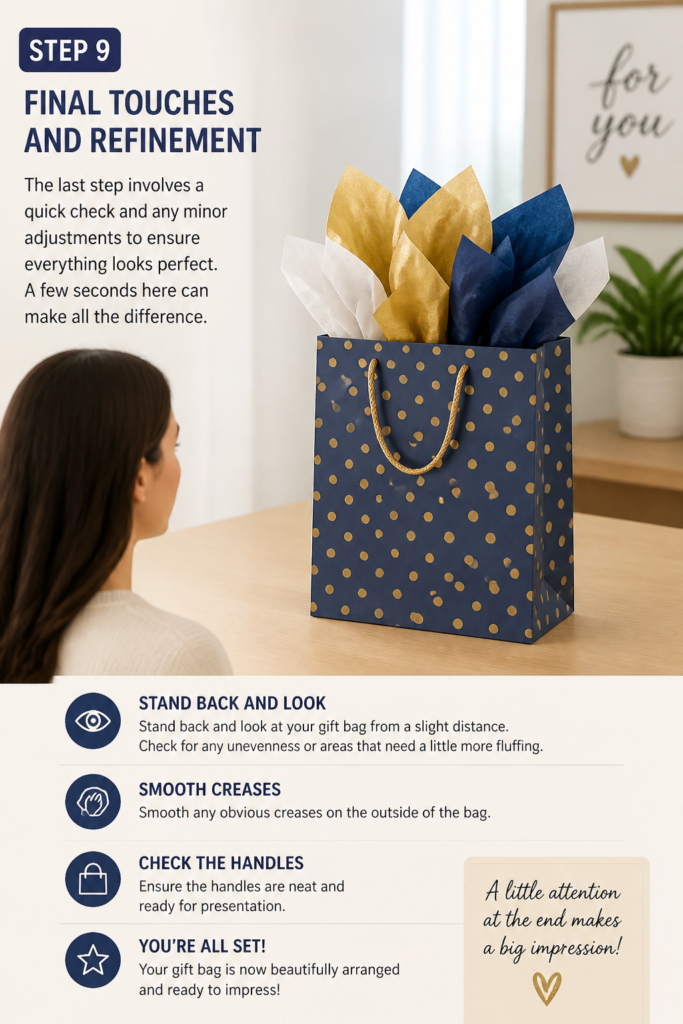
Stand back and look at your gift bag from a slight distance. Check for any unevenness or areas that need a little more fluffing.
Smooth any obvious creases on the outside of the bag. Ensure the handles are neat and ready for presentation.
Common Mistakes to Avoid
Using Too Little Tissue Paper
A common error is not using enough tissue paper, which makes the gift bag look empty and unfinished. The gift might be visible, detracting from the surprise and elegance.
Always aim for a generous amount of tissue paper to create a full, luxurious look. It’s better to have a bit too much than too little to achieve that desired volume.
Crumpling Tissue Paper Too Tightly
When tissue paper is crumpled too compactly, it loses its airy, soft appearance. This results in dense, heavy-looking lumps rather than light, elegant puffs.
The key is a loose, gentle crumple. You want to trap air within the paper to create volume and a soft, cloud-like effect that stands up nicely.
Ignoring the Gift’s Placement
Placing the gift unevenly or too high in the bag can make it difficult to arrange tissue paper effectively. The tissue might lean or look off-balance.
Always ensure your gift is placed centrally and securely at the bottom of the bag. This provides a stable base for the tissue paper to be built around and on top of.
Using Wrinkled Tissue Paper
Even slightly wrinkled tissue paper can make your gift presentation look sloppy and rushed. The delicate nature of tissue paper means creases are highly visible.
Always use fresh, unwrinkled sheets of tissue paper. If you must use a sheet with a slight crease, try to position it so the wrinkle is less visible or at the bottom of a puff.
Troubleshooting
Tissue Paper Keeps Falling Flat
If your tissue paper doesn’t hold its shape and collapses, it’s likely due to not enough air trapped within the folds or insufficient support.
Try using an extra sheet of tissue paper for each puff to add more body. Ensure you are loosely crumpling, not tightly compacting, to maximize air volume. Also, check that your gift provides a stable base at the bottom of the bag.
Gift is Still Visible After Adding Tissue
Seeing the gift peeking through the tissue paper diminishes the surprise and polished look. This often happens when the initial foundational layers are too sparse.
Before adding the decorative puffs, ensure you’ve placed at least one flat sheet of tissue paper lining the bag’s bottom and sides, and one loosely crumpled sheet directly on top of the gift. These base layers are crucial for concealment.
Tissue Paper Looks Uneven or Lopsided
An unbalanced arrangement can make the gift bag appear hastily prepared. This usually stems from inconsistent puffing or uneven placement of the sheets.
After inserting all your puffs, take a moment to gently adjust them. Redistribute the volume by fluffing certain areas or shifting puffs slightly. Aim for a symmetrical, balanced height around the bag’s opening.
Key Takeaways
- Always start with a stable foundation by placing your gift securely at the bottom of the bag.
- Use a flat sheet of tissue paper to line the bag, concealing the gift and providing a clean base.
- Loose crumpling is essential for creating airy, voluminous puffs that stand tall and look elegant.
- Employ the “pinch and lift” technique for consistent, attractive tissue paper puffs.
- Don’t be afraid to use multiple sheets of tissue paper to achieve a full, luxurious look.
- Take time to adjust and fluff the tissue paper for a balanced, symmetrical, and polished final presentation.
Frequently Asked Questions
How many sheets of tissue paper do I typically need for a standard gift bag?
For a standard medium-sized gift bag, you’ll generally need between 3 to 6 sheets of tissue paper. This allows for a base layer, a cushioning layer over the gift, and several decorative puffs to fill the top of the bag nicely.
Should I match the tissue paper color to the gift bag?
While matching is an option, contrasting or complementary colors often create a more dynamic and visually appealing presentation. Consider the overall theme and the recipient’s preferences when choosing your colors.
What if my gift is very small?
For small gifts, you might still want to use a similar number of tissue paper sheets to create volume. You can also place the small gift inside a small box first, then put the box in the gift bag, making it easier to arrange the tissue paper around it.
Can I reuse tissue paper?
Yes, if the tissue paper is still crisp, unwrinkled, and free of tears, it can absolutely be reused. Gently smooth out any folds and store it flat to maintain its quality for future gift-giving.
Our Top Recommended Finds
- Assorted Tissue Paper Packs: These offer a variety of colors and patterns, making it easy to find the perfect match for any occasion or gift bag.
- Gift Bag Variety Sets: Having a range of bag sizes and designs on hand ensures you’re always prepared for last-minute gifting needs.
- Gift Wrapping Station Organizer: A dedicated space or caddy helps keep all your wrapping essentials, including tissue paper, neat and accessible.
Elevate Your Gifting Experience
Mastering the art of tissue paper in a gift bag is a small skill with a big impact. It transforms a simple gift into a beautifully presented gesture, showing extra care and thought.
Now that you have these practical steps, there’s no need to struggle with crumpled, flat tissue paper ever again.
Go ahead and apply these techniques to your next gift. You’ll be amazed at the professional and polished results you can achieve today.
Beginner-friendly templates, step-by-step guides,
and weekly project ideas in your inbox.