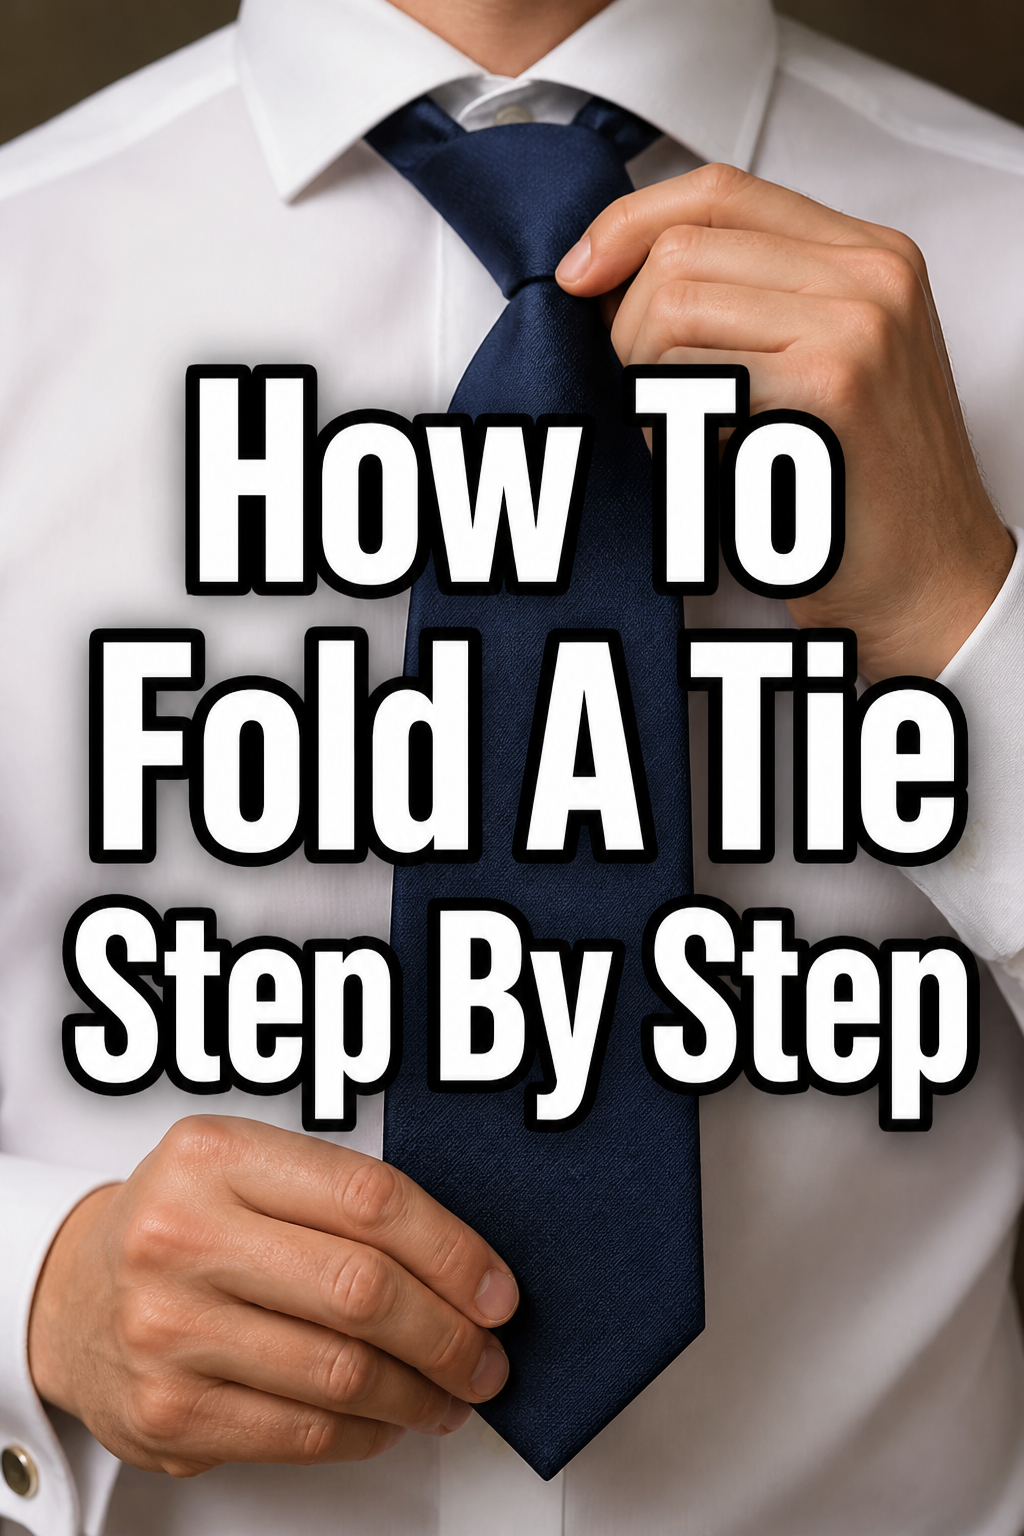
👔 How To Fold A Tie Step By Step

Beginner-friendly templates, step-by-step guides,
and weekly project ideas in your inbox.
A well-tied tie instantly elevates any outfit, broadcasting confidence and attention to detail. Yet, for many, mastering this sartorial skill remains a perplexing challenge. I remember my own struggles before a crucial interview, fumbling endlessly with silk and fabric.
It’s a common hurdle, but one that’s easily overcome with the right guidance. This guide distills years of personal experience and expert advice into a simple, actionable framework. You’re about to gain a timeless skill that will serve you well for any formal occasion.
Quick Overview
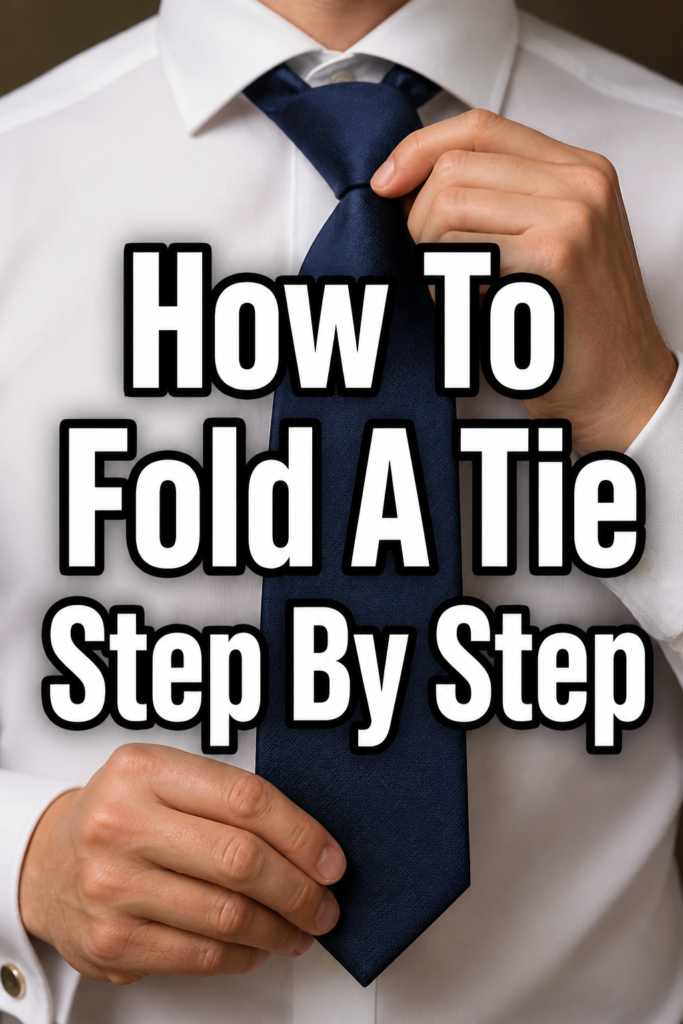
Tying a tie can seem daunting at first, but with a clear method, you’ll achieve a polished look every time. We’ll focus on the classic Four-in-Hand knot, known for its versatility and ease. This guide breaks down each movement, ensuring you build confidence with every step.
- Time needed: 3-7 minutes (practice makes perfect!)
- Difficulty: Beginner
- What you’ll need: One necktie, a mirror (optional, but highly recommended)
Step-by-Step Instructions
The Four-in-Hand knot is perhaps the most popular and versatile tie knot. It’s relatively slim, slightly asymmetrical, and suits most collar styles and tie fabrics. Follow these steps to master it.
Step 1: Drape the Tie
Begin by placing the tie around your neck. Ensure the wide end hangs on your right side. The narrow end should be on your left.
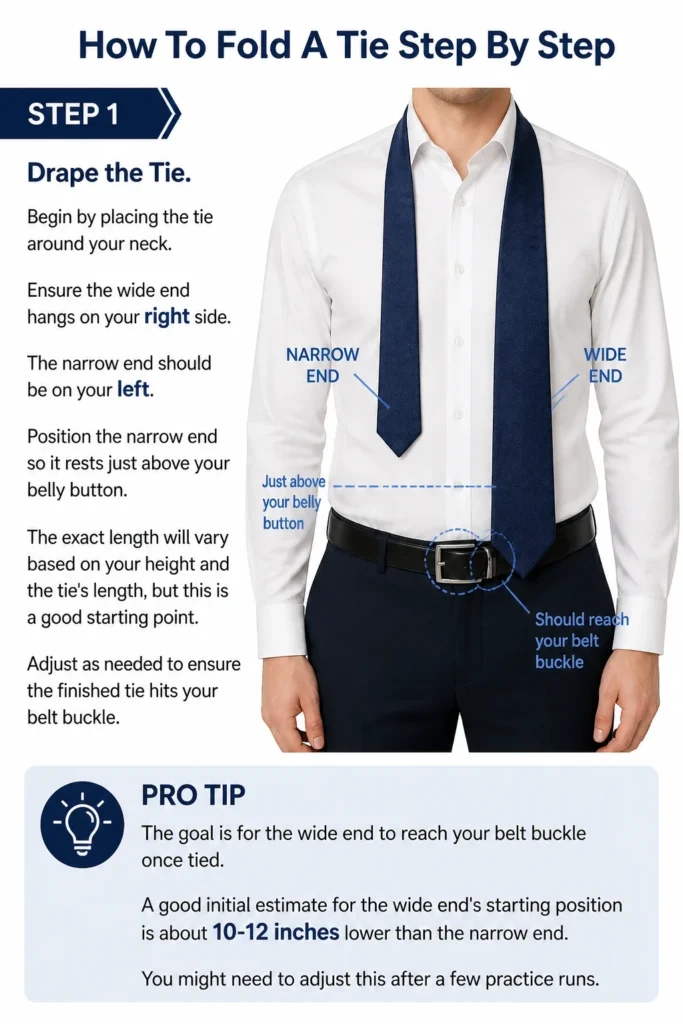
Position the narrow end so it rests just above your belly button. The exact length will vary based on your height and the tie’s length, but this is a good starting point. Adjust as needed to ensure the finished tie hits your belt buckle.
Pro Tip: The goal is for the wide end to reach your belt buckle once tied. A good initial estimate for the wide end’s starting position is about 10-12 inches lower than the narrow end. You might need to adjust this after a few practice runs.
Step 2: Cross the Wide End
Take the wide end of the tie. Cross it over the narrow end. It should pass from your right side to your left side.
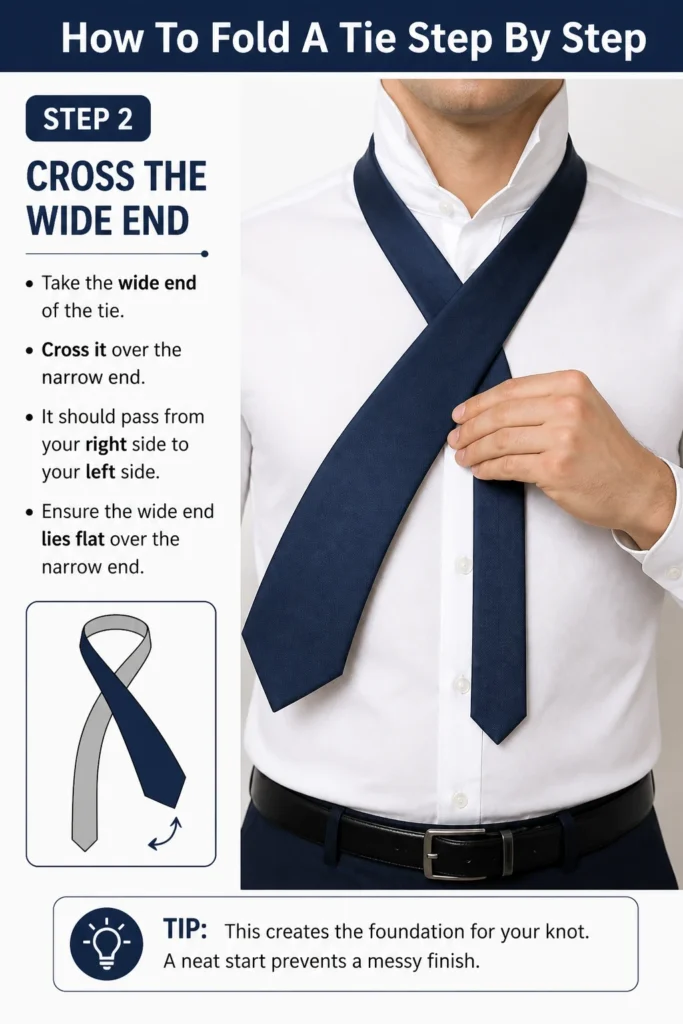
Ensure the wide end lies flat over the narrow end. This creates the foundation for your knot. A neat start prevents a messy finish.
Step 3: Bring Up and Through
Now, bring the wide end underneath the narrow end. It should pass from left to right. This completes the first full pass.
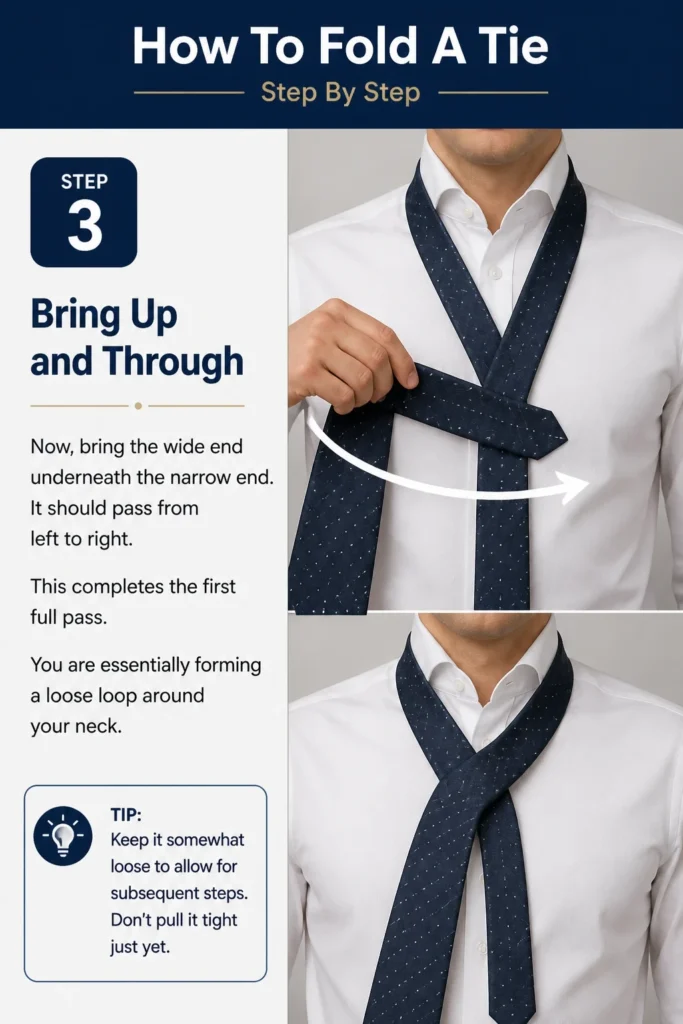
You are essentially forming a loose loop around your neck. Keep it somewhat loose to allow for subsequent steps. Don’t pull it tight just yet.
Step 4: Pass Across the Front
Take the wide end again. Bring it across the front of the knot you are forming. It should go from your right side to your left side.
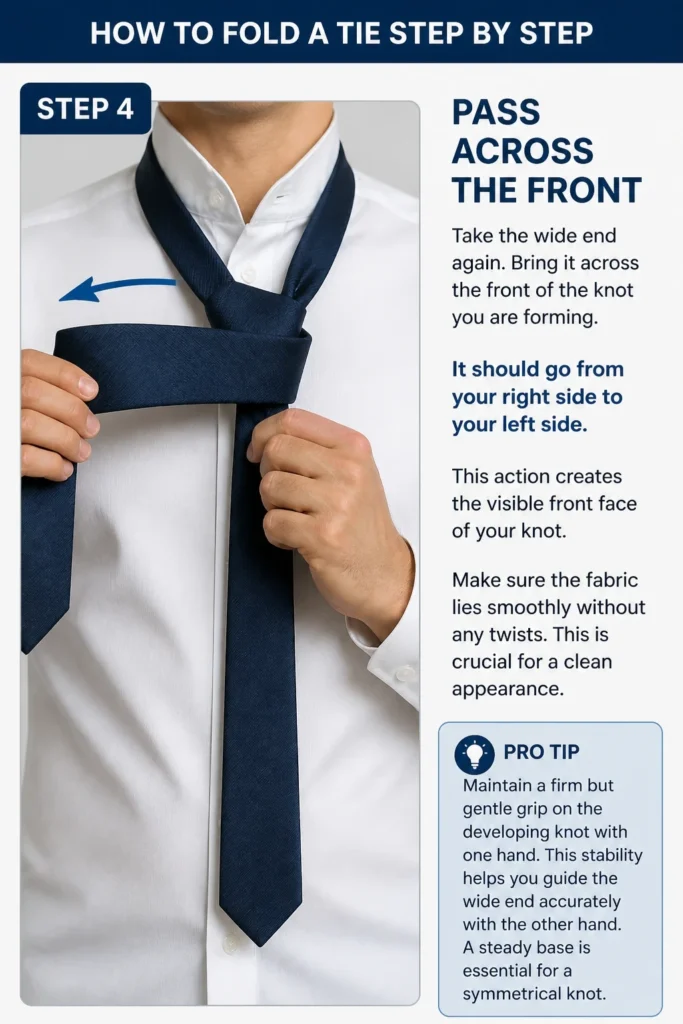
This action creates the visible front face of your knot. Make sure the fabric lies smoothly without any twists. This is crucial for a clean appearance.
Pro Tip: Maintain a firm but gentle grip on the developing knot with one hand. This stability helps you guide the wide end accurately with the other hand. A steady base is essential for a symmetrical knot.
Step 5: Go Up Through the Loop Again
Now, bring the wide end up through the neck loop. This is the loop that formed around your collar. It’s the one you created in Step 3.
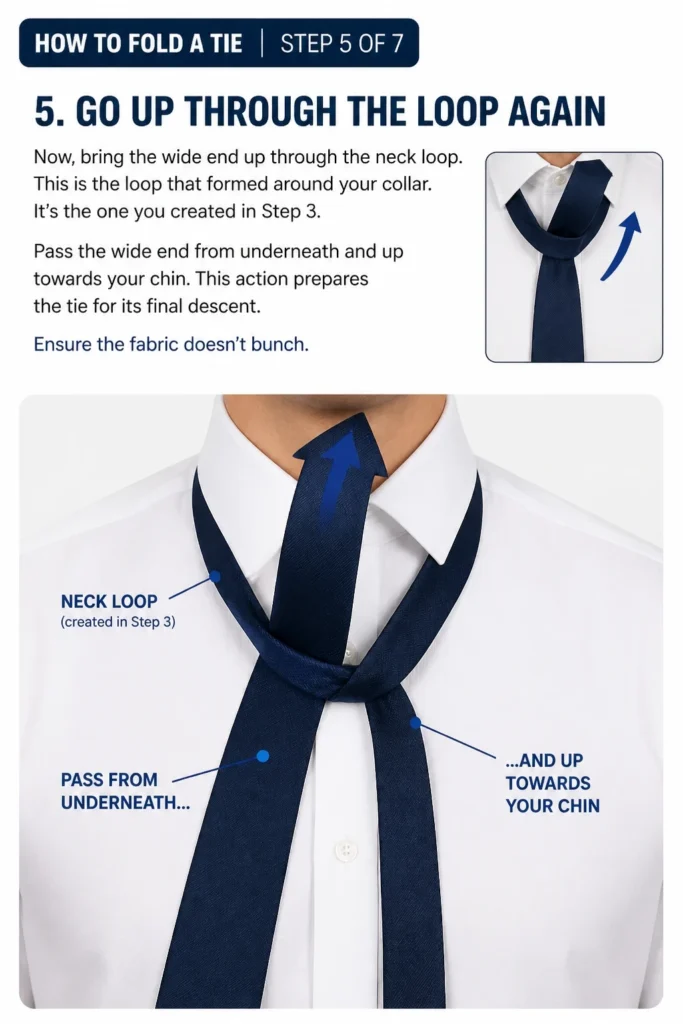
Pass the wide end from underneath and up towards your chin. This action prepares the tie for its final descent. Ensure the fabric doesn’t bunch.
Step 6: Pull Down Through the Front Loop
You’ll see a small horizontal loop on the front of the knot. This was formed in Step 4. Carefully thread the wide end down through this front loop.
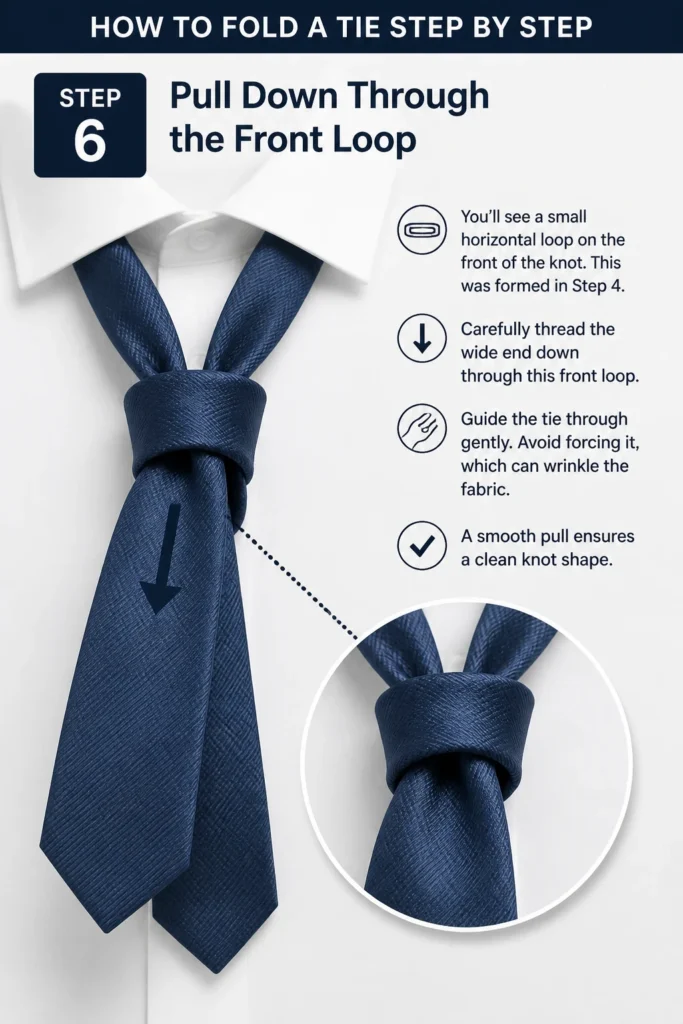
Guide the tie through gently. Avoid forcing it, which can wrinkle the fabric. A smooth pull ensures a clean knot shape.
Step 7: Tighten and Adjust
Hold the narrow end of the tie with one hand. With the other hand, gently pull the wide end downwards. This will tighten the knot.
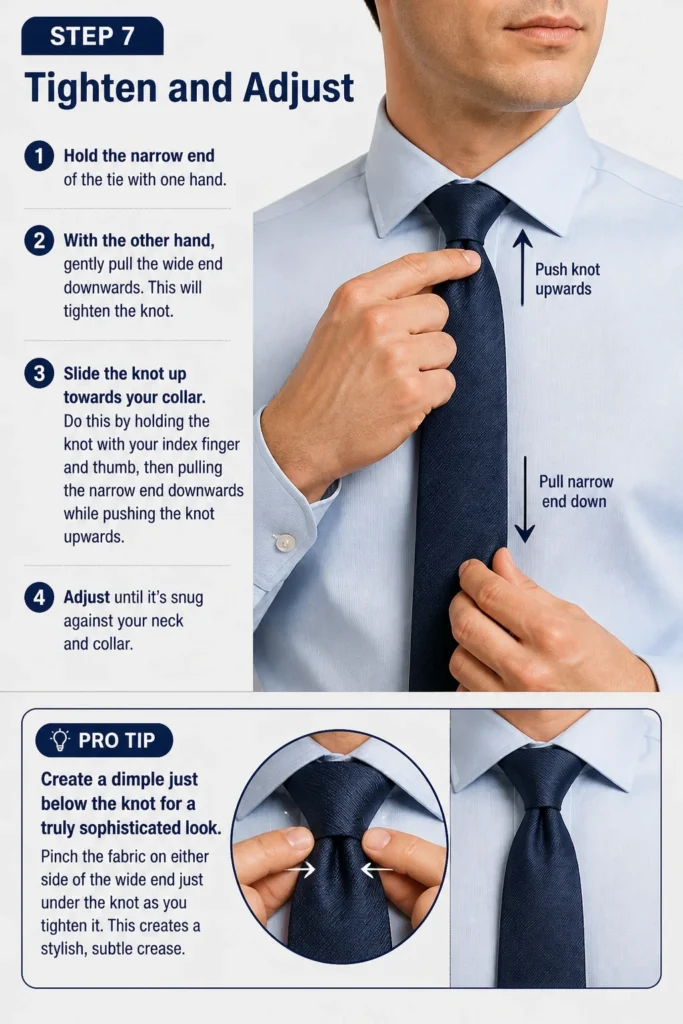
Slide the knot up towards your collar. Do this by holding the knot with your index finger and thumb, then pulling the narrow end downwards while pushing the knot upwards. Adjust until it’s snug against your neck and collar.
Pro Tip: Create a “dimple” just below the knot for a truly sophisticated look. Pinch the fabric on either side of the wide end just under the knot as you tighten it. This creates a stylish, subtle crease.
Common Mistakes to Avoid
Even experienced tie-wearers can sometimes make small errors. Being aware of these common pitfalls will help you achieve a consistently sharp look. Pay attention to these details for a flawless finish.
The Wrong Length
A tie that’s too long or too short looks awkward and unprofessional. The tip of your tie’s wide end should always rest at or just above your belt buckle. Anything higher or lower disrupts your proportions.
To correct this, adjust your starting point in Step 1. If the tie is too long, start with the narrow end higher. If it’s too short, start with the narrow end lower. Practice helps you find your ideal initial drape.
Over-Tightening or Under-Tightening
An overly tight knot can be uncomfortable and restrict breathing. It also gives the impression of being strangled. Conversely, a loose, sloppy knot appears careless and unprofessional, letting your collar show.
Aim for a snug fit that allows a finger to comfortably slide between the knot and your neck. It should sit neatly against your collar, without being restrictive. The knot should maintain its shape without sagging.
Neglecting the Dimple
Many beginners overlook the tie dimple. This small, intentional crease directly under the knot adds depth and elegance. Without it, the tie can look flat and lifeless, missing a touch of refined style.
As you tighten the knot in Step 7, gently pinch the wide end of the tie just below the knot. This creates a subtle, vertical fold. It’s a small detail that makes a big difference.
An Uneven Knot
Sometimes, one side of the knot might appear thicker or higher than the other. This asymmetry can detract from the overall polished look. It often happens when the fabric isn’t laid flat during the initial crosses.
Ensure each pass of the wide end over or under the narrow end is smooth and flat. Take your time to adjust the fabric as you go. A steady hand and careful attention to detail will prevent an uneven finish.
Troubleshooting
Even with clear instructions, you might encounter a few common issues. Don’t worry, these are usually easy to fix. Here are solutions to some frequently faced problems.
My Knot Won’t Stay Tight
If your knot keeps loosening throughout the day, it might be due to the tie material or insufficient tightening. Silk ties can be slippery, making them prone to loosening. Your knot also might not have been fully cinched.
When tightening in Step 7, ensure you pull the wide end firmly but not aggressively. Hold the narrow end securely as you slide the knot up. For very slippery ties, a slightly tighter initial pull can help.
The Tie Looks Lopsided
A lopsided knot often results from uneven tension or twists in the fabric during the tying process. One side might appear fatter or the knot might lean to one side. This can be frustrating after all your effort.
Untie and start again, paying close attention to keeping the fabric flat at each stage. Ensure the wide end is consistently taut as you wrap it. Use a mirror to check for symmetry as you go, making small adjustments.
The Tie Is Too Short/Long After Tying
This is one of the most common issues and almost always comes down to the initial drape. Getting the correct starting length for the wide and narrow ends is key. It’s a balance that takes a little practice to perfect.
If the tie is too short, start with the wide end hanging lower in Step 1. If it’s too long, start with the wide end higher. You’ll develop an intuitive feel for your ideal starting point after a few tries. Consider your height and the tie’s thickness.
Key Takeaways
Mastering the art of tie-tying is a skill that comes with practice and attention to detail. Remember these key points to ensure a perfectly knotted tie every time. Each element contributes to a polished and professional appearance.
- Always aim for the wide end of your tie to reach your belt buckle when finished.
- Practice makes perfect; don’t be discouraged if your first few attempts aren’t flawless.
- Ensure each wrap of the tie is flat and smooth to prevent a lopsided or bulky knot.
- Don’t forget the dimple; it adds a touch of elegance and sophistication to your knot.
- Adjust the knot to be snug against your collar but not uncomfortably tight.
- Choose a knot that complements your collar style and the formality of the occasion.
Frequently Asked Questions
It’s natural to have questions when learning a new skill. Here are some common inquiries about tie-tying and how to address them. These answers will help clarify any lingering doubts.
What are other popular tie knots I should learn?
Beyond the Four-in-Hand, the Half-Windsor and Full Windsor knots are very popular. The Half-Windsor is a medium-sized, symmetrical knot, while the Full Windsor is a large, triangular, and very formal knot. Each offers a distinct look for different occasions and collar types.
How do I know if my tie is the correct length?
The general rule is that the tip of the wide end of your tie should just touch the top of your belt buckle. If it’s significantly above or below, it’s not the correct length. This standard ensures proper proportion and a balanced look.
Should I use a tie clip or tie bar?
A tie clip or tie bar is a stylish accessory that serves a practical purpose. It fastens your tie to your shirt, keeping it neat and preventing it from swinging. It should be placed between the third and fourth buttons of your shirt, roughly mid-chest.
How do I care for my ties?
Hang your ties on a tie hanger or roll them up loosely to prevent creases. Avoid leaving them knotted for extended periods, as this can permanently set the knot and wrinkle the fabric. For stains, professional dry cleaning is often recommended, especially for silk.
Our Top Recommended Finds
Investing in a few quality items can enhance your tie-wearing experience. These suggestions are practical and will help you maintain a sharp look. They address common needs for any tie enthusiast.
- High-Quality Silk Tie: A good silk tie drapes beautifully and holds a knot well. Look for ties with a rich texture and a classic design that will stand the test of time. Quality fabric makes a noticeable difference.
- Tie Clip or Bar: A simple, elegant tie clip keeps your tie secure and adds a touch of sophistication. Choose one that complements your watch or belt buckle for a cohesive look. It’s both functional and fashionable.
- Tie Storage Hanger: Prevent creases and prolong the life of your ties with a dedicated tie hanger. These hangers keep your ties organized and allow them to air out properly. It’s a small investment for better tie care.
Your Journey to Tie Confidence
Tying a tie is more than just securing fabric around your neck. It’s an expression of personal style, attention to detail, and confidence. With the step-by-step guide you’ve just read, you now possess the knowledge to master this essential skill. Practice diligently, and soon you’ll be tying a perfect knot without a second thought.
Don’t stop here; explore other knots like the Half-Windsor for different occasions. Experiment with various tie patterns and shirt collars to truly refine your aesthetic. Embrace the journey of mastering your style, one perfect knot at a time. Go ahead, grab a tie and put your new skills to the test today!
Beginner-friendly templates, step-by-step guides,
and weekly project ideas in your inbox.