
🍯 How To Make Sugar Wax At Home

Beginner-friendly templates, step-by-step guides,
and weekly project ideas in your inbox.
Tired of expensive salon visits and harsh chemical treatments for hair removal?
Making your own sugar wax at home is a simple, natural, and cost-effective alternative that delivers fantastic results.
I’ve refined this recipe over countless batches, ensuring you get a smooth, effective wax every time, right from your kitchen.

Quick Overview
This guide will walk you through creating your own natural sugar wax, perfect for achieving silky-smooth skin without the fuss.
- Time needed: 30-45 minutes (15 mins active, 15-30 mins cooling)
- Difficulty: Beginner to Intermediate
- What you’ll need: Sugar, water, lemon juice, a pot, and a candy thermometer.
Step-by-Step Instructions
Step 1: Gather Your Ingredients and Tools
Preparation is key to a smooth sugaring experience. Make sure everything you need is within reach before you begin.
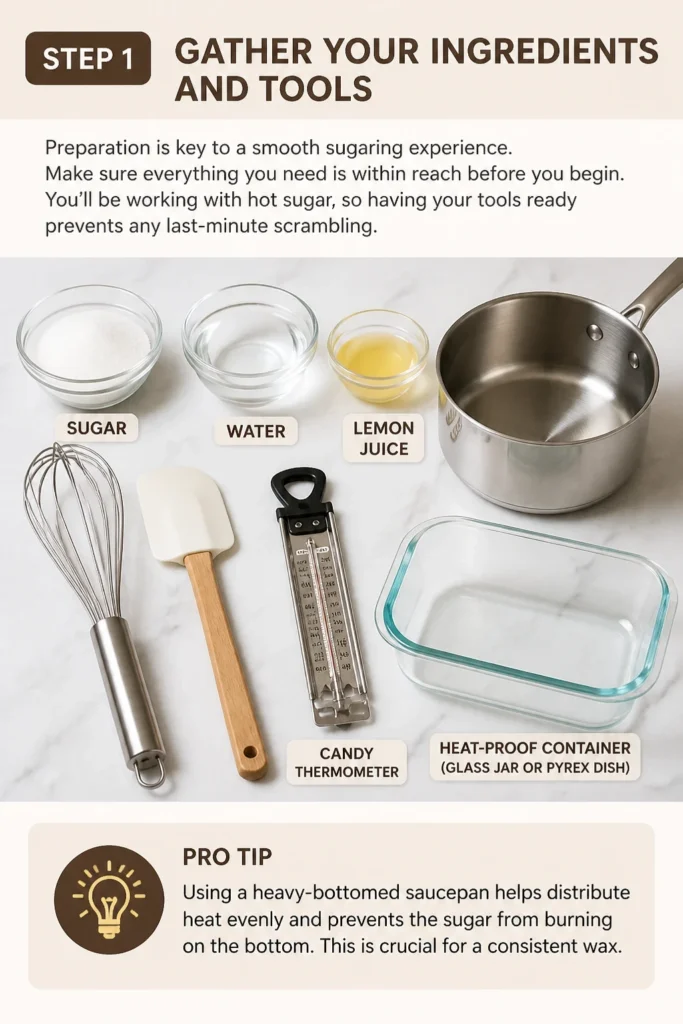
You’ll be working with hot sugar, so having your tools ready prevents any last-minute scrambling.
- Measure out your sugar, water, and lemon juice precisely.
- Set aside a heavy-bottomed saucepan, a whisk or silicone spatula, and a candy thermometer.
- Prepare a heat-proof container for cooling the wax, like a glass jar or a Pyrex dish.
Pro Tip: Using a heavy-bottomed saucepan helps distribute heat evenly and prevents the sugar from burning on the bottom. This is crucial for a consistent wax.
Step 2: Combine the Ingredients
The right ratio of ingredients is essential for achieving the perfect wax consistency.
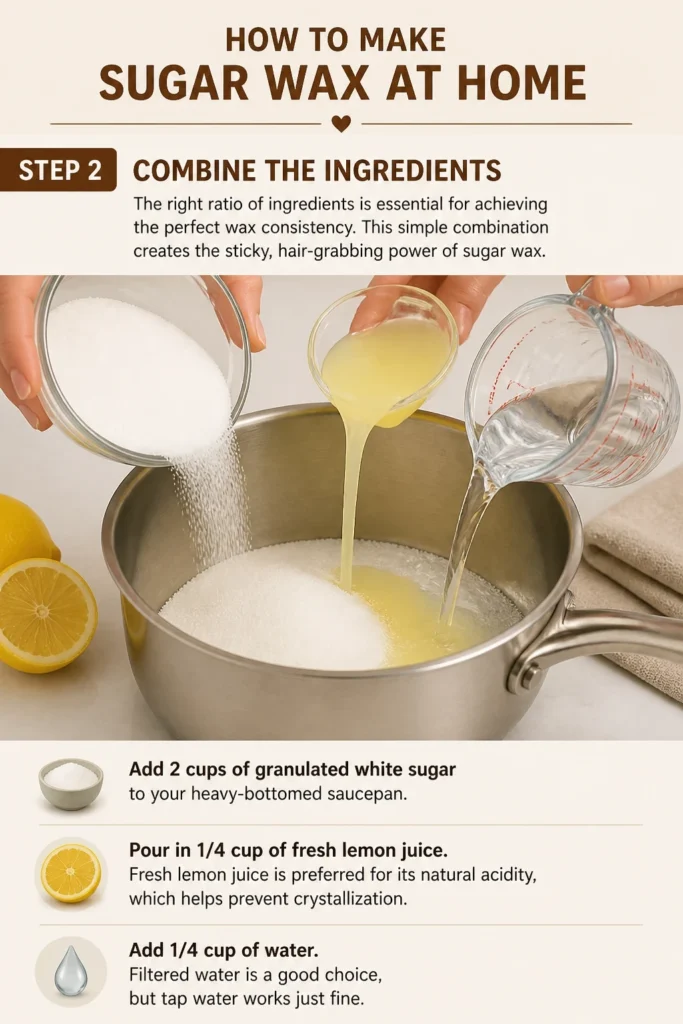
This simple combination creates the sticky, hair-grabbing power of sugar wax.
- Add 2 cups of granulated white sugar to your heavy-bottomed saucepan.
- Pour in 1/4 cup of fresh lemon juice. Fresh lemon juice is preferred for its natural acidity, which helps prevent crystallization.
- Add 1/4 cup of water. Filtered water is a good choice, but tap water works just fine.
Step 3: Begin Heating on Low
Starting with low heat ensures the sugar dissolves properly without burning.
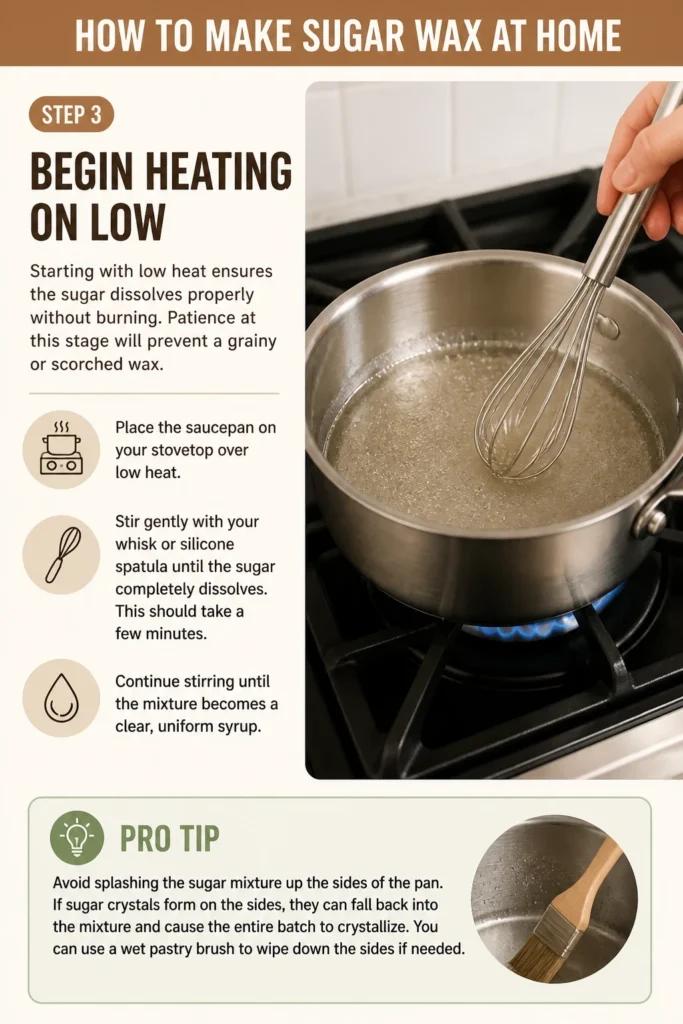
Patience at this stage will prevent a grainy or scorched wax.
- Place the saucepan on your stovetop over low heat.
- Stir gently with your whisk or silicone spatula until the sugar completely dissolves. This should take a few minutes.
- Continue stirring until the mixture becomes a clear, uniform syrup.
Pro Tip: Avoid splashing the sugar mixture up the sides of the pan. If sugar crystals form on the sides, they can fall back into the mixture and cause the entire batch to crystallize. You can use a wet pastry brush to wipe down the sides if needed.
Step 4: Increase Heat and Bring to a Boil
Once dissolved, the mixture needs to reach a rolling boil to properly cook.
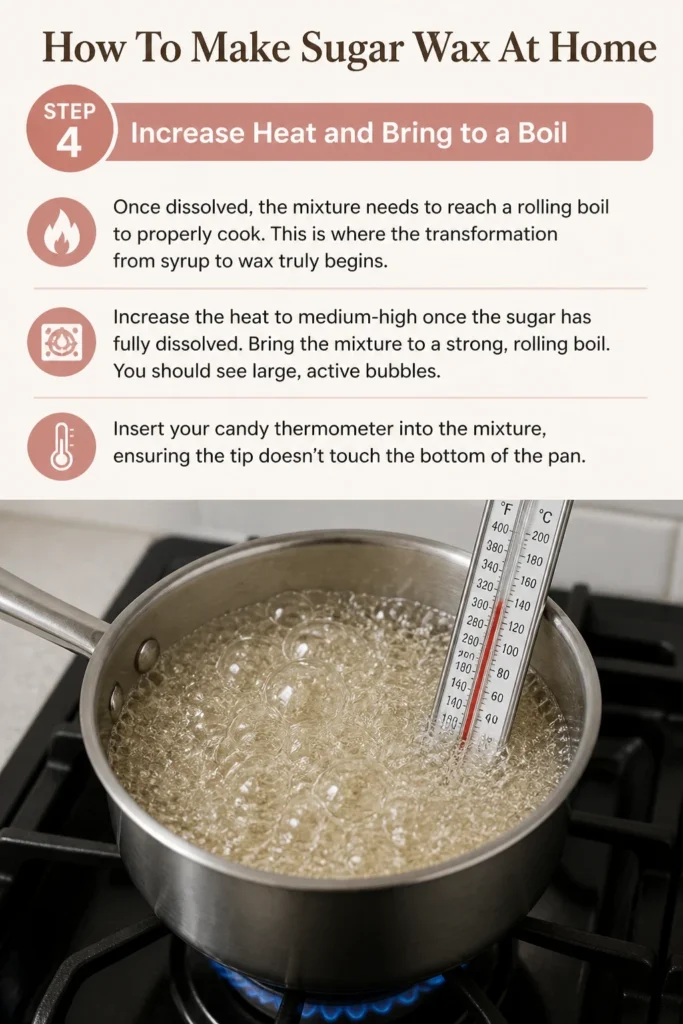
This is where the transformation from syrup to wax truly begins.
- Increase the heat to medium-high once the sugar has fully dissolved.
- Bring the mixture to a strong, rolling boil. You should see large, active bubbles.
- Insert your candy thermometer into the mixture, ensuring the tip doesn’t touch the bottom of the pan.
Step 5: Cook to the Correct Temperature
Temperature is the most critical factor for perfect sugar wax consistency.
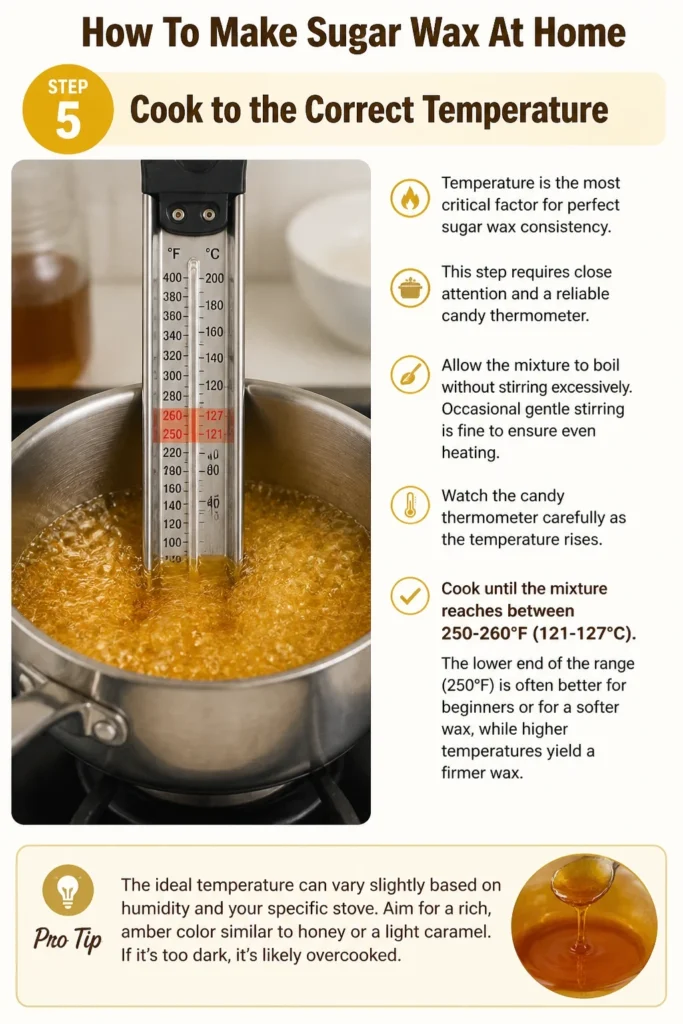
This step requires close attention and a reliable candy thermometer.
- Allow the mixture to boil without stirring excessively. Occasional gentle stirring is fine to ensure even heating.
- Watch the candy thermometer carefully as the temperature rises.
- Cook until the mixture reaches between 250-260°F (121-127°C). The lower end of the range (250°F) is often better for beginners or for a softer wax, while higher temperatures yield a firmer wax.
Pro Tip: The ideal temperature can vary slightly based on humidity and your specific stove. Aim for a rich, amber color similar to honey or a light caramel. If it’s too dark, it’s likely overcooked.
Step 6: Perform a Cold Water Test (Optional but Recommended)
The cold water test offers a visual and tactile confirmation of your wax’s readiness.
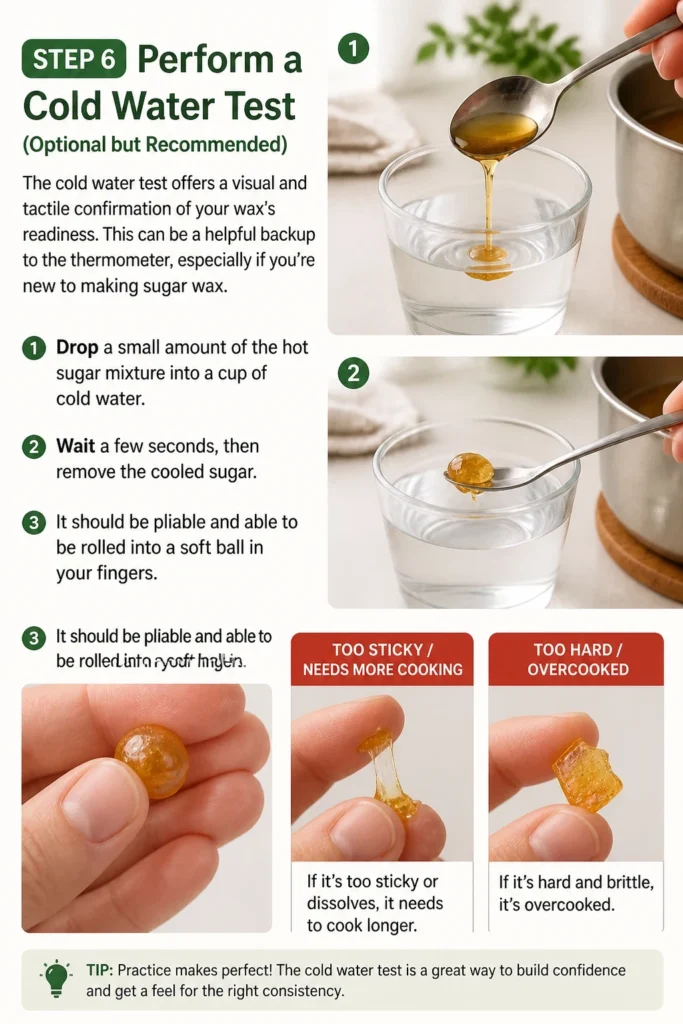
This can be a helpful backup to the thermometer, especially if you’re new to making sugar wax.
- Drop a small amount of the hot sugar mixture into a cup of cold water.
- Wait a few seconds, then remove the cooled sugar.
- It should be pliable and able to be rolled into a soft ball in your fingers. If it’s too sticky or dissolves, it needs to cook longer. If it’s hard and brittle, it’s overcooked.
Step 7: Remove from Heat and Cool
Immediately stopping the cooking process is essential to prevent overcooking.
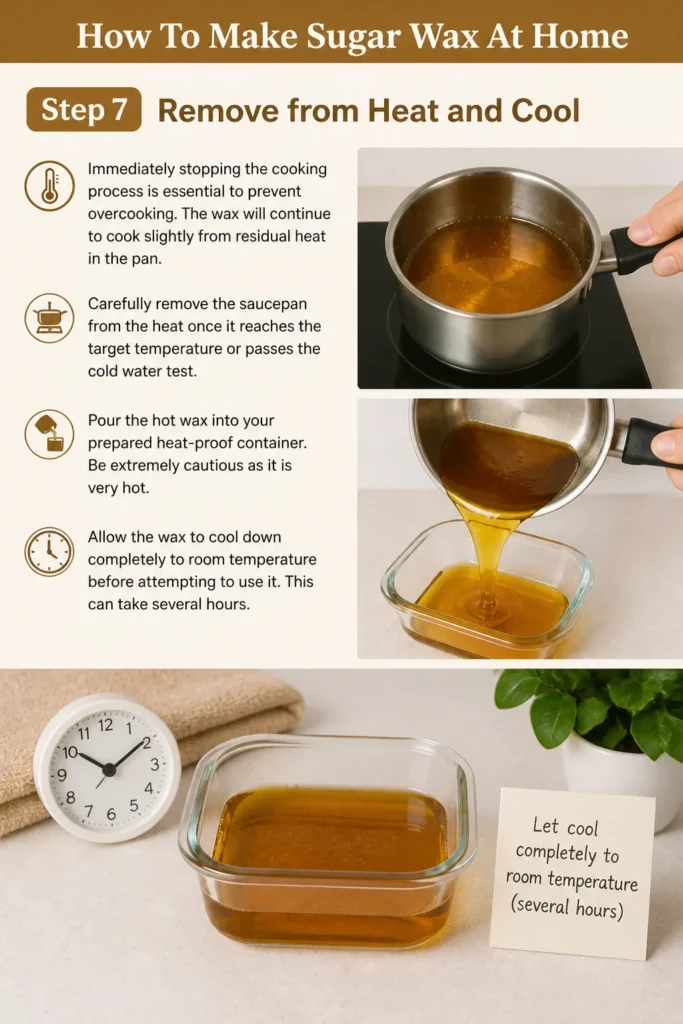
The wax will continue to cook slightly from residual heat in the pan.
- Carefully remove the saucepan from the heat once it reaches the target temperature or passes the cold water test.
- Pour the hot wax into your prepared heat-proof container. Be extremely cautious as it is very hot.
- Allow the wax to cool down completely to room temperature before attempting to use it. This can take several hours.
Step 8: Store Your Sugar Wax
Proper storage ensures your homemade sugar wax remains effective and ready for use.
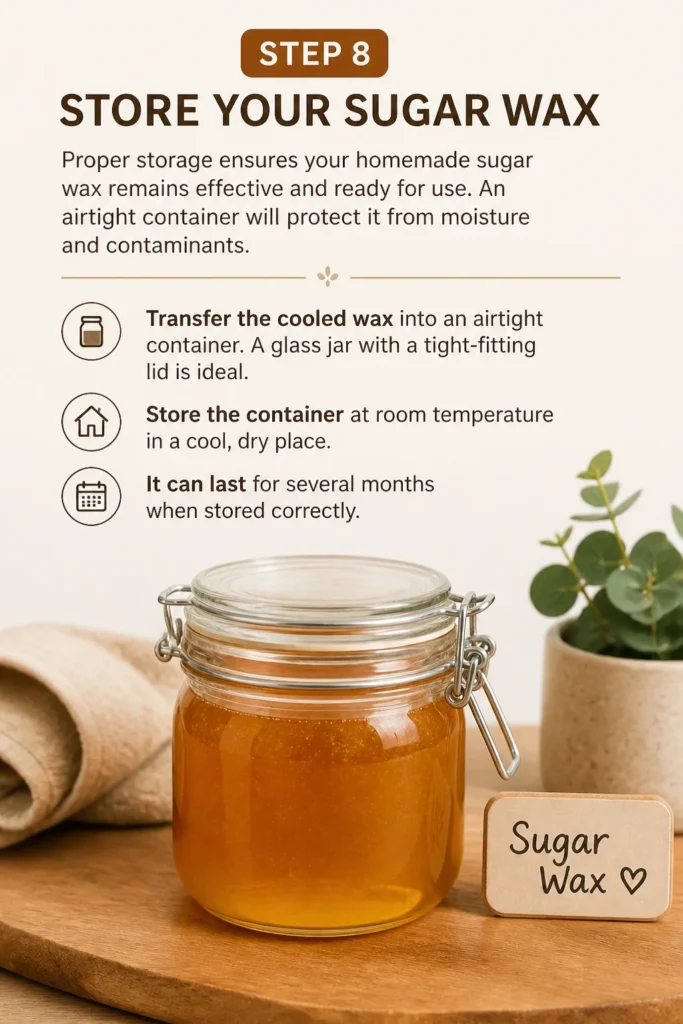
An airtight container will protect it from moisture and contaminants.
- Transfer the cooled wax into an airtight container. A glass jar with a tight-fitting lid is ideal.
- Store the container at room temperature in a cool, dry place.
- It can last for several months when stored correctly.
Common Mistakes to Avoid
Undercooking the Wax
If your sugar wax is too runny or doesn’t pull hair effectively, it’s likely undercooked. This means it didn’t reach the necessary temperature to achieve the right consistency.
The solution is to reheat the wax gently and continue cooking until it reaches the correct amber color and temperature (250-260°F).
Overcooking the Wax
Overcooked wax becomes hard, brittle, and difficult to work with. It will snap rather than pull hair, and it might even crystallize easily.
Unfortunately, overcooked wax is often beyond saving. If it’s only slightly over, you might try adding a tiny bit of water (a teaspoon at a time) and reheating very gently, but this often leads to crystallization.
Adding Too Much Water
While a little water is necessary, too much will dilute the sugar mixture, making it difficult to reach the proper consistency.
If your wax isn’t thickening despite reaching the right temperature, you might have added too much water. Try letting it cook slightly longer to evaporate some of the excess water, but be careful not to burn it.
Uneven Heating
If the sugar doesn’t dissolve completely or burns in spots, it can lead to a gritty, inconsistent wax. This often happens if the heat is too high too soon or if you don’t stir adequately at the beginning.
Always start on low heat, stir until dissolved, and use a heavy-bottomed pot to ensure even heat distribution. A wet pastry brush can help prevent crystals on the pot sides.
Troubleshooting
Wax is Too Sticky/Runny
If your cooled wax feels too sticky or runny to mold and apply, it likely needs more cooking time. It didn’t reach the optimal temperature during preparation.
Gently reheat the wax in a saucepan over low heat. Use your candy thermometer to guide you, aiming for the 250-260°F range. Perform a cold water test to confirm pliability.
Wax is Too Hard/Brittle
A wax that is too hard or brittle was overcooked. It reached too high a temperature and lost too much moisture, making it difficult to spread or work with.
While tricky, you can try to salvage it. Add a teaspoon of water at a time and gently reheat, stirring until it softens. Be cautious not to add too much water, which can cause crystallization.
Wax Crystallizes
Crystallization can happen if sugar crystals are splashed on the sides of the pan and fall back in, or if the wax is overcooked and then reheated too aggressively.
If mild crystallization occurs, you might be able to gently reheat it with a tiny bit of water and stir until smooth. For severe crystallization, it might be best to start a new batch.
Key Takeaways
- Precise measurements of sugar, water, and lemon juice are crucial for success.
- Always start with low heat to dissolve sugar completely, then increase to a boil.
- A candy thermometer is your best friend for reaching the perfect temperature (250-260°F).
- The cold water test provides an excellent backup to ensure pliability.
- Cool the wax completely at room temperature before attempting to use or store it.
- Store your homemade sugar wax in an airtight container in a cool, dry place.
Frequently Asked Questions
Can I use bottled lemon juice?
While fresh lemon juice is recommended for its consistent acidity, bottled lemon juice can be used. Just ensure it’s 100% lemon juice without added sugars or preservatives, as these can affect the wax consistency.
How do I reheat sugar wax for use?
You can gently reheat sugar wax in a microwave in 15-second intervals, stirring between each, or in a double boiler until it reaches a workable, warm consistency. It should be pliable but not too hot to touch.
Is sugar wax less painful than traditional waxing?
Many people find sugaring less painful than traditional waxing because it adheres only to the hair and dead skin cells, not live skin. It’s also pulled in the direction of hair growth, which can reduce discomfort and ingrown hairs.
Can I use sugar wax on all body parts?
Yes, sugar wax is gentle enough for use on most body parts, including legs, arms, underarms, bikini line, and even the face. Always do a patch test first to ensure no adverse reaction.
Our Top Recommended Finds
Having the right tools makes the sugar wax making process much easier and more successful.
- Heavy-Bottomed Saucepan: Essential for even heat distribution and preventing burning.
- Digital Candy Thermometer: Provides accurate temperature readings, which is critical for perfect consistency.
- Airtight Glass Jars: Ideal for safe, long-term storage of your finished sugar wax.
Embrace Your Smooth Skin Journey
Creating your own sugar wax at home is more than just a DIY project; it’s a step towards natural, effective, and budget-friendly self-care.
With a little practice, you’ll master this simple recipe and enjoy consistently smooth skin.
Start your first batch today and discover the satisfying results of homemade sugaring!
Beginner-friendly templates, step-by-step guides,
and weekly project ideas in your inbox.