🌱 How To Make Aloe Vera Gel At Home

Beginner-friendly templates, step-by-step guides,
and weekly project ideas in your inbox.
There’s something incredibly satisfying about crafting your own skincare products.
Fresh aloe vera gel, straight from the plant, offers unmatched purity and potency.
Having used homemade aloe gel for years to soothe sunburns and moisturize skin, I can attest to its incredible benefits and the simple joy of knowing exactly what goes into it.

Quick Overview
You’re about to create a natural, soothing, and versatile gel for your skin and hair.
This guide will walk you through each step, ensuring a pure and effective product.
- Time needed: 30-45 minutes (plus optional chilling time)
- Difficulty: Beginner
- What you’ll need: Fresh aloe vera leaves, a sharp knife, a spoon, a blender, a bowl, a clean airtight container, and optional natural preservatives.
Step-by-Step Instructions
Step 1: Harvest Your Aloe Vera Leaf
Choose a mature, healthy aloe vera leaf from the base of the plant.
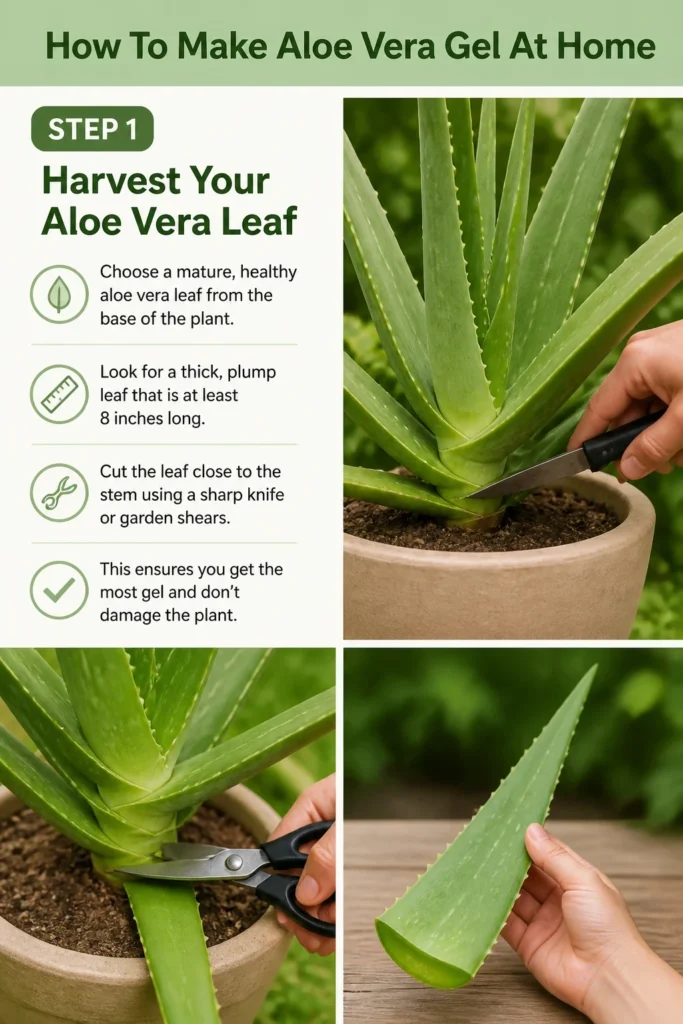
Look for a thick, plump leaf that is at least 8 inches long.
Cut the leaf close to the stem using a sharp knife or garden shears.
This ensures you get the most gel and don’t damage the plant.
Step 2: Allow the Aloin to Drain
Stand the cut aloe leaf upright in a glass or bowl for 10-15 minutes.
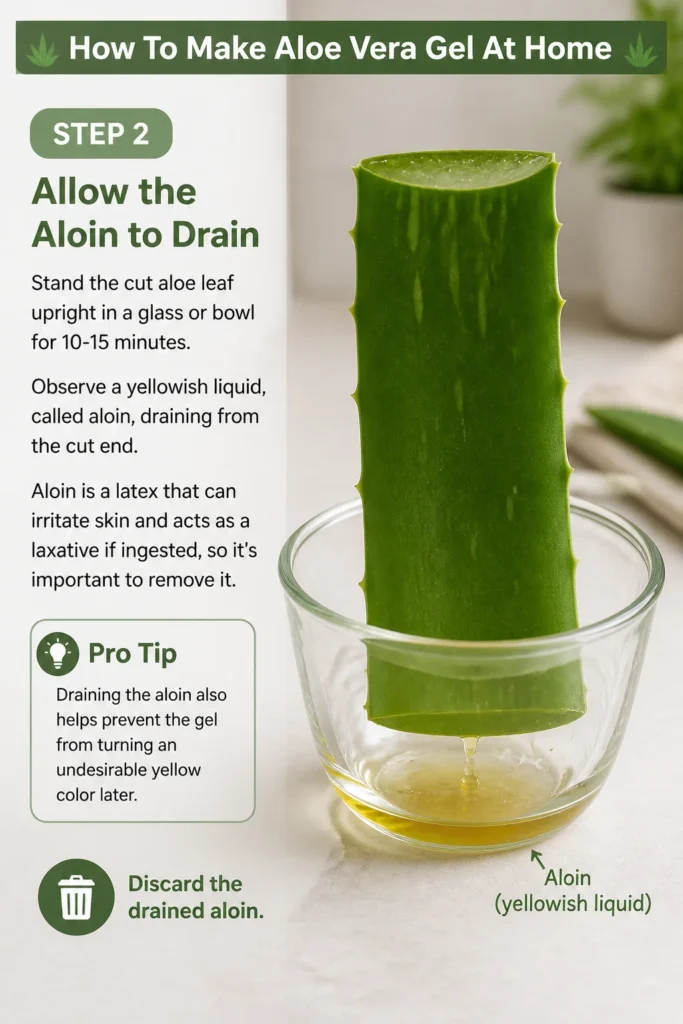
Observe a yellowish liquid, called aloin, draining from the cut end.
Aloin is a latex that can irritate skin and acts as a laxative if ingested, so it’s important to remove it.
Pro Tip: Draining the aloin also helps prevent the gel from turning an undesirable yellow color later. Discard the drained aloin.
Step 3: Wash and Prepare the Leaf
Rinse the aloe leaf thoroughly under cool running water.
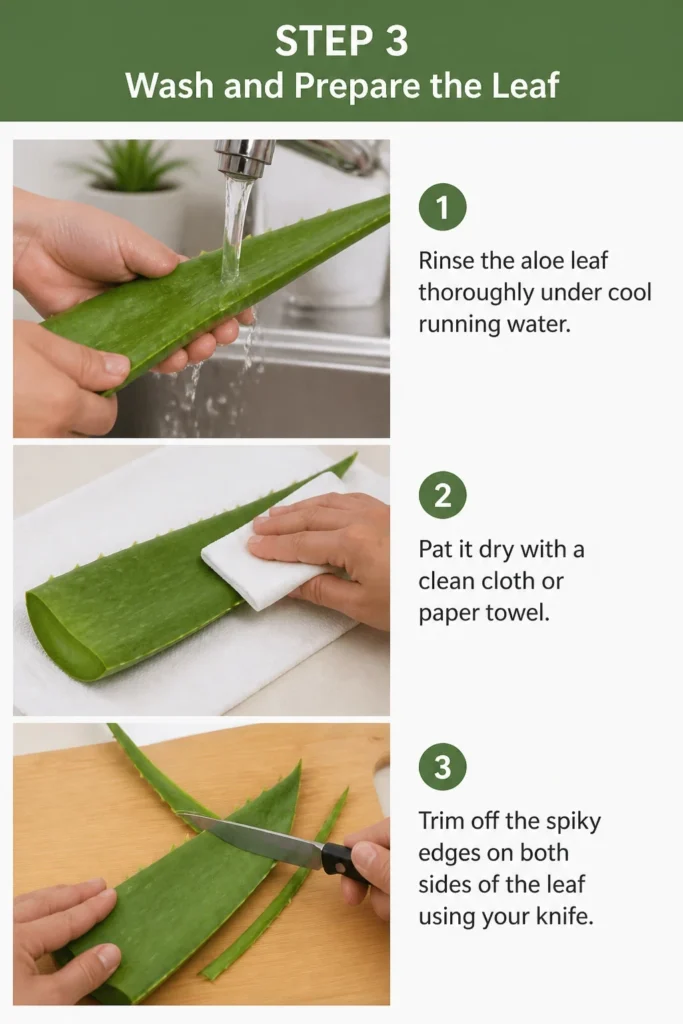
Pat it dry with a clean cloth or paper towel.
Trim off the spiky edges on both sides of the leaf using your knife.
Step 4: Fillet the Leaf
Lay the leaf flat on a clean cutting board.
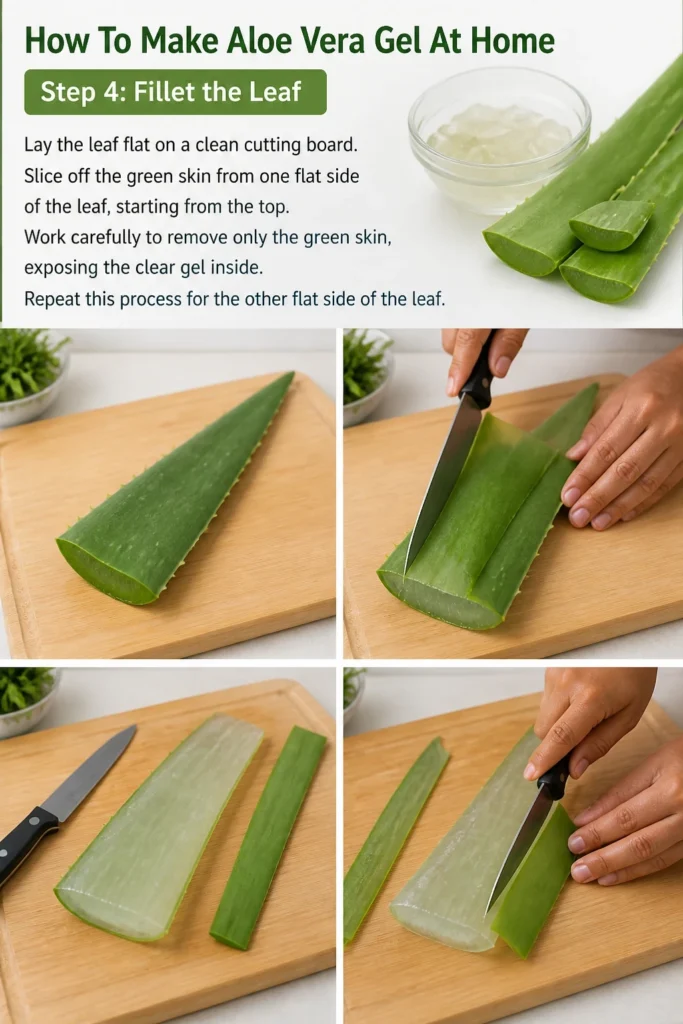
Slice off the green skin from one flat side of the leaf, starting from the top.
Work carefully to remove only the green skin, exposing the clear gel inside.
Repeat this process for the other flat side of the leaf.
Step 5: Extract the Pure Gel
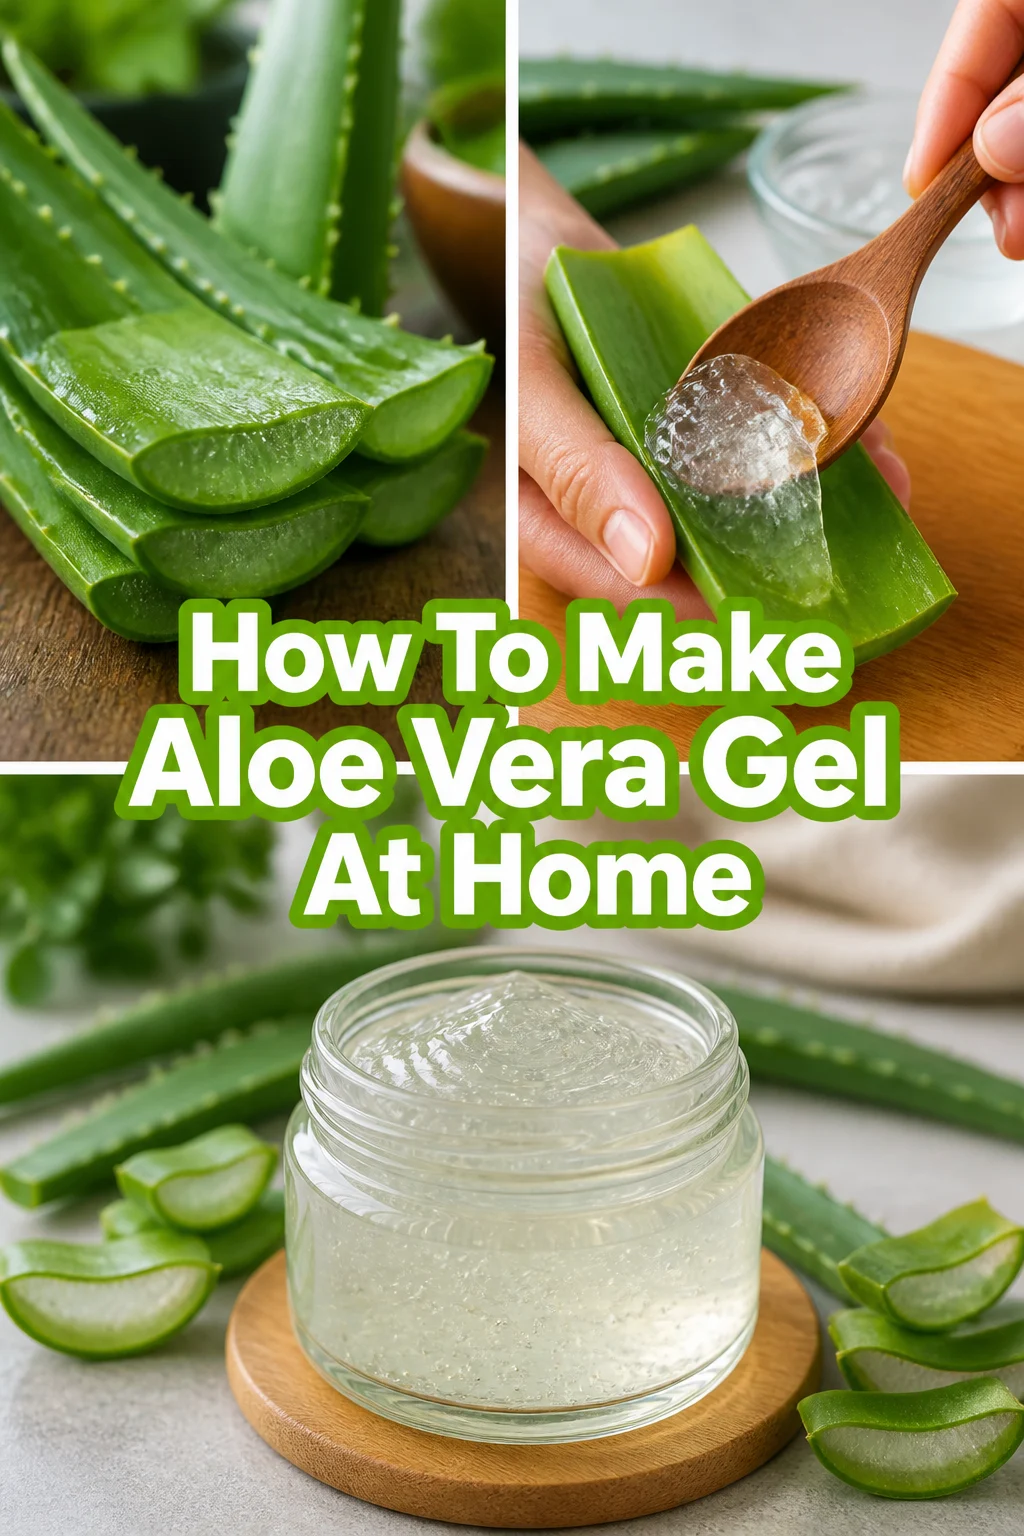
Use a spoon to gently scoop out the clear, translucent gel into a clean bowl.
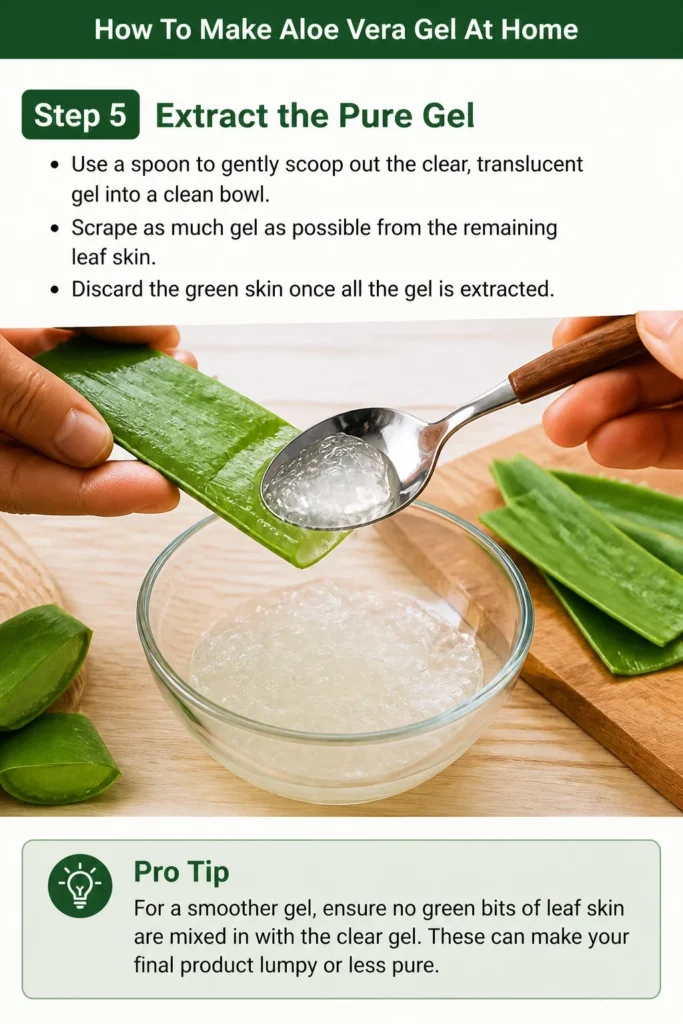
Scrape as much gel as possible from the remaining leaf skin.
Discard the green skin once all the gel is extracted.
Pro Tip: For a smoother gel, ensure no green bits of leaf skin are mixed in with the clear gel. These can make your final product lumpy or less pure.
Step 6: Blend for Smoothness
Transfer the scooped aloe vera gel into a blender.
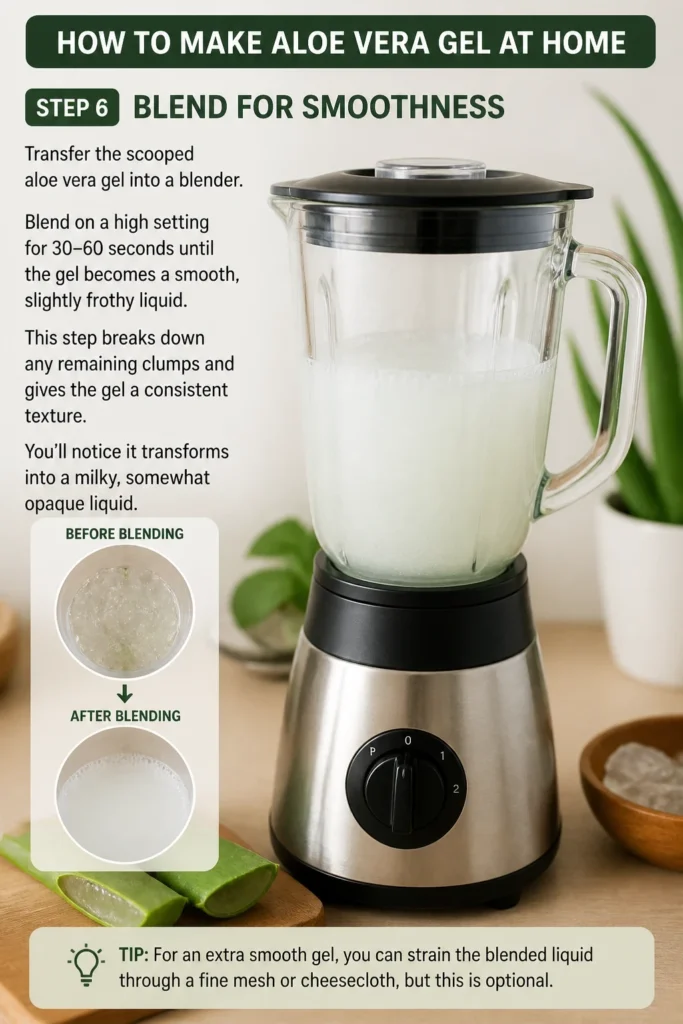
Blend on a high setting for 30-60 seconds until the gel becomes a smooth, slightly frothy liquid.
This step breaks down any remaining clumps and gives the gel a consistent texture.
You’ll notice it transforms into a milky, somewhat opaque liquid.
Step 7: Add Natural Preservatives (Optional, but Recommended)
Consider adding natural preservatives if you plan to store the gel for more than a week.
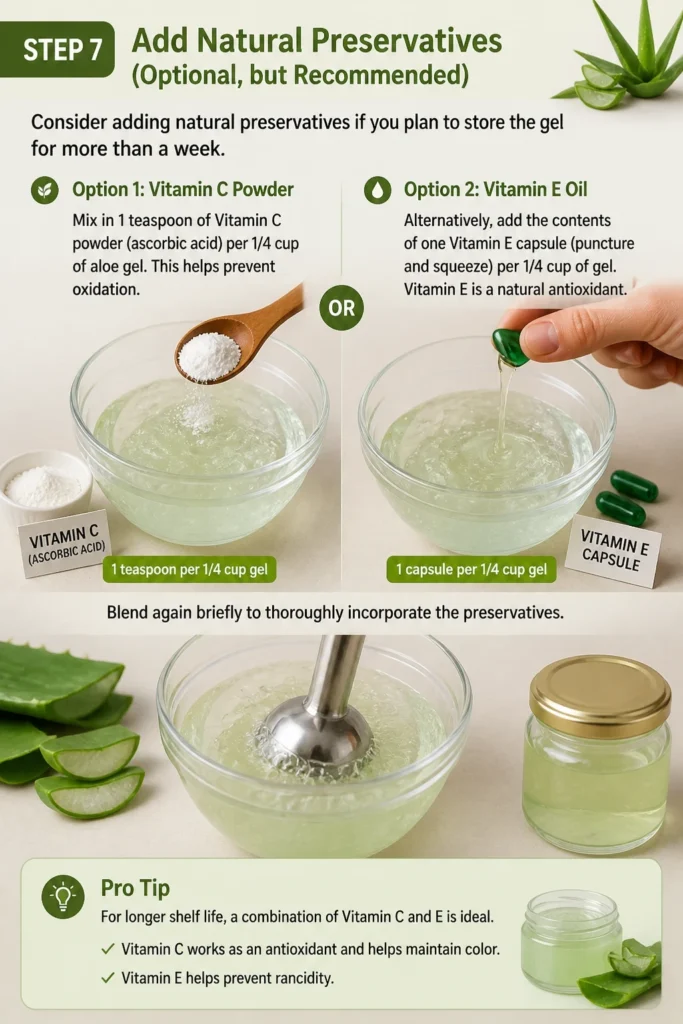
Mix in 1 teaspoon of Vitamin C powder (ascorbic acid) per 1/4 cup of aloe gel. This helps prevent oxidation.
Alternatively, add the contents of one Vitamin E capsule (puncture and squeeze) per 1/4 cup of gel. Vitamin E is a natural antioxidant.
Blend again briefly to thoroughly incorporate the preservatives.
Pro Tip: For longer shelf life, a combination of Vitamin C and E is ideal. Vitamin C works as an antioxidant and helps maintain color, while Vitamin E helps prevent rancidity.
Step 8: Store Your Homemade Gel
Pour the freshly blended aloe vera gel into a clean, airtight container or jar.
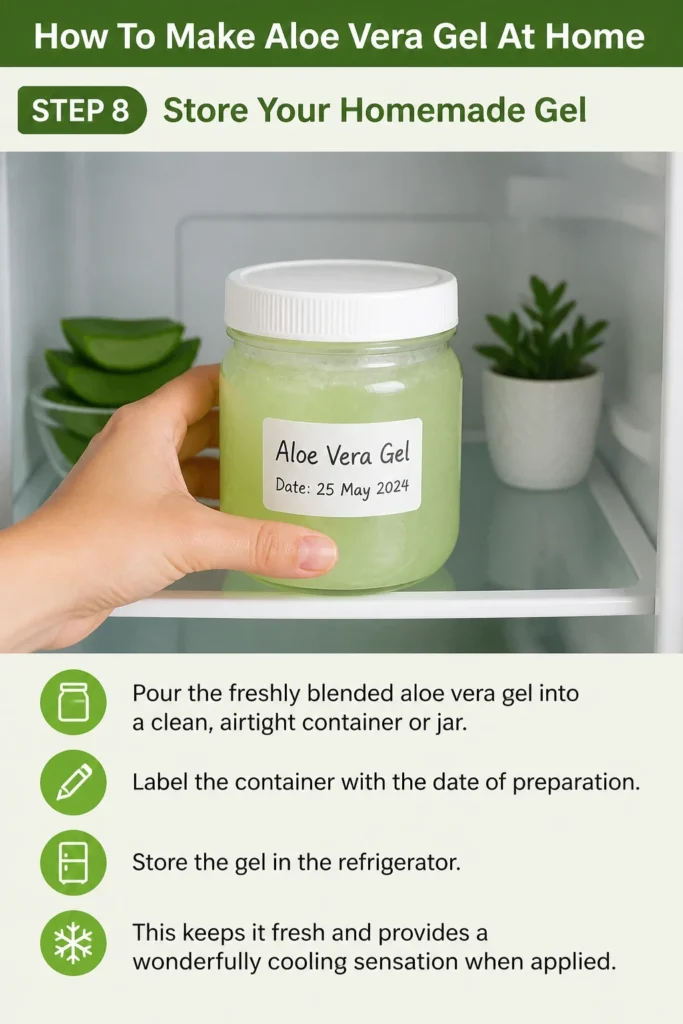
Label the container with the date of preparation.
Store the gel in the refrigerator.
This keeps it fresh and provides a wonderfully cooling sensation when applied.
Common Mistakes to Avoid
Not Draining the Aloin
Many people skip the crucial step of draining the yellowish aloin liquid.
This can lead to skin irritation or an upset stomach if the gel is used internally.
Always stand the cut leaf upright for 10-15 minutes to allow this latex to drain completely before processing.
Leaving Green Bits in the Gel
When filleting the leaf, it’s tempting to scrape quickly and include some green skin.
These green pieces can make your gel lumpy, give it an unpleasant color, and potentially reduce its purity.
Take your time to carefully remove only the clear gel, leaving the green skin behind.
Not Using Preservatives for Longer Storage
Fresh aloe vera gel, without any preservatives, has a very short shelf life, typically only 1-2 weeks in the refrigerator.
If you make a larger batch or want it to last longer, omitting natural preservatives like Vitamin C or E will lead to spoilage.
Always add these antioxidants if you intend to store your gel for more than a few days.
Poor Sanitation
Using unclean tools, containers, or even unwashed hands can introduce bacteria into your fresh gel.
This dramatically shortens its shelf life and can make it unsafe to use on your skin.
Ensure all tools, bowls, and storage containers are thoroughly cleaned and sterilized before use.
Troubleshooting
My Gel is Too Thin/Watery
This often happens if you’ve included too much of the watery layer just beneath the green skin or if the aloe leaf itself wasn’t very mature.
To thicken it slightly, you can try adding a very tiny pinch of xanthan gum (a natural thickener) to the blender during the blending stage, but use sparingly as a little goes a long way.
Alternatively, accept the thinner consistency; it’s still effective and pure.
The Gel Turned Brown/Pink
This discoloration is usually due to oxidation, especially if exposed to air for too long or if no antioxidants were added.
It can also happen if some aloin wasn’t fully drained, or if the leaf was stressed.
Ensure proper aloin drainage, add Vitamin C or E, and store in an airtight container to minimize air exposure.
My Gel Isn’t Lasting Long
A short shelf life is common for preservative-free homemade products.
The most common reasons are lack of preservatives, improper storage, or inadequate sanitation.
Always add natural antioxidants like Vitamin C and E, store in a clean, airtight container in the refrigerator, and ensure all your tools are spotless.
Key Takeaways
- Always drain the yellowish aloin from the aloe leaf to prevent irritation.
- Carefully fillet the leaf to extract only the clear gel, avoiding green skin.
- Blend the gel thoroughly to achieve a smooth, consistent texture.
- Add natural preservatives like Vitamin C or E to extend the gel’s shelf life.
- Store your homemade aloe vera gel in an airtight container in the refrigerator.
- Prioritize cleanliness and sanitation throughout the entire preparation process.
Frequently Asked Questions
Can I use aloe vera from a store-bought leaf?
Yes, you can absolutely use a store-bought aloe vera leaf. Just ensure it looks fresh, plump, and healthy. Follow the same steps, especially the aloin drainage, as you would with a home-grown leaf.
How long does homemade aloe vera gel last?
Without any preservatives, homemade aloe vera gel typically lasts about 1-2 weeks when stored in an airtight container in the refrigerator. With natural preservatives like Vitamin C and E, it can last 3-4 weeks, sometimes longer, depending on storage conditions and cleanliness.
What can I use homemade aloe vera gel for?
Homemade aloe vera gel is incredibly versatile. Use it as a natural moisturizer, a soothing agent for sunburns or insect bites, a hair mask, a base for DIY face masks, or even as a light hair styling product. Its anti-inflammatory properties make it excellent for various skin concerns.
Is it safe to eat homemade aloe vera gel?
While the clear inner gel is generally considered safe for consumption, it’s critical to ensure all the aloin (the yellow latex) has been completely drained and removed. For internal use, ensure you are only consuming the pure, clear inner gel, and consult with a healthcare professional, especially if you have underlying health conditions.
Our Top Recommended Finds
- Sharp Filleting Knife: Essential for cleanly separating the gel from the skin and removing aloin. A good quality, sharp knife makes the process much easier and safer.
- Immersion Blender: Perfect for small batches, an immersion blender quickly whips the gel into a smooth consistency without needing to transfer it to a larger blender.
- Airtight Glass Jars: Ideal for storing your finished gel. Glass is non-reactive, easy to clean, and helps keep your gel fresh in the refrigerator.
Embrace Your Natural Skincare Journey
Crafting your own aloe vera gel is a rewarding experience.
You gain control over ingredients and enjoy the purest form of this incredible plant.
Take these simple steps and transform a humble aloe leaf into a potent, natural remedy for your skin and hair.
Start your homemade skincare adventure today; your skin will thank you.
Beginner-friendly templates, step-by-step guides,
and weekly project ideas in your inbox.