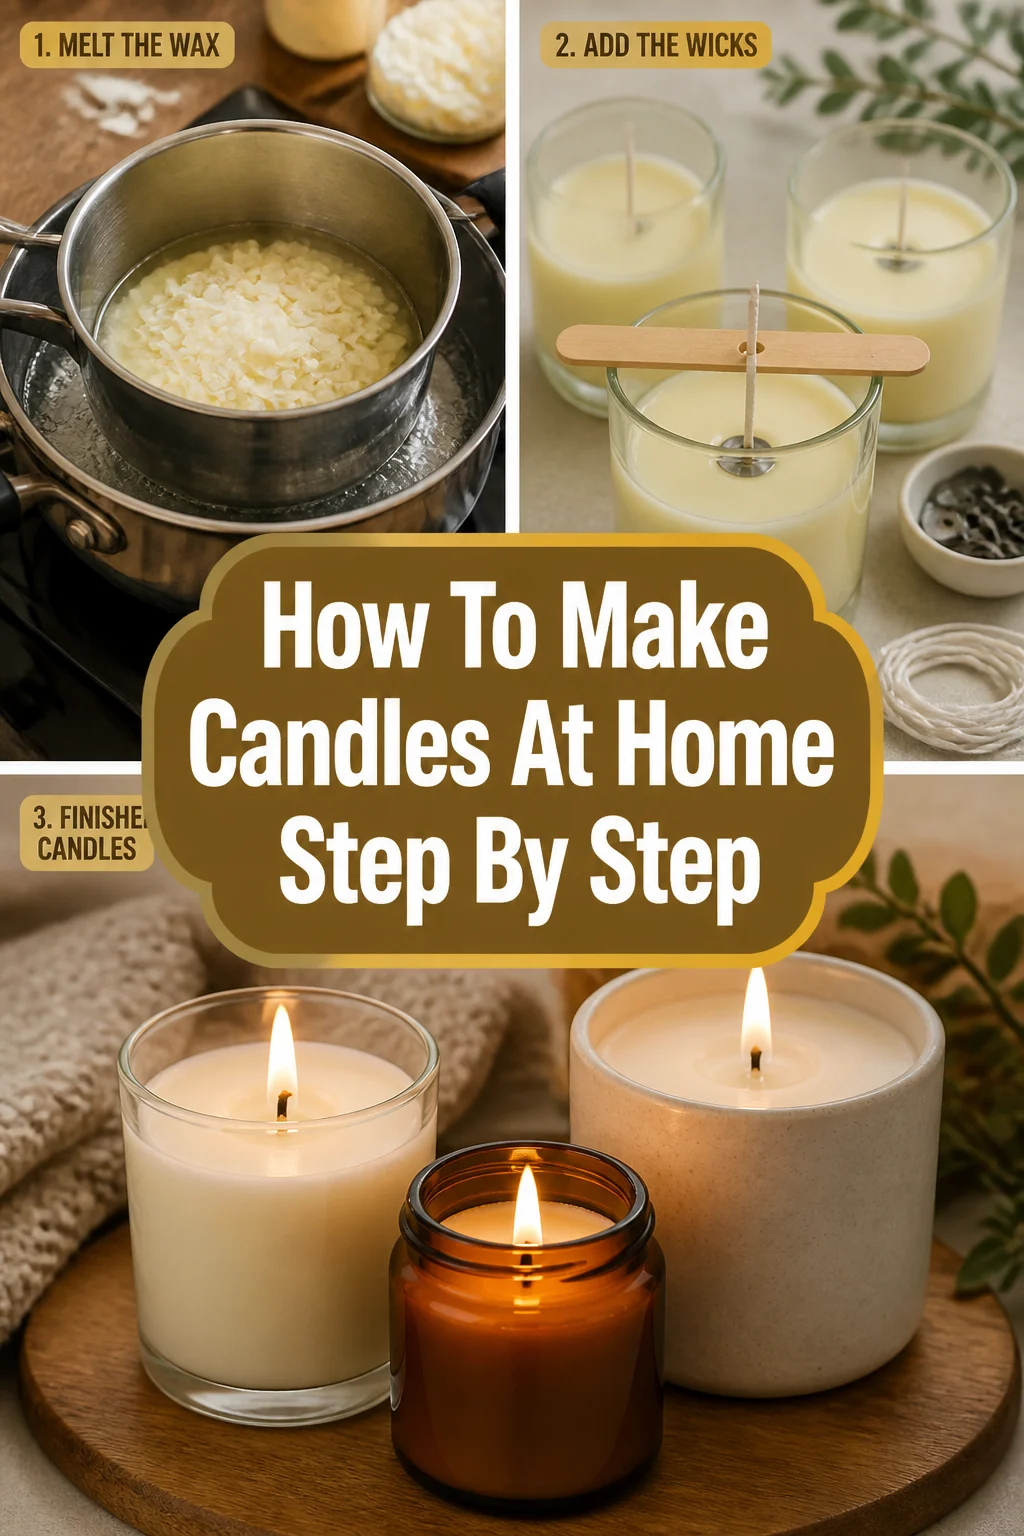
🕯️ How To Make Candles At Home Step By Step

Beginner-friendly templates, step-by-step guides,
and weekly project ideas in your inbox.
There’s a unique satisfaction in creating something beautiful with your own hands, especially when it fills your home with warmth and fragrance.
Making candles at home is a rewarding craft that’s much simpler than you might imagine.
I remember the joy of pouring my first perfectly scented candle; it sparked a passion for handmade gifts and a deeper appreciation for simple pleasures. This guide will help you experience that same joy, providing all the practical steps you need to succeed.

Quick Overview
By following these steps, you will craft beautiful, fragrant candles right in your own kitchen. This process will equip you with the skills to make custom candles for yourself or as thoughtful gifts.
- Time needed: 2-3 hours (active time) + 24-48 hours (curing time)
- Difficulty: Beginner
- What you’ll need: Wax, wicks, containers, a double boiler setup, thermometer, fragrance oil, and optional dye.
Step-by-Step Instructions
Step 1: Gather Your Supplies
Before you begin, collect all necessary materials and tools. Having everything ready prevents interruptions and makes the process smoother.
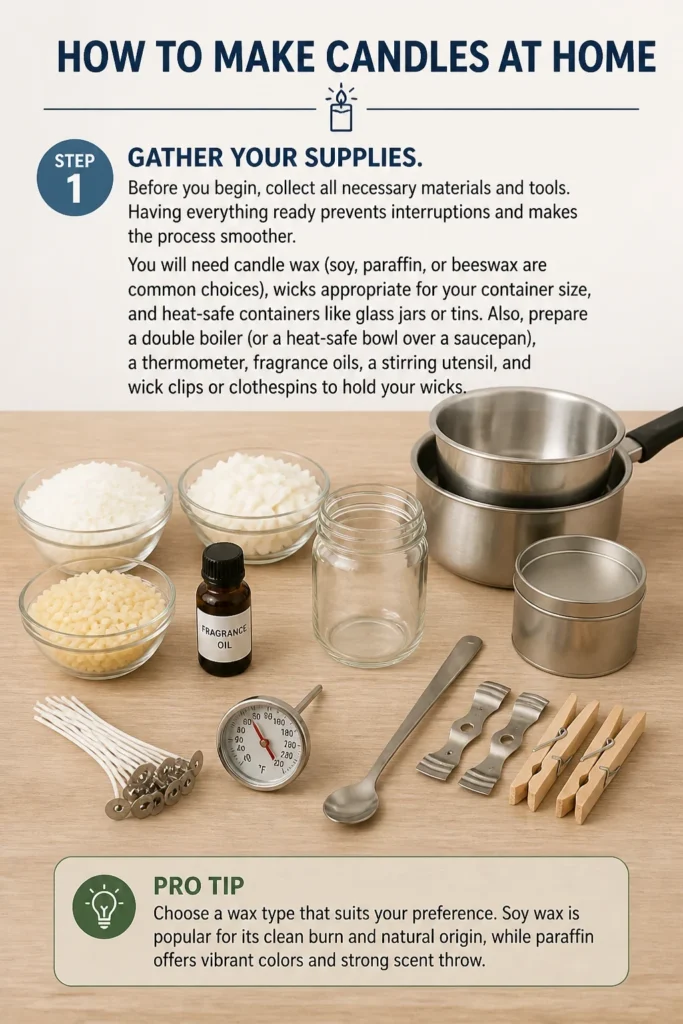
You will need candle wax (soy, paraffin, or beeswax are common choices), wicks appropriate for your container size, and heat-safe containers like glass jars or tins.
Also, prepare a double boiler (or a heat-safe bowl over a saucepan), a thermometer, fragrance oils, a stirring utensil, and wick clips or clothespins to hold your wicks.
Pro Tip: Choose a wax type that suits your preference. Soy wax is popular for its clean burn and natural origin, while paraffin offers vibrant colors and strong scent throw.
Step 2: Prepare Your Containers and Wicks
Clean your chosen candle containers thoroughly, ensuring they are dry and free of dust or residue. This step prevents imperfections in your finished candle.
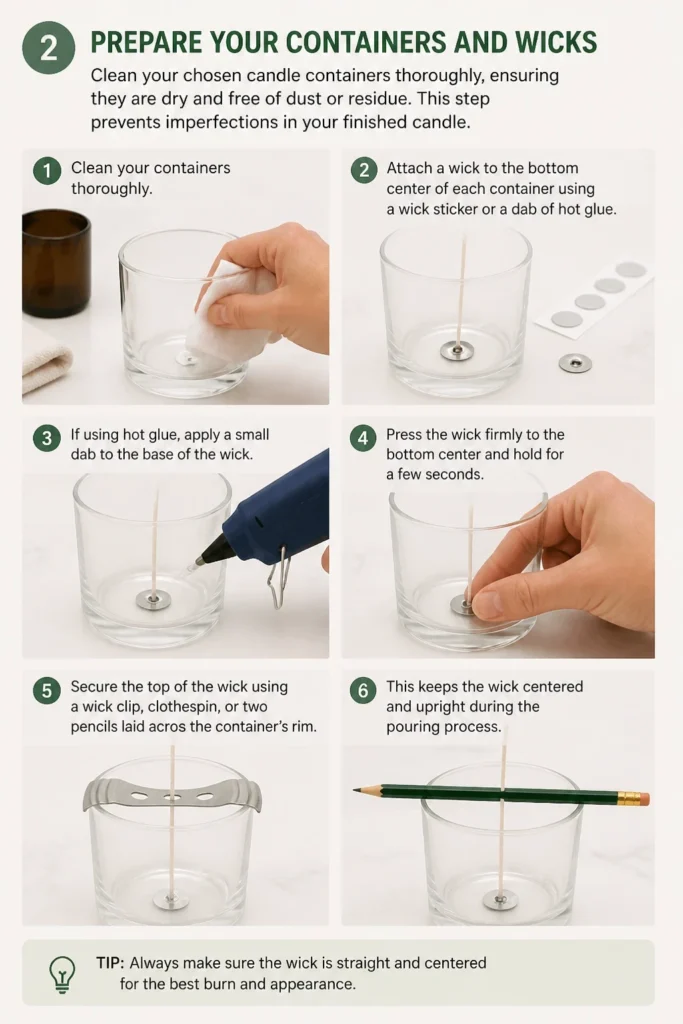
Next, attach a wick to the bottom center of each container using a wick sticker or a dab of hot glue. Make sure the wick is firmly adhered and straight.
Then, secure the top of the wick using a wick clip, clothespin, or two pencils laid across the container’s rim. This keeps the wick centered and upright during the pouring process.
Step 3: Melt the Wax
Measure the correct amount of wax for your containers. A good rule of thumb is to use twice the volume of your container in solid wax flakes to fill it once melted.
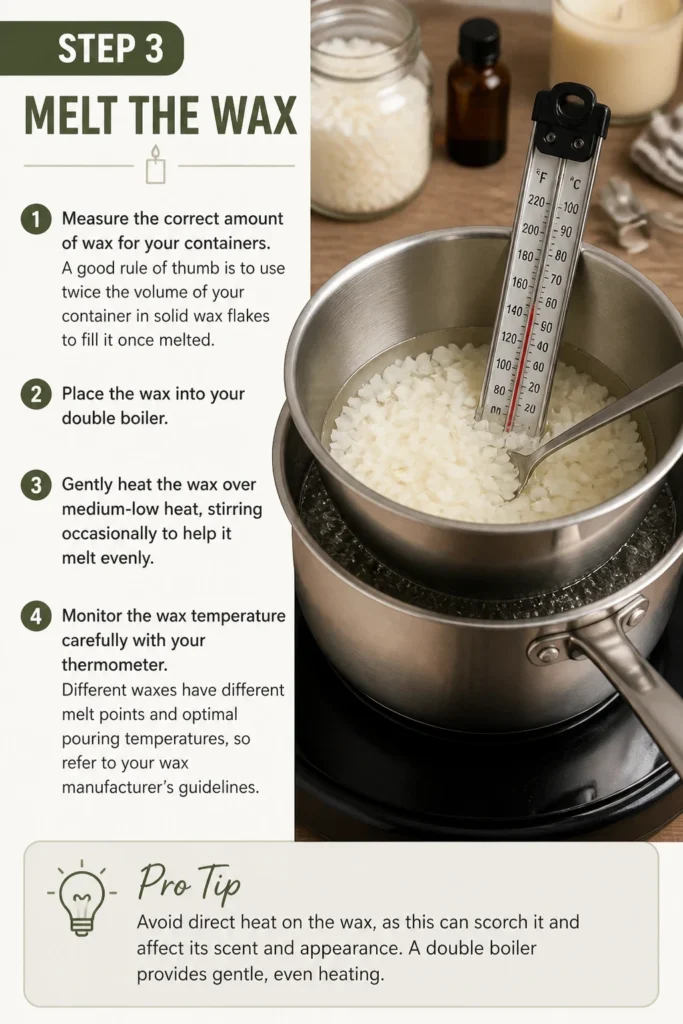
Place the wax into your double boiler. Gently heat the wax over medium-low heat, stirring occasionally to help it melt evenly.
Monitor the wax temperature carefully with your thermometer. Different waxes have different melt points and optimal pouring temperatures, so refer to your wax manufacturer’s guidelines.
Pro Tip: Avoid direct heat on the wax, as this can scorch it and affect its scent and appearance. A double boiler provides gentle, even heating.
Step 4: Add Fragrance and Dye
Once your wax reaches the recommended temperature for fragrance addition (usually around 185°F for most waxes), remove it from the heat. This is the ideal time to add your fragrance oil.
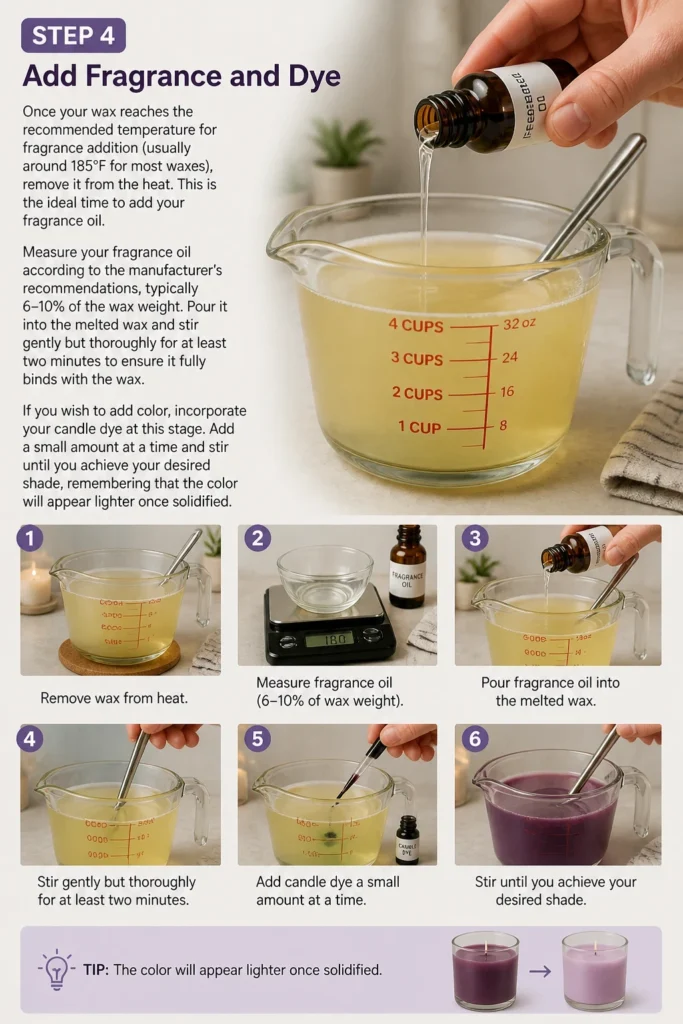
Measure your fragrance oil according to the manufacturer’s recommendations, typically 6-10% of the wax weight. Pour it into the melted wax and stir gently but thoroughly for at least two minutes to ensure it fully binds with the wax.
If you wish to add color, incorporate your candle dye at this stage. Add a small amount at a time and stir until you achieve your desired shade, remembering that the color will appear lighter once solidified.
Step 5: Pour the Wax
Allow the wax to cool slightly to its optimal pouring temperature, usually between 135°F and 160°F, depending on the wax type. Pouring at the right temperature helps prevent cracks and ensures a smooth top surface.
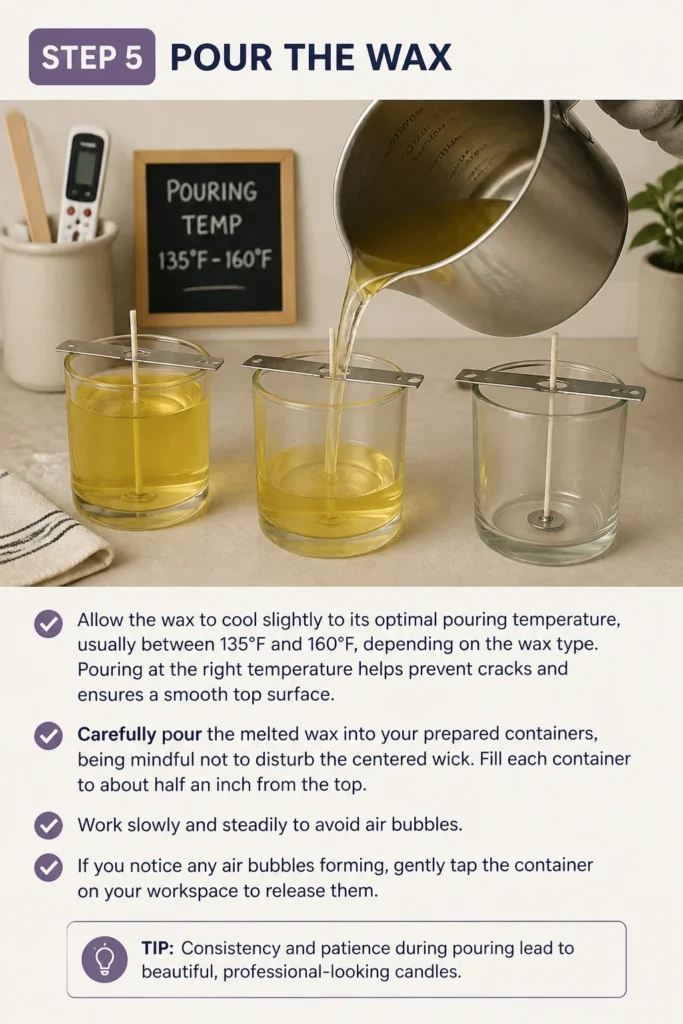
Carefully pour the melted wax into your prepared containers, being mindful not to disturb the centered wick. Fill each container to about half an inch from the top.
Work slowly and steadily to avoid air bubbles. If you notice any air bubbles forming, gently tap the container on your workspace to release them.
Step 6: Secure and Center the Wick
As the wax begins to cool and solidify, the wick may shift. It’s crucial to ensure it remains perfectly centered.
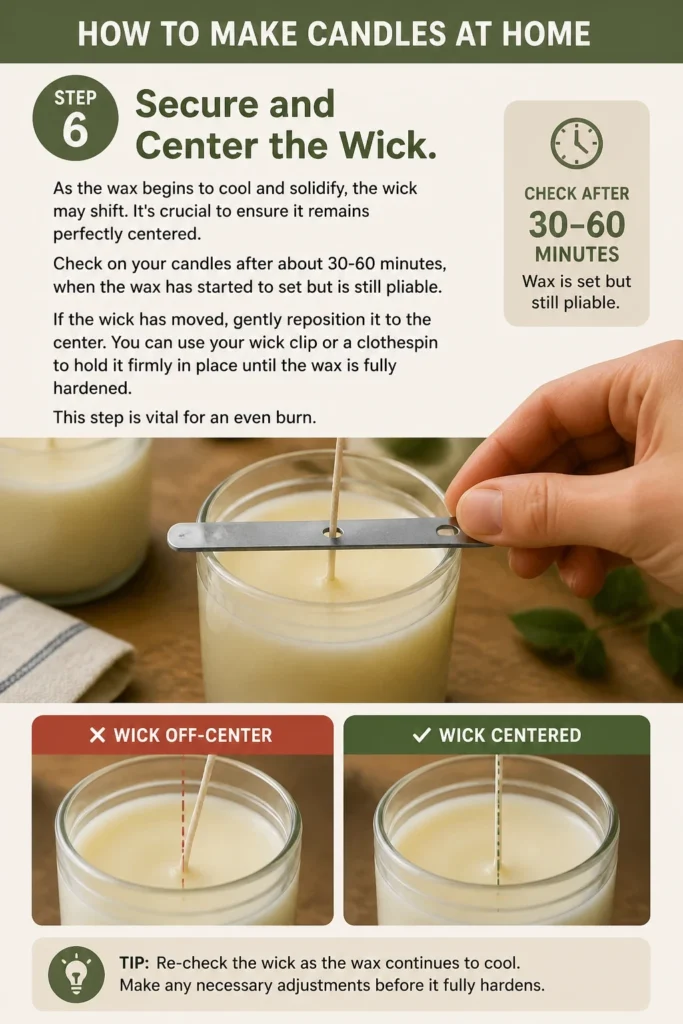
Check on your candles after about 30-60 minutes, when the wax has started to set but is still pliable. If the wick has moved, gently reposition it to the center.
You can use your wick clip or a clothespin to hold it firmly in place until the wax is fully hardened. This step is vital for an even burn.
Step 7: Cure Your Candles
Once the wax has fully hardened, allow your candles to cure. Curing is a crucial step that allows the fragrance oil to bind properly with the wax, resulting in a stronger scent throw when burned.
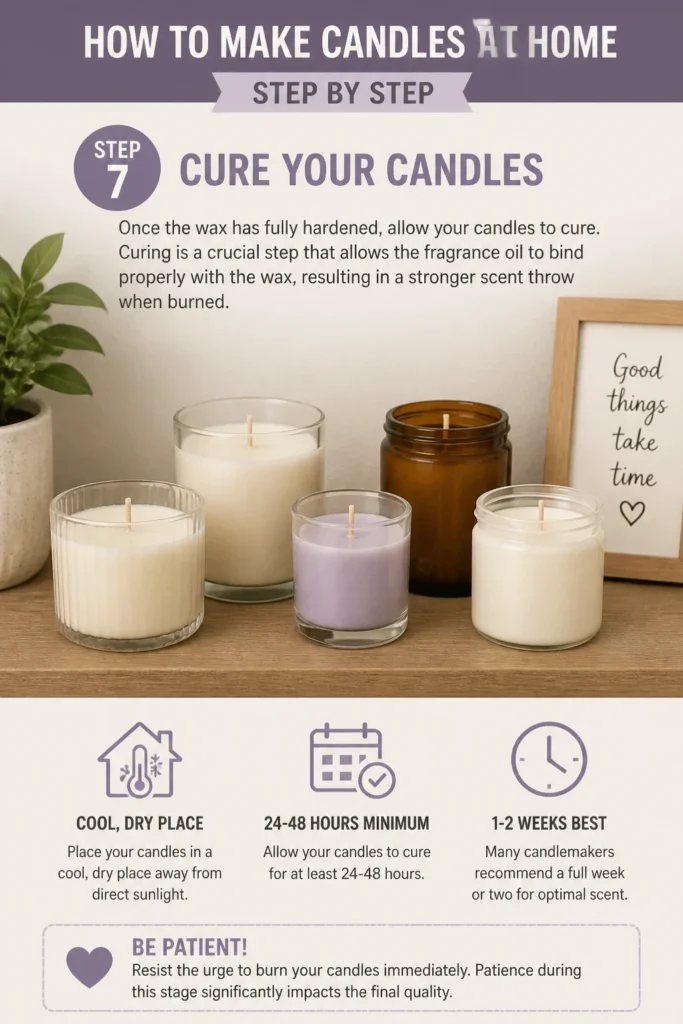
Place your candles in a cool, dry place away from direct sunlight for at least 24-48 hours. Many candlemakers recommend a full week or two for optimal scent.
Resist the urge to burn your candles immediately. Patience during this stage significantly impacts the final quality.
Step 8: Trim and Enjoy
After the curing period, your candles are almost ready. The final step before burning is to trim the wick.
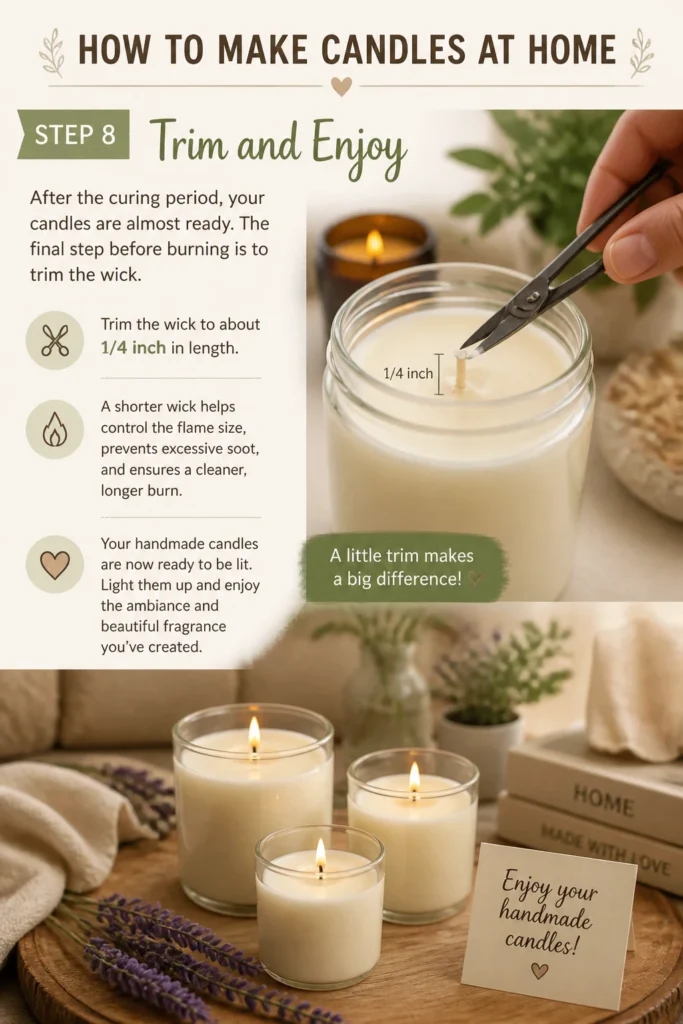
Trim the wick to about 1/4 inch in length. A shorter wick helps control the flame size, prevents excessive soot, and ensures a cleaner, longer burn.
Your handmade candles are now ready to be lit. Light them up and enjoy the ambiance and beautiful fragrance you’ve created.
Common Mistakes to Avoid
Overheating the Wax
Heating wax too quickly or to excessively high temperatures can damage its chemical structure. This often leads to a poor scent throw, discoloration, and a less stable candle.
Always use a thermometer and a double boiler, keeping the temperature within the manufacturer’s recommended range. Patience is key when melting wax.
Using the Wrong Wick Size
A wick that is too small will cause your candle to “tunnel,” leaving unburnt wax around the edges of the container. Conversely, a wick that is too large will create an oversized flame, excessive soot, and burn through the wax too quickly.
Always match your wick size to the diameter of your container and the type of wax you’re using. Wick sizing guides are readily available from suppliers.
Pouring Wax at the Wrong Temperature
Pouring wax when it’s too hot can lead to “wet spots” (where the wax pulls away from the container) and a rough top surface. Pouring it too cool can result in cracks and an uneven finish.
Always refer to your wax’s specific pouring temperature guidelines, often around 135°F to 160°F. Using a thermometer is essential for accuracy.
Not Curing Your Candles
Skipping or shortening the curing period is a common mistake that diminishes the candle’s performance. Without proper curing, the fragrance oil doesn’t fully bond with the wax.
This results in a weak or non-existent scent when the candle is burned. Always allow your candles to cure for at least 24-48 hours, with longer periods (1-2 weeks) often yielding better results.
Troubleshooting
Candle Tunneling
If your candle burns down the center, leaving a ring of unburnt wax around the edges, it’s likely tunneling. This often happens because the wick is too small for the container’s diameter or the initial burn wasn’t long enough.
Ensure you select the correct wick size for your container. When burning a new candle, allow it to burn until the melt pool reaches the edges of the container before extinguishing it. This establishes a proper “memory ring.”
Weak Scent Throw
If your candle doesn’t emit much fragrance when burning, several factors could be at play. You might not have used enough fragrance oil, or it wasn’t stirred in thoroughly.
The wax might also have been too hot when the fragrance was added, causing it to burn off. Additionally, an insufficient curing time can lead to a weak scent. Double-check your fragrance load, mixing time, and always allow for proper curing.
Uneven Top Surface or Cracks
An uneven or cracked top surface after cooling can be frustrating. This often results from pouring the wax when it’s too hot or cooling the candles too quickly.
Pour wax at the recommended temperature for your specific wax type. Allow your candles to cool slowly and evenly at room temperature, away from drafts or cold surfaces. A heat gun can be used briefly to smooth out minor imperfections on the surface.
Key Takeaways
- Gather all supplies beforehand to ensure a smooth and enjoyable candle-making experience.
- Accurate temperature control during melting and pouring is crucial for a professional-looking candle.
- Wick sizing matters immensely for an even burn and to prevent tunneling or excessive soot.
- Thoroughly mix fragrance oil into the wax for at least two minutes to achieve a strong scent throw.
- Curing your candles is non-negotiable for the fragrance to fully develop and perform optimally.
- Always trim your wick to 1/4 inch before each burn to ensure a clean, safe, and efficient flame.
Frequently Asked Questions
What type of wax is best for beginners?
Soy wax is highly recommended for beginners due to its ease of use and forgiving nature. It cleans up easily with soap and water, holds fragrance well, and provides a clean burn. Paraffin wax is also a good option for those seeking vibrant colors and strong scents.
Can I use any container for my candles?
No, not any container is suitable. You must use heat-safe containers designed for candles, such as tempered glass jars, ceramic vessels, or metal tins. Avoid thin glass, plastic, or containers with cracks, as they can shatter or melt when exposed to the heat of the flame.
How much fragrance oil should I use?
The amount of fragrance oil depends on the wax type and the desired scent intensity. Generally, a fragrance load of 6-10% of the wax weight is common. Always check the specific recommendations from your fragrance oil supplier for optimal results and safety.
How long do homemade candles last?
The burn time of a homemade candle depends on its size, the type of wax, and the wick. A properly made 8-ounce soy candle can burn for 40-50 hours. Storing candles in a cool, dark place helps preserve their fragrance and integrity over time.
Our Top Recommended Finds
- Beginner Candle Making Kit: These kits often include pre-measured wax, wicks, fragrance, and basic tools, making it easy to start without sourcing individual components.
- Digital Thermometer: An accurate thermometer is indispensable for monitoring wax temperatures, ensuring proper fragrance addition and pouring.
- Wick Centering Tools: Simple metal or plastic clips that rest on your container’s rim, keeping your wick perfectly upright and centered as the wax cools.
Your Next Step in Home Crafting
You’ve now got the knowledge and the practical steps to create beautiful candles from scratch. The world of candle making offers endless possibilities for customization and creativity.
Experiment with different waxes, scents, and colors to find your signature style. Consider exploring advanced techniques like layering colors or making pillar candles as you grow more confident.
Don’t wait any longer; gather your supplies and embark on this delightful crafting journey today. Your home will soon be filled with the warm glow and inviting aromas of your very own handmade candles.
Beginner-friendly templates, step-by-step guides,
and weekly project ideas in your inbox.