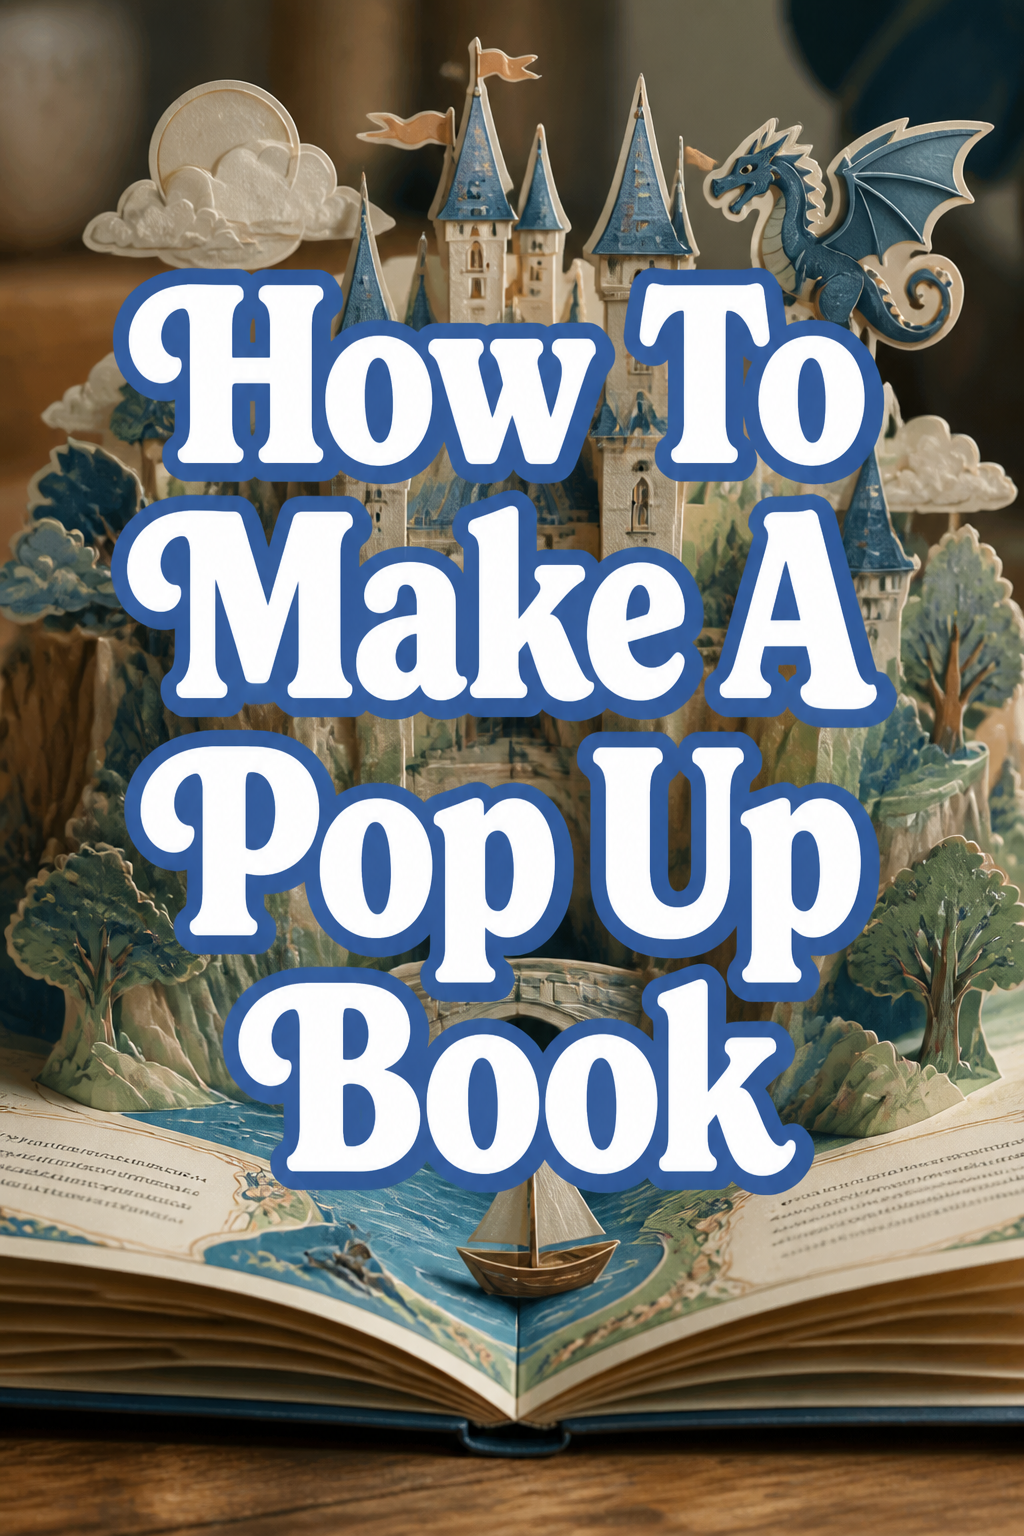
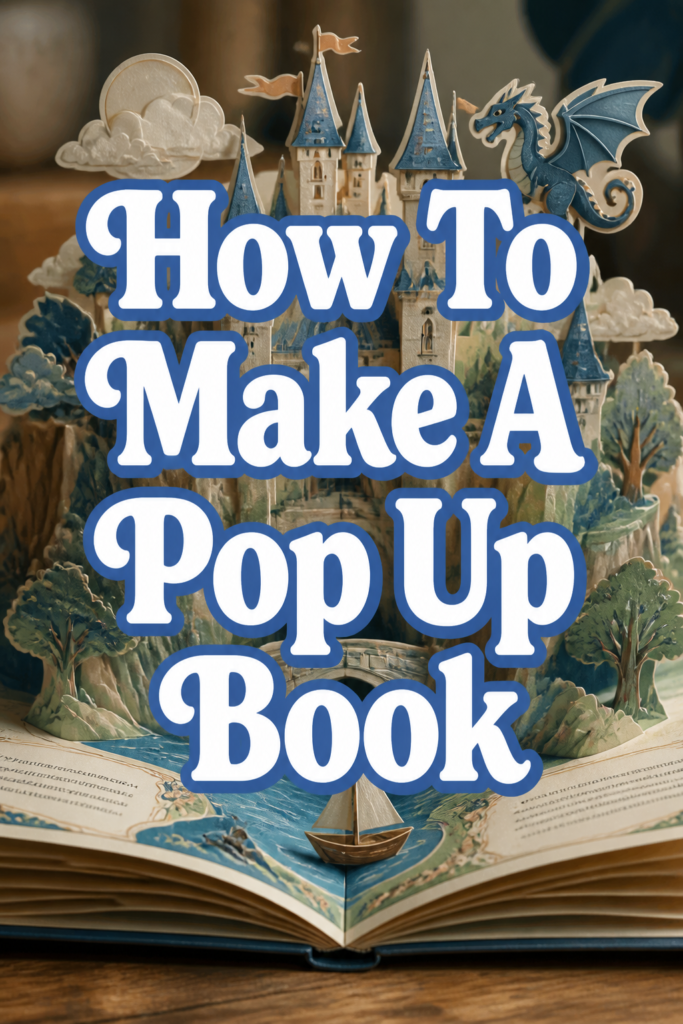
✂️ How To Make A Pop Up Book

Beginner-friendly templates, step-by-step guides,
and weekly project ideas in your inbox.
Creating a pop-up book is a delightful journey into paper engineering. I remember the first time I saw a complex pop-up castle spring to life; it felt like magic. That moment sparked my own fascination, leading me to experiment with countless designs and techniques over the years. This guide draws from those hands-on experiences to show you how anyone can bring paper to life.
You’ll discover the simple secrets behind those amazing paper structures. Get ready to transform flat sheets into captivating three-dimensional scenes.
Quick Overview
You’re about to embark on a fun, creative project that results in a truly unique book. You’ll learn fundamental pop-up mechanisms and assemble your very own interactive story.
- Time needed: 3-6 hours (depending on complexity and drying time)
- Difficulty: Beginner
- What you’ll need: Cardstock, craft knife, ruler, cutting mat, glue stick, pencil, eraser.
Step-by-Step Instructions
Step 1: Gather Your Materials
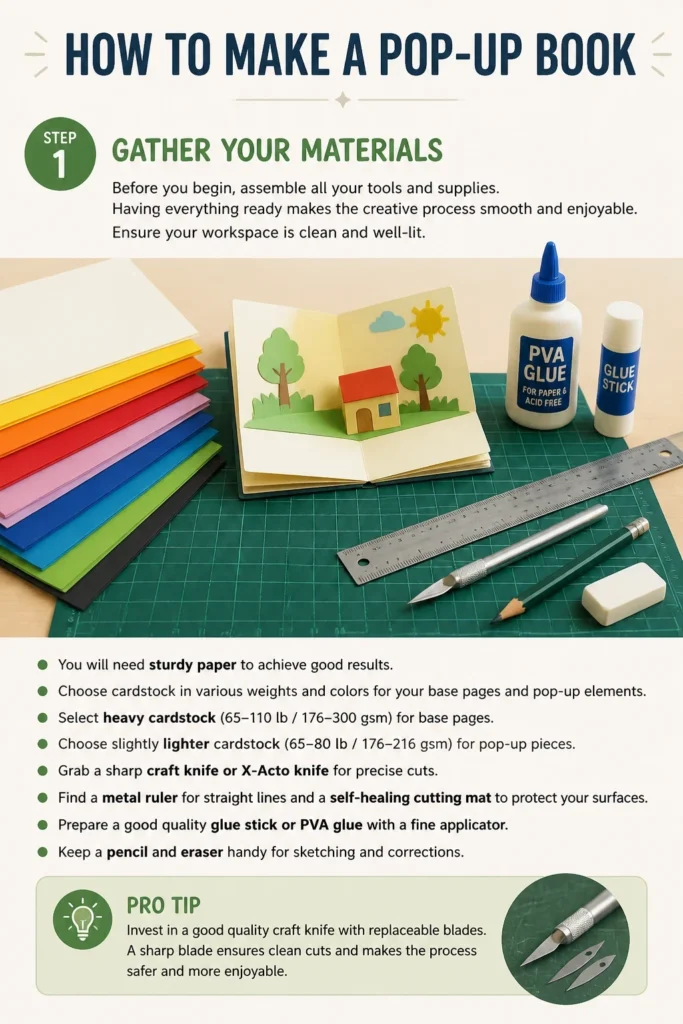
Before you begin, assemble all your tools and supplies. Having everything ready makes the creative process smooth and enjoyable. Ensure your workspace is clean and well-lit.
You will need sturdy paper to achieve good results. Choose cardstock in various weights and colors for your base pages and pop-up elements.
- Select heavy cardstock (65-110 lb / 176-300 gsm) for base pages.
- Choose slightly lighter cardstock (65-80 lb / 176-216 gsm) for pop-up pieces.
- Grab a sharp craft knife or X-Acto knife for precise cuts.
- Find a metal ruler for straight lines and a self-healing cutting mat to protect your surfaces.
- Prepare a good quality glue stick or PVA glue with a fine applicator.
- Keep a pencil and eraser handy for sketching and corrections.
Pro Tip: Invest in a good quality craft knife with replaceable blades. A sharp blade is crucial for clean cuts, preventing tears and frustration. Dull blades are dangerous and create messy edges.
Step 2: Understand Basic Pop-Up Mechanisms
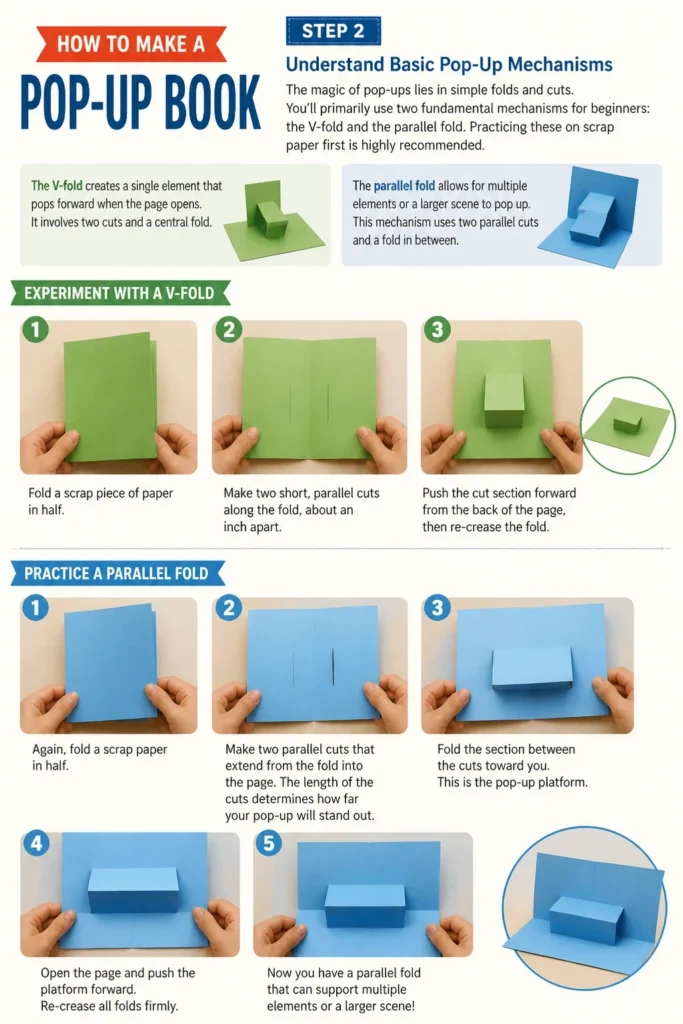
The magic of pop-ups lies in simple folds and cuts. You’ll primarily use two fundamental mechanisms for beginners: the V-fold and the parallel fold. Practicing these on scrap paper first is highly recommended.
The V-fold creates a single element that pops forward when the page opens. It involves two cuts and a central fold.
The parallel fold allows for multiple elements or a larger scene to pop up. This mechanism uses two parallel cuts and a fold in between.
- Experiment with a V-fold: Fold a scrap piece of paper in half. Make two short, parallel cuts along the fold, about an inch apart. Push the cut section forward from the back of the page, then re-crease the fold.
- Practice a parallel fold: Again, fold a scrap paper in half. Make two parallel cuts that extend from the fold into the page, then make a third cut connecting the ends of the first two. Push the central tab forward and crease.
Step 3: Design Your Page Layout
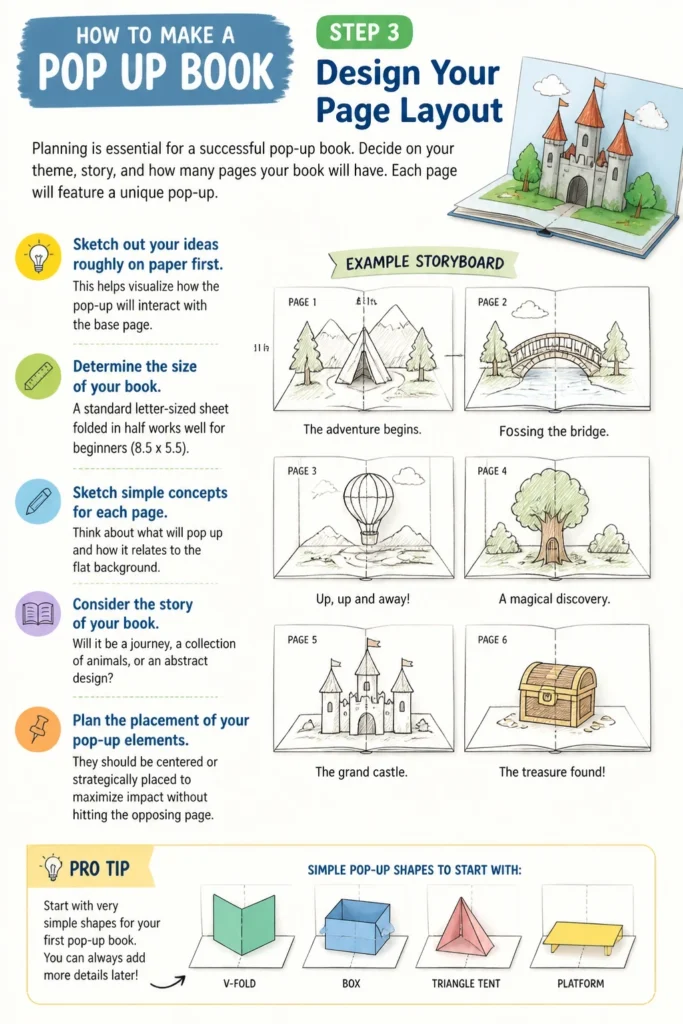
Planning is essential for a successful pop-up book. Decide on your theme, story, and how many pages your book will have. Each page will feature a unique pop-up.
Sketch out your ideas roughly on paper first. This helps visualize how the pop-up will interact with the base page.
- Determine the size of your book. A standard letter-sized sheet folded in half works well for beginners (8.5″ x 5.5″).
- Sketch simple concepts for each page. Think about what will pop up and how it relates to the flat background.
- Consider the “story” of your book. Will it be a journey, a collection of animals, or an abstract design?
- Plan the placement of your pop-up elements. They should be centered or strategically placed to maximize impact without hitting the opposing page.
Pro Tip: Start with very simple shapes for your first pop-ups, like a single house, a tree, or an animal. As you gain confidence, you can add more complex layers.
Step 4: Cut and Score Your Pop-Up Elements
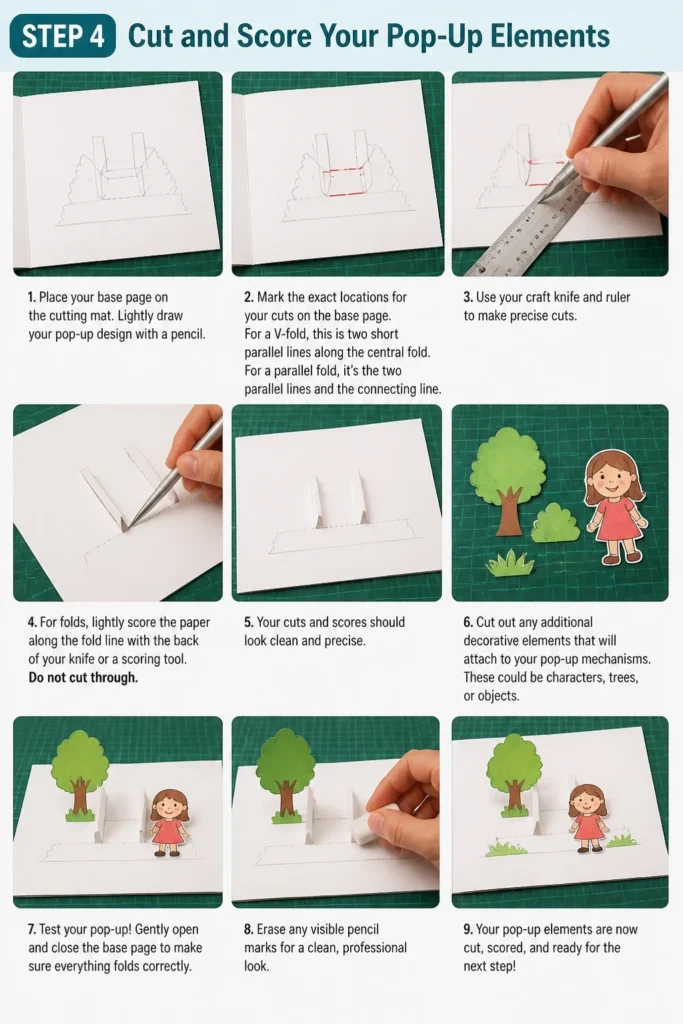
Accuracy is key in this step. Use your ruler and craft knife carefully to create precise cuts and scores. Scoring means making a shallow indentation that helps paper fold cleanly.
Place your base page on the cutting mat. Lightly draw your pop-up design with a pencil.
- Mark the exact locations for your cuts on the base page. For a V-fold, this is two short parallel lines along the central fold. For a parallel fold, it’s the two parallel lines and the connecting line.
- Use your craft knife and ruler to make precise cuts. For folds, lightly score the paper along the fold line with the back of your knife or a scoring tool. Do not cut through.
- Cut out any additional decorative elements that will attach to your pop-up mechanisms. These could be characters, trees, or objects.
- Erase any visible pencil lines once cuts are made.
Step 5: Fold and Glue Your Pop-Up
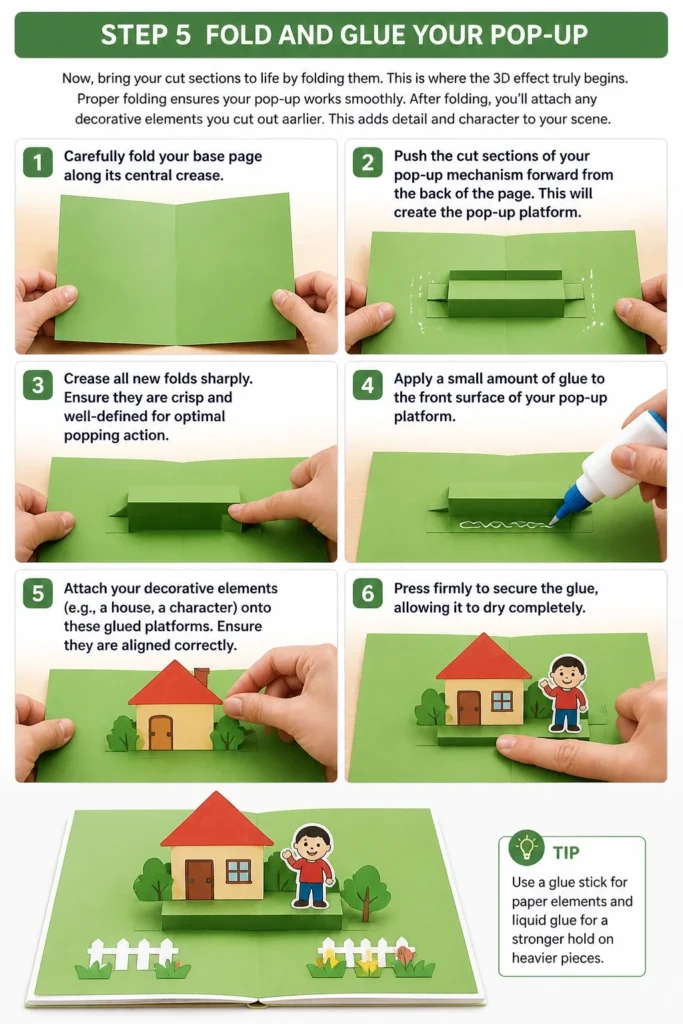
Now, bring your cut sections to life by folding them. This is where the 3D effect truly begins. Proper folding ensures your pop-up works smoothly.
After folding, you’ll attach any decorative elements you cut out earlier. This adds detail and character to your scene.
- Carefully fold your base page along its central crease.
- Push the cut sections of your pop-up mechanism forward from the back of the page. This will create the pop-up platform.
- Crease all new folds sharply. Ensure they are crisp and well-defined for optimal popping action.
- Apply a small amount of glue to the front surface of your pop-up platform.
- Attach your decorative elements (e.g., a house, a character) onto these glued platforms. Ensure they are aligned correctly.
- Press firmly to secure the glue, allowing it to dry completely.
Step 6: Attach Pop-Up to Base Page (If separate)
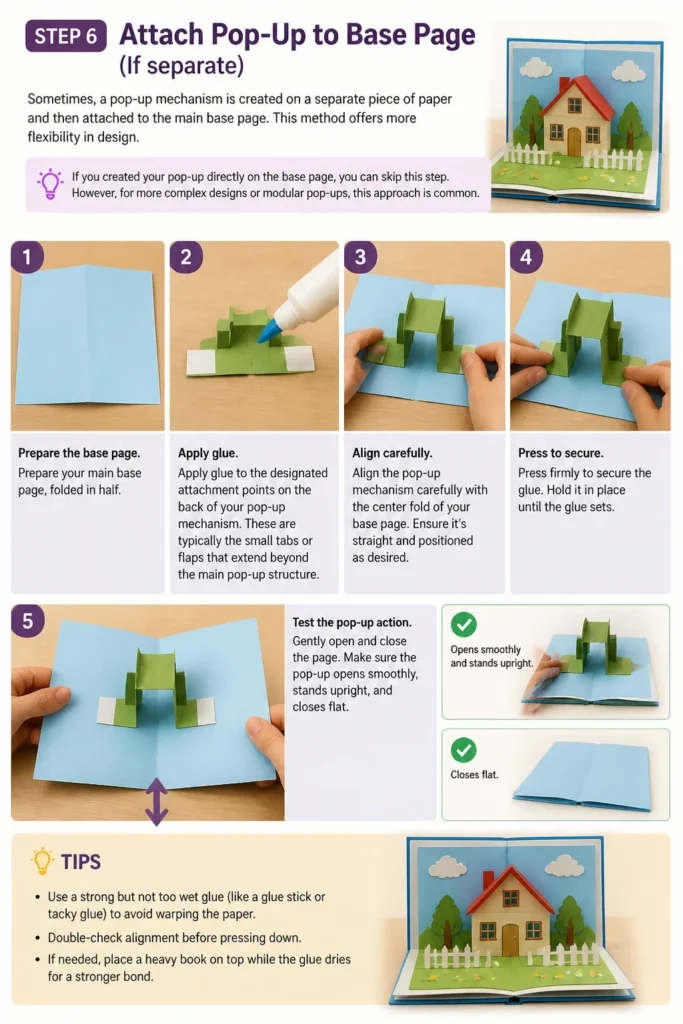
Sometimes, a pop-up mechanism is created on a separate piece of paper and then attached to the main base page. This method offers more flexibility in design.
If you created your pop-up directly on the base page, you can skip this step. However, for more complex designs or modular pop-ups, this approach is common.
- Prepare your main base page, folded in half.
- Apply glue to the designated attachment points on the back of your pop-up mechanism. These are typically the small tabs or flaps that extend beyond the main pop-up structure.
- Align the pop-up mechanism carefully with the center fold of your base page. Ensure it’s straight and positioned as desired.
- Press firmly to secure the glue. Hold it in place until the glue sets.
- Test the pop-up action by gently opening and closing the page. Make sure it operates smoothly without snagging.
Step 7: Assemble Your Book
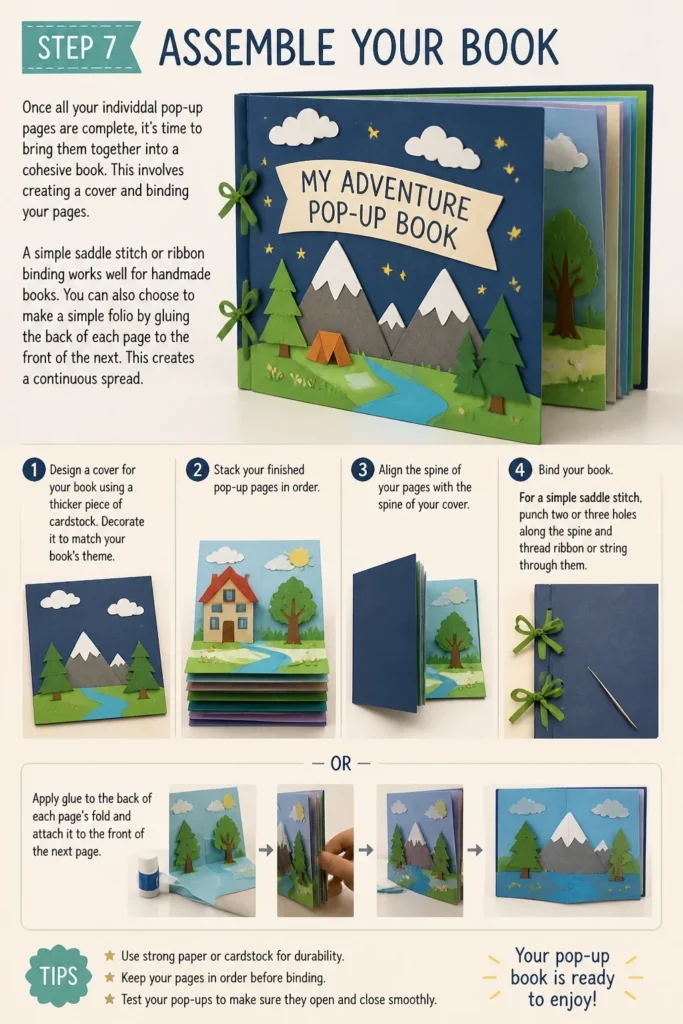
Once all your individual pop-up pages are complete, it’s time to bring them together into a cohesive book. This involves creating a cover and binding your pages. A simple saddle stitch or ribbon binding works well for handmade books.
You can also choose to make a simple folio by gluing the back of each page to the front of the next. This creates a continuous spread.
- Design a cover for your book using a thicker piece of cardstock. Decorate it to match your book’s theme.
- Stack your finished pop-up pages in order.
- Align the spine of your pages with the spine of your cover.
- Bind your book. For a simple saddle stitch, punch two or three holes along the spine and thread ribbon or string through them. Alternatively, apply glue to the back of each page’s fold and attach it to the front of the next page’s fold.
- Allow all glue to dry completely before handling the book extensively.
Step 8: Refine and Decorate
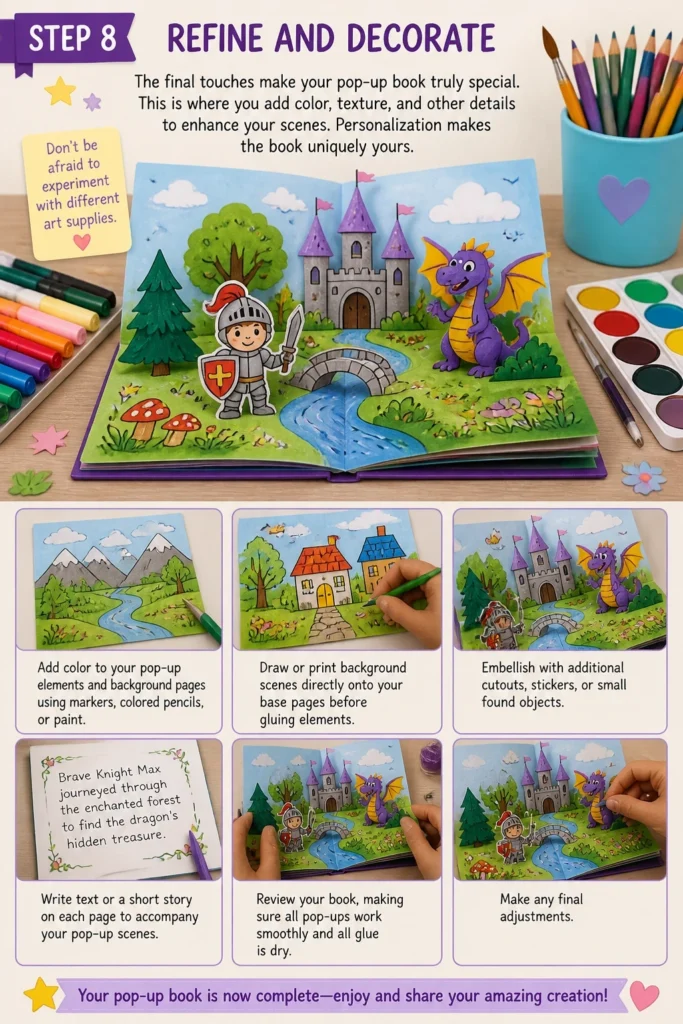
The final touches make your pop-up book truly special. This is where you add color, texture, and other details to enhance your scenes. Personalization makes the book uniquely yours.
Don’t be afraid to experiment with different art supplies. Markers, colored pencils, watercolors, and even glitter can add depth and charm.
- Add color to your pop-up elements and background pages using markers, colored pencils, or paint.
- Draw or print background scenes directly onto your base pages before gluing elements.
- Embellish with additional cutouts, stickers, or small found objects.
- Write text or a short story on each page to accompany your pop-up scenes.
- Review your book, making sure all pop-ups work smoothly and all glue is dry. Make any final adjustments.
Common Mistakes to Avoid
Using Flimsy Paper
Using standard printer paper for pop-ups is a common beginner mistake. It lacks the necessary stiffness to support the pop-up mechanisms and will quickly crease, tear, or sag. Your pop-ups won’t “pop” properly and the book will feel fragile.
Always opt for cardstock, ideally 65-80 lb for pop-up elements and 80-110 lb for base pages. The added weight provides the structural integrity needed for dynamic pop-ups that last.
Over-Gluing
Applying too much glue is another frequent error. Excess glue can seep out, wrinkle the paper, make the page stick where it shouldn’t, or simply look messy. It can also cause the pages to permanently bond together, ruining the pop-up action.
Use glue sparingly and precisely. A thin, even layer is usually sufficient. For PVA glue, a tiny dot goes a long way. Use a glue stick for larger surfaces, ensuring full coverage without globs.
Incorrect Folding and Scoring
Imprecise folds and scores are detrimental to the pop-up mechanism. If folds aren’t crisp or scores aren’t accurately placed, the pop-up won’t open and close smoothly. This can lead to snagging, tearing, or a generally clunky operation.
Always use a ruler for scoring and folding. Score lines should be shallow and consistent. Ensure all folds are pressed firmly and precisely along the intended line to create sharp creases.
Overly Complex Designs for Beginners
Trying to create an intricate, multi-layered pop-up castle on your first attempt can quickly lead to frustration. Complex designs require a solid understanding of basic mechanisms and spatial reasoning. Biting off more than you can chew often results in giving up.
Start with simple V-folds and parallel folds. Master these basic techniques before moving on to more advanced mechanisms or combining multiple pop-ups on one page. Build your skills gradually.
Troubleshooting
Pop-Up Doesn’t Pop Up Properly
If your pop-up element isn’t springing into action as expected, the issue often lies in the folds or the paper itself. The mechanism might be stiff or the paper too weak to hold its shape.
Ensure all folds are crisp and well-creased. Gently work the pop-up mechanism open and closed several times to “break it in.” If the paper is too thin, the pop-up might not have enough rigidity; consider reinforcing it with a second layer of cardstock or trying a heavier paper next time.
Pages Don’t Close Flat
A pop-up book that doesn’t close flat is usually a sign that an element is too large, incorrectly folded, or catching on something. This can stress the paper and damage the pop-up over time.
Carefully examine the pop-up when the page is closing. Identify which part is obstructing the closure. You might need to trim a small edge, adjust a fold, or re-glue an element slightly differently. Sometimes, simply re-creasing all folds very sharply can solve the problem.
Pop-Up Element Tears
Tears in your pop-up can occur from using flimsy paper, rough handling, or incorrect cuts. This is disheartening, especially after putting in effort.
If the tear is small, you can often repair it with a tiny piece of clear tape applied to the back or a dab of PVA glue. To prevent future tears, use appropriate cardstock weight, ensure your craft knife is sharp for clean cuts, and handle your pop-ups gently, especially during the initial folding and testing phases.
Key Takeaways
- Paper Choice is Paramount: Always use sturdy cardstock for both base pages and pop-up elements to ensure durability and proper function.
- Precision is Power: Accurate cuts, scores, and folds are critical for smooth pop-up action and a professional finish.
- Start Simple, Build Complexity: Master basic V-folds and parallel folds before attempting more intricate paper engineering designs.
- Glue Moderately: Use glue sparingly and precisely to avoid mess, paper warping, and accidental sticking of pages.
- Practice Makes Perfect: Don’t be afraid to experiment on scrap paper to understand mechanisms before committing to your final project.
- Personalize Your Project: Decorate and embellish your pop-up book to reflect your unique style and story, making it truly your own.
Frequently Asked Questions
What kind of glue is best for pop-up books?
For most pop-up book projects, a good quality glue stick or a fine-tipped PVA (white craft) glue is ideal. Glue sticks are great for larger surface areas and minimal warping, while PVA glue offers a stronger bond for smaller, intricate attachments. Avoid super glue, as it dries too quickly and can make paper brittle.
Can children make pop-up books?
Absolutely! Pop-up books are a fantastic craft for children, especially with adult supervision for cutting. Simpler designs, like a basic V-fold for a monster’s mouth or a house, are perfect for younger crafters. Pre-cut kits are also available, making it even easier for kids to participate in the assembly and decoration.
How can I make my pop-up book more durable?
To increase durability, use heavier cardstock for all components. Consider laminating your finished pop-up pieces with clear contact paper before assembly, though this can make folding slightly more challenging. Reinforce critical fold lines with thin strips of clear packing tape on the back side. Storing the book flat and handling it gently will also extend its life.
How do I create more complex pop-up designs?
Once you’ve mastered the basics, you can explore advanced mechanisms like box folds, sliding tabs, or rotating wheels. Many online tutorials and books specifically focus on these techniques. Start by dissecting existing pop-up books to understand how their mechanisms work, then try to replicate them with your own designs. Layering multiple simple pop-ups on one page also creates a sense of complexity.
Your Next Creative Adventure Awaits
You’ve now got the tools and knowledge to craft your very own pop-up book, transforming flat paper into captivating three-dimensional worlds. This journey is just the beginning of what you can create. The joy of seeing your designs spring to life is incredibly rewarding.
Don’t let your creativity stop here. Think about designing a pop-up card for a friend, or perhaps a series of pop-up books exploring different themes. The world of paper engineering is vast and full of possibilities. Pick up your supplies today and let your imagination unfold!
Beginner-friendly templates, step-by-step guides,
and weekly project ideas in your inbox.