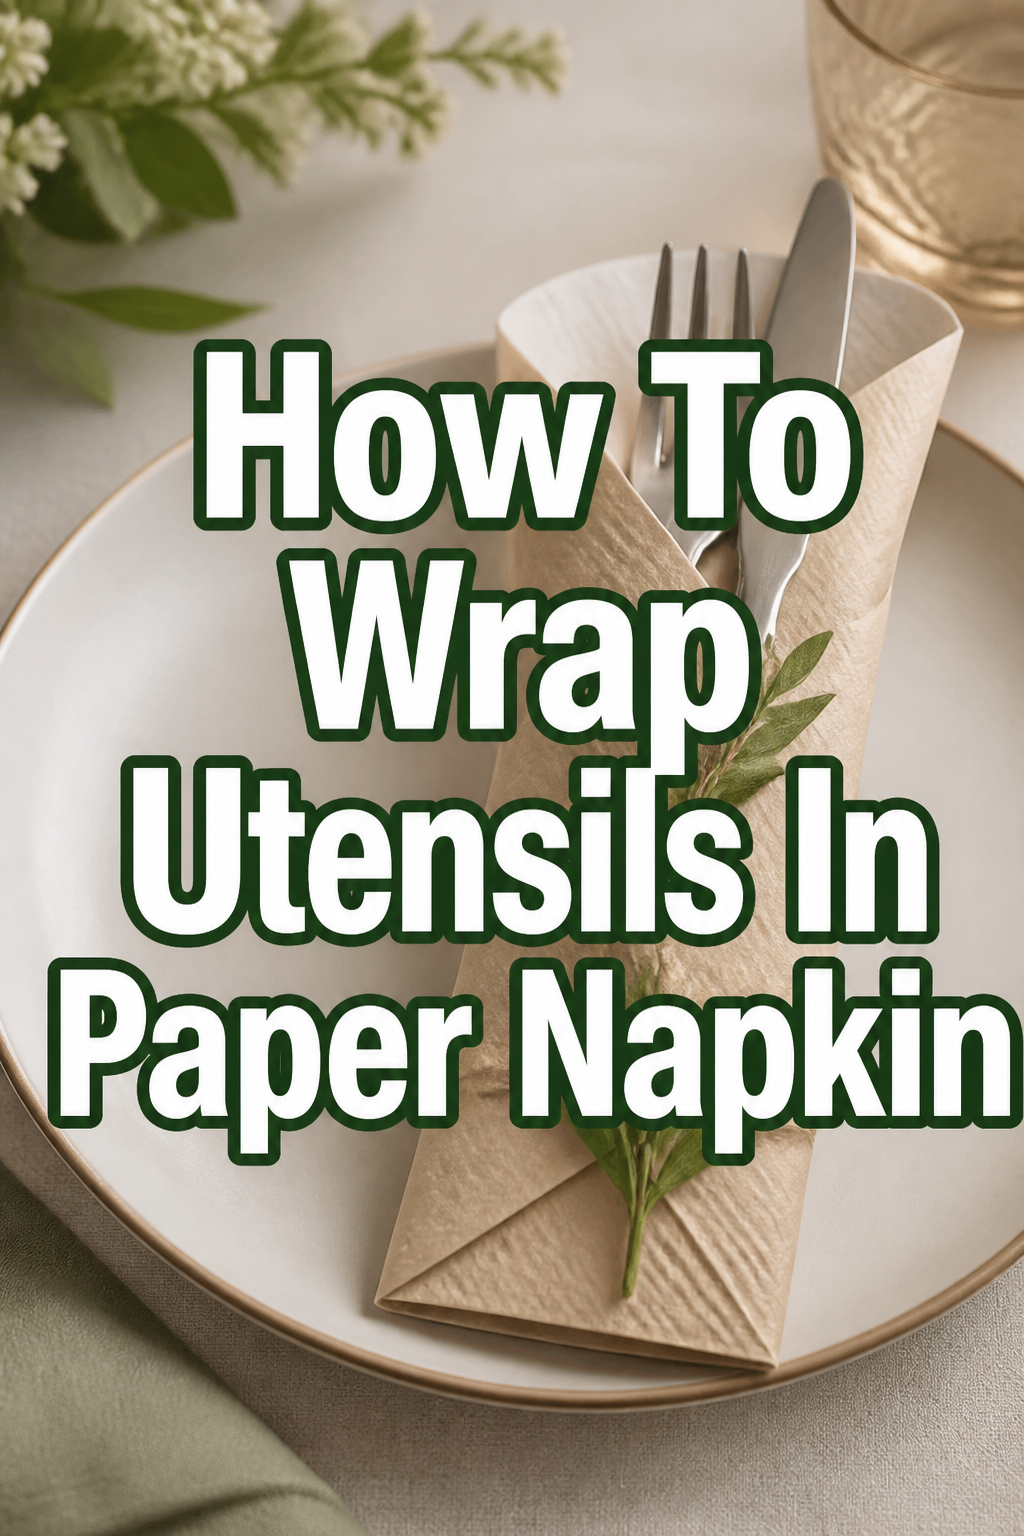
🍴 How To Wrap Utensils In Paper Napkin

Beginner-friendly templates, step-by-step guides,
and weekly project ideas in your inbox.
I remember my first week working in a busy local bistro, facing a mountain of polished silverware and a stack of paper napkins.
It seemed like a simple task, but I quickly realized that a sloppy wrap can make even the best table look messy.
After wrapping thousands of sets over the years, I’ve mastered the techniques that ensure your utensils stay secure and look professional every single time.
Quick Overview
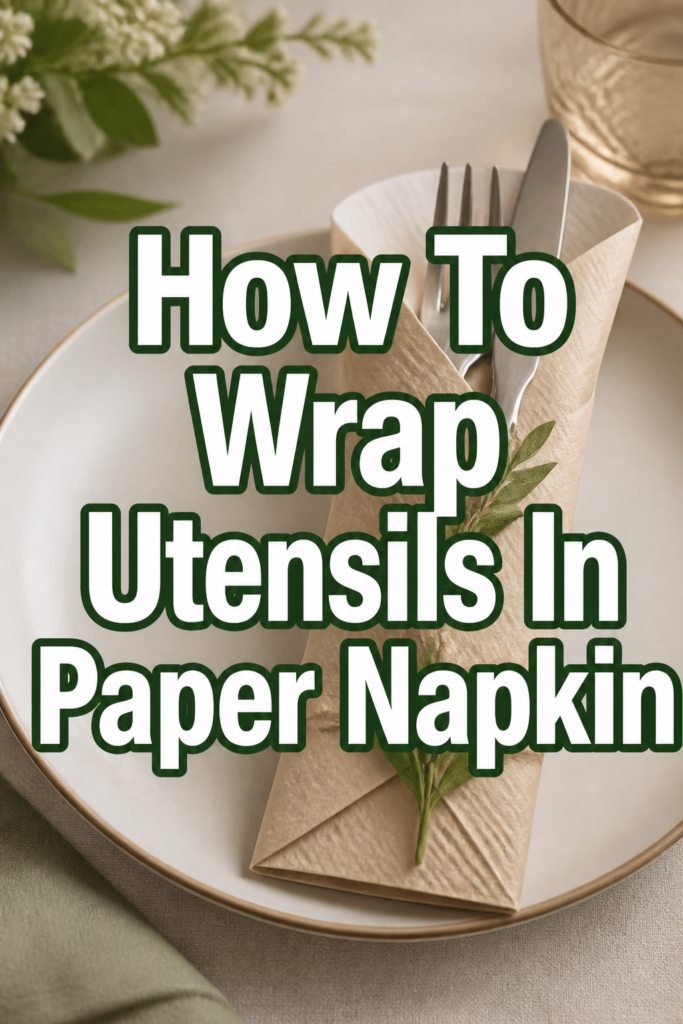
This guide will show you how to create a tight, clean roll that works for casual backyard BBQs or more formal events using standard paper napkins.
- Time needed: 15-30 seconds per set
- Difficulty: Beginner
- What you’ll need: Square paper napkins (preferably 2-ply or 3-ply), forks, knives, spoons, and optional adhesive bands.
Step-by-Step Instructions
Step 1: Prepare Your Workspace
Clear a large, flat surface like a dining table or a clean kitchen counter.
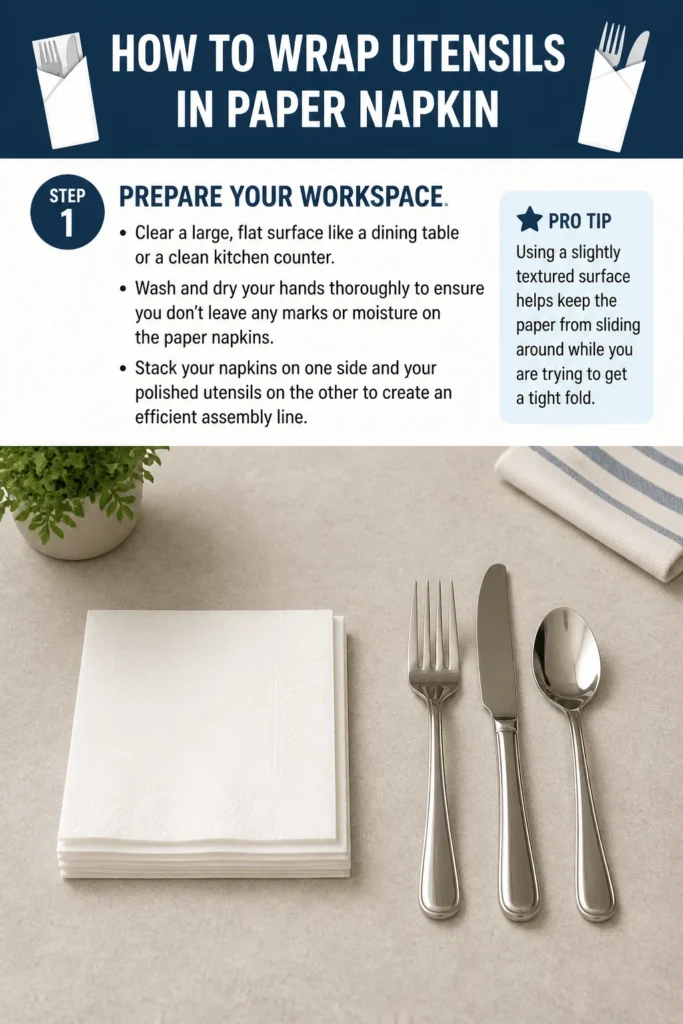
Wash and dry your hands thoroughly to ensure you don’t leave any marks or moisture on the paper napkins.
Stack your napkins on one side and your polished utensils on the other to create an efficient assembly line.
Pro Tip: Using a slightly textured surface helps keep the paper from sliding around while you are trying to get a tight fold.
Step 2: Lay the Napkin Flat
Place a single paper napkin flat on the surface in front of you.
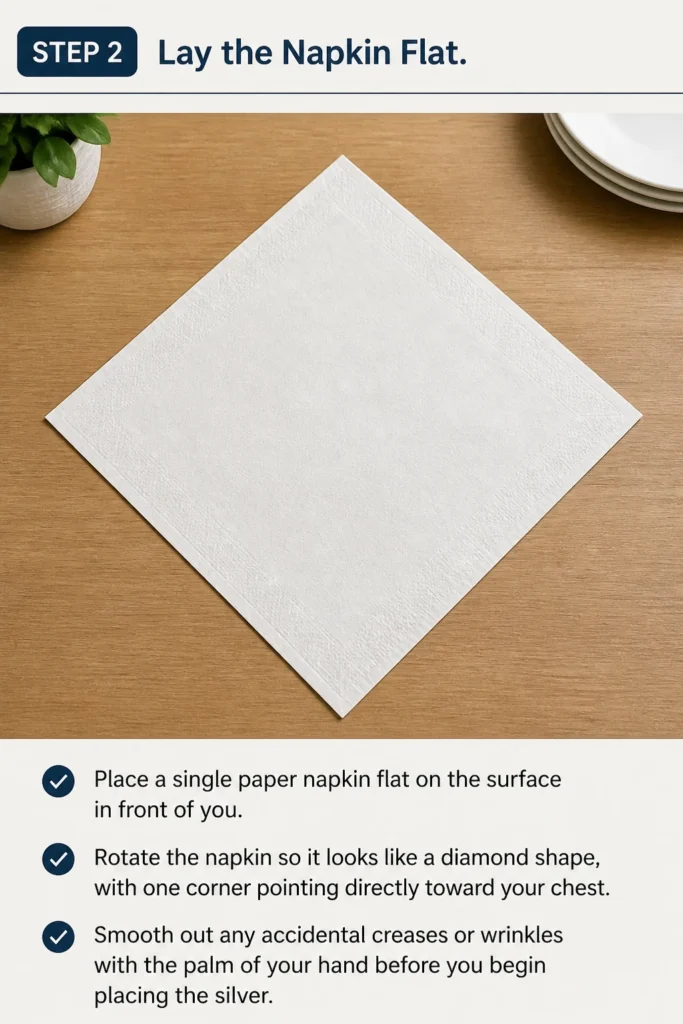
Rotate the napkin so it looks like a diamond shape, with one corner pointing directly toward your chest.
Smooth out any accidental creases or wrinkles with the palm of your hand before you begin placing the silver.
Step 3: Position the Utensils
Gather one of each utensil you plan to include in the wrap, usually a fork, knife, and spoon.
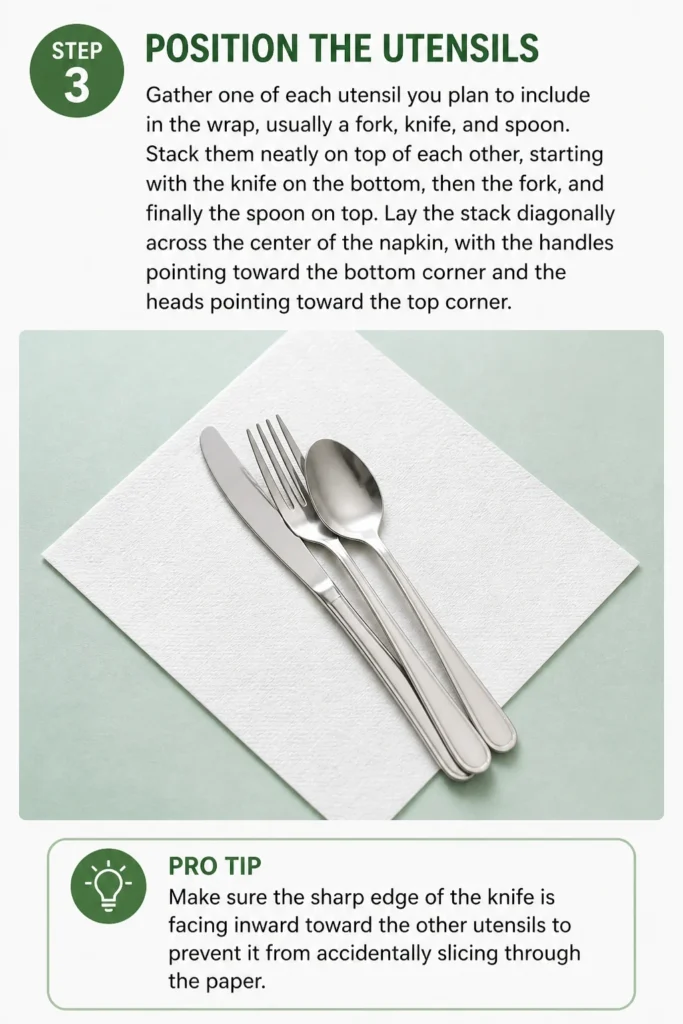
Stack them neatly on top of each other, starting with the knife on the bottom, then the fork, and finally the spoon on top.
Lay the stack diagonally across the center of the napkin, with the handles pointing toward the bottom corner and the heads pointing toward the top corner.
Pro Tip: Make sure the sharp edge of the knife is facing inward toward the other utensils to prevent it from accidentally slicing through the paper.
Step 4: Align the Tips
Adjust the stack so the top of the utensils sits about one inch below the top corner of the diamond.
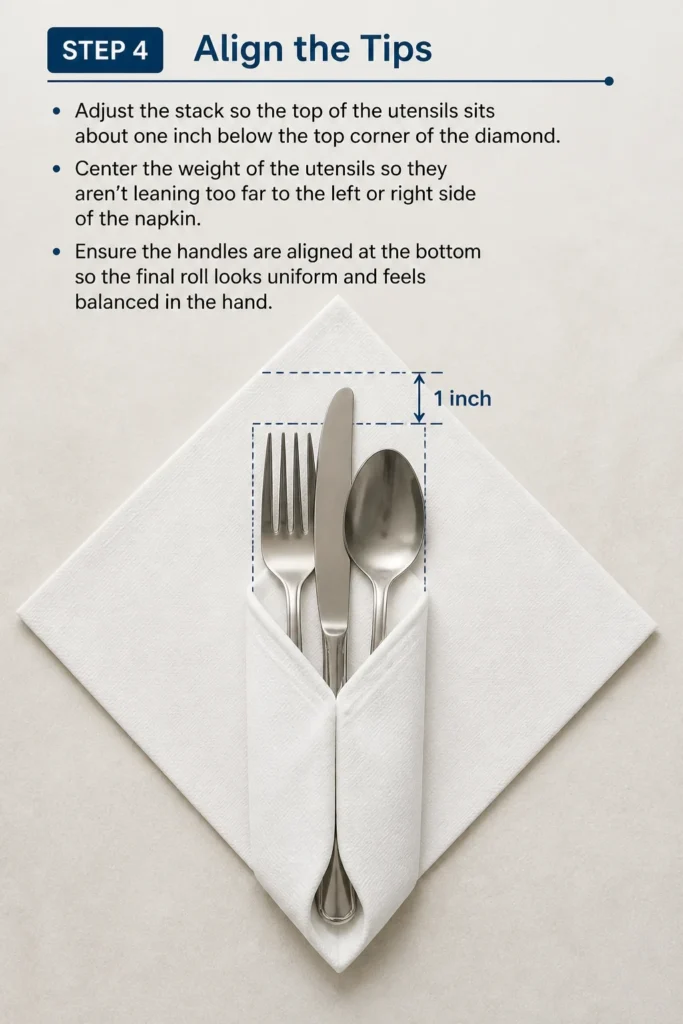
Center the weight of the utensils so they aren’t leaning too far to the left or right side of the napkin.
Ensure the handles are aligned at the bottom so the final roll looks uniform and feels balanced in the hand.
Step 5: Fold the Bottom Corner
Grasp the bottom corner of the napkin, which is the one closest to your body.
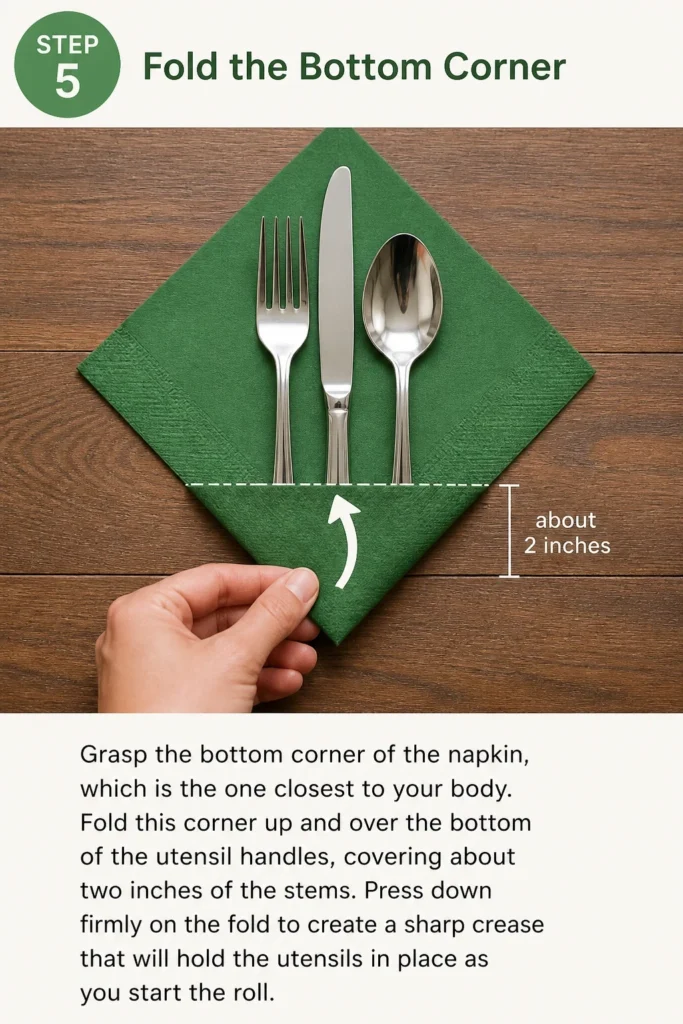
Fold this corner up and over the bottom of the utensil handles, covering about two inches of the stems.
Press down firmly on the fold to create a sharp crease that will hold the utensils in place as you start the roll.
Step 6: Fold the Side Corners
Take the left corner of the napkin and fold it snugly over the middle of the utensils.
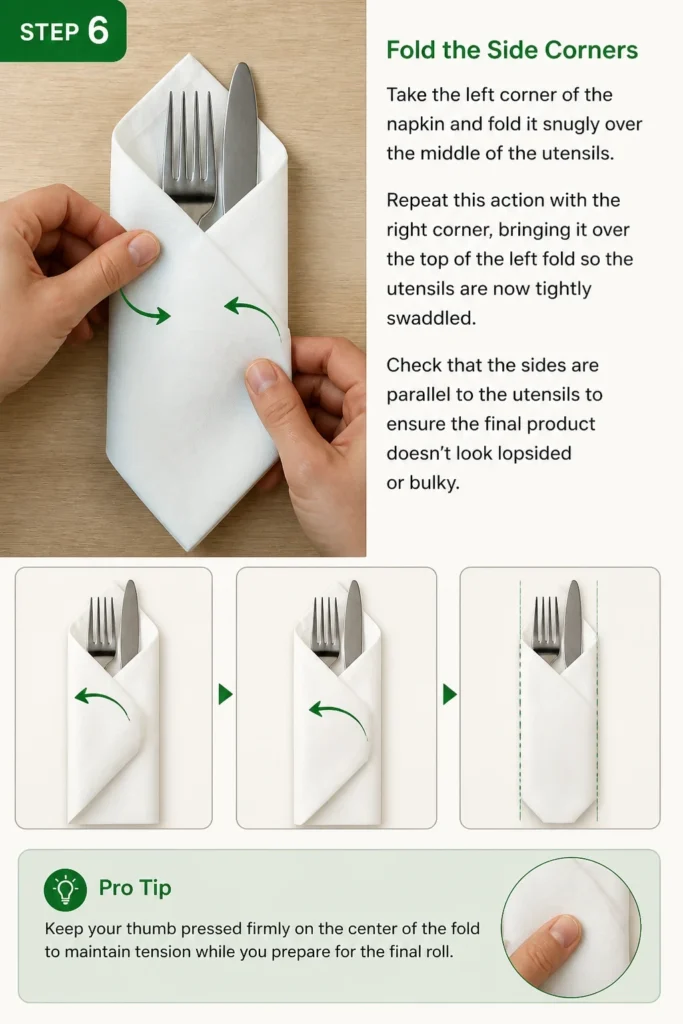
Repeat this action with the right corner, bringing it over the top of the left fold so the utensils are now tightly “swaddled.”
Check that the sides are parallel to the utensils to ensure the final product doesn’t look lopsided or bulky.
Pro Tip: Keep your thumb pressed firmly on the center of the fold to maintain tension while you prepare for the final roll.
Step 7: Execute the Roll
Start from the bottom where you made the first fold and begin rolling the utensils toward the top corner.
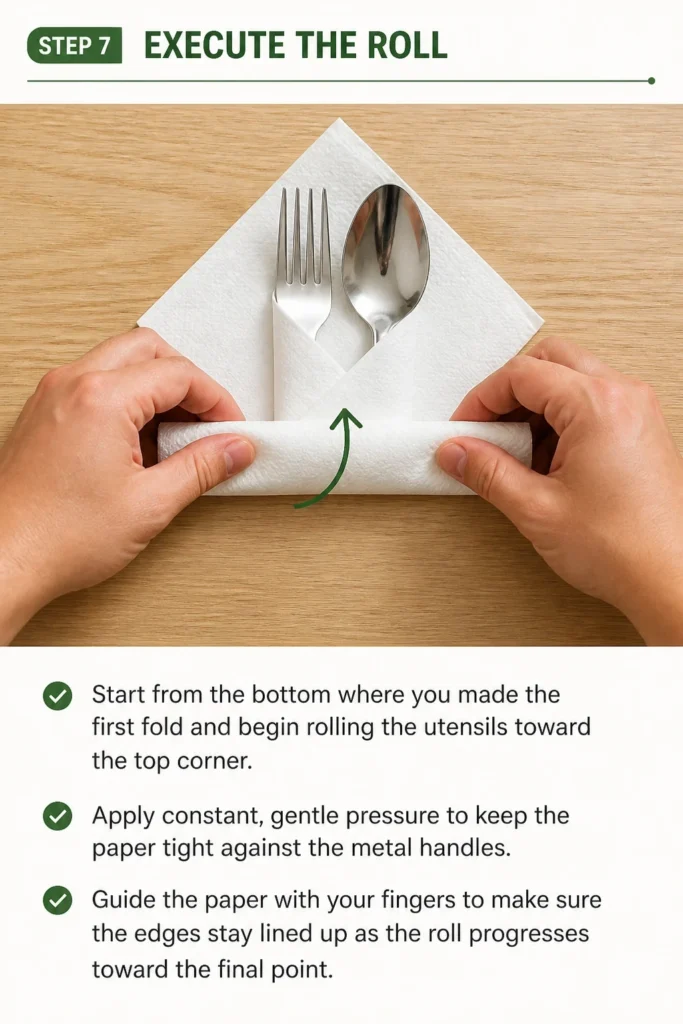
Apply constant, gentle pressure to keep the paper tight against the metal handles.
Guide the paper with your fingers to make sure the edges stay lined up as the roll progresses toward the final point.
Step 8: Secure the Point
Continue rolling until you reach the very top corner of the napkin diamond.
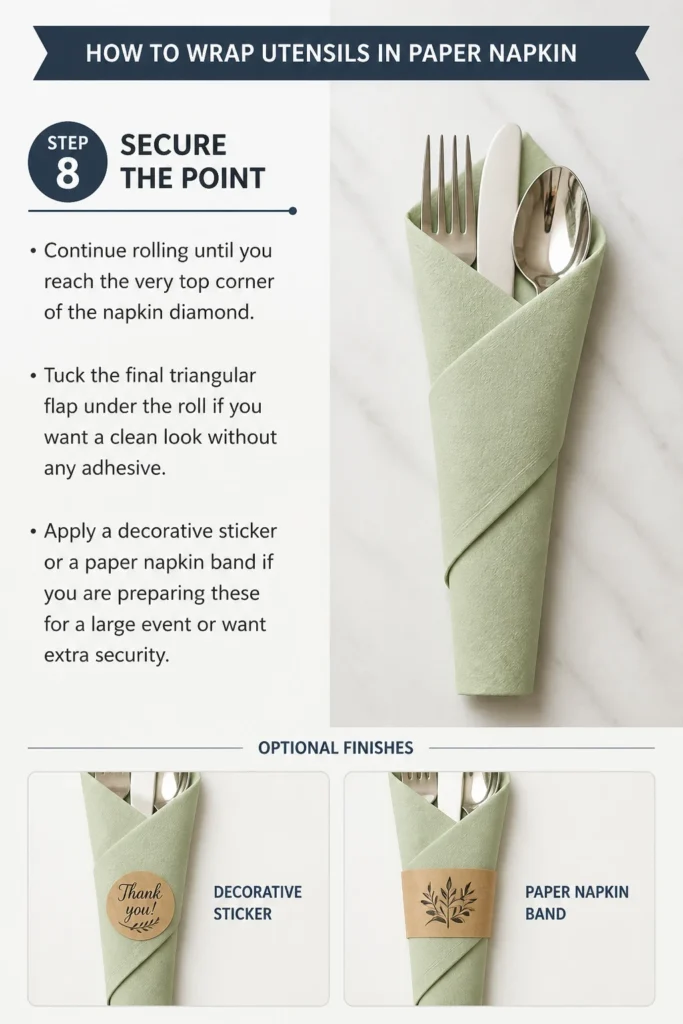
Tuck the final triangular flap under the roll if you want a clean look without any adhesive.
Apply a decorative sticker or a paper napkin band if you are preparing these for a large event or want extra security.
Step 9: Quality Control
Pick up the finished roll and give it a gentle shake to make sure nothing slides out of the bottom.
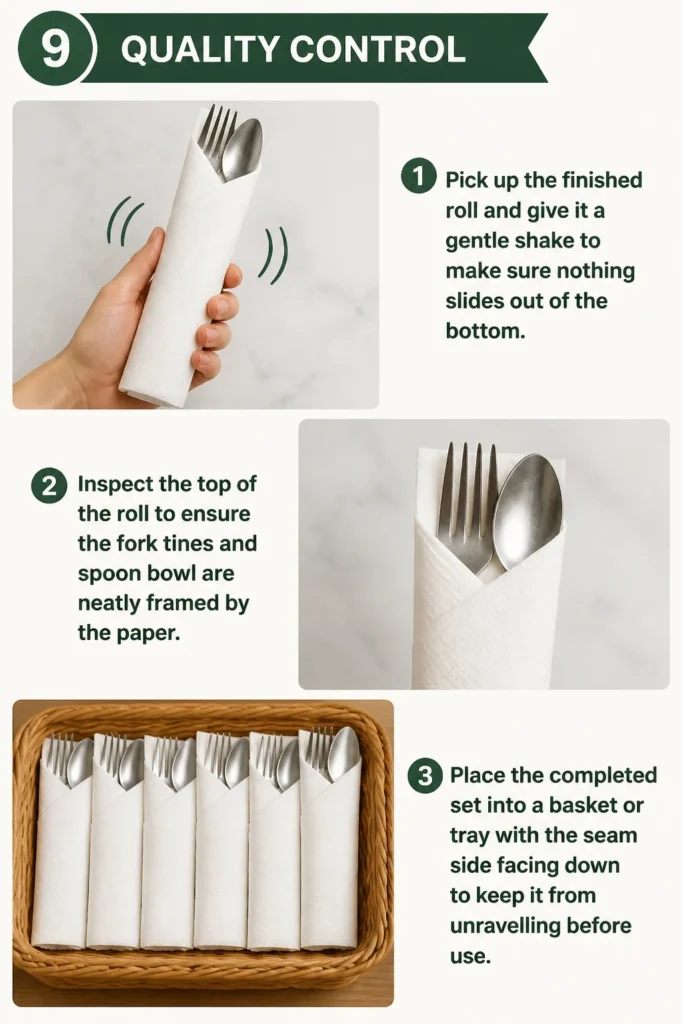
Inspect the top of the roll to ensure the fork tines and spoon bowl are neatly framed by the paper.
Place the completed set into a basket or tray with the seam side facing down to keep it from unravelling before use.
Common Mistakes to Avoid
Using Thin Single-Ply Napkins
Inexpensive, thin napkins tend to tear the moment you try to pull them tight against a fork or knife. This results in a messy presentation and utensils that fall out easily. Always opt for at least a 2-ply napkin if you want a professional-looking wrap that survives being handled by guests.
Leaving Too Much Slack
If the napkin is wrapped loosely, the utensils will clank together and eventually slide out of the bottom. A loose wrap also looks disorganized on a table setting. You want the paper to feel like a firm sleeve that grips the handles of the silverware.
Misaligning the Knife Blade
Putting the knife blade facing outward is a common error that leads to ripped paper. The serrated edge can easily catch on the delicate fibers of the napkin during the rolling process. Always turn the blade inward toward the fork to protect the integrity of the wrap.
Folding the Bottom Too High
If you fold the bottom corner too far up the handles, you won’t have enough paper left on the sides to create a secure wrap. This makes the roll look stubby and increases the chances of the utensils tipping over. Aim to cover only the bottom inch or two of the handles with that first upward fold.
Troubleshooting
The Paper Keeps Tearing
If you find the napkin ripping at the pressure points, you are likely pulling too hard or the utensils are damp. Make sure every piece of silverware is completely bone-dry before you start. You can also try reducing the tension slightly during the initial side-fold to give the paper a bit more “give.”
Utensils Sliding Out the Bottom
This usually happens because the bottom fold wasn’t deep enough or the roll isn’t tight enough. Try increasing the size of the bottom flap that covers the handles. When you begin the roll, ensure your first rotation is as tight as possible to lock that bottom flap into place.
The Roll Looks Crooked
A crooked roll is almost always caused by the utensils not being centered on the diamond at the start. If the stack is too far to one side, one end of the roll will be much thicker than the other. Start over and use the corners of the napkin as visual guides to find the exact center of the paper.
Key Takeaways
- Start with a diamond shape to provide the best angles for a secure and symmetrical wrap.
- Stack utensils strategically with the knife on the bottom and the blade facing inward for safety and stability.
- Maintain tension throughout the rolling process to prevent the silverware from shifting or falling out.
- Choose quality napkins that are thick enough to withstand the pressure of a tight roll without tearing.
- Secure the seam by placing the finished roll seam-side down or using a decorative band for a polished finish.
Frequently Asked Questions
Can I wrap utensils in advance for a party?
Yes, wrapping utensils in advance is a great way to save time on the day of an event. As long as you store them in a clean, dry container or basket, they will stay fresh and ready for your guests. Just be sure to keep them away from high-traffic areas where they might get dusty.
What size napkin is best for wrapping silverware?
Standard dinner napkins, which are usually 15×15 or 17×17 inches, work best for full-sized utensils. Smaller cocktail napkins are generally too tiny to create a secure roll. If you are using heavy-duty plastic utensils, a standard luncheon napkin (13×13 inches) should suffice.
Do I need to use a napkin band?
While not strictly necessary for a tight roll, napkin bands add a professional touch and provide extra security. They are especially helpful if the utensils will be transported or if guests will be picking them up from a buffet pile. For a home setting, a simple tight roll is usually enough.
Should the fork be on the left or right inside the wrap?
When stacking utensils for a roll, the order is less about left/right and more about the vertical stack. Most people find it easiest to put the knife down first, followed by the fork and then the spoon. This creates a flat base that makes the rolling process much smoother.
Our Top Recommended Finds
- Heavy-Duty 3-Ply Paper Napkins: These provide the necessary strength to hold heavy silverware without ripping during the folding process.
- Self-Adhesive Napkin Bands: These come in various colors and are perfect for keeping your wraps secure during large outdoor gatherings.
- Woven Serving Baskets: A sturdy basket is the best way to display your wrapped utensils and keep them organized for your guests.
Level Up Your Hosting Skills
Now that you have mastered the basic restaurant roll, you can experiment with different napkin colors and textures to match your party theme.
Try using a piece of twine or a sprig of fresh herbs tucked into the fold for a rustic, high-end look that will impress your friends.
If you found this guide helpful, consider looking into different ways to fold cloth napkins for your next formal dinner party.
Go ahead and grab a stack of napkins today to practice your technique so you can breeze through your next event prep with total confidence.
Beginner-friendly templates, step-by-step guides,
and weekly project ideas in your inbox.