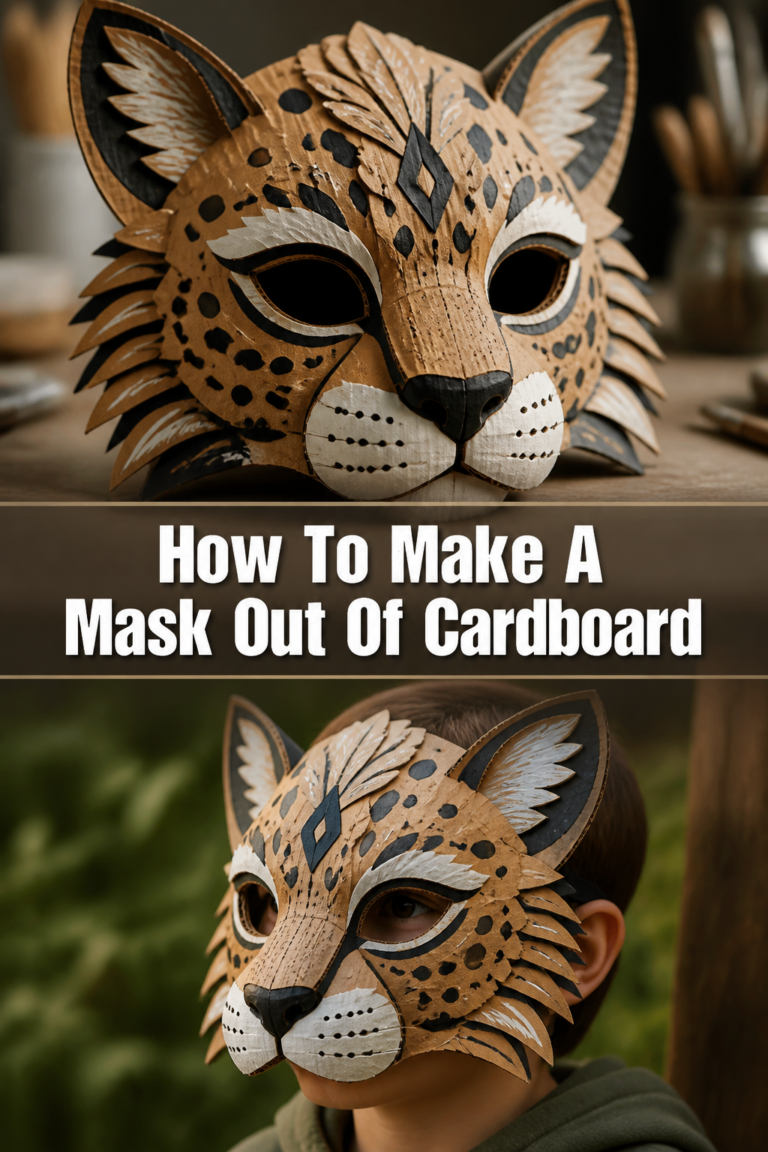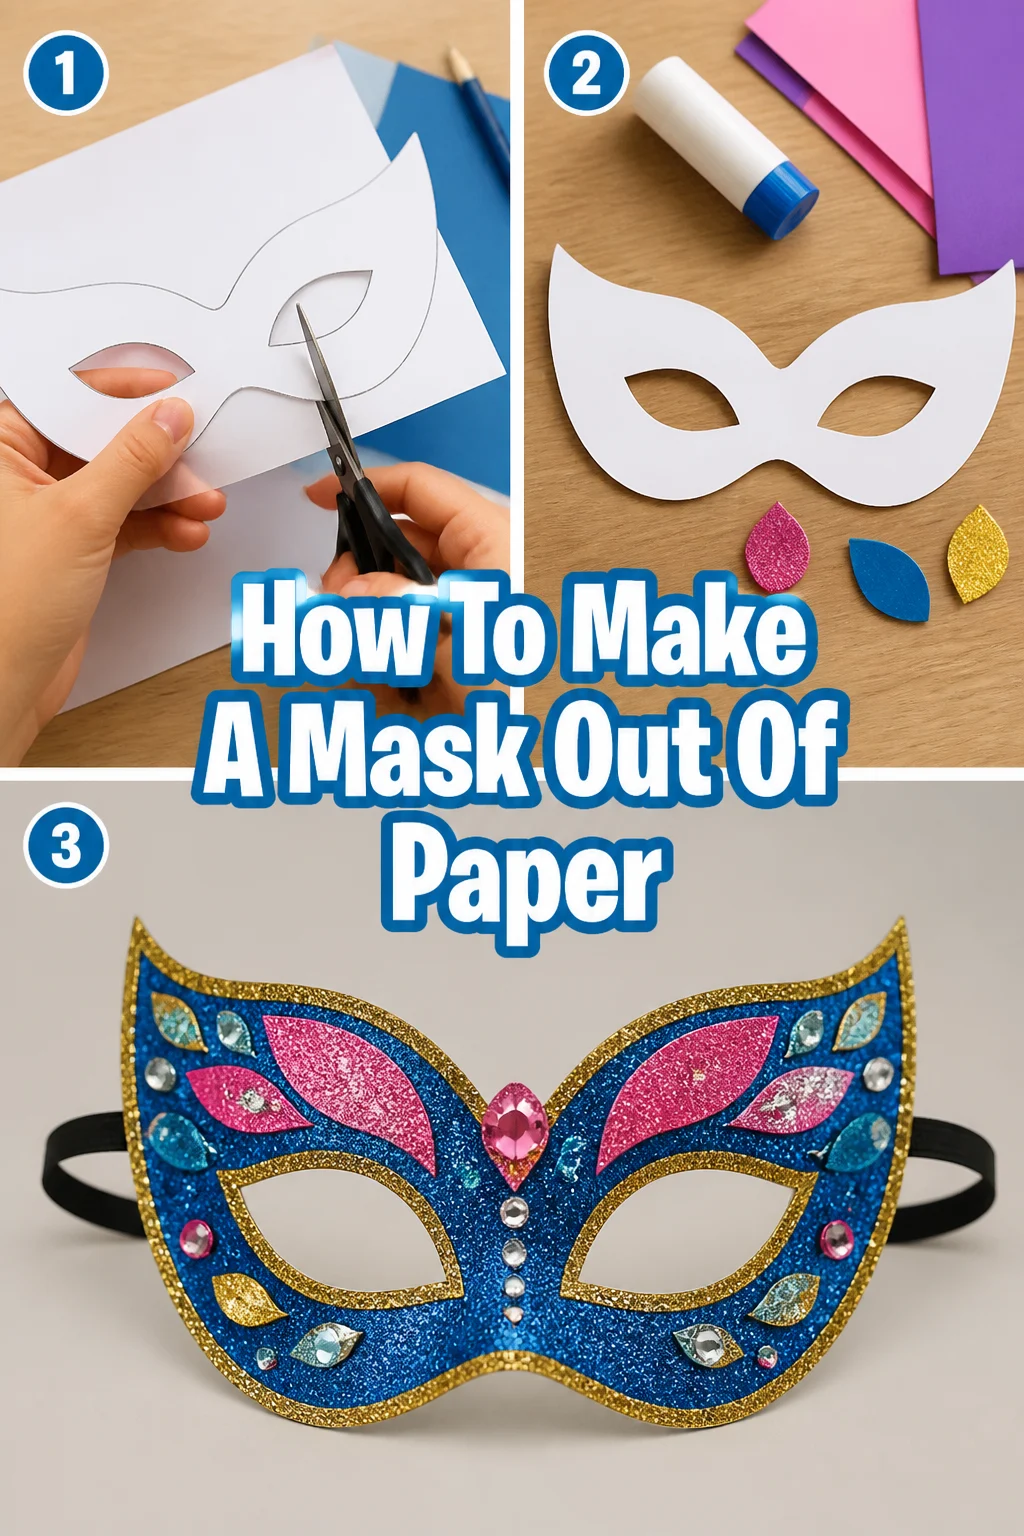
🎭 How To Make A Mask Out Of Paper

Beginner-friendly templates, step-by-step guides,
and weekly project ideas in your inbox.
Making a paper mask is a wonderfully creative and accessible project for all ages.
I remember crafting countless masks as a child, transforming simple paper into fantastical characters and creatures with just a few basic supplies.
This guide draws on years of hands-on experience, providing clear, practical steps to help you bring your own paper mask vision to life.

Quick Overview
This guide will walk you through the process of creating a custom paper mask from start to finish.
You will learn how to design, cut, assemble, and decorate your mask, resulting in a unique wearable piece of art.
- Time needed: 1-3 hours (depending on complexity and drying time)
- Difficulty: Beginner
- What you’ll need: Paper (cardstock recommended), scissors, pencil, glue/tape, decorative items
Step-by-Step Instructions
Step 1: Gather Your Materials
Having all your supplies ready before you start is key to a smooth crafting experience.
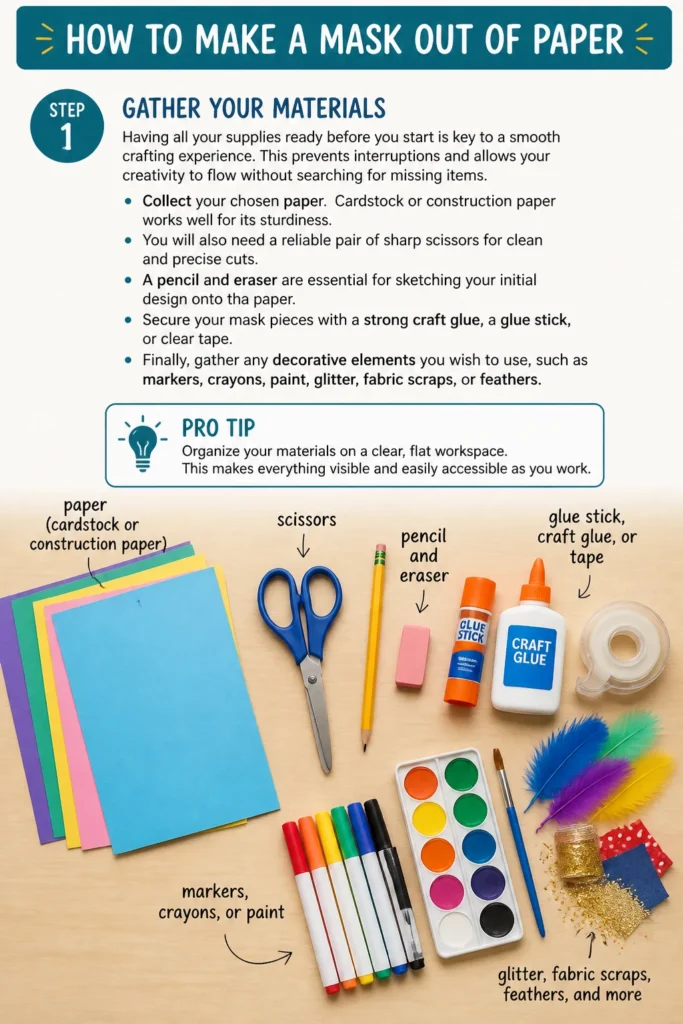
This prevents interruptions and allows your creativity to flow without searching for missing items.
Collect your chosen paper. Cardstock or construction paper works well for its sturdiness.
You will also need a reliable pair of sharp scissors for clean and precise cuts.
A pencil and eraser are essential for sketching your initial design onto the paper.
Secure your mask pieces with a strong craft glue, a glue stick, or clear tape.
Finally, gather any decorative elements you wish to use, such as markers, crayons, paint, glitter, fabric scraps, or feathers.
Pro Tip: Organize your materials on a clear, flat workspace. This makes everything visible and easily accessible as you work.
Step 2: Plan Your Mask Design
Taking a moment to plan your design saves time and avoids mistakes later on.
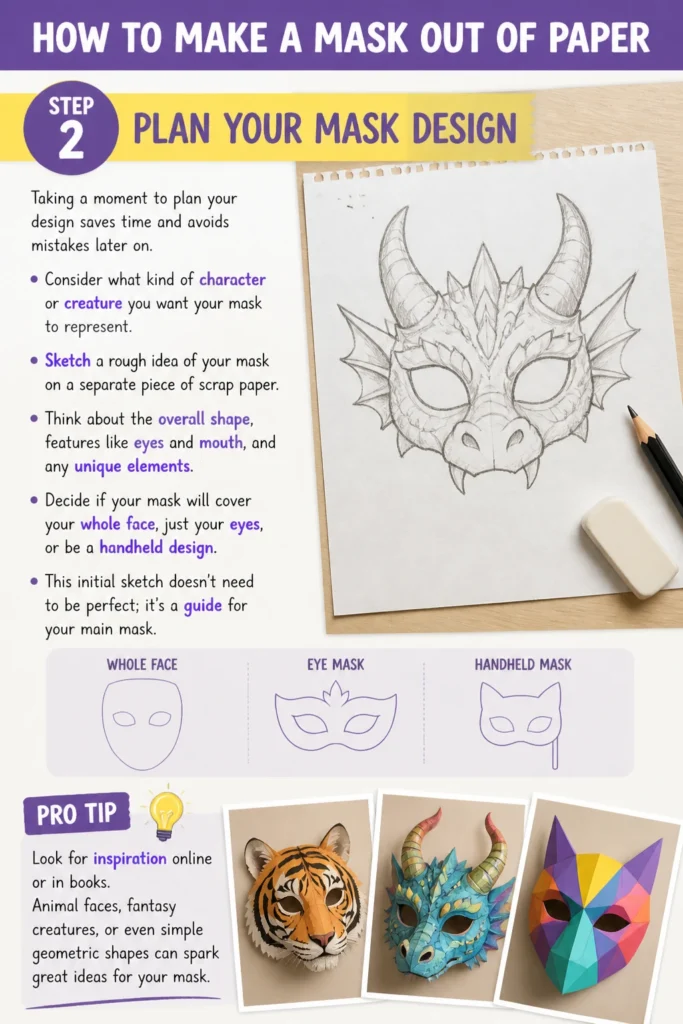
Consider what kind of character or creature you want your mask to represent.
Sketch a rough idea of your mask on a separate piece of scrap paper.
Think about the overall shape, features like eyes and mouth, and any unique elements.
Decide if your mask will cover your whole face, just your eyes, or be a handheld design.
This initial sketch doesn’t need to be perfect; it’s a guide for your main mask.
Pro Tip: Look for inspiration online or in books. Animal faces, fantasy creatures, or even simple geometric shapes can spark great ideas for your mask.
Step 3: Create Your Mask Template
A good template ensures symmetry and proper fit for your face, if applicable.
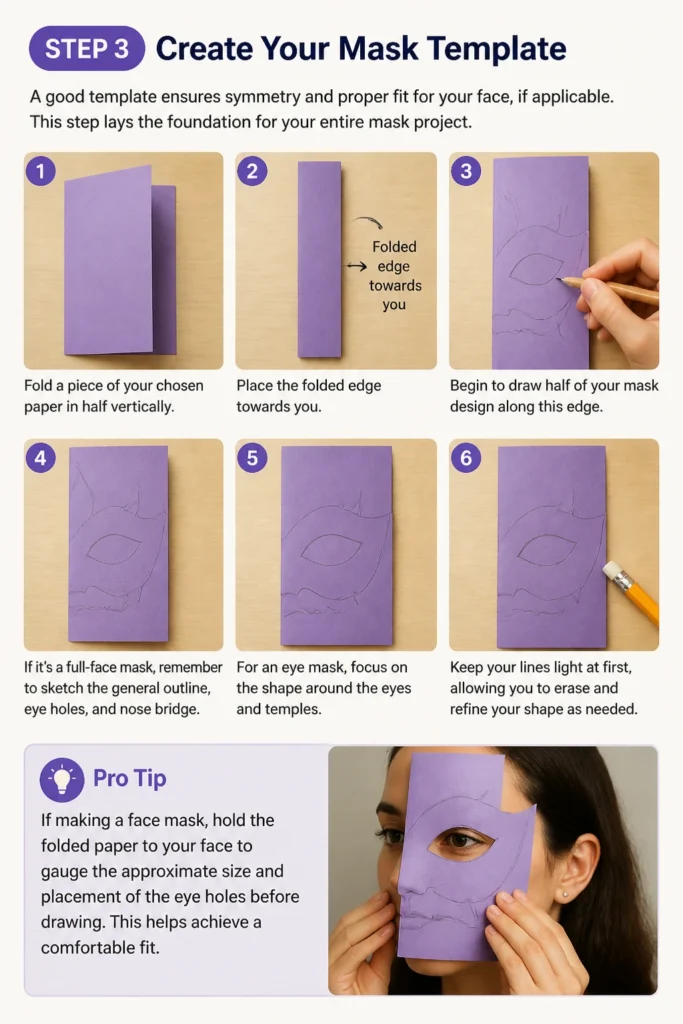
This step lays the foundation for your entire mask project.
Fold a piece of your chosen paper in half vertically.
Place the folded edge towards you and begin to draw half of your mask design along this edge.
If it’s a full-face mask, remember to sketch the general outline, eye holes, and nose bridge.
For an eye mask, focus on the shape around the eyes and temples.
Keep your lines light at first, allowing you to erase and refine your shape as needed.
Pro Tip: If making a face mask, hold the folded paper to your face to gauge the approximate size and placement of the eye holes before drawing. This helps achieve a comfortable fit.
Step 4: Cut Out Your Mask Base
Careful cutting is crucial for a neat and professional-looking mask.
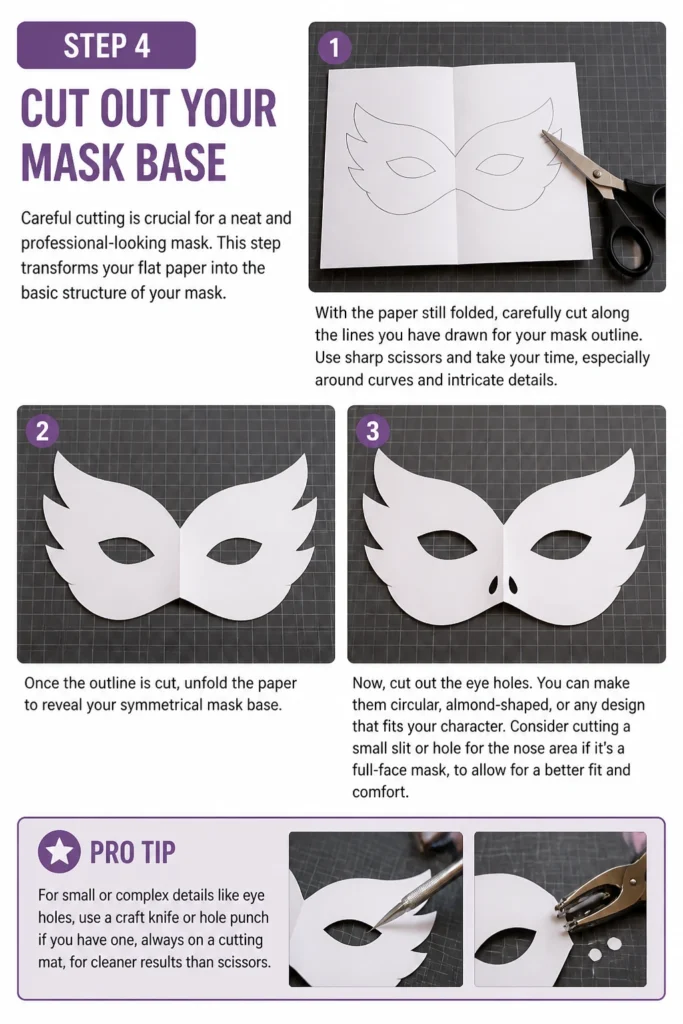
This step transforms your flat paper into the basic structure of your mask.
With the paper still folded, carefully cut along the lines you have drawn for your mask outline.
Use sharp scissors and take your time, especially around curves and intricate details.
Once the outline is cut, unfold the paper to reveal your symmetrical mask base.
Now, cut out the eye holes. You can make them circular, almond-shaped, or any design that fits your character.
Consider cutting a small slit or hole for the nose area if it’s a full-face mask, to allow for a better fit and comfort.
Pro Tip: For small or complex details like eye holes, use a craft knife or hole punch if you have one, always on a cutting mat, for cleaner results than scissors. Adult supervision is recommended for craft knife use.
Step 5: Add Dimensional Elements
Giving your mask depth makes it more visually interesting and realistic.
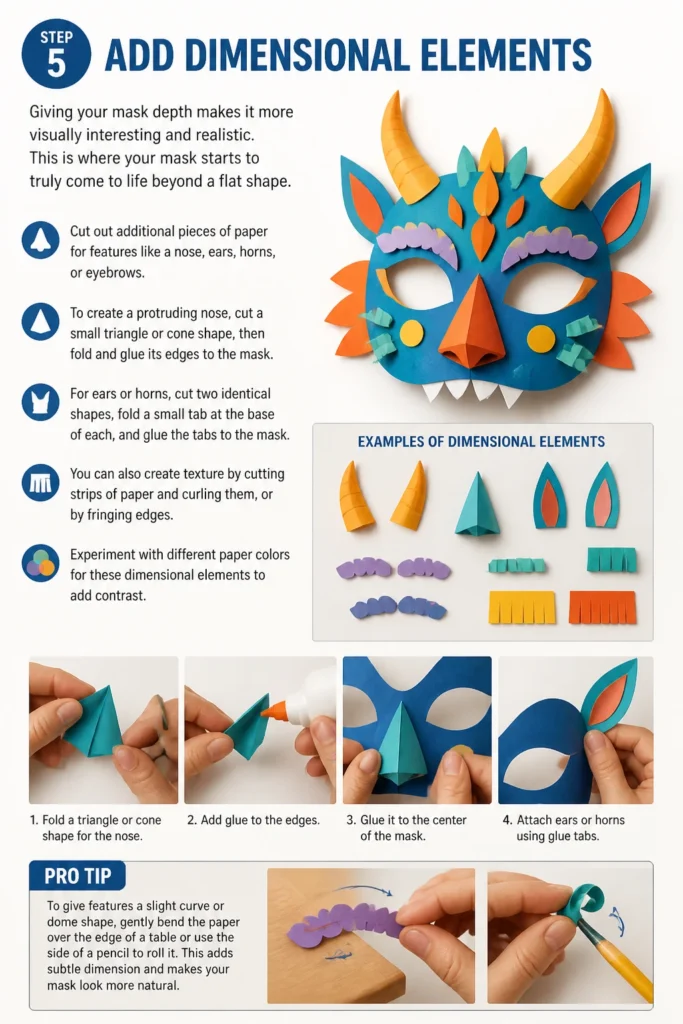
This is where your mask starts to truly come to life beyond a flat shape.
Cut out additional pieces of paper for features like a nose, ears, horns, or eyebrows.
To create a protruding nose, cut a small triangle or cone shape, then fold and glue its edges to the mask.
For ears or horns, cut two identical shapes, fold a small tab at the base of each, and glue the tabs to the mask.
You can also create texture by cutting strips of paper and curling them, or by fringing edges.
Experiment with different paper colors for these dimensional elements to add contrast.
Pro Tip: To give features a slight curve or dome shape, gently bend the paper over the edge of a table or use the side of a pencil to roll it. This adds subtle dimensionality before gluing.
Step 6: Secure and Reinforce
Proper adhesion ensures your mask stays together during decoration and wear.
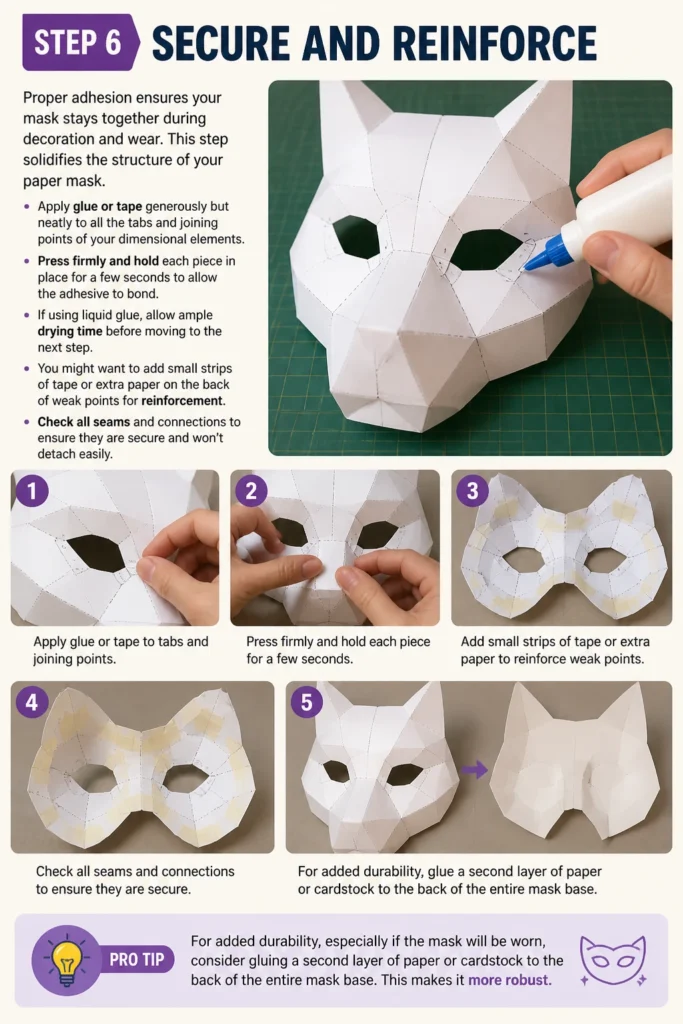
This step solidifies the structure of your paper mask.
Apply glue or tape generously but neatly to all the tabs and joining points of your dimensional elements.
Press firmly and hold each piece in place for a few seconds to allow the adhesive to bond.
If using liquid glue, allow ample drying time before moving to the next step.
You might want to add small strips of tape or extra paper on the back of weak points for reinforcement.
Check all seams and connections to ensure they are secure and won’t detach easily.
Pro Tip: For added durability, especially if the mask will be worn, consider gluing a second layer of paper or cardstock to the back of the entire mask base. This makes it more robust.
Step 7: Decorate Your Mask
This is where your mask truly takes on its unique personality and flair.
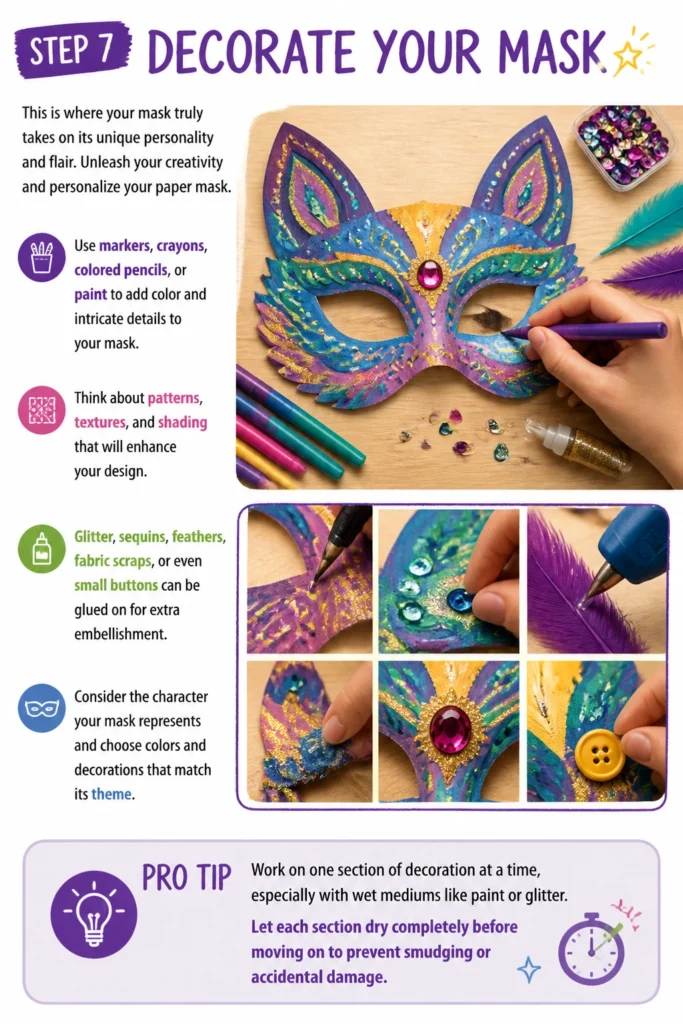
Unleash your creativity and personalize your paper mask.
Use markers, crayons, colored pencils, or paint to add color and intricate details to your mask.
Think about patterns, textures, and shading that will enhance your design.
Glitter, sequins, feathers, fabric scraps, or even small buttons can be glued on for extra embellishment.
Consider the character your mask represents and choose colors and decorations that match its theme.
Don’t be afraid to experiment with different mediums and layering techniques.
Pro Tip: Work on one section of decoration at a time, especially with wet mediums like paint or glitter. Let each section dry completely before moving on to prevent smudging or accidental damage.
Step 8: Attach a Way to Wear It
For a wearable mask, you need a comfortable and secure way to keep it on your face.
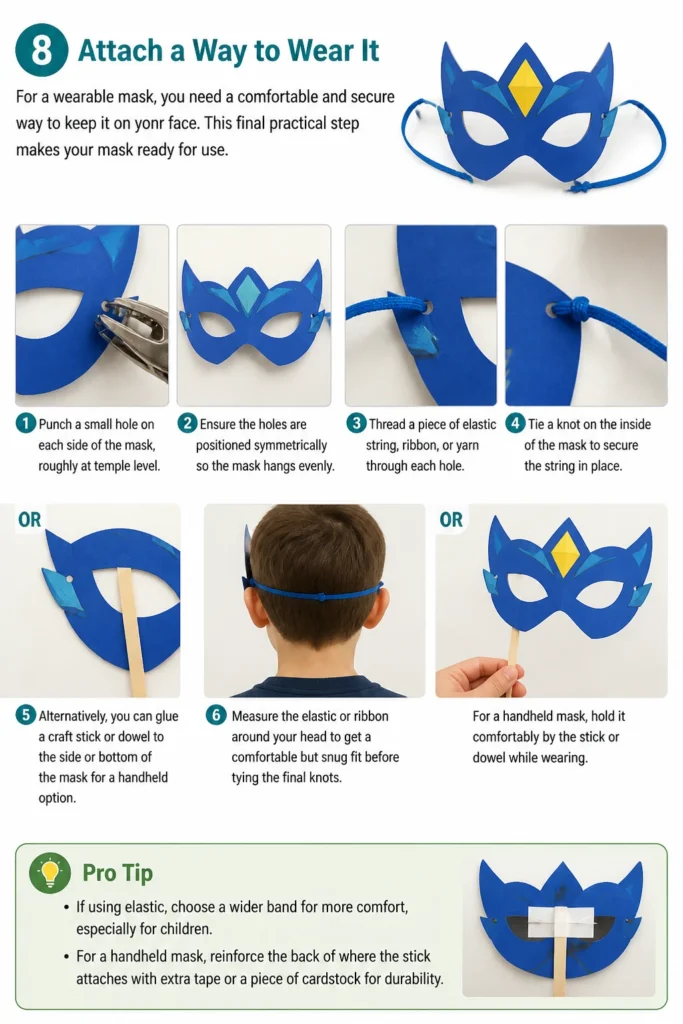
This final practical step makes your mask ready for use.
Punch a small hole on each side of the mask, roughly at temple level.
Ensure the holes are positioned symmetrically so the mask hangs evenly.
Thread a piece of elastic string, ribbon, or yarn through each hole.
Tie a knot on the inside of the mask to secure the string in place.
Alternatively, you can glue a craft stick or dowel to the side or bottom of the mask for a handheld option.
Measure the elastic or ribbon around your head to get a comfortable but snug fit before tying the final knots.
Pro Tip: If using elastic, choose a wider band for more comfort, especially for children. For a handheld mask, reinforce the back of where the stick attaches with an extra piece of paper or tape.
Common Mistakes to Avoid
Rushing the Drying Time
Trying to decorate or handle your mask before the glue is fully dry can lead to parts falling off or smudging.
Wet glue weakens the paper and makes it prone to tearing.
Always allow ample time for all adhesive applications to set completely, which might take several hours or overnight.
Uneven Eye Hole Placement
Poorly placed eye holes can make the mask uncomfortable and difficult to see through.
It also makes the mask look lopsided and unprofessional.
Use the folding technique to ensure symmetry, and hold the template to your face to verify eye placement before making final cuts.
Over-Decorating
While creativity is encouraged, sometimes too many embellishments can make the mask look cluttered or too heavy.
An overly heavy mask might also be uncomfortable to wear or difficult to keep on.
Balance your decorations, focusing on key areas to enhance the design rather than covering every available space.
Using Flimsy Paper for the Base
Thin paper like printer paper will easily tear, wrinkle, or lose its shape, especially when wet with glue or paint.
This results in a mask that lacks durability and structural integrity.
Always opt for cardstock, construction paper, or thin cardboard for the main mask structure to ensure it holds up.
Troubleshooting
Mask Feels Flimsy
If your mask feels too weak or susceptible to bending, it likely needs more support.
This is a common issue if using lighter paper or if the design has unsupported areas.
Solution: Glue a second layer of cardstock to the entire back of the mask for reinforcement. For specific weak points, cut and glue small patches of paper to the back, focusing on areas around eye holes or where features attach.
Elastic Breaks or Comes Undone
The string holding your mask can sometimes snap or slip out of the holes, especially with active wear.
This usually happens if the knots are not tight enough or the holes are too large.
Solution: Ensure your knots are secure and double-knotted. For added security, place a small piece of tape or a tiny dab of glue over the knot on the inside of the mask. If the holes are too big, reinforce them with a small paper washer glued around the hole.
Decorative Elements Fall Off
If glitter, feathers, or other embellishments are detaching, the adhesive might not be strong enough or applied correctly.
This can be frustrating after spending time on decoration.
Solution: Use a strong craft glue suitable for the materials you are attaching. Apply enough glue to create a good bond, pressing the items firmly into place for a few seconds. Allow ample drying time without disturbing the mask.
Key Takeaways
- Planning your mask design beforehand helps streamline the entire crafting process.
- Using cardstock or sturdy paper for the base ensures a durable and long-lasting mask.
- Folding paper in half for the template guarantees a symmetrical and balanced mask shape.
- Allowing glue and paint to dry completely prevents smudges and ensures strong adhesion.
- Adding dimensional elements like noses and ears brings your mask to life with depth and character.
- Always choose a comfortable and secure method for wearing your mask, whether elastic or a handle.
Frequently Asked Questions
Can I use regular printer paper for my mask?
While you technically can, regular printer paper is very thin and will likely tear or wrinkle easily, especially when wet glue or paint is applied. It’s highly recommended to use heavier paper like cardstock or construction paper for a more durable and satisfying result.
How can I make my mask waterproof?
To add a degree of water resistance, you can apply a clear sealant or varnish specifically designed for paper or crafts. Mod Podge or a clear acrylic spray sealant works well. Apply in thin, even coats and allow each layer to dry thoroughly in a well-ventilated area.
What if I don’t have elastic for wearing the mask?
No problem! You can use ribbon, yarn, or even strips of paper glued together for ties. Alternatively, glue a craft stick, a wooden dowel, or a sturdy rolled-up piece of paper to the side or bottom of the mask to create a handheld design. Ensure the handle is securely attached.
Can I make a mask that covers my whole head?
Yes, but it will be more complex. For a full head mask, you might start with a larger paper base, potentially using paper mache techniques over a balloon or a custom-built frame for the initial shape. This guide focuses on face masks, but the principles of design and decoration still apply.
Our Top Recommended Finds
- Heavyweight Cardstock Pack: Provides a sturdy base for any mask, preventing tears and holding shape well.
- Assorted Craft Glue Set: Offers various glues, from quick-drying sticks to strong liquid adhesives for different mask components.
- Craft Scissors Set: Includes different sizes for intricate cuts and larger outlines, ensuring precision and ease of use.
Your Creative Journey Begins!
Creating a paper mask is more than just a craft; it’s an opportunity to express your imagination.
You now have all the tools and knowledge to transform simple paper into a fantastic creation.
Why not start today and see what incredible mask you can bring to life?
Beginner-friendly templates, step-by-step guides,
and weekly project ideas in your inbox.