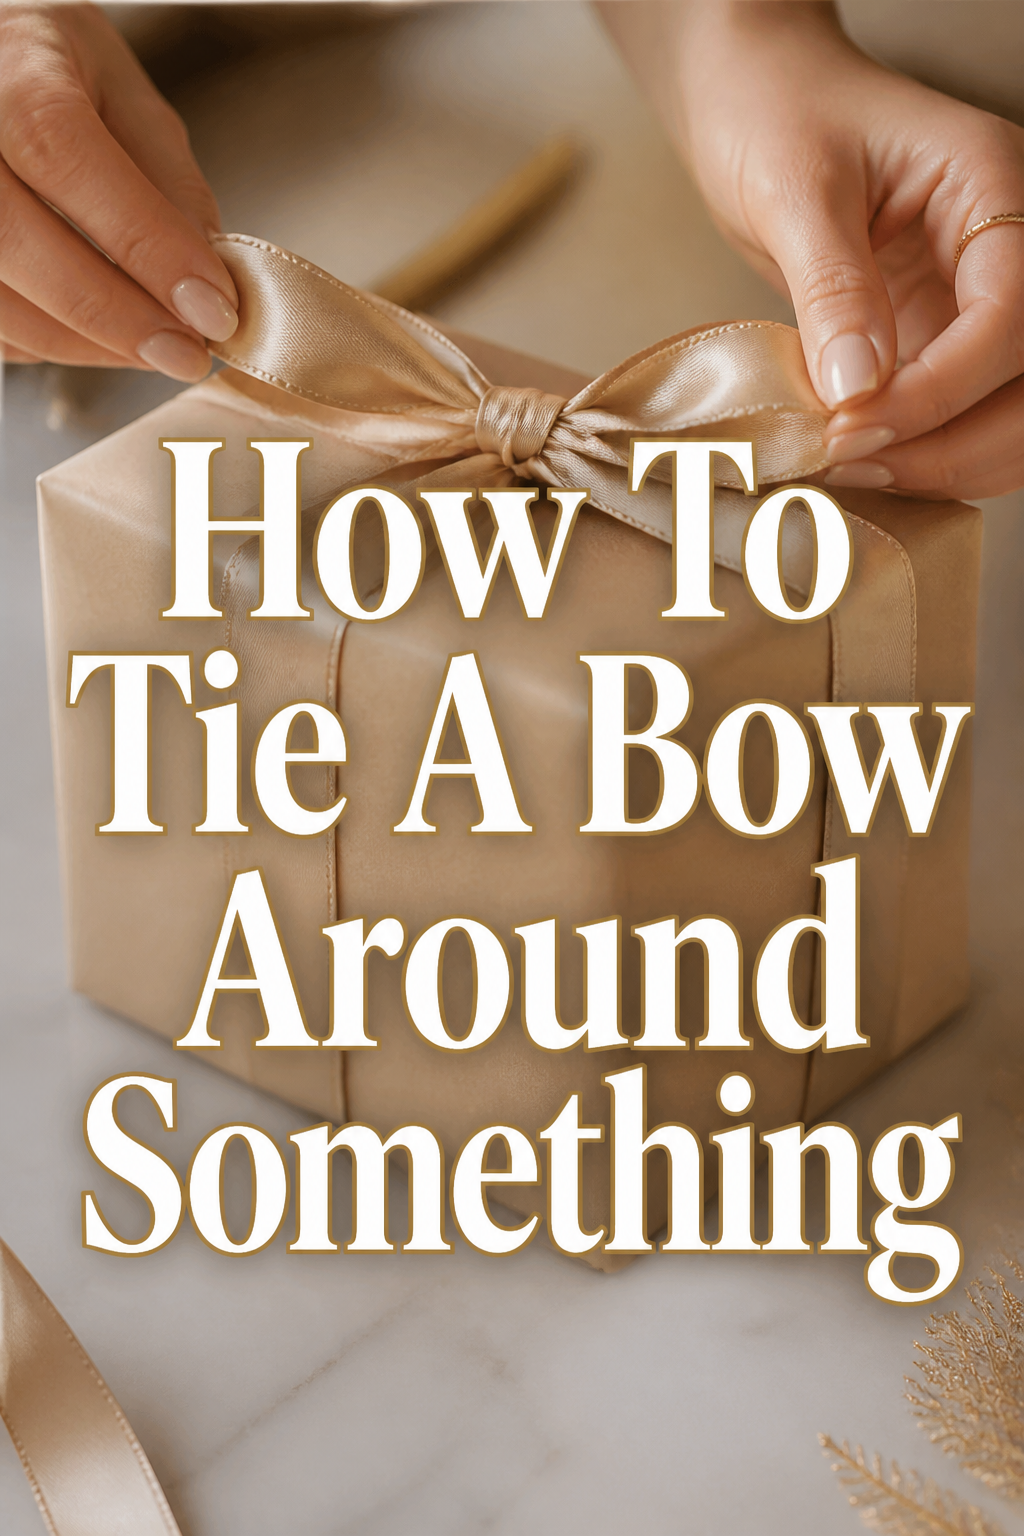
🎀 How To Tie A Bow Around Something

Beginner-friendly templates, step-by-step guides,
and weekly project ideas in your inbox.
Tying a beautiful bow can transform a simple package into a thoughtful gift. It adds a touch of elegance to any item. This skill is incredibly versatile, useful for everything from decorating to crafting.
I’ve personally tied countless bows over the years, from elaborate gift wraps to simple hair accessories. This guide distills that experience into clear, actionable steps. You’ll soon be tying perfect bows with confidence and flair.
Quick Overview
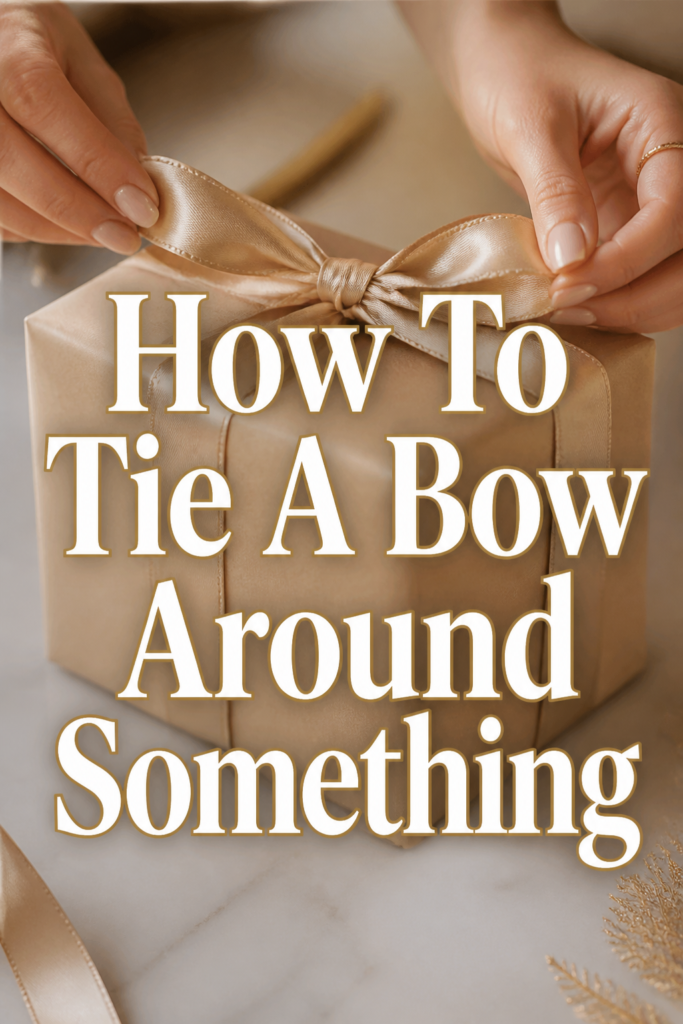
Mastering the art of tying a perfect bow around an object is a rewarding skill. This guide will walk you through each stage, ensuring a neat and attractive result. You’ll gain the confidence to embellish gifts, decorations, and more.
- Time needed: 5-15 minutes (depending on practice and ribbon type)
- Difficulty: Beginner
- What you’ll need: Ribbon (any material), the item you wish to tie the bow around, and optional sharp scissors.
Step-by-Step Instructions
Step 1: Gather Your Materials
Before you begin, select your ribbon. Consider its material, width, and length. A good starting point is a medium-width satin or grosgrain ribbon, as these are easy to handle.
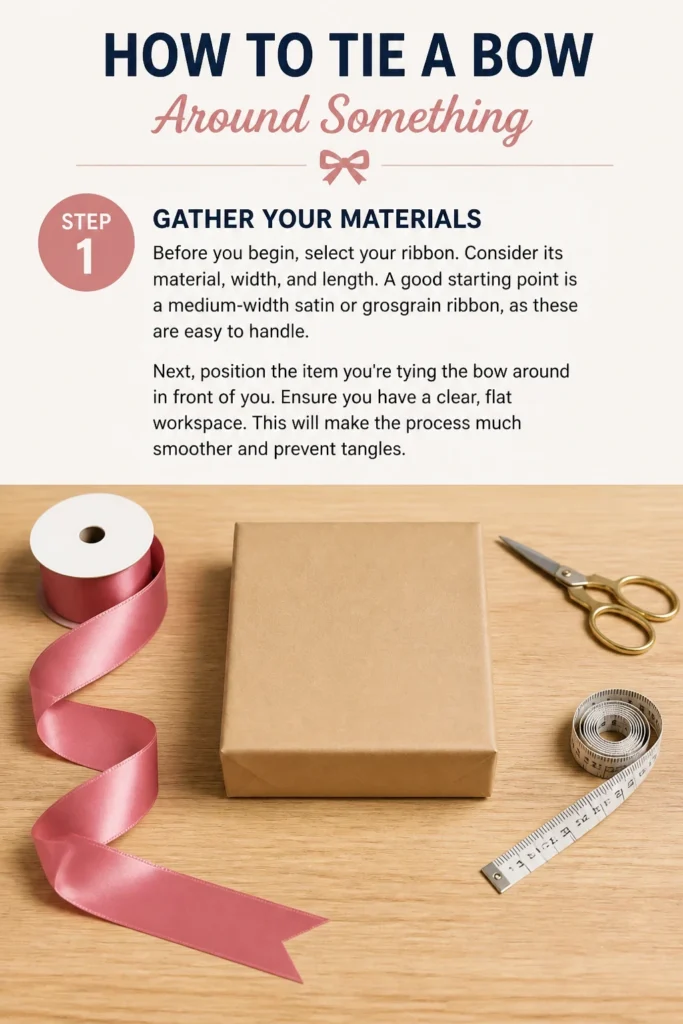
Next, position the item you’re tying the bow around in front of you. Ensure you have a clear, flat workspace. This will make the process much smoother and prevent tangles.
Step 2: Measure and Position the Ribbon
Unroll a generous length of ribbon. It’s always better to have too much than too little. You can trim the excess later.
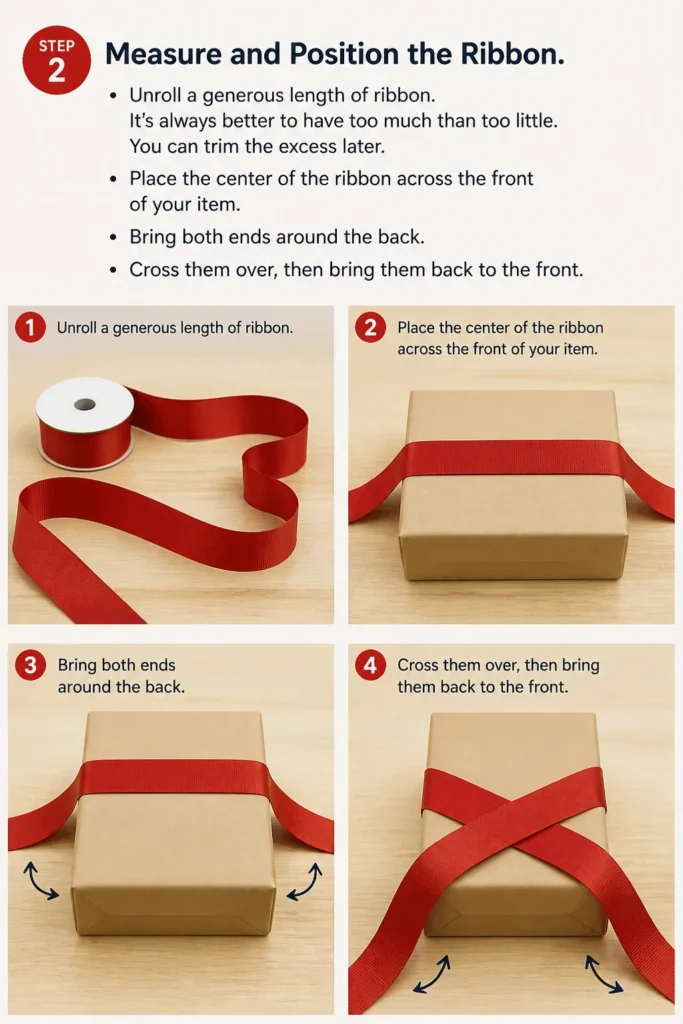
Place the center of the ribbon across the front of your item. Bring both ends around the back. Cross them over, then bring them back to the front.
Step 3: Create the Initial Crossover
Now that both ribbon ends are at the front, hold one end in each hand. Take the right ribbon end and cross it over the left ribbon end. This forms the base of your knot.
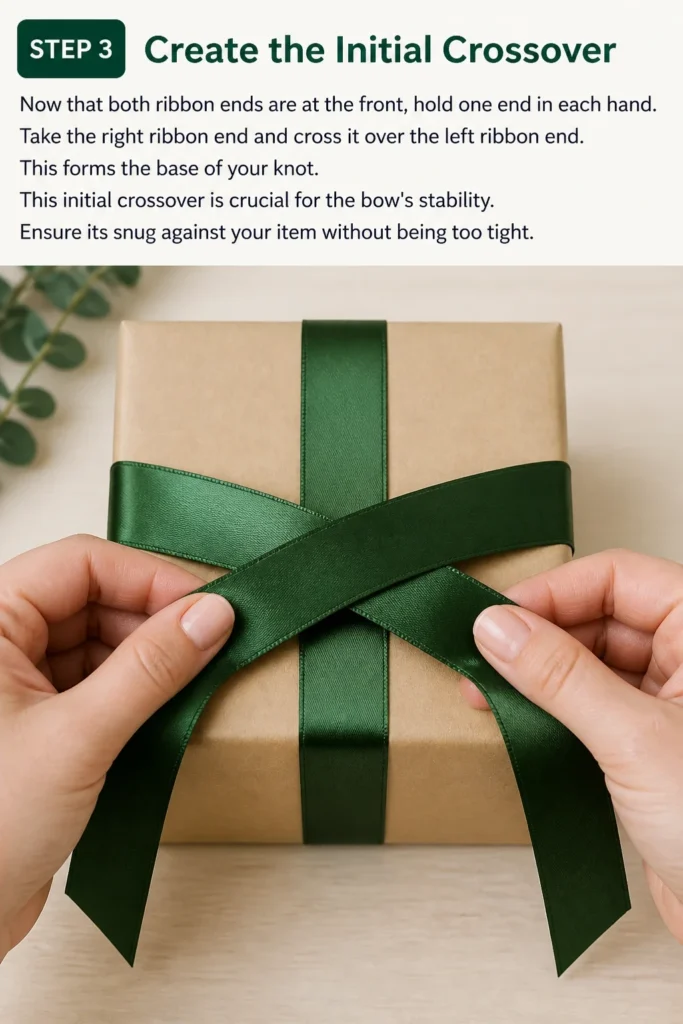
This initial crossover is crucial for the bow’s stability. Ensure it’s snug against your item without being too tight.
Step 4: Form the First Knot
Tuck the right ribbon end (which is now on top) underneath the left ribbon end. Pull it through the loop you just created. This action forms a simple knot.
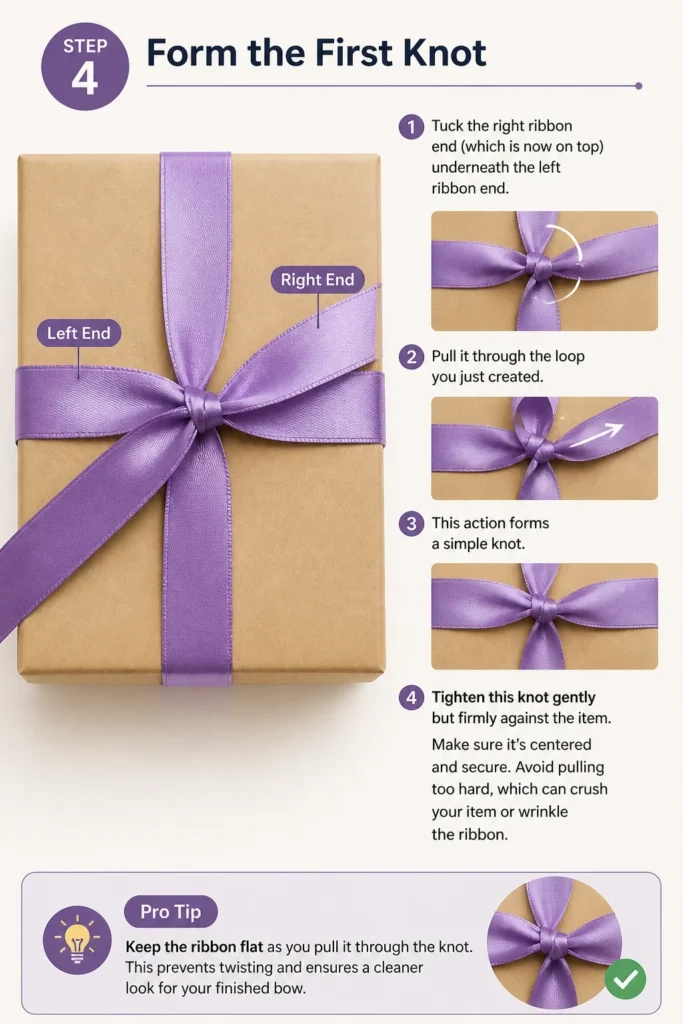
Tighten this knot gently but firmly against the item. Make sure it’s centered and secure. Avoid pulling too hard, which can crush your item or wrinkle the ribbon.
Pro Tip: Keep the ribbon flat as you pull it through the knot. This prevents twisting and ensures a cleaner look for your finished bow.
Step 5: Make the First Loop
Now you have two ribbon ends extending from your knot. Take the ribbon end on the left side. Fold it over to create a loop, similar to a bunny ear.
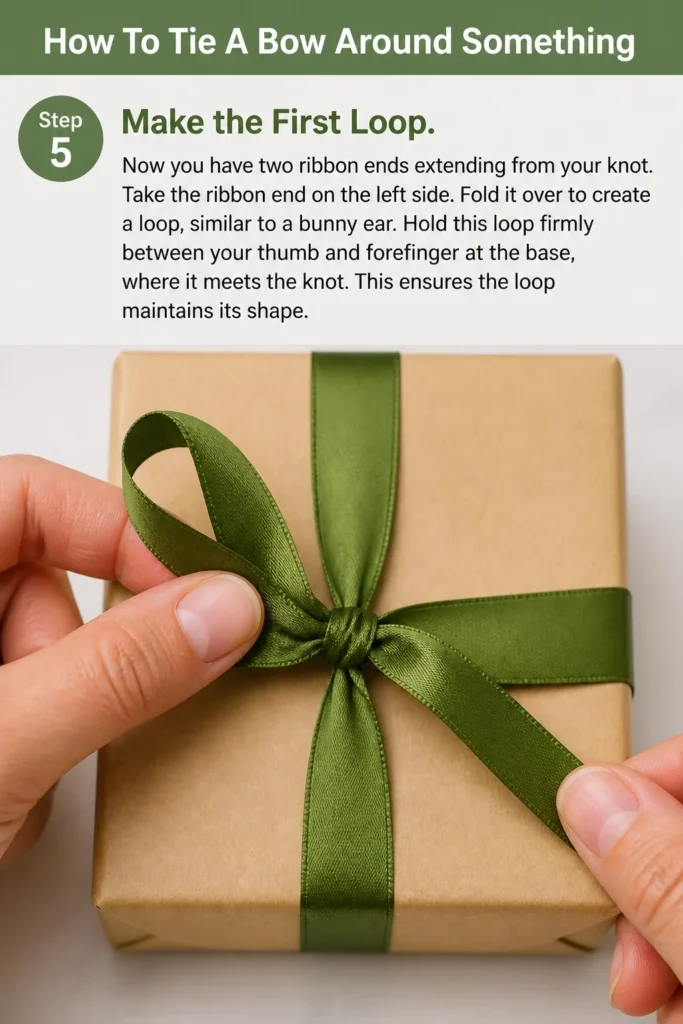
Hold this loop firmly between your thumb and forefinger at the base, where it meets the knot. This ensures the loop maintains its shape.
Step 6: Bring the Second Loop Over
Take the ribbon end on the right side. Wrap it around the base of the first loop you just created. It should go over the top and then behind the first loop.
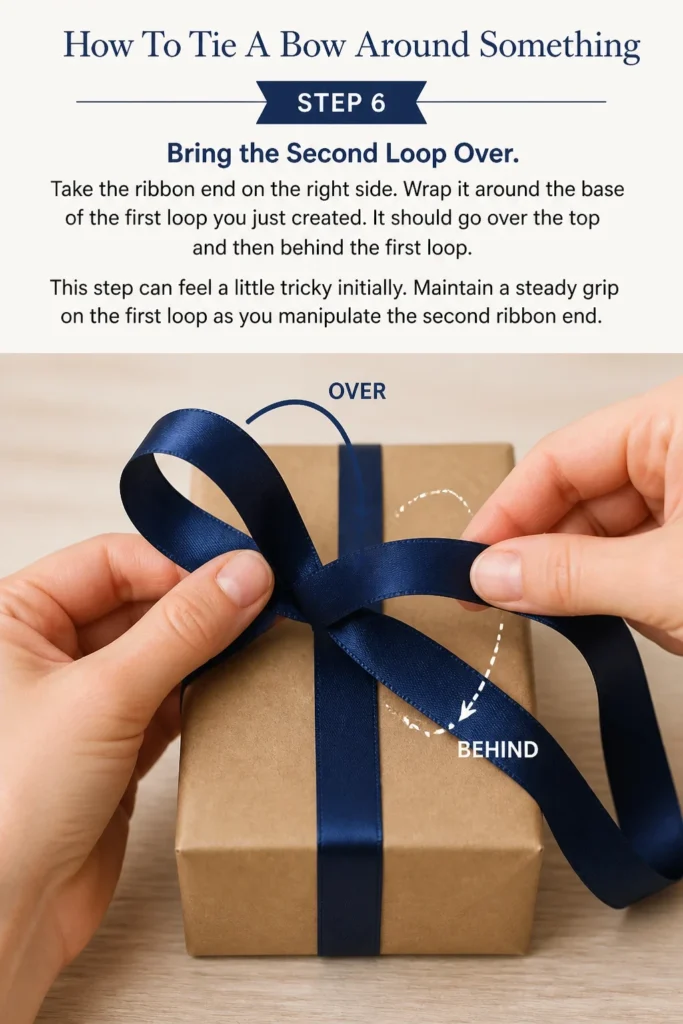
This step can feel a little tricky initially. Maintain a steady grip on the first loop as you manipulate the second ribbon end.
Step 7: Thread and Tighten the Second Loop
After wrapping the second ribbon end, thread it through the small opening behind the first loop. This creates your second loop. It will look like you’re tying another knot, but with loops instead of loose ends.
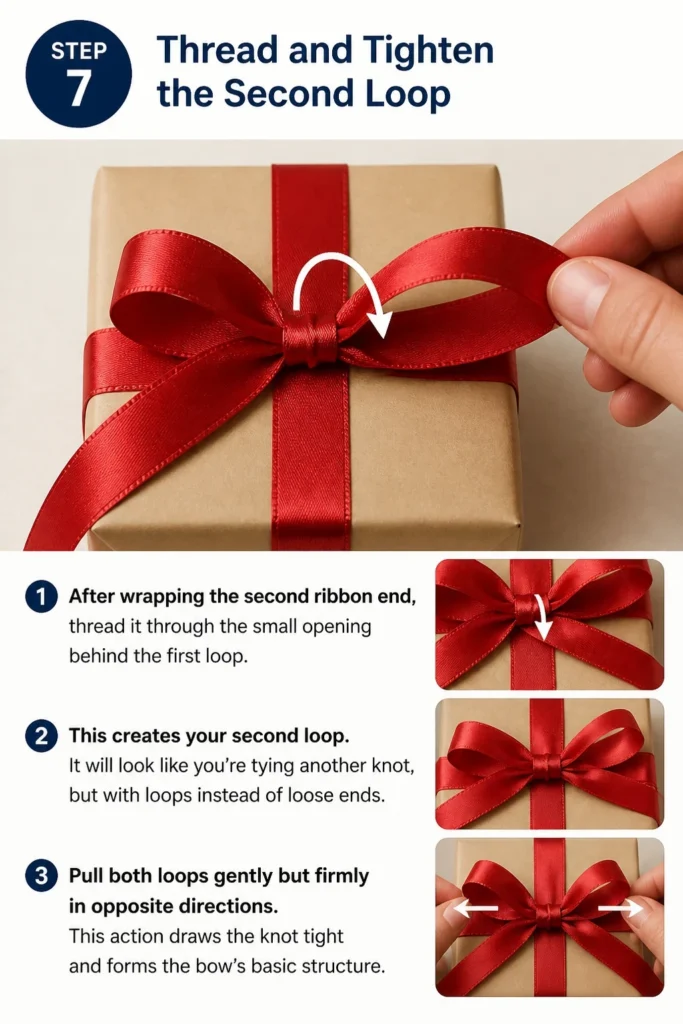
Pull both loops gently but firmly in opposite directions. This action draws the knot tight and forms the bow’s basic structure.
Step 8: Adjust and Refine the Bow
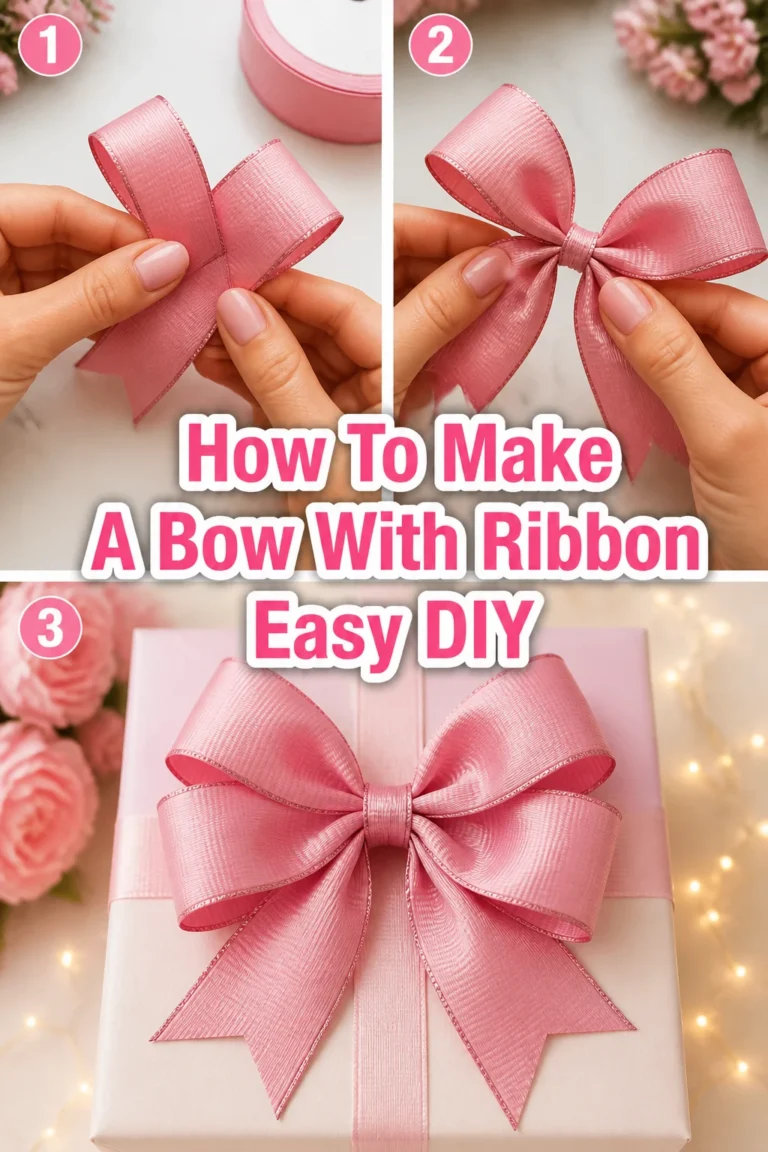
Once the bow is tightened, it’s time for the final touches. Adjust the size of each loop until they are even. Pull on the ribbon tails to make the loops larger or smaller.
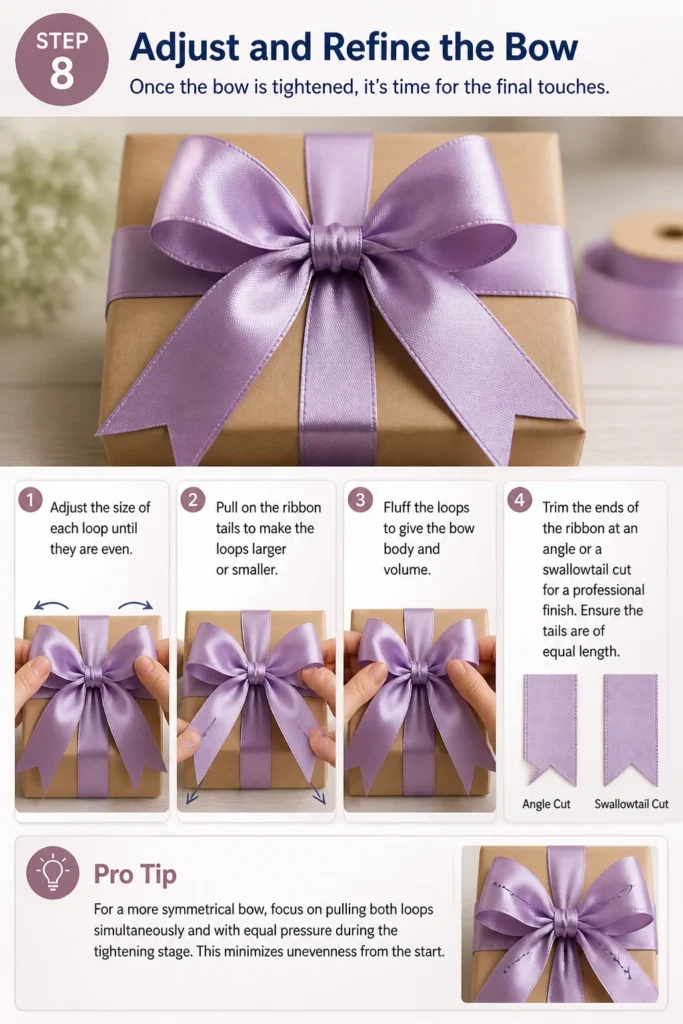
Fluff the loops to give the bow body and volume. Trim the ends of the ribbon at an angle or a swallowtail cut for a professional finish. Ensure the tails are of equal length.
Pro Tip: For a more symmetrical bow, focus on pulling both loops simultaneously and with equal pressure during the tightening stage. This minimizes unevenness from the start.
Common Mistakes to Avoid
Uneven Loops
One of the most common issues is having loops that are different sizes. This often happens if you pull one loop tighter or make one loop larger than the other during creation. The result is a lopsided and less appealing bow. To fix this, always aim to create loops of similar size before tightening. Adjust them meticulously in the final step.
Too Loose a Knot
If your initial knot isn’t snug, the entire bow structure will be unstable. A loose knot means the bow will easily unravel or shift out of place. Ensure the first knot is pulled firmly against the item before you even start making the loops. This provides a strong foundation.
Over-tightening the First Knot
While a snug knot is good, over-tightening can be detrimental. It can crush the item you’re tying the bow around, especially if it’s delicate. It also makes it harder to create the loops smoothly. Apply firm but gentle pressure, just enough to secure the ribbon without deforming the item.
Wrong Ribbon Choice
Using ribbon that is too stiff or too flimsy can make bow tying difficult. Stiff ribbons might not hold their shape gracefully, while flimsy ones can collapse. For beginners, a medium-weight satin or grosgrain ribbon is ideal. It offers enough body to hold shape but is flexible enough to manipulate.
Troubleshooting
Bow Keeps Coming Undone
If your bow repeatedly loosens or falls apart, the primary issue is likely an insufficiently tight initial knot. The very first crossover and pull-through need to be secure against the item. Without this firm foundation, the subsequent loops won’t hold.
Alternatively, the ribbon material itself might be too slippery. Some satin ribbons can be challenging. Try a ribbon with more texture, like grosgrain, for a better grip.
Loops Are Different Sizes
This is a frequent visual problem. It usually occurs because you’re not applying even tension when pulling the loops tight. One side might get more slack than the other.
To correct this, consciously focus on pulling both loops simultaneously and with equal force during Step 7. If they’re still uneven, gently manipulate the loops and tails in Step 8 to redistribute the ribbon until they match.
Ribbon Slips Off the Item
If the ribbon slides around on your item, it might not be secured tightly enough at the initial knot. Ensure the knot is snug against the item’s surface. A very smooth item, like polished metal or glass, can also contribute to slipping.
For such items, consider adding a small piece of double-sided tape or a non-slip pad discreetly underneath the ribbon. This provides extra friction to hold the bow in place.
Key Takeaways
- The initial knot provides the essential foundation for a stable bow.
- Consistent and even tension is vital throughout the entire bow-tying process.
- Practice with different ribbon types to understand their unique handling characteristics.
- Always ensure you have enough ribbon length to avoid frustration during the final adjustments.
- Take your time with the adjustment phase to achieve perfectly symmetrical and attractive loops.
- A precise trim on the ribbon ends adds a professional and polished finish to your bow.
Frequently Asked Questions
What kind of ribbon is best for beginners?
For beginners, grosgrain or satin ribbon with a medium width (around 1 to 1.5 inches) is ideal. Grosgrain has a ribbed texture that provides good grip, making it easier to hold knots. Satin offers a classic look and is generally pliable enough to work with. Avoid very stiff or very flimsy ribbons when you’re just starting out.
How do I make a double bow?
A double bow involves tying two bows on top of each other, or creating extra loops within a single bow. To simplify, after completing your first bow, you can take additional ribbon and tie another, slightly smaller bow directly over the first one. Alternatively, some techniques involve making multiple loops with the same ribbon before tightening the final knot. This adds volume and complexity.
Can I tie a bow with very short ribbon ends?
Tying a bow with very short ribbon ends is challenging but not impossible. It requires precision and careful handling. The key is to ensure you have just enough length to form the loops and thread them through the knot. You might need to use a tool like tweezers to help pull the short ends through. It’s often easier to start with longer ends and trim them later.
How do I keep the bow from slipping?
To prevent a bow from slipping, ensure your initial knot is very snug against the item. If the item itself is very smooth, a tiny dab of hot glue (applied carefully to the back of the bow, not the item if it’s delicate) can secure it. Alternatively, a small piece of double-sided tape hidden beneath the knot can add necessary friction and stability.
Our Top Recommended Finds
- Satin Ribbon Assortment: Perfect for practicing various bow styles without committing to a single color or width. Having a variety allows you to experiment freely.
- High-Quality Fabric Scissors: Essential for clean, crisp cuts on your ribbon ends, preventing fraying. Sharp scissors make a significant difference to the final appearance of your bow.
- Ribbon Storage Box: Keeps your ribbons organized and untangled, making it easy to find the perfect one for your next project. This saves time and reduces waste.
Your Journey to Perfect Bows Begins Now
You’ve just learned the foundational steps to create beautiful bows around anything. This practical skill opens up a world of creative possibilities. From dressing up gifts to adding charm to home decor, a well-tied bow makes a statement.
Don’t hesitate to experiment with different ribbon textures and widths. Each material offers a unique challenge and aesthetic. Grab some ribbon and start practicing today. The more you tie, the more intuitive and effortless it will become.
Beginner-friendly templates, step-by-step guides,
and weekly project ideas in your inbox.