🧶 How To Start A Chunky Knit Blanket

Beginner-friendly templates, step-by-step guides,
and weekly project ideas in your inbox.
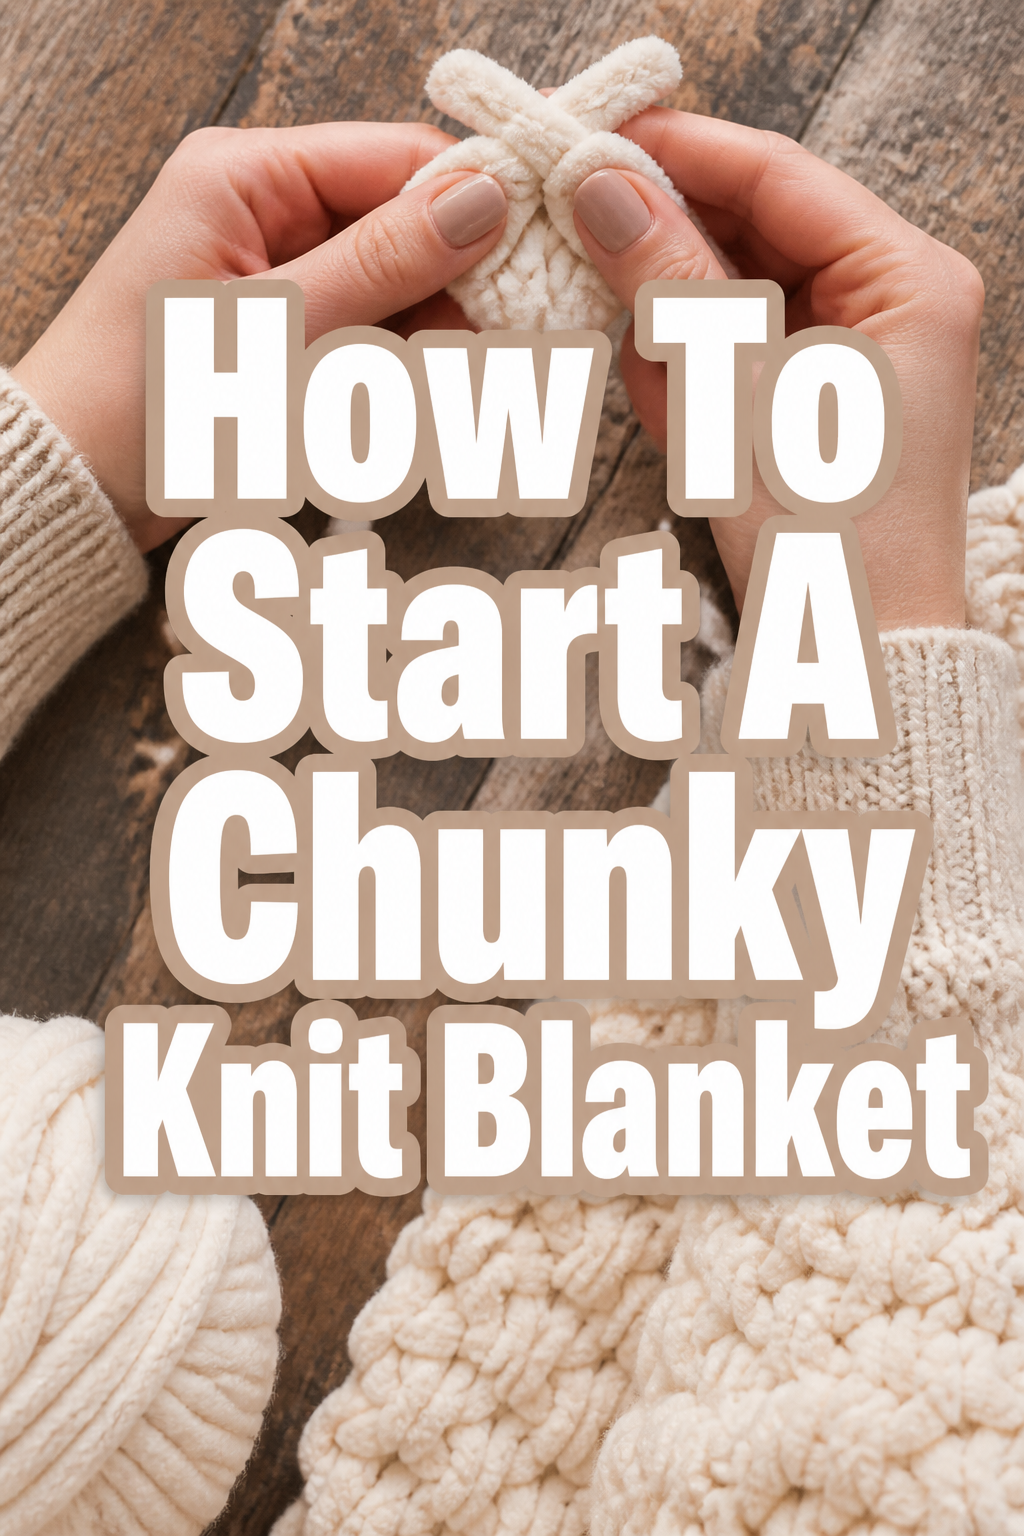
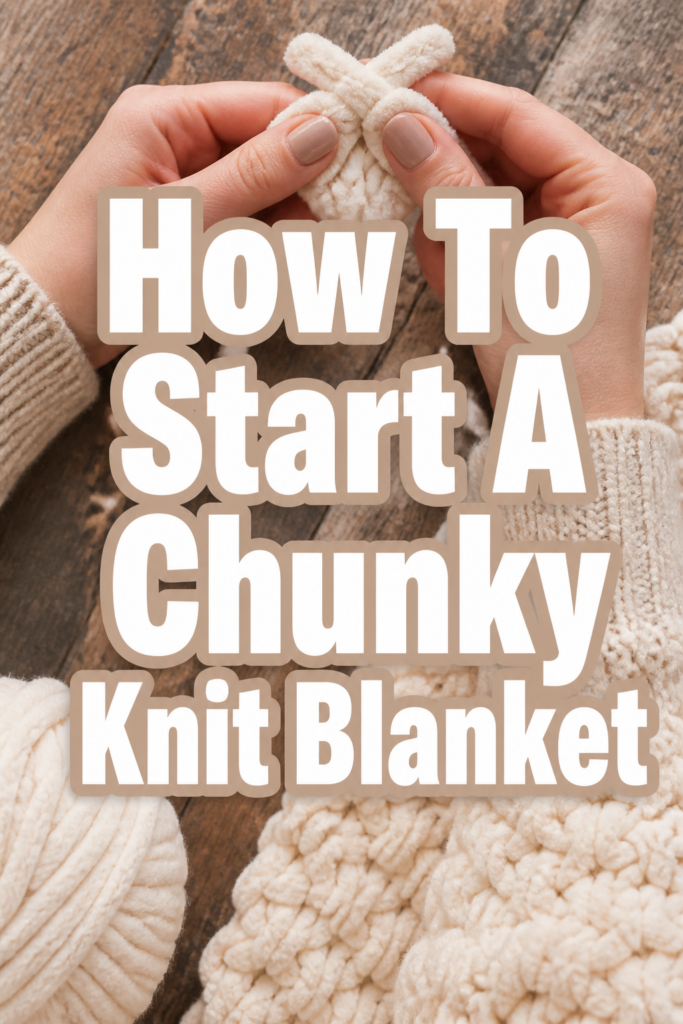
Starting a chunky knit blanket can feel a bit daunting at first glance. I remember my own initial attempts, wrestling with massive skeins of yarn and wondering if I was even holding it right. But once you grasp the basic movements, it becomes incredibly intuitive and deeply satisfying. This guide will walk you through every simple step, ensuring your first chunky blanket project is a cozy success.
You’ll soon discover the joy of creating something beautiful with your own hands.
Quick Overview
This guide will equip you with the knowledge to confidently cast on and begin knitting your very own chunky blanket. You’ll learn the essential techniques to get your project off to a perfect start.
- Time needed: 30-60 minutes for the initial setup and first few rows
- Difficulty: Beginner
- What you’ll need: Chunky yarn (merino wool or jumbo chenille recommended), a clear workspace
Step-by-Step Instructions
Step 1: Choose Your Yarn Wisely
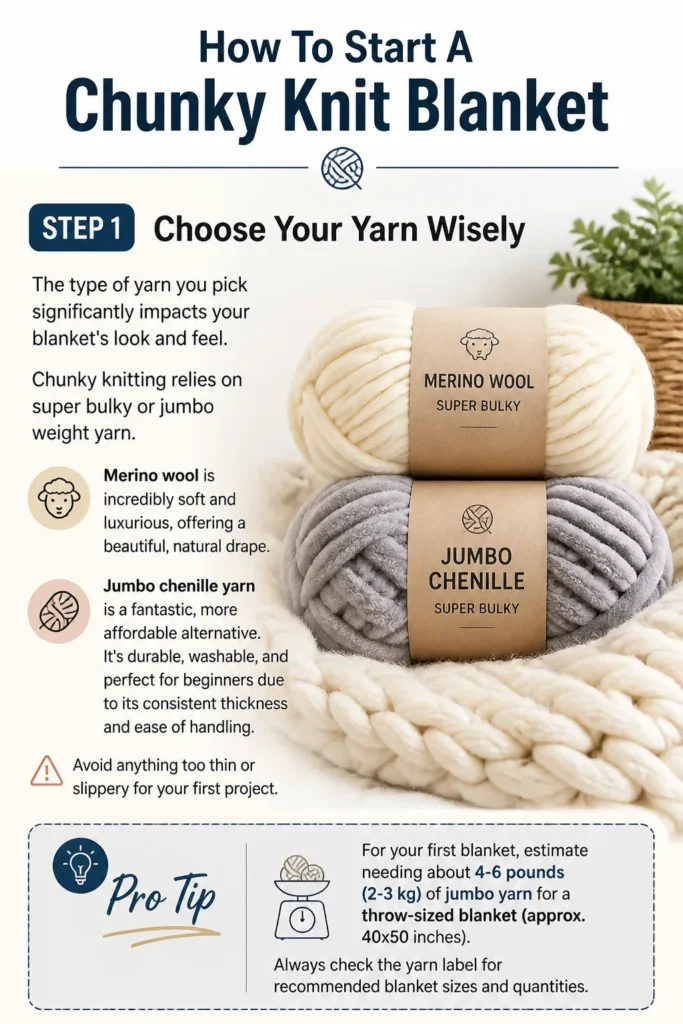
The type of yarn you pick significantly impacts your blanket’s look and feel. Chunky knitting relies on super bulky or jumbo weight yarn. Merino wool is incredibly soft and luxurious, offering a beautiful, natural drape.
Jumbo chenille yarn is a fantastic, more affordable alternative. It’s durable, washable, and perfect for beginners due to its consistent thickness and ease of handling. Avoid anything too thin or slippery for your first project.
Pro Tip: For your first blanket, estimate needing about 4-6 pounds (2-3 kg) of jumbo yarn for a throw-sized blanket (approx. 40×50 inches). Always check the yarn label for recommended blanket sizes and quantities.
Step 2: Prepare Your Workspace
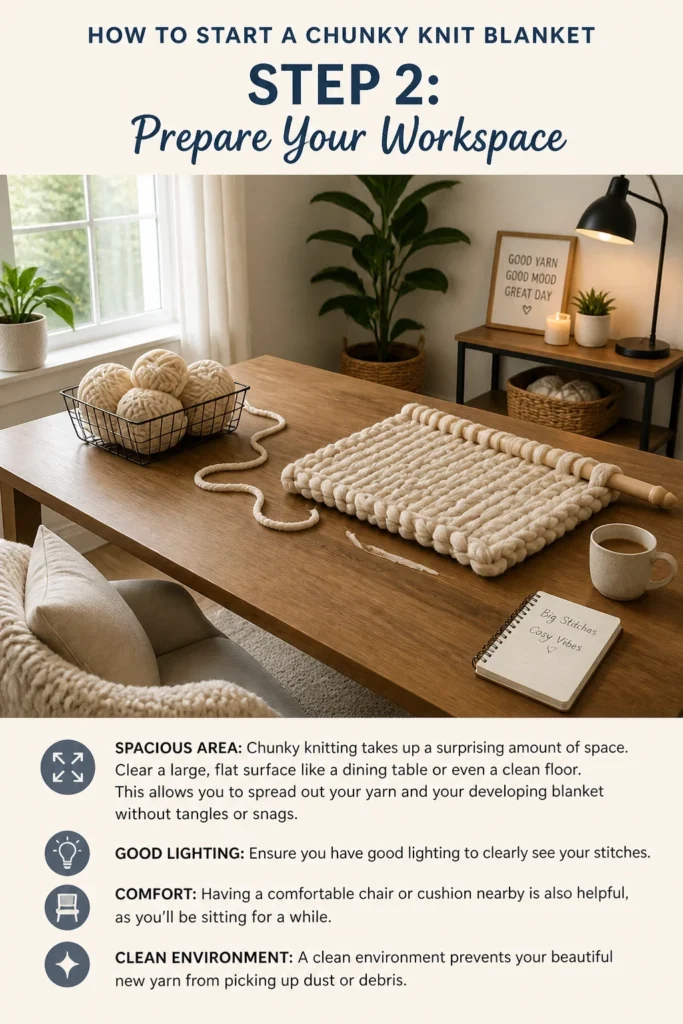
Chunky knitting takes up a surprising amount of space. Clear a large, flat surface like a dining table or even a clean floor. This allows you to spread out your yarn and your developing blanket without tangles or snags.
Ensure you have good lighting to clearly see your stitches. Having a comfortable chair or cushion nearby is also helpful, as you’ll be sitting for a while. A clean environment prevents your beautiful new yarn from picking up dust or debris.
Step 3: Unroll Your Yarn Correctly
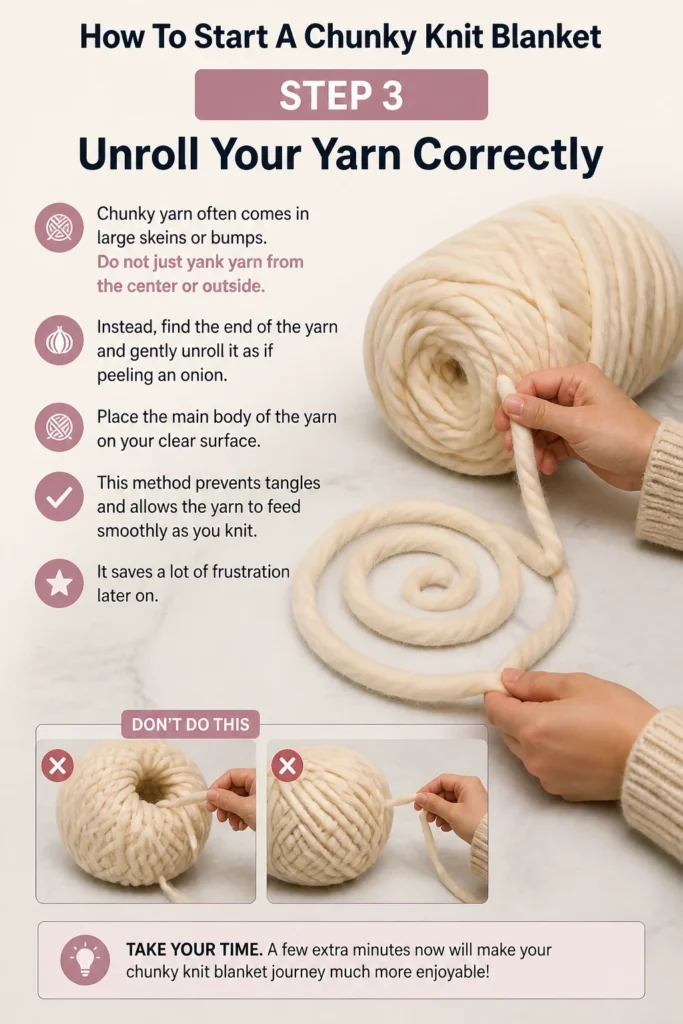
Chunky yarn often comes in large skeins or “bumps.” Do not just yank yarn from the center or outside. Instead, find the end of the yarn and gently unroll it as if peeling an onion.
Place the main body of the yarn on your clear surface. This method prevents tangles and allows the yarn to feed smoothly as you knit. It saves a lot of frustration later on.
Step 4: Create Your Slip Knot
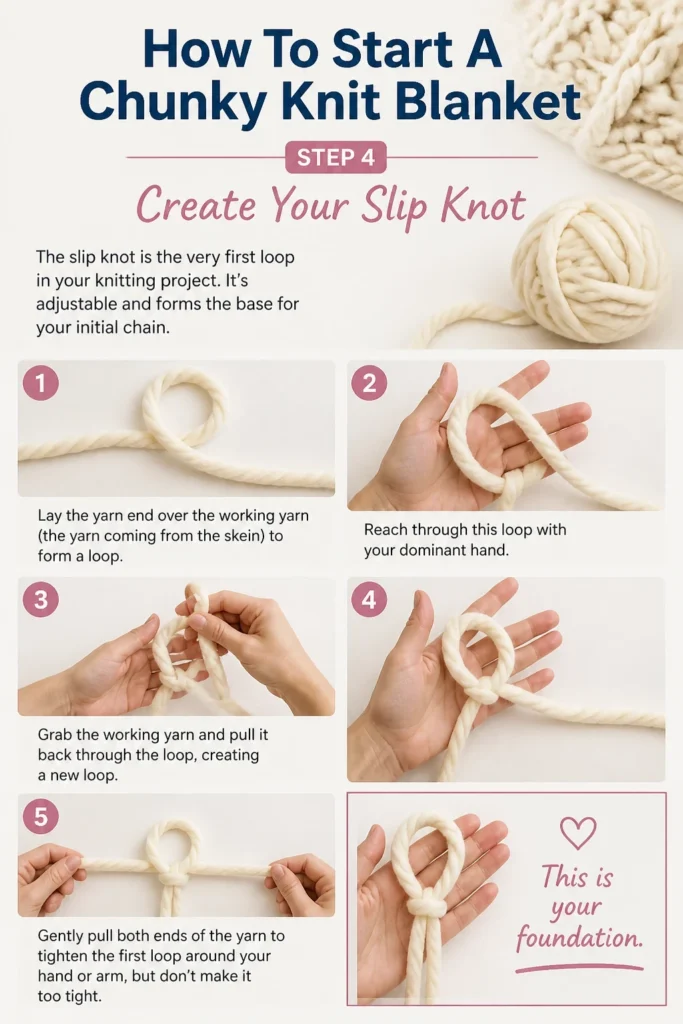
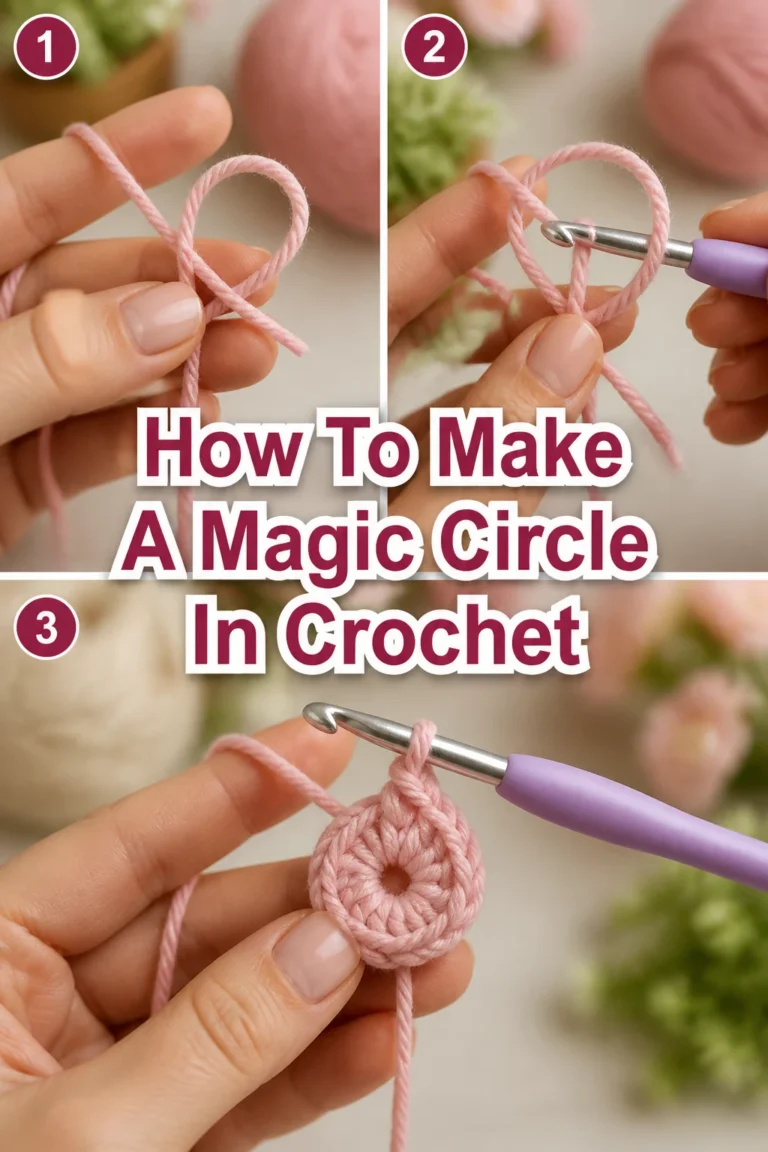
The slip knot is the very first loop in your knitting project. It’s adjustable and forms the base for your initial chain. To make one, lay the yarn end over the working yarn (the yarn coming from the skein) to form a loop.
Reach through this loop with your dominant hand. Grab the working yarn and pull it back through the loop, creating a new loop. Gently pull both ends of the yarn to tighten the first loop around your hand or arm, but don’t make it too tight. This is your foundation.
Step 5: Form the Foundation Chain (Casting On)
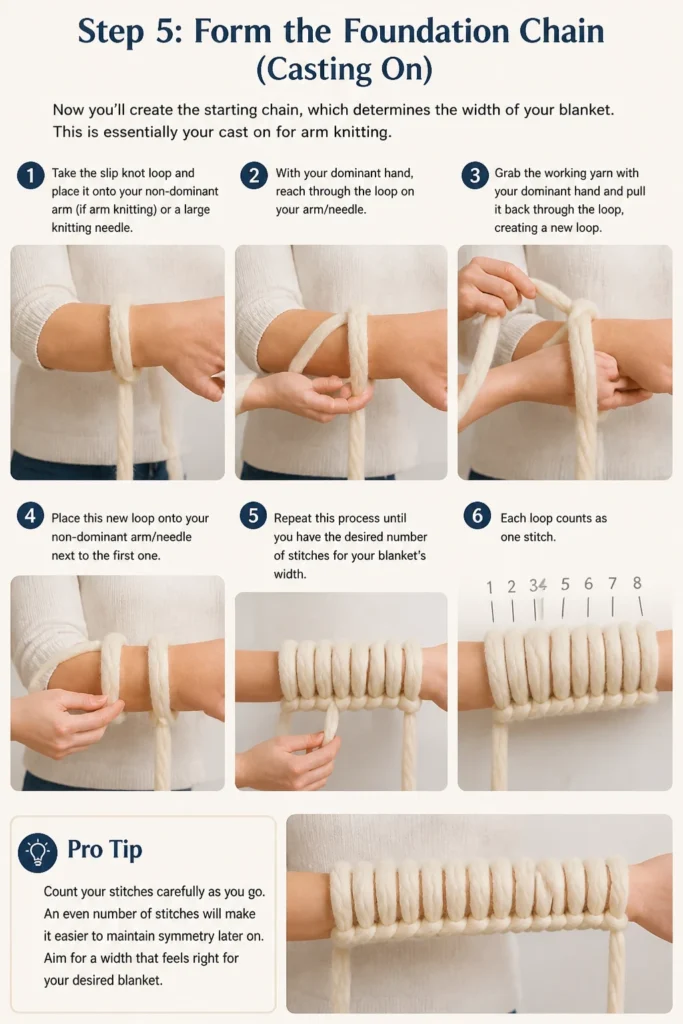
Now you’ll create the starting chain, which determines the width of your blanket. This is essentially your “cast on” for arm knitting. Take the slip knot loop and place it onto your non-dominant arm (if arm knitting) or a large knitting needle.
With your dominant hand, reach through the loop on your arm/needle. Grab the working yarn with your dominant hand and pull it back through the loop, creating a new loop. Place this new loop onto your non-dominant arm/needle next to the first one. Repeat this process until you have the desired number of stitches for your blanket’s width. Each loop counts as one stitch.
Pro Tip: Count your stitches carefully as you go. An even number of stitches will make it easier to maintain symmetry later on. Aim for a width that feels right for your desired blanket size. For a standard throw, 25-35 stitches are common with jumbo yarn.
Step 6: Begin Your First Row of Knitting
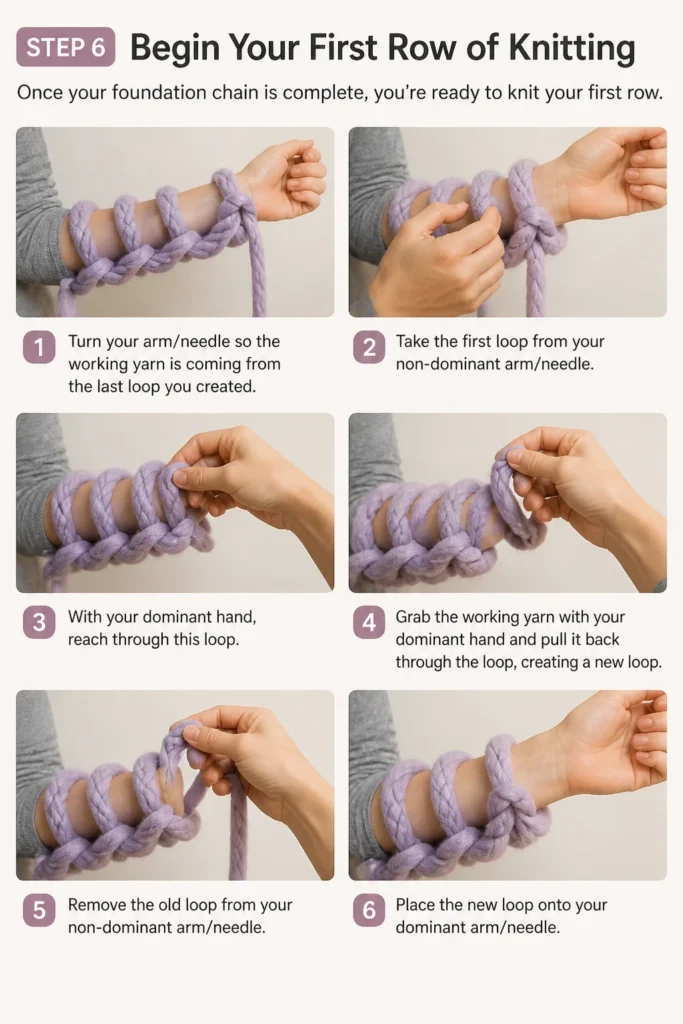
Once your foundation chain is complete, you’re ready to knit your first row. Turn your arm/needle so the working yarn is coming from the last loop you created. Take the first loop from your non-dominant arm/needle.
With your dominant hand, reach through this loop. Grab the working yarn with your dominant hand and pull it back through the loop, creating a new loop. Remove the old loop from your non-dominant arm/needle. Place the new loop onto your dominant arm/needle.
Step 7: Continue Knitting Across the Row
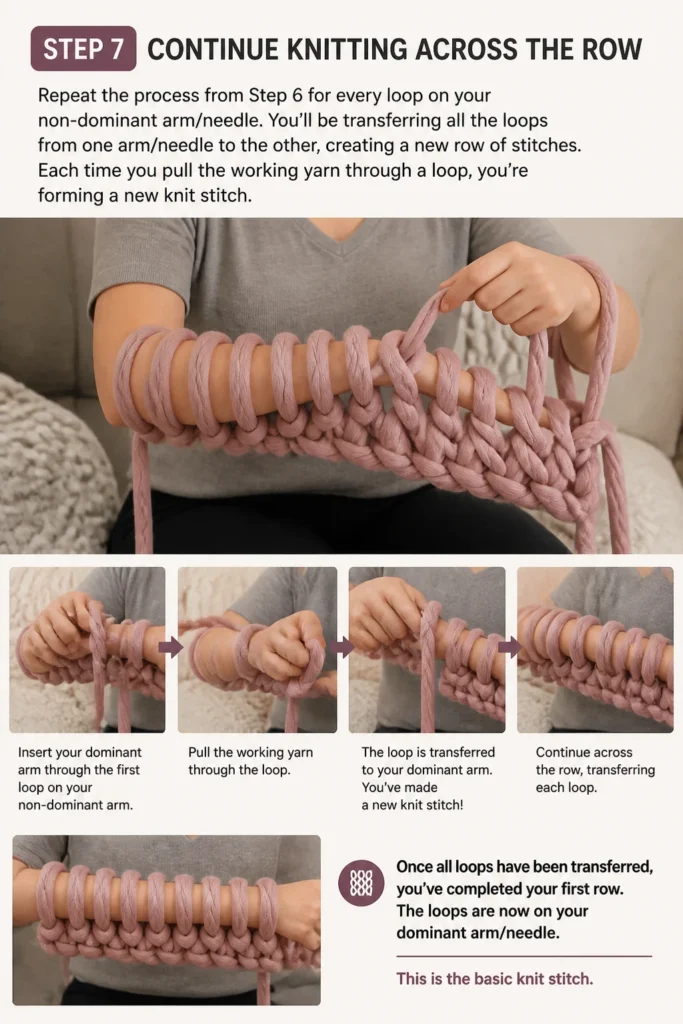
Repeat the process from Step 6 for every loop on your non-dominant arm/needle. You’ll be transferring all the loops from one arm/needle to the other, creating a new row of stitches. Each time you pull the working yarn through a loop, you’re forming a new knit stitch.
Once all loops have been transferred, you’ve completed your first row. The loops are now on your dominant arm/needle. This is the basic knit stitch.
Step 8: Turn Your Work and Start the Next Row
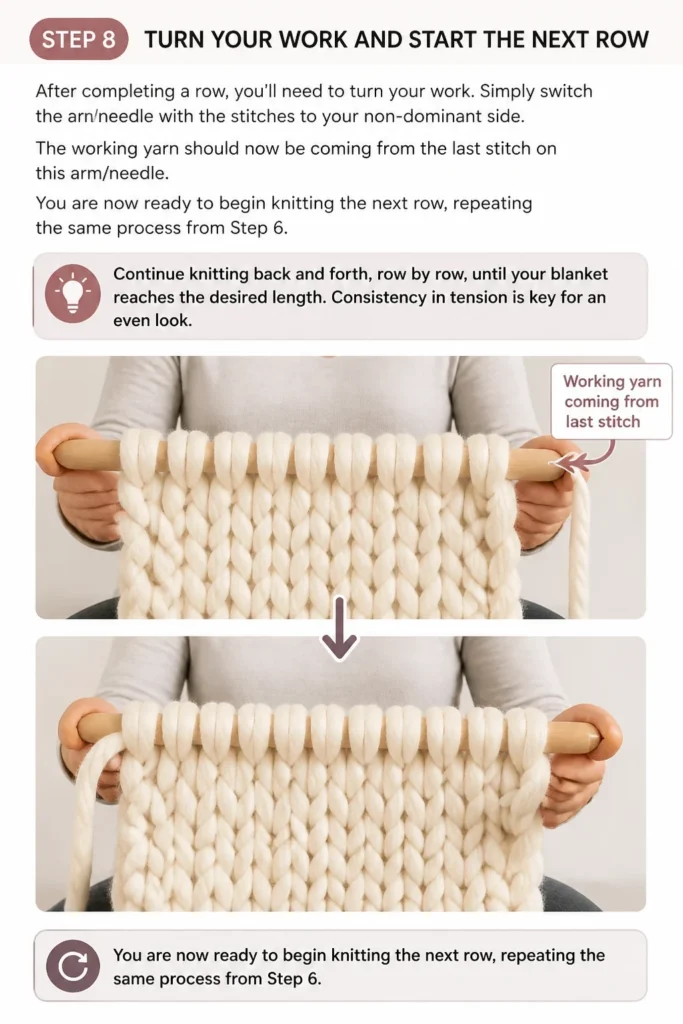
After completing a row, you’ll need to “turn your work.” Simply switch the arm/needle with the stitches to your non-dominant side. The working yarn should now be coming from the last stitch on this arm/needle.
You are now ready to begin knitting the next row, repeating the same process from Step 6. Continue knitting back and forth, row by row, until your blanket reaches the desired length. Consistency in tension is key for an even look.
Common Mistakes to Avoid
Too Tight or Too Loose Stitches
One common pitfall for beginners is inconsistent tension. If your stitches are too tight, they will be very difficult to pull through, making the knitting process slow and frustrating. The resulting fabric will be stiff and rigid.
Conversely, stitches that are too loose can create a gappy, uneven fabric. It can also make it easier for stitches to fall off your arms or needles. Practice finding a comfortable, consistent tension where stitches are snug but still easily moved.
Uneven Edges
Many new knitters struggle with maintaining straight edges. This often happens by either adding extra stitches or dropping stitches at the beginning or end of a row. Always count your stitches at the end of each row, especially in the beginning.
Ensuring you knit into the very last stitch of a row and don’t accidentally create an extra loop will keep your edges neat. Consistency in how you start and end each row is crucial for a professional finish.
Twisted Stitches
Sometimes, a stitch can become twisted when you pull the working yarn through incorrectly. This can make the stitch look different and affect the overall texture of your blanket. Always ensure you are pulling the working yarn straight through the loop.
If a stitch looks odd, pause and examine it. Untwist it gently before continuing. A twisted stitch can sometimes be mistaken for a dropped stitch, so it’s good to learn to identify the difference.
Troubleshooting
Dropped Stitch
A dropped stitch is when a loop accidentally falls off your arm or needle. Don’t panic! If you catch it quickly, it’s usually an easy fix. Look for the “ladder” of yarn below the dropped stitch.
Gently pick up the dropped loop with your fingers. Use the laddering yarn to recreate the stitch, pulling the working yarn through the loop in the correct direction. If it’s several rows down, you might need a crochet hook to help ladder it back up.
Stitches are Too Hard to Pull Through
This issue almost always comes down to tension. If your stitches are too tight, they won’t slide easily. Take a deep breath and try to relax your hands.
Consciously loosen your grip on the yarn and try to make your loops a little larger as you form them. It might feel strange at first, but consistent, relaxed tension will make knitting much more enjoyable.
Blanket is Curling
If your blanket edges start to curl inwards, it’s a common characteristic of stockinette stitch (which is what you get when you knit every row). While some curling is normal, excessive curling might indicate very tight tension or uneven edges.
Often, blocking (gently wetting and shaping the finished blanket) can help alleviate curling. For a simple solution during knitting, you can try adding a border stitch, like a garter stitch (knitting the first and last few stitches of every row differently), to help flatten the edges.
Key Takeaways
- Yarn Choice Matters: Select super bulky or jumbo yarn for the best chunky knit results.
- Clear Your Space: A large, clear area prevents tangles and makes knitting easier.
- Master the Slip Knot: This foundational loop is the starting point for all your stitches.
- Count Your Stitches: Regularly counting helps maintain consistent width and straight edges.
- Relax Your Tension: Even, relaxed tension is crucial for a beautiful, soft, and easy-to-knit blanket.
- Practice Makes Perfect: Don’t get discouraged by initial challenges; practice builds confidence and skill.
Frequently Asked Questions
How much yarn do I need for a chunky knit blanket?
The amount of yarn depends on the desired size of your blanket and the specific yarn weight. For a small throw (approx. 40×50 inches) using jumbo chenille or merino, you’ll typically need 4-6 pounds (2-3 kg) of yarn. Always check the yarn label for its specific yardage and recommended projects.
Can I use regular knitting needles for a chunky knit blanket?
If you’re using super bulky yarn, you’ll need appropriately sized jumbo knitting needles (typically US size 50 or 25mm and larger). For jumbo or giant yarn, arm knitting is the most common and often easiest method, as traditional needles may not be large enough.
How do I wash my chunky knit blanket?
Washing instructions vary greatly by yarn type. Merino wool often requires gentle hand washing in cold water with a wool-safe detergent, then laid flat to dry. Jumbo chenille is usually machine washable on a gentle cycle and can be tumble dried on low. Always refer to your yarn’s specific care label to prevent damage.
What’s the best yarn for beginners?
Jumbo chenille yarn is highly recommended for beginners. It’s affordable, durable, easy to grip, and less prone to splitting than some natural fibers. It also creates a beautiful, soft fabric that holds its shape well, making it very forgiving for new knitters.
Our Top Recommended Finds
- Jumbo Chenille Yarn: An excellent, budget-friendly choice that is soft, durable, and easy to work with for beginners.
- High-Quality Merino Wool Roving: For a truly luxurious feel, merino offers unparalleled softness and a beautiful, natural aesthetic, though it requires more delicate handling.
- Giant Knitting Needles (25mm+): If you prefer the feel of needles over arm knitting, invest in a pair of appropriately sized jumbo needles for super bulky yarns.
Embrace Your Cozy Creation!
You now have all the foundational knowledge to embark on your chunky knit blanket journey. The first few rows are often the trickiest, but with patience and practice, you’ll find your rhythm. Don’t be afraid to experiment with different yarn types or even try a simple pattern once you’re comfortable.
Imagine snuggling up with your very own handmade, super soft blanket this coming season. Why wait? Gather your yarn, clear your space, and start creating that cozy masterpiece today. Your future self will thank you for it!
Beginner-friendly templates, step-by-step guides,
and weekly project ideas in your inbox.