🧶 How To Crochet A Bag For Beginners

Beginner-friendly templates, step-by-step guides,
and weekly project ideas in your inbox.
I remember sitting on my porch with a tangled mess of neon pink yarn and a hook that felt far too big for my hands.
That first attempt at a bag ended up looking more like a triangular fishing net than a tote, but it taught me exactly what beginners struggle with most.
This guide is built from those early mistakes and years of teaching others how to create functional, beautiful accessories with just a string and a stick.
Quick Overview
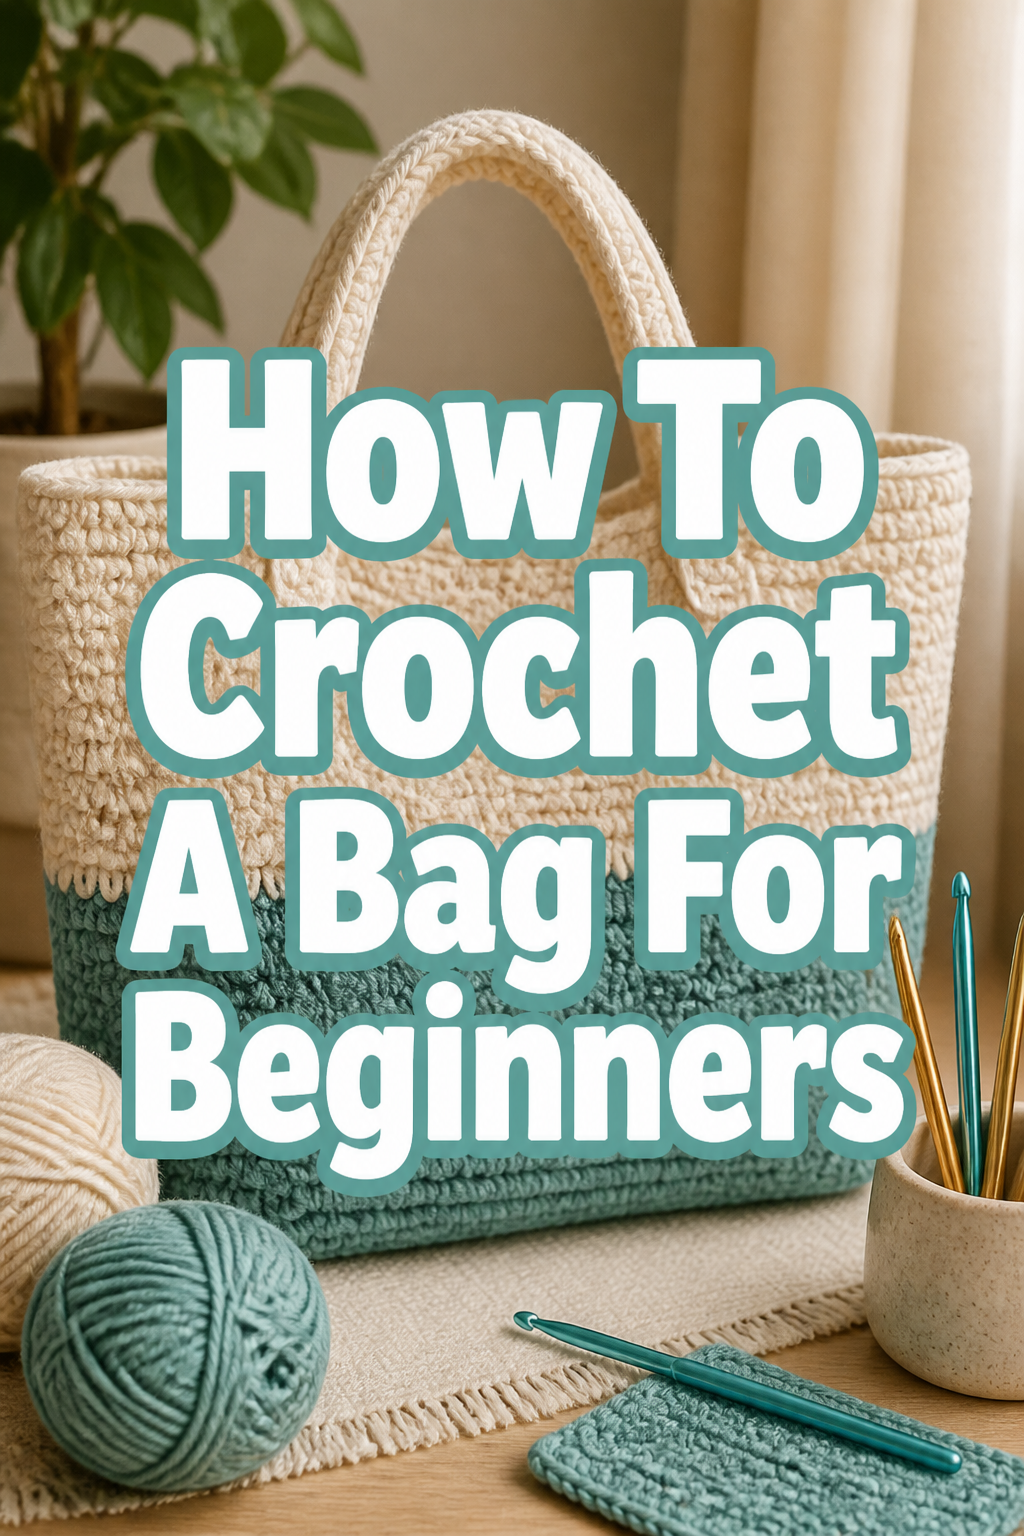
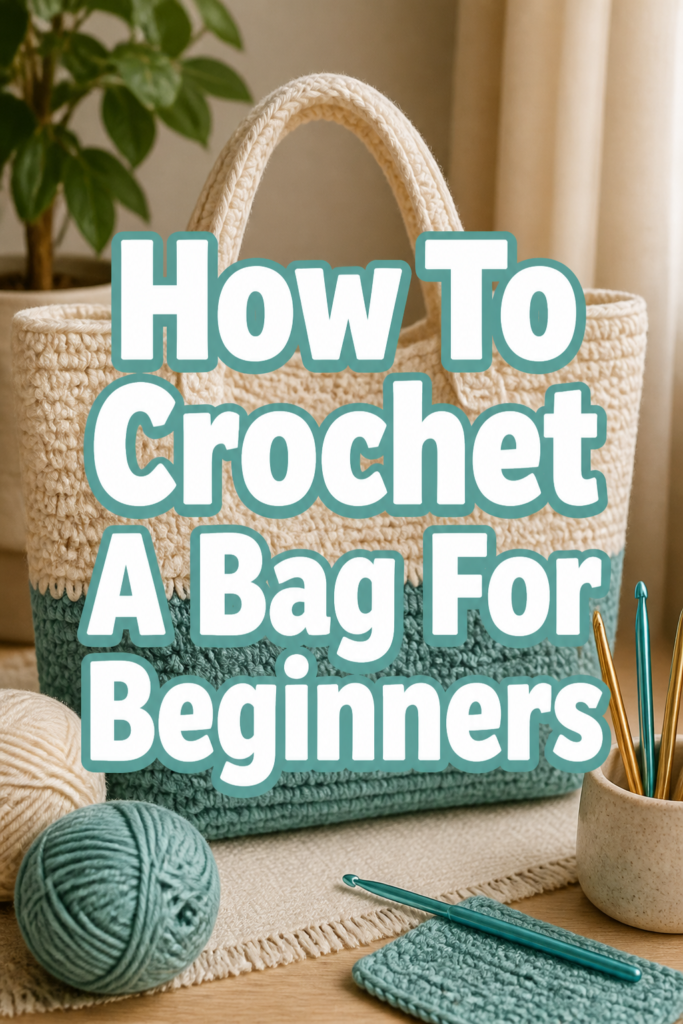
In this project, you will create a classic rectangular market tote using two identical panels and a sturdy strap.
This design focuses on mastering the foundation chain, the single crochet stitch, and the double crochet stitch for a fast-growing project.
- Time needed: 4 to 6 hours (can be broken into smaller sessions)
- Difficulty: Beginner
- What you’ll need: Cotton yarn (Weight 4), 5.0mm crochet hook, scissors, tapestry needle, and stitch markers.
Step-by-Step Instructions
Step 1: Select Your Yarn and Hook
Choose a medium-weight cotton yarn for your first bag because cotton does not stretch as much as acrylic or wool.
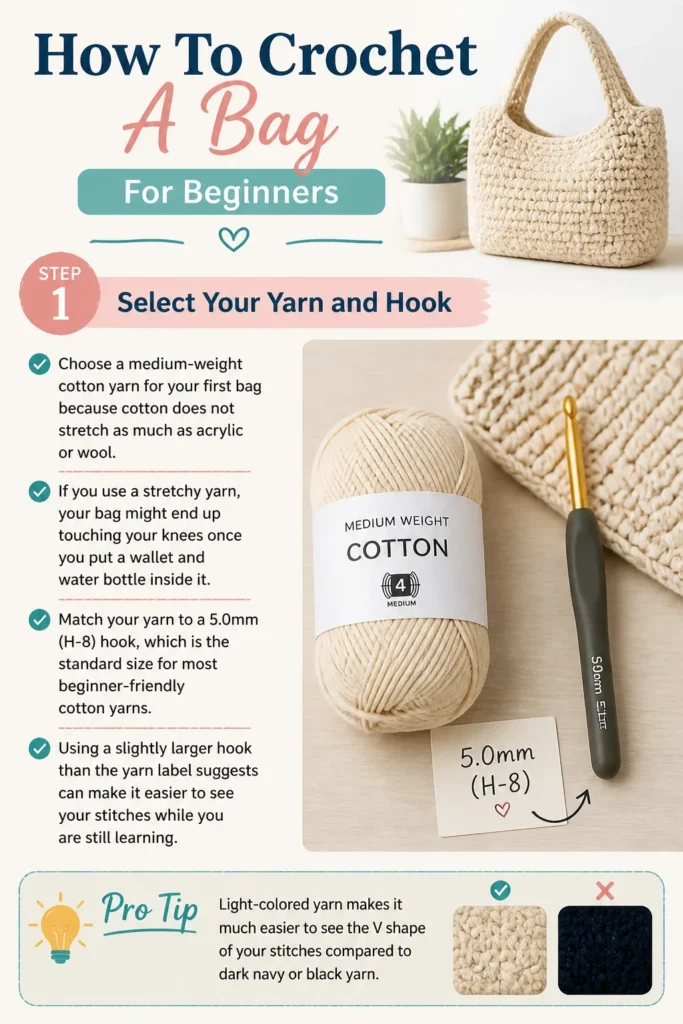
If you use a stretchy yarn, your bag might end up touching your knees once you put a wallet and water bottle inside it.
Match your yarn to a 5.0mm (H-8) hook, which is the standard size for most beginner-friendly cotton yarns.
Using a slightly larger hook than the yarn label suggests can make it easier to see your stitches while you are still learning.
Pro Tip: Light-colored yarn makes it much easier to see the “V” shape of your stitches compared to dark navy or black yarn.
Step 2: Create Your Foundation Chain
Start by making a slip knot and placing it on your hook, ensuring it is snug but can still slide back and forth easily.
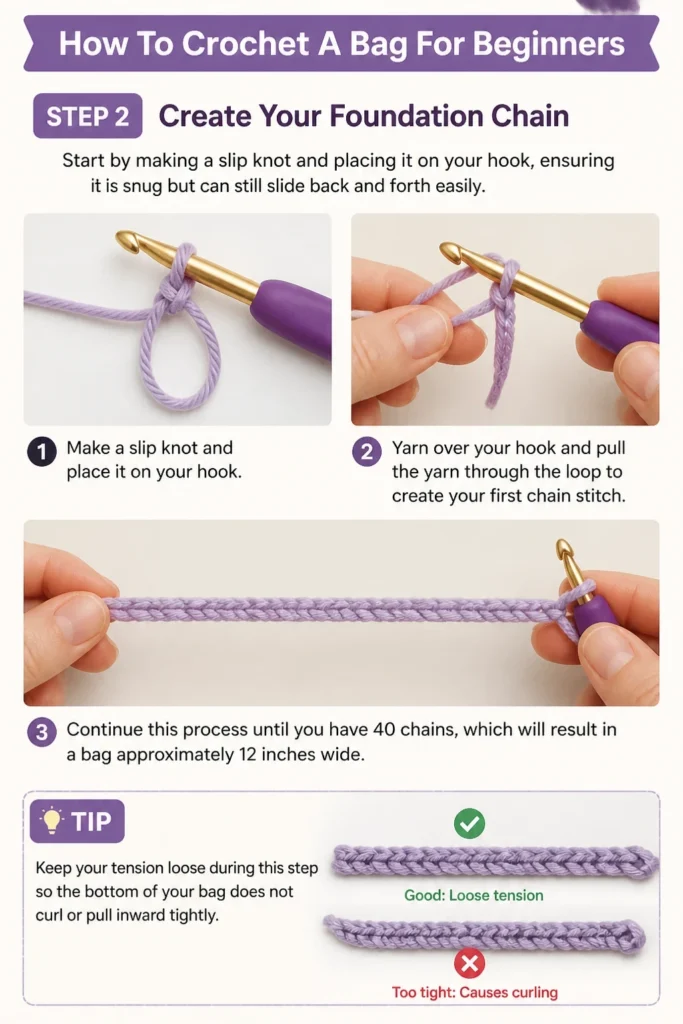
Yarn over your hook and pull the yarn through the loop to create your first chain stitch.
Continue this process until you have 40 chains, which will result in a bag approximately 12 inches wide.
Keep your tension loose during this step so the bottom of your bag does not curl or pull inward tightly.
Step 3: Work the First Row of Single Crochet
Insert your hook into the second chain from the hook, skipping the loop that is currently on your hook.
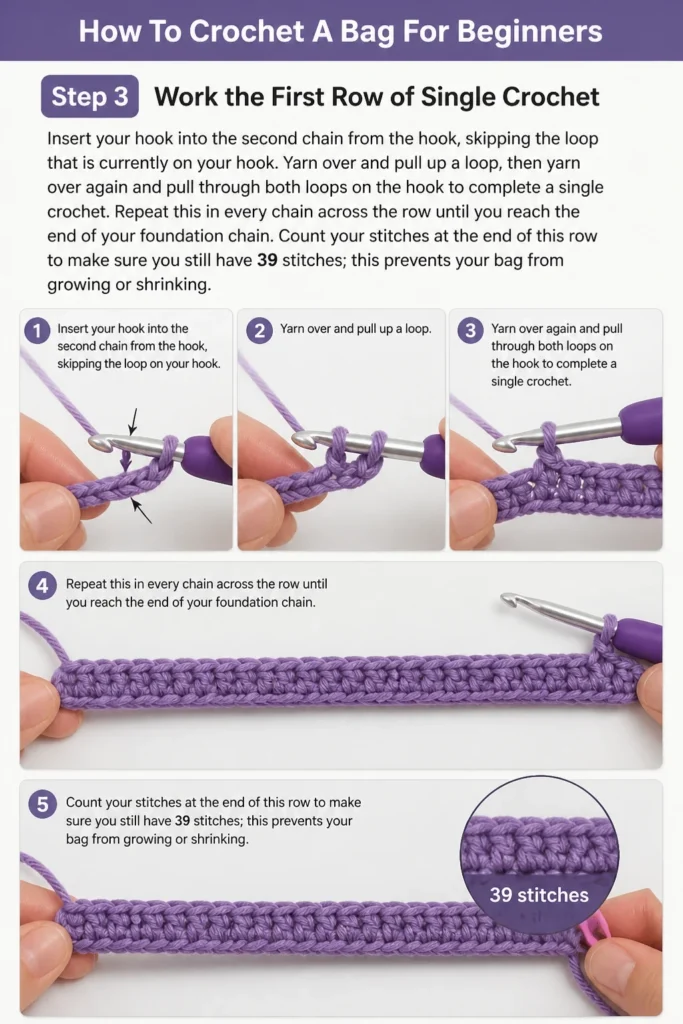
Yarn over and pull up a loop, then yarn over again and pull through both loops on the hook to complete a single crochet.
Repeat this in every chain across the row until you reach the end of your foundation chain.
Count your stitches at the end of this row to make sure you still have 39 stitches; this prevents your bag from growing or shrinking.
Step 4: Build Height with Double Crochet
Chain two at the end of your row and turn your work over so the back is now facing you.
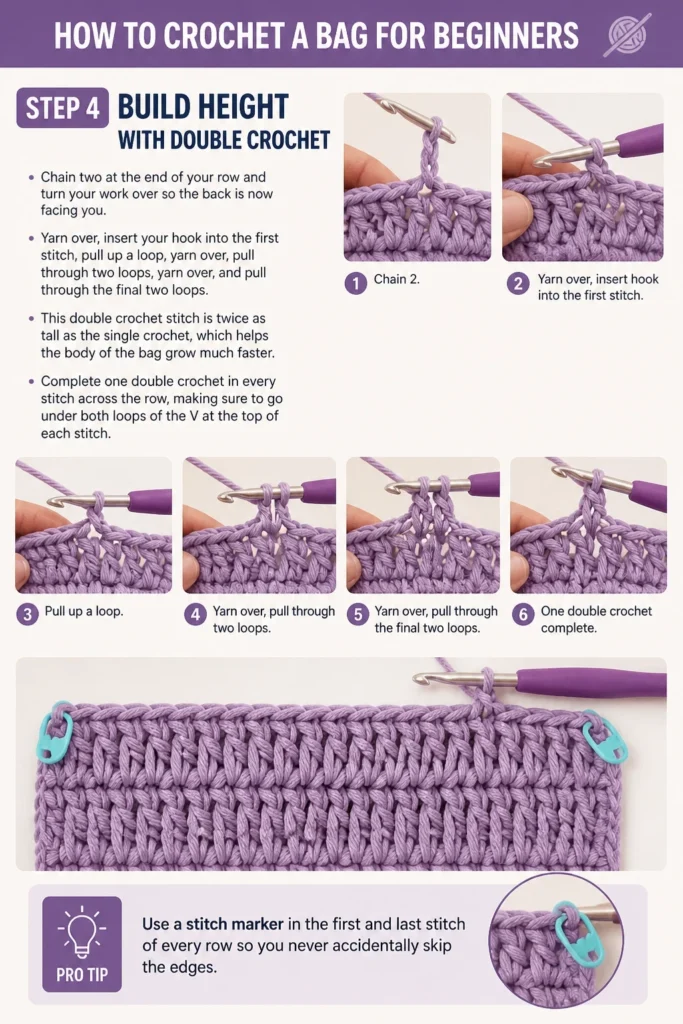
Yarn over, insert your hook into the first stitch, pull up a loop, yarn over, pull through two loops, yarn over, and pull through the final two loops.
This double crochet stitch is twice as tall as the single crochet, which helps the body of the bag grow much faster.
Complete one double crochet in every stitch across the row, making sure to go under both loops of the “V” at the top of each stitch.
Pro Tip: Use a stitch marker in the first and last stitch of every row so you never accidentally skip the edges.
Step 5: Continue the Panel to Desired Length
Repeat the double crochet rows until your panel measures about 13 inches in height from the starting edge.
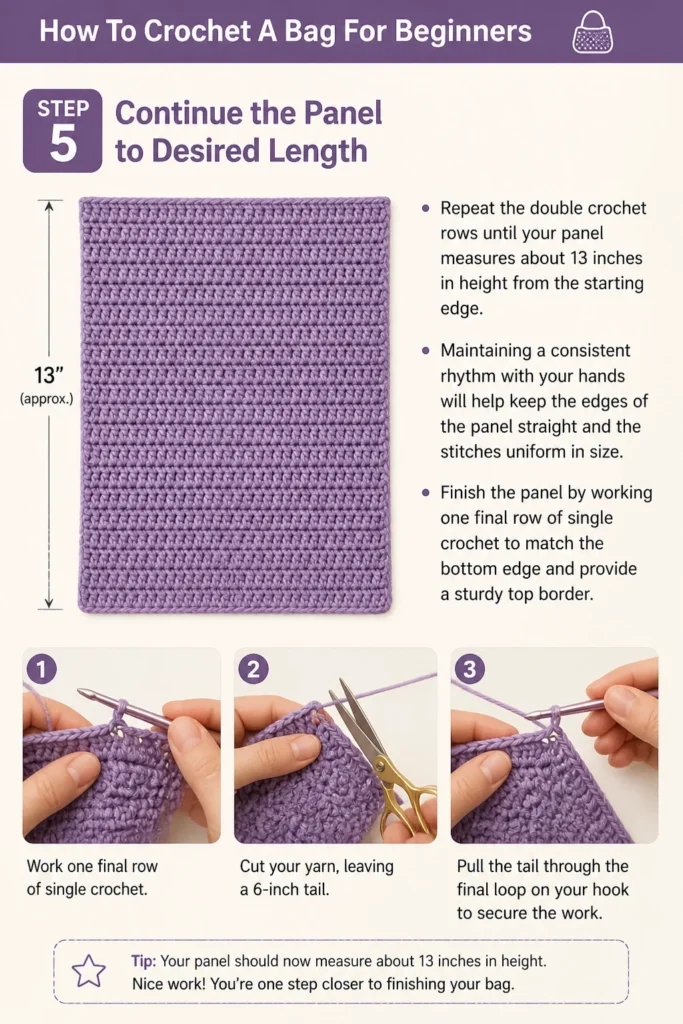
Maintaining a consistent rhythm with your hands will help keep the edges of the panel straight and the stitches uniform in size.
Finish the panel by working one final row of single crochet to match the bottom edge and provide a sturdy top border.
Cut your yarn, leaving a 6-inch tail, and pull it through the final loop on your hook to secure the work.
Step 6: Create the Second Matching Panel
Follow the exact same steps from Step 2 through Step 5 to create a second identical rectangle.
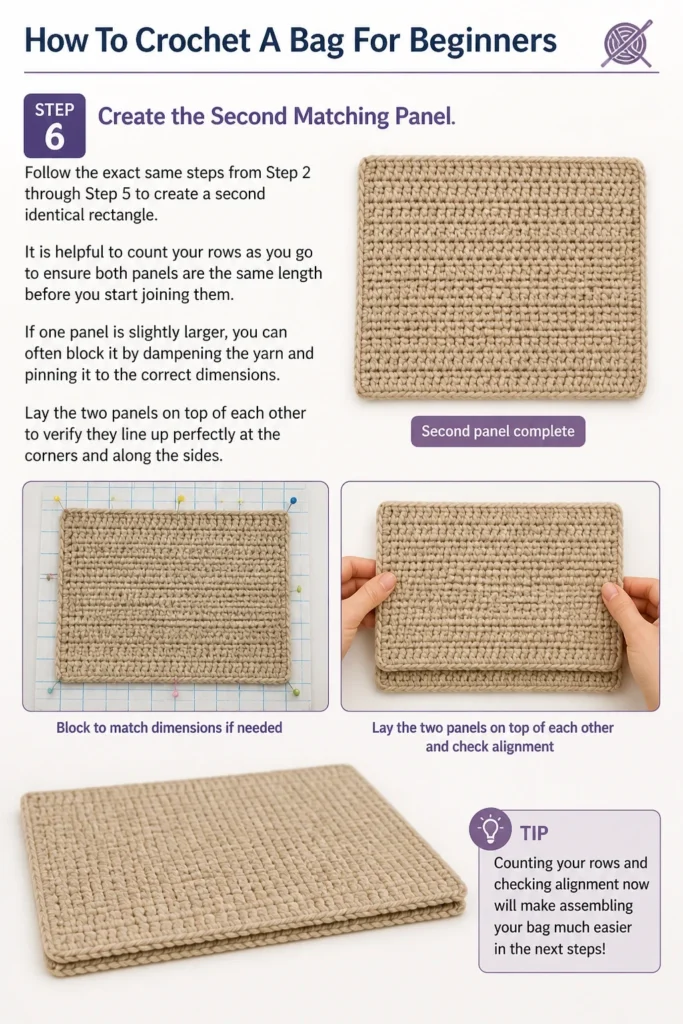
It is helpful to count your rows as you go to ensure both panels are the same length before you start joining them.
If one panel is slightly larger, you can often “block” it by dampening the yarn and pinning it to the correct dimensions.
Lay the two panels on top of each other to verify they line up perfectly at the corners and along the sides.
Step 7: Join the Panels Together
Place the two panels together with the “pretty” sides facing each other on the inside.
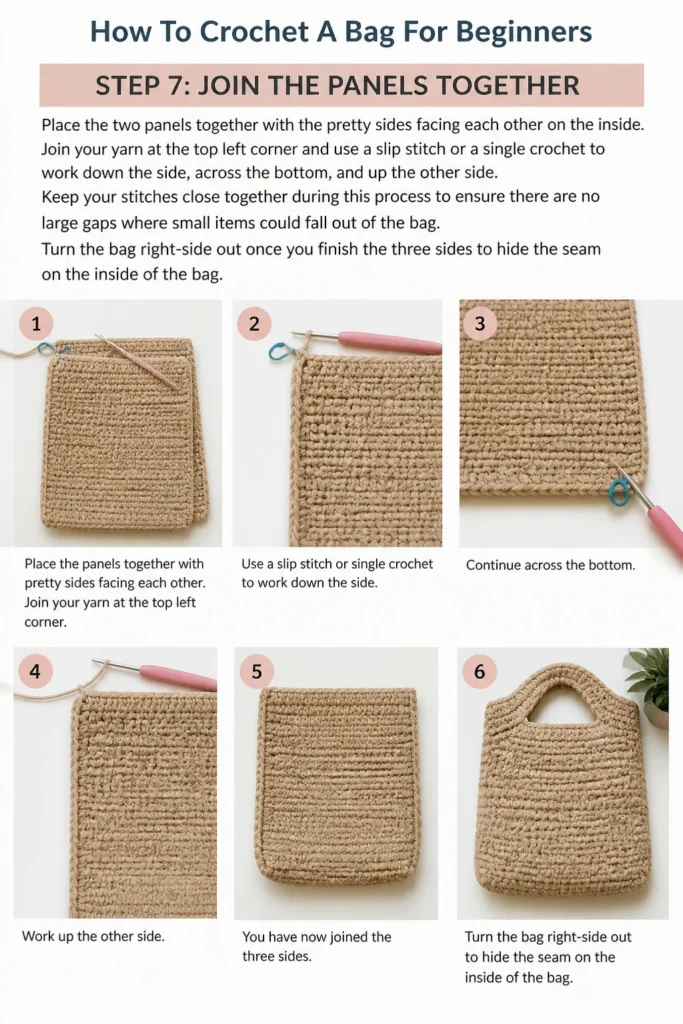
Join your yarn at the top left corner and use a slip stitch or a single crochet to work down the side, across the bottom, and up the other side.
Keep your stitches close together during this process to ensure there are no large gaps where small items could fall out of the bag.
Turn the bag right-side out once you finish the three sides to hide the seam on the inside of the bag.
Step 8: Crochet and Attach the Straps
Chain 60 to 80 stitches depending on how long you want your handle to be for over-the-shoulder or hand-carrying.
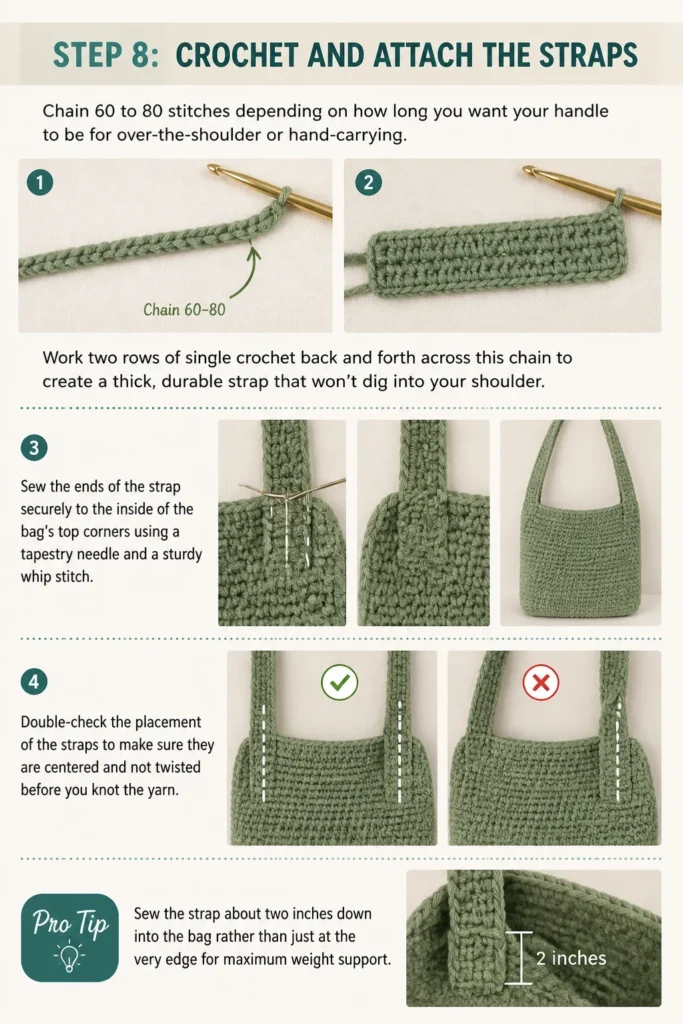
Work two rows of single crochet back and forth across this chain to create a thick, durable strap that won’t dig into your shoulder.
Sew the ends of the strap securely to the inside of the bag’s top corners using a tapestry needle and a sturdy whip stitch.
Double-check the placement of the straps to make sure they are centered and not twisted before you knot the yarn.
Pro Tip: Sew the strap about two inches down into the bag rather than just at the very edge for maximum weight support.
Step 9: Weave in All Loose Ends
Thread your tapestry needle with the leftover yarn tails from the beginning and end of your panels.
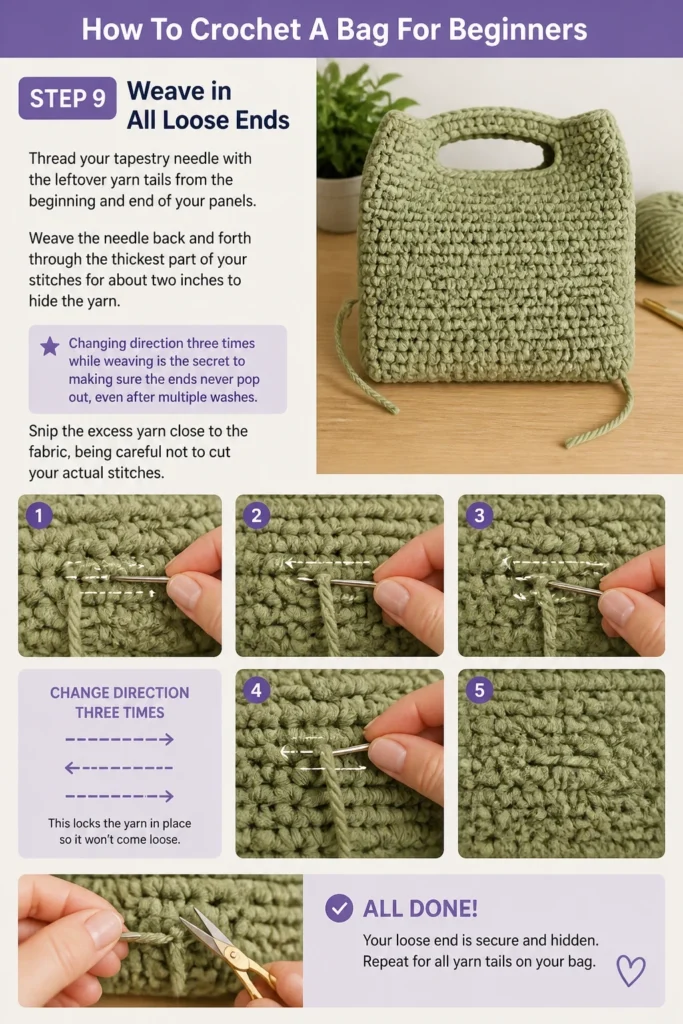
Weave the needle back and forth through the thickest part of your stitches for about two inches to hide the yarn.
Changing direction three times while weaving is the secret to making sure the ends never pop out, even after multiple washes.
Snip the excess yarn close to the fabric, being careful not to cut your actual stitches.
Common Mistakes to Avoid
Inconsistent Stitch Counts
The most frequent error for beginners is accidentally adding or subtracting stitches at the ends of the rows. This happens when you either work into the turning chain by mistake or stop one stitch too early. Your bag will end up looking like a trapezoid instead of a rectangle if you do not count your stitches every few rows.
Pulling the Yarn Too Tight
Beginners often hold the yarn with a “death grip” out of nerves, which makes the stitches incredibly difficult to work into on the next row. If you find yourself struggling to force the hook through the loops, take a breath and consciously loosen your grip. Your hook should be able to glide through the yarn without resistance.
Choosing the Wrong Yarn Weight
Using a very thin yarn for a bag will result in a flimsy fabric that won’t hold its shape. Conversely, using a “roving” or chunky wool yarn will make the bag too heavy and prone to pilling. Stick to a standard worsted weight cotton or a cotton-blend to ensure the bag is both lightweight and structurally sound.
Troubleshooting
The Bottom Edge Is Much Tighter Than the Top
This usually happens because the foundation chain was made too tightly compared to the rest of the stitches. To fix this, you can restart using a hook one size larger specifically for the foundation chain, then switch back to the regular hook for the rows. This provides the extra slack needed for the bottom to lie flat.
There Are Large Gaps Between the Stitches
If you see big holes in your fabric, your hook might be too large for the yarn you chose. You can try “sizing down” your hook by 0.5mm to create a denser, more solid fabric. Also, ensure you are inserting the hook under both loops of the stitch above, as working in only one loop can create a stretchier, hole-filled texture.
The Straps Are Stretching Too Much
Cotton stretches less than other fibers, but all crochet fabric has some give when weight is added. If your straps feel too bouncy, you can “line” them by sewing a piece of non-stretch ribbon or fabric to the underside of the strap. Alternatively, crochet your straps vertically (short rows) rather than horizontally (long chains) to reduce the vertical stretch.
Key Takeaways
- Always use cotton yarn for bags to prevent excessive stretching and ensure the project remains durable over time.
- Count your stitches at the end of every single row to maintain a perfect rectangular shape for your panels.
- Use stitch markers in the first and last stitches of a row to clearly identify where to turn your work.
- Secure your straps at least two inches deep into the bag body to distribute the weight and prevent the yarn from tearing.
- Weave in ends in multiple directions to ensure your hard work doesn’t unravel during use or washing.
Frequently Asked Questions
How many skeins of yarn do I need for a standard bag?
For a medium-sized tote bag, you will typically need two to three 50g skeins of worsted weight cotton yarn. It is always better to have a little extra than to run out halfway through the second panel. If you are making a larger beach bag, plan for four to five skeins to be safe.
Can I wash my handmade crochet bag?
Yes, especially if you used cotton yarn, which is generally machine washable. Place the bag inside a mesh laundry bag to prevent the straps from getting tangled or stretched in the machine. Lay the bag flat on a towel to air dry rather than putting it in the dryer to maintain its original shape.
How do I make the bag bigger?
To increase the width, simply add more stitches to your foundation chain in the beginning. To make it taller, add more rows of double crochet before finishing the panel. Just remember that a larger bag will require more yarn and may need wider straps to support the extra weight of the items you’ll carry.
What if I don’t know how to do a double crochet?
You can make the entire bag using only single crochet stitches if you prefer. It will result in a much sturdier, denser fabric, but it will take about twice as long to finish. The process is exactly the same; you just replace every “double crochet” instruction with a “single crochet” instruction.
Our Top Recommended Finds
- Ergonomic Crochet Hook Set: These hooks have soft rubber handles that prevent hand cramps during long crafting sessions.
- Locking Stitch Markers: These plastic clips stay securely in your yarn and are essential for keeping track of your row ends.
- 100% Mercerized Cotton Yarn: This specific type of cotton has a slight sheen and is extra strong, making it perfect for bags that need to carry heavy items.
Ready To Start Your First Project
Now that you have the steps and the secrets to success, it is time to pick up your hook and get started.
Crocheting a bag is a rewarding way to practice your stitches while creating something you can actually use every day.
Once you master this basic rectangular design, you can experiment with different colors, stripes, or even adding a fabric lining.
Grab your favorite color of yarn today and see how quickly your new favorite accessory comes to life.
Beginner-friendly templates, step-by-step guides,
and weekly project ideas in your inbox.