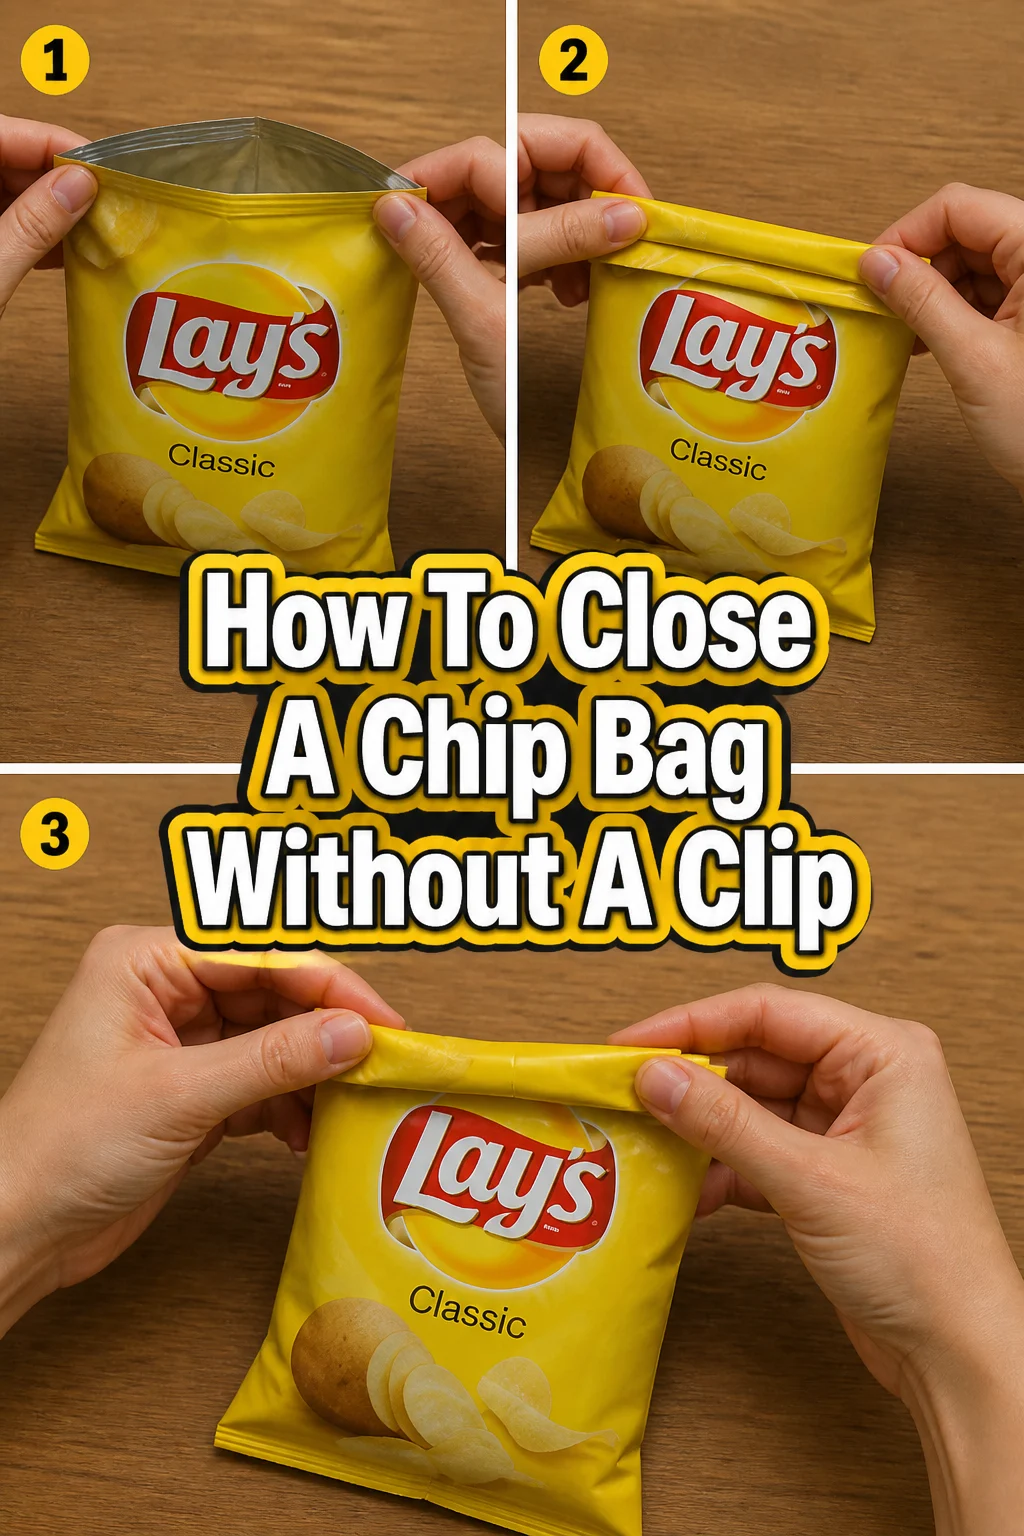
🍿 How To Close A Chip Bag Without A Clip

Beginner-friendly templates, step-by-step guides,
and weekly project ideas in your inbox.
We have all been there, standing in the kitchen with a half-eaten bag of chips and no plastic clip in sight.
I used to use rubber bands or even heavy books to keep my snacks fresh until I learned the art of the fold.
This guide draws from my years of hosting game nights and camping trips to ensure your snacks stay crunchy without any extra tools.

Quick Overview
You are about to learn a simple mechanical fold that uses the tension of the bag itself to create an airtight seal.
- Time needed: 30 seconds
- Difficulty: Beginner
- What you’ll need: An open bag of chips and a flat surface
Step-by-Step Instructions
Step 1: Flatten the Bag
Place the chip bag on a flat surface like a counter or table to ensure you have full control over the material.
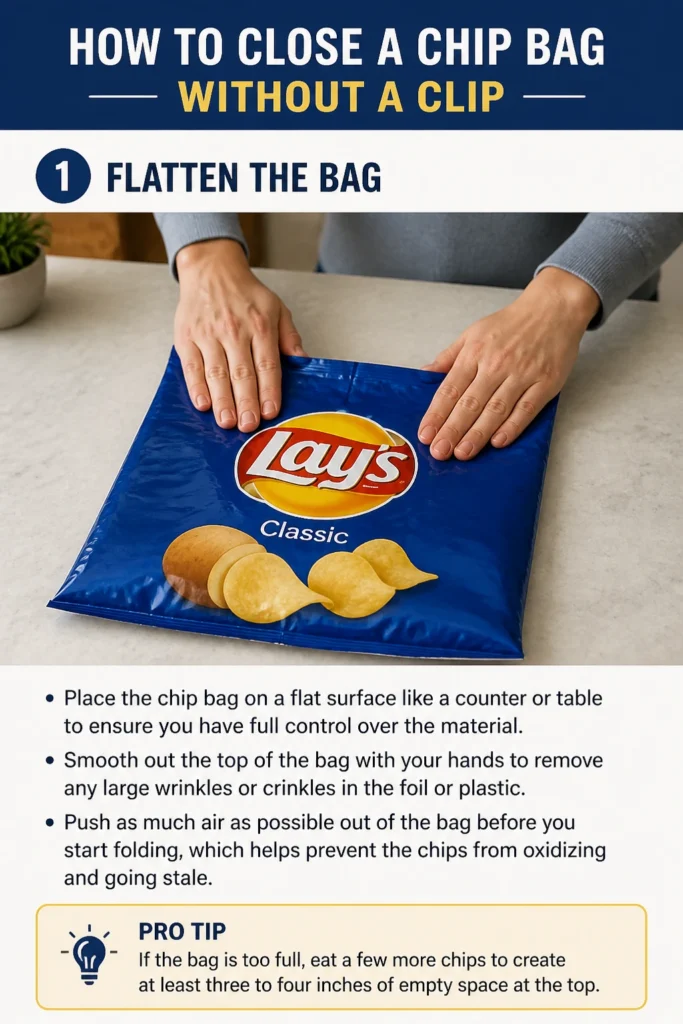
Smooth out the top of the bag with your hands to remove any large wrinkles or crinkles in the foil or plastic.
Push as much air as possible out of the bag before you start folding, which helps prevent the chips from oxidizing and going stale.
Pro Tip: If the bag is too full, eat a few more chips to create at least three to four inches of empty space at the top.
Step 2: Fold the Corners Inward
Identify the two top corners of the bag where the opening is located.
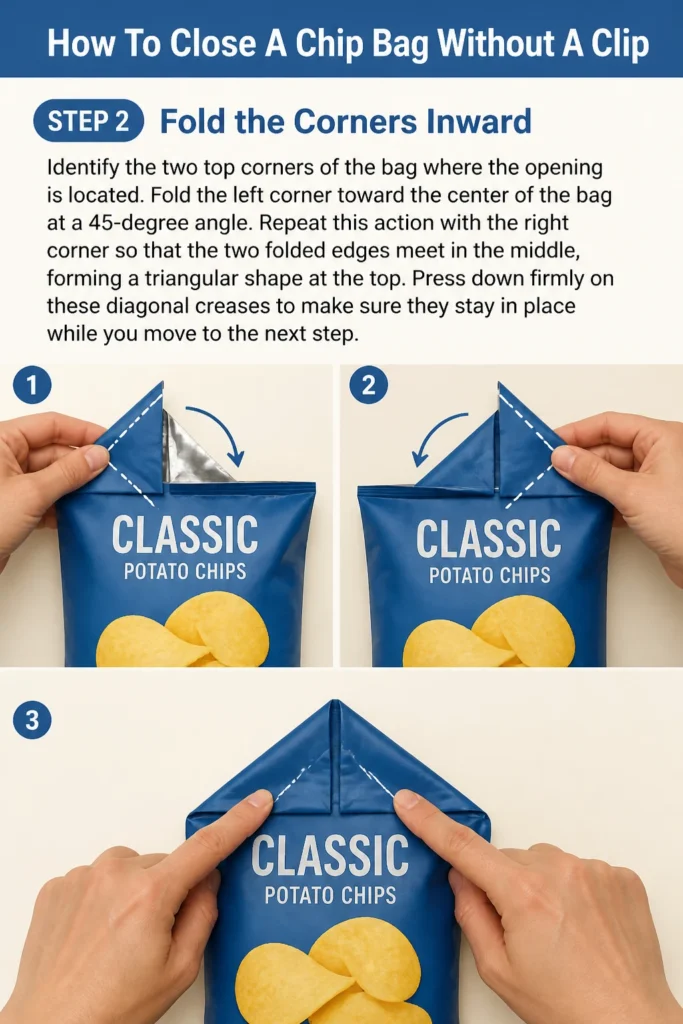
Fold the left corner toward the center of the bag at a 45-degree angle.
Repeat this action with the right corner so that the two folded edges meet in the middle, forming a triangular shape at the top.
Press down firmly on these diagonal creases to make sure they stay in place while you move to the next step.
Step 3: Begin the Downward Roll
Grasp the very top point of the triangle you just created with both hands.
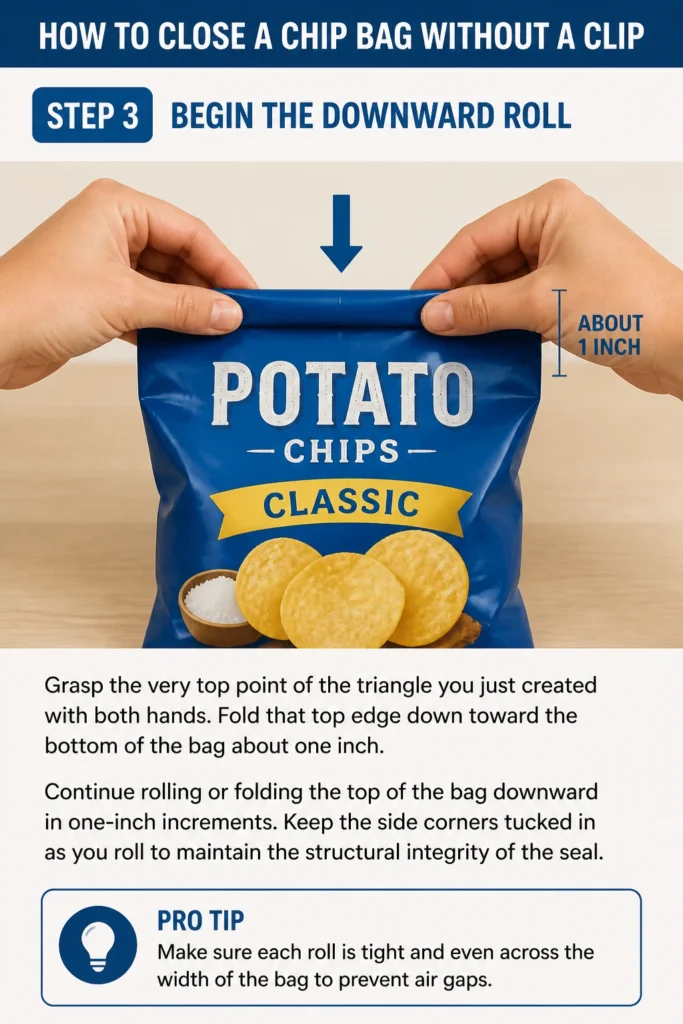
Fold that top edge down toward the bottom of the bag about one inch.
Continue rolling or folding the top of the bag downward in one-inch increments.
Keep the side corners tucked in as you roll to maintain the structural integrity of the seal.
Pro Tip: Make sure each roll is tight and even across the width of the bag to prevent air gaps.
Step 4: Create Tension
Stop rolling once you have made about three or four full rotations down the bag.
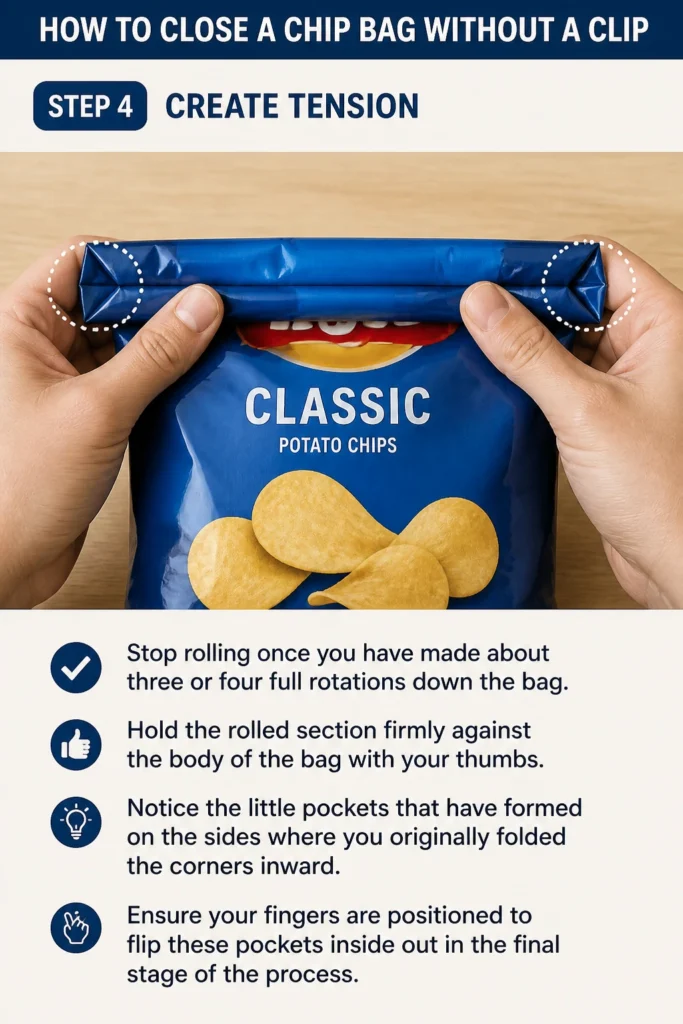
Hold the rolled section firmly against the body of the bag with your thumbs.
Notice the little “pockets” that have formed on the sides where you originally folded the corners inward.
Ensure your fingers are positioned to flip these pockets inside out in the final stage of the process.
Step 5: Invert the Corners
Slide your thumbs inside the folds of the corners while keeping the main roll pressed down with your other fingers.
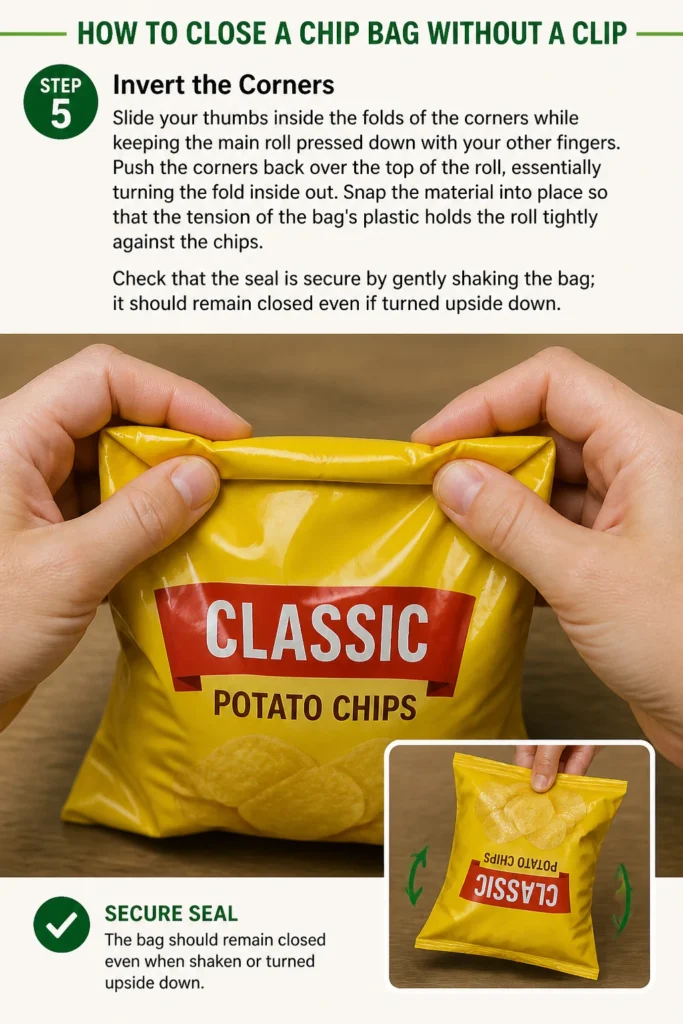
Push the corners back over the top of the roll, essentially turning the fold inside out.
Snap the material into place so that the tension of the bag’s plastic holds the roll tightly against the chips.
Check that the seal is secure by gently shaking the bag; it should remain closed even if turned upside down.
Common Mistakes to Avoid
Leaving Too Much Air Inside
If you leave a large pocket of air inside the bag before you start folding, the pressure will fight against your seal. This often causes the “origami” fold to pop open after a few minutes. Always press the bag flat against the chips before you begin your first corner tuck.
Making Folds Too Wide
Some people try to fold the entire top of the bag down in huge three-inch chunks. This creates a loose seal that lets air seep in through the sides. Small, tight rolls of about one inch provide the best grip and keep the moisture out effectively.
Using Greasy Hands
Trying to perform these precise folds right after reaching into a bag of buttery or oily chips can be difficult. The plastic becomes slippery, and the creases won’t hold their shape. Wipe your hands on a napkin before you start the closing process to ensure a firm grip on the material.
Ignoring Bag Material
Very thin plastic bags, like those used for some generic brand pretzels, don’t have the “memory” that thicker foil bags do. You might need to make an extra roll or two to ensure the thin material stays tucked. Heavier foil bags usually hold the shape much better with fewer rotations.
Troubleshooting
The Fold Keeps Unraveling
This usually happens because the initial corner tucks weren’t deep enough. Try unfolding the bag and starting over, making sure the corner folds meet or even slightly overlap in the center. The deeper the initial triangle, the more material you have to “lock” the roll in place.
The Bag Is Too Full To Fold
If you only have an inch of space at the top, this specific mechanical fold will not work. You need enough surface area to create the roll and the inversion. In this case, your best bet is to transfer some chips to a bowl or a different container until you have enough room to fold.
The Plastic Is Tearing
Some chip bags are designed with “easy-tear” notches that can split further if you pull too hard during the inversion step. If you see a tear starting, stop immediately and move your fold line below the tear. Applying too much force during the “tuck” phase is the most common cause of bag failure.
Key Takeaways
- Flattening is essential to remove air and create a clean working surface for the folds.
- Angle the corners to create the triangular “pockets” that will eventually lock the bag shut.
- Roll tightly in small increments rather than large chunks to maximize the surface area of the seal.
- Invert the corners to use the bag’s own physical tension as a substitute for a plastic clip.
- Practice makes perfect as different bag materials require slightly different levels of pressure.
Frequently Asked Questions
Does this method keep chips as fresh as a real clip?
Yes, if done correctly, the origami fold can actually be more airtight than a standard clip. Clips often leave small gaps at the edges of the bag where air can enter. The fold creates a continuous seal across the entire width of the bag, which significantly slows down the staling process.
Can I use this for frozen food bags?
This method works best on foil or thin plastic bags like those used for snacks. Frozen food bags are often made of a much thicker, rubberized plastic that doesn’t hold a crease well. For frozen items, you are usually better off using a rubber band or a dedicated freezer clip to handle the moisture and temperature changes.
Will this work on small, individual-sized bags?
It is possible, but it can be quite fiddly because there is less material to work with. For small bags, you might only need one corner fold and a very tight roll. The physics remain the same, but you will need more finger dexterity to get the inversion to stay in place.
What if the bag was opened down the side?
Unfortunately, this method only works for bags that are opened at the top. If the bag is ripped down the side, the tension required for the lock won’t exist. In that situation, your best option is to move the chips into a sealable plastic bag or a Tupperware container.
Our Top Recommended Finds
- Glass Storage Jars: If you find yourself constantly struggling with bag seals, transferring snacks to airtight glass jars is a great long-term solution. They look great on a counter and provide a 100% airtight environment.
- Handheld Heat Sealers: These tiny devices use heat to fuse the plastic back together. They are perfect for people who want a factory-level seal without using bulky clips or learning complex folds.
- Silicone Stretch Lids: While usually for bowls, these can be stretched over the top of a sturdy chip bag to create a vacuum seal. They are reusable and much more durable than standard plastic wrap.
Keep Your Snacks Crunchy Every Time
Mastering the art of the clipless seal is a small but incredibly satisfying life skill. Once you get the hang of the inversion tuck, you will never find yourself hunting through junk drawers for a stray clothespin again.
Try practicing this fold on your next bag of tortilla chips or pretzels to see how much longer they stay fresh. You can also look into other “life hacks” for the kitchen, such as how to properly store bread or keep herbs fresh in the fridge.
Start using this technique today and save yourself from the disappointment of a stale snack. Your taste buds and your wallet will thank you for the extra effort.
Beginner-friendly templates, step-by-step guides,
and weekly project ideas in your inbox.