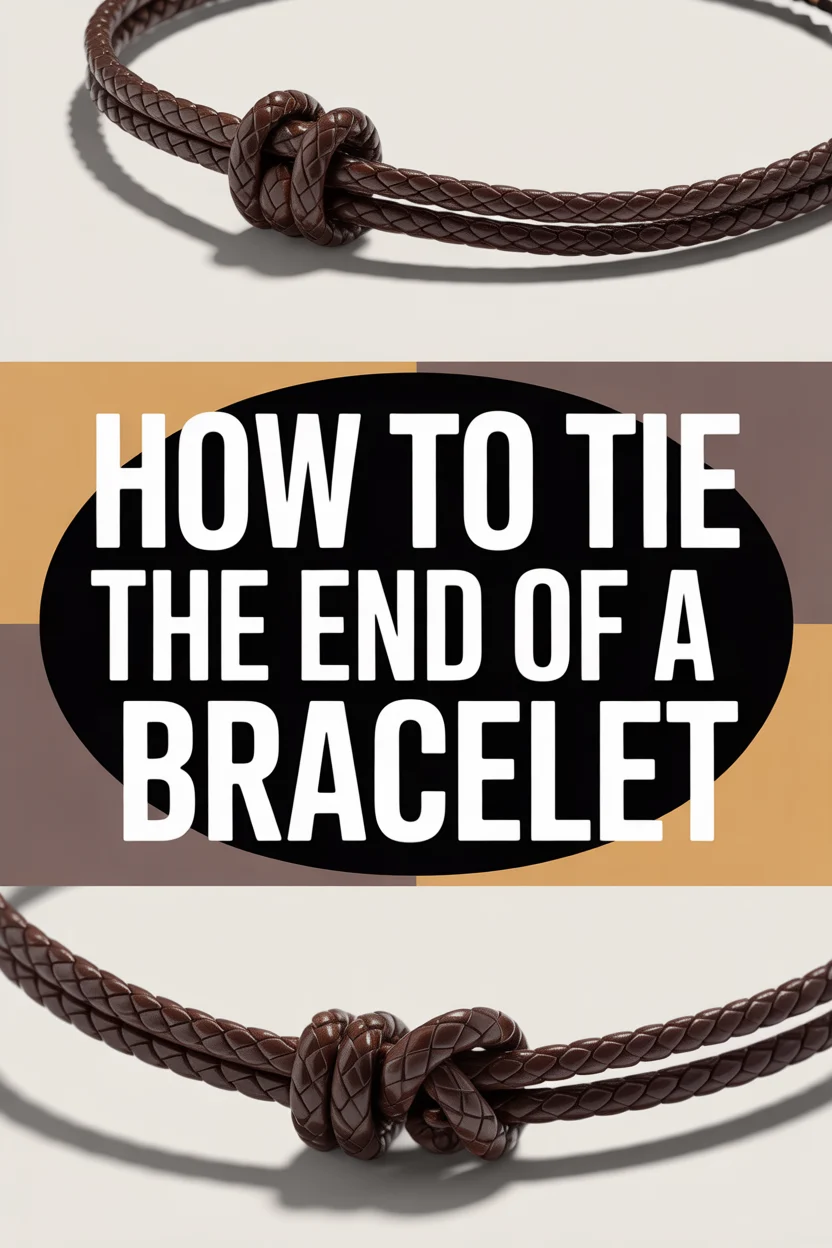
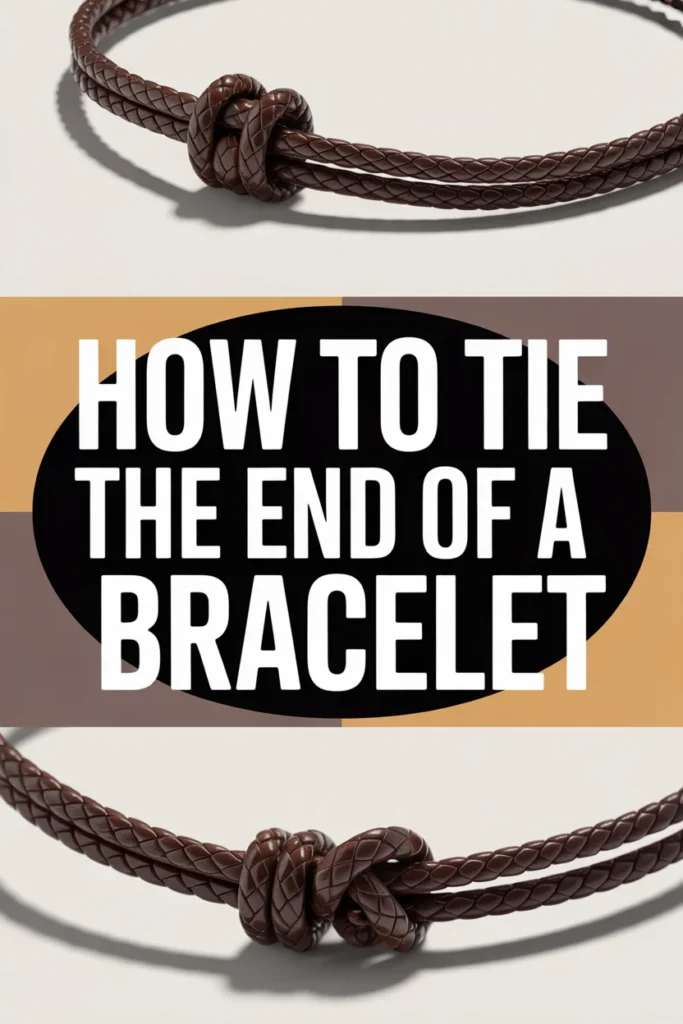
How To Tie The End Of A Bracelet

Beginner-friendly templates, step-by-step guides,
and weekly project ideas in your inbox.
I remember the frustration of finishing a beautiful handmade bracelet, only for the knot to unravel hours later. It’s a common problem, turning a cherished piece into a scattered mess of beads. Through countless attempts and a few accidental bead explosions, I learned the crucial techniques for a truly secure finish.
This guide shares those hard-won lessons, ensuring your bracelets stay perfectly intact. You’ll gain the confidence to create pieces that last, whether for yourself or as thoughtful gifts. Let’s make sure your creations are as durable as they are beautiful.
Quick Overview
This guide will walk you through the process of creating a strong, secure knot to finish your bracelets. You’ll learn the techniques for a lasting hold, preventing frustrating unravels. We’ll cover essential steps and common pitfalls, ensuring your finished piece is perfect.
- Time needed: 10-15 minutes (for learning and practice)
- Difficulty: Beginner
- What you’ll need: Bracelet material (elastic cord, string, etc.), scissors, optional jewelry glue or clear nail polish, a flat surface.
Step-by-Step Instructions
Step 1: Gather Your Materials and Prepare Your Bracelet
Before you start knotting, ensure all your beads are strung onto the cord. Double-check that you haven’t missed any beads or spacers. Lay your bracelet flat on a clean, stable surface to prevent it from rolling away.
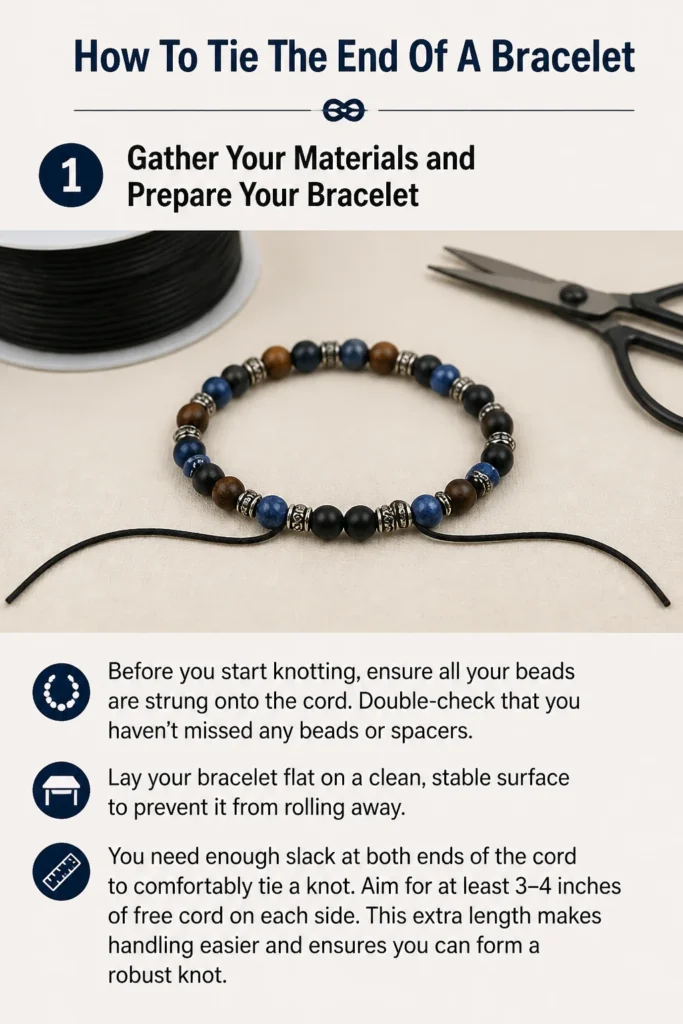
You need enough slack at both ends of the cord to comfortably tie a knot. Aim for at least 3-4 inches of free cord on each side. This extra length makes handling easier and ensures you can form a robust knot.
Step 2: Position the Ends for Knotting
Bring the two free ends of your bracelet cord together. They should meet directly above where the first and last beads touch. Overlap them slightly, making sure there’s no tension pulling the bracelet taut yet.
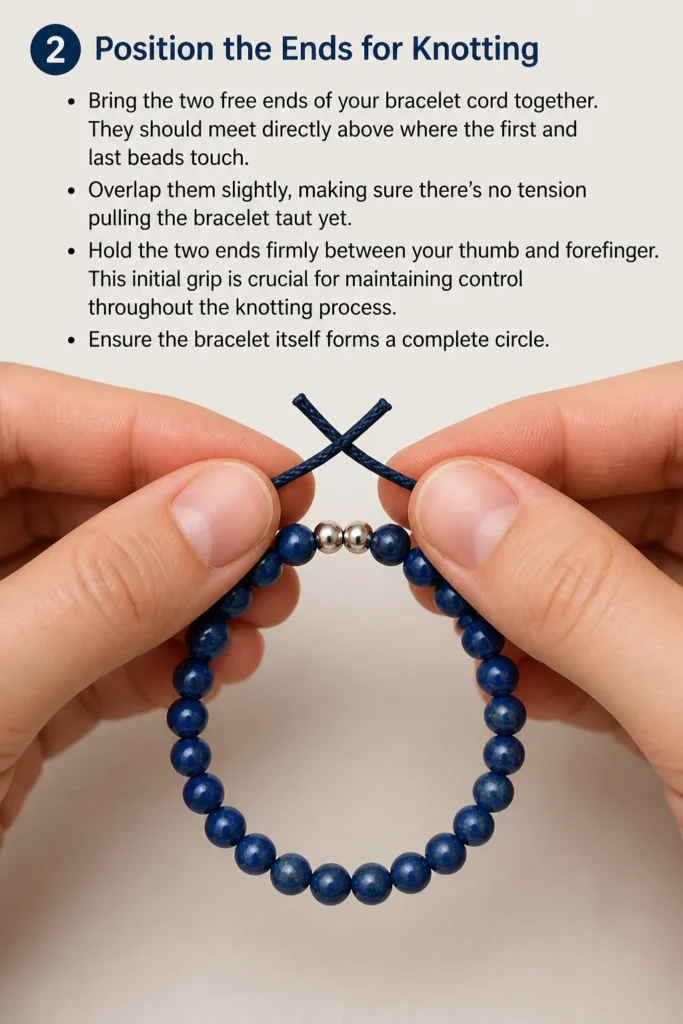
Hold the two ends firmly between your thumb and forefinger. This initial grip is crucial for maintaining control throughout the knotting process. Ensure the bracelet itself forms a complete circle.
Step 3: Begin the First Loop (Left Over Right)
Take the cord end coming from the left side of your bracelet. Pass it over the cord end coming from the right side. This creates a simple “X” shape with the two cords.
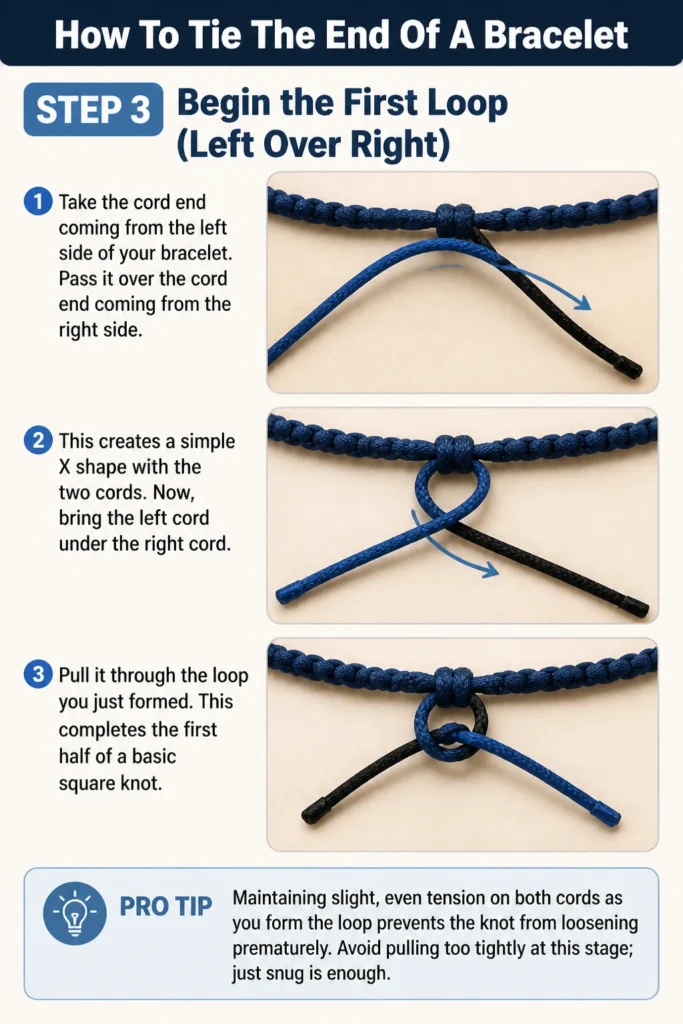
Now, bring the left cord under the right cord. Pull it through the loop you just formed. This completes the first half of a basic square knot.
Pro Tip: Maintaining slight, even tension on both cords as you form the loop prevents the knot from loosening prematurely. Avoid pulling too tightly at this stage; just snug is enough.
Step 4: Create the Second Pass for Added Security
With the first loop completed, take the same left cord and pass it over the right cord again. This is where the surgeon’s knot gains its extra strength. You are essentially making a double pass through the first half of the knot.
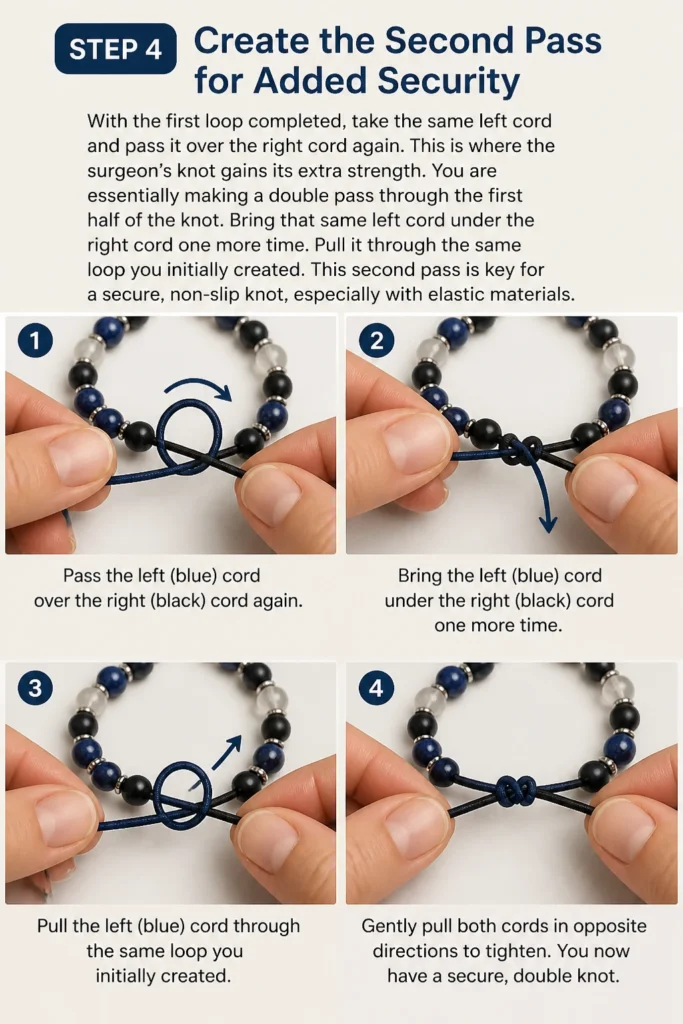
Bring that same left cord under the right cord one more time. Pull it through the same loop you initially created. This second pass is key for a secure, non-slip knot, especially with elastic materials.
Step 5: Gently Tighten the First Half of the Knot
Carefully pull both cord ends away from the bracelet, guiding the knot down towards the beads. Use your fingernails or a small tool to push the knot flush against the last beads. It’s important to tighten slowly and evenly.
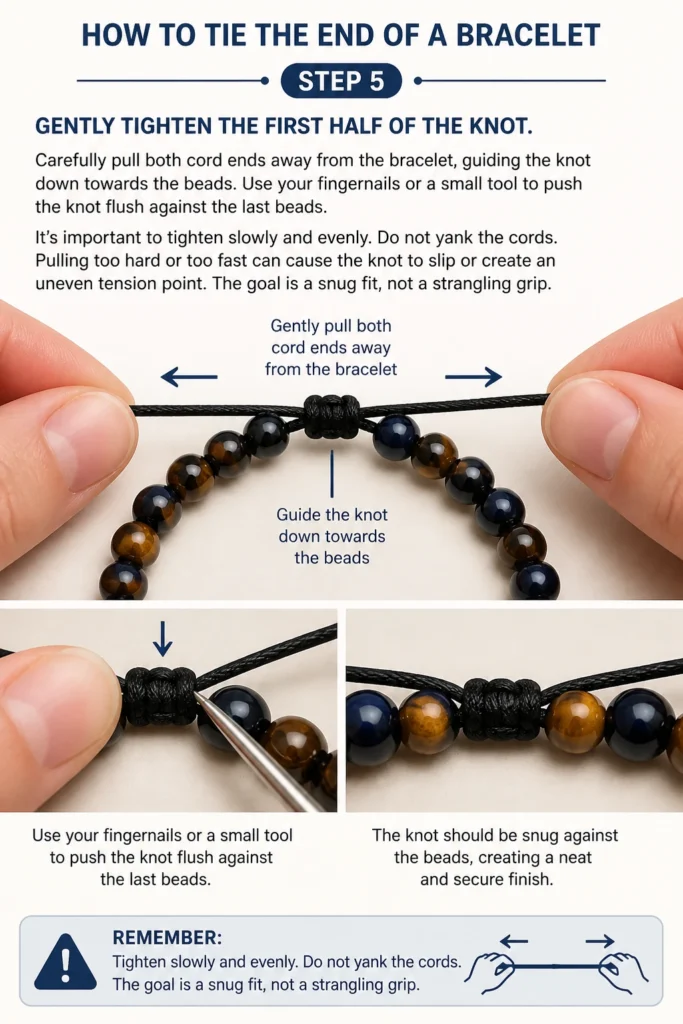
Do not yank the cords. Pulling too hard or too fast can cause the knot to slip or create an uneven tension point. The goal is a snug fit, not a strangling grip.
Step 6: Begin the Second Loop (Right Over Left)
Now, reverse the order to complete the square knot. Take the cord end that is now on the right side. Pass it over the cord end that is on the left side. You are creating another “X” shape, but in the opposite direction from before.
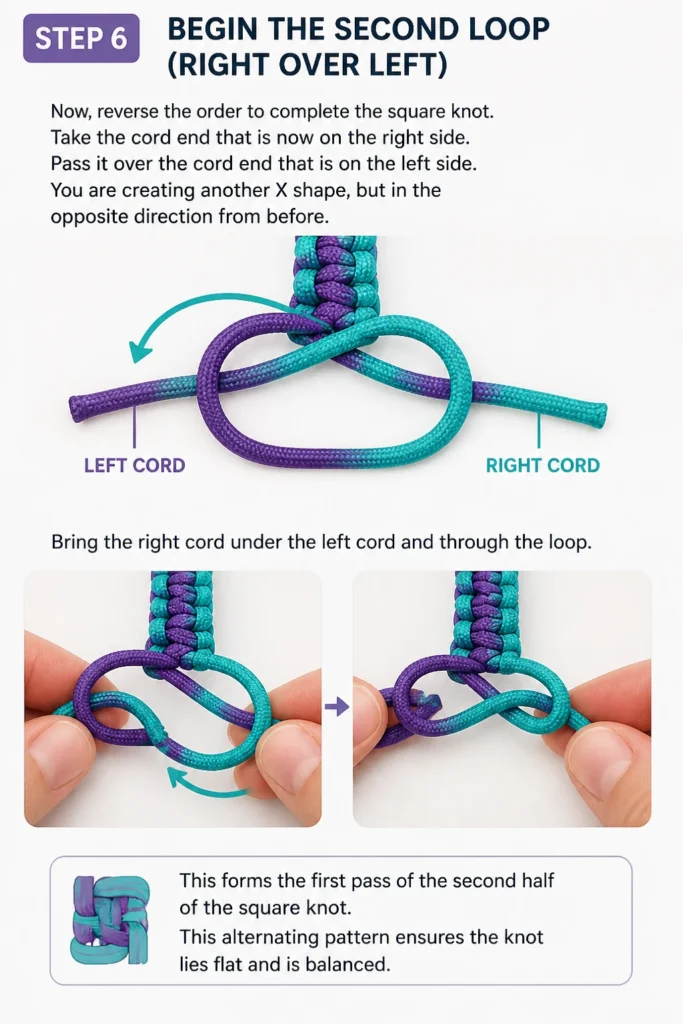
Bring the right cord under the left cord and through the loop. This forms the first pass of the second half of the square knot. This alternating pattern ensures the knot lies flat and is balanced.
Step 7: Create the Second Pass (Again) for Ultimate Hold
Just like before, we’ll add a second pass for extra security. Take the same right cord and pass it over the left cord once more. This reinforces the second half of the knot significantly.
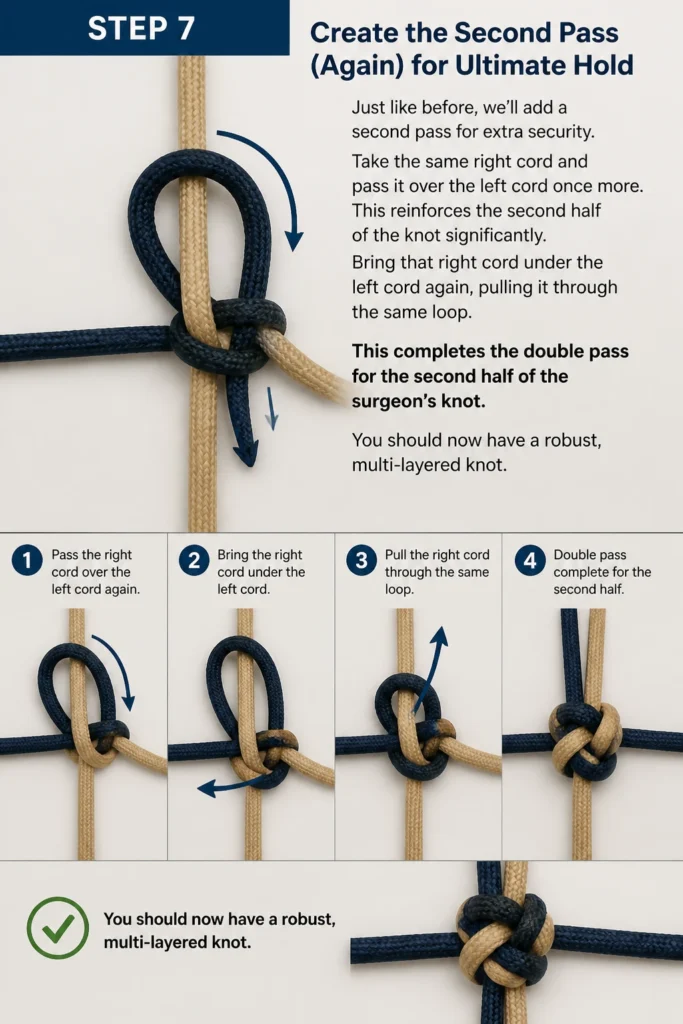
Bring that right cord under the left cord again, pulling it through the same loop. This completes the double pass for the second half of the surgeon’s knot. You should now have a robust, multi-layered knot.
Step 8: Tighten the Entire Knot Securely
This is the most critical tightening phase. Hold the bracelet firmly with one hand. With the other hand, pull both free cord ends away from the bracelet, slowly and with increasing firmness. Ensure the knot is perfectly flush against the beads.
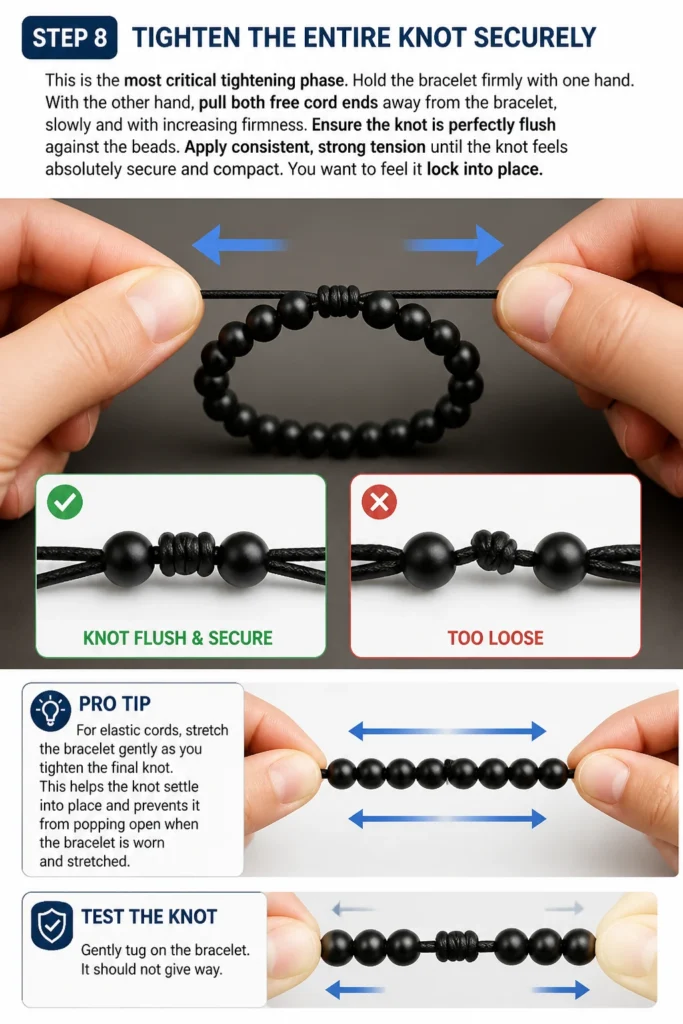
Apply consistent, strong tension until the knot feels absolutely secure and compact. You want to feel it “lock” into place. Test the knot by gently tugging on the bracelet itself; it should not give way.
Pro Tip: For elastic cords, stretch the bracelet gently as you tighten the final knot. This helps the knot settle into place and prevents it from popping open when the bracelet is worn and stretched.
Step 9: Trim Excess Material
Once the knot is tight and secure, it’s time to trim the excess cord. Use sharp scissors for a clean cut. Cut the cords as close to the knot as possible without actually cutting into the knot itself. Leave a tiny bit of a “tail” if you’re unsure, perhaps 1-2 millimeters.
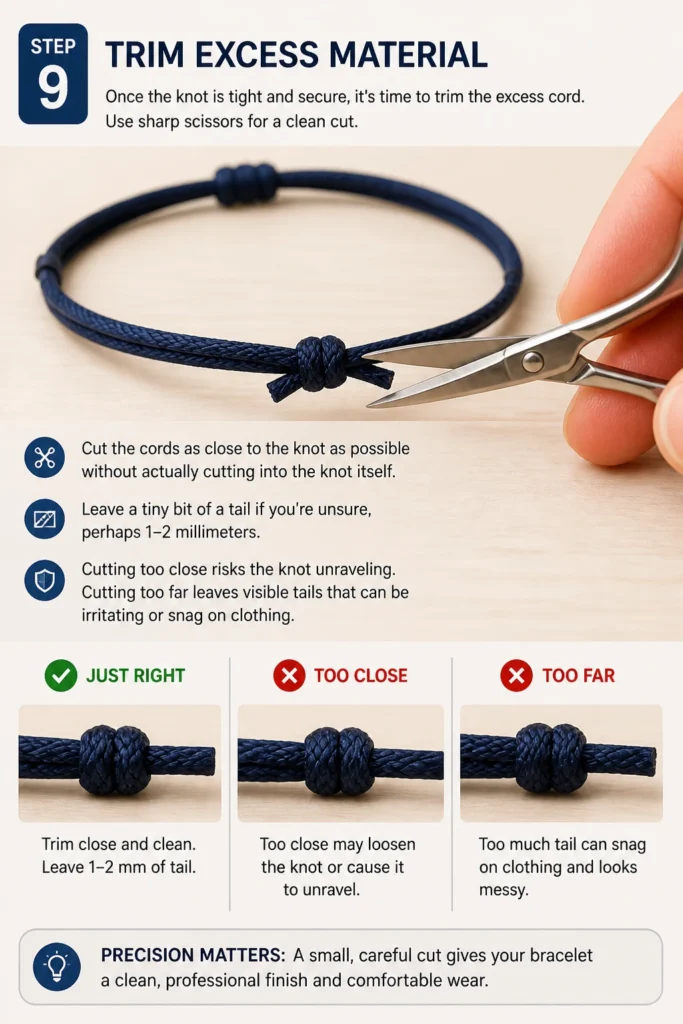
Cutting too close risks the knot unraveling. Cutting too far leaves visible tails that can be irritating or snag on clothing. Precision here makes a big difference in the finished look and feel.
Step 10: Secure with Adhesive (Optional but Recommended)
For maximum security, especially with elastic or slippery cords, apply a tiny dab of jewelry glue or clear nail polish to the knot. A toothpick or the tip of a sewing needle can help apply it precisely.
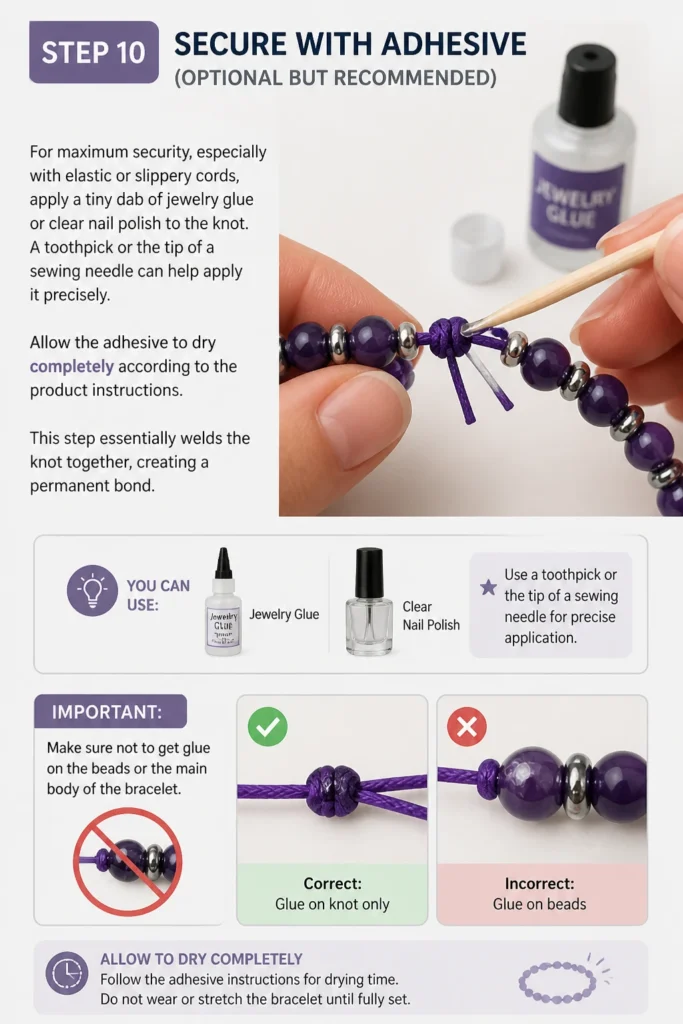
Allow the adhesive to dry completely according to the product instructions. This step essentially “welds” the knot together, creating a permanent bond. Make sure not to get glue on the beads or the main body of the bracelet.
Common Mistakes to Avoid
Not Enough Slack
Beginning to tie your knot with too little cord on either side is a common pitfall. This makes it incredibly difficult to manipulate the cords, resulting in a loose or poorly formed knot. You might also run out of cord before the knot is fully tied.
Always ensure you have at least 3-4 inches of free cord on each end. This provides ample material for comfortable knotting and allows for precision tightening. It’s better to have a little too much than too little.
Uneven Tension
Pulling one cord tighter than the other during the knotting process can lead to an unbalanced and weak knot. An unevenly tightened knot is more prone to slipping, unraveling, or creating an unsightly bulge on one side. This is especially true for elastic cords.
Strive for consistent, even tension on both cords throughout each step. Visualize the knot forming symmetrically as you pull. Practice helps develop this feel for balanced tension.
Cutting Too Close
Trimming the excess cord too close to the knot is a frequent cause of unraveling. Even a perfectly tied knot needs a tiny bit of material beyond its core to hold securely. Cutting right at the knot’s edge removes this crucial anchor.
Always leave a very small tail, about 1-2 millimeters, when trimming. This small margin provides enough material for the knot to grip itself and prevents premature failure. It’s a small detail with a big impact on durability.
Forgetting the Double Pass
Many beginners use a simple square knot, which involves only one pass through each half. While effective for some materials, elastic cords or slippery strings often require more. A single pass knot can easily loosen under tension.
The surgeon’s knot, with its crucial double pass in each half, provides significantly more friction and grip. This extra step is essential for creating a truly secure and long-lasting connection, especially for stretch bracelets.
Troubleshooting
Knot Keeps Slipping
If your knot feels loose or slips even after tightening, the cord material might be too slick. Some synthetic cords or very smooth elastic can be difficult to knot securely with standard methods. The knot simply doesn’t get enough grip.
Try using the surgeon’s knot method described in this guide, ensuring both double passes are executed. Applying a tiny dab of jewelry glue or clear nail polish to the finished knot is highly recommended for slippery materials. Let it dry completely before wearing.
Knot Is Bulky or Uneven
A knot that appears lumpy, large, or sits awkwardly on your bracelet often indicates uneven tightening or incorrect formation. This can happen if one side of the knot is pulled tighter than the other, or if the double passes weren’t properly aligned.
Slow down your knotting process. Ensure both sides of the knot are pulled with equal tension as you tighten. Carefully guide the knot into place against the beads. Practice helps you achieve a compact, neat finish.
Bracelet Breaks After a Few Wears
If the cord itself is snapping near the knot, it could be due to excessive tension during tightening or a weak spot in the cord. Sometimes, friction from the knot can weaken the cord over time, especially if it’s very thin.
Avoid over-tightening the knot to the point where the cord material is strained. For elastic bracelets, consider using a slightly thicker cord if you experience frequent breaks. You can also try reinforcing the knot area with a small crimp cover if appropriate for your design.
Key Takeaways
- Always ensure ample cord slack (3-4 inches) before you begin knotting.
- Use a surgeon’s knot for superior security, especially with elastic or slippery materials.
- Execute the double pass in both halves of the knot for maximum friction and hold.
- Tighten the knot slowly and evenly, guiding it flush against the beads.
- Trim excess cord carefully, leaving a tiny 1-2 millimeter tail to prevent unraveling.
- Reinforce the knot with a small dab of jewelry glue or clear nail polish for ultimate durability.
Frequently Asked Questions
Can I use any knot to finish a bracelet?
While many knots exist, not all are suitable for finishing a bracelet, especially elastic ones. Simple overhand knots often unravel under tension. A surgeon’s knot or a square knot with extra passes offers superior security and is generally recommended for longevity. The type of cord also influences knot choice.
What kind of glue should I use for securing the knot?
For jewelry, a specialized jewelry glue like E6000 or Hypo Cement is ideal. These glues are designed to be strong and flexible, resisting cracking. Super glue can work in a pinch but can sometimes make elastic brittle. Clear nail polish is a good temporary or alternative option.
How do I make an adjustable knot instead of a fixed one?
To create an adjustable bracelet, you’ll typically use a sliding knot (often a macrame square knot or a series of half-hitch knots). This involves creating a loop with the bracelet ends and then knotting around those ends to form a movable closure. It’s a different technique than the fixed finishing knot described here.
My elastic cord keeps breaking after I tie it. What am I doing wrong?
Breaking elastic cord often points to over-tightening the knot, which weakens the cord at that stress point. It could also be due to using a very thin or low-quality elastic that can’t withstand the tension. Ensure your cord is appropriate for the weight of your beads and practice gentle, even tightening.
Our Top Recommended Finds
- Quality Elastic Cord: Investing in durable, strong elastic cord (e.g., Beadalon Elasticity, Stretch Magic) ensures your bracelets last longer and knots hold better. This is the foundation of a good stretch bracelet.
- Precision Jewelry Scissors: Sharp, fine-tipped scissors allow you to trim excess cord cleanly and precisely without fraying or accidentally snipping the main knot. They make a huge difference in the finished look.
- Jewelry Adhesive (e.g., E6000 or Hypo Cement): A reliable jewelry glue provides an extra layer of security, bonding your knot permanently and preventing slippage, especially on smooth or elastic materials.
Crafting Bracelets That Endure
You now have the practical steps and insights to confidently tie the end of any bracelet, ensuring it stays secure and beautiful for years to come. No more lost beads or frustrating unravels. This skill elevates your crafting, turning simple strings into cherished pieces.
Don’t let another creation fall apart. Take these techniques and apply them to your next project. Consider exploring different knot types for various bracelet styles, like macrame sliding knots for adjustable pieces, to expand your repertoire. The world of secure bracelet making is now open to you.
Beginner-friendly templates, step-by-step guides,
and weekly project ideas in your inbox.