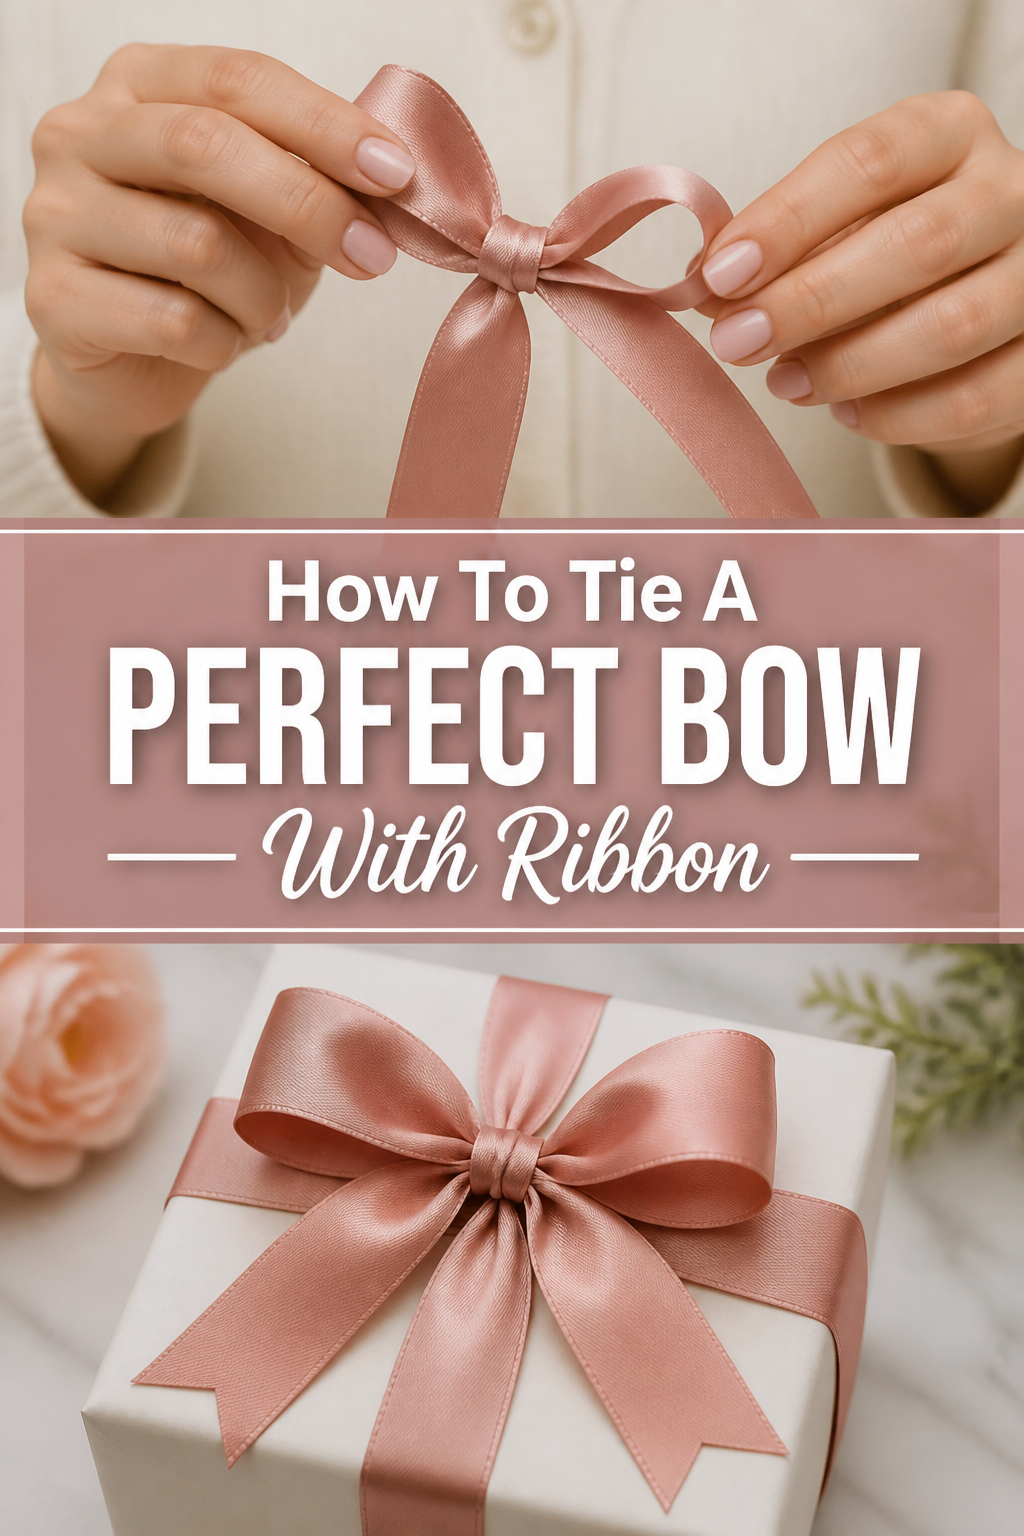
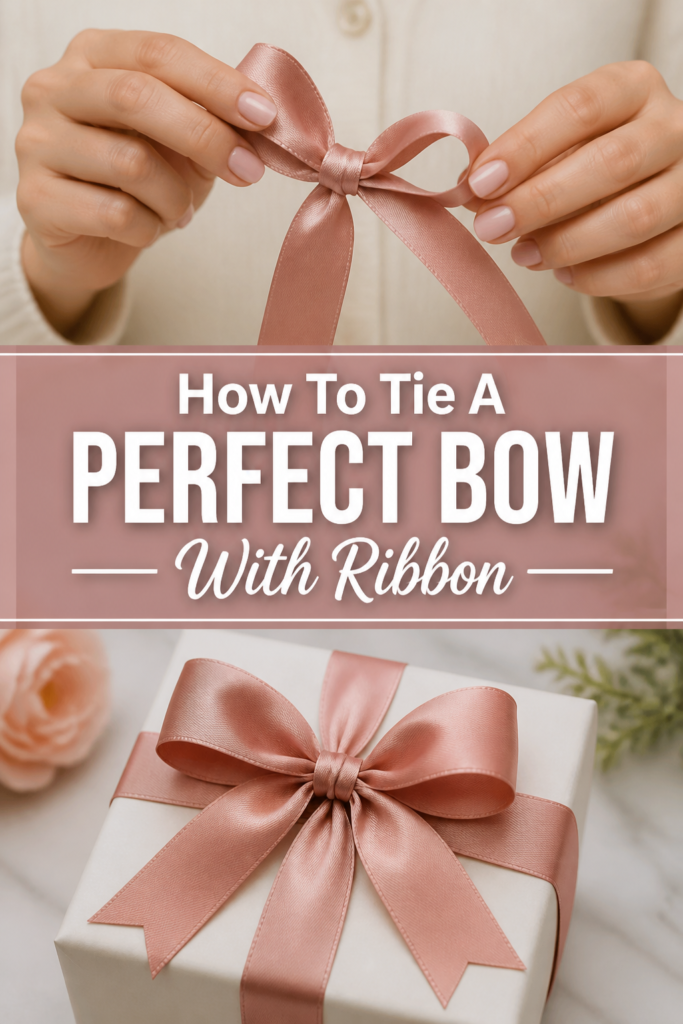
🎀 How To Tie A Perfect Bow With Ribbon

Beginner-friendly templates, step-by-step guides,
and weekly project ideas in your inbox.
I remember years of struggling with lopsided, sad-looking bows that never quite captured the elegance I envisioned for a gift or decoration.
It was frustrating, but with a few simple adjustments and a clear method, I discovered the secret to creating truly perfect bows every single time.
This guide shares that tried-and-true process, helping you achieve beautiful, symmetrical bows with ease.
Quick Overview
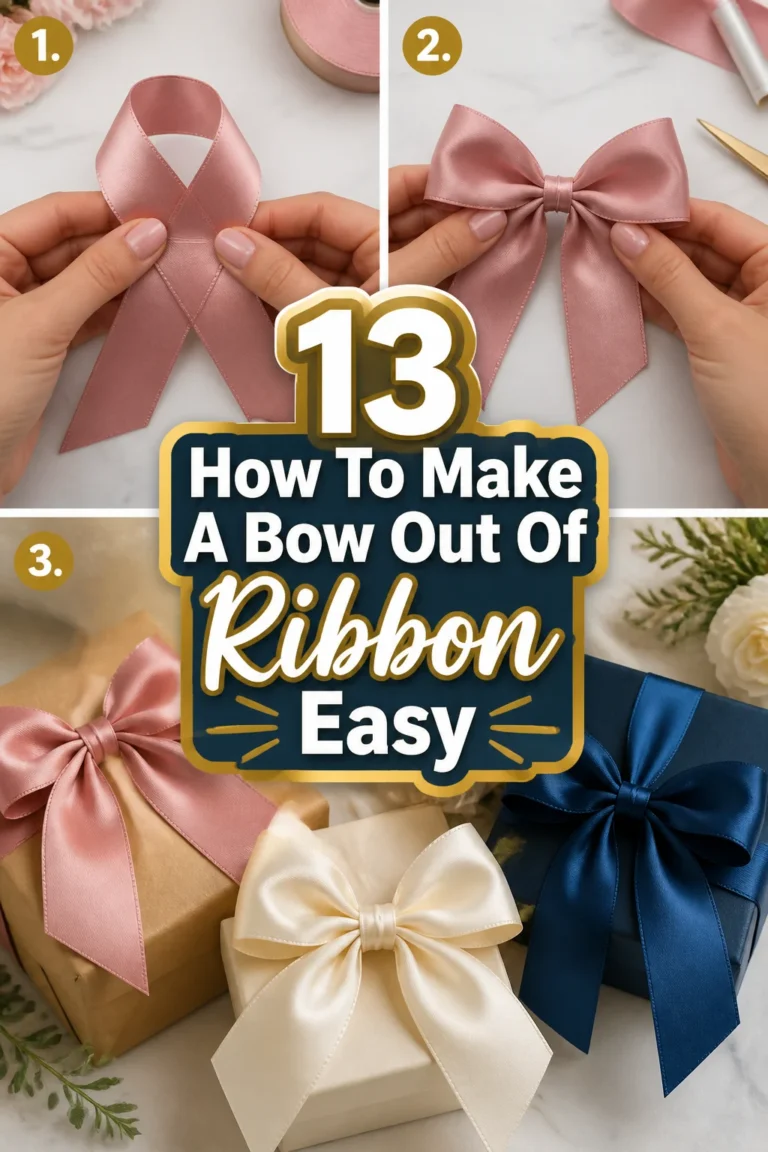
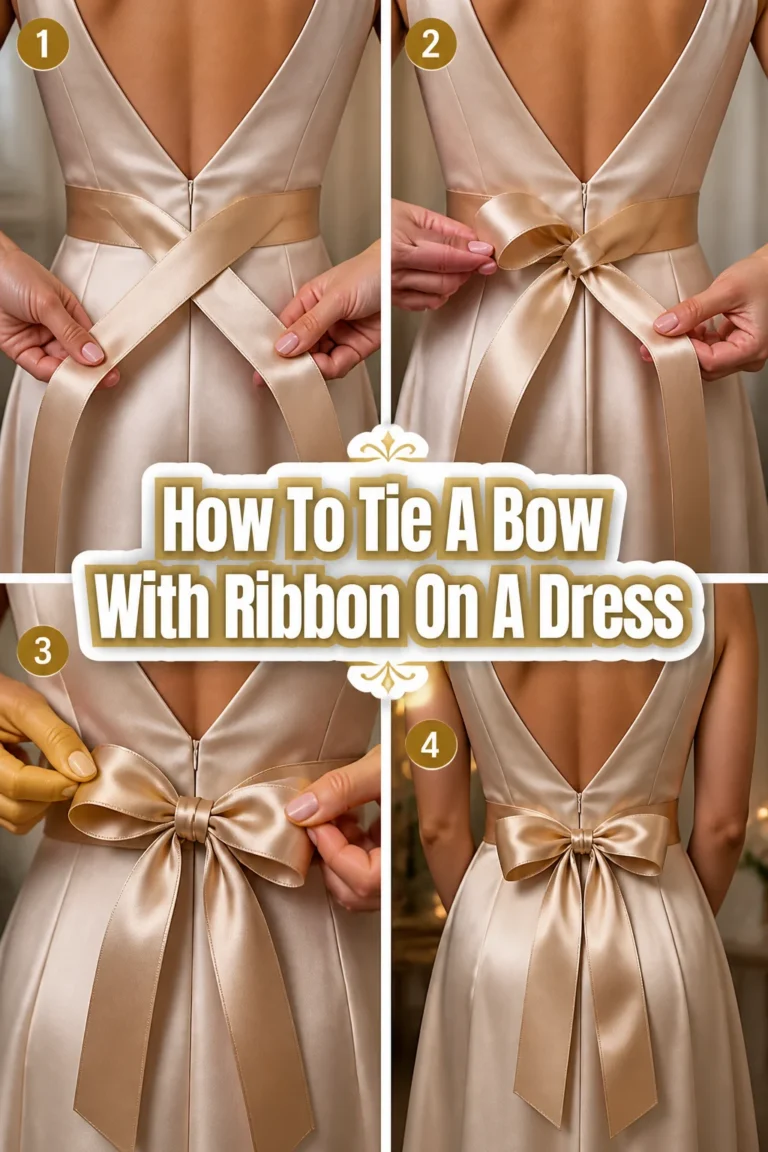
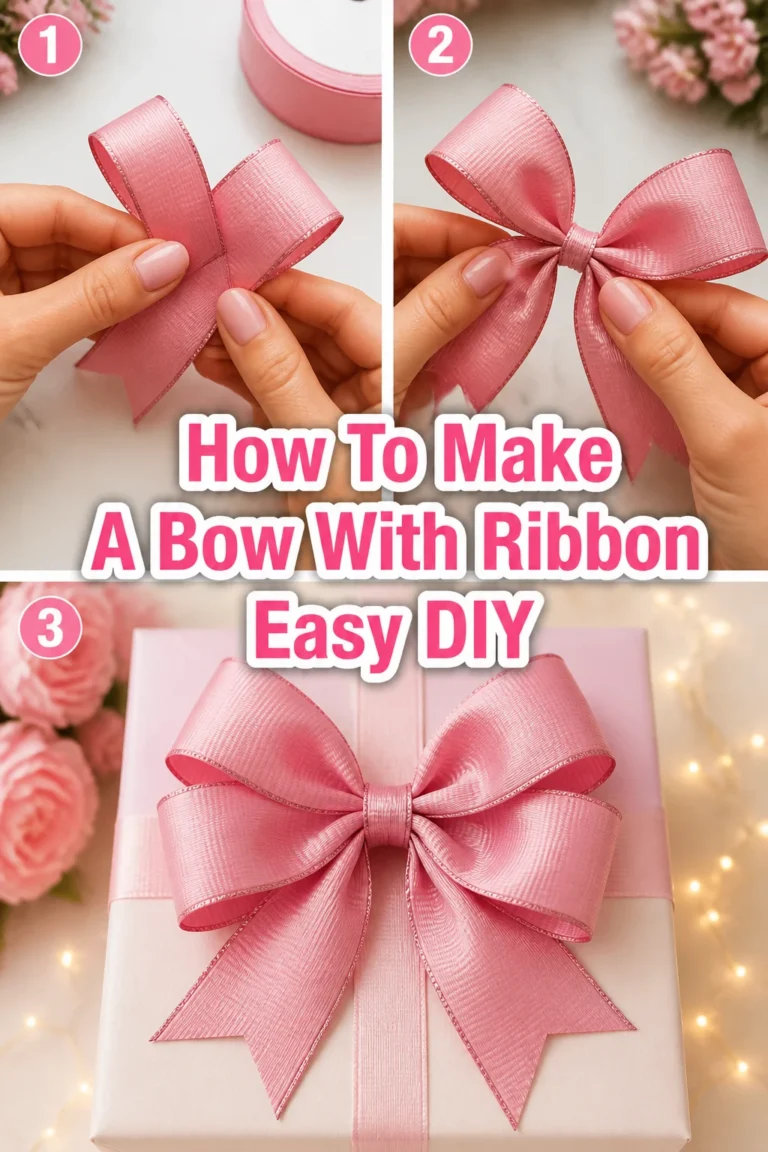
By following these detailed steps, you will master the art of tying a beautiful, symmetrical bow that adds a touch of elegance to any package, hair accessory, or craft project.
- Time needed: 5-10 minutes (for practice, less once mastered)
- Difficulty: Beginner
- What you’ll need: A length of ribbon (satin, grosgrain, or wire-edged work best for learning), a flat surface, and sharp scissors.
Step-by-Step Instructions
Step 1: Choose Your Ribbon and Determine Length
Select a ribbon that suits your project. For beginners, a medium-width ribbon (around 1-inch) with a bit of body, like grosgrain or satin, is ideal.
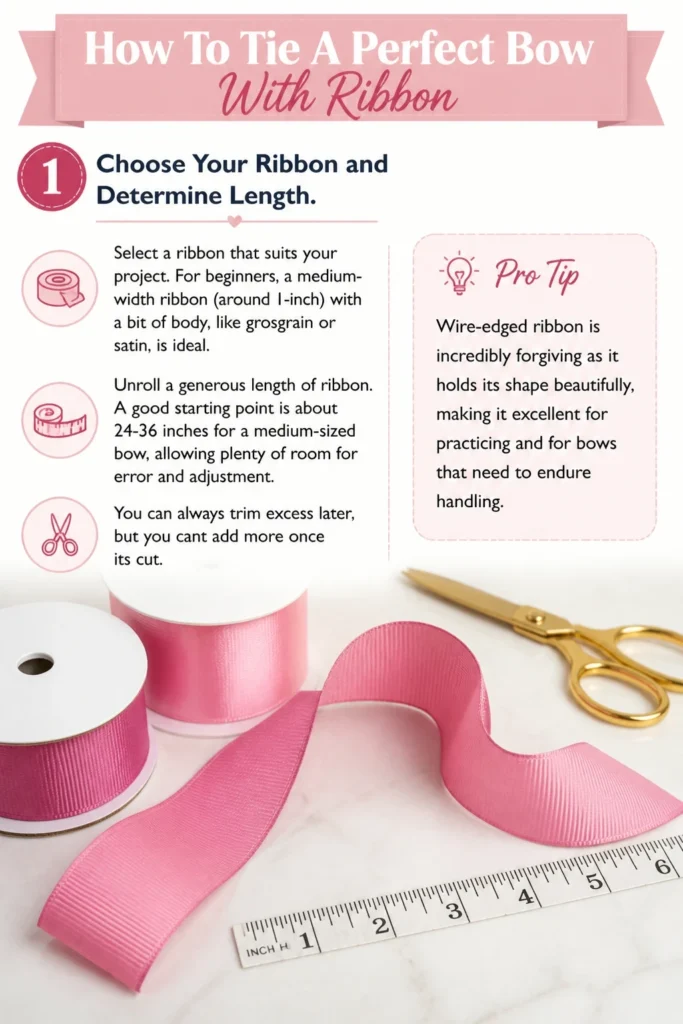
Unroll a generous length of ribbon. A good starting point is about 24-36 inches for a medium-sized bow, allowing plenty of room for error and adjustment.
You can always trim excess later, but you can’t add more once it’s cut.
Pro Tip: Wire-edged ribbon is incredibly forgiving as it holds its shape beautifully, making it excellent for practicing and for bows that need to endure handling.
Step 2: Create the Initial Loop
Hold one end of your ribbon in your non-dominant hand. Let the bulk of the ribbon hang freely.
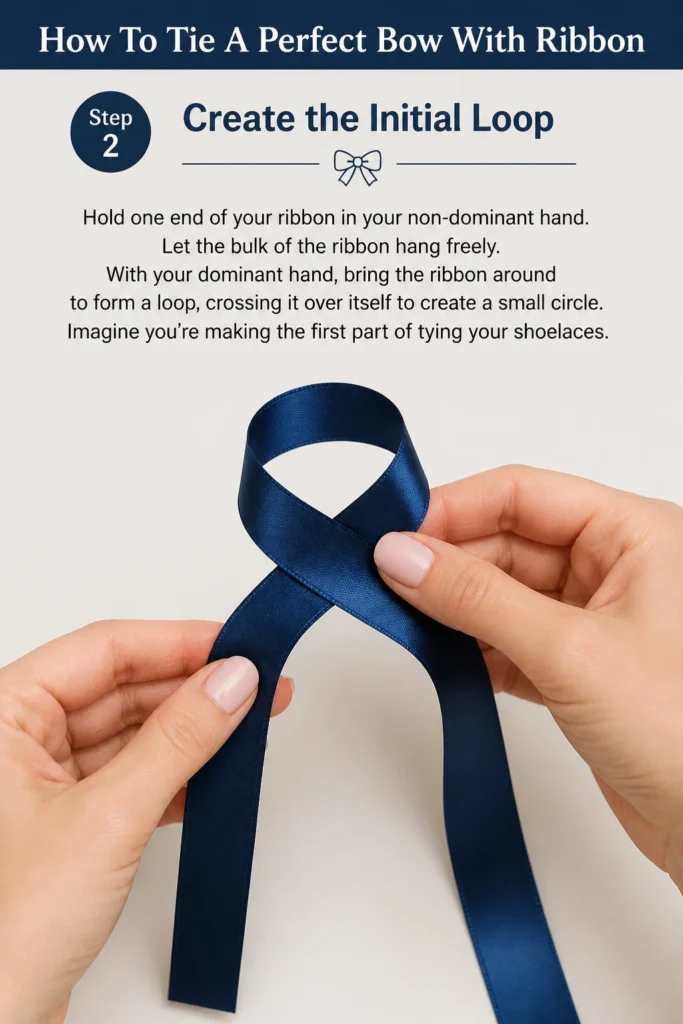
With your dominant hand, bring the ribbon around to form a loop, crossing it over itself to create a small circle.
Imagine you’re making the first part of tying your shoelaces.
Step 3: Form the First Ear
Take the working end of the ribbon (the longer piece coming from the roll) and create your first “ear” or loop.
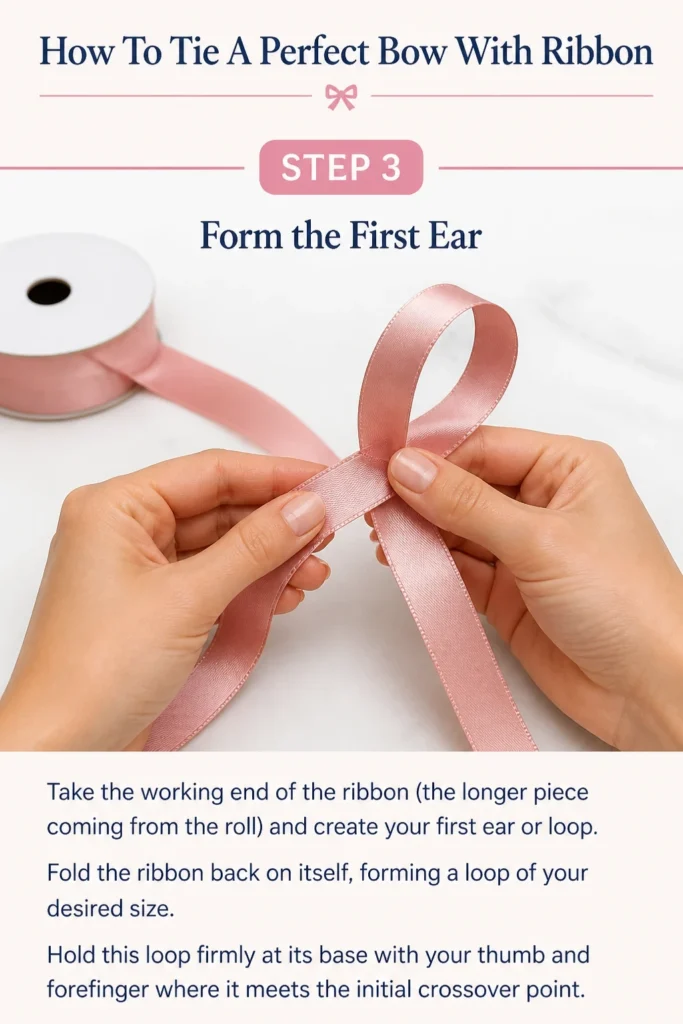
Fold the ribbon back on itself, forming a loop of your desired size.
Hold this loop firmly at its base with your thumb and forefinger where it meets the initial crossover point.
Step 4: Bring the Ribbon Around and Over
Now, take the remaining length of the working ribbon and bring it up and over the top of the first loop you just formed.
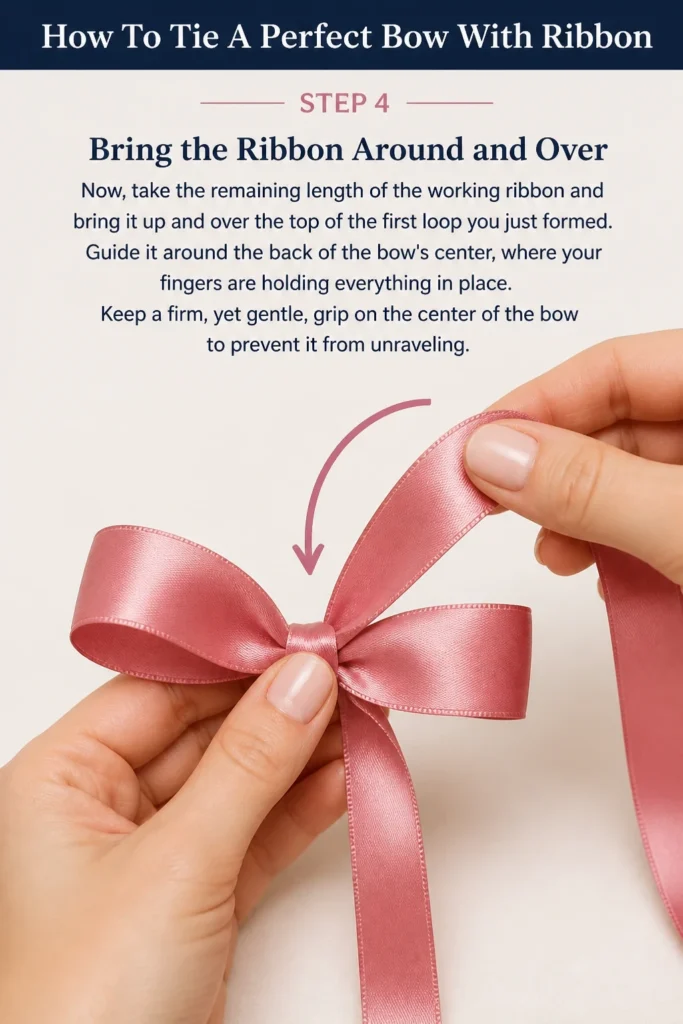
Guide it around the back of the bow’s center, where your fingers are holding everything in place.
Keep a firm, yet gentle, grip on the center of the bow to prevent it from unraveling.
Step 5: Create the Second Ear Through the Center
As you bring the ribbon around the back, thread it through the small opening or “hole” that was created when you crossed the ribbon in Step 2.
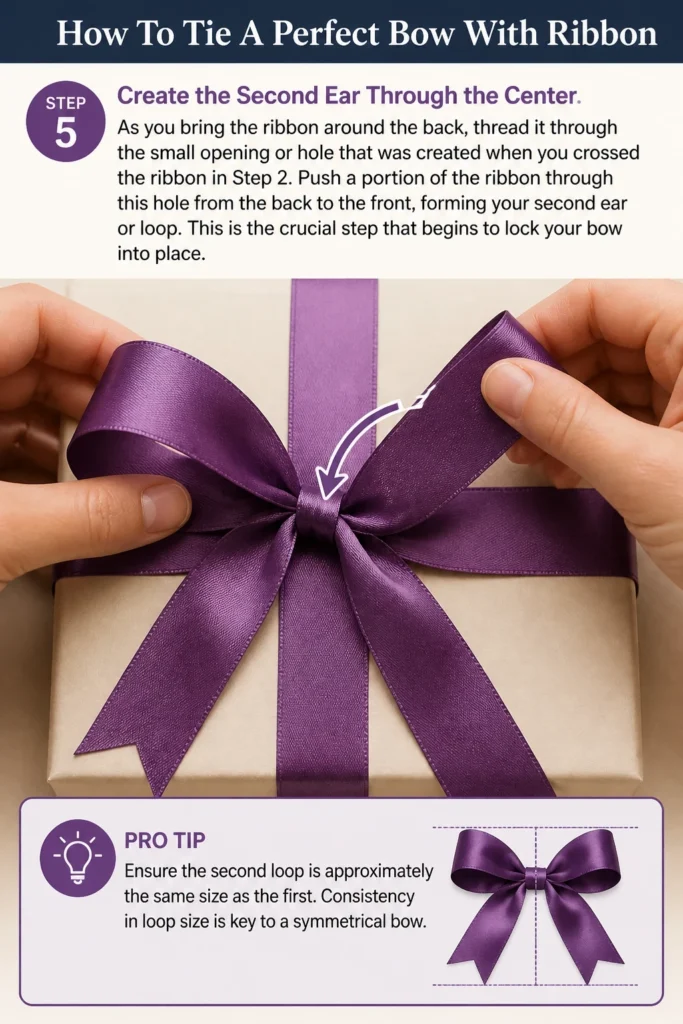
Push a portion of the ribbon through this hole from the back to the front, forming your second “ear” or loop.
This is the crucial step that begins to lock your bow into place.
Pro Tip: Ensure the second loop is approximately the same size as the first. Consistency in loop size is key to a symmetrical bow.
Step 6: Gently Pull and Tighten
Now you have two loops (the “ears”) and two “tails” hanging down.
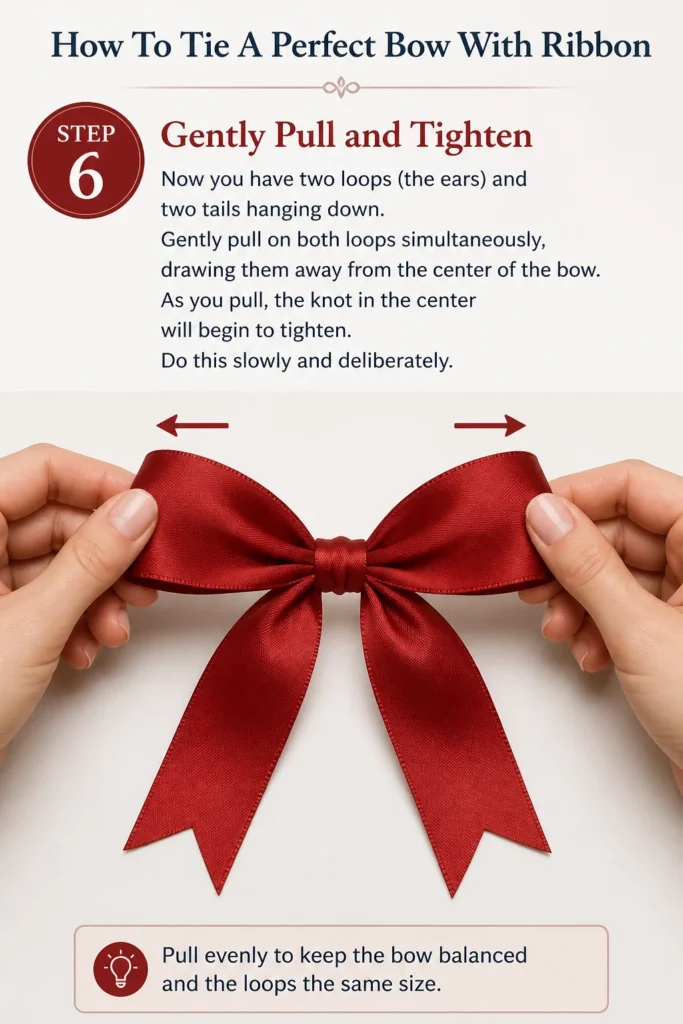
Gently pull on both loops simultaneously, drawing them away from the center of the bow.
As you pull, the knot in the center will begin to tighten. Do this slowly and deliberately.
Step 7: Adjust for Symmetry and Shape
This is where the “perfect” comes in. Once the knot is snug but not fully tightened, begin to manipulate the loops and tails.
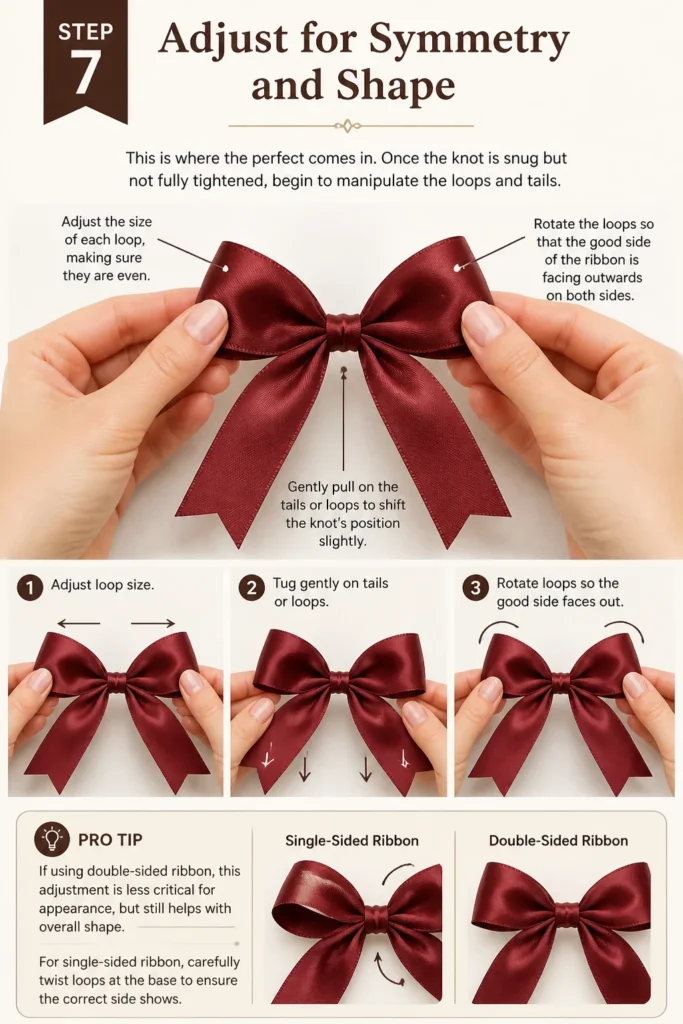
Adjust the size of each loop, making sure they are even. Gently pull on the tails or loops to shift the knot’s position slightly.
Rotate the loops so that the “good” side of the ribbon is facing outwards on both sides.
Pro Tip: If using double-sided ribbon, this adjustment is less critical for appearance, but still helps with overall shape. For single-sided ribbon, carefully twist loops at the base to ensure the correct side shows.
Step 8: Final Tightening and Trimming
Once you are happy with the symmetry and shape of your bow, give a final, firm pull on the loops to fully tighten the knot.
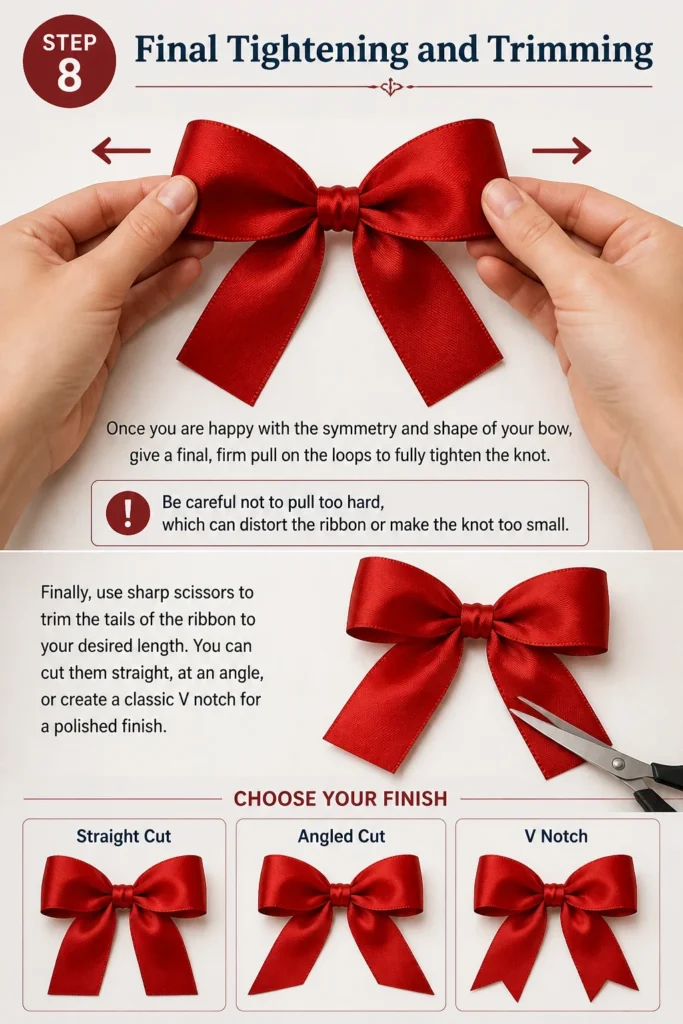
Be careful not to pull too hard, which can distort the ribbon or make the knot too small.
Finally, use sharp scissors to trim the tails of the ribbon to your desired length. You can cut them straight, at an angle, or create a classic “V” notch for a polished finish.
Common Mistakes to Avoid
Uneven Loops
Many people find their bows end up with one loop significantly larger or smaller than the other. This usually happens when one side of the ribbon is pulled tighter than the other during the initial tightening phase.
To correct this, always form both loops to roughly the same size before you begin tightening. Adjust them iteratively, pulling gently on one loop and then the other until they match.
Loose or Sloppy Knot
A bow that easily falls apart or looks messy often stems from a knot that isn’t tight enough at its core. This can occur if the ribbon isn’t held firmly at the center during the looping process.
Maintain a consistent, firm grip with your non-dominant hand on the central crossover point throughout steps 3-6. This foundational grip ensures the knot forms securely before you even begin to pull the loops.
Twisted Ribbon
Especially with single-sided ribbon, it’s common for the “wrong” side to show on one or both loops. This happens if the ribbon twists as you form the loops or pull it through the center opening.
Pay close attention to the orientation of the ribbon as you create each loop. If you notice a twist, gently untwist the ribbon at the base of the loop before tightening, ensuring the desired side faces out.
Tails That Are Too Short or Too Long
Cutting the ribbon too short at the beginning limits your ability to adjust the loops and ties, often resulting in a stunted bow. Conversely, excessively long tails can look disproportionate.
Always start with more ribbon than you think you’ll need. It’s much easier to trim excess ribbon at the end than to try and add length. Aim for tails that are roughly one to one-and-a-half times the length of the bow loops.
Troubleshooting
My Bow Looks Lopsided
Lopsidedness is a common issue, usually due to uneven tension or loop sizes. Don’t fully tighten your bow right away.
Instead, gently pull on the loops and tails, wiggling them slightly to redistribute the ribbon. Adjust each loop individually until they appear balanced before the final pull.
The Ribbon Keeps Slipping
If your ribbon feels like it’s constantly slipping or refuses to hold its shape, the problem might be the ribbon type itself or an insufficiently tight initial hold.
For very silky ribbons, you might need to apply slightly more pressure with your fingers at the central knot. Using a ribbon with some texture or wire-edged ribbon can also make the process much easier.
I Can’t Get the Knot Tight Enough
A loose knot means the bow won’t stay put. This often happens if the central crossover point isn’t secured properly before forming the second loop.
Ensure your non-dominant hand holds the ribbon very firmly where the first loop crosses over. When you thread the second loop through, make sure it passes directly through that tight central point, then pull the loops away from each other firmly but smoothly.
Key Takeaways
- Always start with a generous length of ribbon to allow for adjustments and trimming.
- Maintain a firm grip on the central crossover point throughout the looping process.
- Form both loops to a similar size before you begin the final tightening.
- Adjust the loops and tails for symmetry and orientation before giving the final pull.
- Practice makes perfect; don’t get discouraged by your first few attempts.
- Wire-edged ribbon is an excellent choice for beginners and complex bows.
Frequently Asked Questions
What type of ribbon is best for beginners?
Grosgrain ribbon or wire-edged ribbon are excellent choices for beginners. Grosgrain has a nice texture that holds its shape well, while wire-edged ribbon is incredibly pliable and forgiving, making it easy to sculpt into the desired form.
How do I make sure the bow stays tight?
The key to a tight bow is to create a secure, firm knot at the very center. Hold the initial crossover point tightly with your fingers as you form the loops. When tightening, pull both loops away from the center simultaneously and firmly, but avoid yanking.
Can I use this method for tying bows on gifts?
Absolutely! This method is perfect for tying bows directly onto gift packages. Just ensure you have enough ribbon length to wrap around the gift first, then follow the steps to create your bow on top of the package.
How do I create a multi-loop bow?
Once you’ve mastered the basic two-loop bow, creating multi-loop bows involves adding more loops before tightening. Instead of just two, you’ll continuously fold and layer loops, securing them at the same central point, then pulling the tails through to create the knot. It requires a bit more practice but uses the same fundamental principles.
Our Top Recommended Finds
- Quality Satin Ribbon Assortment: A pack with various colors and widths offers versatility for different projects and helps you discover your preferred ribbon type.
- Sharp Fabric Scissors: Clean cuts are essential for neat ribbon ends. A dedicated pair of fabric scissors prevents fraying and ensures a professional finish.
- Wire-Edged Ribbon Collection: Investing in a few rolls of wire-edged ribbon will transform your bow-tying experience, making it easier to achieve perfectly sculpted shapes.
Embrace the Art of Bow Tying
Tying a perfect bow is a skill that elevates any project, adding a touch of thoughtful craftsmanship.
It’s a simple gesture that speaks volumes, whether adorning a special gift, gracing a beautiful floral arrangement, or accenting a homemade craft.
Take your ribbon, find a quiet moment, and start practicing today. You’ll soon find yourself creating bows that are not just tied, but truly crafted with confidence and flair.
Beginner-friendly templates, step-by-step guides,
and weekly project ideas in your inbox.