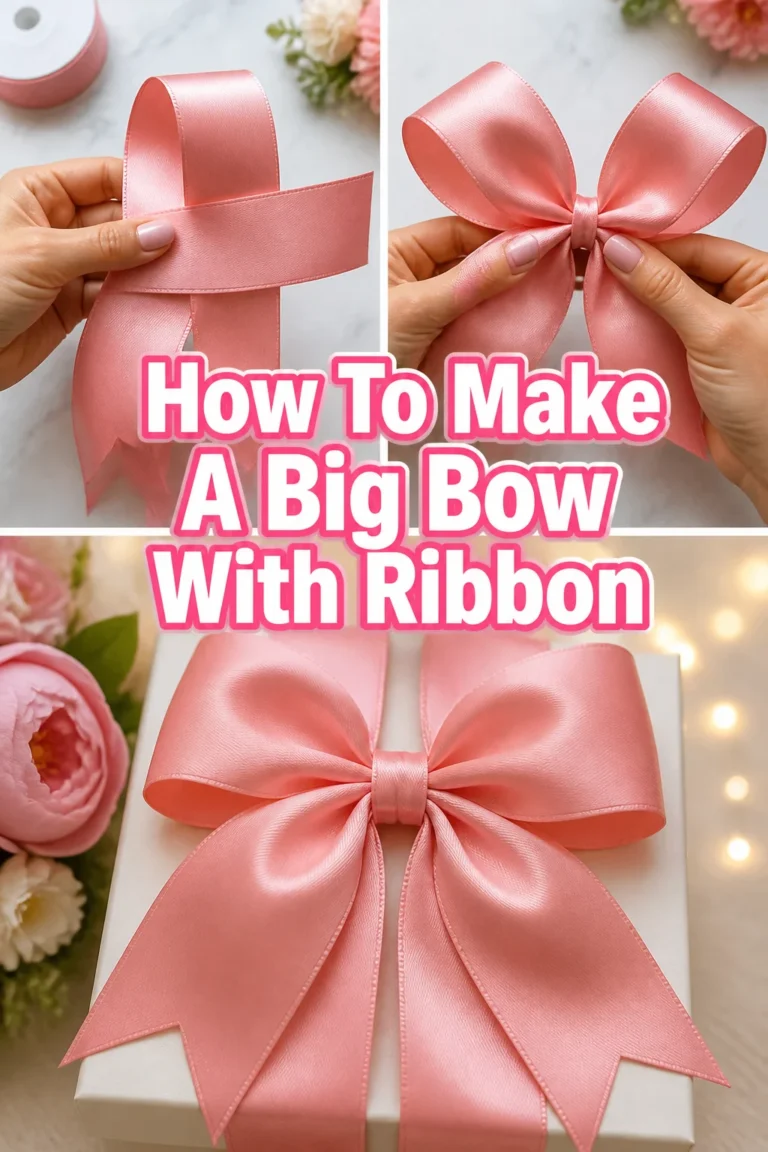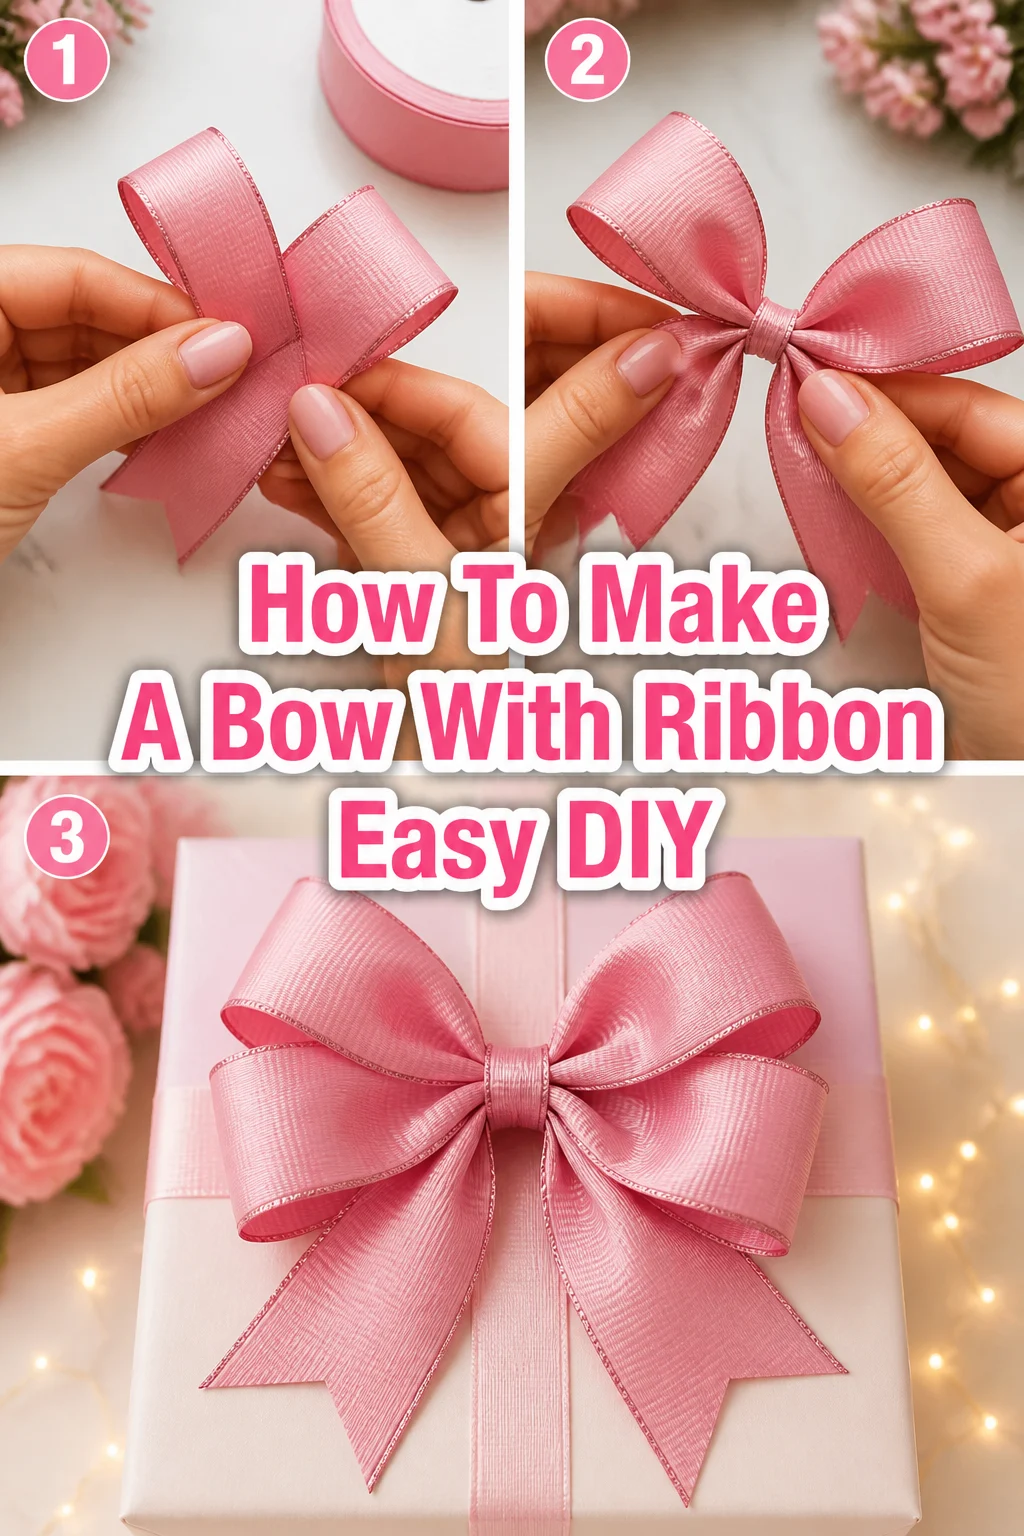
🎀 How To Make A Bow With Ribbon Easy DIY

Beginner-friendly templates, step-by-step guides,
and weekly project ideas in your inbox.
Learning to make a beautiful bow from ribbon is a skill that truly elevates any gift or decoration. It’s a simple craft that opens up a world of creative possibilities.
I remember struggling with store-bought bows that never quite matched my vision. Mastering this technique transformed my gift-wrapping, making every present feel uniquely special and handcrafted. You can achieve the same elegant results, even if you’re a complete beginner.

Quick Overview
This guide will walk you through creating a classic, elegant ribbon bow that looks professionally made. You’ll learn the fundamental techniques to craft a versatile bow suitable for gifts, hair accessories, or home decor.
- Time needed: 10-20 minutes (once you get the hang of it)
- Difficulty: Beginner
- What you’ll need: Ribbon, scissors, floral wire or thin string, ruler or measuring tape
Step-by-Step Instructions
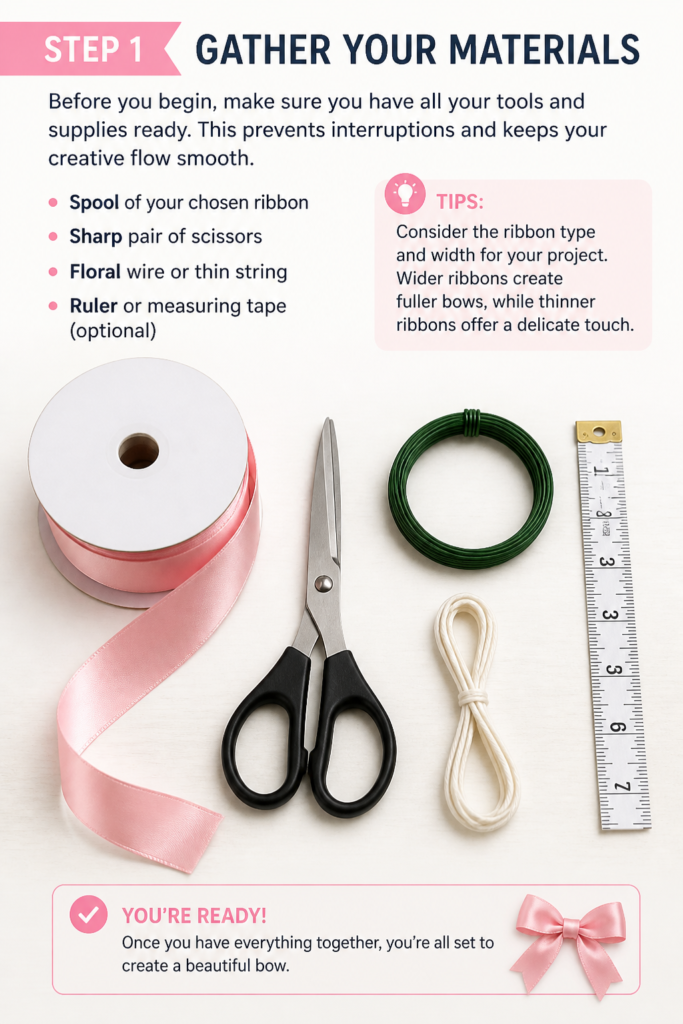
Step 1: Gather Your Materials
Before you begin, make sure you have all your tools and supplies ready. This prevents interruptions and keeps your creative flow smooth.
You will need a spool of your chosen ribbon, a sharp pair of scissors, and a length of floral wire or a thin piece of string. A ruler or measuring tape can also be very helpful for consistent loop sizes.
Consider the ribbon type and width for your project. Wider ribbons create fuller bows, while thinner ribbons offer a delicate touch.
Step 2: Measure and Cut Your Ribbon Length
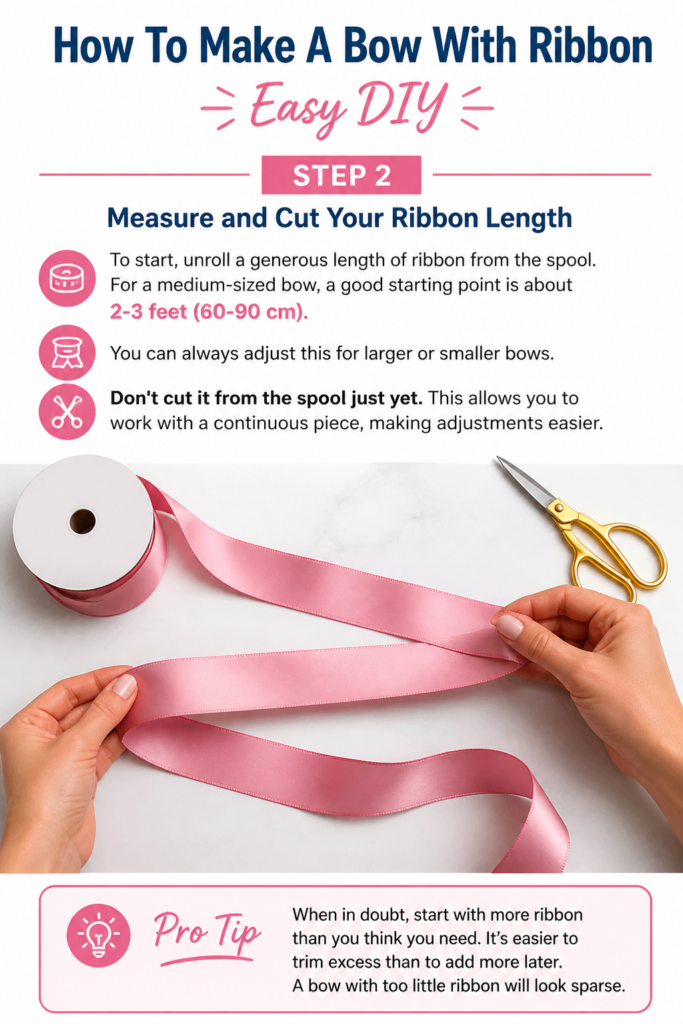
To start, unroll a generous length of ribbon from the spool. For a medium-sized bow, a good starting point is about 2-3 feet (60-90 cm). You can always adjust this for larger or smaller bows.
Don’t cut it from the spool just yet. This allows you to work with a continuous piece, making adjustments easier.
Pro Tip: When in doubt, start with more ribbon than you think you need. It’s easier to trim excess than to add more later. A bow with too little ribbon will look sparse.
Step 3: Create Your First Loop
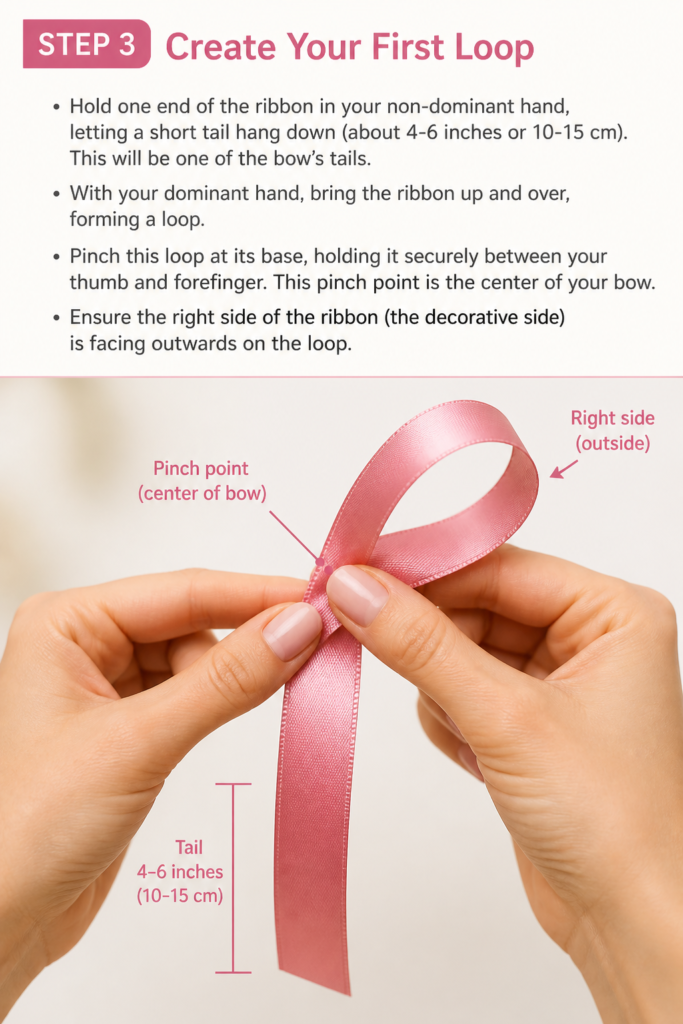
Hold one end of the ribbon in your non-dominant hand, letting a short “tail” hang down (about 4-6 inches or 10-15 cm). This will be one of the bow’s tails.
With your dominant hand, bring the ribbon up and over, forming a loop. Pinch this loop at its base, holding it securely between your thumb and forefinger. This pinch point is the center of your bow.
Ensure the “right” side of the ribbon (the decorative side) is facing outwards on the loop.
Step 4: Form the Second Loop
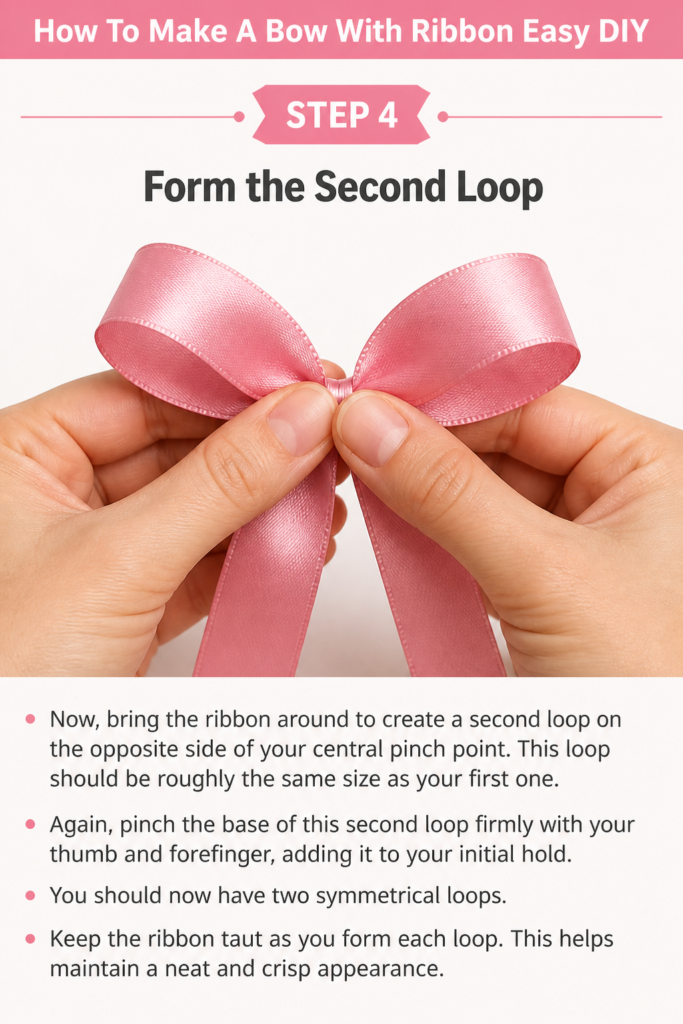
Now, bring the ribbon around to create a second loop on the opposite side of your central pinch point. This loop should be roughly the same size as your first one.
Again, pinch the base of this second loop firmly with your thumb and forefinger, adding it to your initial hold. You should now have two symmetrical loops.
Keep the ribbon taut as you form each loop. This helps maintain a neat and crisp appearance.
Step 5: Add More Loops for Fullness
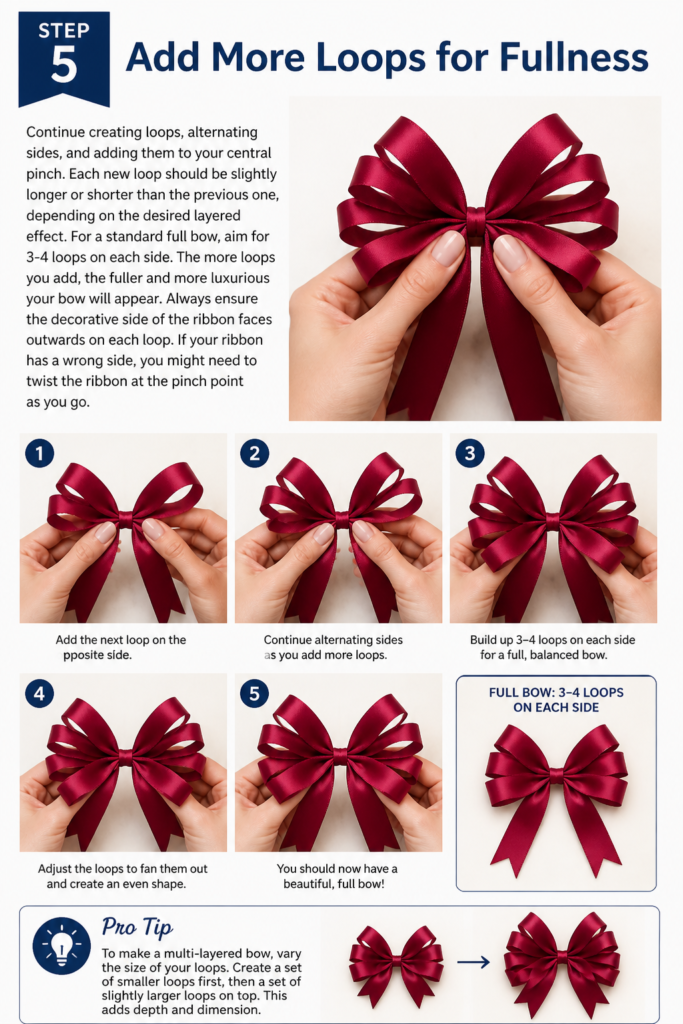
Continue creating loops, alternating sides, and adding them to your central pinch. Each new loop should be slightly longer or shorter than the previous one, depending on the desired layered effect.
For a standard full bow, aim for 3-4 loops on each side. The more loops you add, the fuller and more luxurious your bow will appear.
Always ensure the decorative side of the ribbon faces outwards on each loop. If your ribbon has a wrong side, you might need to twist the ribbon at the pinch point as you go.
Pro Tip: To make a multi-layered bow, vary the size of your loops. Create a set of smaller loops first, then a set of slightly larger loops on top. This adds depth and dimension.
Step 6: Secure the Center of the Bow
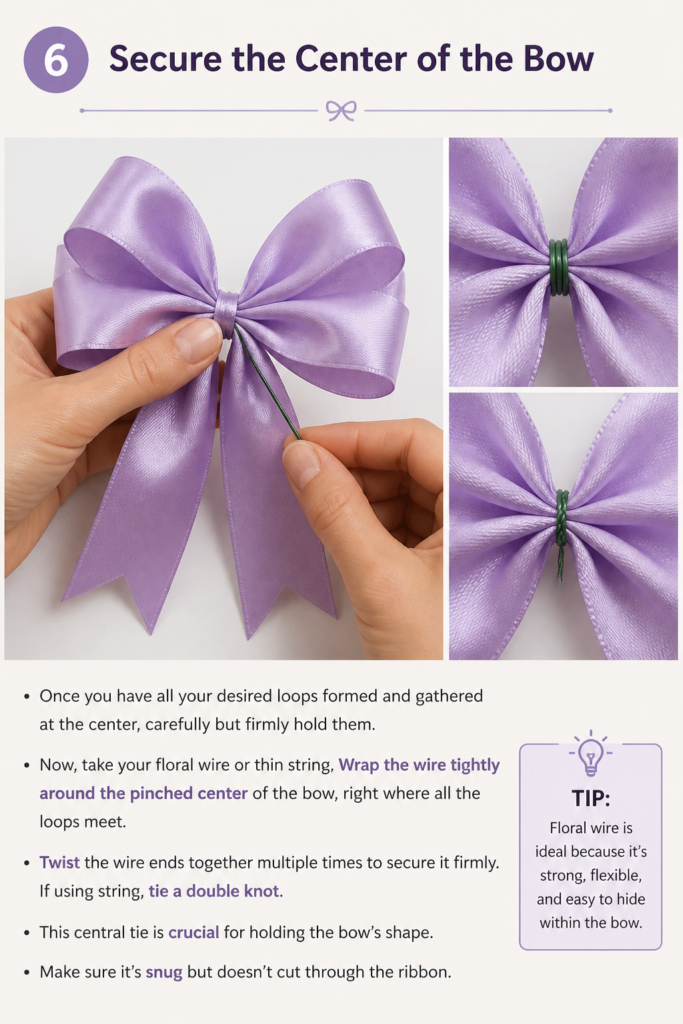
Once you have all your desired loops formed and gathered at the center, carefully but firmly hold them. Now, take your floral wire or thin string.
Wrap the wire tightly around the pinched center of the bow, right where all the loops meet. Twist the wire ends together multiple times to secure it firmly. If using string, tie a double knot.
This central tie is crucial for holding the bow’s shape. Make sure it’s snug but doesn’t cut through the ribbon.
Step 7: Trim and Shape the Tails
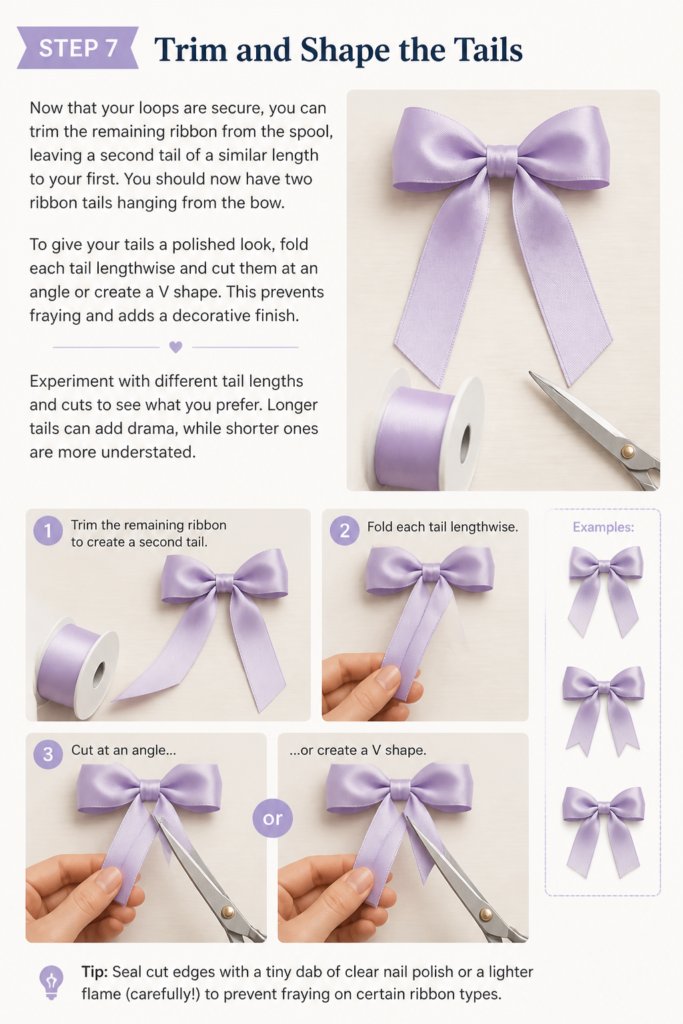
Now that your loops are secure, you can trim the remaining ribbon from the spool, leaving a second tail of a similar length to your first. You should now have two ribbon tails hanging from the bow.
To give your tails a polished look, fold each tail lengthwise and cut them at an angle or create a “V” shape. This prevents fraying and adds a decorative finish.
Experiment with different tail lengths and cuts to see what you prefer. Longer tails can add drama, while shorter ones are more understated.
Step 8: Fluff and Arrange Your Loops
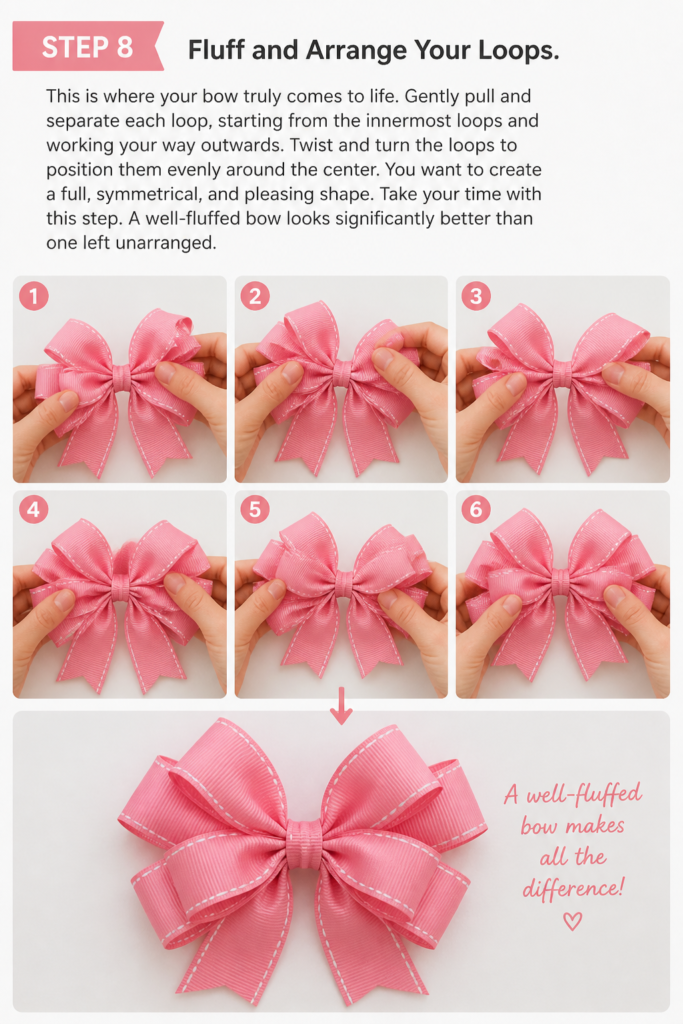
This is where your bow truly comes to life. Gently pull and separate each loop, starting from the innermost loops and working your way outwards.
Twist and turn the loops to position them evenly around the center. You want to create a full, symmetrical, and pleasing shape.
Take your time with this step. A well-fluffed bow looks significantly better than one left unarranged.
Common Mistakes to Avoid
Not Using Enough Ribbon
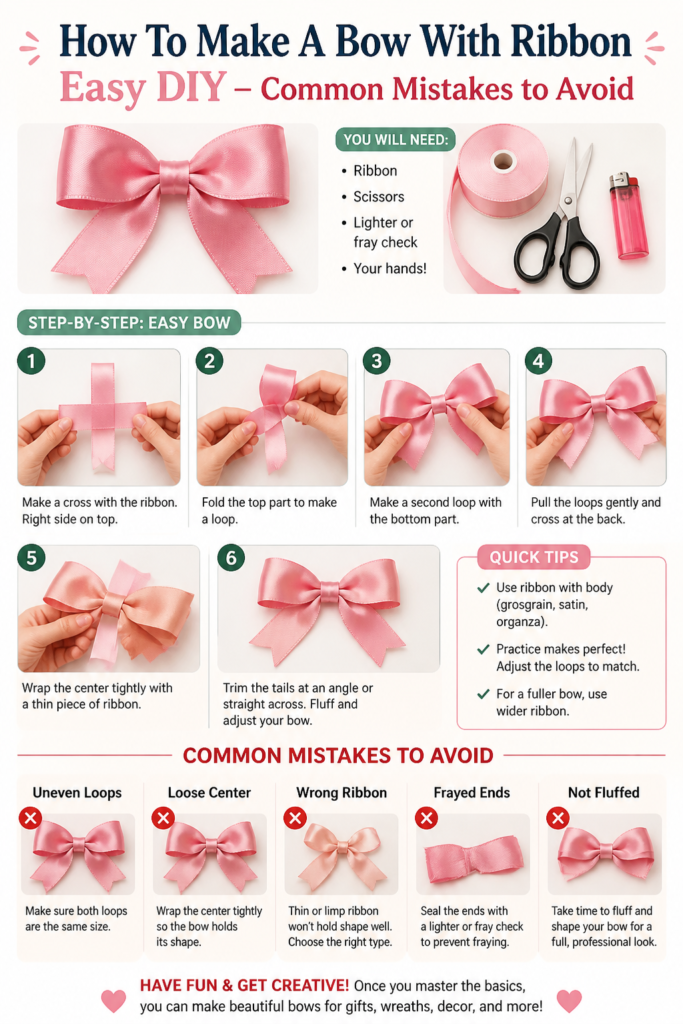
One of the most common pitfalls is underestimating the amount of ribbon needed. A bow made with too little ribbon will look skimpy and flat. It won’t have the desired fullness or bounce.
Always start with a generous length of ribbon, even if it feels excessive. You can always trim the excess, but you can’t add more once you’ve secured the center. Err on the side of abundance for a lush, beautiful bow.
Inconsistent Loop Sizes
If your loops are all different sizes without intentional variation, your bow can look lopsided or messy. Symmetry is key for a classic bow.
Pay attention as you form each loop, trying to match them on opposing sides. If you want a layered look, intentionally make certain sets of loops larger or smaller, but keep the pairs consistent.
Loose Central Tie
A weak or loose tie at the bow’s center will cause it to fall apart or lose its shape quickly. The loops will sag, and the bow won’t hold its form.
Ensure you wrap your floral wire or string very tightly around the pinched center. Twist the wire ends multiple times or tie a secure double knot with string. This firm anchor is what gives your bow stability.
Not Fluffing the Bow Properly
Leaving your bow un-fluffed after assembly is like leaving a cake un-iced. It looks unfinished and lacks dimension. The loops will lie flat and appear lifeless.
Always take the time to gently pull, separate, and arrange each loop. Work them into a full, rounded shape, ensuring all the decorative sides are facing outwards. This final touch makes all the difference.
Troubleshooting
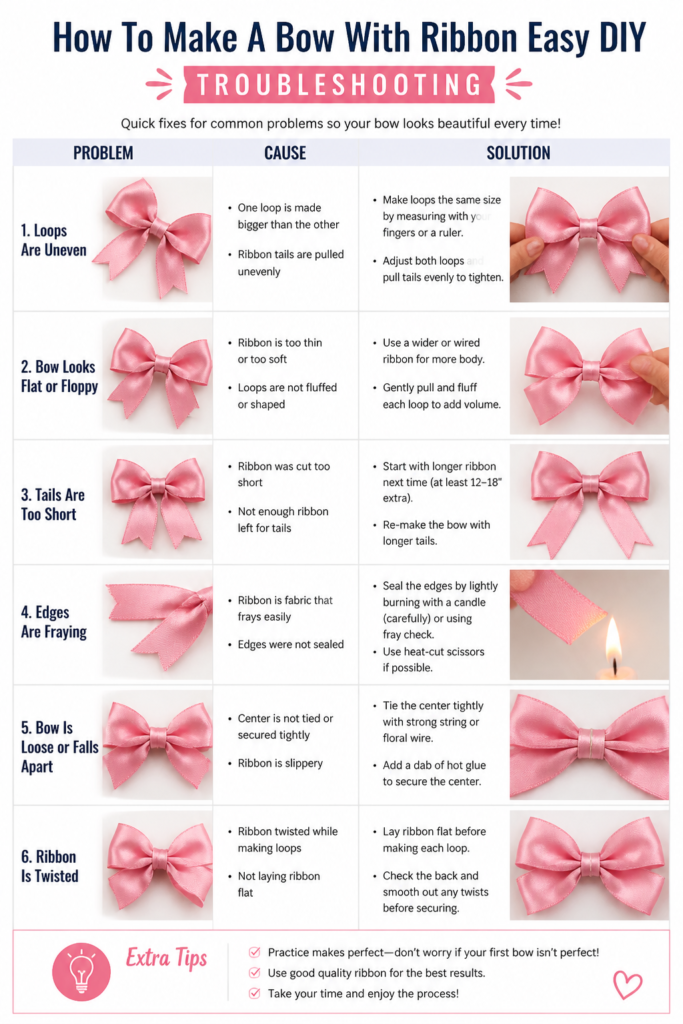
My Bow Looks Flat and Lifeless
If your bow lacks volume, it’s likely due to either insufficient loops or improper fluffing. A flat bow often means the loops are too close together.
To fix this, gently go back and separate each loop, pulling them outwards and upwards from the center. Ensure you have enough loops (at least 3-4 per side for a standard bow). Next time, consider adding more loops during the construction phase for greater fullness.
The Loops Keep Slipping Out of My Fingers
Holding multiple loops securely while adding new ones can be tricky, especially with slippery ribbon types. This often happens when your grip isn’t firm enough.
Try using a small binder clip or clothespin to temporarily hold the existing loops at the pinch point while you form new ones. You can also press your thumb and forefinger together very tightly, using the pads of your fingers for maximum grip.
My Ribbon Tails Are Uneven
Uneven tails can make the bow look unbalanced. This usually occurs if you don’t measure the initial tail or if you cut the second tail without referencing the first.
To correct this, lay the bow flat and compare the tail lengths. Trim the longer tail to match the shorter one. In the future, always cut your first tail, then use that as a guide for the second when you finish the loops.
Key Takeaways
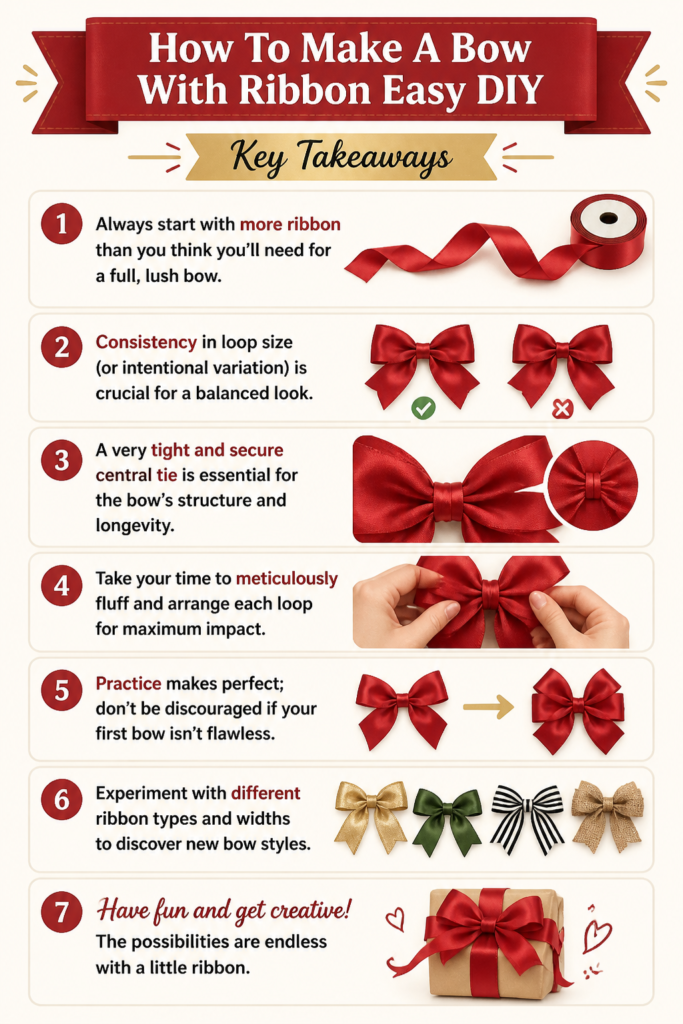
- Always start with more ribbon than you think you’ll need for a full, lush bow.
- Consistency in loop size (or intentional variation) is crucial for a balanced look.
- A very tight and secure central tie is essential for the bow’s structure and longevity.
- Take your time to meticulously fluff and arrange each loop for maximum impact.
- Practice makes perfect; don’t be discouraged if your first bow isn’t flawless.
- Experiment with different ribbon types and widths to discover new bow styles.
Frequently Asked Questions
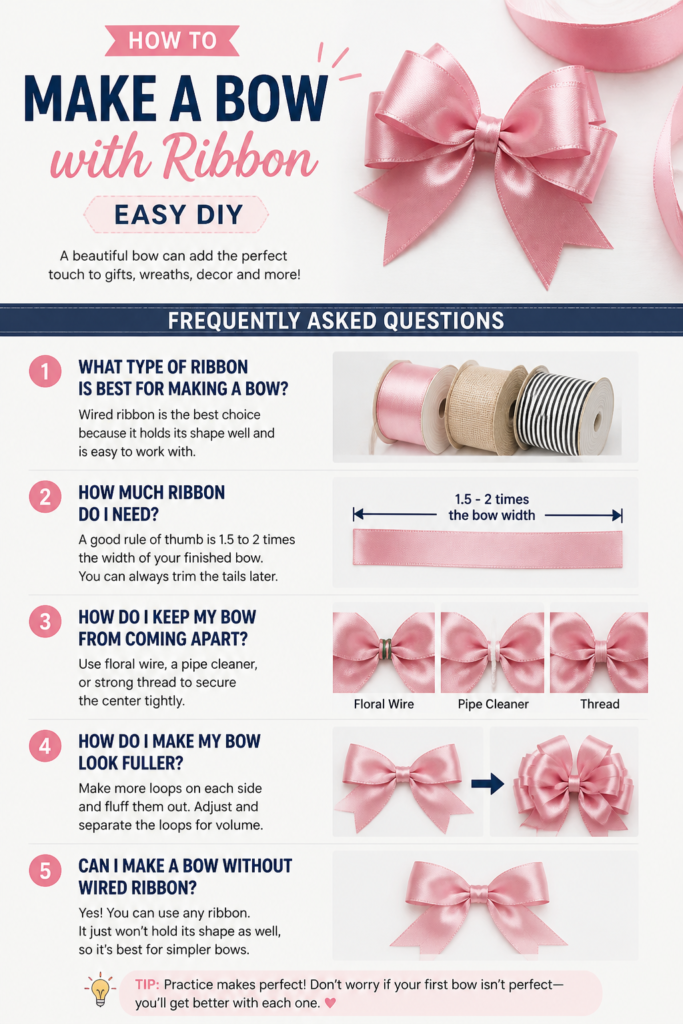
What type of ribbon is best for making bows?
Wired ribbon is often recommended for beginners because the wire edges help the loops hold their shape beautifully. Grosgrain, satin, velvet, and sheer ribbons also make excellent bows. The “best” type depends on the look you’re going for and the project.
How do I make a bigger or smaller bow?
To make a bigger bow, simply use a longer piece of ribbon and create larger loops. For a smaller bow, use less ribbon and make smaller loops. The fundamental technique remains the same, just scaled up or down.
Can I make a bow with multiple colors of ribbon?
Absolutely! Making a bow with multiple ribbons adds fantastic dimension and visual interest. Simply hold two or more ribbons together as if they were one, and follow the same step-by-step instructions. Ensure they are aligned at the center.
How can I attach my finished bow to a gift or project?
If you used floral wire to secure the center, you can simply twist the remaining wire ends around the gift box. For other projects, you can hot glue the bow in place, or use a safety pin or ribbon to tie it on, depending on the item.
Our Top Recommended Finds
- Wired Edge Ribbon Assortment: Great for beginners, these ribbons hold their shape wonderfully and come in various colors and patterns for endless creativity.
- High-Quality Fabric Scissors: Sharp scissors are a game-changer. They ensure clean, crisp cuts on your ribbon, preventing fraying and making your bows look professional.
- Thin Floral Wire (26-28 Gauge): This fine wire is perfect for securing bow centers discreetly. It’s strong enough to hold shape but thin enough to be easily hidden within the ribbon.
Start Crafting Your Own Beautiful Bows Today
You now have all the knowledge and steps to create stunning ribbon bows for any occasion. Imagine the joy of personalizing gifts, enhancing home decor, or adding a touch of elegance to party favors with your own handmade creations.
Don’t wait to add this delightful skill to your crafting repertoire. Pick out your favorite ribbon, grab your scissors, and start practicing. You’ll be amazed at how quickly you master the art of bow making, bringing a unique, handcrafted charm to everything you do.
Beginner-friendly templates, step-by-step guides,
and weekly project ideas in your inbox.