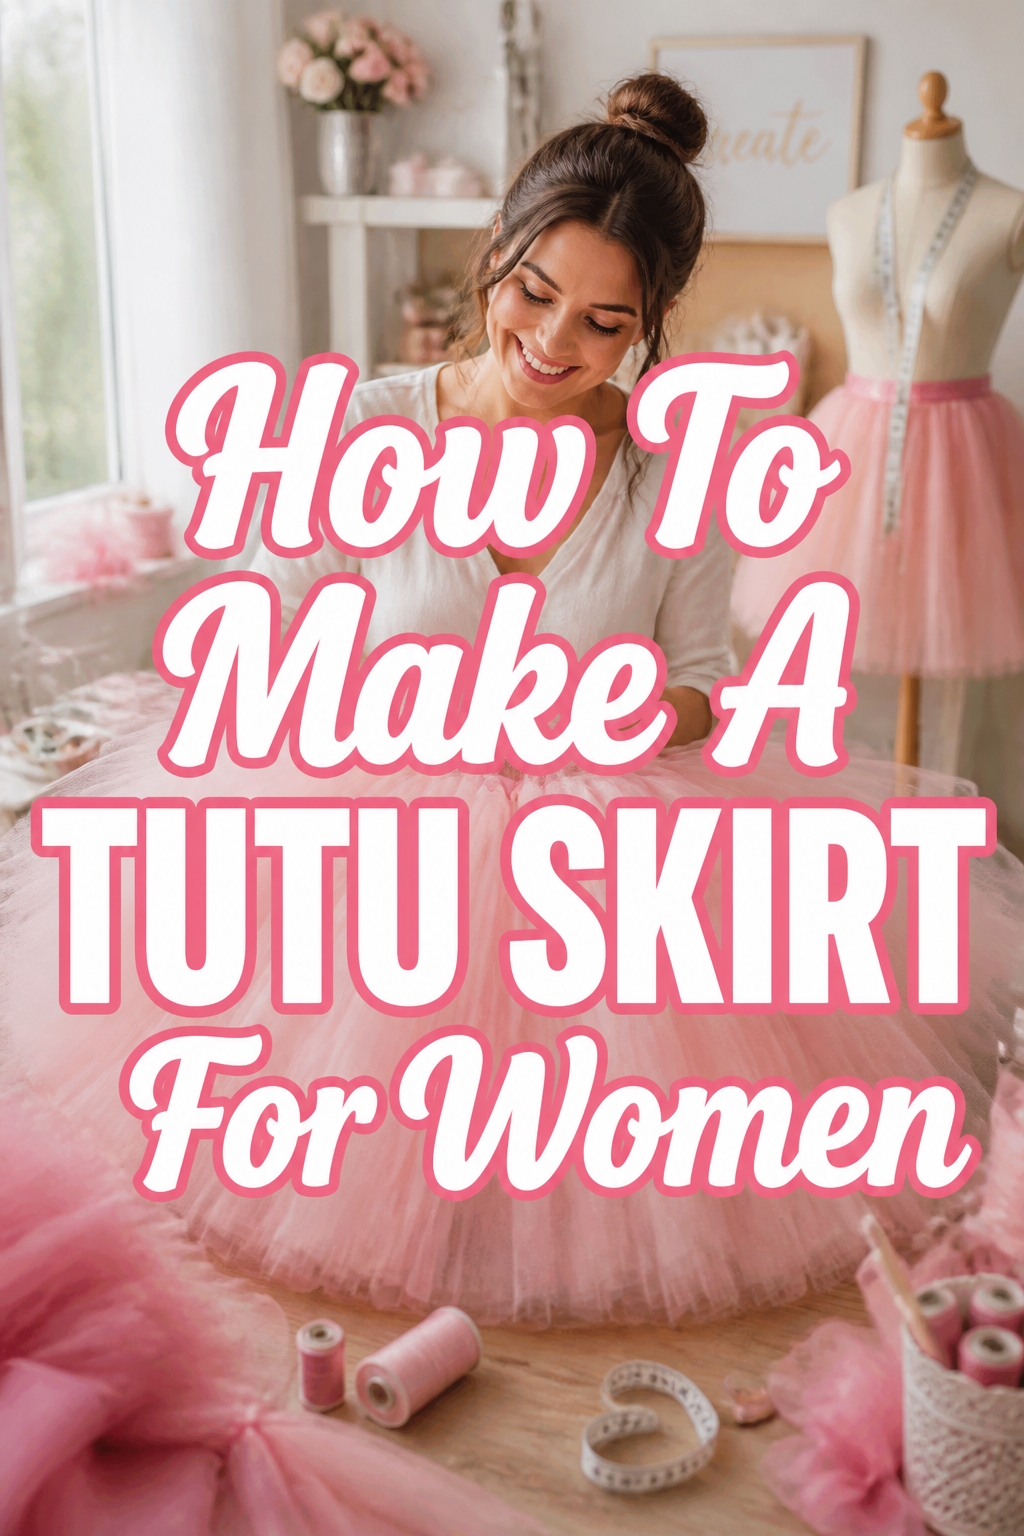
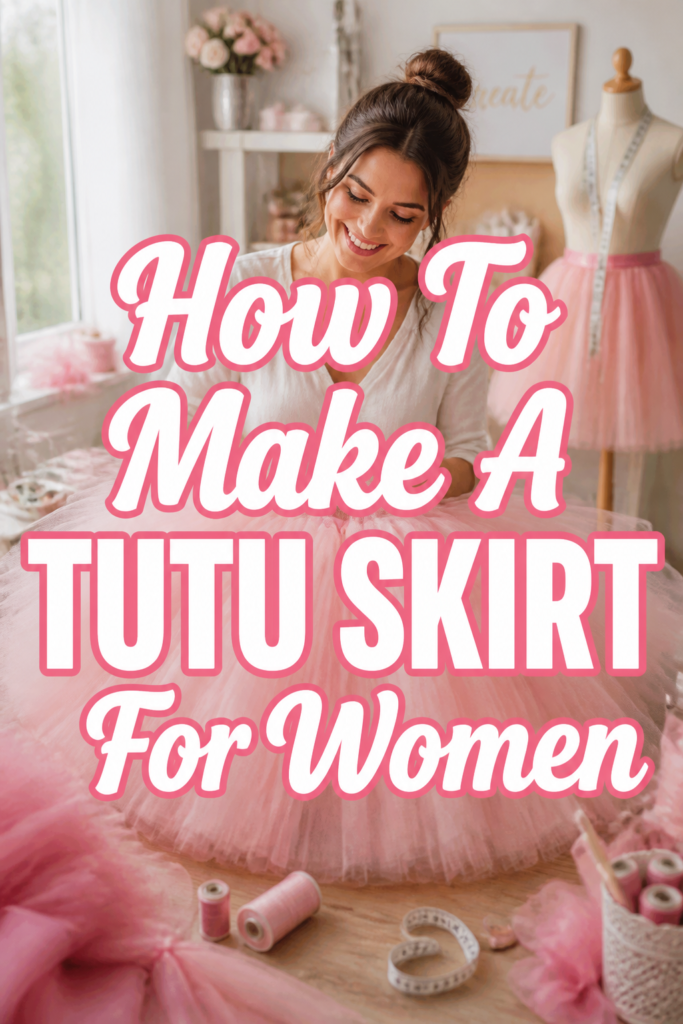
How To Make A Tutu Skirt For Women

Beginner-friendly templates, step-by-step guides,
and weekly project ideas in your inbox.
Making a beautiful tutu for yourself is an incredibly rewarding project. It allows for complete customization, letting your creativity shine through.
I’ve personally crafted a range of tutus, from whimsical party wear to elegant statement pieces. This guide shares all my best tips and tricks.
You’ll discover just how simple it is to create a stunning, custom-fit tutu that perfectly expresses your unique style. Let’s get started on your next favorite DIY!
Quick Overview
This guide will walk you through creating a no-sew tutu skirt, perfect for parties, costumes, or just for fun. You’ll learn how to measure, cut, and assemble your tutu with ease.
- Time needed: 2-4 hours (depending on skirt fullness and experience)
- Difficulty: Beginner
- What you’ll need: Tulle fabric, non-roll elastic, sharp scissors, measuring tape
Step-by-Step Instructions
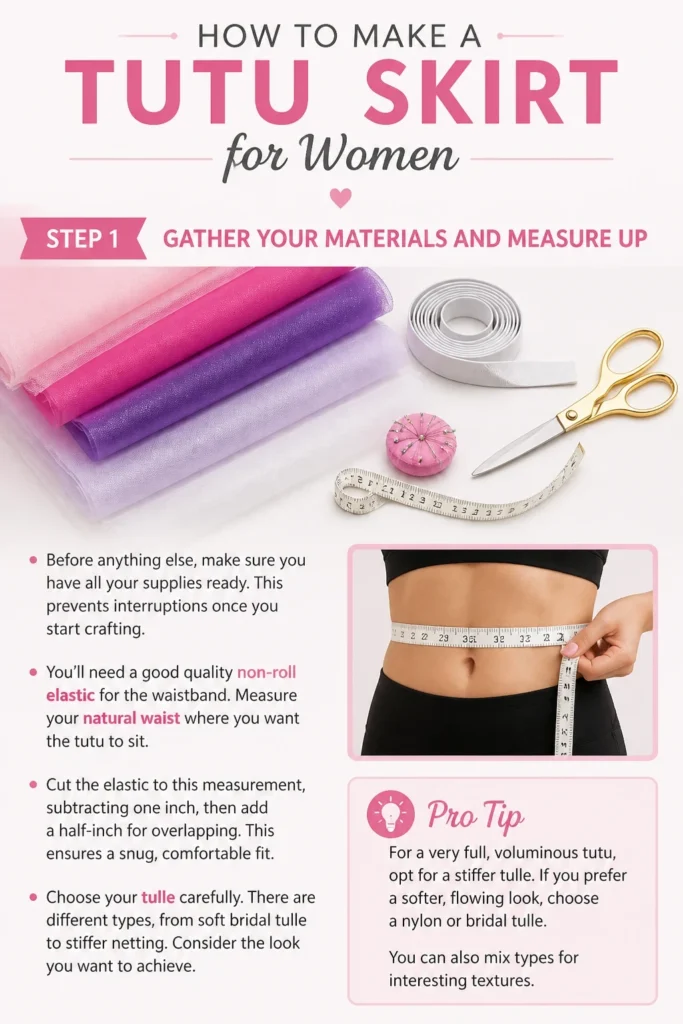
Step 1: Gather Your Materials and Measure Up
Before anything else, make sure you have all your supplies ready. This prevents interruptions once you start crafting.
You’ll need a good quality non-roll elastic for the waistband. Measure your natural waist where you want the tutu to sit.
Cut the elastic to this measurement, subtracting one inch, then add a half-inch for overlapping. This ensures a snug, comfortable fit.
Choose your tulle carefully. There are different types, from soft bridal tulle to stiffer netting. Consider the look you want to achieve.
Pro Tip: For a very full, voluminous tutu, opt for a stiffer tulle. If you prefer a softer, flowing look, choose a nylon or bridal tulle. You can also mix types for interesting textures.
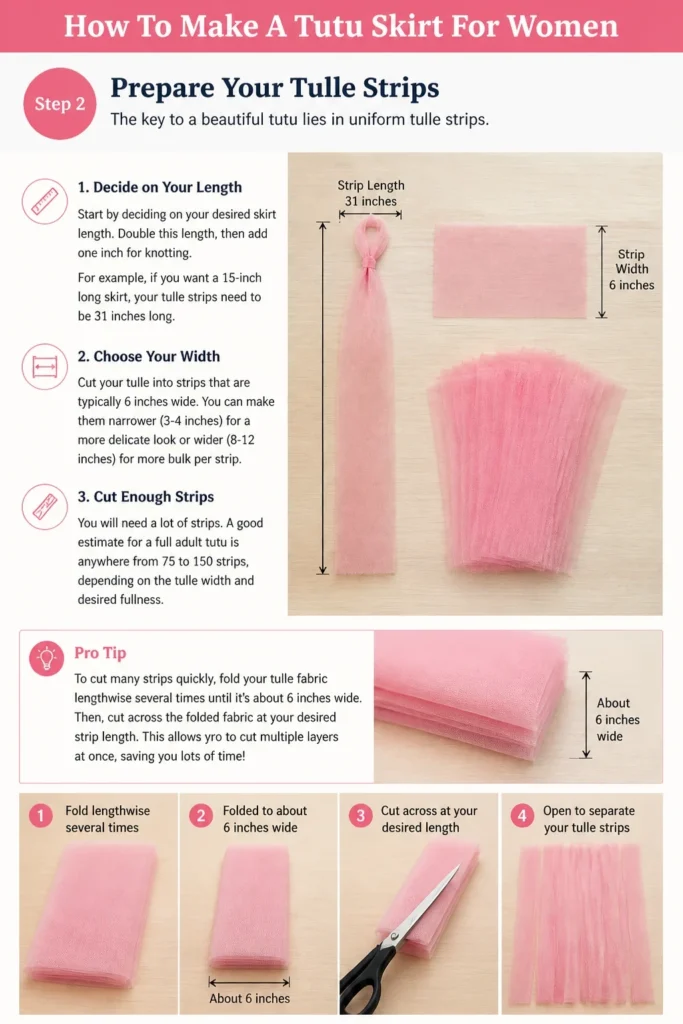
Step 2: Prepare Your Tulle Strips
The key to a beautiful tutu lies in uniform tulle strips. Start by deciding on your desired skirt length.
Double this length, then add one inch for knotting. For example, if you want a 15-inch long skirt, your tulle strips need to be 31 inches long.
Cut your tulle into strips that are typically 6 inches wide. You can make them narrower (3-4 inches) for a more delicate look or wider (8-12 inches) for more bulk per strip.
You will need a lot of strips. A good estimate for a full adult tutu is anywhere from 75 to 150 strips, depending on the tulle width and desired fullness.
Pro Tip: To cut many strips quickly, fold your tulle fabric lengthwise several times until it’s about 6 inches wide. Then, cut across the folded fabric at your desired strip length. This allows you to cut multiple layers at once.
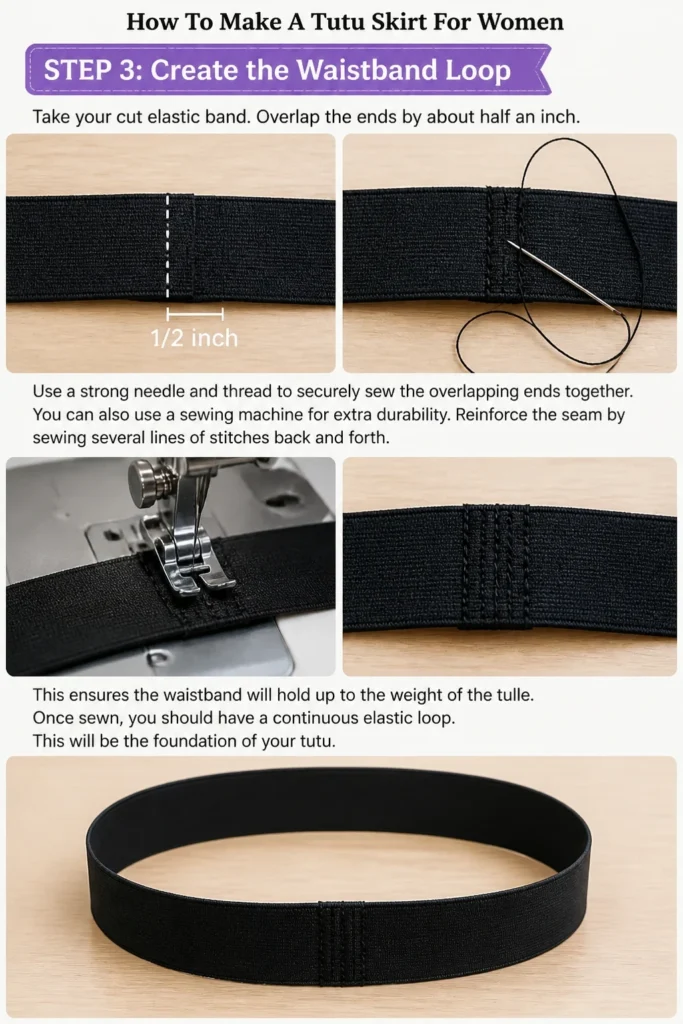
Step 3: Create the Waistband Loop
Take your cut elastic band. Overlap the ends by about half an inch.
Use a strong needle and thread to securely sew the overlapping ends together. You can also use a sewing machine for extra durability.
Reinforce the seam by sewing several lines of stitches back and forth. This ensures the waistband will hold up to the weight of the tulle.
Once sewn, you should have a continuous elastic loop. This will be the foundation of your tutu.
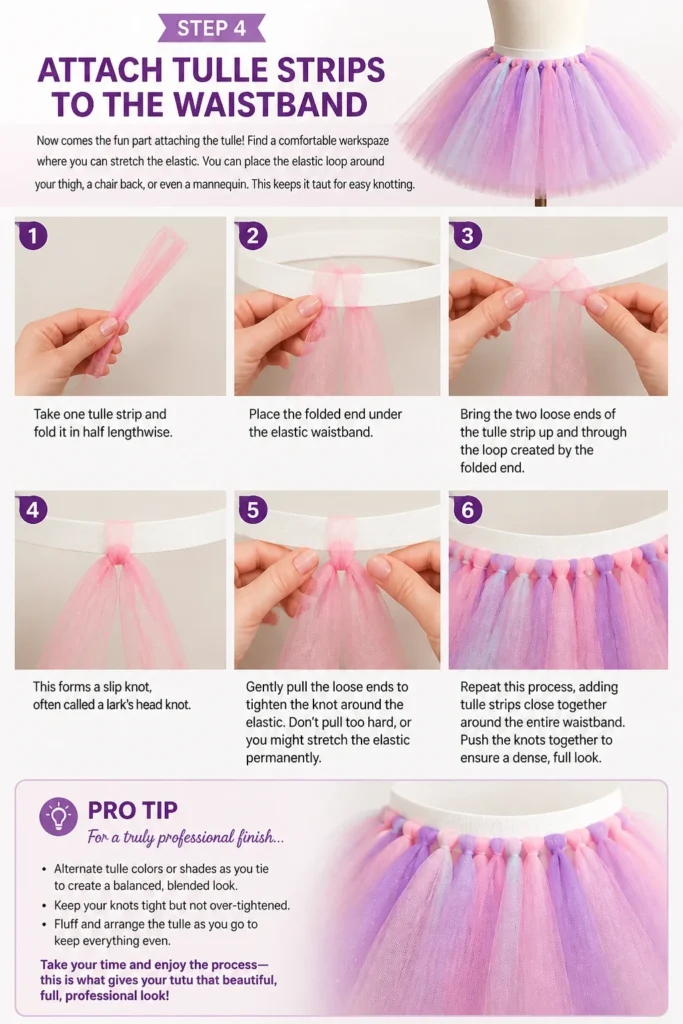
Step 4: Attach Tulle Strips to the Waistband
Now comes the fun part: attaching the tulle! Find a comfortable workspace where you can stretch the elastic.
You can place the elastic loop around your thigh, a chair back, or even a mannequin. This keeps it taut for easy knotting.
Take one tulle strip and fold it in half lengthwise. Place the folded end under the elastic waistband.
Bring the two loose ends of the tulle strip up and through the loop created by the folded end. This forms a slip knot, often called a lark’s head knot.
Gently pull the loose ends to tighten the knot around the elastic. Don’t pull too hard, or you might stretch the elastic permanently.
Repeat this process, adding tulle strips close together around the entire waistband. Push the knots together to ensure a dense, full look.
Pro Tip: For a truly professional finish, alternate the direction of your knots. Do one knot with the loop opening facing up, then the next with the loop opening facing down. This creates a more even distribution of tulle.
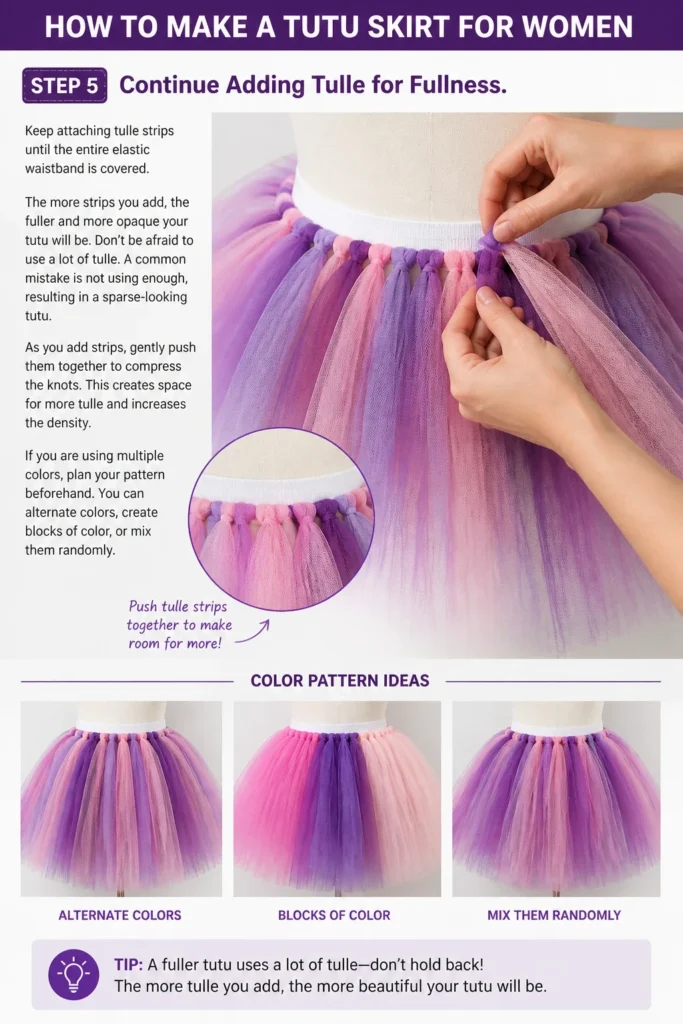
Step 5: Continue Adding Tulle for Fullness
Keep attaching tulle strips until the entire elastic waistband is covered. The more strips you add, the fuller and more opaque your tutu will be.
Don’t be afraid to use a lot of tulle. A common mistake is not using enough, resulting in a sparse-looking tutu.
As you add strips, gently push them together to compress the knots. This creates space for more tulle and increases the density.
If you are using multiple colors, plan your pattern beforehand. You can alternate colors, create blocks of color, or mix them randomly.
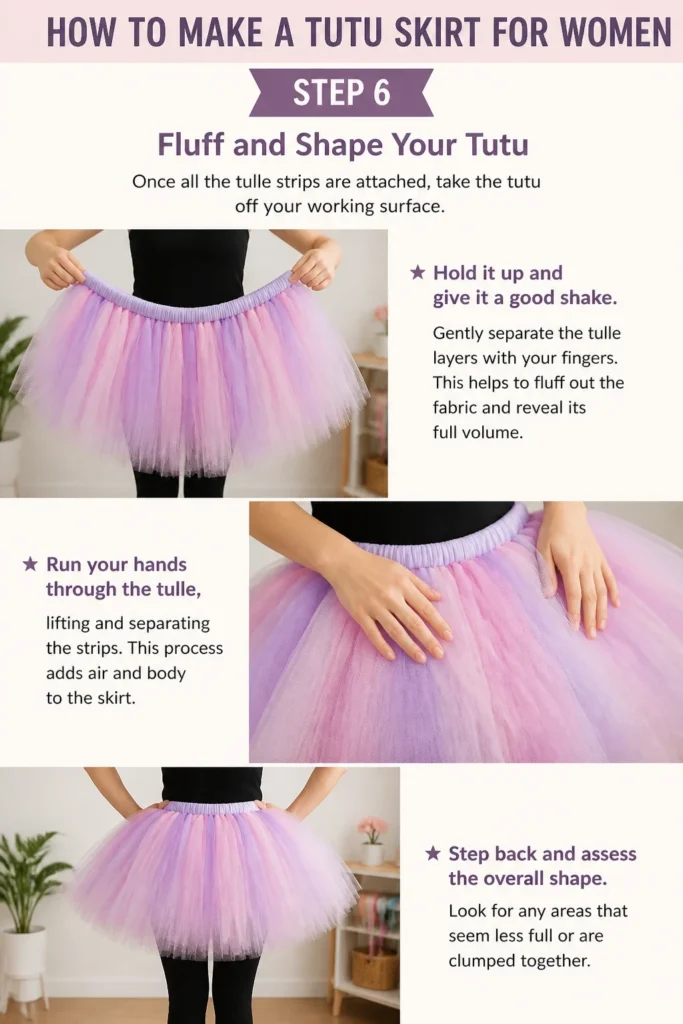
Step 6: Fluff and Shape Your Tutu
Once all the tulle strips are attached, take the tutu off your working surface. Hold it up and give it a good shake.
Gently separate the tulle layers with your fingers. This helps to fluff out the fabric and reveal its full volume.
Run your hands through the tulle, lifting and separating the strips. This process adds air and body to the skirt.
Step back and assess the overall shape. Look for any areas that seem less full or are clumped together.
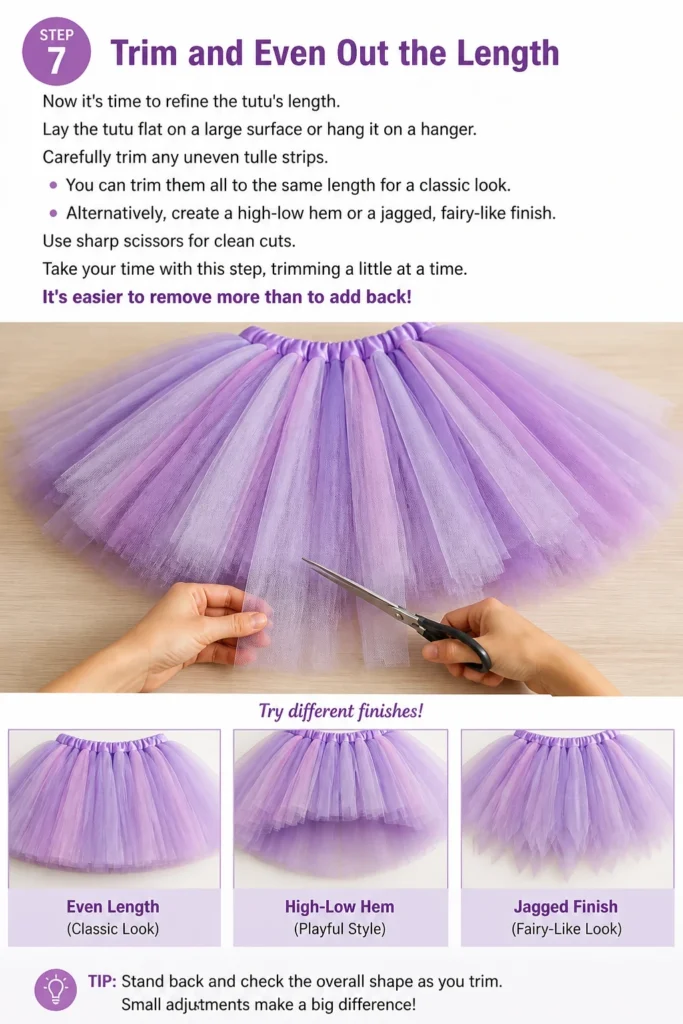
Step 7: Trim and Even Out the Length
Now it’s time to refine the tutu’s length. Lay the tutu flat on a large surface or hang it on a hanger.
Carefully trim any uneven tulle strips. You can trim them all to the same length for a classic look.
Alternatively, create a high-low hem or a jagged, fairy-like finish. Use sharp scissors for clean cuts.
Take your time with this step, trimming a little at a time. It’s easier to remove more than to add back!
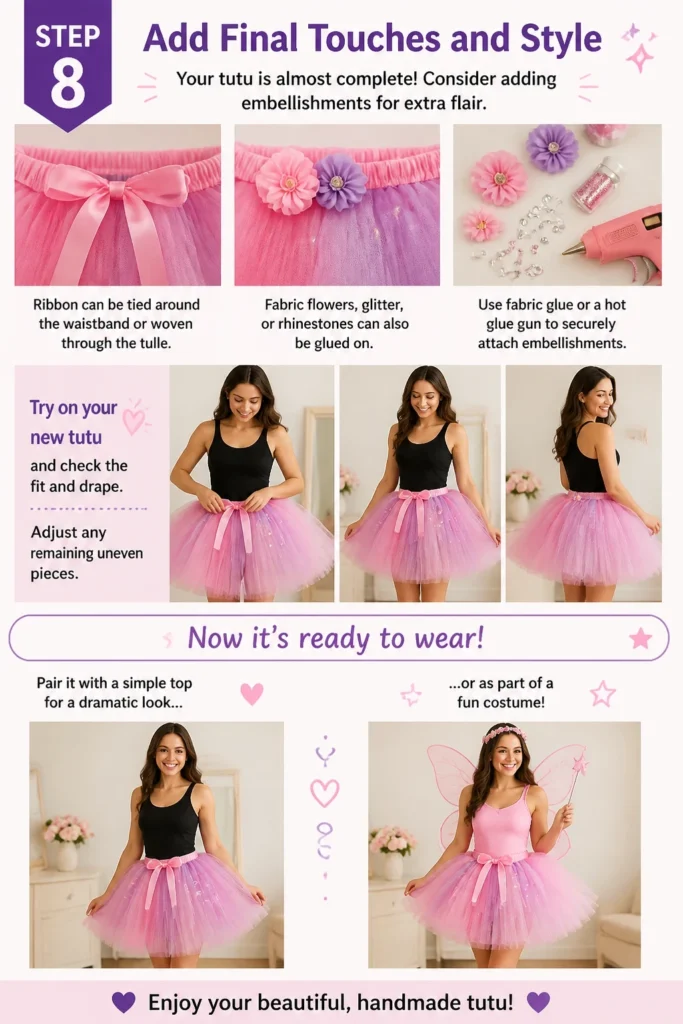
Step 8: Add Final Touches and Style
Your tutu is almost complete! Consider adding embellishments for extra flair.
Ribbon can be tied around the waistband or woven through the tulle. Fabric flowers, glitter, or rhinestones can also be glued on.
Try on your new tutu and check the fit and drape. Adjust any remaining uneven pieces.
Now it’s ready to wear! Pair it with a simple top for a dramatic look or as part of a fun costume.
Common Mistakes to Avoid
Not Measuring Correctly
Failing to accurately measure your waist can lead to a waistband that’s too tight or too loose. A too-tight band will be uncomfortable, while a too-loose one will constantly slip down. Always measure carefully and double-check your numbers before cutting the elastic.
Uneven Tulle Strips
If your tulle strips are cut at different lengths or widths, your finished tutu will look messy and unpolished. Take the time to cut all strips consistently. Using a rotary cutter and a cutting mat can greatly improve accuracy and speed.
Using the Wrong Elastic
Thin, flimsy elastic can roll or sag under the weight of the tulle, ruining the shape of your tutu. Always opt for a high-quality, non-roll elastic that is at least 1 inch wide. This provides a sturdy foundation for your skirt.
Not Enough Tulle
A sparse tutu is a common disappointment for first-time makers. It simply won’t have the desired volume and bounce. Always err on the side of buying more tulle than you think you’ll need, especially for a full adult skirt. You can always use leftover tulle for other crafts.
Troubleshooting
My Tutu Looks Sparse and Lacks Volume
This usually means you haven’t used enough tulle strips or the strips are too narrow. To fix this, simply add more tulle strips to the existing waistband. Push the current knots together to create space, then tie in additional strips until you achieve your desired fullness.
The Tutu Length is Uneven After Tying
Minor unevenness is common before trimming. If there are significant differences, it’s likely due to inconsistent tulle strip cutting. Lay the tutu flat or hang it on a hanger, then carefully trim all the strips to your desired uniform length using sharp fabric scissors.
My Waistband Keeps Rolling or Twisting
A rolling waistband often indicates that the elastic is too thin or not strong enough for the weight of the tulle. In the future, use a wider (at least 1-inch) and sturdier non-roll elastic. For an existing tutu, you can try sewing a piece of stiff interfacing or grosgrain ribbon to the inside of the waistband for added support.
Key Takeaways
- Accurate waist measurement and elastic preparation are crucial for a comfortable fit.
- Cut tulle strips consistently in both length and width for a polished look.
- Use a high-quality, non-roll elastic for a durable and supportive waistband.
- Attach a generous amount of tulle strips to achieve desired fullness and opacity.
- Fluff, shape, and carefully trim your tutu for a professional and even finish.
- Personalize your tutu with embellishments to make it uniquely yours.
Frequently Asked Questions
Can I sew a tutu instead of tying it?
Yes, you absolutely can! Sewing a tutu typically involves gathering strips of tulle and sewing them onto a fabric waistband. This method can create a very neat and durable finish, but it requires basic sewing machine skills.
What kind of tulle is best for a women’s tutu?
For a classic, voluminous tutu, a stiffer netting or crinoline tulle works well. For a softer, more flowing look, choose nylon tulle or bridal illusion tulle. You can also layer different types for texture.
How much tulle do I need for an adult tutu?
This varies greatly depending on the desired fullness and length. For a moderately full, knee-length adult tutu (around 15-18 inches long), you might need 25-50 yards of 6-inch wide tulle on a spool, or 10-15 yards of wider tulle fabric. Always buy extra to be safe.
Can I wash my handmade tutu?
Hand-washing is generally recommended for tutus to protect the delicate tulle and knots. Fill a basin with cool water and a mild detergent, gently swish the tutu, rinse thoroughly, and then hang it to air dry. Avoid machine washing or drying, as this can damage the tulle and stretch the elastic.
Our Top Recommended Finds
- Rotary Cutter and Mat Set: Perfect for precisely and quickly cutting many tulle strips. It makes the cutting process much more efficient and accurate.
- High-Quality Fabric Scissors: Essential for clean, crisp cuts on tulle without snagging. A sharp pair will make trimming a breeze.
- 1.5-inch Non-Roll Elastic: Provides a sturdy and comfortable waistband that won’t twist or sag under the weight of the tulle.
Your Custom Tutu Awaits!
You now have all the knowledge and steps to create a stunning, custom tutu skirt. Imagine the possibilities, from vibrant costume pieces to elegant party wear. This project is a fantastic way to express your personal style.
Don’t stop here! Once you master the basic tied tutu, consider experimenting with multiple layers, different tulle textures, or even adding lights. The world of tutu making is full of creative potential. Start gathering your materials today and bring your unique vision to life!
Get Over 150+ Sewing and DIY Blueprints♡Beginner-friendly templates, step-by-step guides,
and weekly project ideas in your inbox.