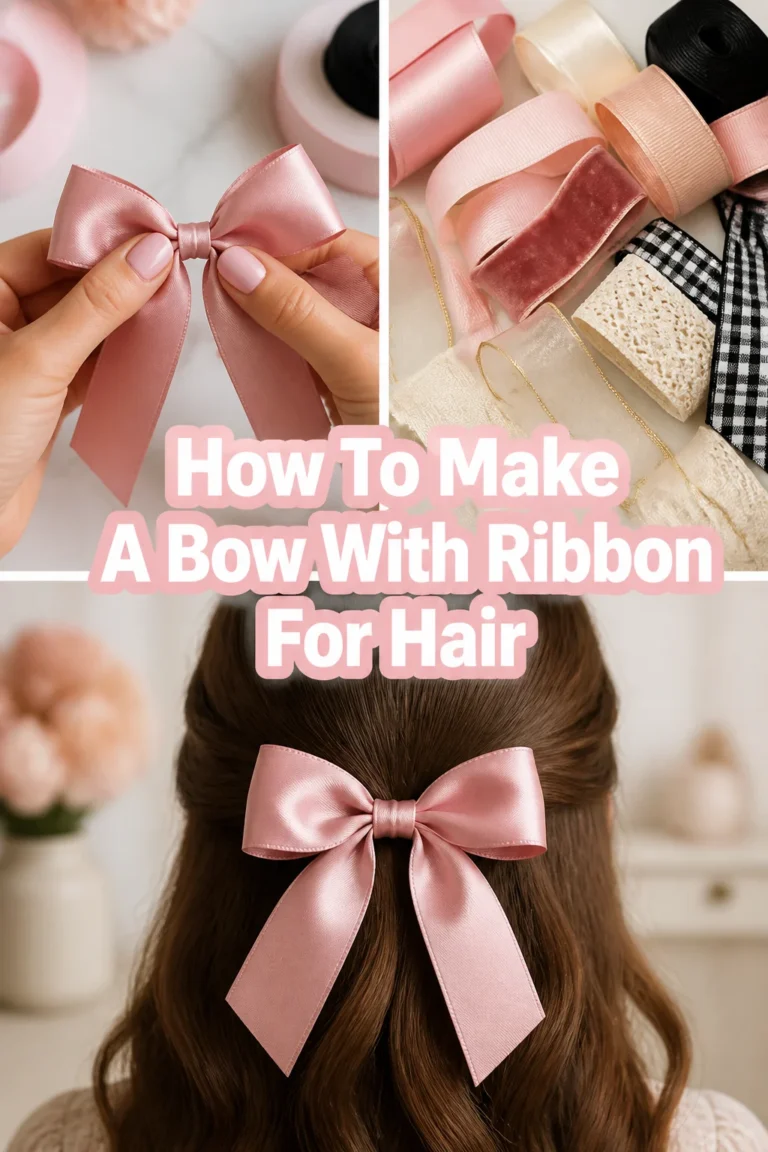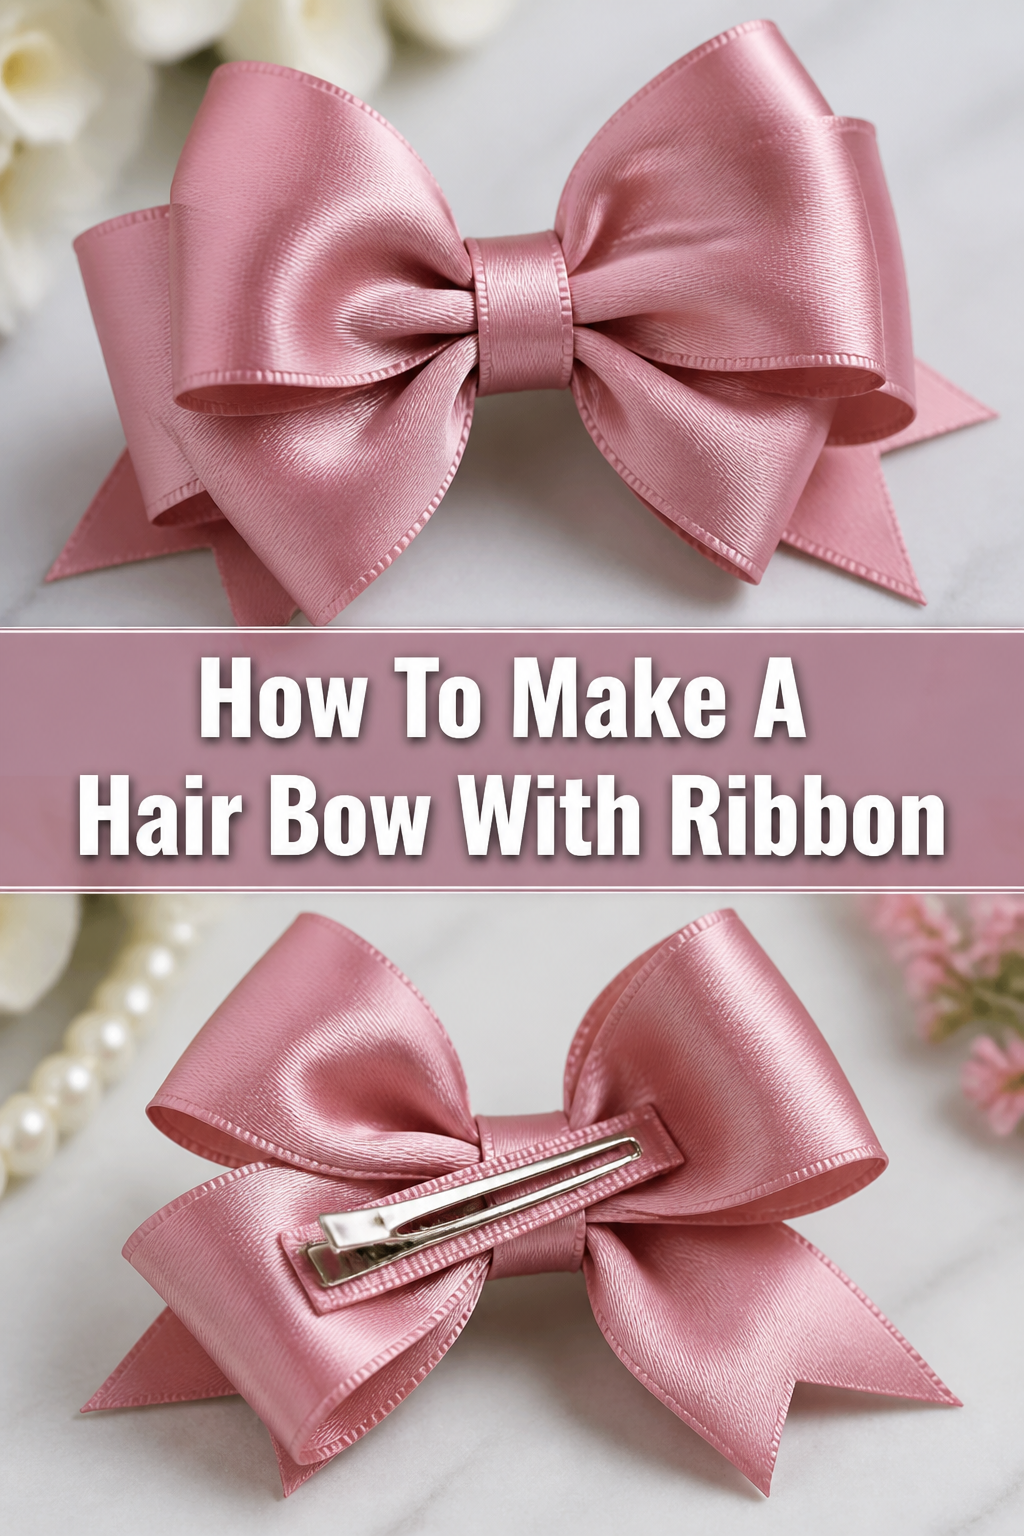
🎀 How To Make A Hair Bow With Ribbon

Beginner-friendly templates, step-by-step guides,
and weekly project ideas in your inbox.
Remember that special feeling of adding the perfect finishing touch to an outfit?
Crafting beautiful hair bows with ribbon is a wonderfully rewarding skill, and I’ve personally enjoyed making countless designs for friends and family over the years.
This guide shares all my tried-and-true techniques, ensuring you can create your own stunning, personalized accessories with confidence.
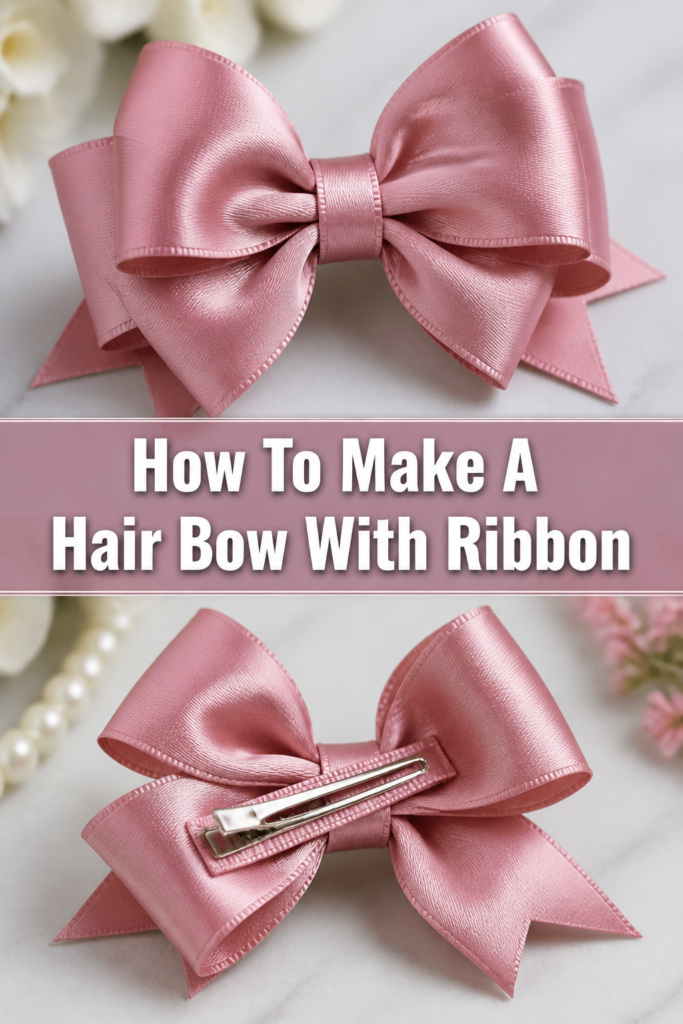
Quick Overview
You’re about to create a lovely, handmade hair bow that adds a unique flair to any hairstyle.
It’s a fantastic project for personal use or thoughtful gifting, bringing a touch of charm and creativity to your everyday.
- Time needed: 15-30 minutes (per bow)
- Difficulty: Beginner
- What you’ll need: Ribbon, sharp scissors, needle, thread, hot glue gun, hair clip or elastic band.
Step-by-Step Instructions
Step 1: Gather Your Materials
Before you begin, ensure everything you need is within easy reach on a clean, flat surface.
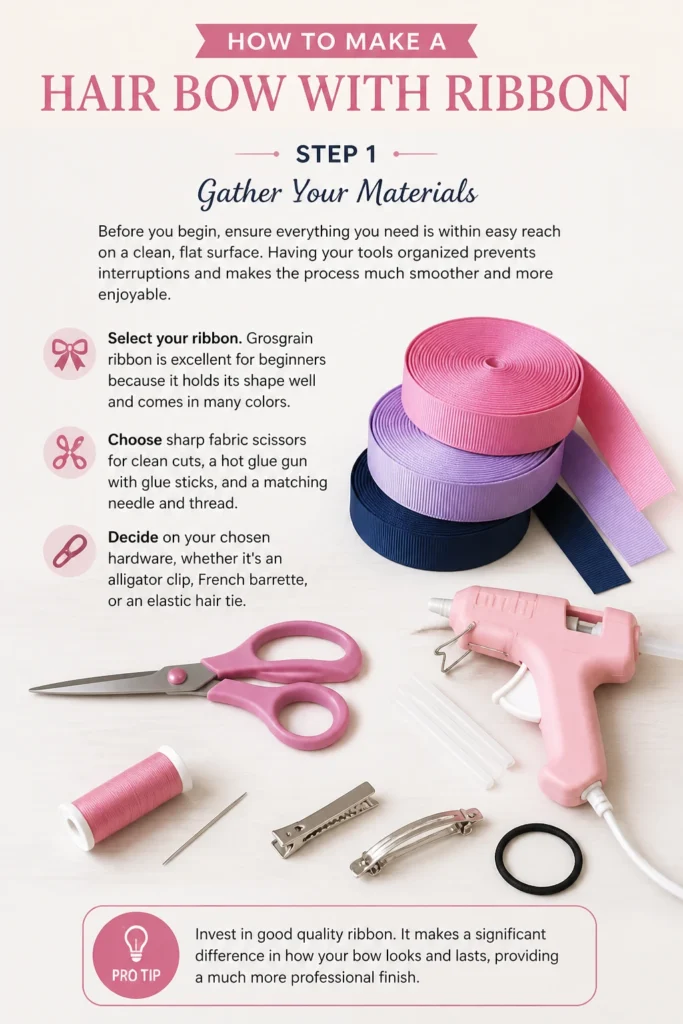
Having your tools organized prevents interruptions and makes the process much smoother and more enjoyable.
Select your ribbon. Grosgrain ribbon is excellent for beginners because it holds its shape well and comes in many colors.
Choose sharp fabric scissors for clean cuts, a hot glue gun with glue sticks, and a matching needle and thread.
Decide on your chosen hardware, whether it’s an alligator clip, French barrette, or an elastic hair tie.
Pro Tip: Invest in good quality ribbon. It makes a significant difference in how your bow looks and lasts, providing a much more professional finish.
Step 2: Cut Your Ribbon Pieces
The length and number of ribbon pieces will determine the size and fullness of your finished bow.
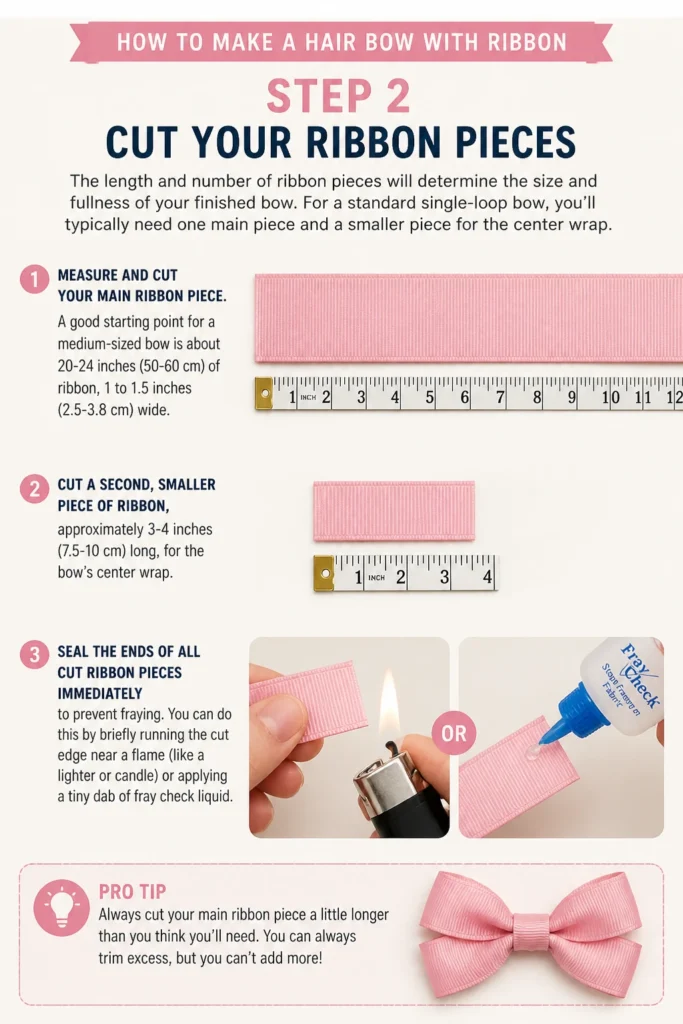
For a standard single-loop bow, you’ll typically need one main piece and a smaller piece for the center wrap.
Measure and cut your main ribbon piece. A good starting point for a medium-sized bow is about 20-24 inches (50-60 cm) of ribbon, 1 to 1.5 inches (2.5-3.8 cm) wide.
Cut a second, smaller piece of ribbon, approximately 3-4 inches (7.5-10 cm) long, for the bow’s center wrap.
Seal the ends of all cut ribbon pieces immediately to prevent fraying. You can do this by briefly running the cut edge near a flame (like a lighter or candle) or applying a tiny dab of fray check liquid.
Pro Tip: Always cut your main ribbon piece a little longer than you think you’ll need. You can always trim excess, but you can’t add more if it’s too short.
Step 3: Form the Main Bow Loops
This step creates the classic bow shape, forming the loops that give your bow its volume and structure.
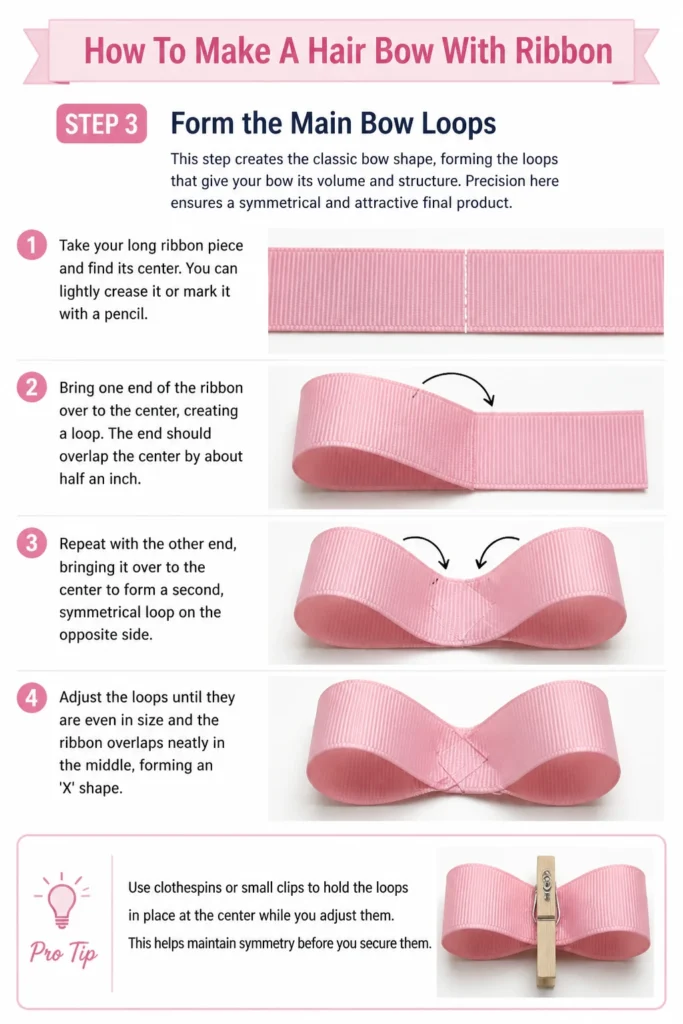
Precision here ensures a symmetrical and attractive final product.
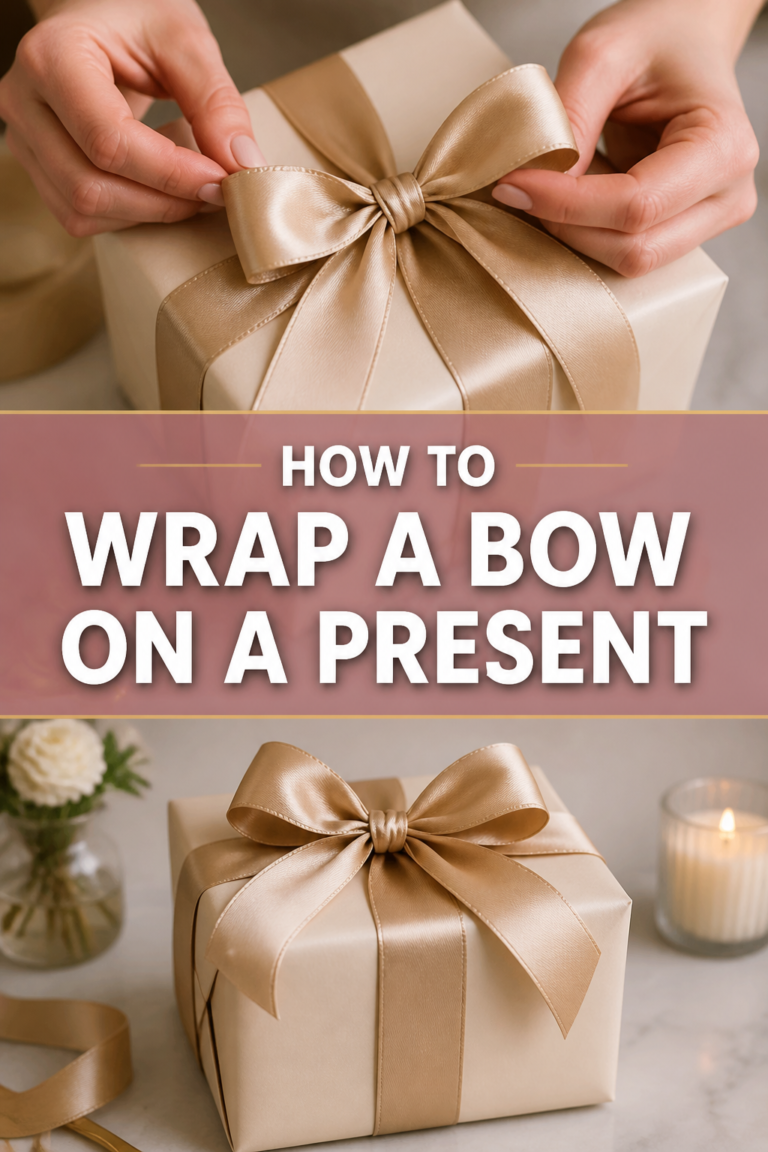
Take your long ribbon piece and find its center. You can lightly crease it or mark it with a pencil.
Bring one end of the ribbon over to the center, creating a loop. The end should overlap the center by about half an inch.
Repeat with the other end, bringing it over to the center to form a second, symmetrical loop on the opposite side.
Adjust the loops until they are even in size and the ribbon overlaps neatly in the middle, forming an ‘X’ shape.
Pro Tip: Use clothespins or small clips to hold the loops in place at the center while you adjust them. This helps maintain symmetry before you secure them.
Step 4: Secure the Bow’s Center
Once your loops are perfectly formed, you need to firmly secure the center to hold the bow’s shape.
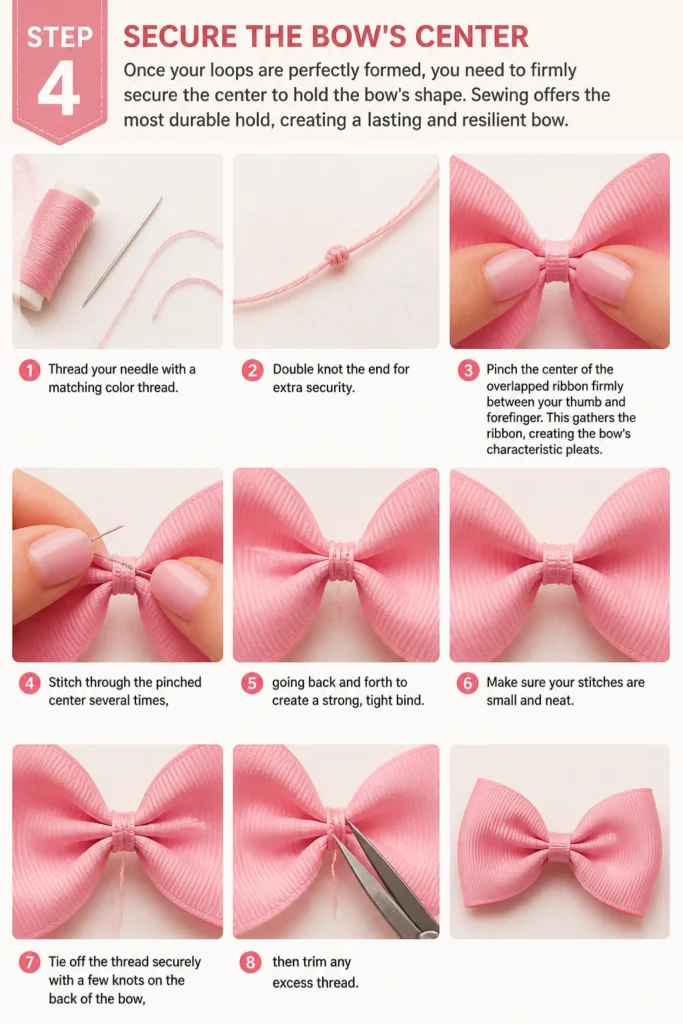
Sewing offers the most durable hold, creating a lasting and resilient bow.
Thread your needle with a matching color thread. Double knot the end for extra security.
Pinch the center of the overlapped ribbon firmly between your thumb and forefinger. This gathers the ribbon, creating the bow’s characteristic pleats.
Stitch through the pinched center several times, going back and forth to create a strong, tight bind. Make sure your stitches are small and neat.
Tie off the thread securely with a few knots on the back of the bow, then trim any excess thread.
Step 5: Attach the Center Wrap
The center wrap not only conceals your stitches but also adds a refined, finished look to your bow.
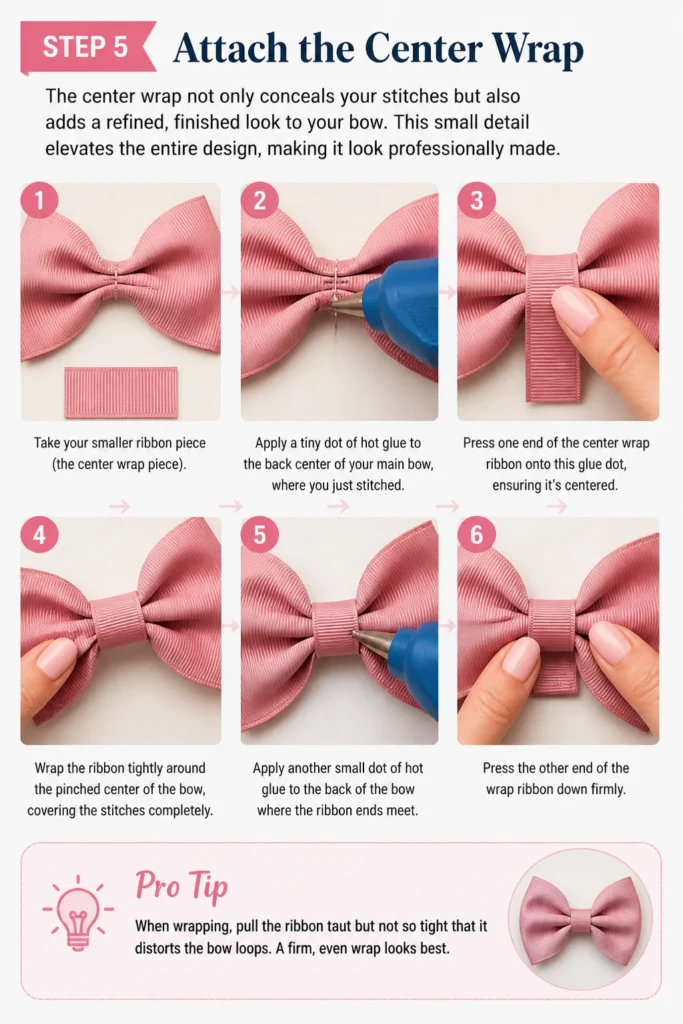
This small detail elevates the entire design, making it look professionally made.
Take your smaller ribbon piece (the center wrap piece).
Apply a tiny dot of hot glue to the back center of your main bow, where you just stitched.
Press one end of the center wrap ribbon onto this glue dot, ensuring it’s centered.
Wrap the ribbon tightly around the pinched center of the bow, covering the stitches completely.
Apply another small dot of hot glue to the back of the bow where the ribbon ends meet, then press the other end of the wrap ribbon down firmly.
Pro Tip: When wrapping, pull the ribbon taut but not so tight that it distorts the bow loops. A firm, even wrap looks best.
Step 6: Attach the Bow to Hardware
This is where your ribbon creation transforms into a functional hair accessory.
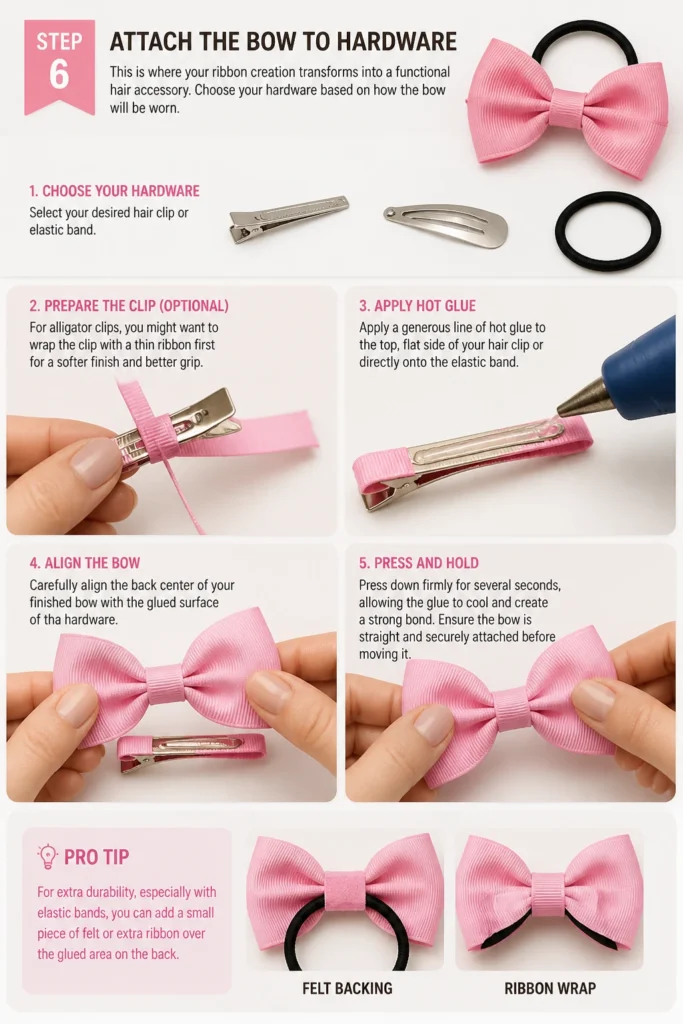
Choose your hardware based on how the bow will be worn.
Select your desired hair clip or elastic band. For alligator clips, you might want to wrap the clip with a thin ribbon first for a softer finish and better grip.
Apply a generous line of hot glue to the top, flat side of your hair clip or directly onto the elastic band.
Carefully align the back center of your finished bow with the glued surface of the hardware.
Press down firmly for several seconds, allowing the glue to cool and create a strong bond.
Ensure the bow is straight and securely attached before moving it.
Pro Tip: For extra durability, especially with elastic bands, you can add a small piece of felt or extra ribbon over the glued area on the back of the bow, sandwiching the hardware in place.
Step 7: Refine and Trim
The final touches ensure your bow is perfectly shaped and polished.
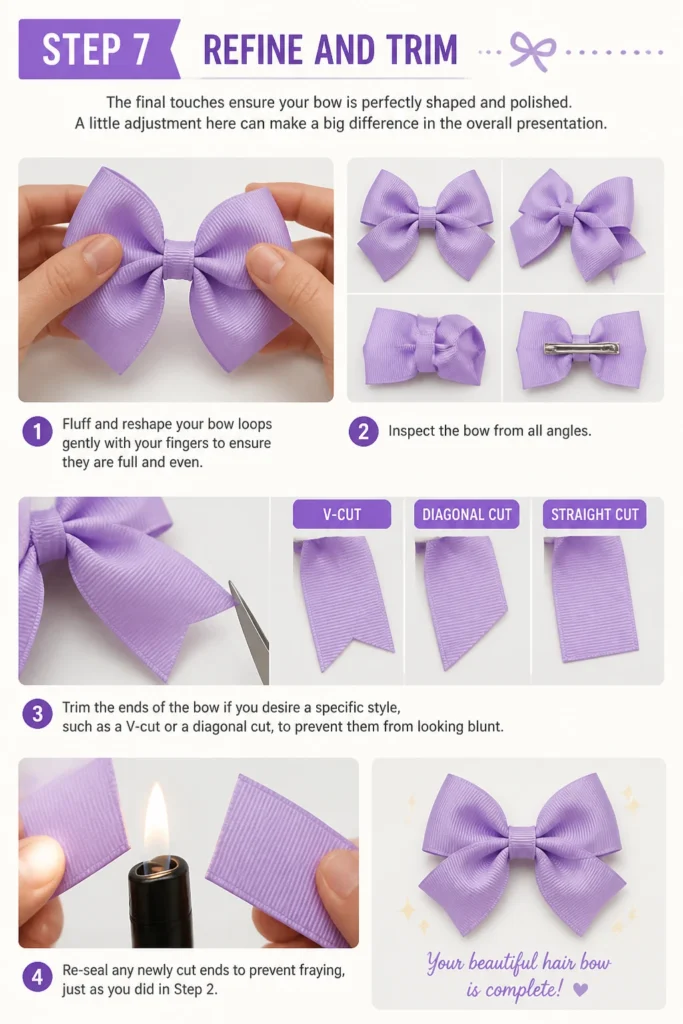
A little adjustment here can make a big difference in the overall presentation.
Fluff and reshape your bow loops gently with your fingers to ensure they are full and even.
Inspect the bow from all angles. Look for any stray threads or uneven edges.
Trim the ends of the bow if you desire a specific style, such as a V-cut or a diagonal cut, to prevent them from looking blunt.
Re-seal any newly cut ends to prevent fraying, just as you did in Step 2.
Step 8: Embellish Your Bow (Optional)
Adding embellishments allows you to truly personalize your hair bow and make it unique.
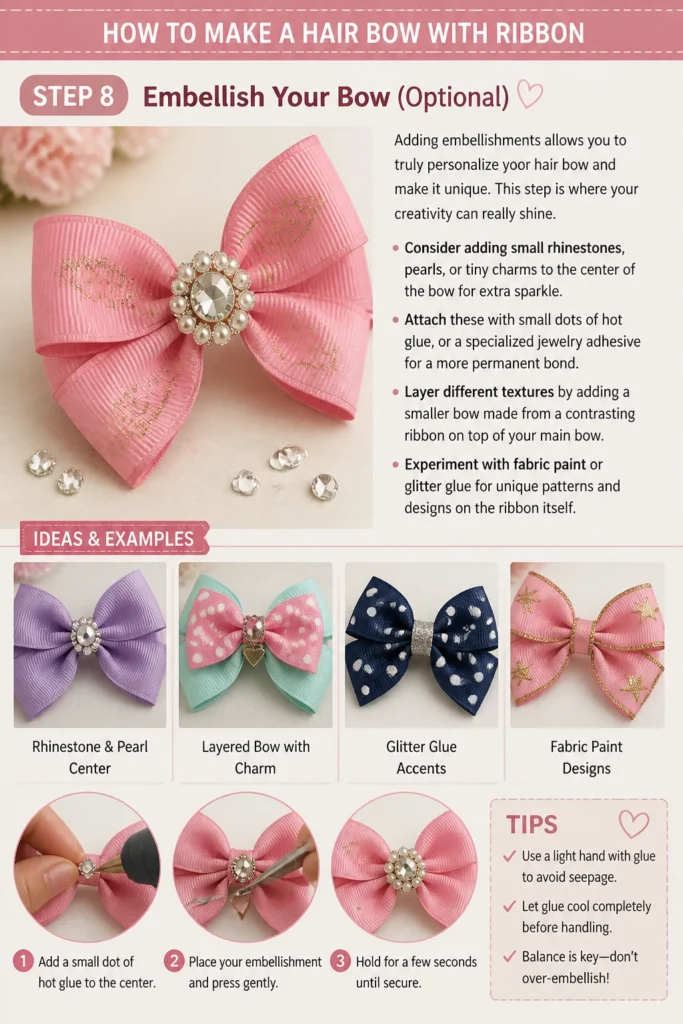
This step is where your creativity can really shine.
Consider adding small rhinestones, pearls, or tiny charms to the center of the bow for extra sparkle.
Attach these with small dots of hot glue, or a specialized jewelry adhesive for a more permanent bond.
Layer different textures by adding a smaller bow made from a contrasting ribbon on top of your main bow.
Experiment with fabric paint or glitter glue for unique patterns and designs on the ribbon itself.
Common Mistakes to Avoid
Cutting Ribbon Too Short
Many beginners underestimate the amount of ribbon needed, especially for the main loops. Cutting ribbon too short results in a small, cramped bow that is difficult to manipulate and tie.
Always err on the side of caution and cut a longer piece. You can always trim excess, but adding length is impossible once cut. A longer piece allows for more generous loops and easier handling during the shaping process.
Uneven Loops
A bow’s charm lies in its symmetry. If your loops are uneven, one side will appear larger or droopier than the other, making the bow look lopsided and unprofessional.
Take your time in Step 3 to carefully adjust each loop. Use a ruler if needed, or gently tug and pull until both loops match perfectly in size and shape before securing the center.
Using Too Much Hot Glue
While hot glue is a fantastic tool for bow making, over-application can lead to a stiff, lumpy, and unsightly bow. Excess glue can seep through the ribbon, creating hard spots and a messy appearance.
Use hot glue sparingly. Small, precise dots or thin lines are usually sufficient to create a strong bond. Practice on a scrap piece of ribbon to get a feel for the right amount before applying it to your finished bow.
Skipping Heat Sealing
Frayed ribbon edges can quickly ruin the look of a beautiful handmade bow, making it appear old and worn before its time. Skipping the heat-sealing step is a common oversight.
Always heat-seal the ends of your ribbon pieces immediately after cutting. This simple step creates a clean, sealed edge that prevents fraying, significantly extending the life and pristine appearance of your bow.
Troubleshooting
Bow Looks Flat/Limp
Sometimes, a finished bow might lack the desired fullness or appear too flat, not holding its shape well. This can be disappointing after all your effort.
To fix this, consider using a stiffer ribbon type, like grosgrain, for future bows. For existing bows, you can gently spray them with a fabric stiffener or hairspray (from a distance) to help them hold their form. Also, ensure your loops are generously sized and not pulled too tightly during assembly.
Ribbon Ends Fraying
Despite best efforts, ribbon ends might start to fray, especially after some wear. This is a common issue, particularly with satin or thinner ribbons.
If fraying occurs, carefully trim the frayed threads with sharp scissors. Then, re-seal the ends using a lighter or a dedicated fray-check liquid. For longer-lasting prevention, always heat-seal all ribbon ends thoroughly at the beginning of your project.
Bow Doesn’t Stay Attached to Clip
It’s frustrating when your beautiful bow separates from its hardware. This often happens if the glue bond isn’t strong enough or the surface wasn’t prepared properly.
Ensure you use enough hot glue to create a substantial bond between the bow and the clip, pressing firmly until it cools. For plastic or metal clips, you can lightly scuff the surface with sandpaper to give the glue something better to adhere to. For extra security, wrap the clip with a thin ribbon first, then glue the bow to the wrapped ribbon.
Key Takeaways
- Choosing the right ribbon material significantly impacts the bow’s final look and durability.
- Precision in cutting and forming symmetrical loops is essential for a professional finish.
- Heat sealing ribbon ends prevents fraying, extending the life and beauty of your handmade bows.
- Securely stitching the center of the bow provides a strong foundation before adding the wrap.
- Using hot glue sparingly prevents stiffness and mess, ensuring a neat and clean appearance.
- Don’t be afraid to personalize your bows with embellishments to reflect your unique style.
Frequently Asked Questions
What type of ribbon is best for hair bows?
Grosgrain ribbon is highly recommended for beginners due to its sturdy texture, which holds shape well. Satin ribbon offers a luxurious, shiny finish, while velvet ribbon provides a rich, soft look. The best choice often depends on the desired aesthetic and the bow’s intended use.
How do I make a multi-layered bow?
To create a multi-layered bow, simply make several bows of varying sizes and stack them. Start with the largest bow as the base, then glue smaller bows on top, centering each one. You can use different ribbon types or colors for each layer to add depth and visual interest.
Can I wash a ribbon hair bow?
Most ribbon hair bows are not designed for machine washing, as this can damage the ribbon, dissolve the glue, or distort the shape. It’s best to spot clean any soiled areas with a damp cloth and a mild soap solution, then allow it to air dry completely.
What’s the best way to store my bows?
Storing your bows properly helps maintain their shape and prevents them from getting crushed or dusty. Consider using a dedicated bow holder, which typically has clips or ribbons to hang bows. Alternatively, store them flat in a drawer or a box, ensuring they are not piled on top of each other.
Our Top Recommended Finds
- Grosgrain Ribbon Assortment: Perfect for beginners, offering a wide range of colors and widths to experiment with different bow styles.
- Mini Hot Glue Gun with Fine Tip: Provides precise application, crucial for neat work and avoiding excess glue on your delicate bows.
- Sharp Fabric Scissors: Ensures clean, crisp cuts through ribbon, preventing frayed edges and contributing to a professional finish.
Crafting Your Signature Style
You now possess the knowledge and practical steps to create beautiful, personalized hair bows with ribbon.
This skill opens up a world of creative possibilities, allowing you to match accessories to any outfit or occasion, or even craft thoughtful gifts.
Don’t wait—gather your materials today and start transforming simple ribbons into stunning hair adornments. Your unique style is just a bow away!
Beginner-friendly templates, step-by-step guides,
and weekly project ideas in your inbox.