How To Make A Toga Out Of A Sheet

Beginner-friendly templates, step-by-step guides,
and weekly project ideas in your inbox.
Welcome to your ultimate guide for crafting a classic toga from a simple bedsheet.
I’ve personally draped countless sheets for parties and costume events, perfecting the art of a comfortable, stylish, and secure toga.
This guide distills years of trial and error into straightforward steps, ensuring your DIY toga looks authentically Roman and stays put all day or night.

Quick Overview
You’re about to transform an ordinary sheet into an iconic garment, perfect for costume parties, historical reenactments, or just a bit of fun.
This process is surprisingly simple, focusing on strategic folds and secure fastenings to create an elegant drape.
- Time needed: 15-30 minutes
- Difficulty: Beginner
- What you’ll need: A flat sheet, safety pins, optional belt/rope
Step-by-Step Instructions
Step 1: Choose Your Sheet Wisely
Select a flat bedsheet, preferably a twin or queen size for most adults.
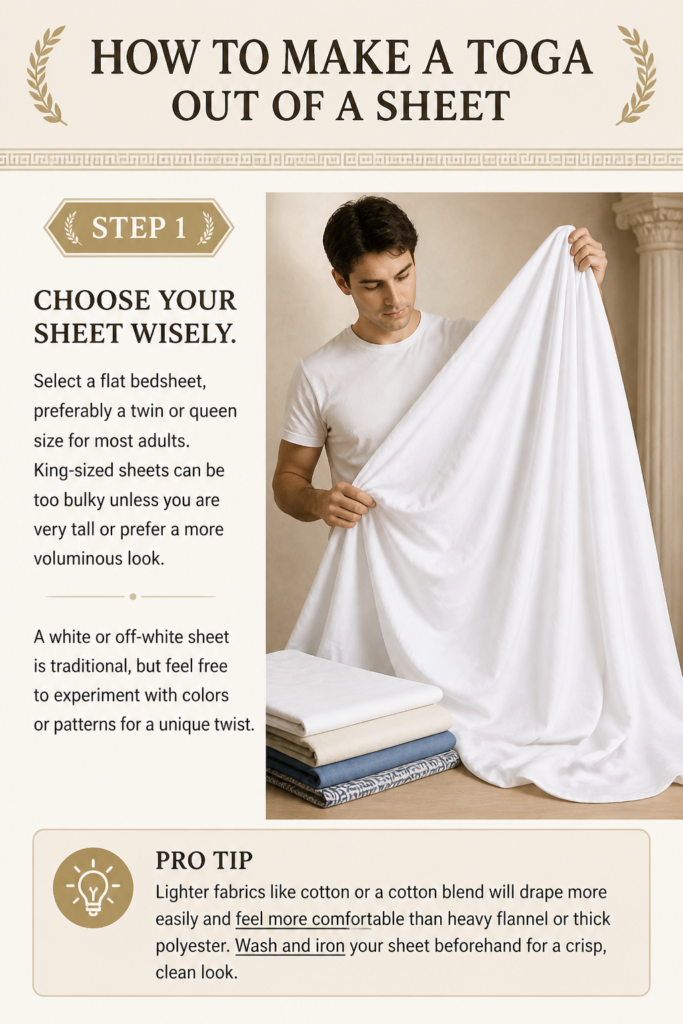
King-sized sheets can be too bulky unless you are very tall or prefer a more voluminous look.
A white or off-white sheet is traditional, but feel free to experiment with colors or patterns for a unique twist.
Pro Tip: Lighter fabrics like cotton or a cotton blend will drape more easily and feel more comfortable than heavy flannel or thick polyester. Wash and iron your sheet beforehand for a crisp, clean look.
Step 2: Prepare Your Sheet
Lay your chosen sheet out flat on a clean surface, like a bed or the floor.
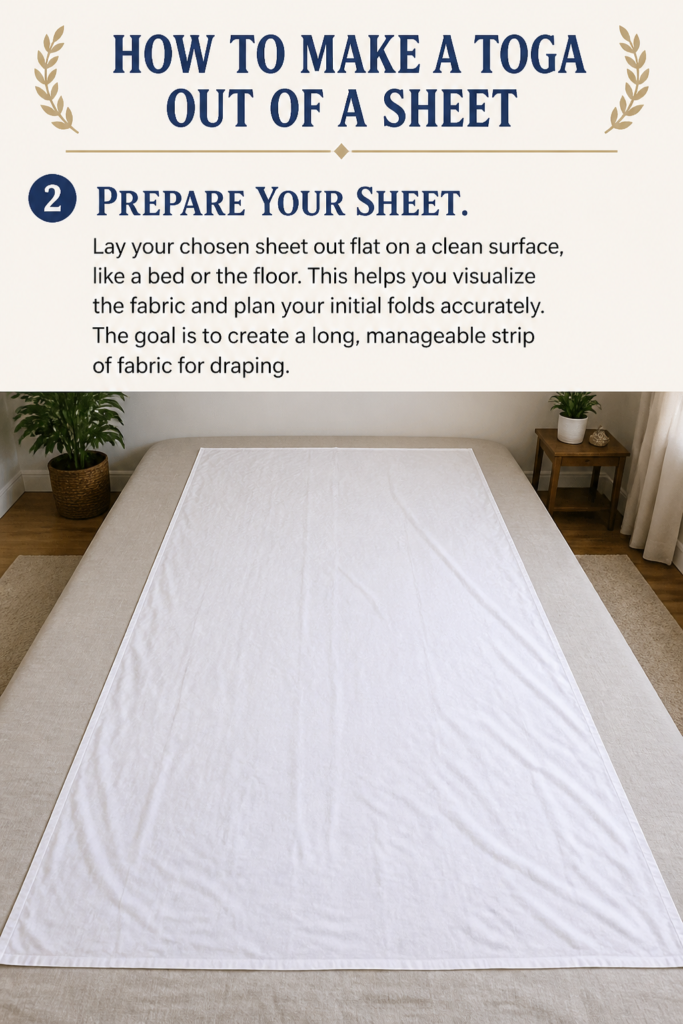
This helps you visualize the fabric and plan your initial folds accurately.
The goal is to create a long, manageable strip of fabric for draping.
Step 3: Create the Initial Fold
Fold the sheet lengthwise, bringing one long edge towards the other.
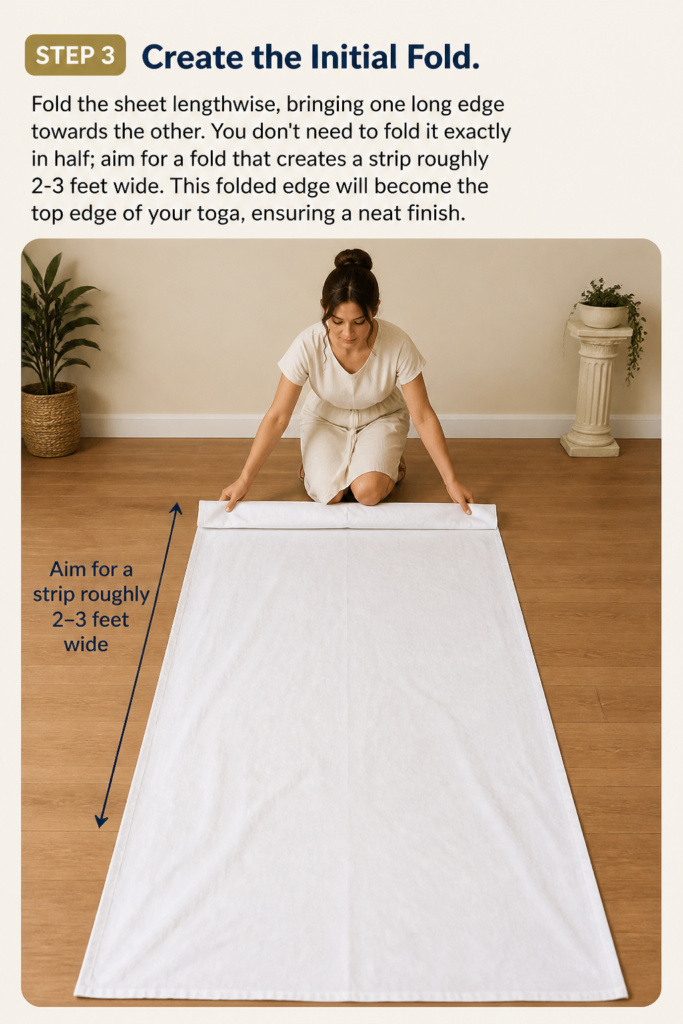
You don’t need to fold it exactly in half; aim for a fold that creates a strip roughly 2-3 feet wide.
This folded edge will become the top edge of your toga, ensuring a neat finish.
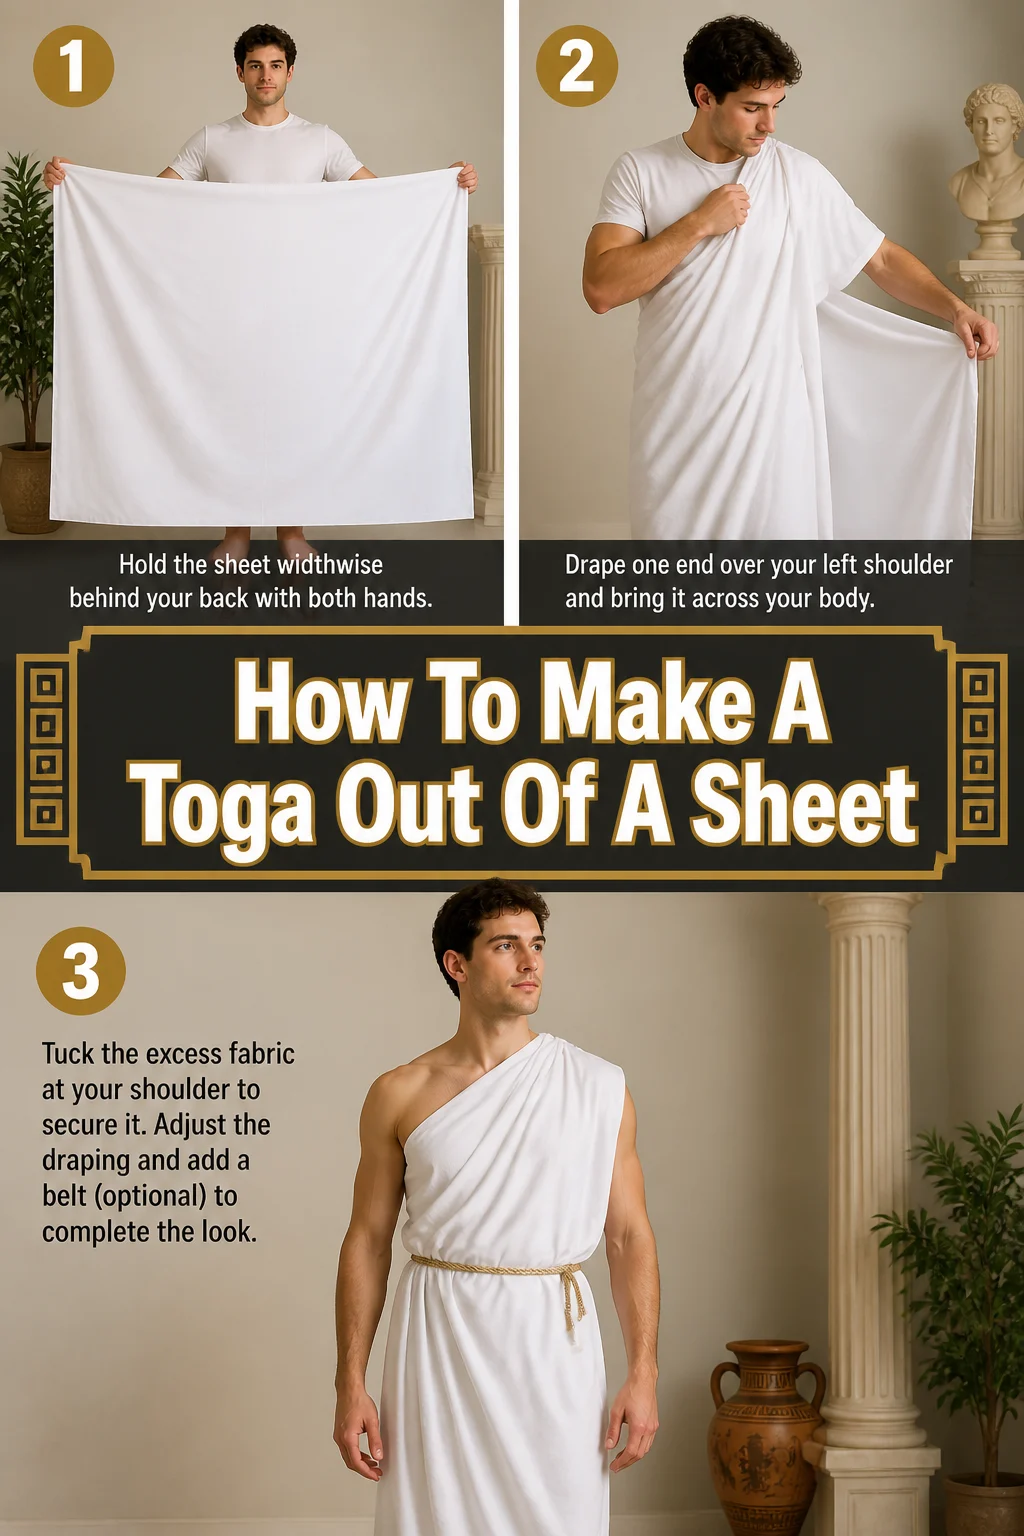
Step 4: Start the Drape – Over the Shoulder
Hold one end of your folded sheet and bring it over your left shoulder, letting about 1-2 feet of fabric hang down your back.
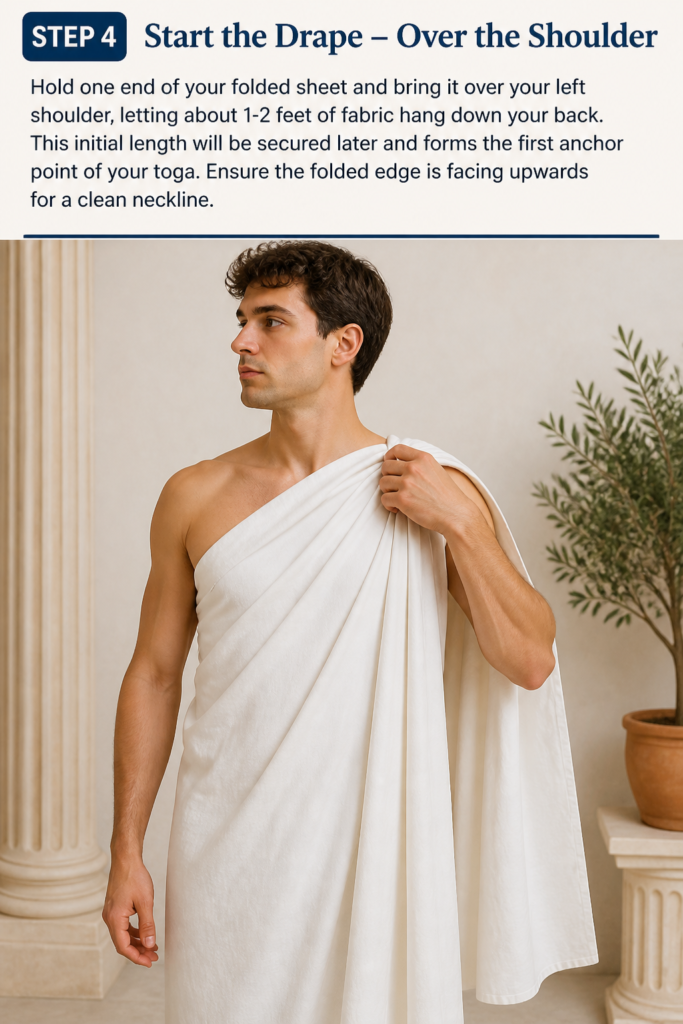
This initial length will be secured later and forms the first anchor point of your toga.
Ensure the folded edge is facing upwards for a clean neckline.
Step 5: Wrap Across the Body
Bring the long length of the sheet from your left shoulder, across your chest, and under your right armpit.
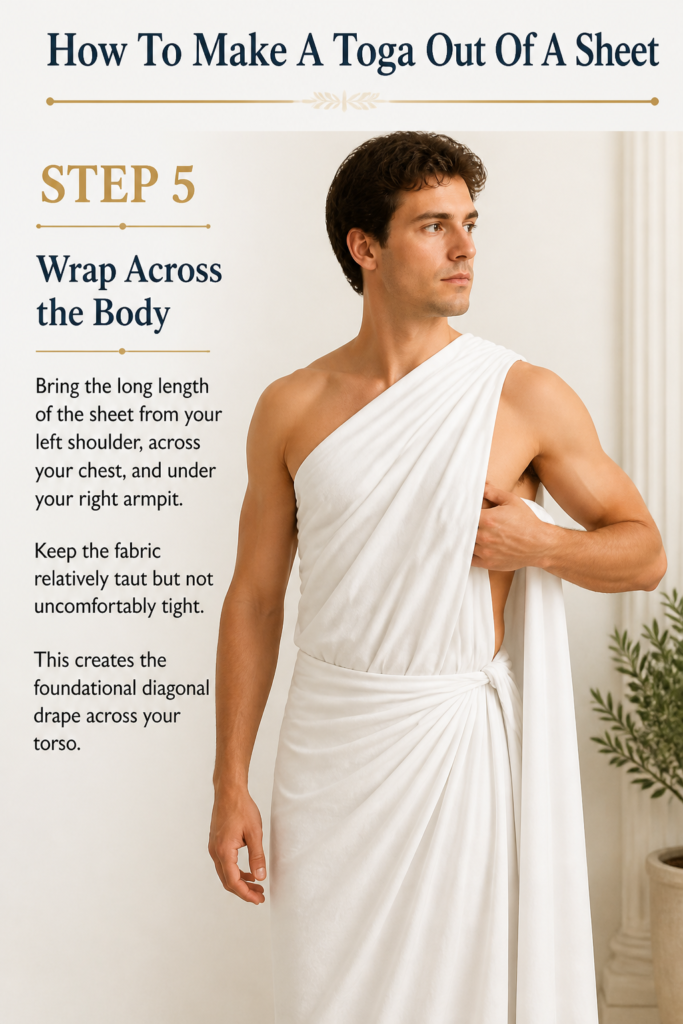
Keep the fabric relatively taut but not uncomfortably tight.
This creates the foundational diagonal drape across your torso.
Step 6: Secure Under the Armpit
Use a safety pin to secure the fabric where it passes under your right armpit.
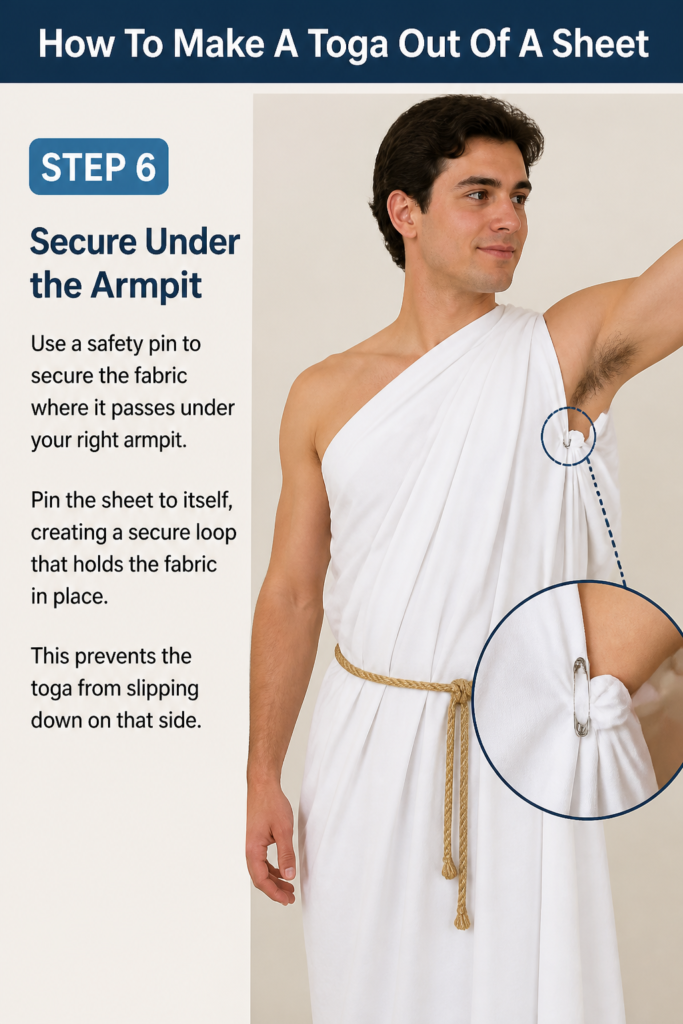
Pin the sheet to itself, creating a secure loop that holds the fabric in place.
This prevents the toga from slipping down on that side.
Step 7: Continue the Drape – Around the Back
Wrap the remaining long length of the sheet around your back, moving from your right side to your left.
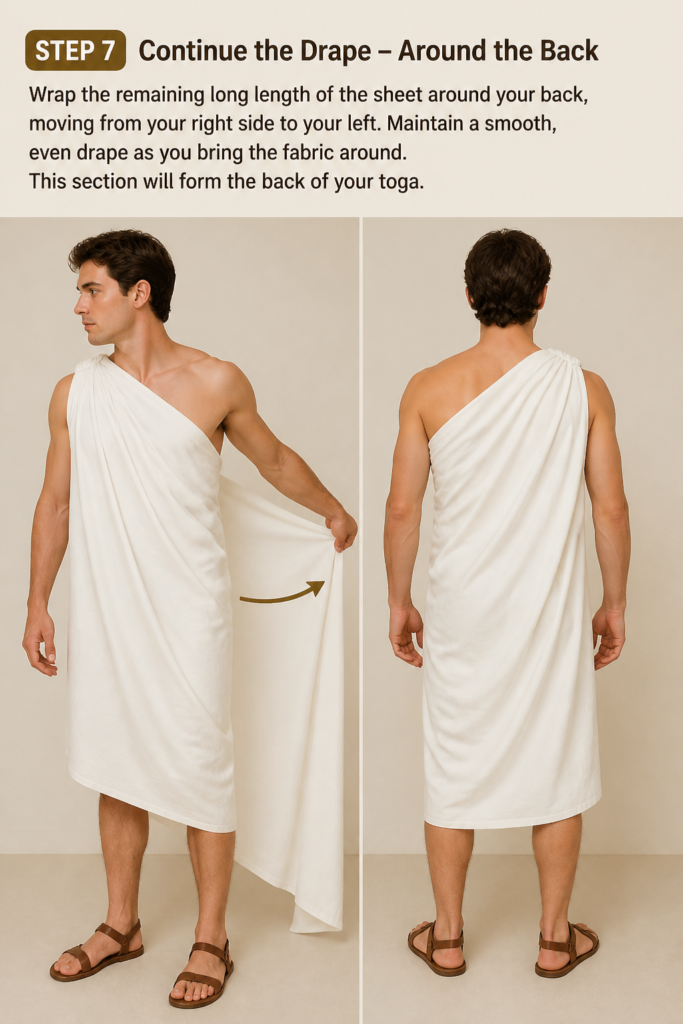
Maintain a smooth, even drape as you bring the fabric around.
This section will form the back of your toga.
Step 8: Bring it Over the Shoulder Again
Bring the sheet up and over your left shoulder once more, meeting the initial piece of fabric that was hanging down your back.
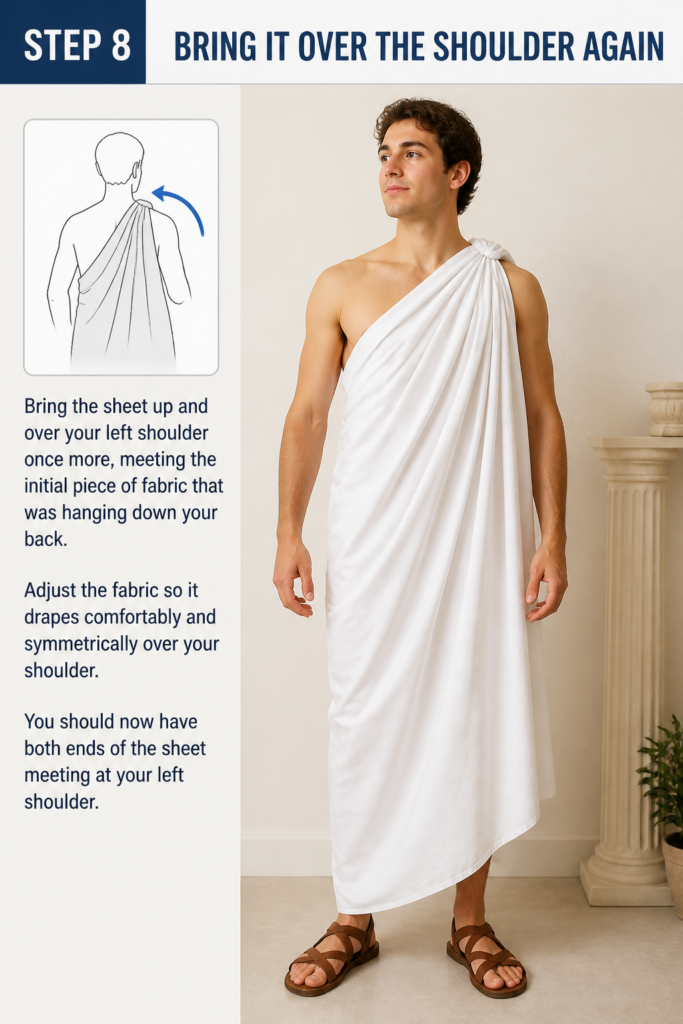
Adjust the fabric so it drapes comfortably and symmetrically over your shoulder.
You should now have both ends of the sheet meeting at your left shoulder.
Step 9: Finalize the Shoulder Fastening
Gather the two ends of the sheet at your left shoulder and secure them firmly with a large safety pin.
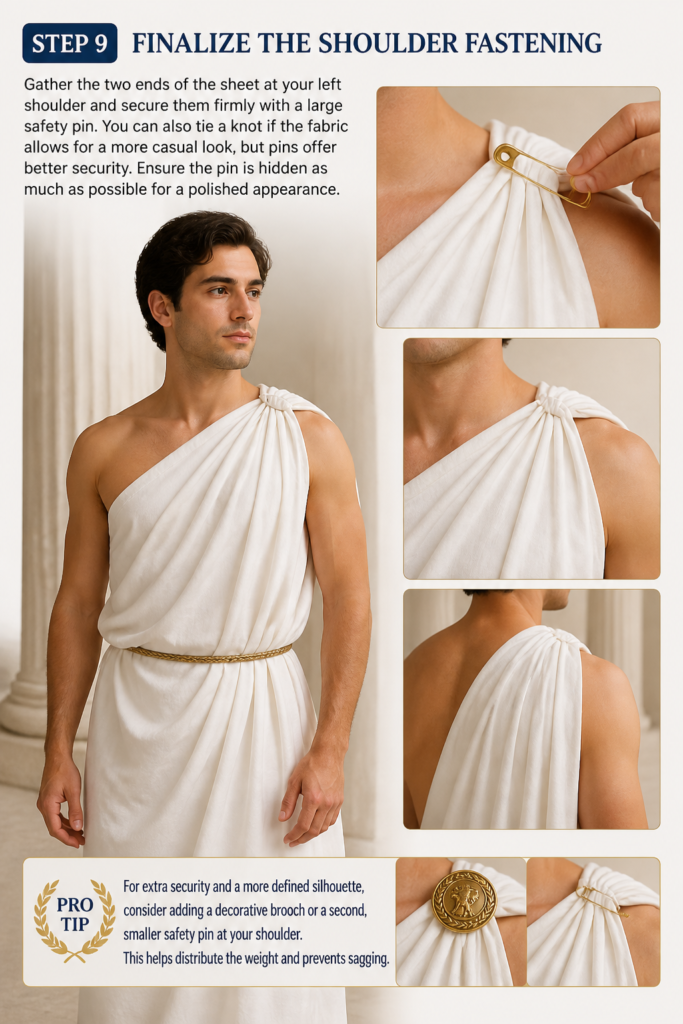
You can also tie a knot if the fabric allows for a more casual look, but pins offer better security.
Ensure the pin is hidden as much as possible for a polished appearance.
Pro Tip: For extra security and a more defined silhouette, consider adding a decorative brooch or a second, smaller safety pin at your shoulder. This helps distribute the weight and prevents sagging.
Step 10: Adjust and Accessorize
Adjust the folds and drapes of your toga until you achieve a look you like.
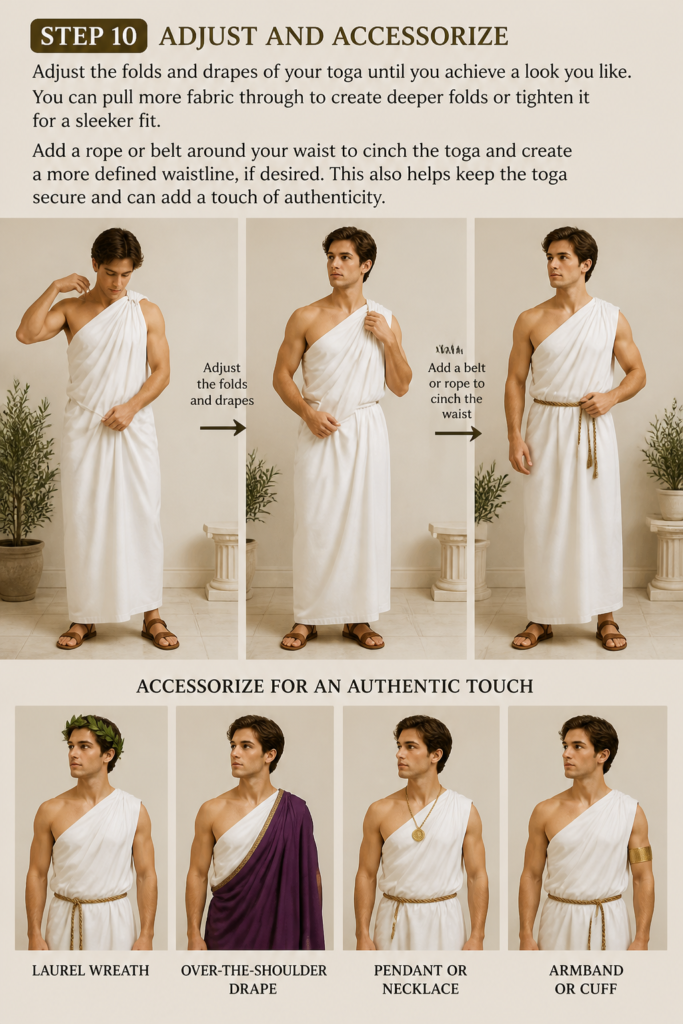
You can pull more fabric through to create deeper folds or tighten it for a sleeker fit.
Add a rope or belt around your waist to cinch the toga and create a more defined waistline, if desired.
This also helps keep the toga secure and can add a touch of authenticity.
Common Mistakes to Avoid
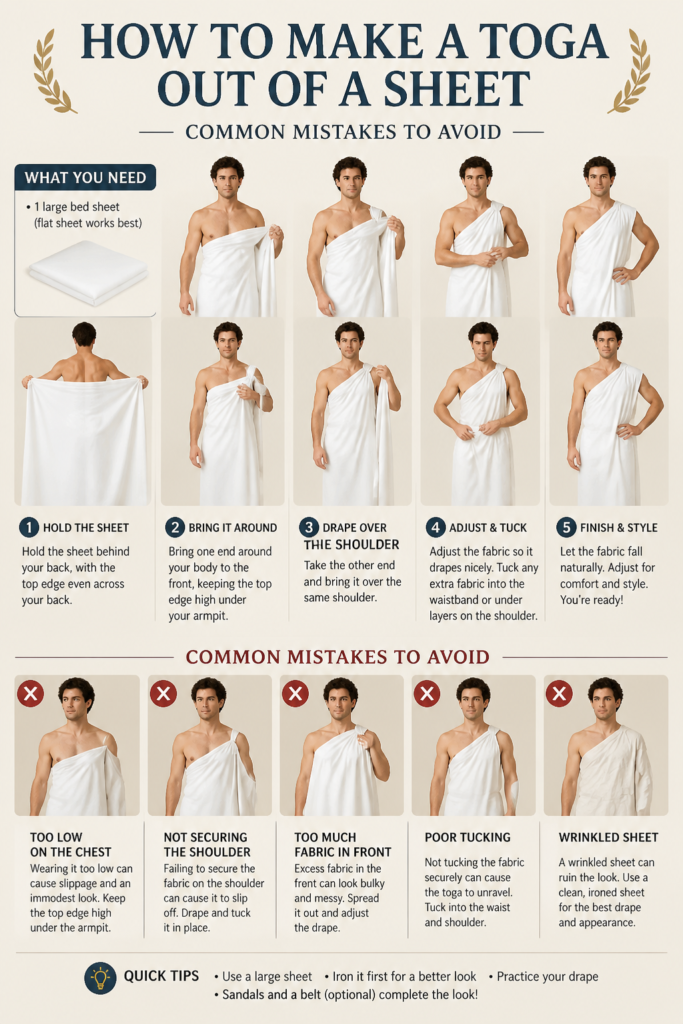
Using the Wrong Sheet Size
A common pitfall is grabbing any old sheet without considering its dimensions.
Too small, and your toga will look like a skimpy towel; too large, and you’ll be swimming in excess fabric, making it hard to manage and drape elegantly.
Always opt for a twin or queen flat sheet to strike the right balance for most adult body types.
Skipping the Safety Pins
Many believe a toga can be held together by pure willpower and strategic tucks, but this is a recipe for wardrobe malfunctions.
Without secure safety pins at critical points, your toga is prone to unraveling at the most inconvenient moments.
Invest in several large, sturdy safety pins to ensure your creation stays put.
Ignoring Fabric Weight and Type
Choosing a heavy, stiff fabric like canvas or a very thick flannel will result in a toga that lacks the classic flowing drape.
It will feel restrictive and look bulky, rather than elegant.
Lightweight cotton or linen blends are ideal as they flow beautifully and are comfortable to wear.
Not Practicing the Drape
Attempting to put on a toga for the first time just minutes before an event is asking for trouble.
Draping takes a little practice to get the hang of the folds and tension.
Do a trial run a day or two before to perfect your technique and ensure you know exactly where to pin.
Troubleshooting
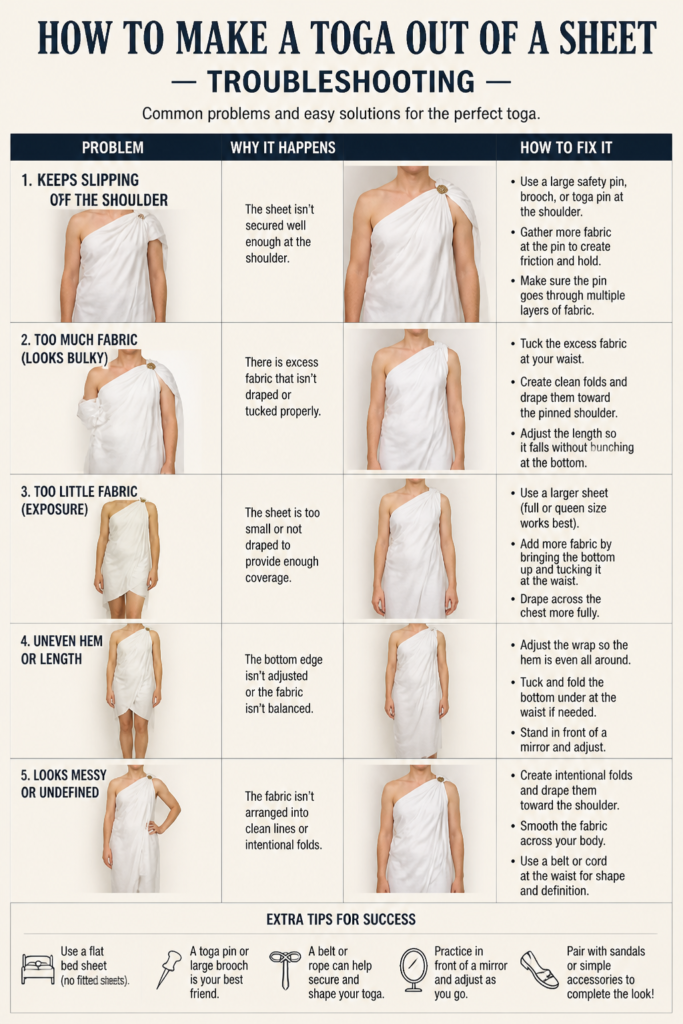
Toga Feels Too Loose or Keeps Slipping
If your toga feels like it’s constantly shifting or about to fall off, your pins might not be placed correctly or securely enough.
Re-evaluate the tension of the fabric as you wrap it around your body, ensuring it’s snug but not tight.
Add more safety pins, especially at the shoulder and under the armpit, to reinforce the structure.
A belt or rope cinched at the waist can also provide significant stability.
Excess Fabric Bunching Up
This usually happens if your sheet is too large for your frame or if you haven’t managed the folds effectively.
Try re-folding your sheet lengthwise in Step 3 to create a narrower strip before you start draping.
When wrapping, consciously smooth out the fabric and create intentional pleats rather than random bunches, securing them with discreet pins if necessary.
Uncomfortable Rubbing or Chafing
Sometimes the edges of the sheet or the safety pins can irritate your skin, especially under the arms or at the shoulder.
Ensure the safety pins are positioned on the outside layer of fabric, away from your skin, or consider covering the sharp parts with a small piece of fabric tape.
If the sheet itself is the issue, you might need a softer fabric or wear a thin undershirt to create a barrier.
Key Takeaways
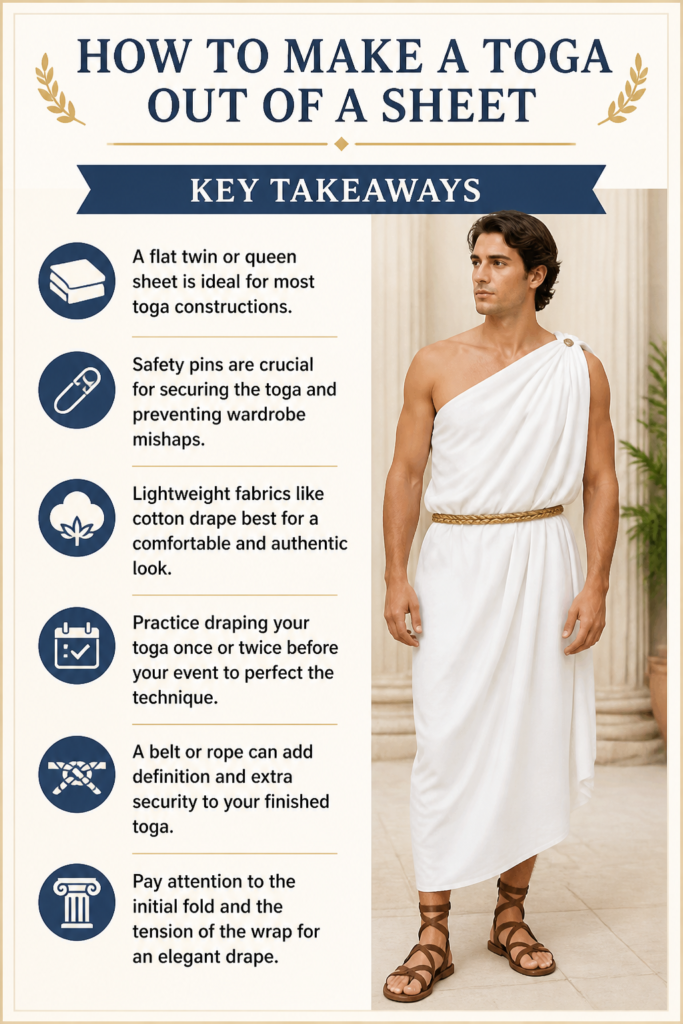
- A flat twin or queen sheet is ideal for most toga constructions.
- Safety pins are crucial for securing the toga and preventing wardrobe mishaps.
- Lightweight fabrics like cotton drape best for a comfortable and authentic look.
- Practice draping your toga once or twice before your event to perfect the technique.
- A belt or rope can add definition and extra security to your finished toga.
- Pay attention to the initial fold and the tension of the wrap for an elegant drape.
Frequently Asked Questions
Can I make a toga without safety pins?
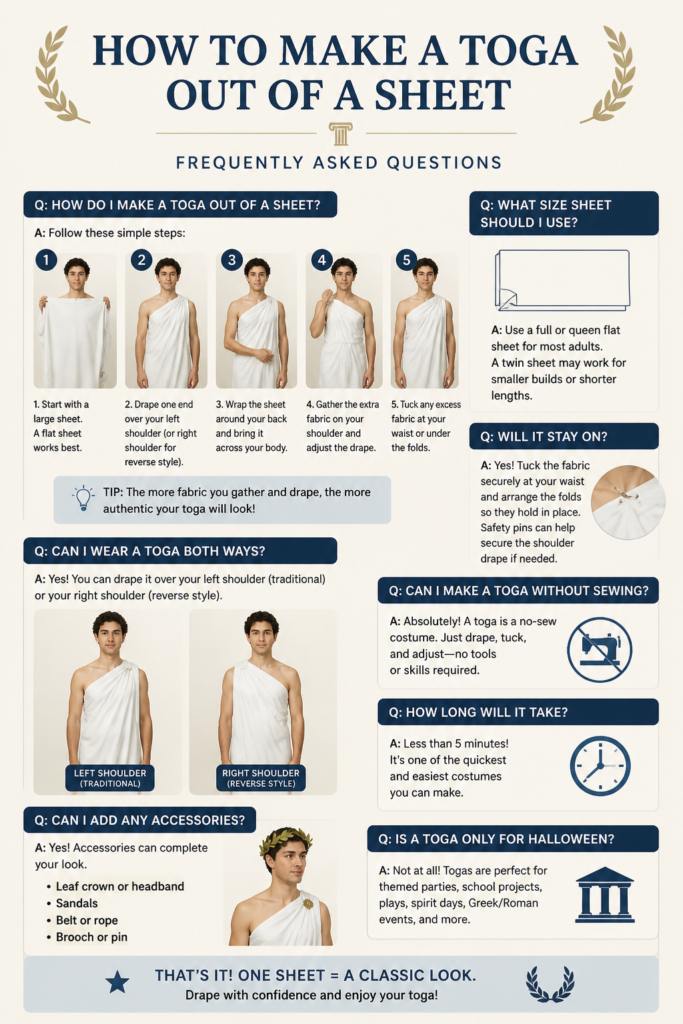
While technically possible by tying knots, it’s highly recommended to use safety pins for a secure and long-lasting drape. Knots can come undone, look bulky, and don’t offer the same level of stability as pins.
What if I only have a fitted sheet?
A fitted sheet is not ideal for making a toga due to its elasticated edges, which prevent a smooth drape. It’s best to use a flat sheet for an authentic and manageable toga creation.
How can I make my toga more ornate?
You can enhance your toga with various accessories. A decorative brooch at the shoulder, a braided rope belt, or even gold trim sewn along the edges of the sheet can elevate its look. Headpieces like laurel wreaths are also classic additions.
Can kids make a toga from a sheet?
Absolutely! A twin or even a crib-sized flat sheet works well for children. The steps remain the same, though you might need to adjust the initial fold to create a narrower strip of fabric to suit their smaller frame.
Our Top Recommended Finds
- Large Safety Pins: Essential for securing your toga effectively. Look for sturdy, rust-resistant pins that won’t easily bend.
- Cotton Flat Sheets: A plain white or off-white cotton flat sheet (twin or queen size) provides the perfect base for an authentic drape and comfortable wear.
- Gold Rope/Cording: For an instant upgrade, a simple gold rope can serve as a stylish belt, cinching the toga and adding a touch of Roman flair.
Embrace Your Inner Roman
You now possess all the knowledge to transform a simple sheet into a magnificent toga.
This isn’t just about creating a costume; it’s about embracing a bit of history and creativity.
Gather your materials, follow these steps, and prepare to channel your inner emperor or empress with confidence and style.
Beginner-friendly templates, step-by-step guides,
and weekly project ideas in your inbox.