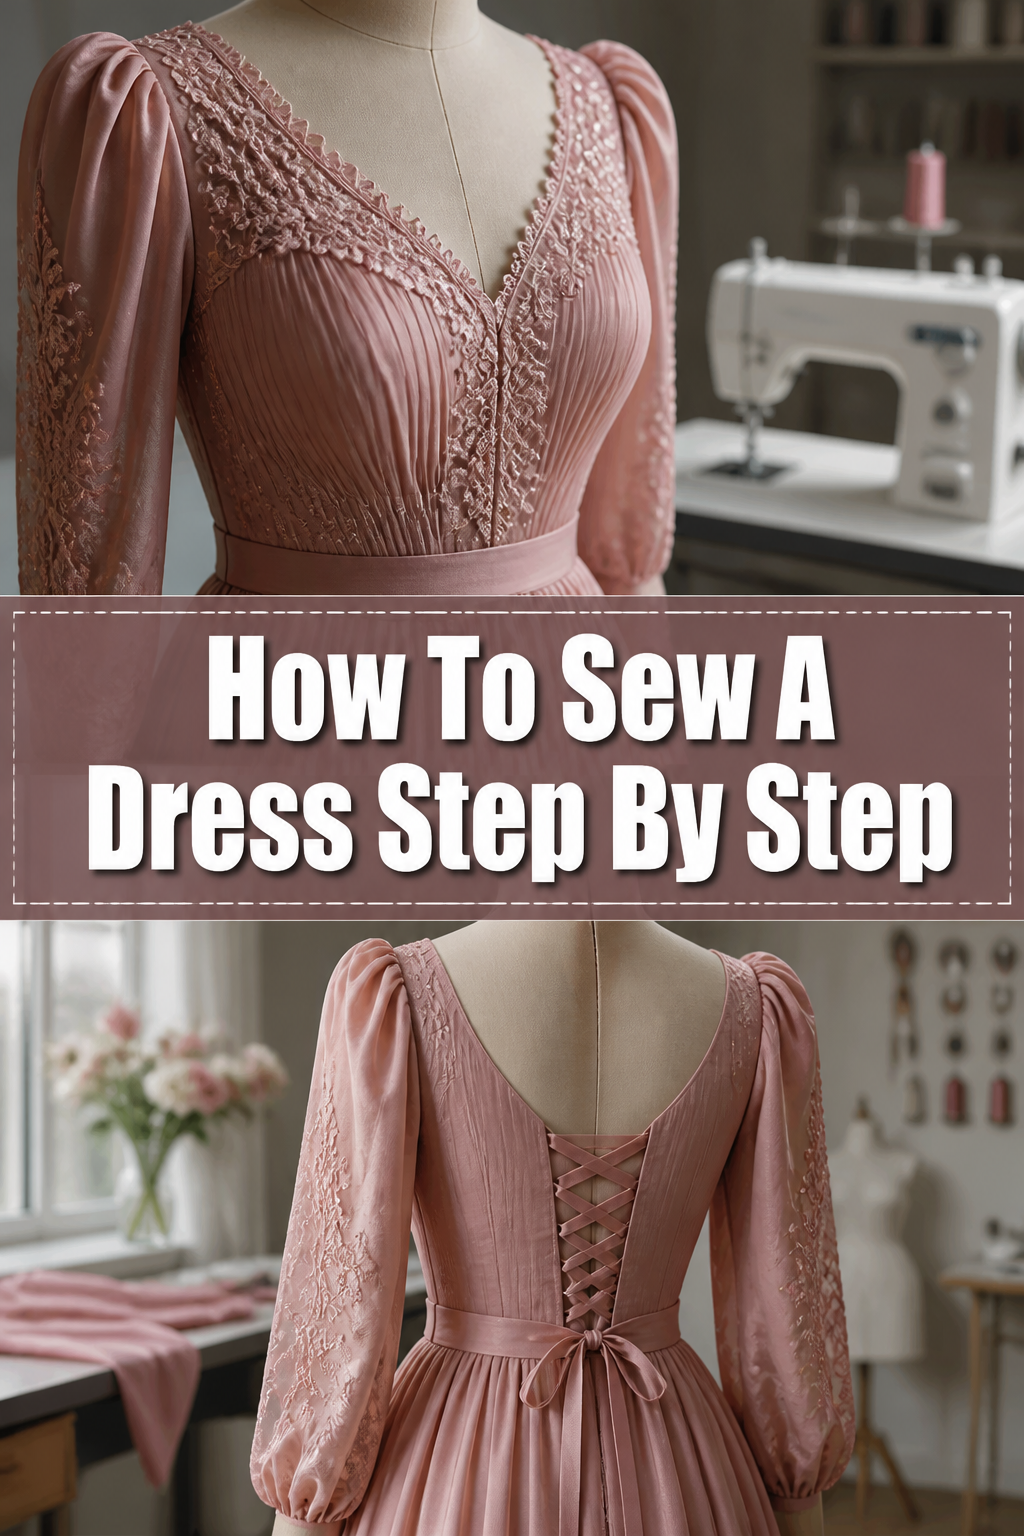
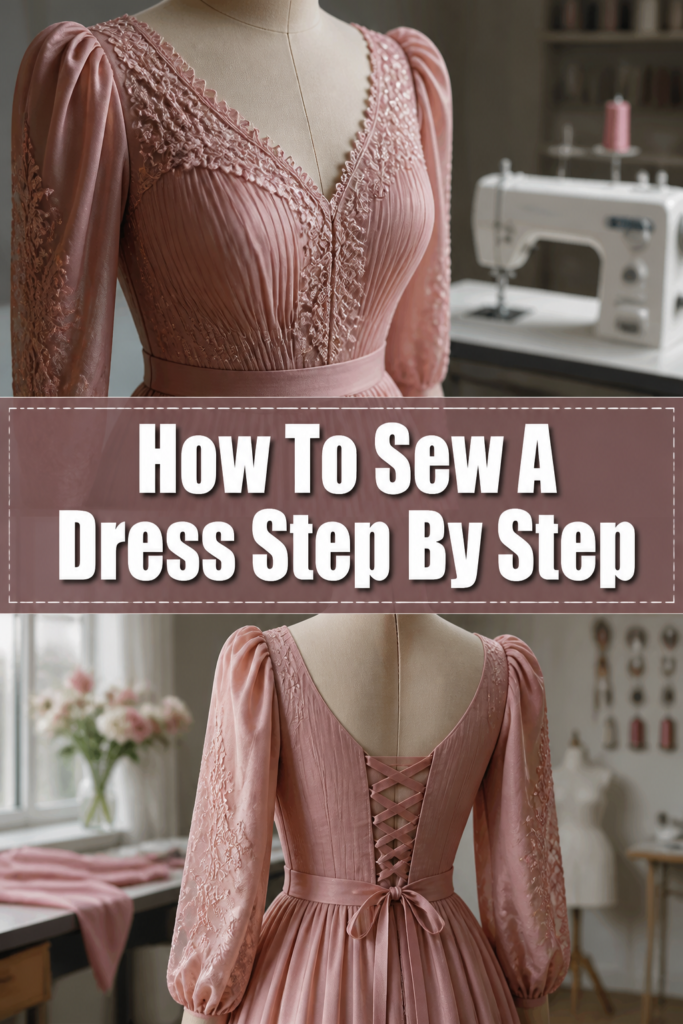
👗 How To Sew A Dress Step By Step

Beginner-friendly templates, step-by-step guides,
and weekly project ideas in your inbox.
Learning to sew a dress can feel like a big undertaking, but it’s an incredibly rewarding journey.
I remember the joy of finishing my first wearable garment, a simple sundress, and feeling a real sense of accomplishment.
This guide will walk you through each stage, building your skills and confidence along the way.
Quick Overview
You’re about to embark on creating a beautiful, custom-fitted dress. This guide covers everything from choosing your pattern to the final stitches, ensuring a successful project.
- Time needed: 15-25 hours (spread over several days/weeks)
- Difficulty: Intermediate (Requires basic machine sewing skills)
- What you’ll need: Sewing machine, fabric, pattern, thread, scissors, pins, iron, measuring tape, notions (zipper, buttons, etc. as per pattern)
Step-by-Step Instructions
Step 1: Choose Your Pattern and Fabric
Select a sewing pattern that matches your skill level. For beginners, a simple A-line dress or a shift dress with minimal darts and no complex closures is ideal.
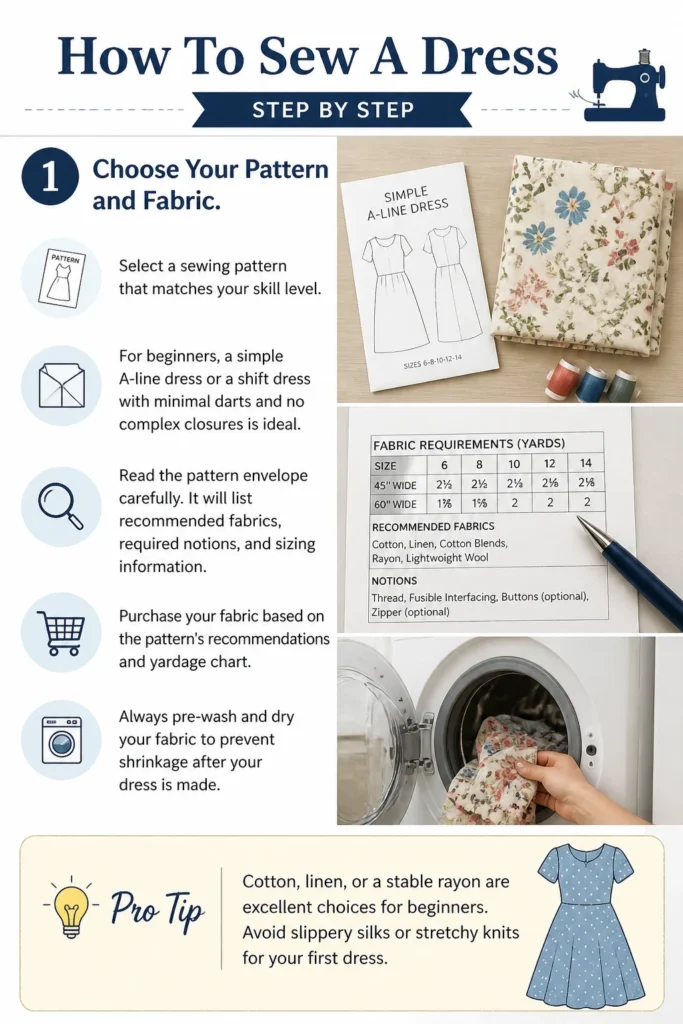
Read the pattern envelope carefully. It will list recommended fabrics, required notions, and sizing information.
Purchase your fabric based on the pattern’s recommendations and yardage chart. Always pre-wash and dry your fabric to prevent shrinkage after your dress is made.
Pro Tip: Cotton, linen, or a stable rayon are excellent choices for beginners. Avoid slippery silks or stretchy knits for your first dress.
Step 2: Take Accurate Measurements
Measure your bust, waist, and hip circumferences. Compare these to the pattern’s body measurement chart, not your ready-to-wear clothing size.
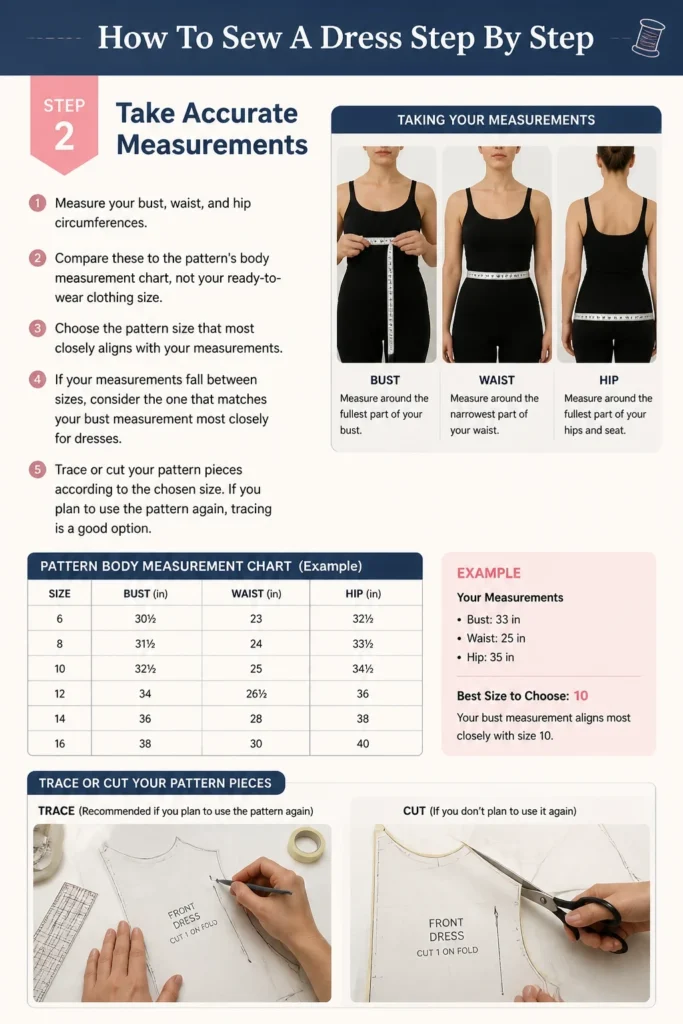
Choose the pattern size that most closely aligns with your measurements. If your measurements fall between sizes, consider the one that matches your bust measurement most closely for dresses.
Trace or cut your pattern pieces according to the chosen size. If you plan to use the pattern again, tracing is a good option.
Step 3: Prepare and Cut Your Fabric
Iron your pre-washed fabric thoroughly to remove any wrinkles. This ensures accurate cutting and prevents distortion.
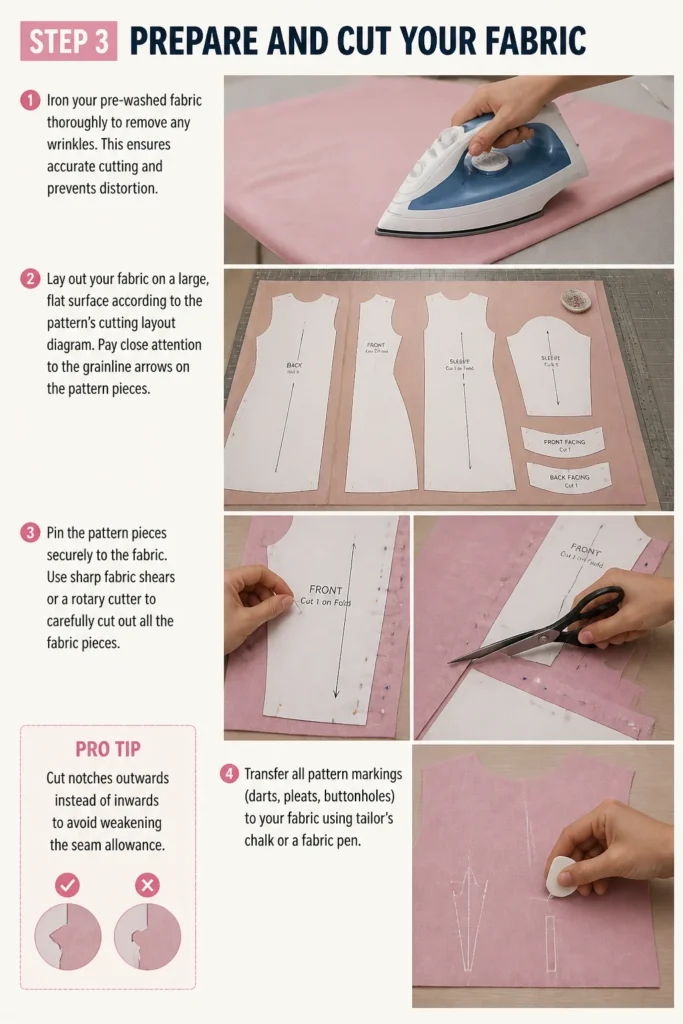
Lay out your fabric on a large, flat surface according to the pattern’s cutting layout diagram. Pay close attention to the grainline arrows on the pattern pieces.
Pin the pattern pieces securely to the fabric. Use sharp fabric shears or a rotary cutter to carefully cut out all the fabric pieces.
Pro Tip: Cut notches outwards instead of inwards to avoid weakening the seam allowance. Transfer all pattern markings (darts, pleats, buttonholes) to your fabric using tailor’s chalk or a fabric pen.
Step 4: Prepare Your Sewing Machine and Thread
Thread your sewing machine with a good quality all-purpose thread that matches your fabric. Wind a bobbin with the same thread.
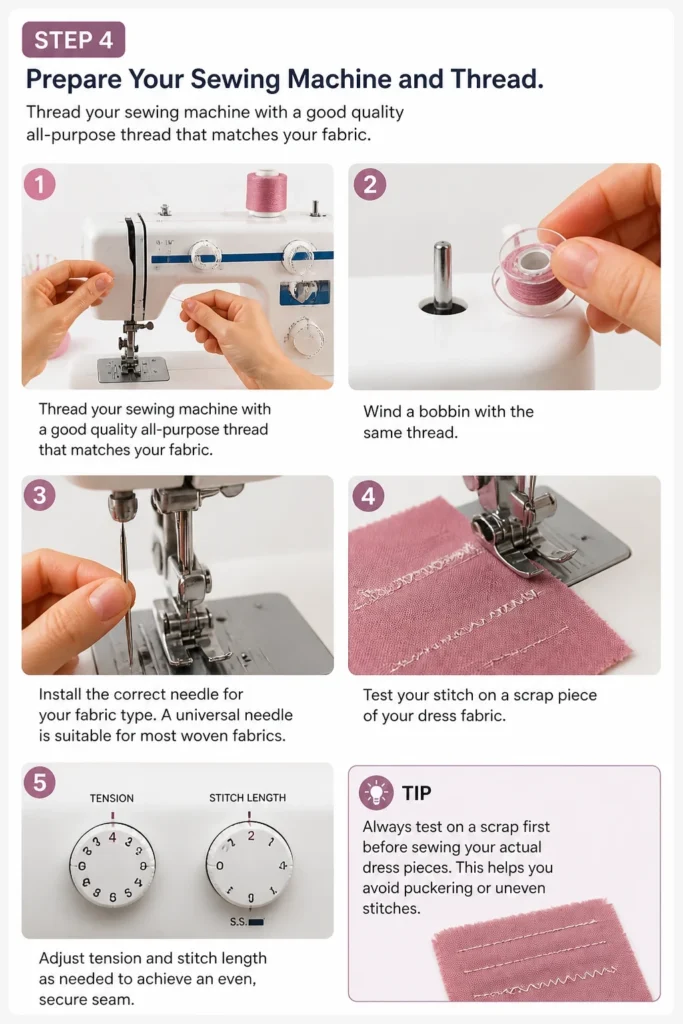
Install the correct needle for your fabric type. A universal needle is suitable for most woven fabrics.
Test your stitch on a scrap piece of your dress fabric. Adjust tension and stitch length as needed to achieve an even, secure seam.
Step 5: Construct the Bodice
Sew any darts or pleats on the bodice pieces as indicated by your pattern markings. Press these flat according to the pattern’s instructions.
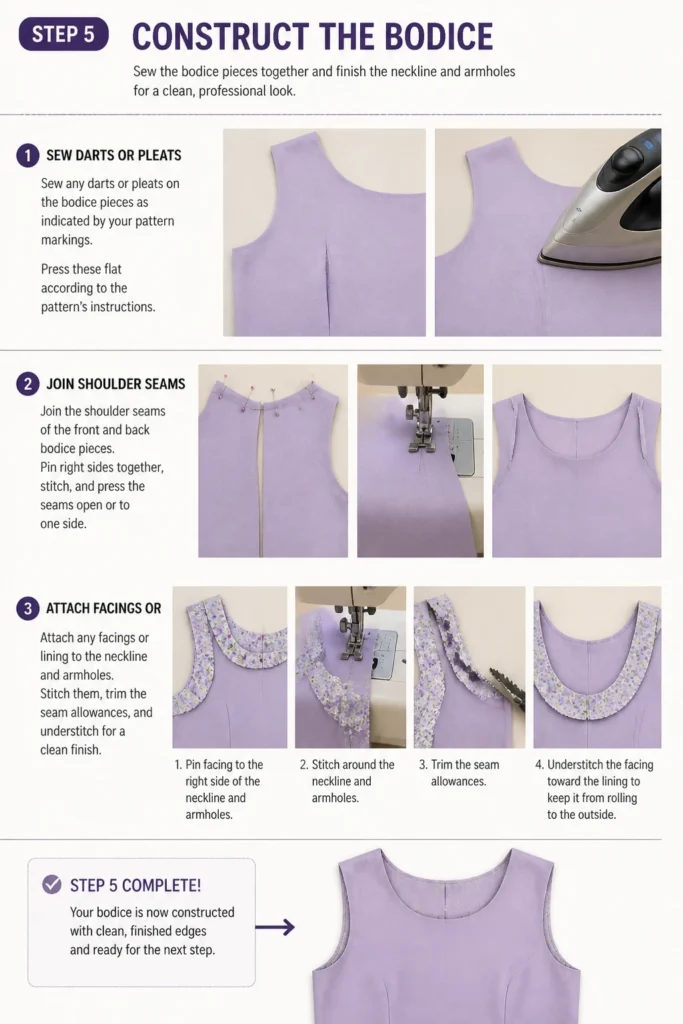
Join the shoulder seams of the front and back bodice pieces. Pin right sides together, stitch, and press the seams open or to one side.
Attach any facings or lining to the neckline and armholes. Stitch them, trim the seam allowances, and understitch for a clean finish.
Step 6: Assemble the Skirt
Sew any darts, pleats, or gathers on the skirt pieces. Press them as instructed by the pattern.
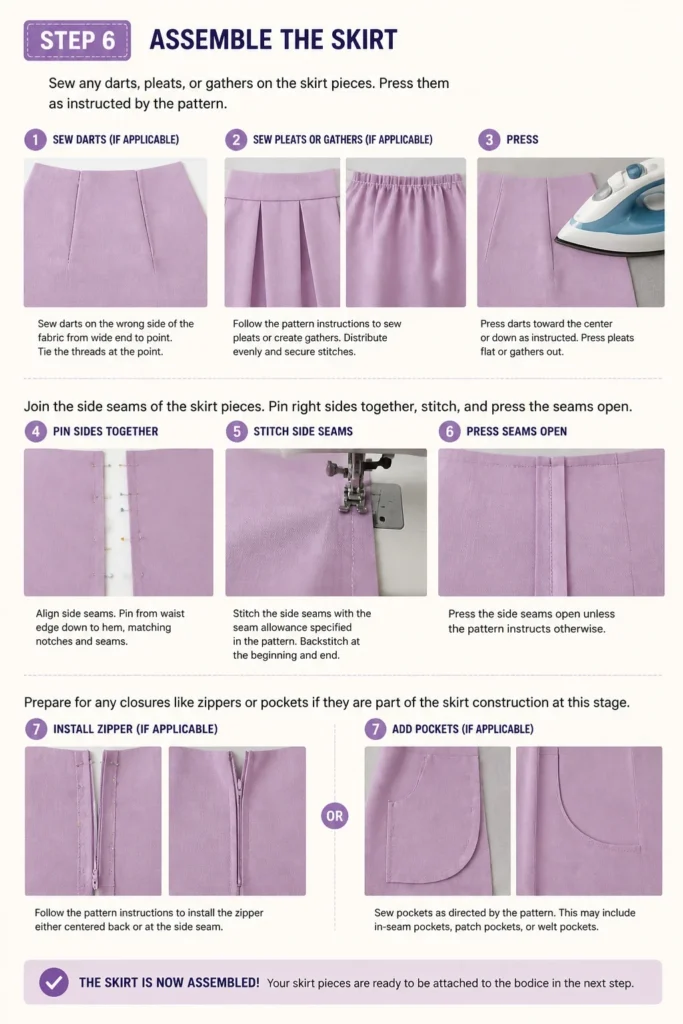
Join the side seams of the skirt pieces. Pin right sides together, stitch, and press the seams open.
Prepare for any closures like zippers or pockets if they are part of the skirt construction at this stage.
Step 7: Join Bodice and Skirt
Pin the bodice and skirt together at the waistline, right sides facing. Align any side seams or darts for a neat finish.
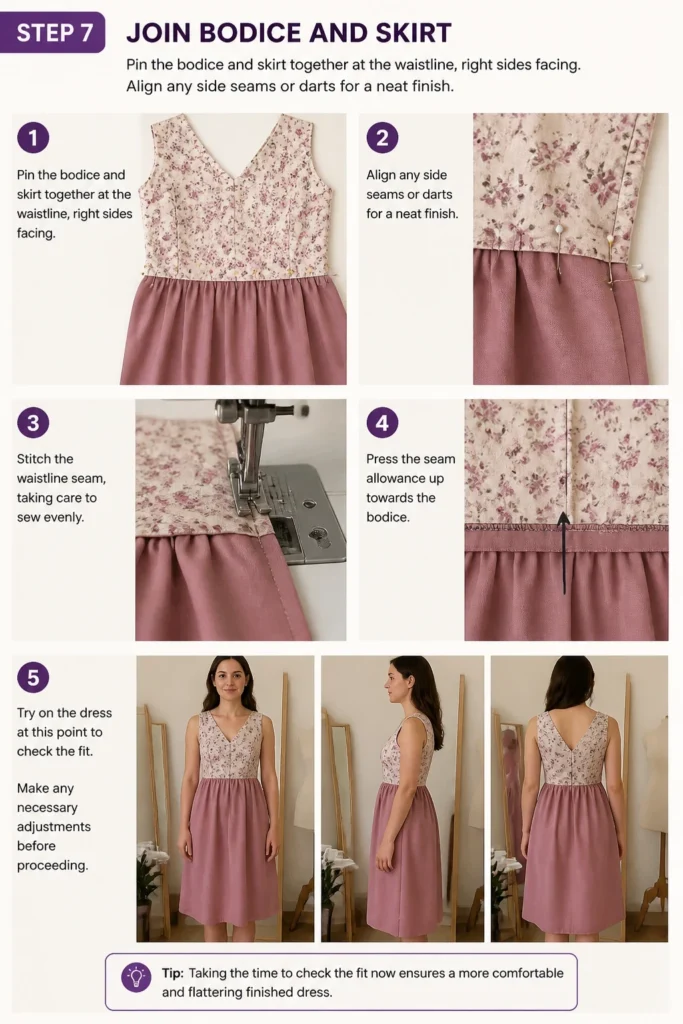
Stitch the waistline seam, taking care to sew evenly. Press the seam allowance up towards the bodice.
Try on the dress at this point to check the fit. Make any necessary adjustments before proceeding.
Step 8: Insert Closures and Finish Details
Install your zipper, buttons, or other closures according to the pattern. A lapped or invisible zipper is a common choice for dresses.
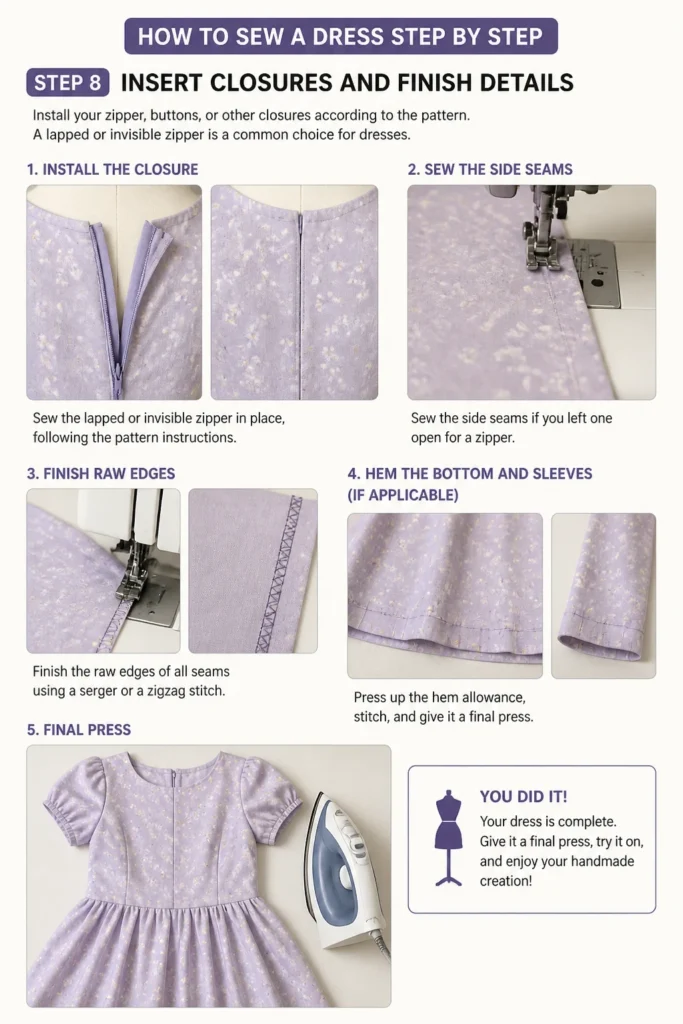
Sew the side seams if you left one open for a zipper. Finish the raw edges of all seams using a serger or a zigzag stitch.
Hem the bottom of the dress and the sleeves (if applicable). Press up the hem allowance, stitch, and give it a final press.
Step 9: Final Press and Inspection
Press your entire dress thoroughly, paying attention to all seams, darts, and hems. A good press can make a handmade garment look professionally finished.
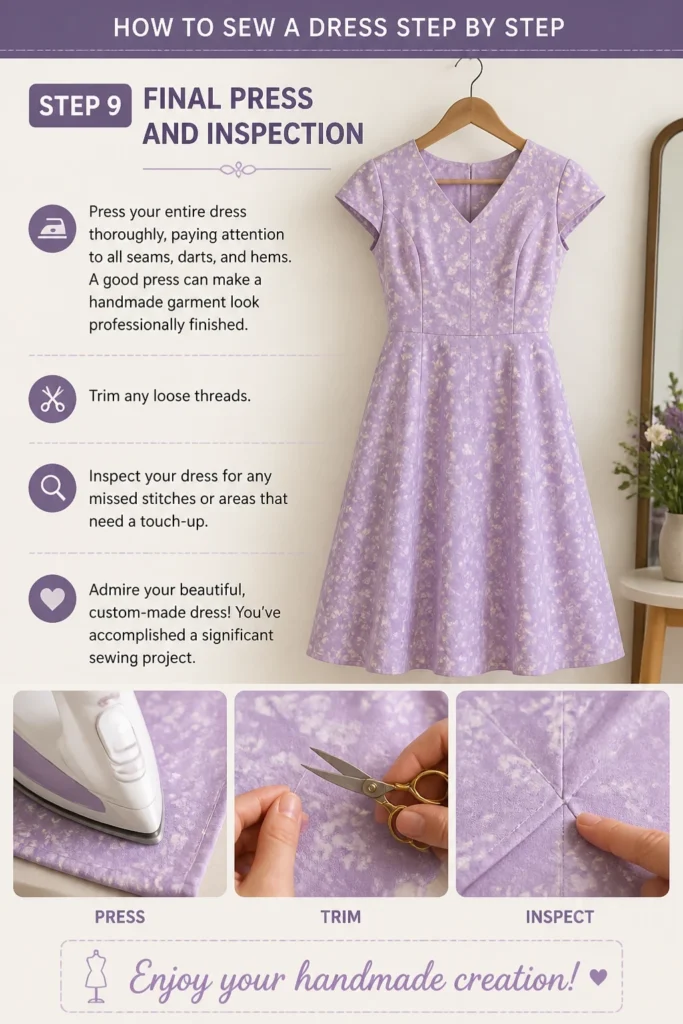
Trim any loose threads. Inspect your dress for any missed stitches or areas that need a touch-up.
Admire your beautiful, custom-made dress! You’ve accomplished a significant sewing project.
Common Mistakes to Avoid
Skipping Pre-Shrinking Fabric
Many new sewers skip washing their fabric before cutting. This can lead to a dress that shrinks unevenly or becomes too small after its first wash.
Always pre-wash and dry your fabric in the same way you plan to wash the finished garment. This stabilizes the fabric and removes any manufacturing finishes that might affect sewing.
Using the Wrong Size Needle or Thread
A needle that is too thick can leave visible holes, while one that is too thin might break. Incorrect thread can result in weak seams or skipped stitches.
Always match your needle type and size to your fabric. Use a good quality all-purpose thread for most projects. Consult your sewing machine manual for guidance on needle and thread choices.
Not Pressing Seams as You Go
Pressing seams after each step, rather than waiting until the end, creates crisp, professional-looking results. Skipping this step often leads to bulky, uneven seams.
Make your iron your best friend. Press seams open or to one side as instructed by your pattern. This shapes the garment and sets the stitches.
Rushing the Cutting Process
Inaccurate cutting can throw off the entire garment’s fit and appearance. Rushing can lead to pieces that don’t match up correctly.
Take your time when laying out and cutting your fabric. Ensure your fabric is perfectly flat, and pattern pieces are aligned with the grainline. Use sharp tools for precise cuts.
Troubleshooting
Skipped Stitches
If your sewing machine is skipping stitches, the most common culprits are a dull or incorrect needle, or improper threading.
Try replacing your needle with a new, correct size for your fabric. Re-thread your machine completely, both the top thread and the bobbin, ensuring all guides are followed.
Fabric Puckering
Puckering can occur if your thread tension is too tight, your stitch length is too short, or if you’re pulling the fabric while sewing.
Adjust your tension settings slightly looser. Increase your stitch length. Guide the fabric gently through the machine without pulling or pushing.
Uneven Hem
An uneven hem often happens if the fabric wasn’t hung for a day or two before hemming, or if it was cut inaccurately.
Hang your dress on a hanger for 24-48 hours before hemming to allow the fabric to relax and settle. Re-measure and mark your hem from the floor up, ensuring an even distance all around.
Key Takeaways
- Always pre-wash and press your fabric before cutting to prevent shrinkage and ensure accuracy.
- Accurate measurements and careful pattern cutting are fundamental to a well-fitting dress.
- Pressing seams after each sewing step is crucial for a professional finish.
- Don’t rush; take your time with each stage, especially when cutting and inserting closures.
- Test your machine settings on a scrap of fabric before sewing your garment pieces.
- Embrace imperfections as part of the learning process; every stitch builds skill.
Frequently Asked Questions
Can I sew a dress without a pattern?
While possible for very simple designs, using a pattern is highly recommended for your first dress. Patterns provide essential guidance on cutting, construction order, and fit, saving you time and frustration.
How do I choose the right size if my measurements are different for bust, waist, and hips?
For dresses, prioritize your bust measurement as it’s often the hardest to alter. You can then grade between sizes for the waist and hips, or make adjustments to the pattern pieces before cutting.
What’s the best way to finish raw seams inside the dress?
The simplest way for beginners is to use a zigzag stitch along the raw edge of each seam allowance. For a more professional finish, a serger (overlocker) is ideal, or you can use French seams for delicate fabrics.
How long does it typically take to sew a dress?
The time varies greatly depending on the complexity of the pattern and your sewing speed. A simple dress might take 10-15 hours, while a more intricate design could take 20-30 hours or more. Don’t be afraid to break it into smaller sessions.
Our Top Recommended Finds
- Good Quality Fabric Shears: Sharp scissors are essential for clean, precise cuts that don’t fray your fabric. Look for shears specifically designed for fabric.
- Tailor’s Ham and Seam Roll: These pressing tools help you press curved seams and darts accurately, giving your dress a smoother, more professional shape.
- Wonder Clips: These tiny clips are fantastic for holding fabric layers together, especially thick fabrics or those you don’t want to pin. They’re also great for hemming.
Your Next Stitching Adventure Awaits
You’ve now completed a beautiful dress, a testament to your patience and growing skill. This project has equipped you with valuable techniques that will serve you well in future sewing endeavors.
Consider tackling a dress with a different sleeve style, a more intricate collar, or even exploring different fabric types. Each new challenge expands your creative horizons.
Don’t let your sewing machine gather dust. Pick your next pattern and continue building your handmade wardrobe today!
Beginner-friendly templates, step-by-step guides,
and weekly project ideas in your inbox.