🎁 How To Tie A Ribbon On A Gift

Beginner-friendly templates, step-by-step guides,
and weekly project ideas in your inbox.
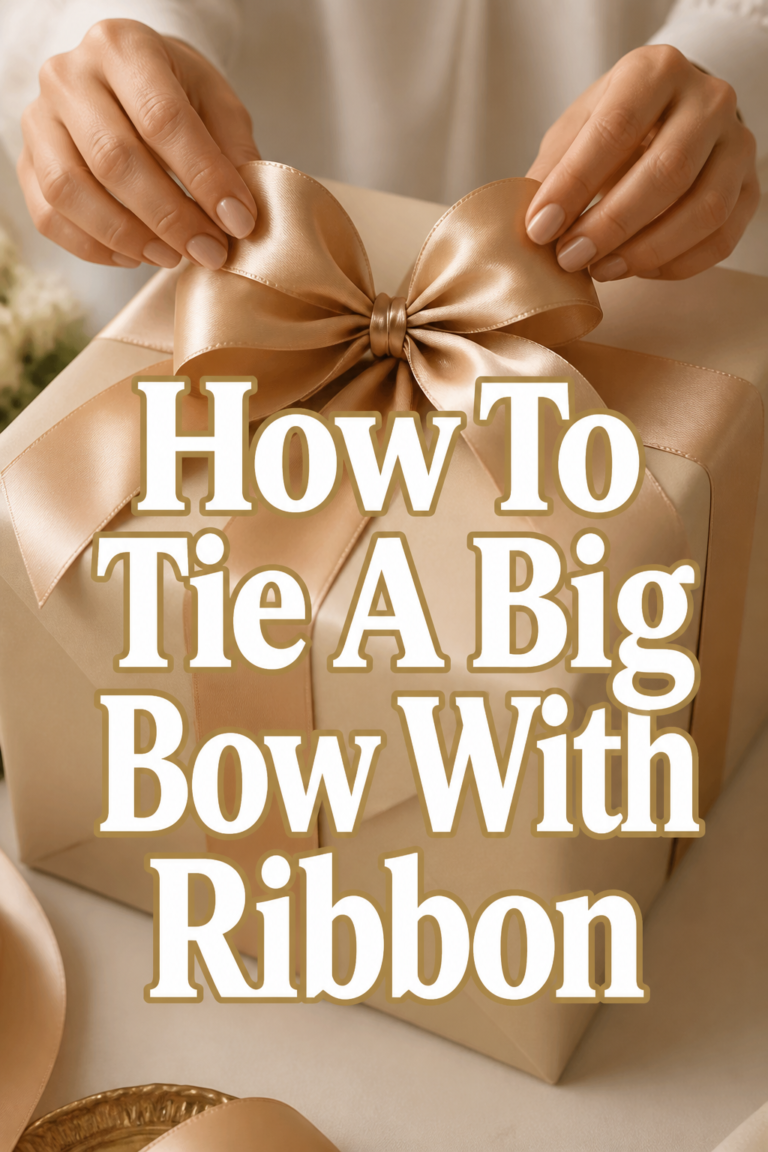
There’s a special joy in giving a beautifully wrapped gift. A well-tied ribbon adds that perfect touch of elegance and thoughtfulness. It transforms a simple package into something truly memorable.
I remember the first time I tried to tie a perfect bow; it was a tangled mess. Over time, I learned the simple techniques that make all the difference, and now I love seeing the recipient’s smile. This guide shares those practical steps, making it easy for you to create stunning gift presentations every time.

Quick Overview
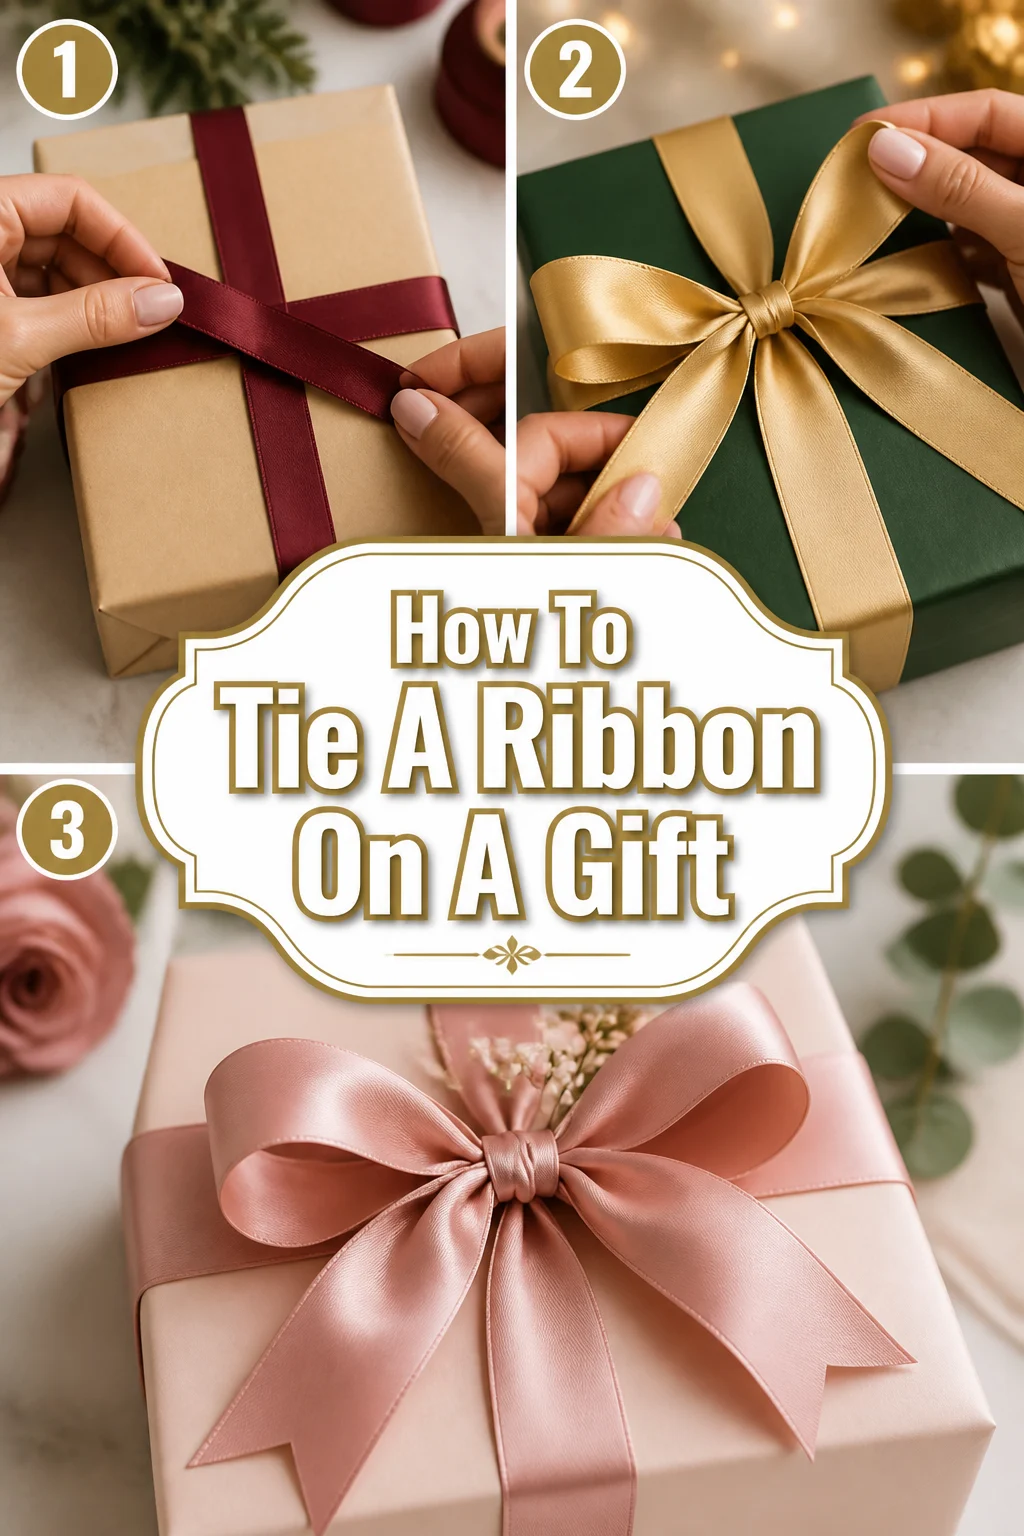
This guide will walk you through the process of tying a classic, elegant ribbon bow on any gift. You’ll learn how to select the right ribbon, wrap it securely around your package, and form a beautiful, symmetrical bow. By the end, you’ll have a skill that elevates all your gift-giving occasions.
- Time needed: 5-10 minutes
- Difficulty: Beginner
- What you’ll need: Gift, wrapping paper (optional), ribbon, sharp scissors
Step-by-Step Instructions
Step 1: Choose Your Ribbon and Prepare Your Gift
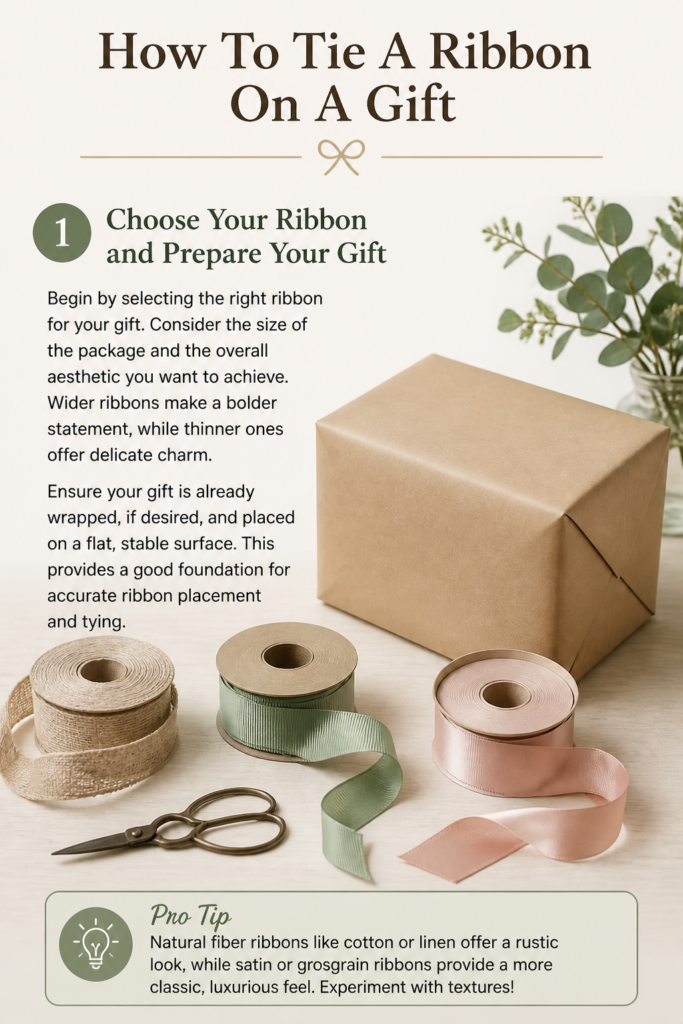
Begin by selecting the right ribbon for your gift. Consider the size of the package and the overall aesthetic you want to achieve. Wider ribbons make a bolder statement, while thinner ones offer delicate charm.
Ensure your gift is already wrapped, if desired, and placed on a flat, stable surface. This provides a good foundation for accurate ribbon placement and tying.
Pro Tip: Natural fiber ribbons like cotton or linen offer a rustic look, while satin or grosgrain ribbons provide a more classic, luxurious feel. Experiment with textures!
Step 2: Measure and Cut Your Ribbon
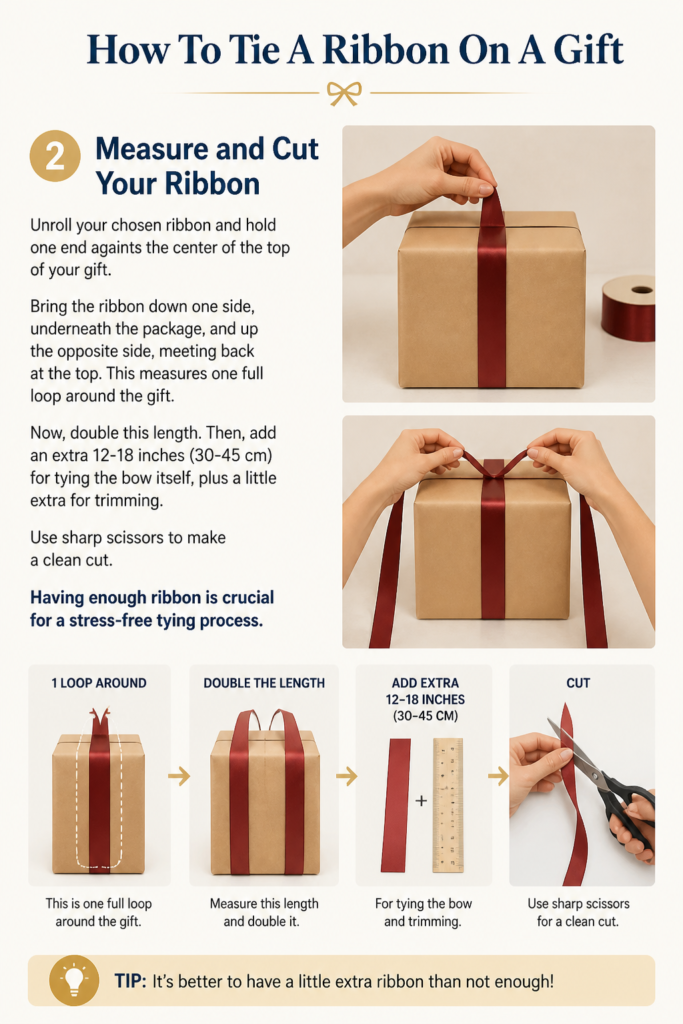
Unroll your chosen ribbon and hold one end against the center of the top of your gift. Bring the ribbon down one side, underneath the package, and up the opposite side, meeting back at the top. This measures one full loop around the gift.
Now, double this length. Then, add an extra 12-18 inches (30-45 cm) for tying the bow itself, plus a little extra for trimming. Use sharp scissors to make a clean cut. Having enough ribbon is crucial for a stress-free tying process.
Step 3: Position the Ribbon Horizontally
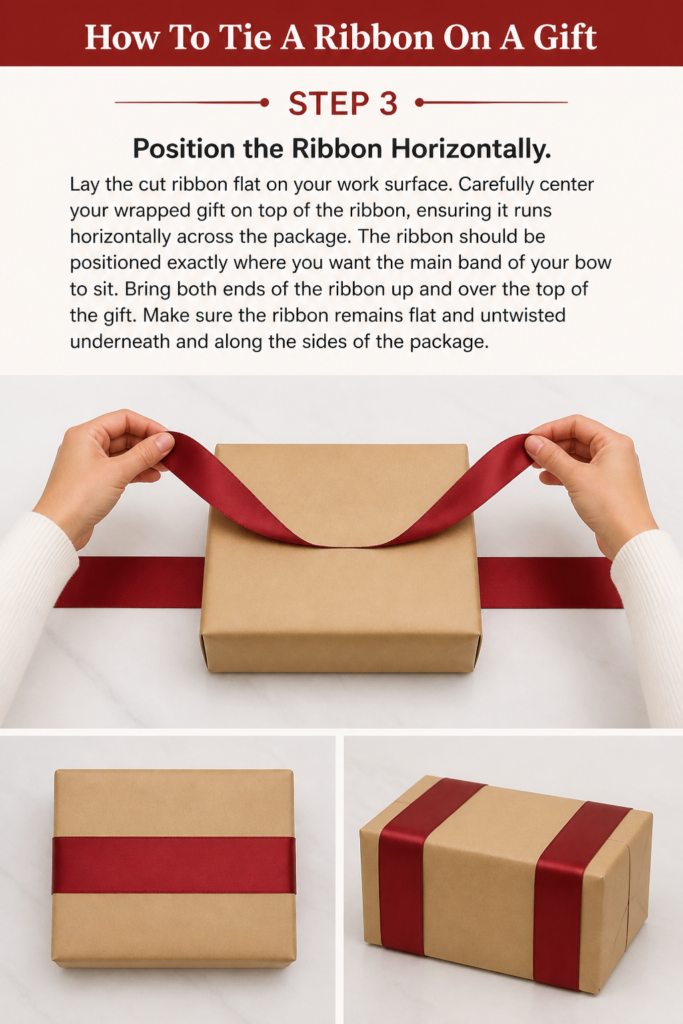
Lay the cut ribbon flat on your work surface. Carefully center your wrapped gift on top of the ribbon, ensuring it runs horizontally across the package. The ribbon should be positioned exactly where you want the main band of your bow to sit.
Bring both ends of the ribbon up and over the top of the gift. Make sure the ribbon remains flat and untwisted underneath and along the sides of the package.
Step 4: Cross the Ribbon Underneath
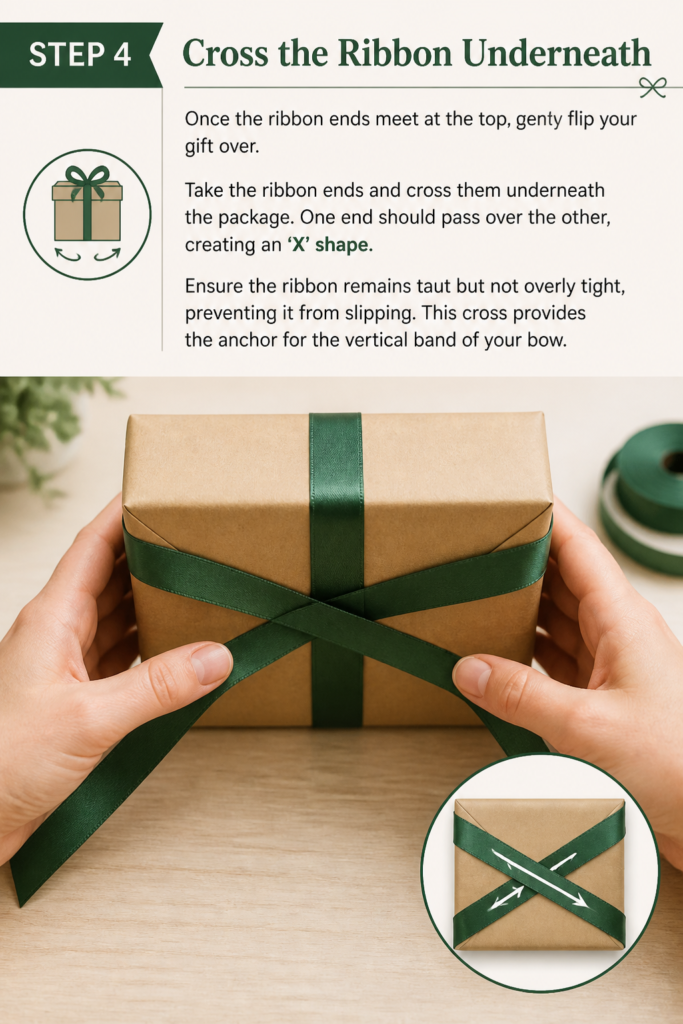
Once the ribbon ends meet at the top, gently flip your gift over. Take the ribbon ends and cross them underneath the package. One end should pass over the other, creating an ‘X’ shape.
Ensure the ribbon remains taut but not overly tight, preventing it from slipping. This cross provides the anchor for the vertical band of your bow.
Step 5: Bring the Ribbon Back to the Top
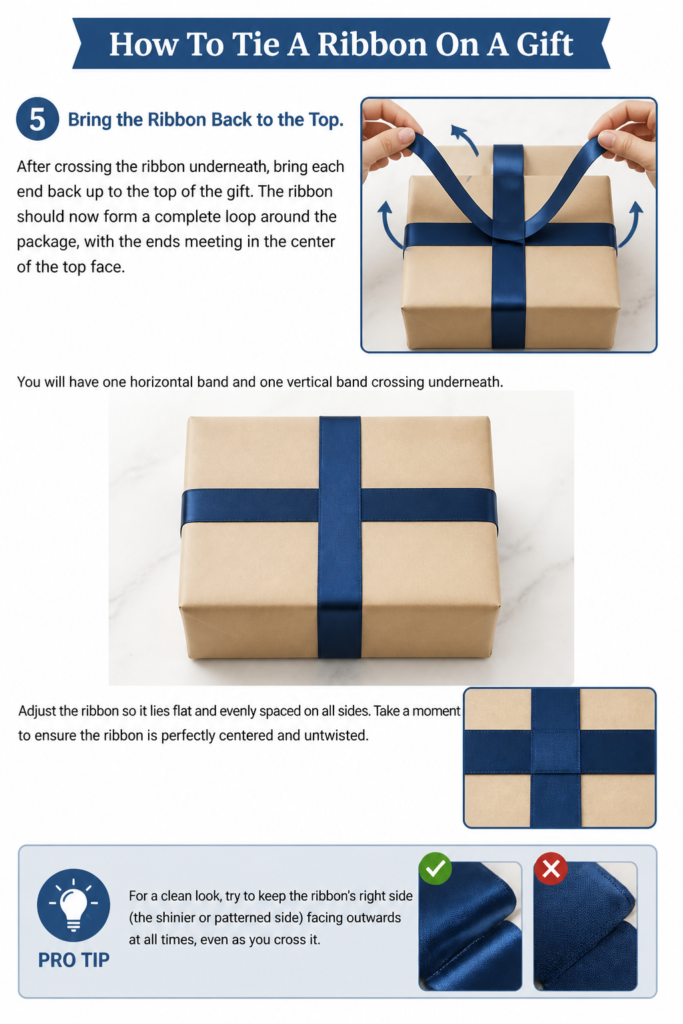
After crossing the ribbon underneath, bring each end back up to the top of the gift. The ribbon should now form a complete loop around the package, with the ends meeting in the center of the top face. You will have one horizontal band and one vertical band crossing underneath.
Adjust the ribbon so it lies flat and evenly spaced on all sides. Take a moment to ensure the ribbon is perfectly centered and untwisted.
Pro Tip: For a clean look, try to keep the ribbon’s “right” side (the shinier or patterned side) facing outwards at all times, even as you cross it.
Step 6: Tie the First Knot
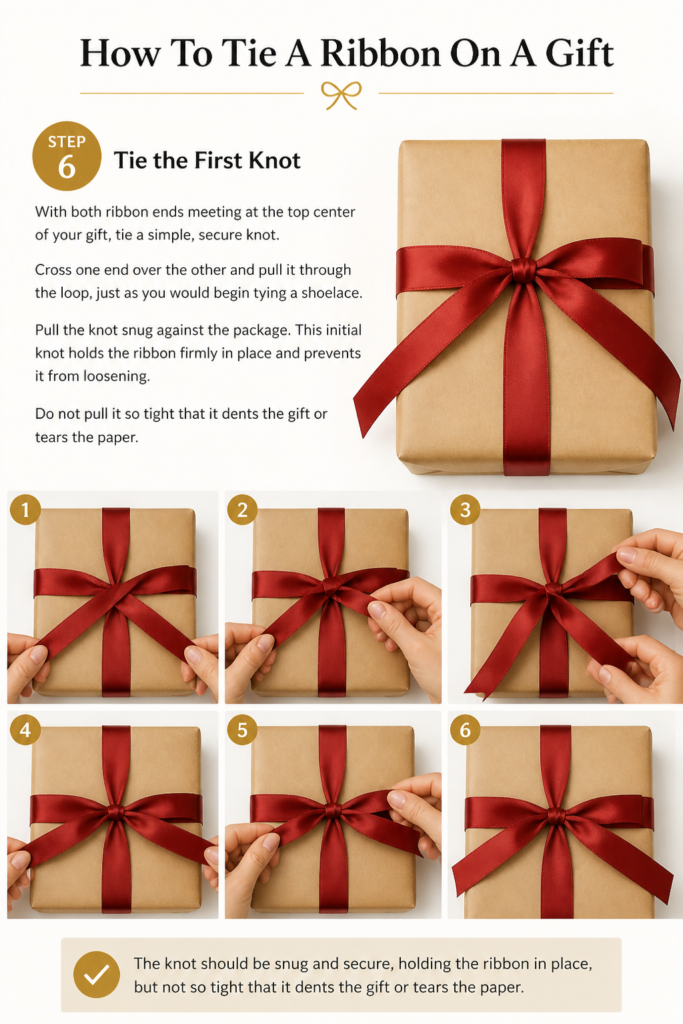
With both ribbon ends meeting at the top center of your gift, tie a simple, secure knot. Cross one end over the other and pull it through the loop, just as you would begin tying a shoelace. Pull the knot snug against the package.
This initial knot holds the ribbon firmly in place and prevents it from loosening. Do not pull it so tight that it dents the gift or tears the paper.
Step 7: Form the First Loop of the Bow
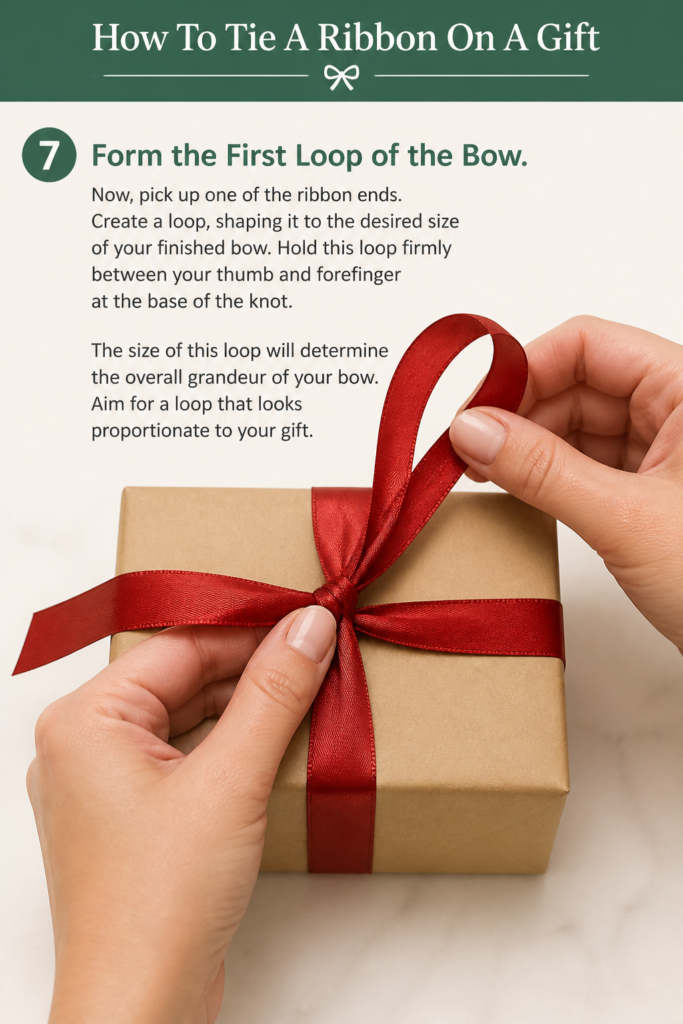
Now, pick up one of the ribbon ends. Create a loop, shaping it to the desired size of your finished bow. Hold this loop firmly between your thumb and forefinger at the base of the knot.
The size of this loop will determine the overall grandeur of your bow. Aim for a loop that looks proportionate to your gift.
Step 8: Form the Second Loop and Tie the Bow
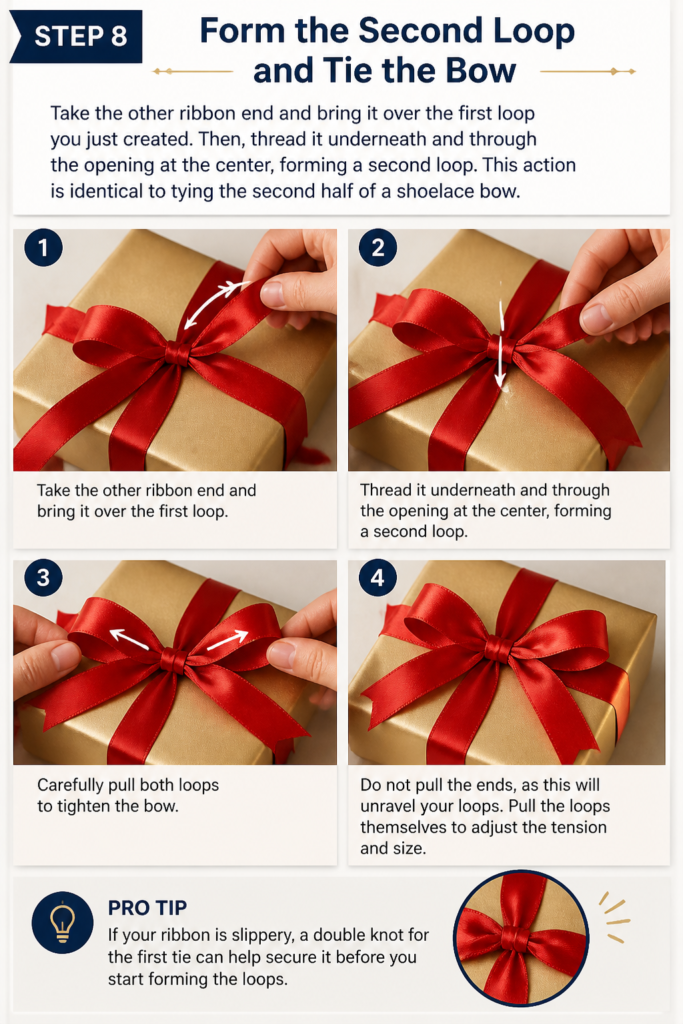
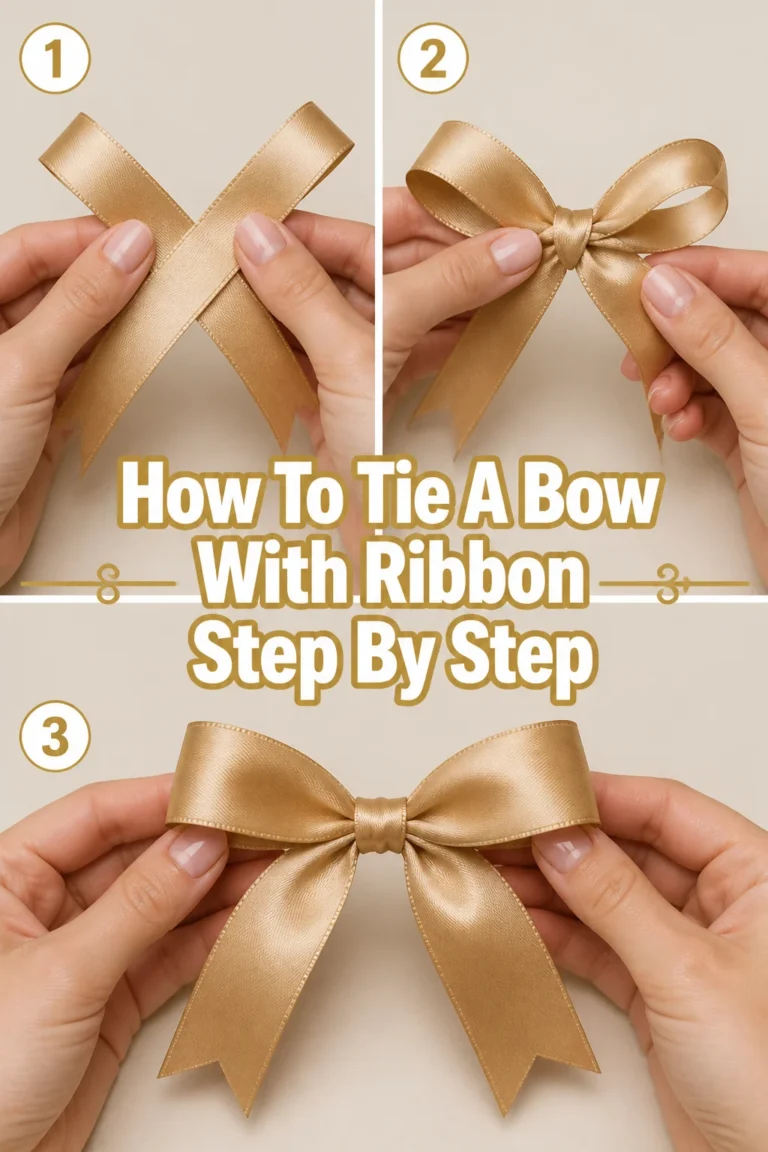
Take the other ribbon end and bring it over the first loop you just created. Then, thread it underneath and through the opening at the center, forming a second loop. This action is identical to tying the second half of a shoelace bow.
Carefully pull both loops to tighten the bow. Do not pull the ends, as this will unravel your loops. Pull the loops themselves to adjust the tension and size.
Pro Tip: If your ribbon is slippery, a double knot for the first tie can help secure it before you start forming the loops.
Step 9: Adjust and Fluff Your Bow
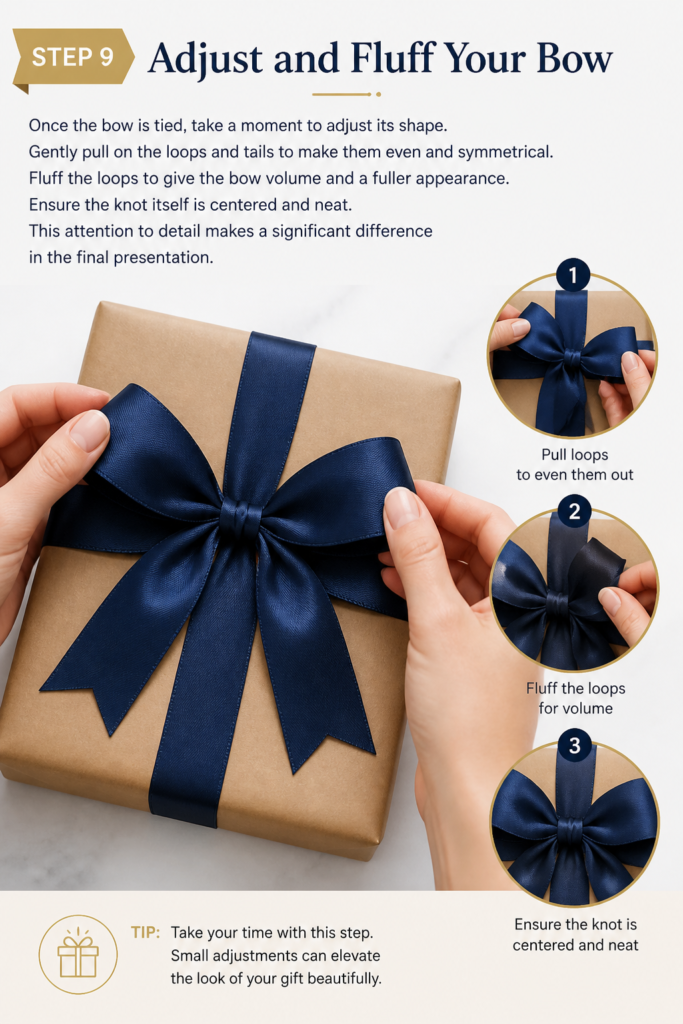
Once the bow is tied, take a moment to adjust its shape. Gently pull on the loops and tails to make them even and symmetrical. Fluff the loops to give the bow volume and a fuller appearance.
Ensure the knot itself is centered and neat. This attention to detail makes a significant difference in the final presentation.
Step 10: Trim the Ribbon Ends
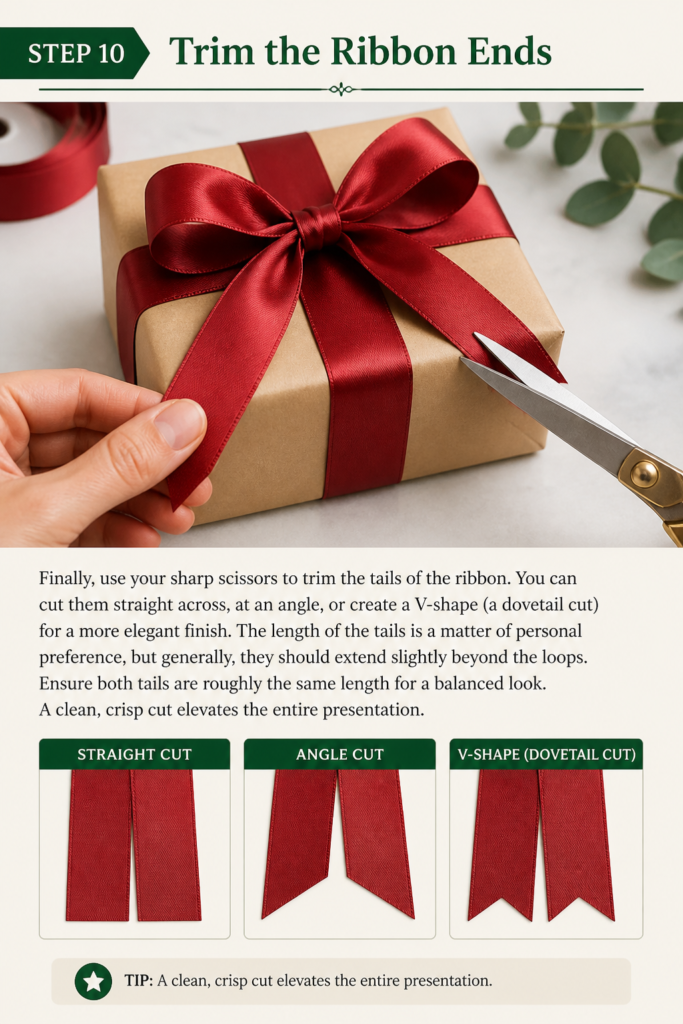
Finally, use your sharp scissors to trim the tails of the ribbon. You can cut them straight across, at an angle, or create a V-shape (a dovetail cut) for a more elegant finish. The length of the tails is a matter of personal preference, but generally, they should extend slightly beyond the loops.
Ensure both tails are roughly the same length for a balanced look. A clean, crisp cut elevates the entire presentation.
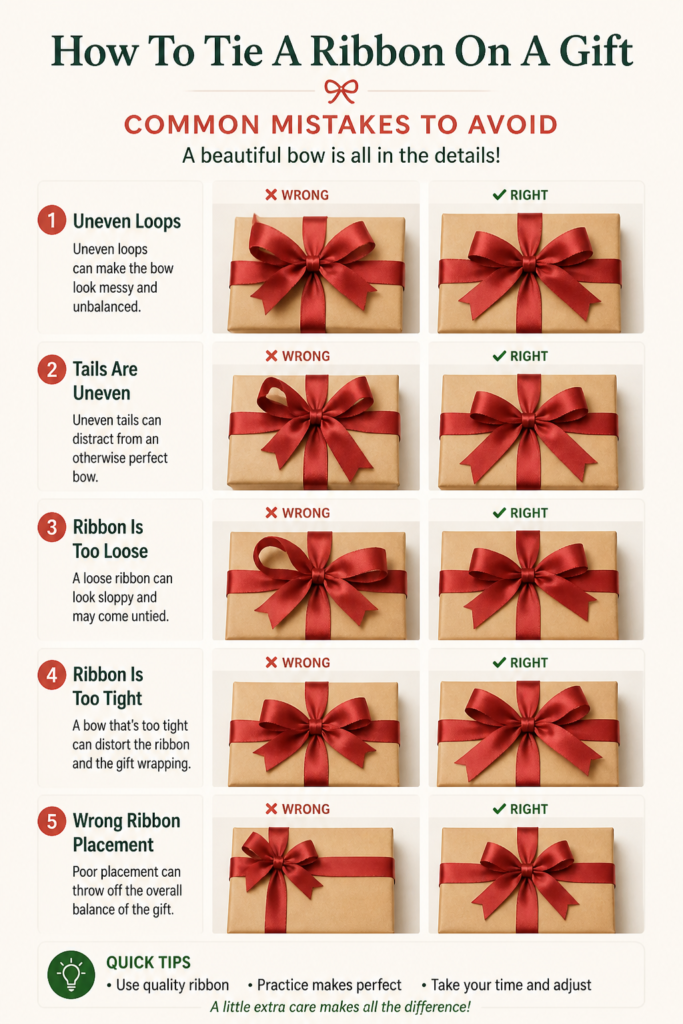
Common Mistakes to Avoid
Using Too Little Ribbon
A very common pitfall is underestimating the amount of ribbon needed. If you start with too short a piece, you’ll struggle to form symmetrical loops and a secure knot, often resulting in a small, sad-looking bow or one that simply won’t tie. Always measure generously, adding extra length for both the bow and comfortable handling. It’s better to have too much ribbon and trim it than too little and have to start over.
Tying the First Knot Too Loosely
The initial knot you make after bringing the ribbon ends to the top is crucial. If this knot isn’t snug against the package, the entire ribbon structure can shift and loosen. This leads to a sloppy appearance and a bow that easily falls apart. Ensure this first knot is firm but not overly tight, providing a stable foundation for the rest of your bow.
Uneven Loops and Tails
Many beginners struggle with creating symmetrical loops and tails. One loop might be larger than the other, or the tails could be drastically different in length. This imbalance detracts from the polished look of a well-tied bow. Take your time to gently adjust each loop and tail after the bow is tied, pulling them until they are even and proportionate. Practice helps develop an eye for symmetry.
Twisting the Ribbon
Ribbons, especially wider ones, can easily twist as you wrap them around the gift or form loops. A twisted ribbon looks messy and unprofessional, hiding the ribbon’s true width and pattern. Always ensure the ribbon lies flat against the gift and that the “right” side (the intended display side) is facing outwards at all times. Gently smooth out any twists as you go.
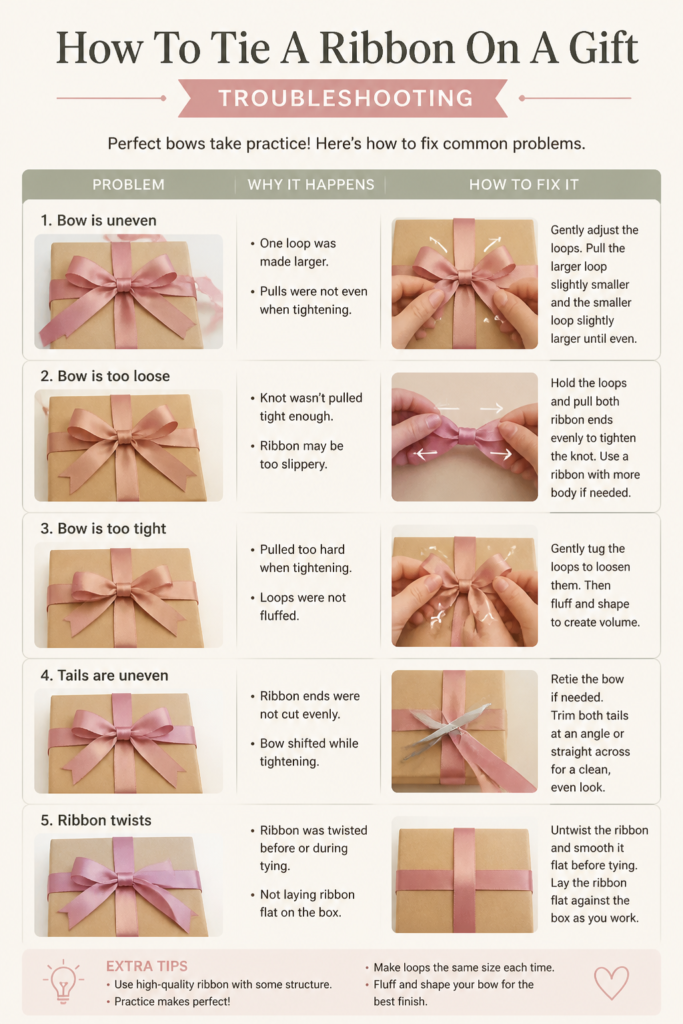
Troubleshooting
My Bow Keeps Coming Undone
If your bow consistently unravels, the issue is likely with the initial knot or how you’re tightening the loops. Ensure your first knot is pulled securely against the gift, creating a firm base. When forming the bow, pull the loops themselves, not the ribbon tails, to tighten the second part of the knot. For slippery ribbons, consider tying a double knot for the first tie to add extra grip.
The Ribbon Slips Off the Gift
A ribbon that slides around on the gift, especially on glossy paper, indicates it’s not tight enough or the first knot isn’t secure. Make sure the ribbon is snug against the gift when you tie the initial knot. You can also try using a small piece of double-sided tape on the underside of the gift where the ribbon crosses to provide extra grip. Some ribbons naturally have more friction than others, so consider the material.
My Bow Looks Flat and Lifeless
A flat bow often results from not fluffing the loops adequately or using a ribbon that lacks body. After tying, gently pull each loop upwards and outwards to add volume and dimension. If your ribbon is very thin or flimsy, consider using two pieces of ribbon together for a fuller effect, or choose a ribbon with more stiffness, like grosgrain or wired ribbon, which holds its shape better.
Key Takeaways
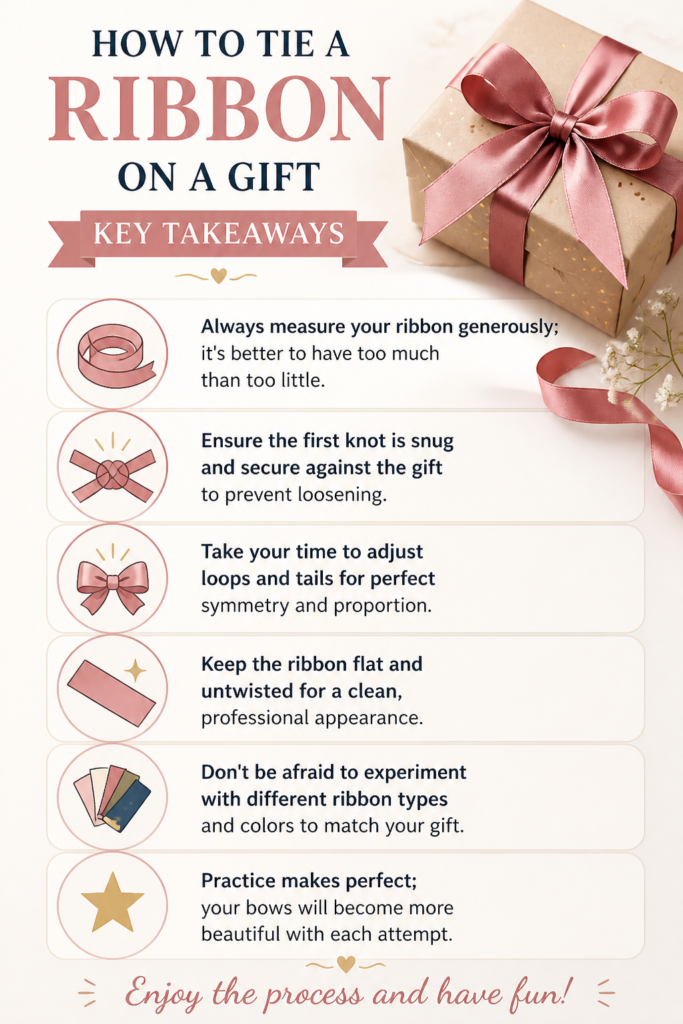
- Always measure your ribbon generously; it’s better to have too much than too little.
- Ensure the first knot is snug and secure against the gift to prevent loosening.
- Take your time to adjust loops and tails for perfect symmetry and proportion.
- Keep the ribbon flat and untwisted for a clean, professional appearance.
- Don’t be afraid to experiment with different ribbon types and colors to match your gift.
- Practice makes perfect; your bows will become more beautiful with each attempt.
Frequently Asked Questions
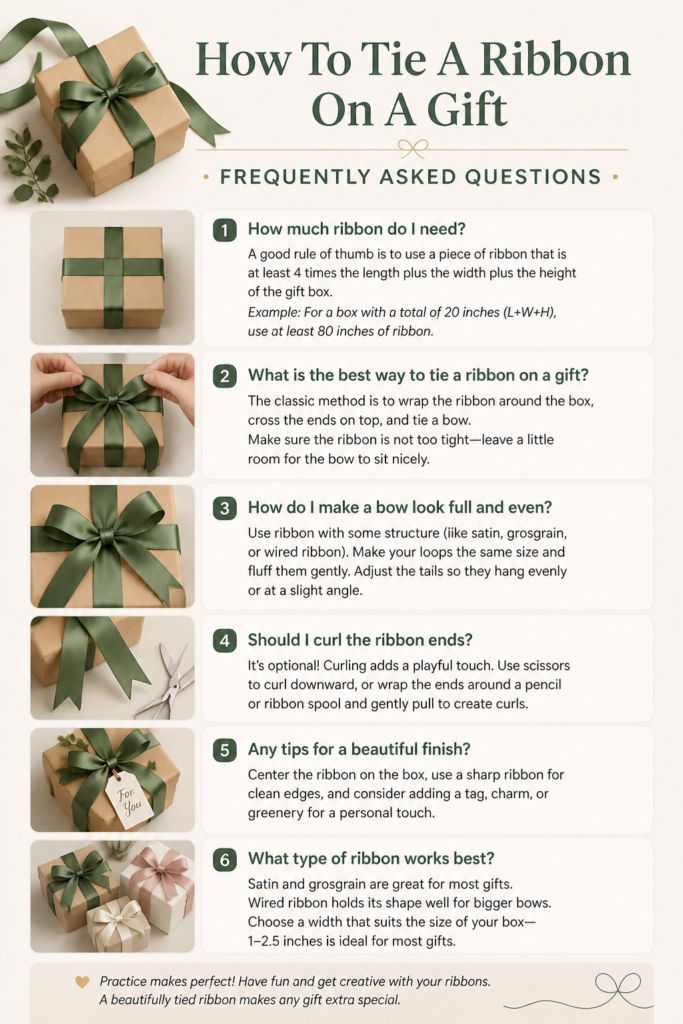
What type of ribbon is best for tying bows on gifts?
The best ribbon depends on the look you want. Satin ribbon offers a classic, luxurious sheen, while grosgrain ribbon provides a textured, sturdy bow that holds its shape well. Wired ribbon is excellent for elaborate bows as it can be shaped and fluffed easily. For a rustic feel, consider burlap or natural linen ribbons.
How do I make a double bow or a more elaborate bow?
To create a double bow, simply tie two separate bows of different sizes or colors and layer them on top of each other, securing them with a small piece of wire or glue dot. For more elaborate bows, you can make multiple loops on each side before tying, or use a bow maker tool. This guide focuses on a classic single bow, which is a great foundation.
Can I reuse ribbon from old gifts?
Absolutely! Reusing ribbon is a wonderful way to be sustainable and can add a vintage charm to your gifts. Gently unknot and smooth out any creases from previously used ribbons. Store them carefully to prevent tangling. Just ensure they are still in good condition and not frayed or stained.
My ribbon keeps slipping off my glossy gift wrap. What can I do?
Glossy gift wrap can be challenging for ribbons. To prevent slipping, secure the ribbon with a small piece of double-sided tape on the underside of the gift where the ribbon crosses. You can also place a tiny dot of hot glue (be careful not to damage the paper) under the bow’s knot to anchor it firmly.
Our Top Recommended Finds
- Assorted Satin Ribbon Set: A multi-color pack provides versatility for various gifts and occasions, offering a smooth, elegant finish.
- Grosgrain Ribbon Variety Pack: Ideal for bows that need to hold their shape, these ribbons come in different widths and add a lovely texture.
- High-Quality Fabric Scissors: Sharp, dedicated fabric scissors make clean cuts, preventing frayed edges and ensuring a professional look.
Unleash Your Inner Gift-Giving Artist
Tying a beautiful ribbon on a gift is a simple skill that brings immense satisfaction. It’s a small gesture that speaks volumes about your care and attention to detail. Every time you present a gift, you’re not just giving an item; you’re sharing a piece of your thoughtfulness.
Now that you have the steps, gather your materials and give it a try. Practice makes perfect, and soon you’ll be creating stunning presentations with ease. Embrace the joy of crafting and make your next gift truly unforgettable.
Beginner-friendly templates, step-by-step guides,
and weekly project ideas in your inbox.