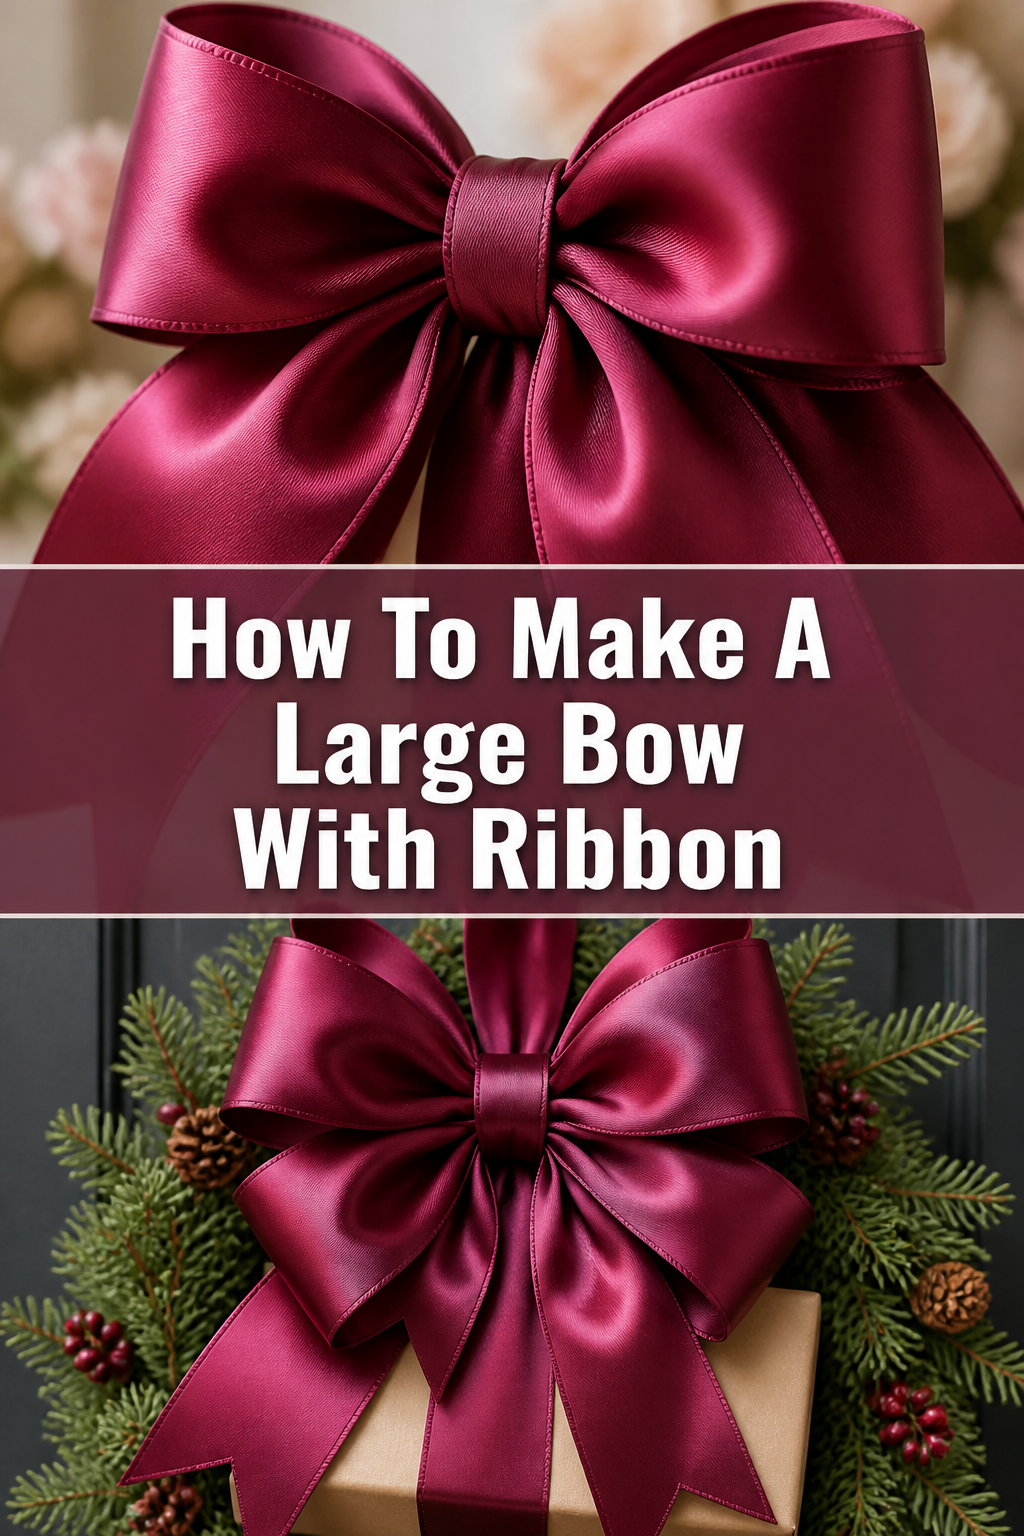
💡 How To Make A Large Bow With Ribbon

Beginner-friendly templates, step-by-step guides,
and weekly project ideas in your inbox.
Creating a massive, professional-looking bow is a skill that instantly elevates your home decor and gift-wrapping game.
I remember spending hours struggling with floppy loops and tangled ribbon until I realized that the secret lies in the structure, not just the folding.
This guide draws on years of floral design experience to show you how to build a sturdy, beautiful bow that holds its shape all season long.
Quick Overview
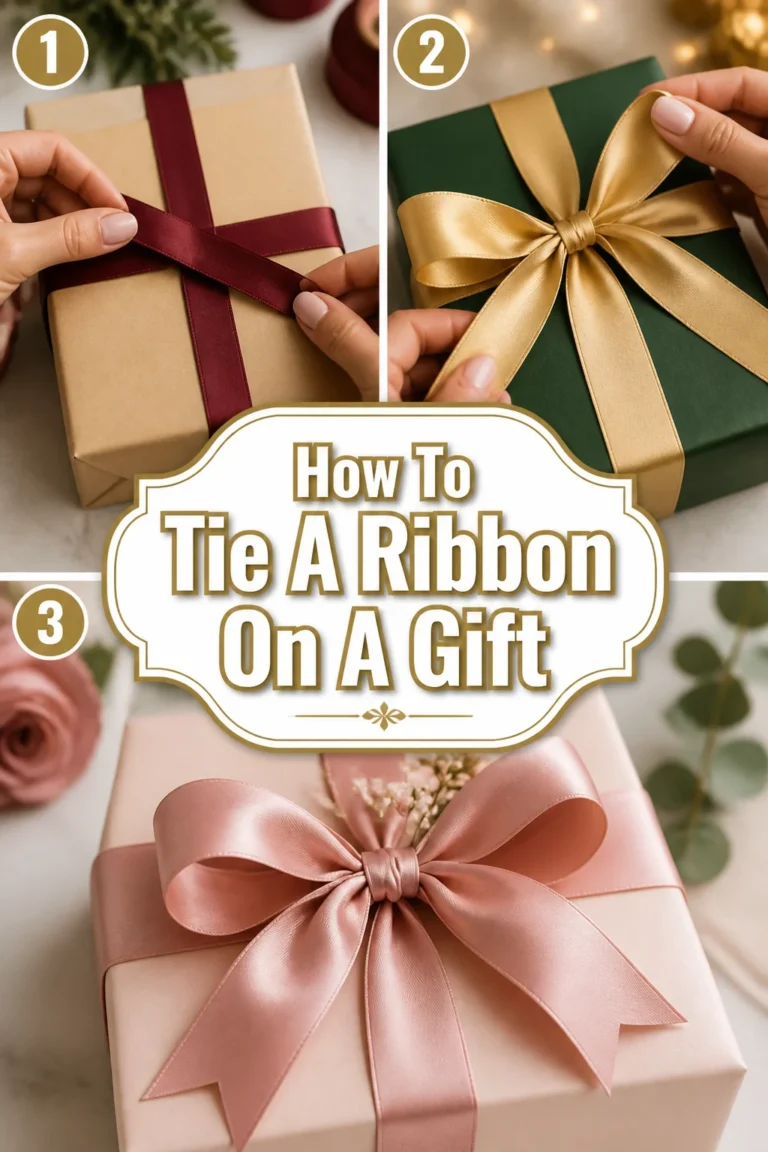
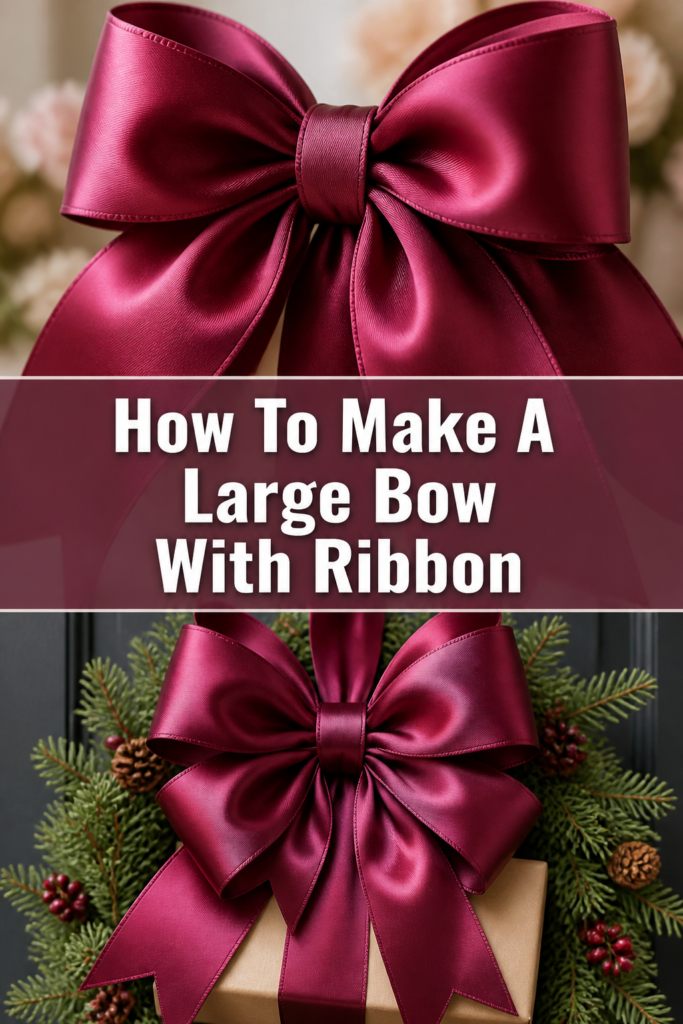
A large bow serves as the crowning jewel for wreaths, Christmas trees, or oversized presents. By the end of this tutorial, you will have a multi-layered masterpiece that looks like it came straight from a high-end boutique.
- Time needed: 15 to 20 minutes
- Difficulty: Beginner
- What you’ll need: Wired ribbon (2.5 inches wide or larger), floral wire or pipe cleaners, sharp fabric scissors, and a measuring tape.
Step-by-Step Instructions
Step 1: Choose the Right Ribbon
Select a ribbon that features a wired edge to ensure your loops stay upright and full. Non-wired ribbon will inevitably sag under its own weight, especially when you are aiming for a larger scale.
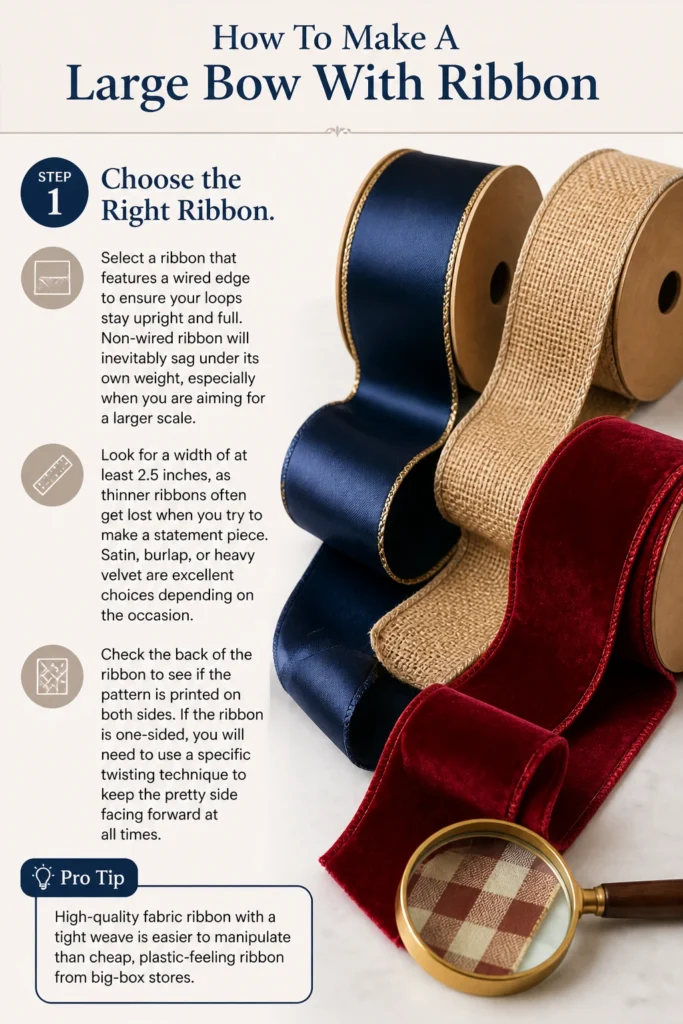
Look for a width of at least 2.5 inches, as thinner ribbons often get lost when you try to make a statement piece. Satin, burlap, or heavy velvet are excellent choices depending on the occasion.
Check the back of the ribbon to see if the pattern is printed on both sides. If the ribbon is one-sided, you will need to use a specific twisting technique to keep the “pretty” side facing forward at all times.
Pro Tip: High-quality fabric ribbon with a tight weave is easier to manipulate than cheap, plastic-feeling ribbon from big-box stores.
Step 2: Measure and Cut the Tails
Determine how long you want the tails of your bow to hang. For a standard wreath, tails that are 12 to 18 inches long usually provide a balanced look.
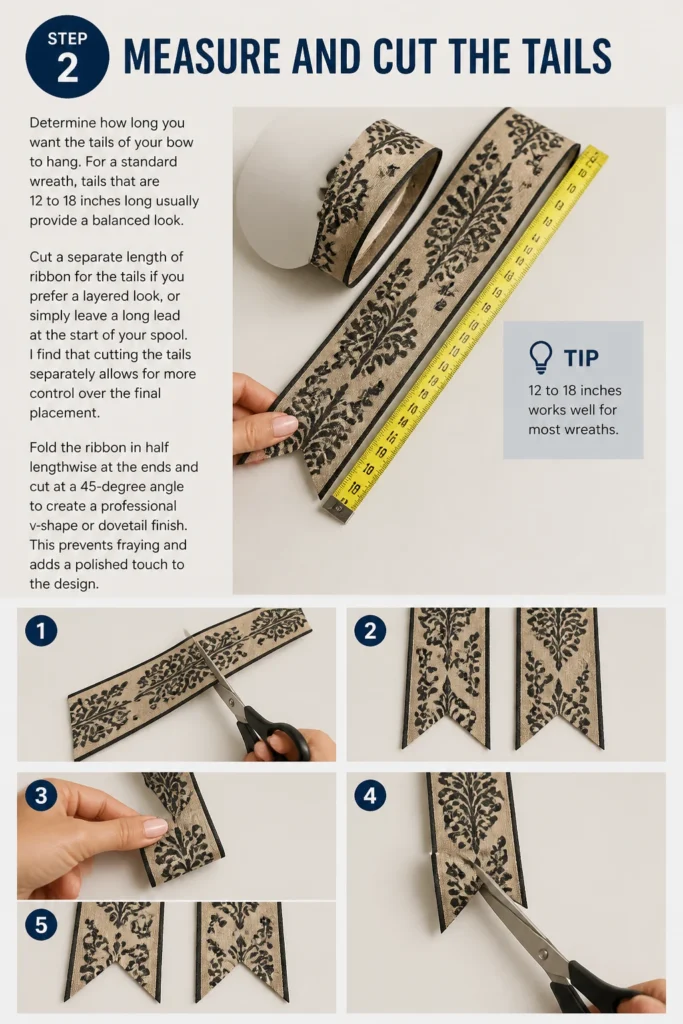
Cut a separate length of ribbon for the tails if you prefer a “layered” look, or simply leave a long lead at the start of your spool. I find that cutting the tails separately allows for more control over the final placement.
Fold the ribbon in half lengthwise at the ends and cut at a 45-degree angle to create a professional “v-shape” or dovetail finish. This prevents fraying and adds a polished touch to the design.
Step 3: Create the Center Loop
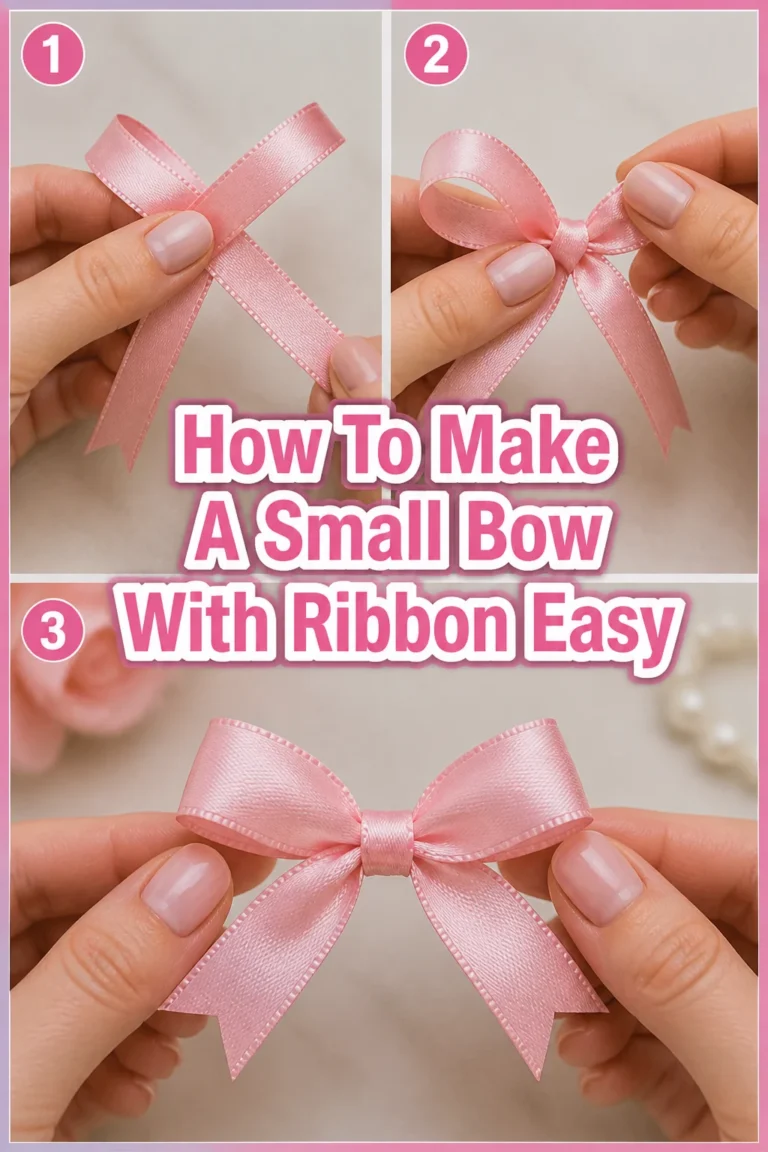
Form a small circle with the ribbon, roughly 2 to 3 inches in diameter. This will be the “button” or the very center of your bow that hides the wire later on.
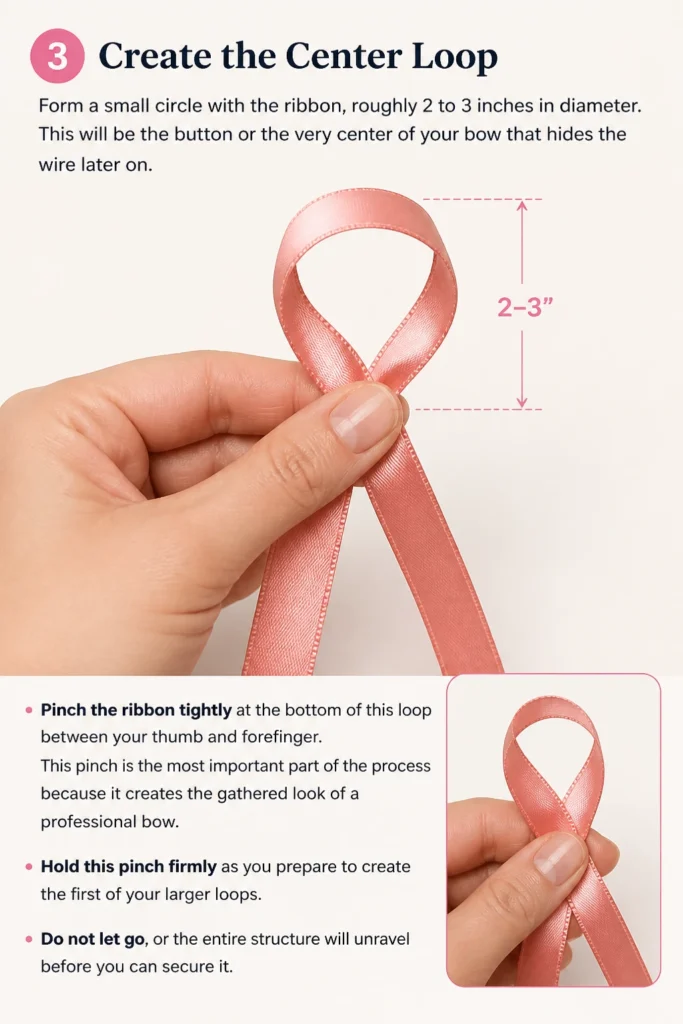
Pinch the ribbon tightly at the bottom of this loop between your thumb and forefinger. This “pinch” is the most important part of the process because it creates the gathered look of a professional bow.
Hold this pinch firmly as you prepare to create the first of your larger loops. Do not let go, or the entire structure will unravel before you can secure it.
Step 4: Fold the First Set of Loops
Pull the ribbon away from your pinched center to create a loop about 5 or 6 inches long. The size of this loop determines the overall diameter of your finished bow.
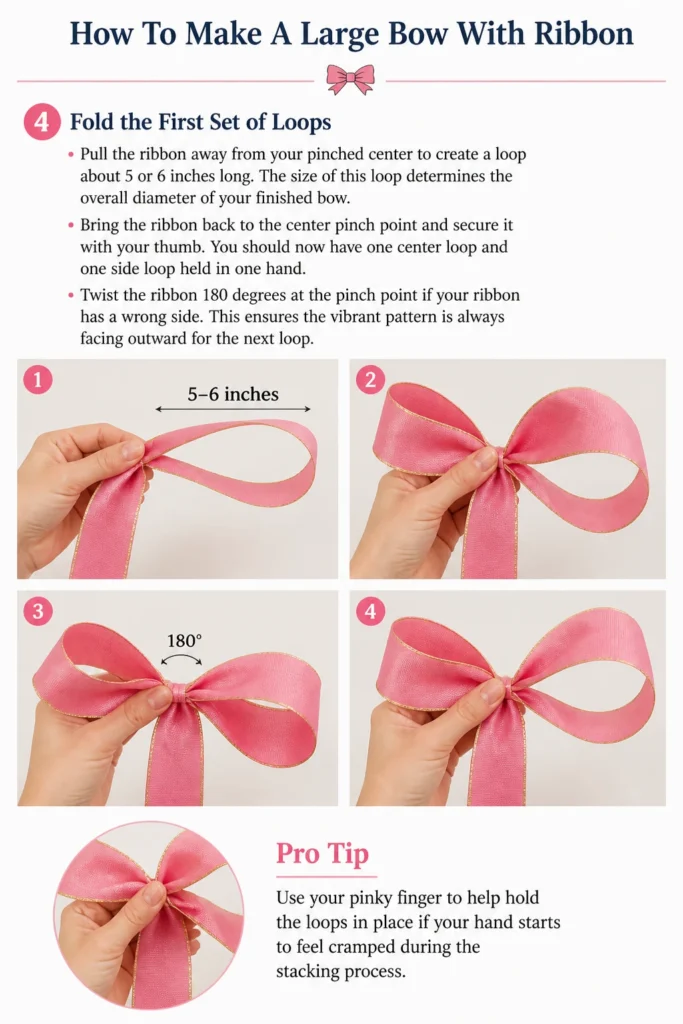
Bring the ribbon back to the center pinch point and secure it with your thumb. You should now have one center loop and one side loop held in one hand.
Twist the ribbon 180 degrees at the pinch point if your ribbon has a “wrong” side. This ensures the vibrant pattern is always facing outward for the next loop.
Pro Tip: Use your pinky finger to help hold the loops in place if your hand starts to feel cramped during the stacking process.
Step 5: Balance the Opposite Side
Create a second loop on the opposite side of the center that matches the size of the first one. Symmetry is key during this stage to prevent the bow from looking lopsided.
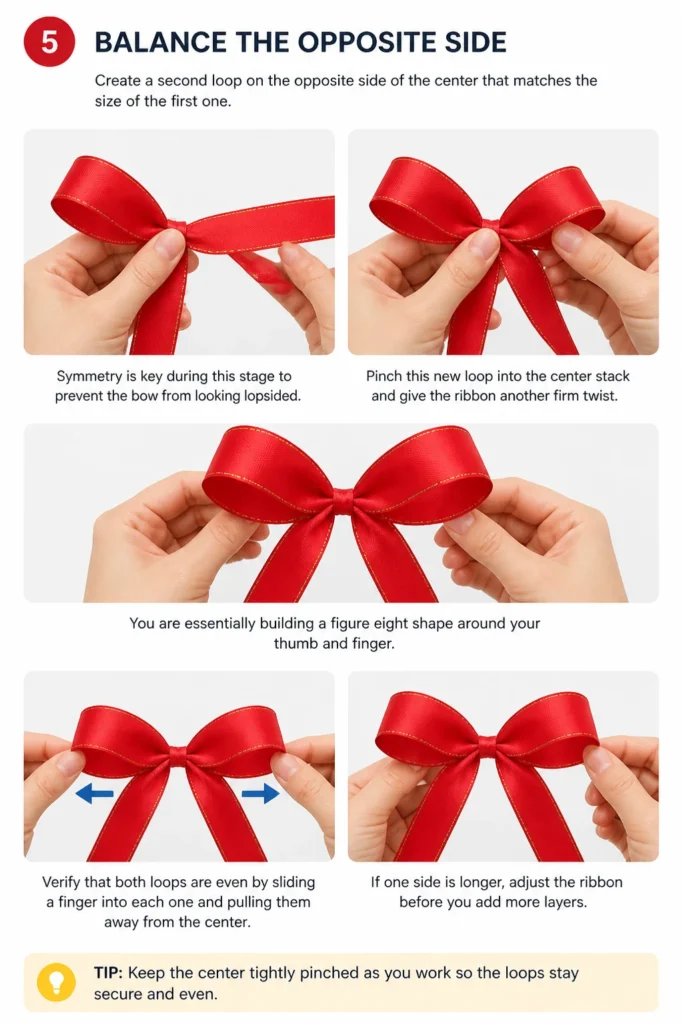
Pinch this new loop into the center stack and give the ribbon another firm twist. You are essentially building a “figure eight” shape around your thumb and finger.
Verify that both loops are even by sliding a finger into each one and pulling them away from the center. If one side is longer, adjust the ribbon before you add more layers.
Step 6: Stack Additional Layers
Repeat the looping and twisting process until you have at least three or four loops on each side. For a truly “large” bow, you might want six loops per side.
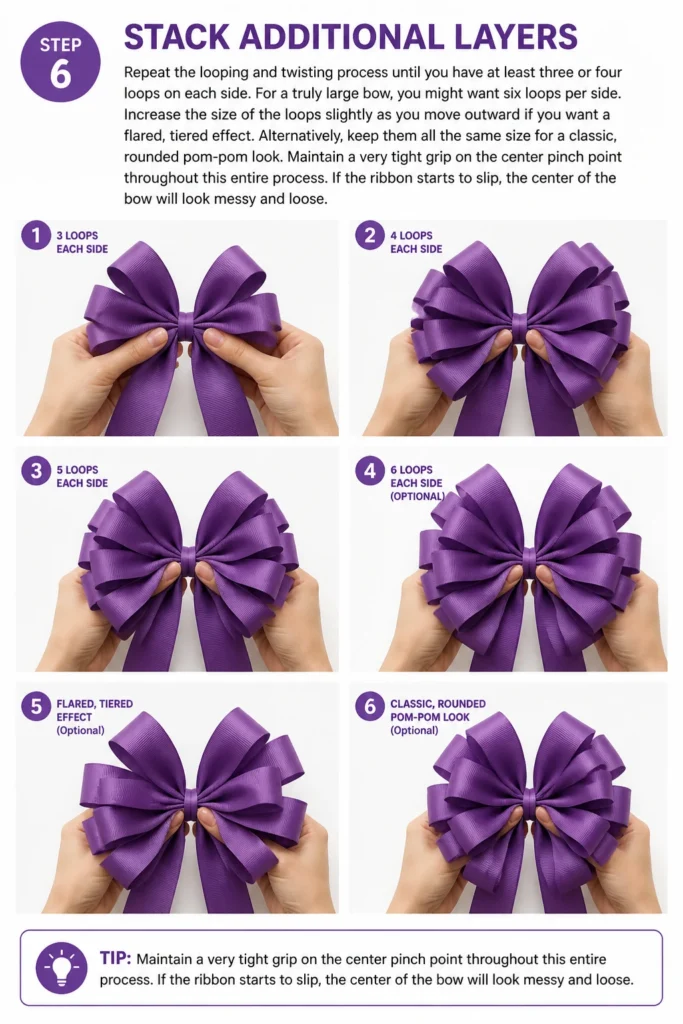
Increase the size of the loops slightly as you move outward if you want a flared, tiered effect. Alternatively, keep them all the same size for a classic, rounded pom-pom look.
Maintain a very tight grip on the center pinch point throughout this entire process. If the ribbon starts to slip, the center of the bow will look messy and loose.
Step 7: Secure with Floral Wire
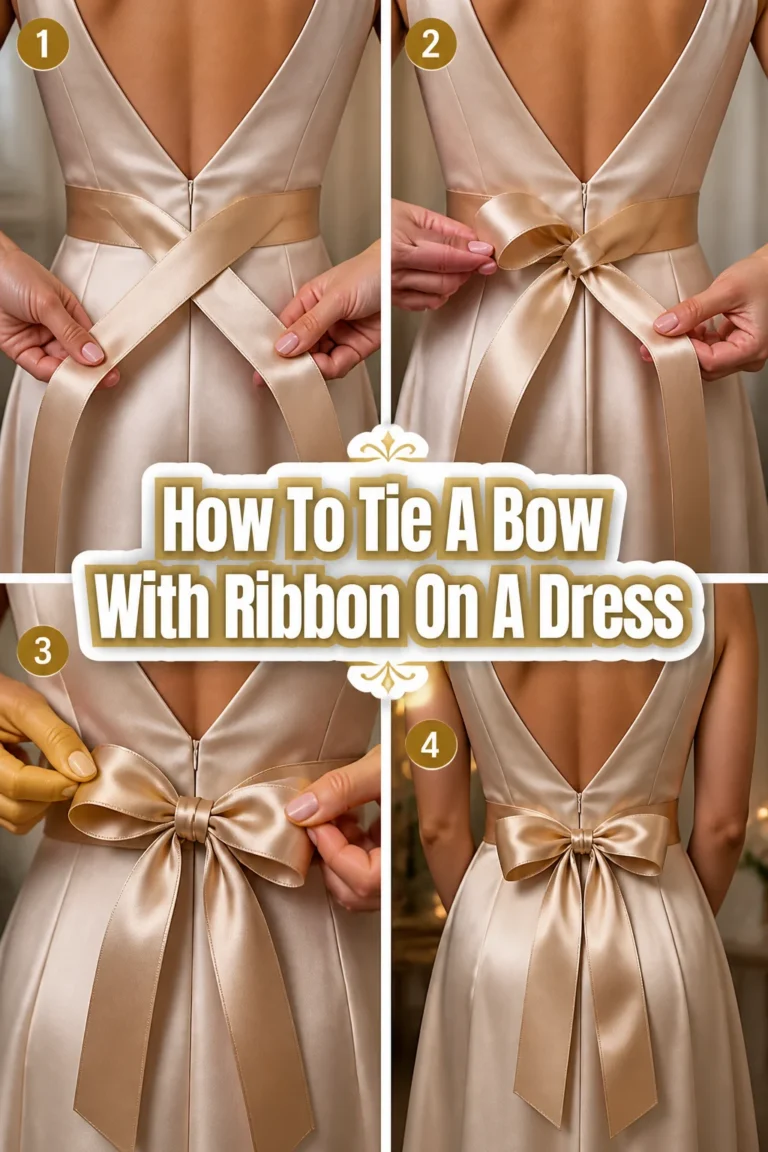
Slide a 12-inch piece of floral wire or a pipe cleaner through the very center loop you created in Step 3. Wrap it around the entire pinched stack of ribbon.
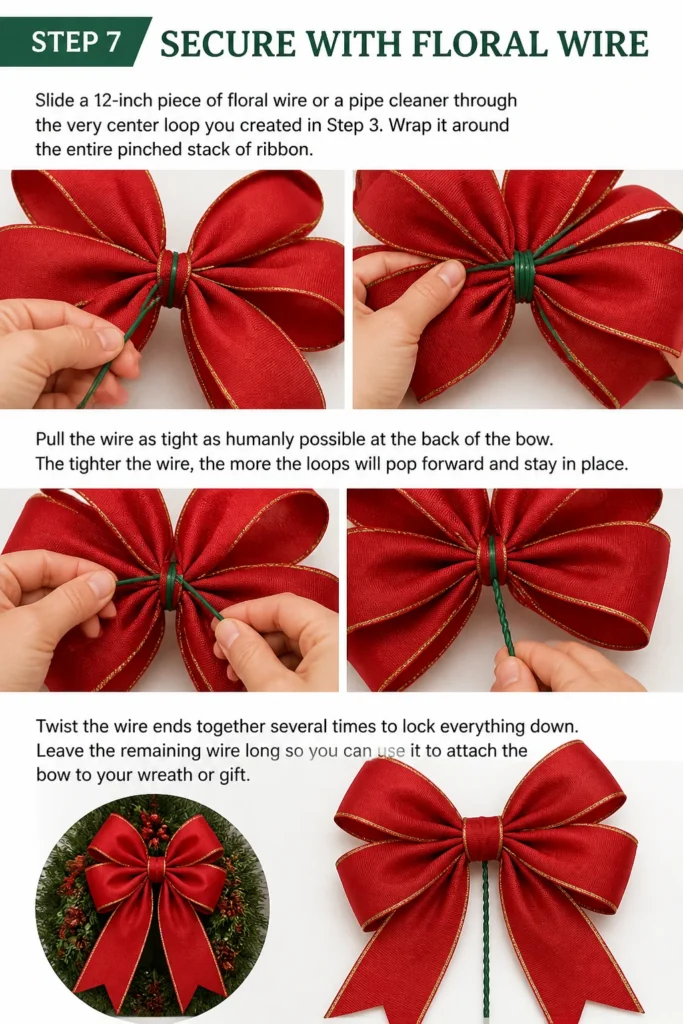
Pull the wire as tight as humanly possible at the back of the bow. The tighter the wire, the more the loops will “pop” forward and stay in place.
Twist the wire ends together several times to lock everything down. Leave the remaining wire long so you can use it to attach the bow to your wreath or gift.
Step 8: Fluff and Finish
Arrange the loops by pulling them in different directions. Start from the bottom layer and move toward the center, alternating sides as you go.
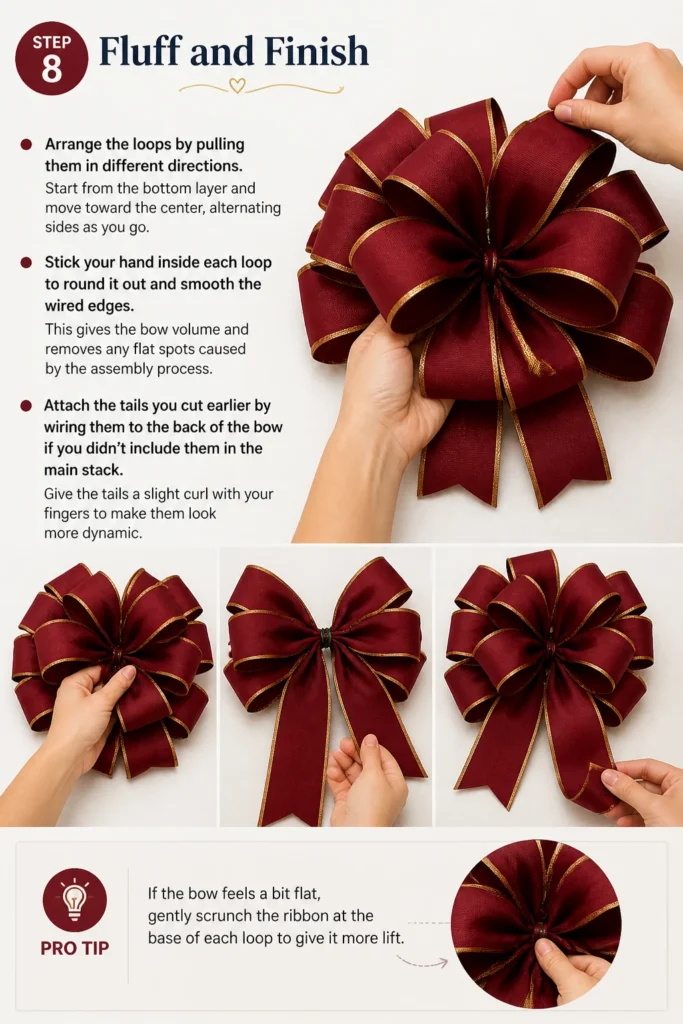
Stick your hand inside each loop to round it out and smooth the wired edges. This gives the bow volume and removes any flat spots caused by the assembly process.
Attach the tails you cut earlier by wiring them to the back of the bow if you didn’t include them in the main stack. Give the tails a slight curl with your fingers to make them look more dynamic.
Pro Tip: If the bow feels a bit flat, gently “scrunch” the ribbon at the base of each loop to give it more lift.
Common Mistakes to Avoid
Using Thin Ribbon Without Wire
Many beginners try to make large bows using standard satin or grosgrain ribbon. Without the internal wire, the loops will collapse under their own weight almost immediately. This results in a limp, sad-looking decoration that lacks the professional “wow” factor.
The wire is what allows you to “sculpt” the bow and give it a three-dimensional shape. If you must use non-wired ribbon, you will need to use starch or a stiffening spray, but even then, it won’t hold up as well as a wired alternative.
Loose Wiring at the Center
If you don’t pull your floral wire tight enough, the loops will slide around and the bow will lose its shape. A loose center causes the loops to look flat rather than gathered and full. You want the ribbon to be bunched up tightly so that the loops naturally flare outward.
Think of the wire as the spine of your bow. It needs to be rigid and secure to support the weight of the fabric and the tension of the loops.
Inconsistent Loop Sizes
It is very easy to accidentally make one side of the bow larger than the other as you add layers. This creates a lopsided appearance that is very noticeable once the bow is hung up. Always measure or visually compare your loops against the previous ones before you move on to the next layer.
Taking an extra five seconds to check the symmetry during the “pinching” stage saves you from having to take the whole thing apart later. A balanced bow is the hallmark of a skilled crafter.
Troubleshooting
The Bow Looks Flat and Lifeless
This usually happens when the loops are all pulled in the same direction. To fix this, you need to “stagger” the loops by pulling one up, one down, and one to the side. This creates a spherical shape rather than a flat, two-dimensional one.
Don’t be afraid to be firm with the ribbon. Since it has wire in it, you can bend and mold it quite aggressively until it reaches the desired fullness.
The Center Wire is Visible
If you can see the floral wire or pipe cleaner in the middle of your bow, your center loop is likely too large or not pinched correctly. You can fix this by taking a small scrap of the same ribbon and wrapping it around the center to hide the wire.
Glue this scrap piece at the back with a tiny dab of hot glue. This creates a clean, professional finish that hides the “mechanics” of the bow construction.
Key Takeaways
- Use wired ribbon to ensure the loops maintain their shape and volume over time.
- Pinch the center tightly to create the gathered effect that makes bows look professional.
- Twist the ribbon at every turn to keep the patterned side facing the front.
- Secure with floral wire instead of string or thread for a much stronger hold.
- Dovetail the ends of the tails for a high-end, finished appearance.
- Fluff from the inside out to give the bow a full, rounded silhouette.
Frequently Asked Questions
How much ribbon do I need for a large bow?
For a standard large bow with six to eight loops, you should plan on using about 3 to 5 yards of ribbon. If you want exceptionally long tails or a very dense, multi-layered bow, it is safer to have a full 10-yard spool on hand. It is always better to have a bit of excess than to run out halfway through your final loop.
Can I use two different types of ribbon in one bow?
Yes, layering ribbons is a fantastic way to add texture and color. You can hold two ribbons together and treat them as one as you fold your loops. This creates a “double-thick” look that is very popular for high-end holiday decor and weddings.
What gauge of wire is best for securing bows?
A 26-gauge floral wire is usually the sweet spot for bow making. It is thin enough to twist easily with your fingers but strong enough to hold heavy fabric in place. If you are using a very heavy velvet or thick burlap, you might want to move up to a 22-gauge wire for extra security.
How do I store large bows so they don’t get crushed?
The best way to store these bows is to stuff the loops with tissue paper and place them in a rigid plastic bin. Because they have wired edges, you can usually fluff them back to life even if they get slightly flattened. Avoid stacking heavy items on top of them, as this can permanently kink the wire.
Our Top Recommended Finds
- 2.5-Inch Wired Satin Ribbon: This is the most versatile material for beginners because it is easy to fold and comes in every color imaginable.
- 26-Gauge Floral Wire: These pre-cut wire pieces save time and provide the perfect amount of tension for securing your ribbon stack.
- Fabric Shears: A dedicated pair of sharp scissors is essential for getting clean, crisp dovetail cuts without any fraying or jagged edges.
Bring Your Decor To Life Today
Now that you know the secret of the “pinch and twist,” you can create custom bows for every season of the year.
Try experimenting with different textures like rustic jute or elegant organza to see how the material changes the character of the bow.
Grab a spool of your favorite ribbon and start practicing your loops right now; you will be amazed at how quickly your skills improve.
Beginner-friendly templates, step-by-step guides,
and weekly project ideas in your inbox.