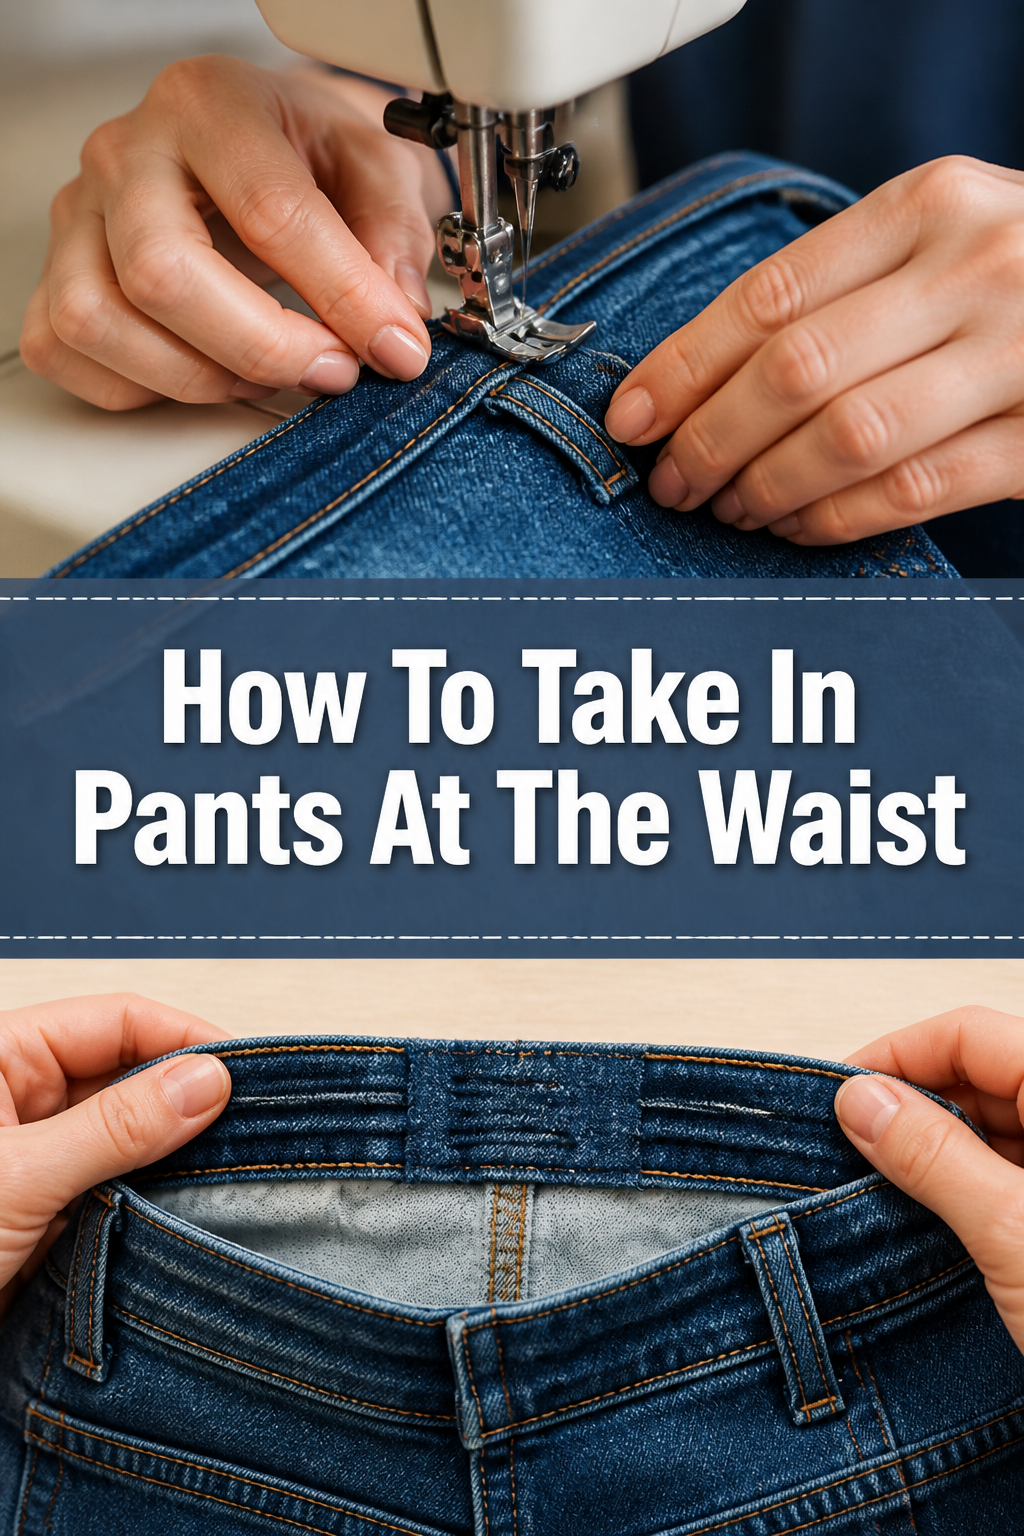
🧵 How To Take In Pants At The Waist

Beginner-friendly templates, step-by-step guides,
and weekly project ideas in your inbox.
Finding a pair of pants that fits perfectly in the hips but gaps at the waist is a common frustration for almost everyone.
I have spent years tailoring my own thrift store finds because I realized early on that off-the-rack sizing is rarely consistent.
This guide will teach you how to achieve a professional-looking fit without needing a degree in fashion design.
Quick Overview
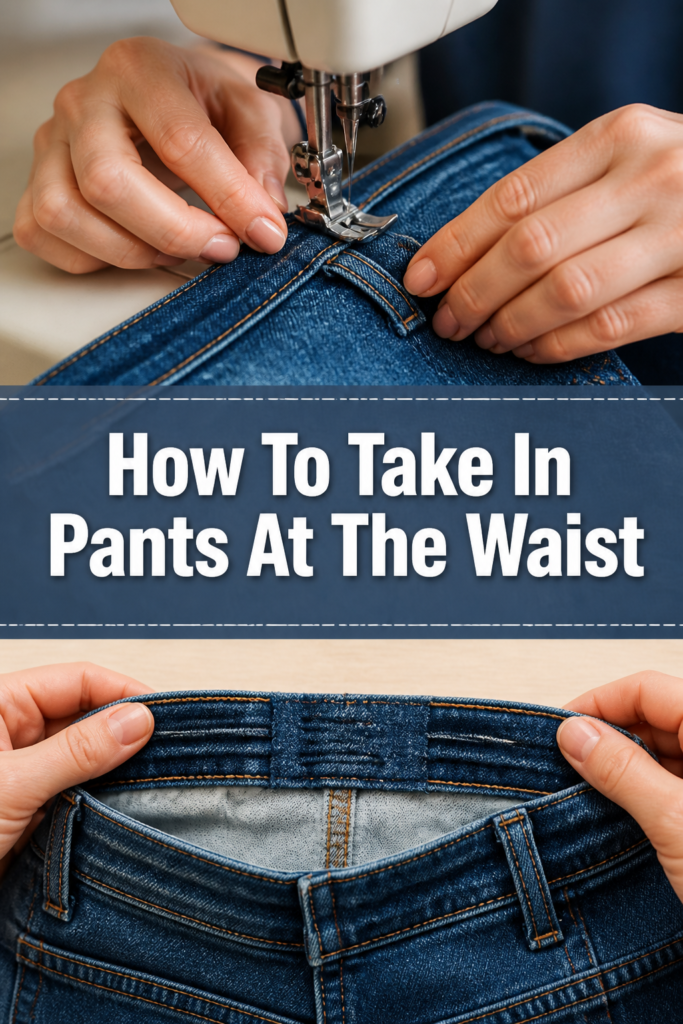
Taking in the waist of your pants is a fundamental sewing skill that saves money and improves your wardrobe’s overall look.
You will be focusing on the center back seam, which is the most effective way to reduce the circumference of the waistband while maintaining the garment’s shape.
- Time needed: 45 to 90 minutes
- Difficulty: Intermediate
- What you’ll need: Sewing machine, seam ripper, fabric chalk, straight pins, heavy-duty thread, and an iron.
Step-by-Step Instructions
Step 1: Pin the Excess Fabric
Put the pants on inside out so you can easily access the seams and see exactly where the fabric needs to be removed.
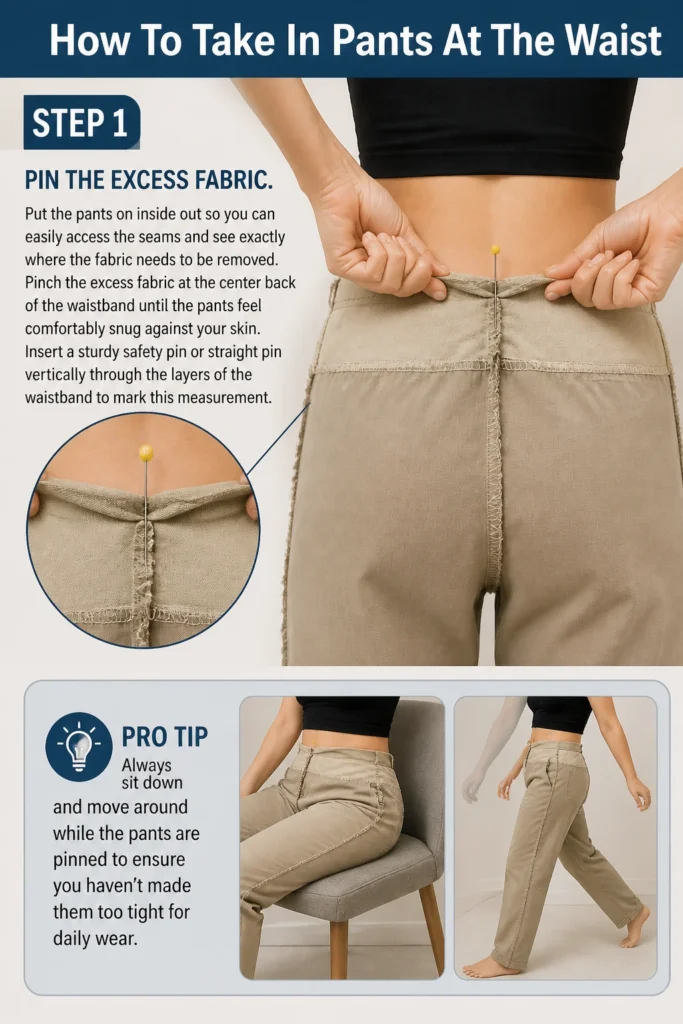
Pinch the excess fabric at the center back of the waistband until the pants feel comfortably snug against your skin.
Insert a sturdy safety pin or straight pin vertically through the layers of the waistband to mark this measurement.
Pro Tip: Always sit down and move around while the pants are pinned to ensure you haven’t made them too tight for daily wear.
Step 2: Mark the New Seam Line
Remove the pants carefully to avoid getting poked by the pins you just placed.
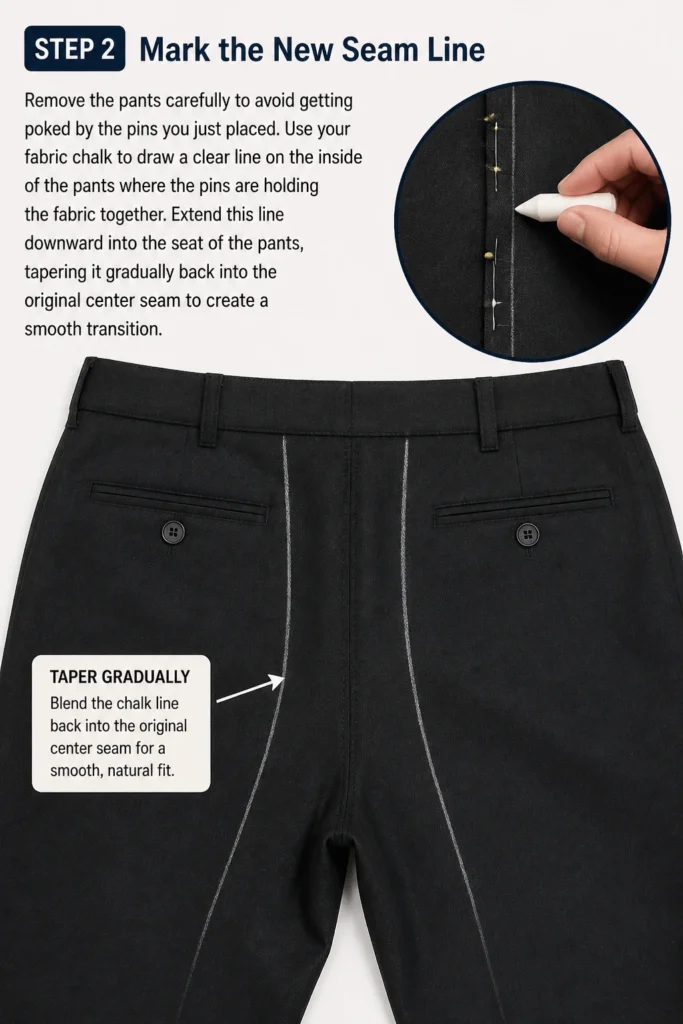
Use your fabric chalk to draw a clear line on the inside of the pants where the pins are holding the fabric together.
Extend this line downward into the seat of the pants, tapering it gradually back into the original center seam to create a smooth transition.
Step 3: Remove the Center Belt Loop
Locate the belt loop that sits directly over the center back seam, as this will interfere with your sewing path.
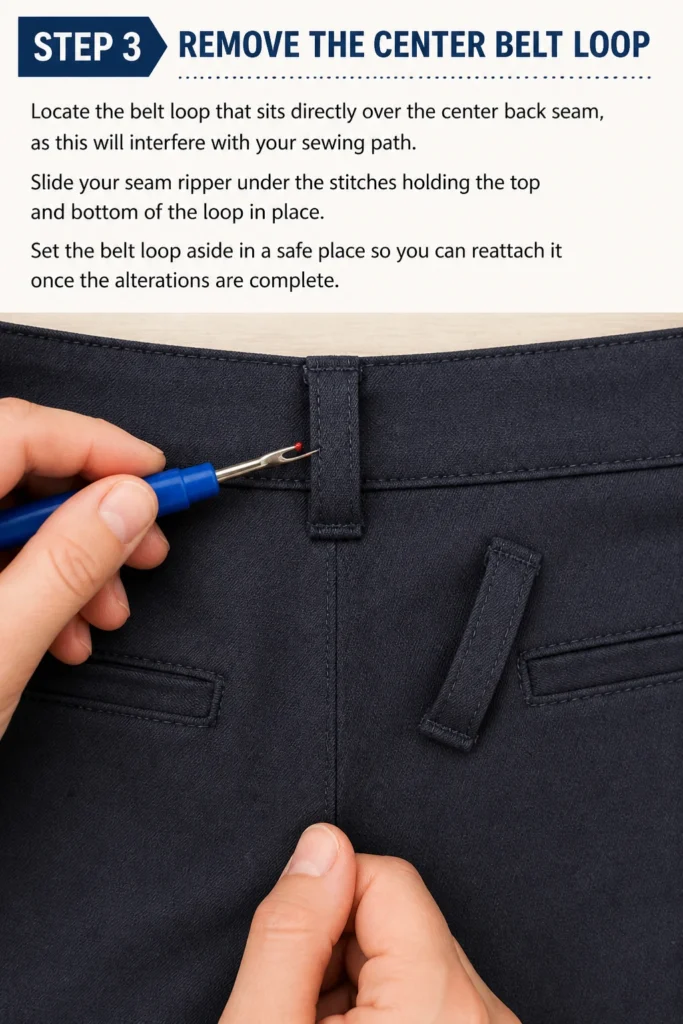
Slide your seam ripper under the stitches holding the top and bottom of the loop in place.
Set the belt loop aside in a safe place so you can reattach it once the alterations are complete.
Step 4: Open the Waistband Seams
Identify where the waistband is attached to the main body of the pants at the back.
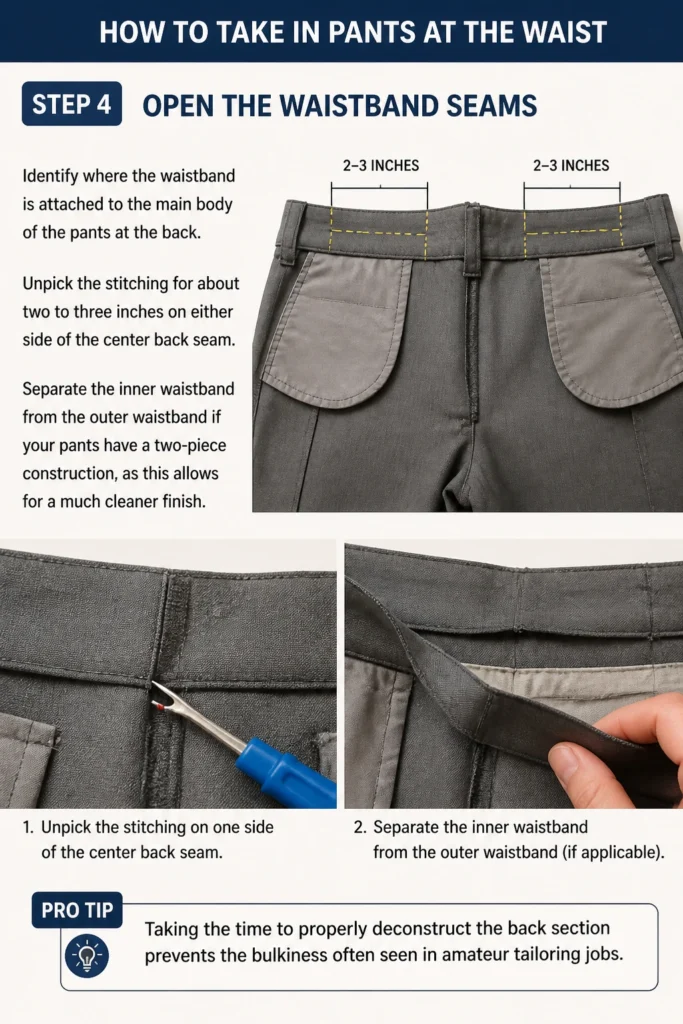
Unpick the stitching for about two to three inches on either side of the center back seam.
Separate the inner waistband from the outer waistband if your pants have a two-piece construction, as this allows for a much cleaner finish.
Pro Tip: Taking the time to properly deconstruct the back section prevents the “bulkiness” often seen in amateur tailoring jobs.
Step 5: Stitch the New Back Seam
Align the chalk marks you made earlier and pin the fabric together along that line.
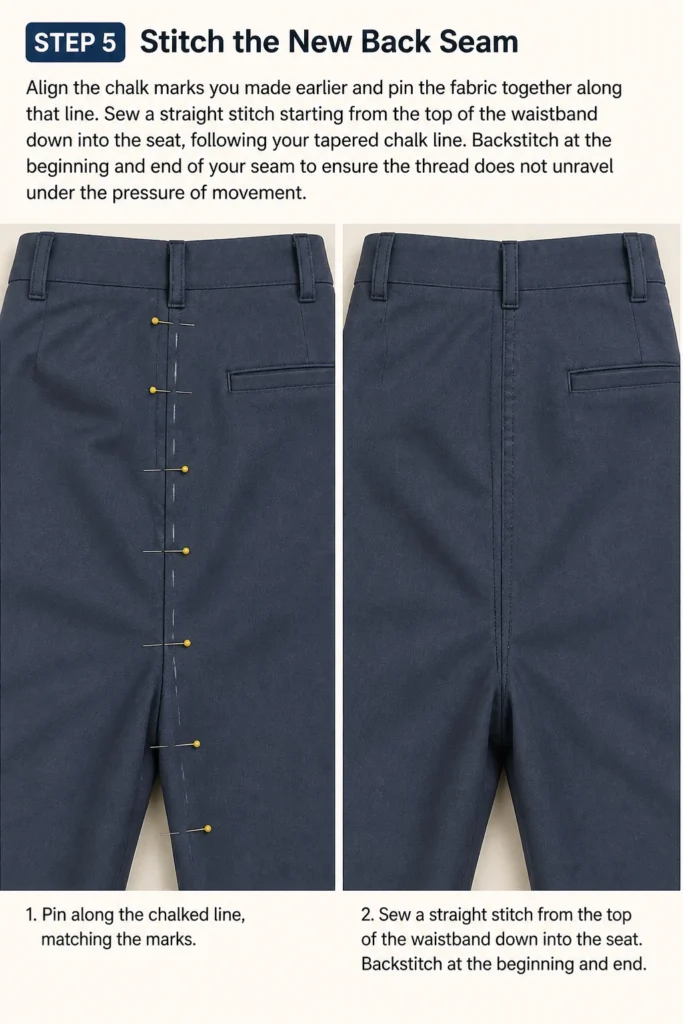
Sew a straight stitch starting from the top of the waistband down into the seat, following your tapered chalk line.
Backstitch at the beginning and end of your seam to ensure the thread does not unravel under the pressure of movement.
Step 6: Trim and Press the Seam Allowance
Cut away the excess fabric about half an inch from your new stitch line if you are certain the fit is perfect.
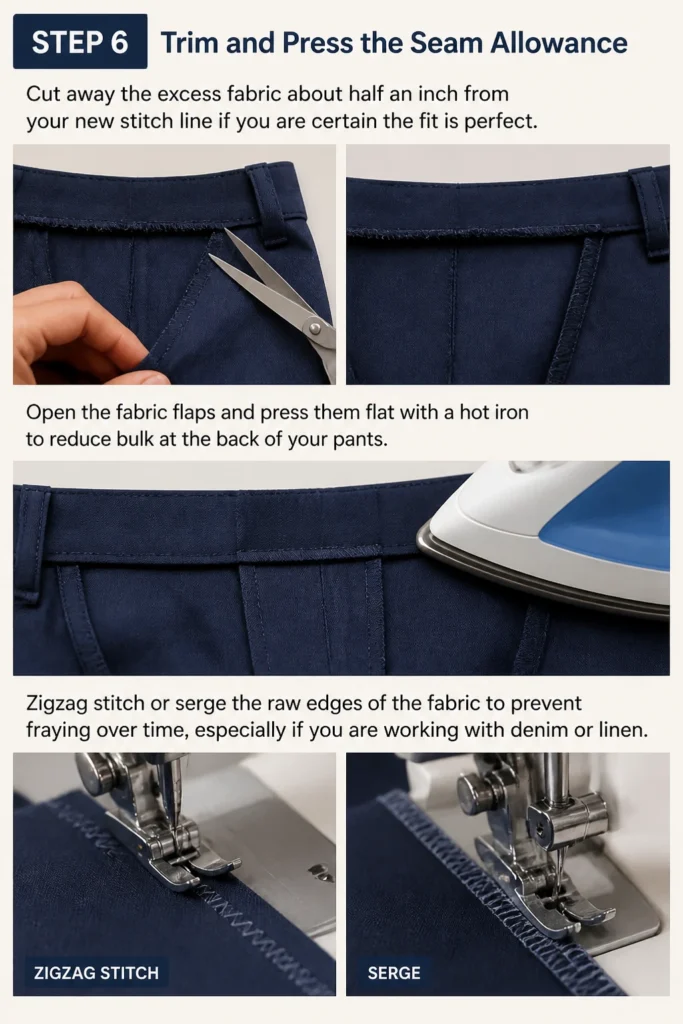
Open the fabric flaps and press them flat with a hot iron to reduce bulk at the back of your pants.
Zigzag stitch or serge the raw edges of the fabric to prevent fraying over time, especially if you are working with denim or linen.
Step 7: Adjust the Waistband Length
Fold the waistband pieces so they match the new, smaller width of the pants’ body.
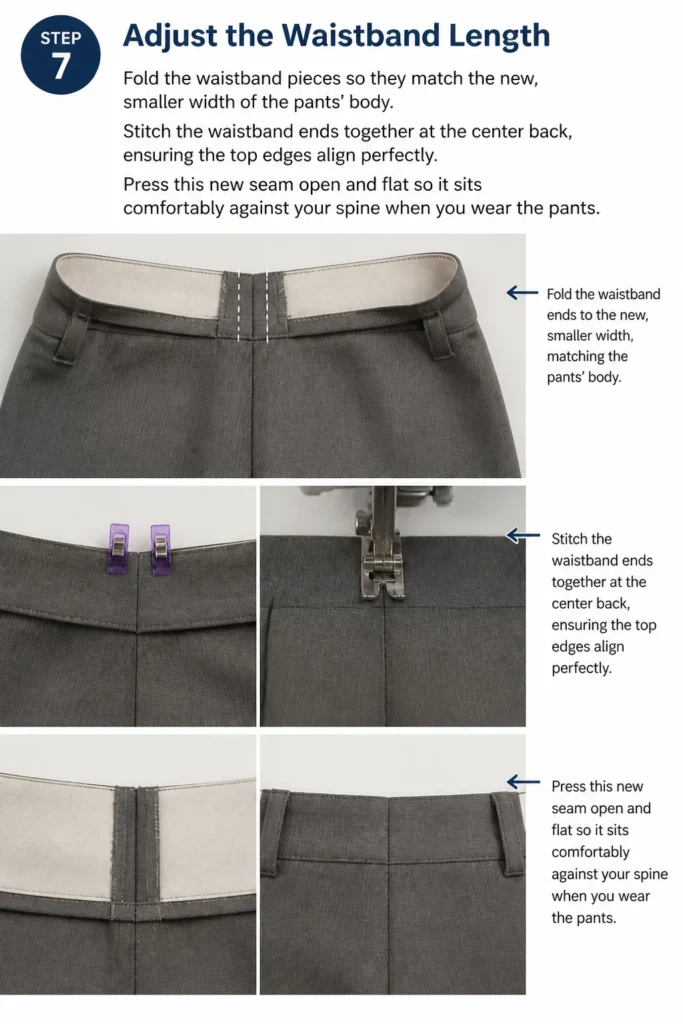
Stitch the waistband ends together at the center back, ensuring the top edges align perfectly.
Press this new seam open and flat so it sits comfortably against your spine when you wear the pants.
Step 8: Reattach the Waistband and Belt Loop
Pin the waistband back onto the body of the pants, tucking the raw edges inside as they were originally.
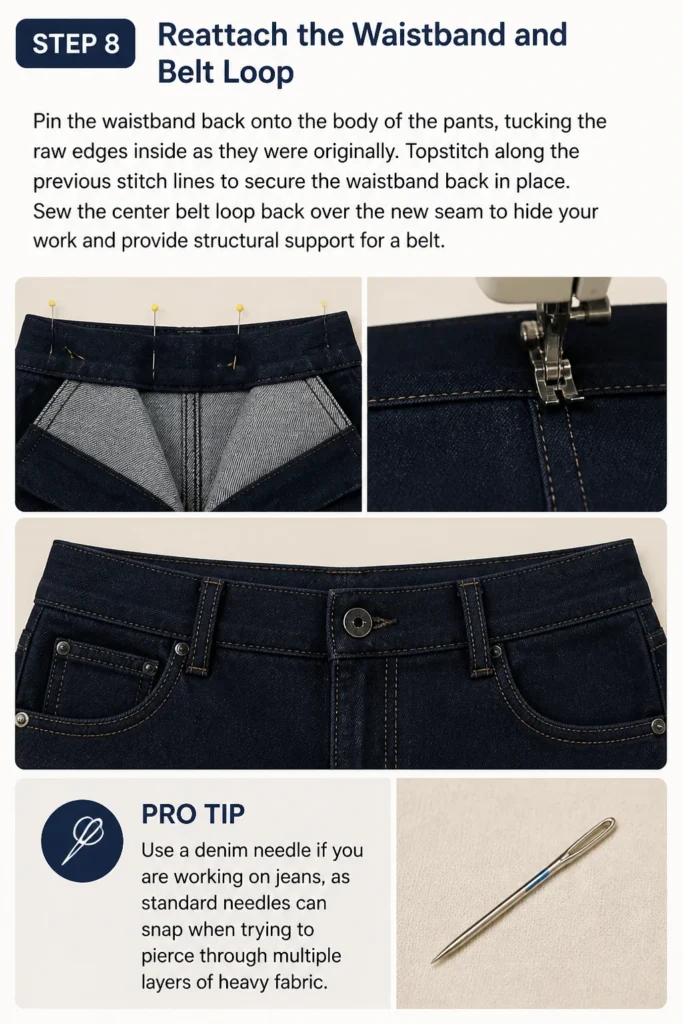
Topstitch along the previous stitch lines to secure the waistband back in place.
Sew the center belt loop back over the new seam to hide your work and provide structural support for a belt.
Pro Tip: Use a denim needle if you are working on jeans, as standard needles can snap when trying to pierce through multiple layers of heavy fabric.
Common Mistakes to Avoid
Taking In Too Much Fabric
It is tempting to make the waist as tight as possible to achieve a snatched look.
However, your body expands when you sit down or eat, and fabric that is too tight will eventually rip or cause the zipper to fail.
Leave about a finger’s width of breathing room to ensure the pants remain functional for all-day use.
Ignoring the Taper
If you only sew the waistband and stop abruptly, you will end up with a strange “point” or bulge at the base of the alteration.
The key to a professional look is a long, slow taper that blends into the original seat seam over several inches.
Rushing this step results in an awkward silhouette that makes it obvious the pants have been modified.
Using the Wrong Thread Weight
Using thin, all-purpose thread on heavy denim or work trousers is a recipe for a wardrobe malfunction.
The tension at the waist is significant, so you need a heavy-duty or “topstitching” thread that can handle the strain.
Always match the thread color as closely as possible to the original stitching to keep the alteration invisible.
Troubleshooting
The Back Pockets Look Too Close Together
This happens when you take in more than two inches from the center back seam.
If the pockets start to look distorted or migrate toward the center, you may need to take smaller amounts from the side seams instead.
For significant size changes, distributing the reduction across three points (back and both sides) maintains the original design balance.
The Fabric is Bunching Under the Waistband
Bunching usually indicates that the waistband and the body of the pants were not aligned properly before sewing.
You must ensure that the circumference of the new waistband perfectly matches the circumference of the adjusted pants opening.
Rip out the topstitching, smooth the fabric from the center outward, and re-pin the sections before trying again.
Key Takeaways
- Always fit the pants inside out to mark your measurements accurately.
- Taper your new seam deeply into the seat to avoid creating a visible bump.
- Remove belt loops before sewing to ensure a flat, professional finish.
- Use a hot iron at every stage to press seams open and reduce bulk.
- Check the fit by sitting and walking before you trim any excess fabric.
- Select a needle and thread weight that matches the specific fabric of your pants.
Frequently Asked Questions
Can I take in pants without a sewing machine?
You can certainly do this by hand using a backstitch, which is incredibly strong and mimics a machine stitch.
However, it will take significantly longer, and you must ensure your stitches are very small and tight to withstand the pressure of the waistband.
Hand-sewing is best reserved for dress slacks made of lighter materials rather than heavy denim.
How many sizes can I realistically take in?
Generally, you can take in a waistband by one to two sizes before the proportions of the pants start to look strange.
Once you go beyond two inches of reduction, the placement of the pockets and the side seams will shift too far toward the back.
If you need to go smaller than that, consider a more complex alteration involving the side seams.
What if my pants have a leather brand patch on the back?
You should carefully remove the patch with a seam ripper before you begin the alteration process.
After you have finished taking in the waist and reattaching the belt loop, you can sew the patch back on.
If the pants have shrunk significantly, you might need to trim the patch or center it over the new seam.
Is it easier to use darts instead of the center seam?
Darts are easier for beginners because they don’t involve cutting the waistband, but they can create bulk and don’t look as professional.
Darts work well for minor adjustments on skirts or trousers that you plan to wear with a long shirt covering the waist.
For a permanent, high-quality fix that looks like it came from the factory, the center back seam method is superior.
Our Top Recommended Finds
- Magnetic Pin Cushion: This keeps your pins organized and easy to grab while you are focused on holding fabric in place.
- Tailor’s Chalk Set: Using actual chalk instead of a pen ensures the marks disappear after the first wash and won’t stain delicate fabrics.
- Heavy-Duty Seam Ripper: A sharp, ergonomic seam ripper makes the deconstruction phase much faster and prevents accidental fabric tears.
Mastering Your Perfect Fit
Learning to adjust your own clothing is one of the most empowering skills you can develop as a fashion-conscious individual.
Once you master the center back seam technique, you will never have to pass up a great pair of vintage trousers just because the waist is a bit loose.
Start practicing on an old pair of jeans today to build your confidence before moving on to your favorite dress pants.
The more you practice, the more intuitive the tapering and stitching will become, leading to a wardrobe that looks custom-made for your body.
Beginner-friendly templates, step-by-step guides,
and weekly project ideas in your inbox.