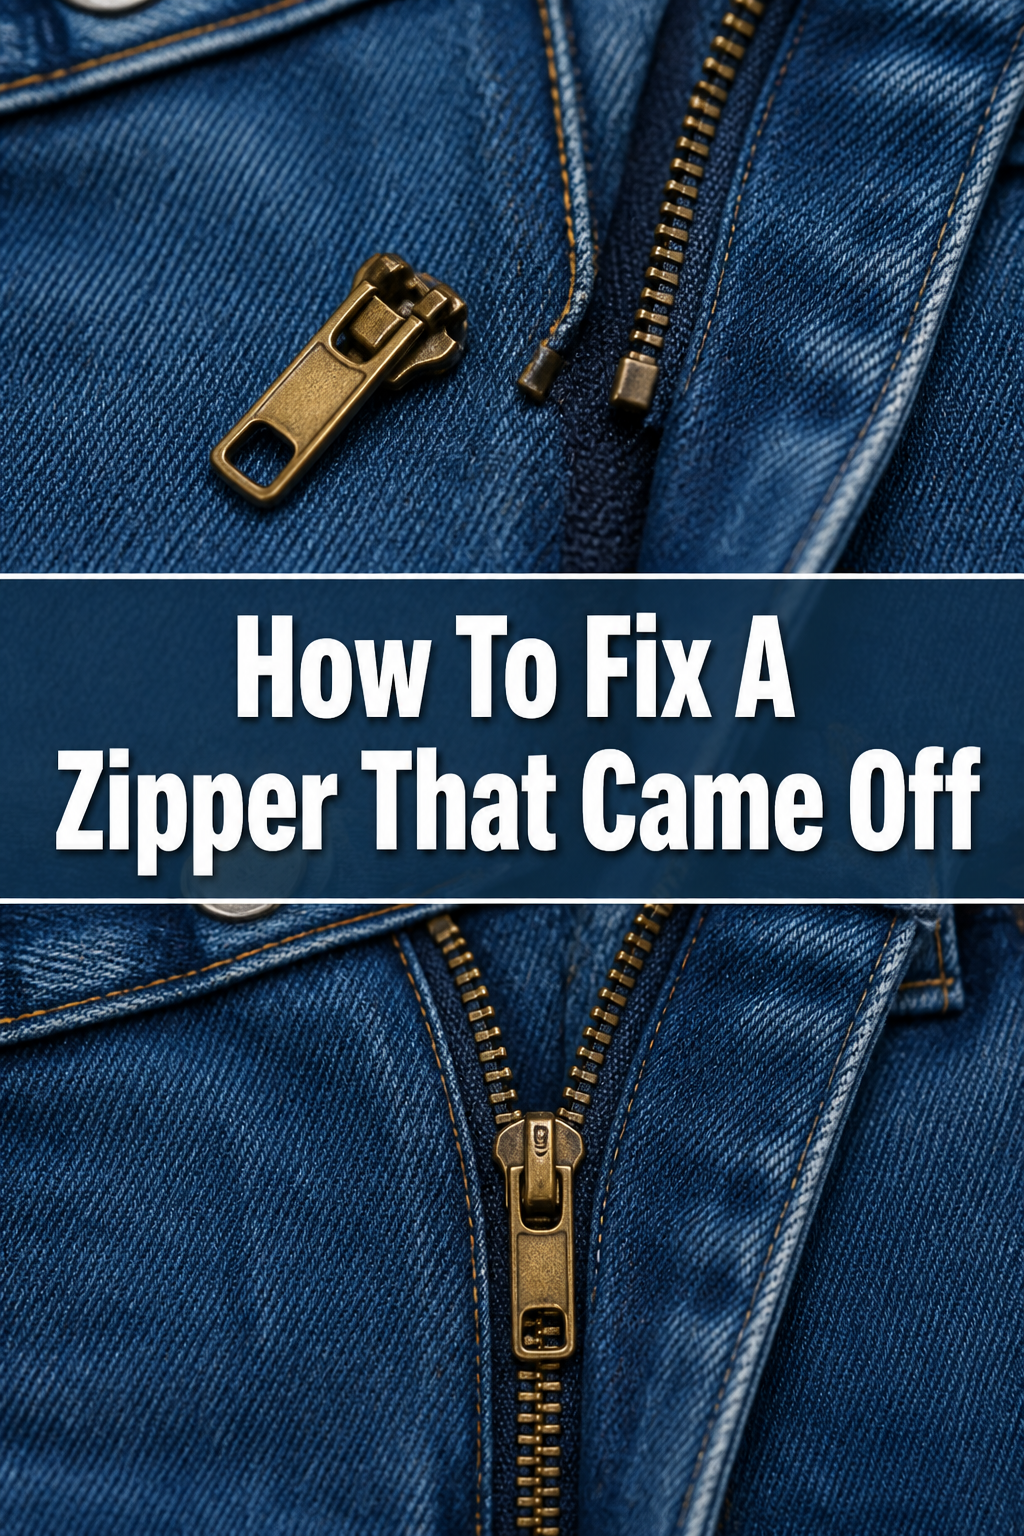
🧵 How To Fix A Zipper That Came Off

Beginner-friendly templates, step-by-step guides,
and weekly project ideas in your inbox.
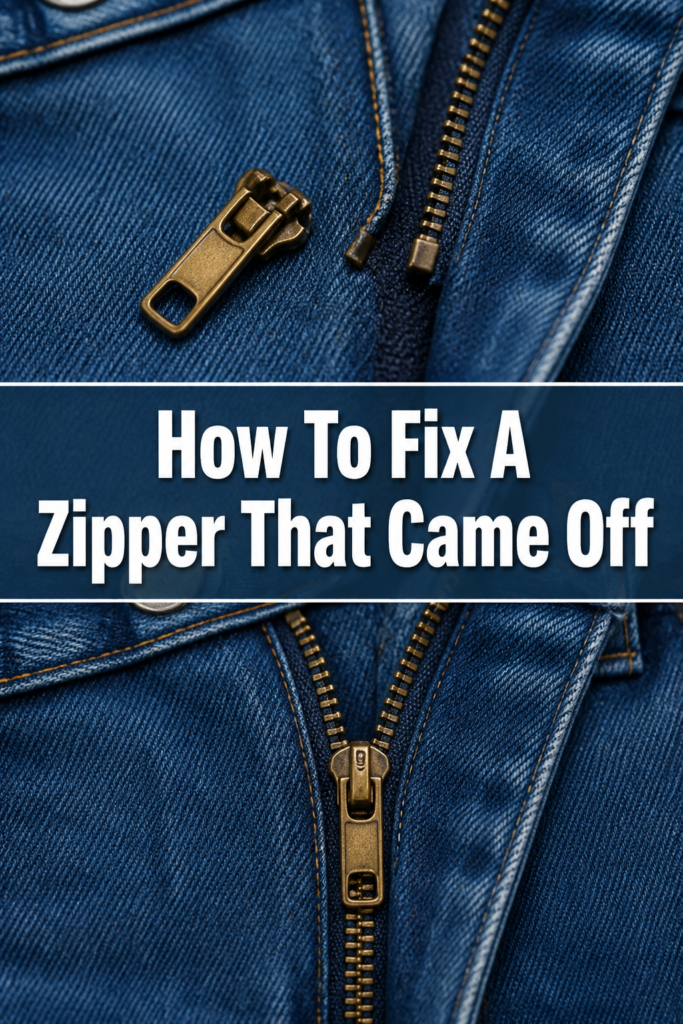
Few things are as frustrating as a zipper slider detaching completely from its tracks. It often feels like a death sentence for your favorite jacket, bag, or pair of pants.
I’ve personally salvaged countless items by mastering this surprisingly simple repair. This guide will walk you through the process, empowering you to bring those beloved items back to life.
You don’t need to be a sewing expert to follow these steps.
Quick Overview
Repairing a detached zipper slider is a practical skill that saves money and extends the life of your belongings. You’ll learn how to re-align the teeth and securely re-attach the slider.
- Time needed: 15-45 minutes (depending on zipper type and experience)
- Difficulty: Beginner to Intermediate
- What you’ll need: Pliers (needle-nose recommended), scissors, seam ripper (optional), replacement zipper stop (optional)
Step-by-Step Instructions
Step 1: Assess the Damage and Gather Tools
First, carefully examine the zipper. Determine if the slider has simply come off one side, or if it’s completely detached from both tracks. This initial assessment guides your approach.
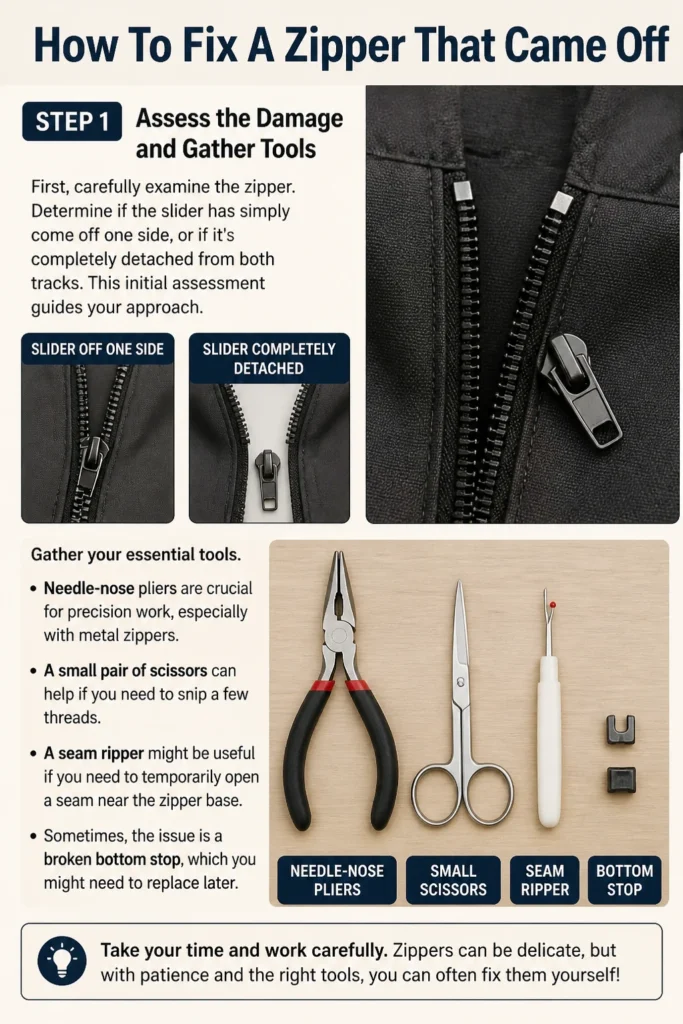
Gather your essential tools. Needle-nose pliers are crucial for precision work, especially with metal zippers. A small pair of scissors can help if you need to snip a few threads.
A seam ripper might be useful if you need to temporarily open a seam near the zipper base. Sometimes, the issue is a broken bottom stop, which you might need to replace later.
Step 2: Identify the Zipper Type and Top/Bottom
Zippers come in various forms: coil (plastic), Vislon (chunky plastic), and metal. The repair method is largely similar, but metal zippers require a bit more force and care with pliers.
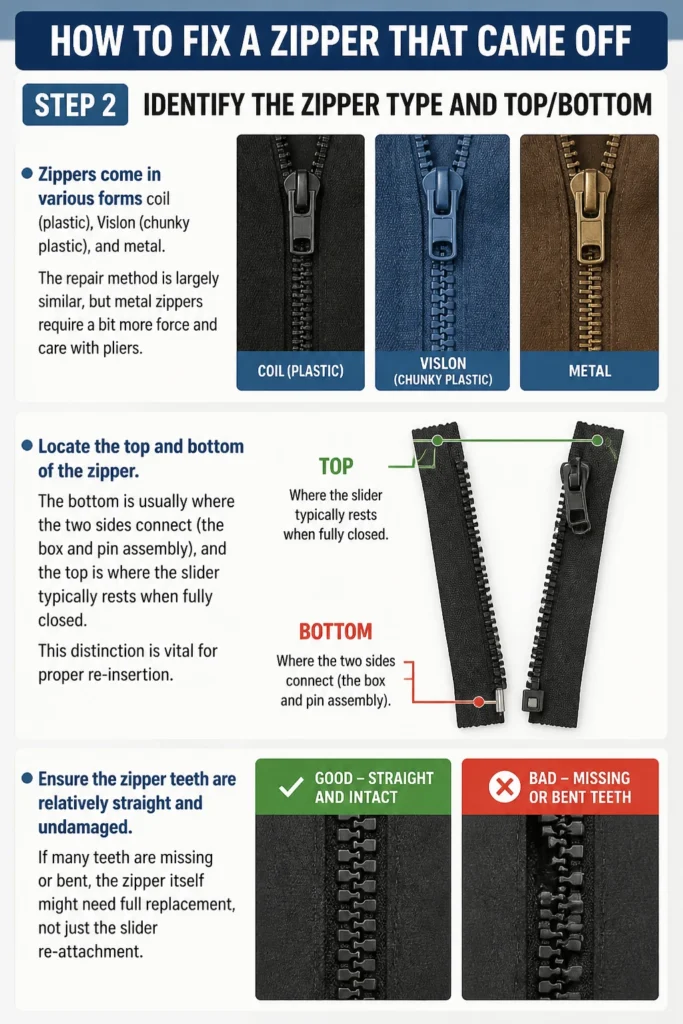
Locate the top and bottom of the zipper. The bottom is usually where the two sides connect (the box and pin assembly), and the top is where the slider typically rests when fully closed. This distinction is vital for proper re-insertion.
Ensure the zipper teeth are relatively straight and undamaged. If many teeth are missing or bent, the zipper itself might need full replacement, not just the slider re-attachment.
Step 3: Prepare the Zipper Tracks
Lay the item flat and spread the zipper tracks apart. You need a clear view and easy access to the individual teeth. If the zipper is sewn into a seam, try to make it as accessible as possible.
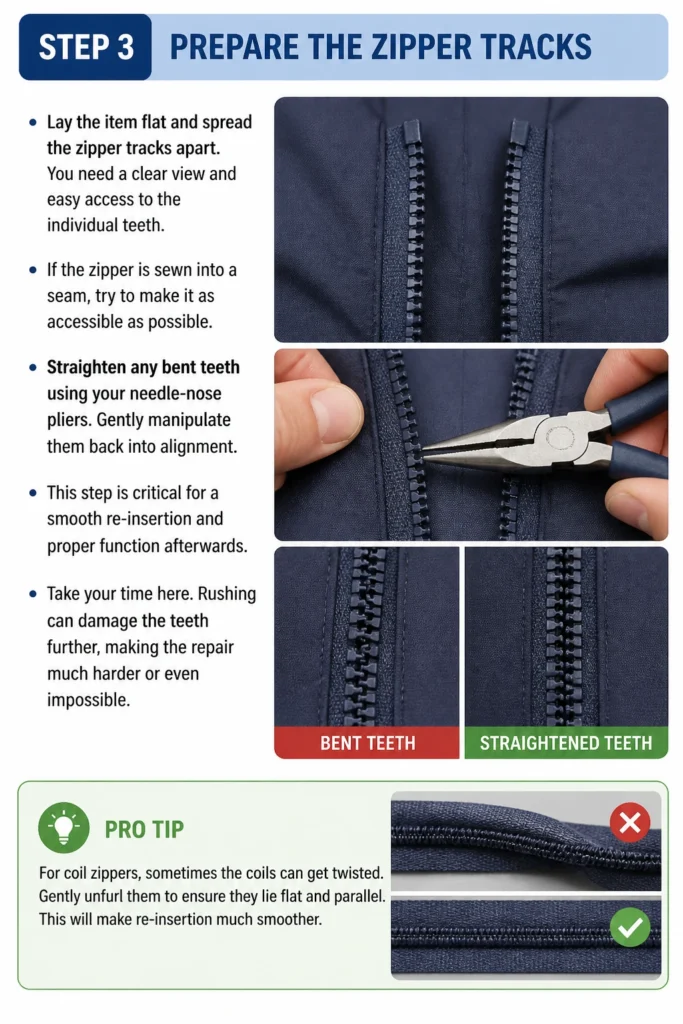
Straighten any bent teeth using your needle-nose pliers. Gently manipulate them back into alignment. This step is critical for a smooth re-insertion and proper function afterwards.
Take your time here. Rushing can damage the teeth further, making the repair much harder or even impossible.
Pro Tip: For coil zippers, sometimes the coils can get twisted. Gently unfurl them to ensure they lie flat and parallel. This will make re-insertion much smoother.
Step 4: Re-insert the Slider from the Bottom (Method 1: Open-Ended Zippers)
This method works best for jackets and other items with open-ended zippers where the slider can detach completely. Hold the zipper slider with the wide end facing down, where the teeth normally merge.
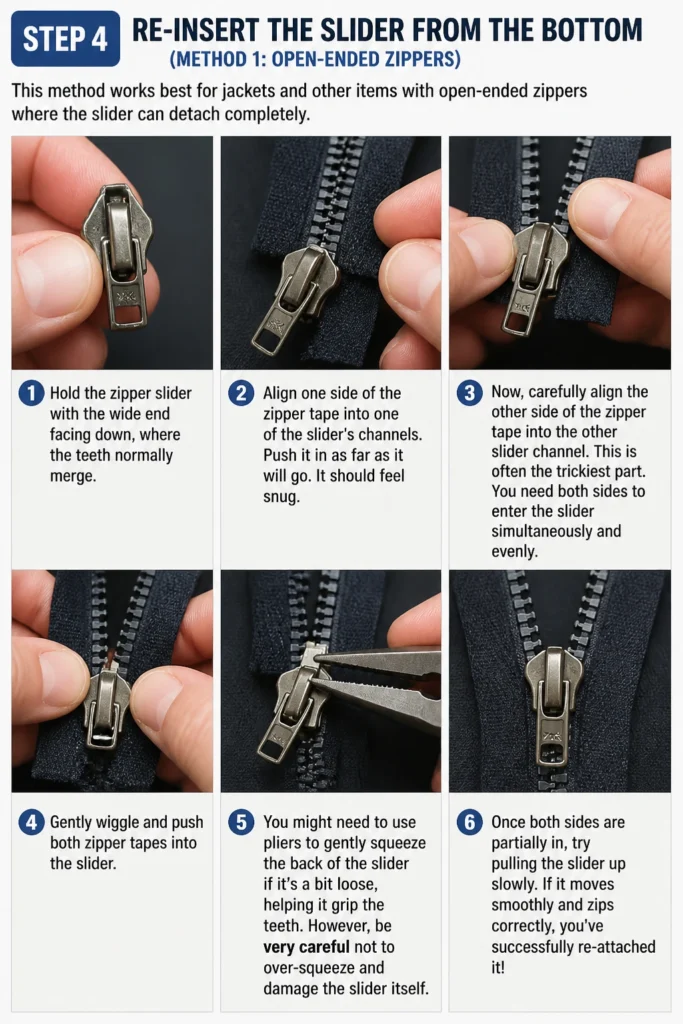
Align one side of the zipper tape into one of the slider’s channels. Push it in as far as it will go. It should feel snug.
Now, carefully align the other side of the zipper tape into the other slider channel. This is often the trickiest part. You need both sides to enter the slider simultaneously and evenly.
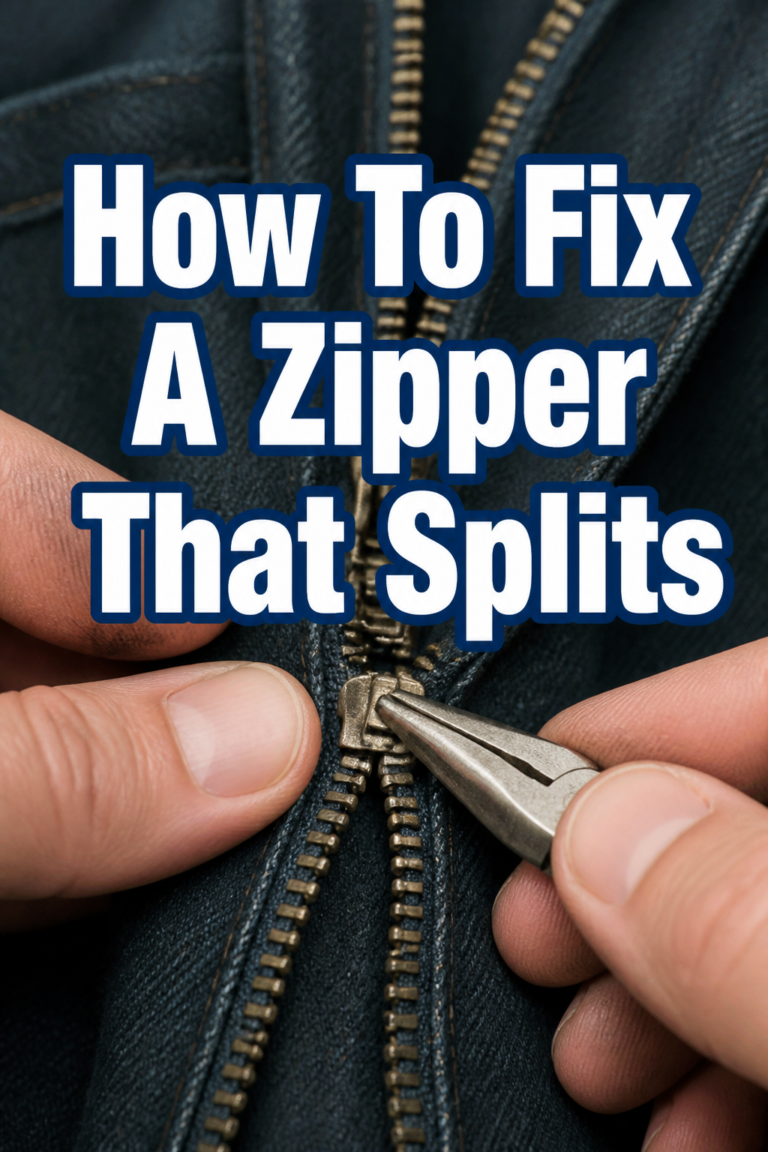
Gently wiggle and push both zipper tapes into the slider. You might need to use pliers to gently squeeze the back of the slider if it’s a bit loose, helping it grip the teeth. However, be very careful not to over-squeeze and damage the slider itself.
Once both sides are partially in, try to pull the slider down towards the bottom pin and box. It should start to engage both sets of teeth.
Step 5: Re-insert the Slider from the Top (Method 2: Closed-Ended Zippers)
For zippers that are closed at both ends (like on a backpack pocket or jeans), you’ll need to create an opening at the top. Use a seam ripper or small scissors to carefully remove a few stitches from the seam just above the top zipper stop.
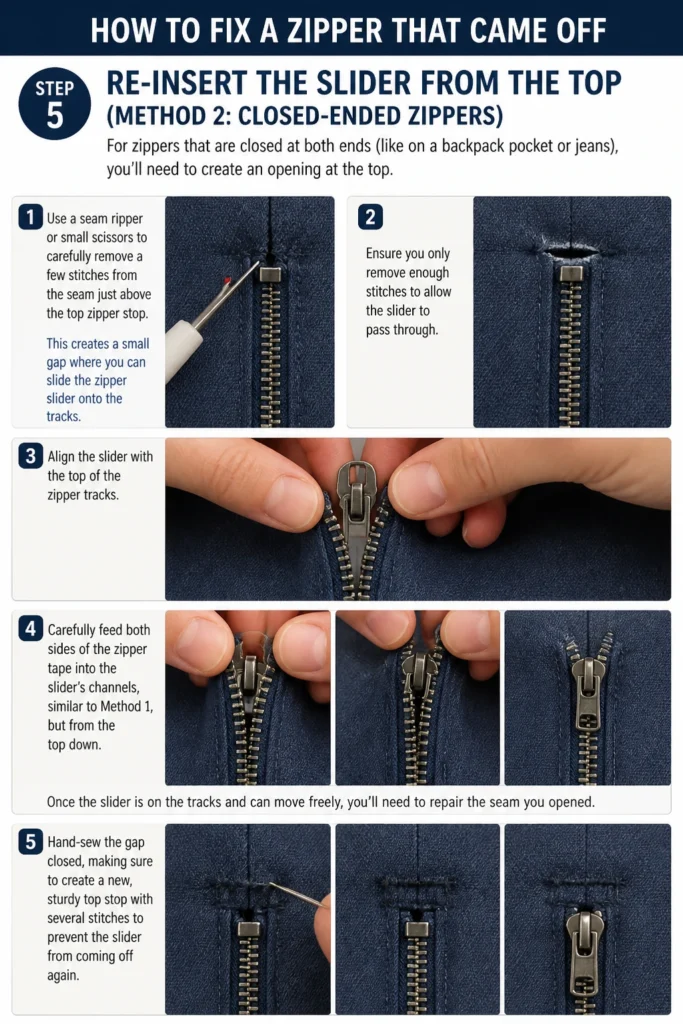
This creates a small gap where you can slide the zipper slider onto the tracks. Ensure you only remove enough stitches to allow the slider to pass through.
Align the slider with the top of the zipper tracks. Carefully feed both sides of the zipper tape into the slider’s channels, similar to Method 1, but from the top down.
Once the slider is on the tracks and can move freely, you’ll need to repair the seam you opened. Hand-sew the gap closed, making sure to create a new, sturdy top stop with several stitches to prevent the slider from coming off again.
Step 6: Test the Zipper and Adjust the Slider (If Needed)
Once the slider is back on, gently pull it up and down the track a few times. Listen and feel for any catches or resistance. The zipper should operate smoothly.
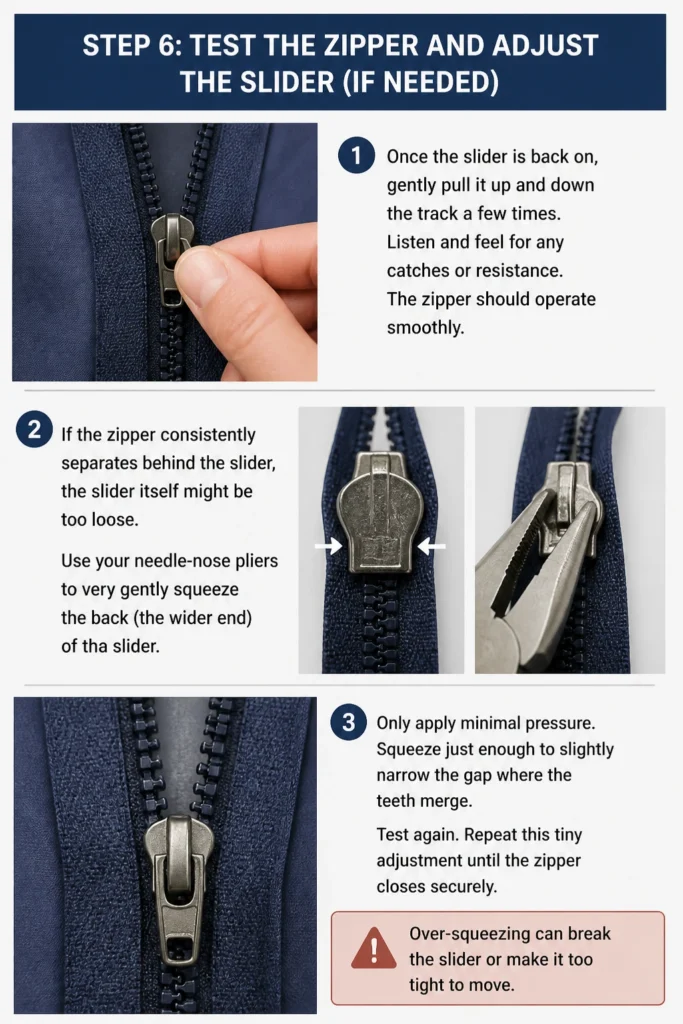
If the zipper consistently separates behind the slider, the slider itself might be too loose. Use your needle-nose pliers to very gently squeeze the back (the wider end) of the slider. Only apply minimal pressure.
Squeeze just enough to slightly narrow the gap where the teeth merge. Test again. Repeat this tiny adjustment until the zipper closes securely. Over-squeezing can break the slider or make it too tight to move.
Step 7: Reinforce Top or Bottom Stops (If Applicable)
If your zipper’s original top or bottom stop was damaged or missing, now is the time to install a new one. Zipper repair kits often come with metal stops that crimp onto the tape.
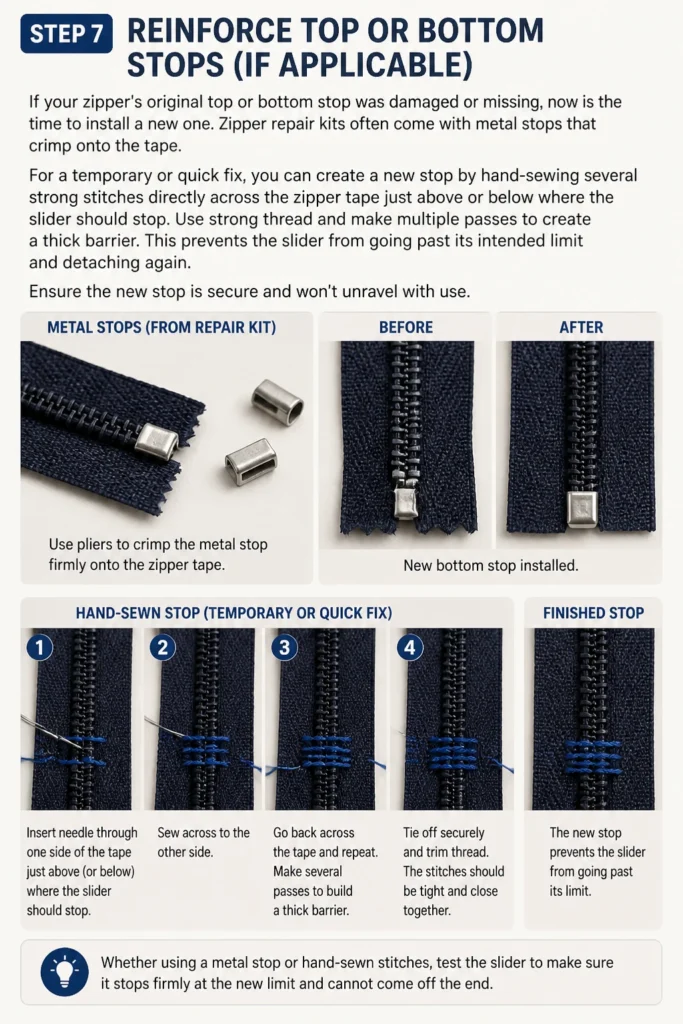
For a temporary or quick fix, you can create a new stop by hand-sewing several strong stitches directly across the zipper tape just above or below where the slider should stop. Use strong thread and make multiple passes to create a thick barrier.
This prevents the slider from going past its intended limit and detaching again. Ensure the new stop is secure and won’t unravel with use.
Common Mistakes to Avoid
Forcing the Slider
Trying to force the zipper slider onto the tracks when it’s not perfectly aligned is a common mistake. This can bend or break zipper teeth, damage the slider itself, or tear the zipper tape. Always take your time to align the teeth properly before applying gentle pressure. If it’s not going on smoothly, stop and re-evaluate the alignment.
Over-Squeezing the Slider
When adjusting a loose slider, applying too much pressure with pliers can permanently damage it. Sliders are often made of soft metal or plastic, and over-squeezing can flatten them, making them impossible to move, or even crack them. Make very small, incremental adjustments and test after each squeeze.
Damaging Zipper Teeth
Using excessive force or the wrong tools can easily damage the delicate zipper teeth. Bent or missing teeth can prevent the zipper from ever closing properly, even with a new slider. Always use needle-nose pliers for precision, and only apply gentle pressure when straightening teeth. Avoid sharp objects that could scratch or gouge the teeth.
Ignoring Bottom/Top Stops
Neglecting to repair or reinforce the bottom or top zipper stops is a recipe for repeat failure. These stops are crucial for preventing the slider from coming off again. If a stop was broken, replace it with a new metal stop or create a sturdy sewn stop. Without it, your newly fixed zipper will likely detach again quickly.
Troubleshooting
Zipper Still Separates After Closing
If the zipper teeth still separate even after you’ve re-attached the slider and pulled it up, the slider itself is likely too loose. This means the channels inside the slider aren’t gripping the teeth tightly enough.
Gently use your needle-nose pliers to squeeze the back (wider part) of the slider very slightly. Make tiny adjustments, then test the zipper. Repeat this process until the teeth interlock securely behind the slider. Be careful not to over-squeeze.
Slider Gets Stuck or Is Hard to Pull
A sticky or hard-to-pull slider can be due to bent teeth, debris in the tracks, or a slider that has been squeezed too tightly. First, inspect the teeth for any misalignment and straighten them with pliers.
Clean the zipper tracks with a small brush to remove any lint or grime. If the slider feels too tight, you might have over-squeezed it. Try to gently pry the back of the slider open a tiny bit with a flat-head screwdriver, but be extremely cautious not to break it. Lubricating the zipper with a graphite pencil or zipper lubricant can also help.
Zipper Tape is Frayed or Damaged
If the zipper tape itself is frayed or torn near the teeth, the repair will be more challenging. For minor fraying, you can apply a small amount of clear nail polish or fabric glue to the frayed edges to prevent further unraveling.
However, if the damage is extensive, the zipper tape may not hold the teeth securely, and the zipper will likely need to be fully replaced. This is a more advanced repair, often requiring a sewing machine.
Key Takeaways
- Patience is paramount: Rushing can cause more damage than good during zipper repair.
- Identify zipper type: Knowing if it’s open-ended or closed-ended dictates the best re-insertion method.
- Straighten teeth first: Misaligned teeth are a primary cause of zipper malfunction and need correction.
- Gentle slider adjustment: Only make tiny, incremental squeezes to the slider to avoid breaking it.
- Reinforce stops: Always ensure top and bottom stops are secure to prevent future detachment.
- Lubrication helps: A graphite pencil can significantly improve a sticky zipper’s movement.
Frequently Asked Questions
Can all zippers be fixed this way?
Most standard coil, Vislon, and metal zippers where the slider has come off can be repaired using these methods. However, if the zipper teeth themselves are extensively damaged, missing, or the slider is broken (e.g., the pull tab snapped off and the body cracked), then a full zipper replacement might be necessary. This guide focuses on re-attaching a detached, but otherwise functional, slider.
What if I don’t have needle-nose pliers?
While needle-nose pliers are highly recommended for their precision, you can sometimes get by with regular pliers for metal zippers, or even strong tweezers for coil zippers. The key is to have a tool that allows you to grip and manipulate small parts without damaging the surrounding material. For squeezing the slider, a regular pair of pliers used with extreme caution might work.
How do I prevent the zipper from coming off again?
The best prevention is to ensure the top and bottom stops are robust. If they are plastic, they can wear down. Consider replacing worn plastic stops with more durable metal ones from a repair kit. Additionally, avoid yanking the zipper aggressively, especially when it’s stuck. Keep zippers clean and occasionally lubricate them with a graphite pencil to ensure smooth operation, reducing stress on the slider and stops.
Is it worth fixing an old zipper?
Absolutely! Fixing a zipper is a cost-effective and environmentally friendly alternative to replacing an entire item. It extends the lifespan of your favorite clothes, bags, and gear, saving you money and reducing waste. Often, the repair is much simpler and quicker than you might anticipate, making it a highly rewarding DIY project.
Our Top Recommended Finds
- Needle-Nose Pliers: Essential for precise manipulation of zipper teeth and gentle slider adjustments.
- Zipper Repair Kit: Often includes various slider sizes, top/bottom stops, and tools for a comprehensive fix.
- Graphite Pencil: A simple, effective lubricant for sticky zippers, just rub the lead along the teeth.
Breathe New Life Into Your Zippers Today
Don’t let a detached zipper condemn your favorite items to the donation pile or the trash. With a little patience and the right tools, you have the power to restore functionality and extend their life.
This guide provides a clear roadmap for tackling this common household repair. Take a moment to assess your zipper, gather your supplies, and confidently approach the task.
You’ll be amazed at how satisfying it is to fix something yourself. Get started on that repair today and enjoy the renewed utility of your cherished belongings.
Beginner-friendly templates, step-by-step guides,
and weekly project ideas in your inbox.