🎁 How To Wrap A Bow On A Present

Beginner-friendly templates, step-by-step guides,
and weekly project ideas in your inbox.
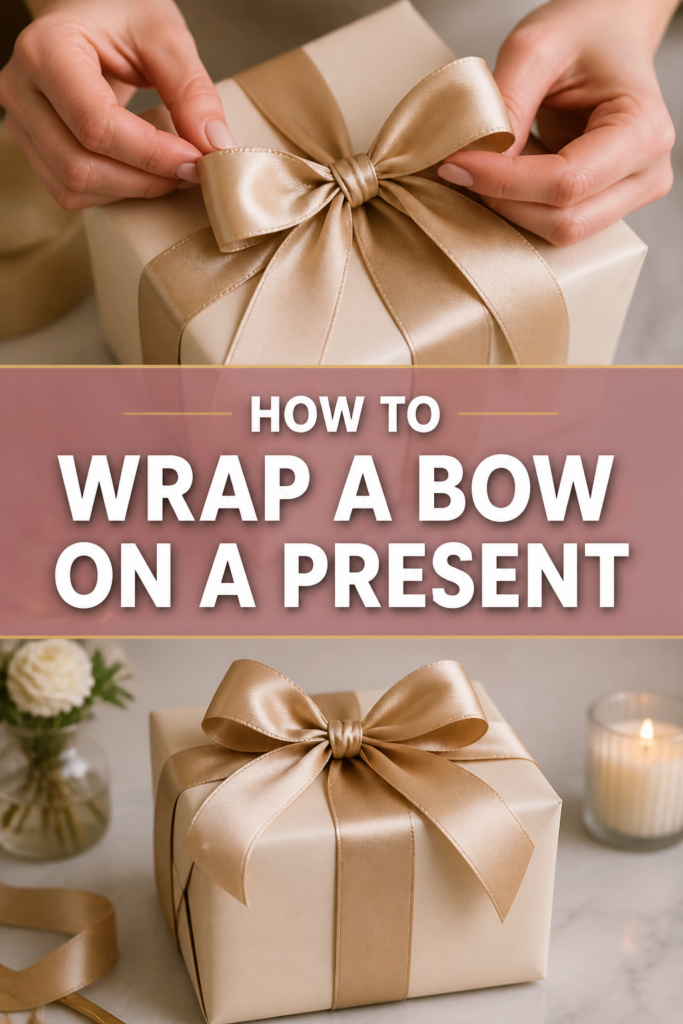
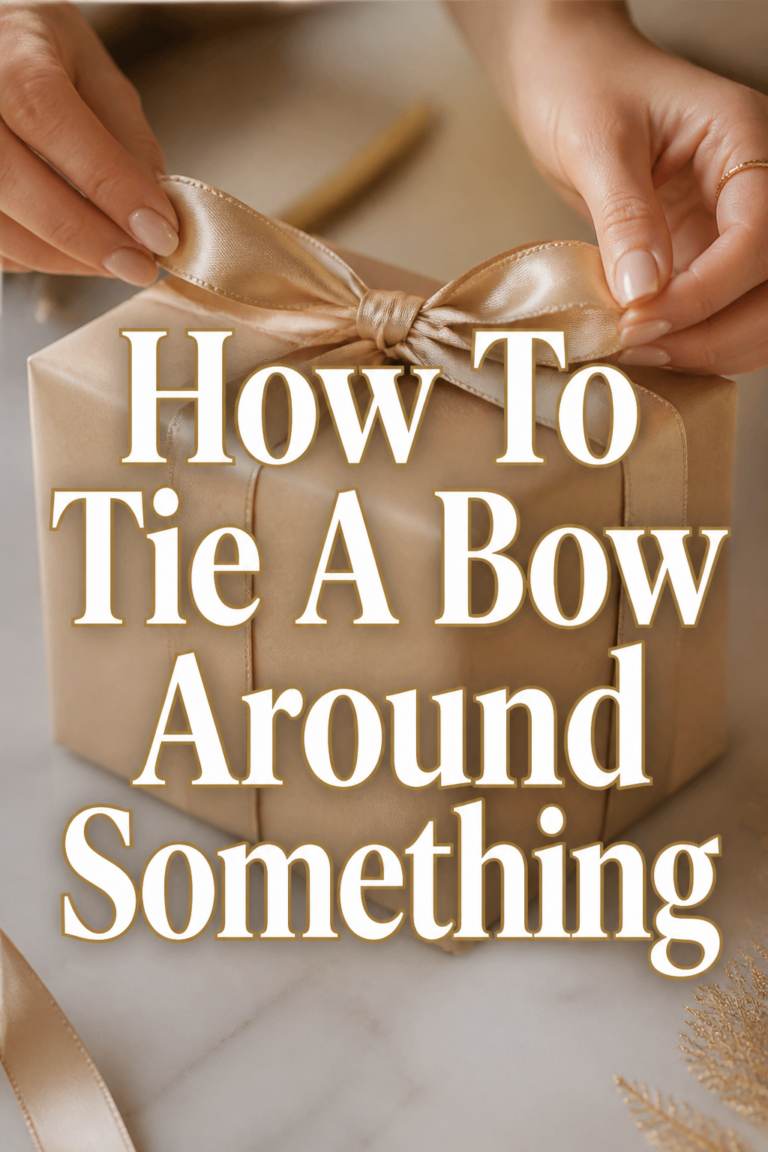
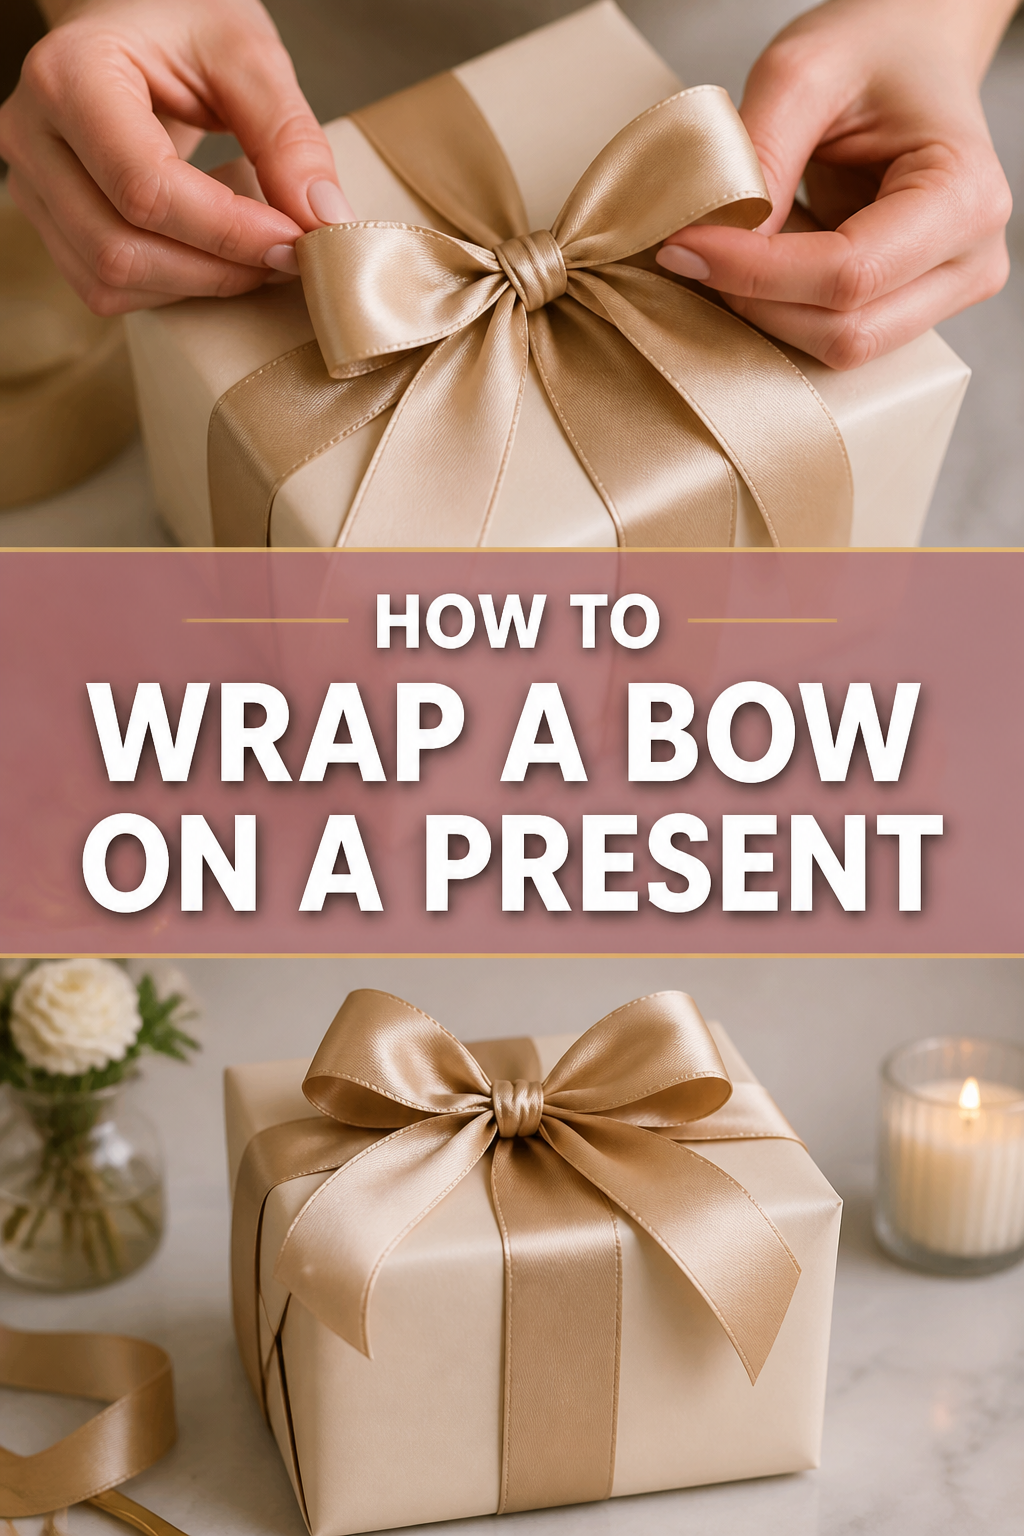
There’s a special joy in giving a gift, and presenting it beautifully adds another layer of thoughtfulness. A perfectly tied bow elevates any package, making it feel truly special.
I’ve spent countless hours perfecting my gift-wrapping skills over the years, learning the subtle tricks that transform a simple ribbon into a stunning centerpiece. This guide shares all those practical insights, helping you achieve a professional-looking bow every single time.
Quick Overview
This guide will walk you through creating a classic, elegant bow that enhances any present. You’ll learn the techniques for measuring, securing, and shaping your ribbon for a polished finish.
- Time needed: 10-20 minutes (depending on practice)
- Difficulty: Beginner to Intermediate
- What you’ll need: Ribbon, sharp scissors, a wrapped present
Step-by-Step Instructions
Step 1: Select Your Ribbon
Choosing the right ribbon is the first crucial step for a beautiful bow. Different materials offer unique textures and hold their shape differently. Consider the gift and the occasion.
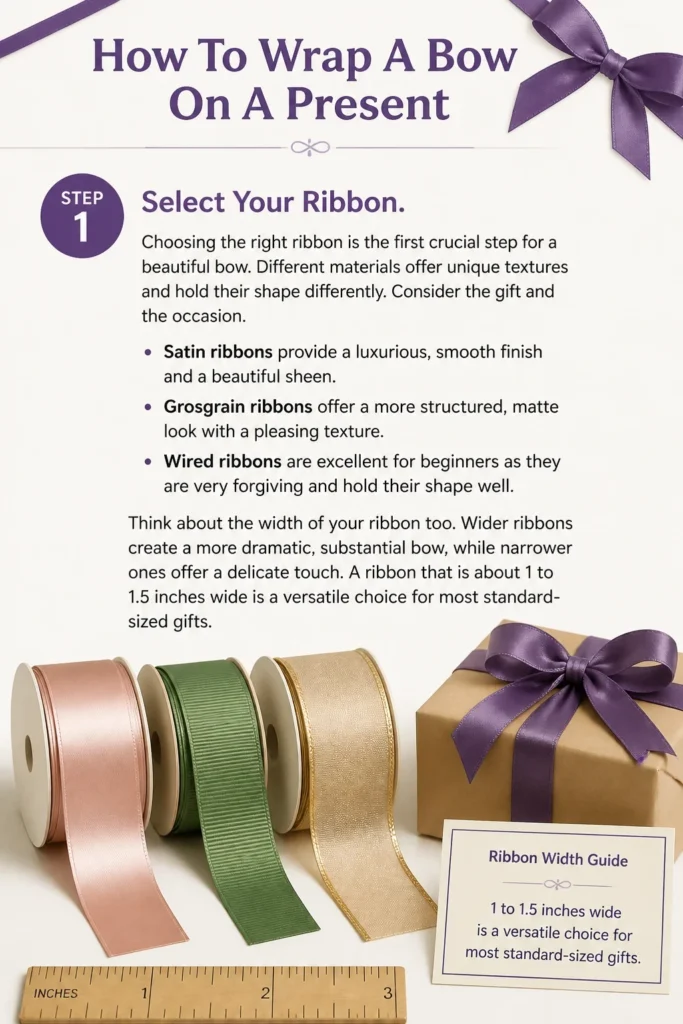
Satin ribbons provide a luxurious, smooth finish and a beautiful sheen. Grosgrain ribbons offer a more structured, matte look with a pleasing texture. Wired ribbons are excellent for beginners as they are very forgiving and hold their shape well.
Think about the width of your ribbon too. Wider ribbons create a more dramatic, substantial bow, while narrower ones offer a delicate touch. A ribbon that is about 1 to 1.5 inches wide is a versatile choice for most standard-sized gifts.
Step 2: Measure the Ribbon
Accurate measurement prevents waste and ensures you have enough length for a generous bow. Start by placing one end of the ribbon at the center of the top of your wrapped present.
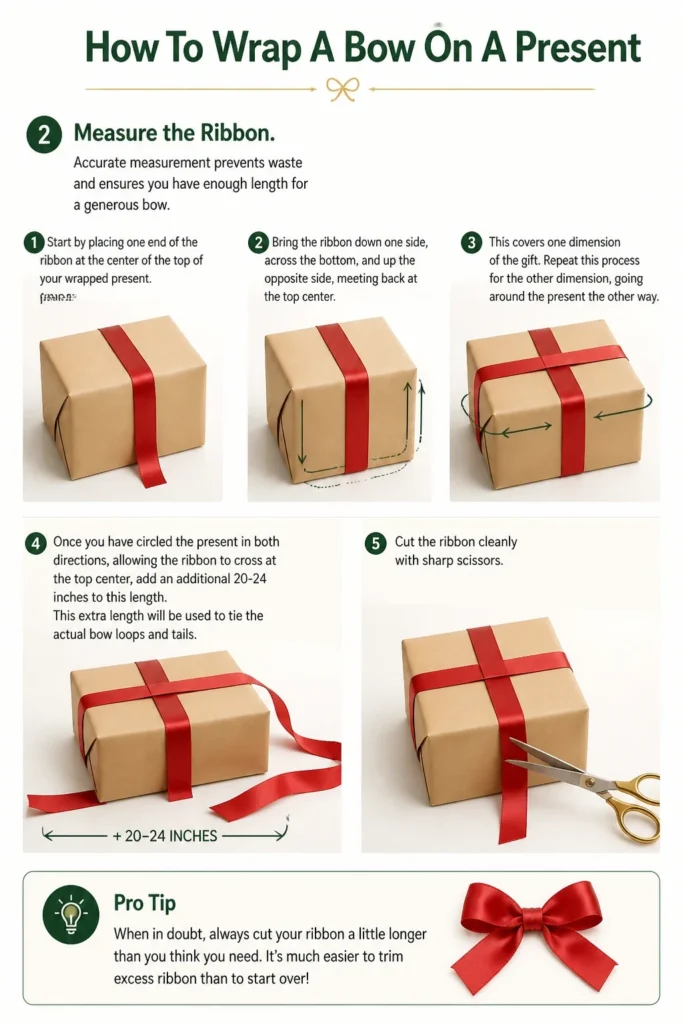
Bring the ribbon down one side, across the bottom, and up the opposite side, meeting back at the top center. This covers one dimension of the gift. Repeat this process for the other dimension, going around the present the other way.
Once you have circled the present in both directions, allowing the ribbon to cross at the top center, add an additional 20-24 inches to this length. This extra length will be used to tie the actual bow loops and tails. Cut the ribbon cleanly with sharp scissors.
Pro Tip: When in doubt, always cut your ribbon a little longer than you think you need. It’s much easier to trim excess ribbon than to try and make a short piece work.
Step 3: Position the Ribbon
Lay your measured ribbon flat on a clean surface. Place your wrapped present directly in the center of the ribbon’s length.
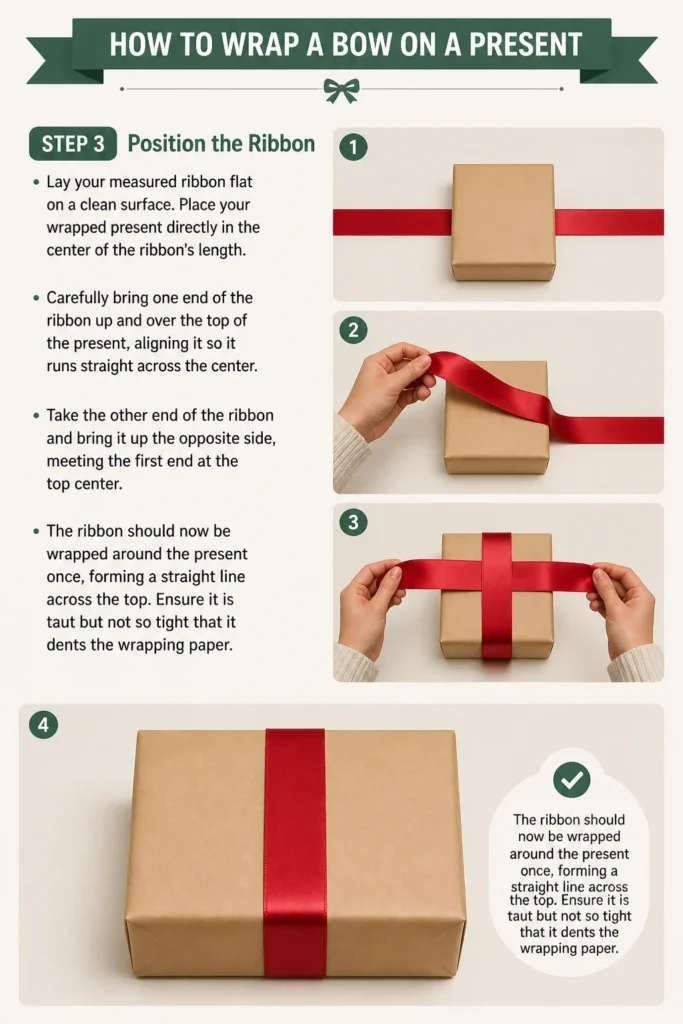
Carefully bring one end of the ribbon up and over the top of the present, aligning it so it runs straight across the center. Take the other end of the ribbon and bring it up the opposite side, meeting the first end at the top center.
The ribbon should now be wrapped around the present once, forming a straight line across the top. Ensure it is taut but not so tight that it dents the wrapping paper.
Step 4: Create the First Cross
With the ribbon ends meeting at the top center, gently twist one end to bring it underneath the present. The goal is to create a perpendicular line with the existing ribbon.
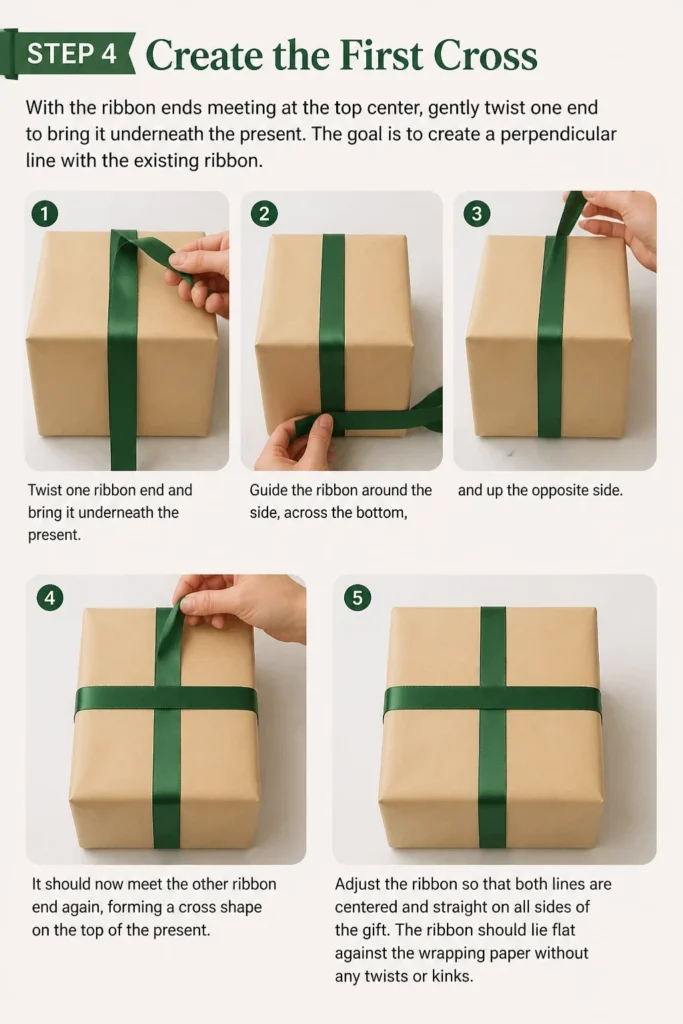
Guide this ribbon end around the side of the present, across the bottom, and up the opposite side. It should now meet the other ribbon end again, but this time forming a cross shape on the top of the present.
Adjust the ribbon so that both lines are centered and straight on all sides of the gift. The ribbon should lie flat against the wrapping paper without any twists or kinks.
Step 5: Secure with a Simple Knot
Once the ribbon forms a neat cross on the top of your present, it’s time to secure it. Take the two ribbon ends that are now meeting at the center.
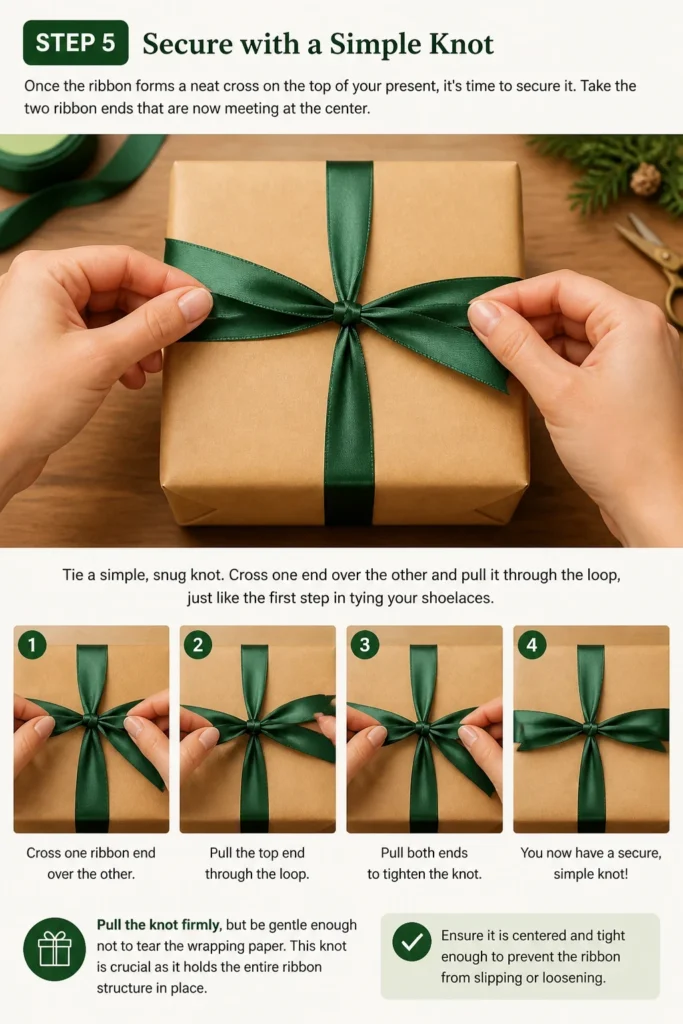
Tie a simple, snug knot. Cross one end over the other and pull it through the loop, just like the first step in tying your shoelaces. Pull the knot firmly, but be gentle enough not to tear the wrapping paper.
This knot is crucial as it holds the entire ribbon structure in place. Ensure it is centered and tight enough to prevent the ribbon from slipping or loosening.
Step 6: Form the First Loop
Now you have two ribbon tails extending from the central knot. Pick up one of these tails.
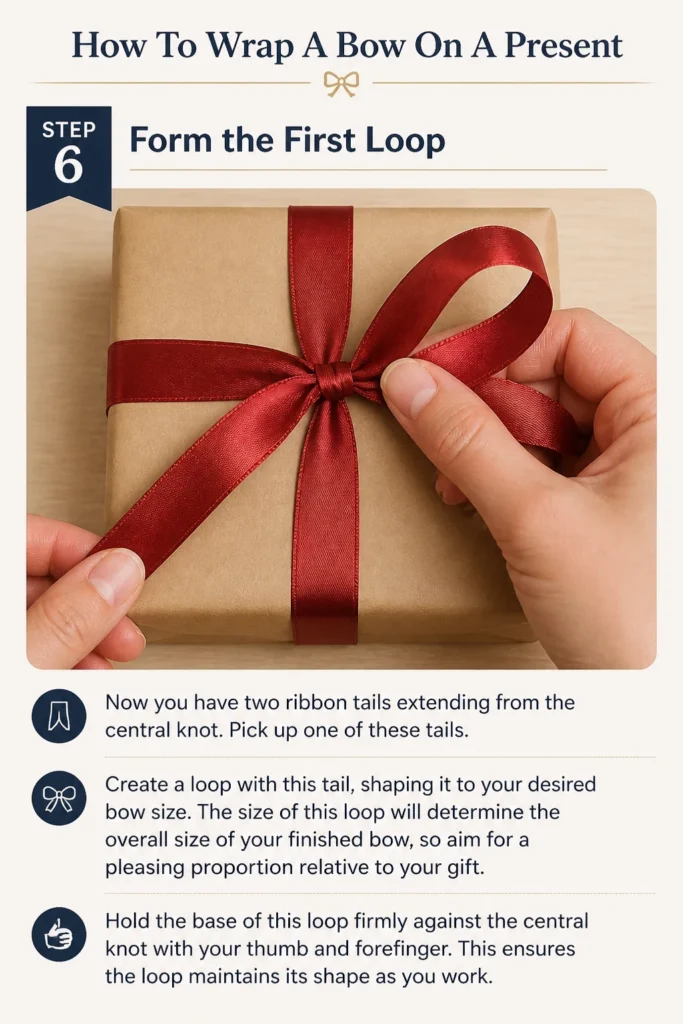
Create a loop with this tail, shaping it to your desired bow size. The size of this loop will determine the overall size of your finished bow, so aim for a pleasing proportion relative to your gift.
Hold the base of this loop firmly against the central knot with your thumb and forefinger. This ensures the loop maintains its shape as you work.
Step 7: Create the Second Loop
Take the other ribbon tail. Bring it over the first loop you just created, passing it across the center where your thumb is holding the base.
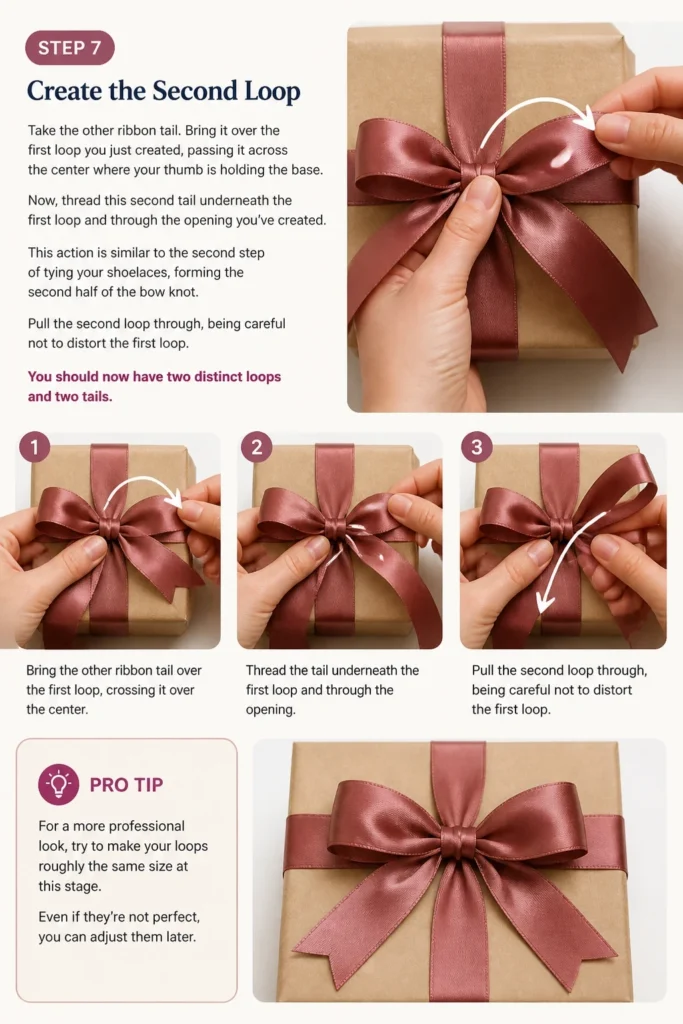
Now, thread this second tail underneath the first loop and through the opening you’ve created. This action is similar to the second step of tying your shoelaces, forming the second half of the bow knot.
Pull the second loop through, being careful not to distort the first loop. You should now have two distinct loops and two tails.
Pro Tip: For a more professional look, try to make your loops roughly the same size at this stage. Even if they’re not perfect, you can adjust them later.
Step 8: Tighten and Adjust the Bow
With both loops formed, gently pull them apart from each other. This action will tighten the knot at the center of the bow.
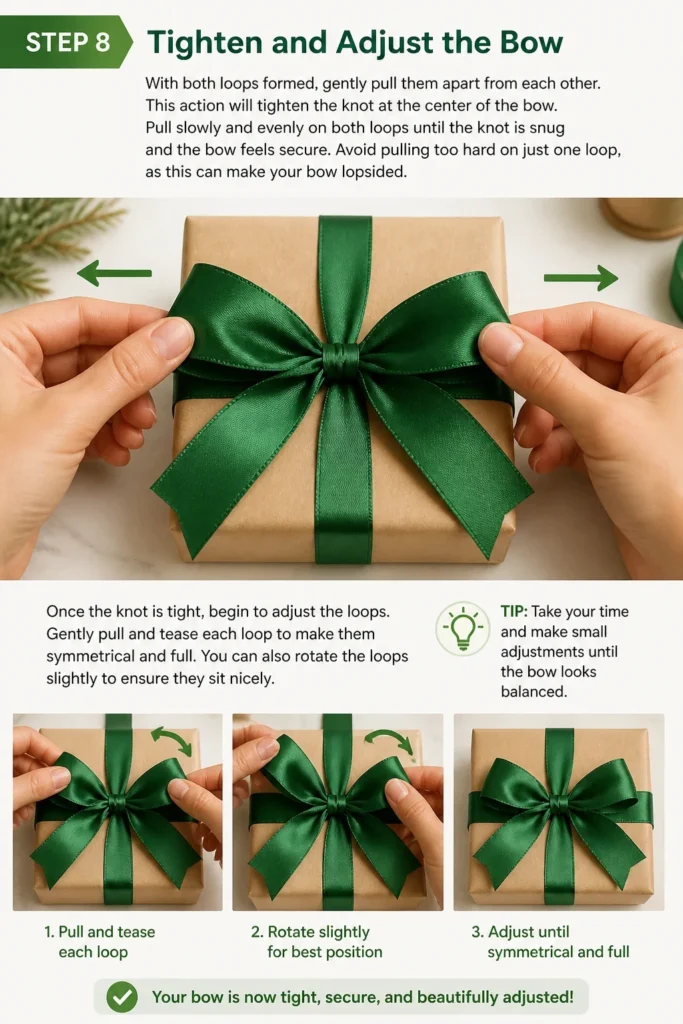
Pull slowly and evenly on both loops until the knot is snug and the bow feels secure. Avoid pulling too hard on just one loop, as this can make your bow lopsided.
Once the knot is tight, begin to adjust the loops. Gently pull and tease each loop to make them symmetrical and full. You can also rotate the loops slightly to ensure they sit nicely.
Step 9: Fluff and Shape the Loops
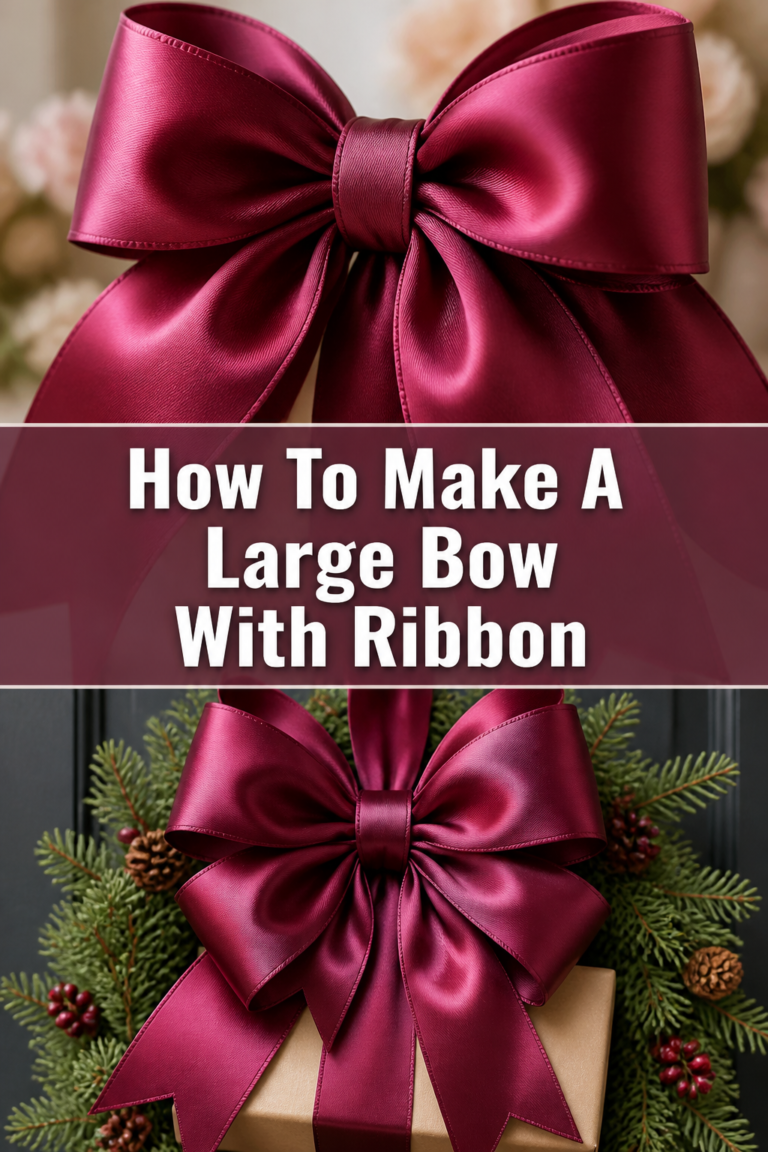
This step is where your bow truly comes to life. Once the loops are tightened, use your fingers to gently separate and fluff them.
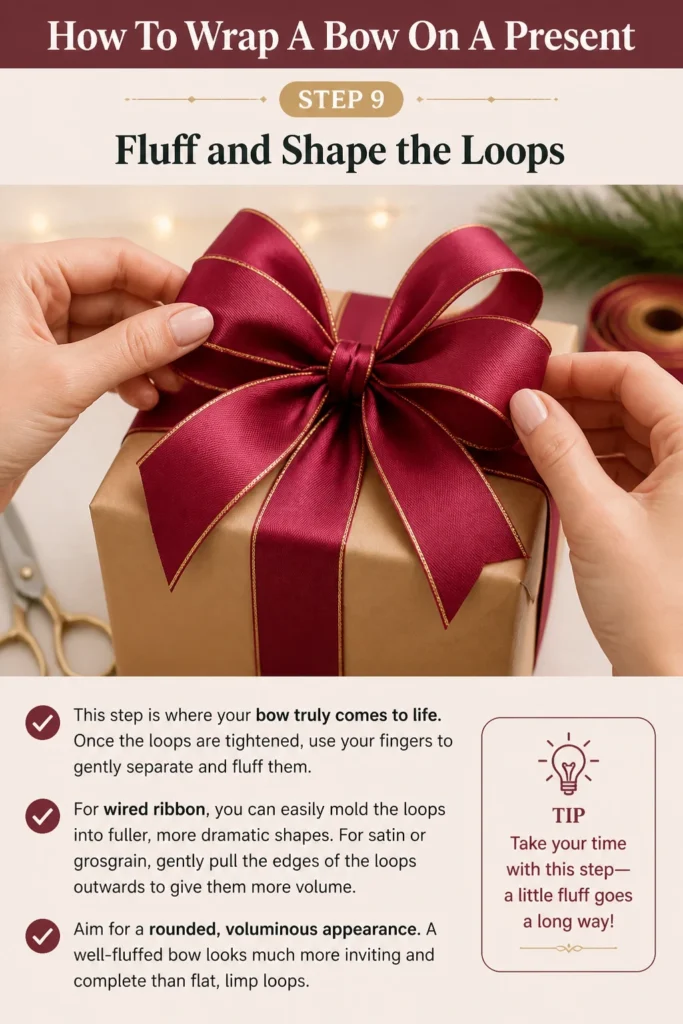
For wired ribbon, you can easily mold the loops into fuller, more dramatic shapes. For satin or grosgrain, gently pull the edges of the loops outwards to give them more volume.
Aim for a rounded, voluminous appearance. A well-fluffed bow looks much more inviting and complete than flat, limp loops.
Step 10: Trim the Ribbon Tails
The final touch is to trim the ribbon tails for a polished finish. Hold one tail and decide on your desired length.
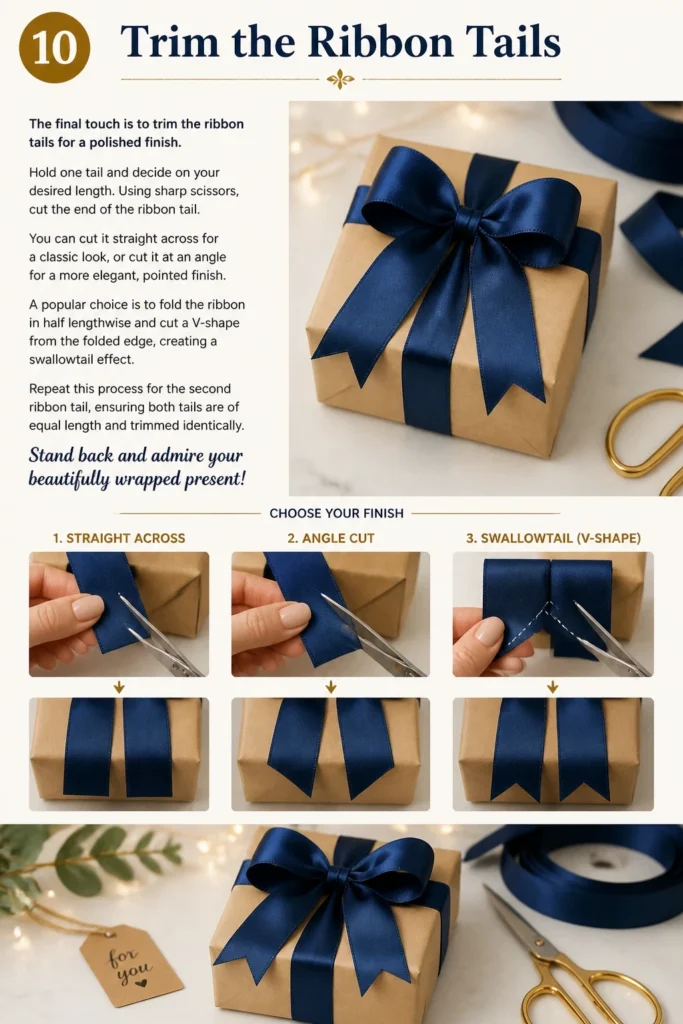
Using sharp scissors, cut the end of the ribbon tail. You can cut it straight across for a classic look, or cut it at an angle for a more elegant, pointed finish. A popular choice is to fold the ribbon in half lengthwise and cut a V-shape from the folded edge, creating a swallowtail effect.
Repeat this process for the second ribbon tail, ensuring both tails are of equal length and trimmed identically. Stand back and admire your beautifully wrapped present!
Common Mistakes to Avoid
Using Too Little Ribbon
One of the most frequent frustrations is running out of ribbon just as you’re about to tie the bow. This results in a tiny, sad-looking bow or one that simply won’t tie. Always err on the side of generosity with your ribbon measurement. Having a little extra length allows for more substantial loops and tails, contributing to a much more elegant and balanced final bow.
Tying a Loose Knot
A bow that constantly slips or loses its shape is usually the result of a loose initial knot. If the central knot isn’t pulled tight enough, the entire ribbon structure will lack tension and stability. Make sure that first knot, after crossing the ribbon around the present, is pulled firmly. This creates a solid foundation for your loops.
Uneven Loops and Tails
A lopsided bow with one loop significantly larger than the other, or tails of unequal length, can detract from an otherwise well-wrapped gift. Pay close attention during steps 6 and 7 to try and create symmetrical loops. After tightening, take the time in step 8 to adjust and pull the loops until they are as even as possible. Always trim both tails to the same length at the very end.
Twisted Ribbon
Nothing ruins the clean look of a bow faster than twisted ribbon, especially with satin or grosgrain. As you wrap the ribbon around the present and form your loops, constantly check that the ribbon lies flat and the correct side is facing outwards. Gently smooth out any twists before tightening your knots. This ensures a smooth, professional appearance from every angle.
Troubleshooting
My Bow Looks Lopsided
A lopsided bow often happens when one loop is pulled tighter than the other, or when the initial knot wasn’t perfectly centered. To fix this, gently loosen the central knot just enough to allow some movement.
Once slightly loosened, carefully adjust the loops by pulling on them until they appear more even in size. Then, retighten the knot by pulling both loops away from the center simultaneously. Take your time to reposition the loops and fluff them back into shape.
The Ribbon Slips Off the Present
If your ribbon keeps sliding around or coming off the corners, it’s likely that the initial knot wasn’t tight enough, or the ribbon itself is very slick. Ensure the first knot you tie after wrapping the ribbon around the present is very snug.
For particularly slippery ribbons or presents, you can secure the ribbon underneath the gift with a tiny piece of double-sided tape or a dot of hot glue. Apply the adhesive discreetly to the underside of the present where the ribbon crosses, ensuring it won’t be visible.
My Bow Loops Are Flat and Lifeless
Flat loops can be due to using a ribbon without enough body, or simply not fluffing them sufficiently. If you’re using a soft ribbon like thin satin, it may naturally be harder to make stand up.
To add volume, gently pinch the base of each loop and push it upwards. For non-wired ribbons, you can also gently curl the edges of the loops outwards using your thumb and forefinger. Wired ribbons are much easier; simply mold them with your fingers to create the desired fullness and shape.
Key Takeaways
- Choose the Right Ribbon: The material and width of your ribbon significantly impact the final look and ease of handling.
- Measure Generously: Always cut more ribbon than you think you need to ensure ample length for a full, elegant bow.
- Secure the Initial Knot: A tight, centered first knot provides a stable foundation for your entire bow structure.
- Aim for Symmetry: Pay attention to making your loops and tails as even as possible for a polished appearance.
- Fluff for Volume: Don’t skip the final fluffing and shaping steps; they transform a basic knot into a beautiful bow.
- Practice Makes Perfect: The more you practice, the more intuitive and effortless bow-tying becomes.
Frequently Asked Questions
What kind of ribbon is best for beginners?
Wired ribbon is generally the best choice for beginners. Its internal wire allows it to hold its shape beautifully, making it very forgiving if your loops aren’t perfectly even initially. You can easily adjust and reshape the loops until you achieve the desired look. Satin and grosgrain ribbons are also great, but require a bit more practice to achieve perfect symmetry and fullness.
How much ribbon do I need for an average-sized gift?
For an average-sized gift box (roughly 8x8x4 inches), you’ll typically need about 2 to 2.5 yards (approximately 72-90 inches) of ribbon. This allows for wrapping around the box both ways and provides enough extra length for generous loops and tails. Always measure your specific gift and add extra for the bow to be safe.
Can I make a multi-loop bow with this method?
Yes, you absolutely can! Once you’ve mastered the basic two-loop bow, you can expand on this technique. Instead of just creating two loops from your initial tails, you can create multiple smaller loops from each tail before tying them down. Alternatively, you can create a series of loops separately and then wire or tie them together onto your main ribbon cross.
How do I keep the bow from getting crushed during transport?
To protect your beautiful bow, consider placing the gift in a larger gift bag or box with tissue paper around it to cushion the bow. For very delicate bows, you can even gently place a plastic dome or a small piece of cardboard over the bow before securing it with tape to the box lid, creating a protective barrier. Inform the recipient to handle with care!
Our Top Recommended Finds
- High-Quality Satin Ribbon Set: A multi-color pack provides versatility for various occasions and a luxurious feel. The smooth texture is a classic choice for elegant bows.
- Sharp Craft Scissors: Dedicated ribbon scissors ensure clean, crisp cuts, preventing frayed edges and making the trimming process much easier. Look for a pair with comfortable handles.
- Wired Edge Ribbon Assortment: Perfect for beginners or those who want durable, shapely bows. The wire allows for easy manipulation and holds its form well.
Unwrap the Art of Gifting
Mastering the art of tying a beautiful bow on a present is a skill that brings immense satisfaction. It transforms a simple gift into a thoughtful gesture, showing care and attention to detail.
Don’t let the first few attempts discourage you. Like any craft, it improves with practice. Each bow you tie will be a step towards perfection, adding a personal touch to every gift you give.
Grab some ribbon and a practice box today. Start creating those stunning, eye-catching bows that will make your presents truly unforgettable.
Beginner-friendly templates, step-by-step guides,
and weekly project ideas in your inbox.