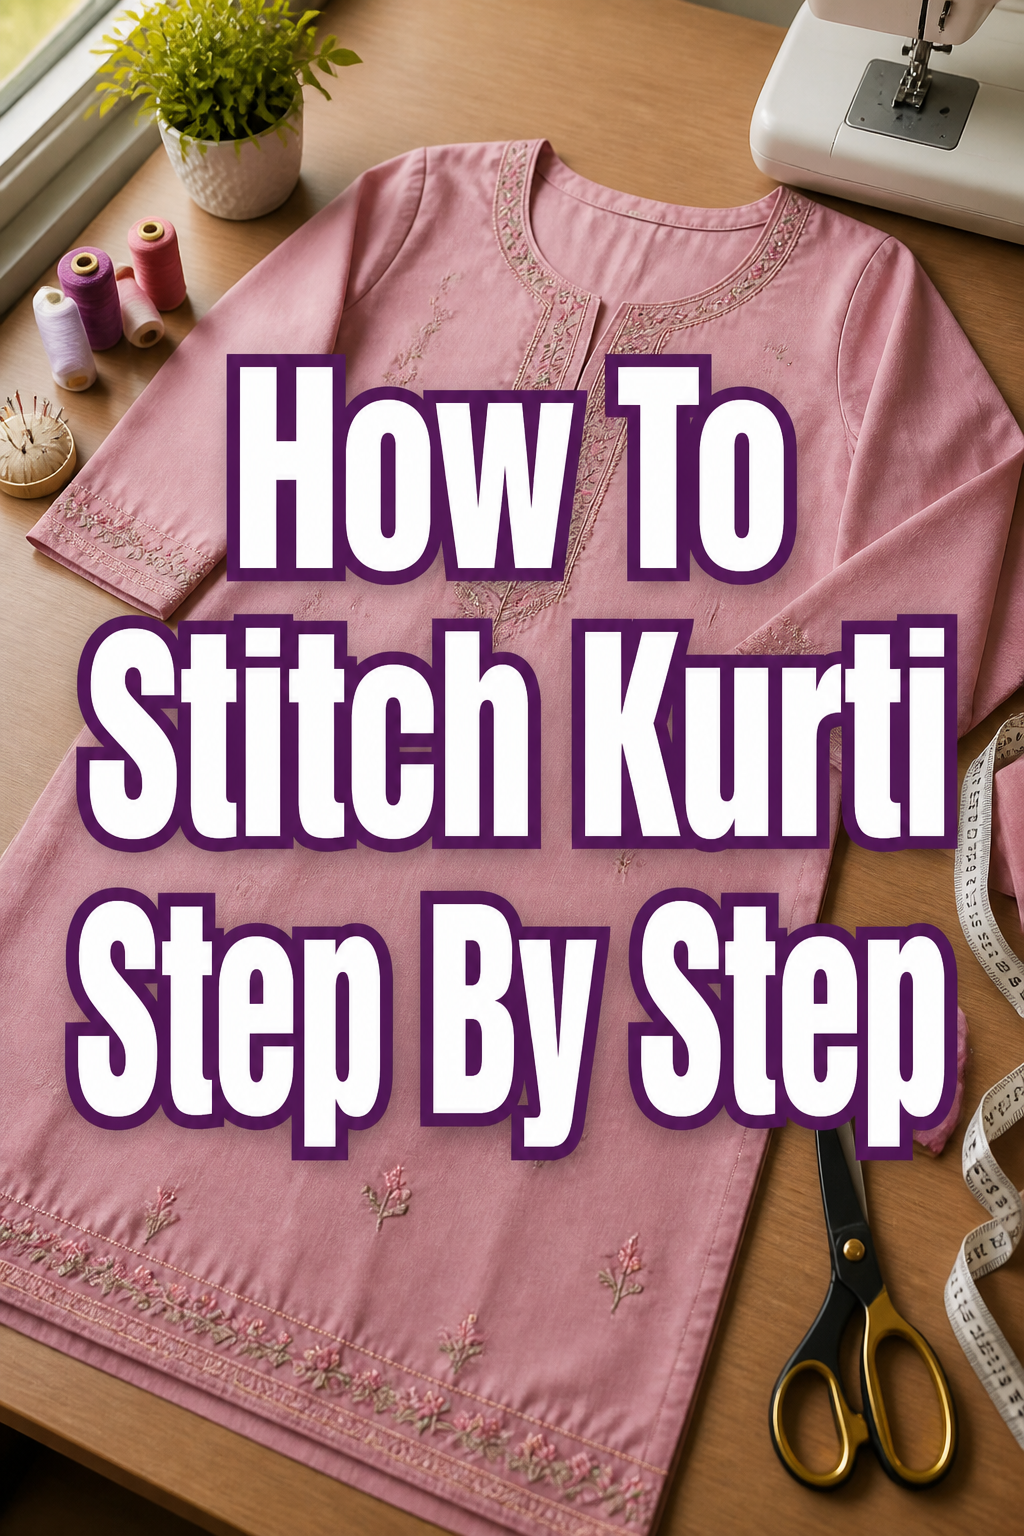
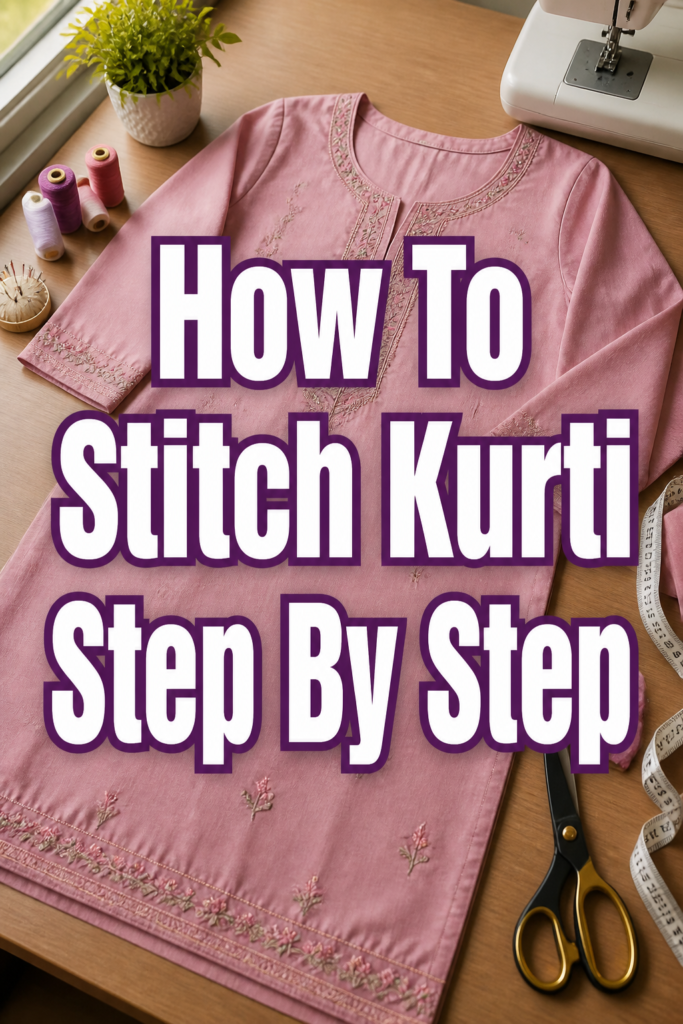
🧵 How To Stitch Kurti Step By Step

Beginner-friendly templates, step-by-step guides,
and weekly project ideas in your inbox.
Learning to stitch your own kurti can feel like a daunting task, but it’s incredibly rewarding.
I remember the satisfaction of wearing my first self-stitched garment; it felt truly unique and perfectly fitted.
This guide will break down the process into simple, manageable steps, allowing you to create beautiful kurtis with confidence.
Quick Overview
This comprehensive guide will walk you through transforming fabric into a stylish, custom-fit kurti. You’ll learn to take measurements, cut fabric precisely, and assemble your garment with professional finishing.
- Time needed: 8-12 hours (spread over several sessions for beginners)
- Difficulty: Intermediate (requires basic sewing machine knowledge)
- What you’ll need: Fabric, sewing machine, measuring tape, scissors, thread, pins, chalk, iron, kurti pattern (optional)
Step-by-Step Instructions
Step 1: Gather Your Materials and Prepare Your Workspace
Before you begin, collect all necessary tools and materials. A tidy workspace makes the entire stitching process smoother and more enjoyable.
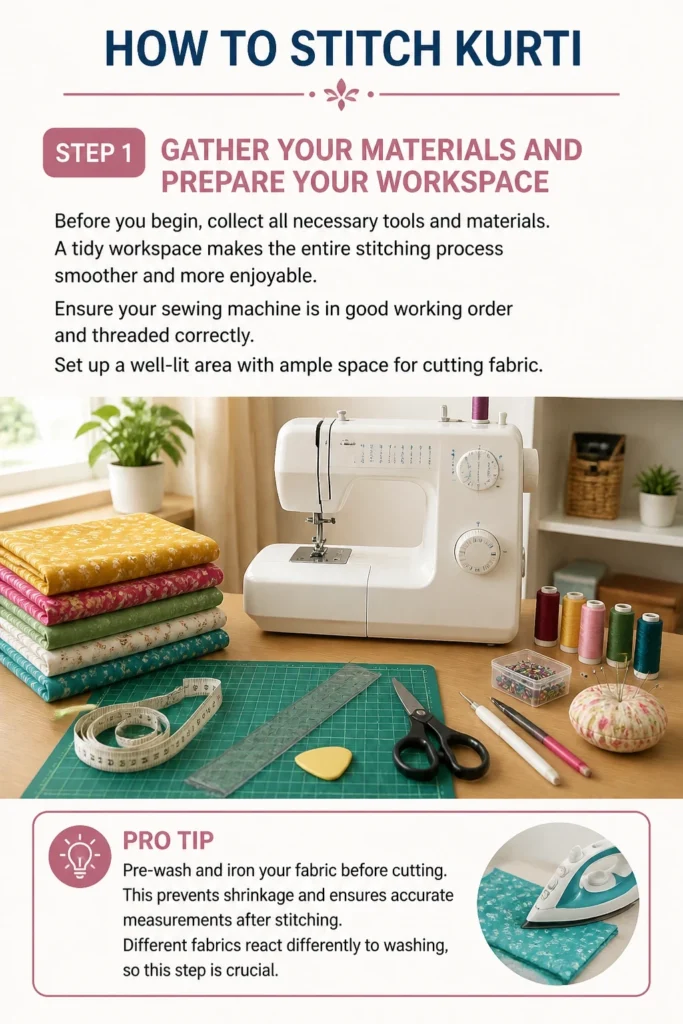
Ensure your sewing machine is in good working order and threaded correctly. Set up a well-lit area with ample space for cutting fabric.
Pro Tip: Pre-wash and iron your fabric before cutting. This prevents shrinkage and ensures accurate measurements after stitching. Different fabrics react differently to washing, so this step is crucial.
Step 2: Take Accurate Body Measurements
Precise measurements are the foundation of a well-fitting kurti. Ask a friend for help or use a full-length mirror to ensure accuracy.
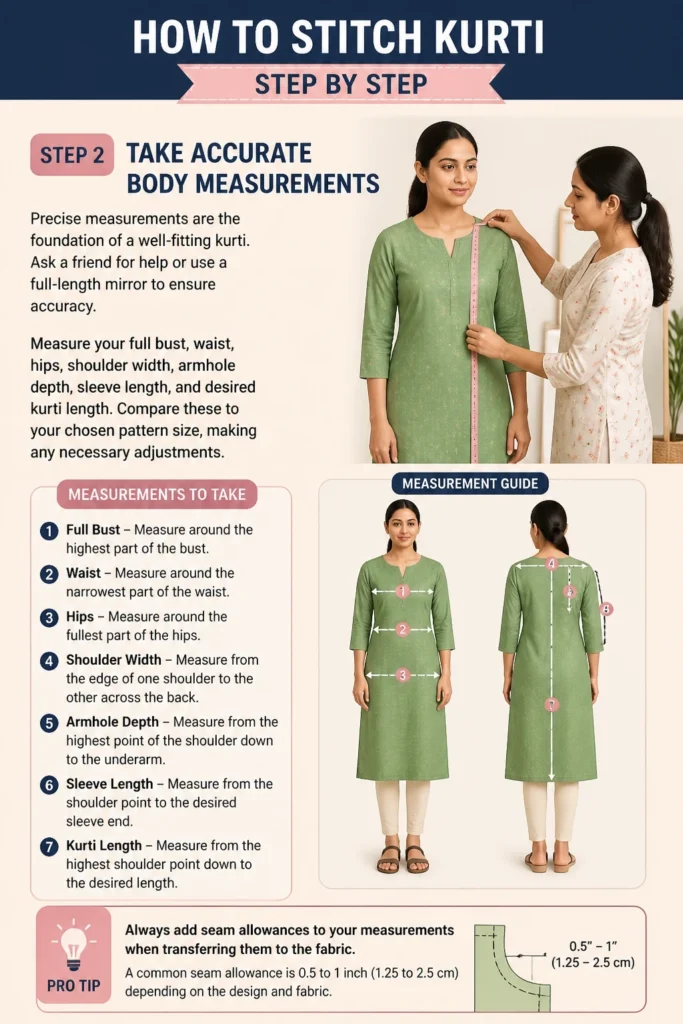
Measure your full bust, waist, hips, shoulder width, armhole depth, sleeve length, and desired kurti length. Compare these to your chosen pattern size, making any necessary adjustments.
Pro Tip: Always add seam allowances to your measurements when transferring them to the fabric. A common seam allowance is 0.5 to 1 inch (1.25 to 2.5 cm) depending on the design and fabric.
Step 3: Prepare Your Pattern and Cut the Fabric
Lay your fabric flat on a large surface, ensuring it’s smooth and wrinkle-free. If using a printed fabric, pay attention to the print direction.
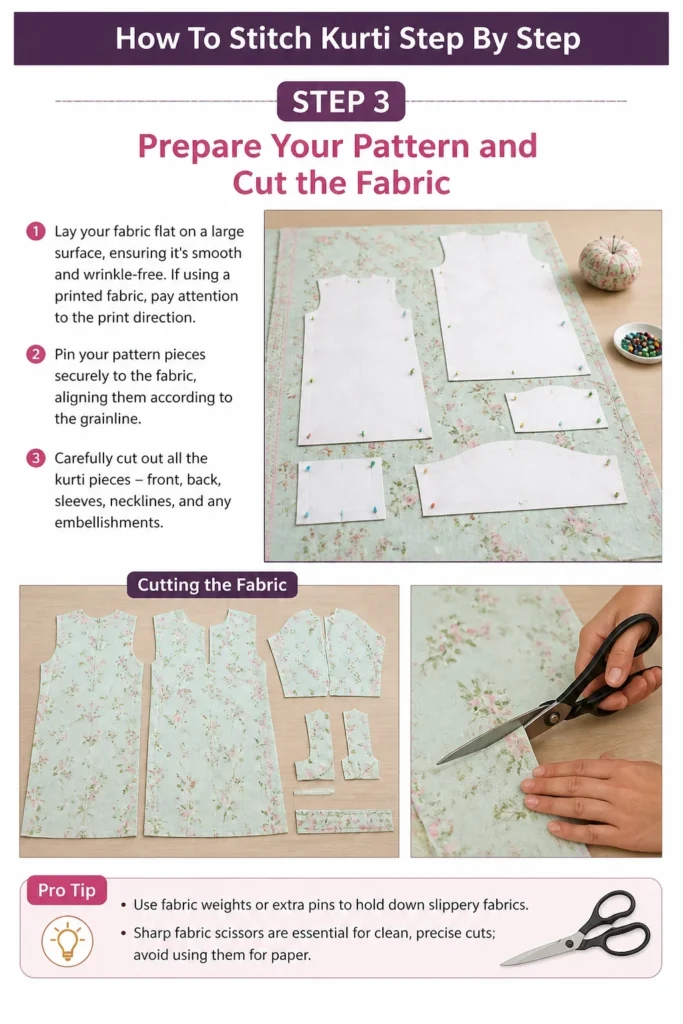
Pin your pattern pieces securely to the fabric, aligning them according to the grainline. Carefully cut out all the kurti pieces: front, back, sleeves, necklines, and any embellishments.
Pro Tip: Use fabric weights or extra pins to hold down slippery fabrics. Sharp fabric scissors are essential for clean, precise cuts; avoid using them for paper.
Step 4: Prepare the Neckline
The neckline is a focal point of your kurti, so take extra care with this step. You can use a facing, a lining, or a bias tape for a clean finish.
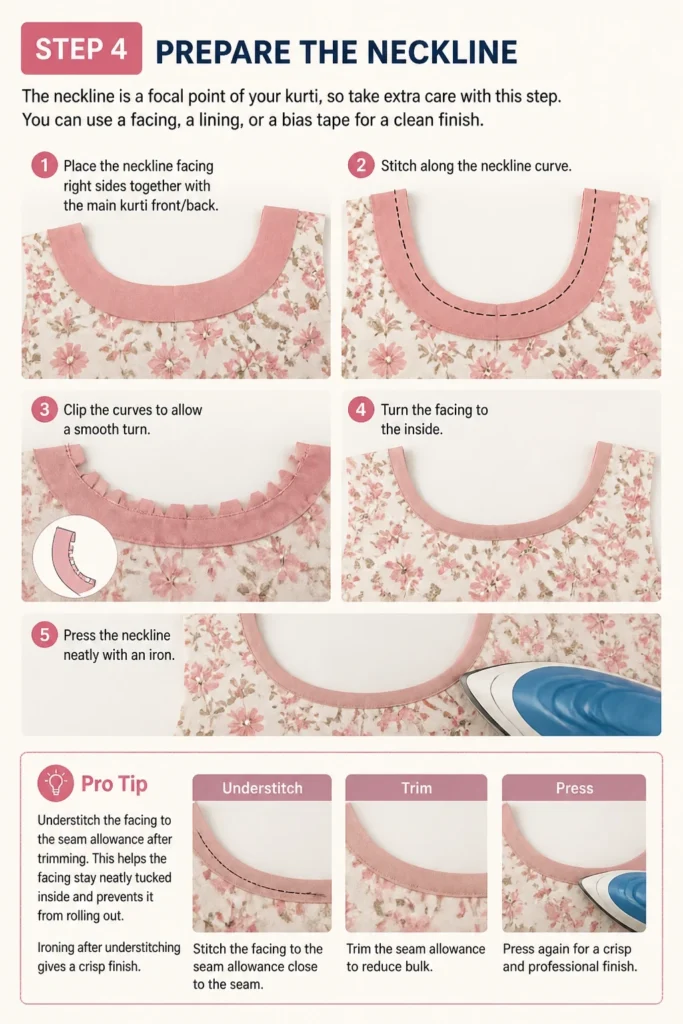
Place the neckline facing right sides together with the main kurti front/back. Stitch along the neckline curve, then clip the curves and turn the facing to the inside.
Pro Tip: Understitch the facing to the seam allowance after trimming. This helps the facing stay neatly tucked inside and prevents it from rolling out. Ironing after understitching gives a crisp finish.
Step 5: Join the Shoulder Seams
With the neckline finished, it’s time to connect the front and back pieces. This forms the basic structure of your kurti.
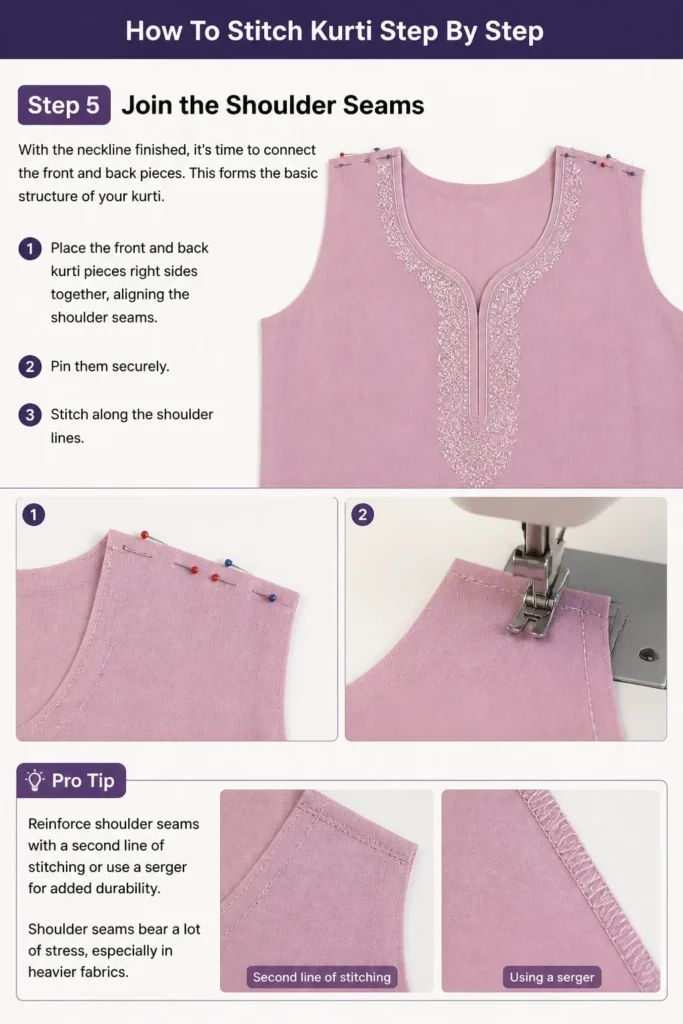
Place the front and back kurti pieces right sides together, aligning the shoulder seams. Pin them securely and stitch along the shoulder lines.
Pro Tip: Reinforce shoulder seams with a second line of stitching or use a serger for added durability. Shoulder seams bear a lot of stress, especially in heavier fabrics.
Step 6: Attach the Sleeves
Attaching sleeves can be tricky, but patience makes all the difference. Ensure you differentiate between the right and left sleeves.
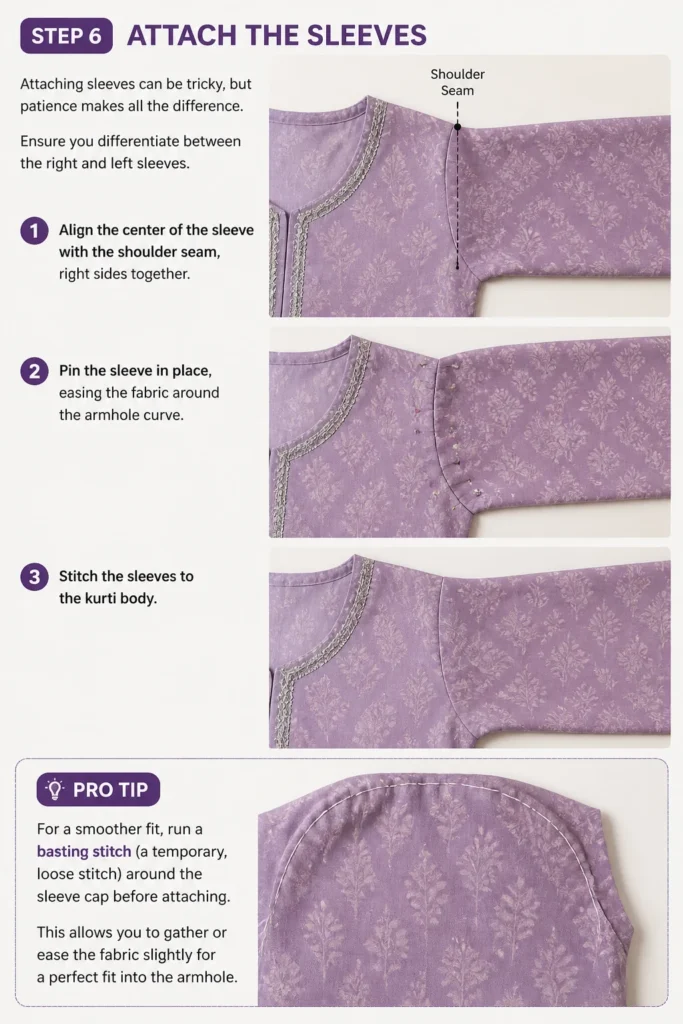
Align the center of the sleeve with the shoulder seam, right sides together. Pin the sleeve in place, easing the fabric around the armhole curve. Stitch the sleeves to the kurti body.
Pro Tip: For a smoother fit, run a basting stitch (a temporary, loose stitch) around the sleeve cap before attaching. This allows you to gather or ease the fabric slightly for a perfect fit into the armhole.
Step 7: Stitch the Side Seams
Now, bring the kurti together by stitching the side seams. This step defines the fit of your garment.
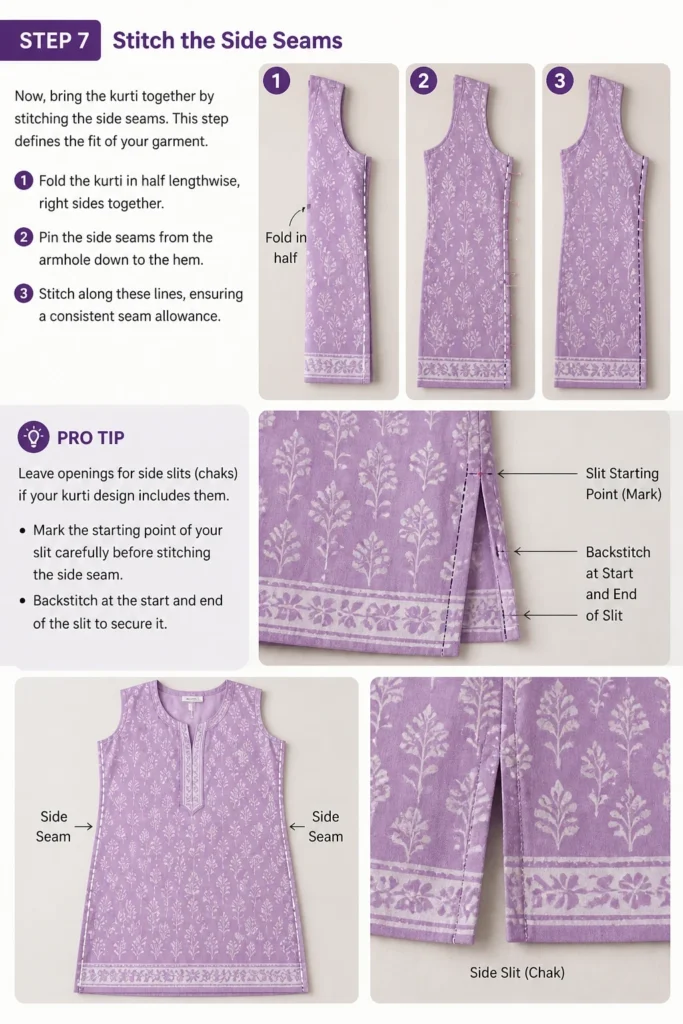
Fold the kurti in half lengthwise, right sides together. Pin the side seams from the armhole down to the hem. Stitch along these lines, ensuring a consistent seam allowance.
Pro Tip: Leave openings for side slits (chaks) if your kurti design includes them. Mark the starting point of your slit carefully before stitching the side seam. Backstitch at the start and end of the slit to secure it.
Step 8: Finish the Side Slits and Hem
Well-finished slits and a neat hem elevate the overall look of your kurti. This is where attention to detail pays off.
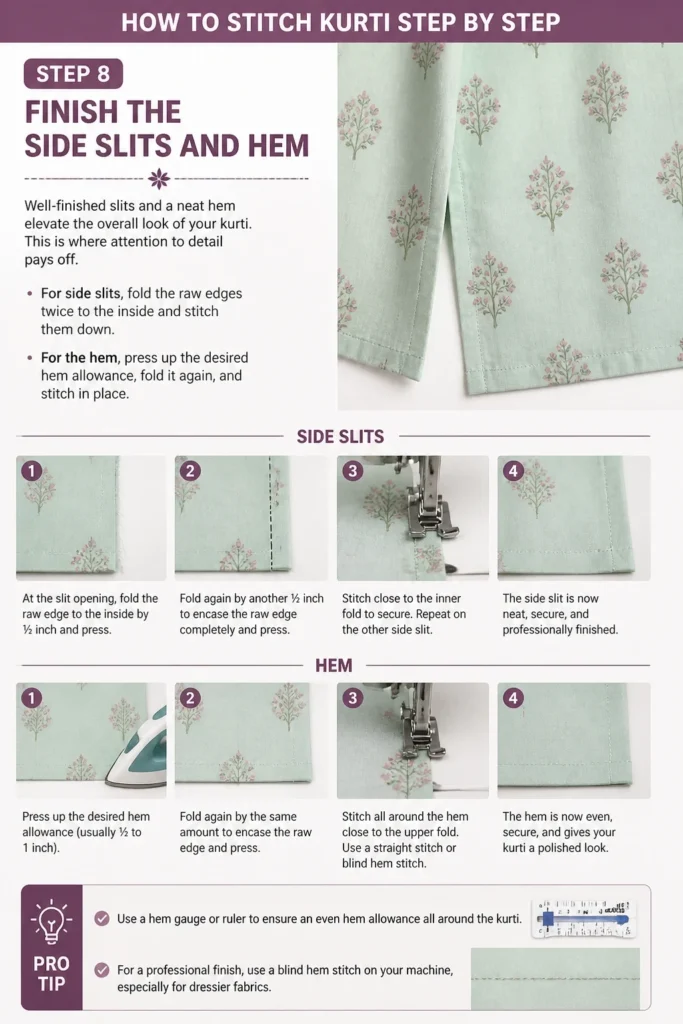
For side slits, fold the raw edges twice to the inside and stitch them down. For the hem, press up the desired hem allowance, fold it again, and stitch in place.
Pro Tip: Use a hem gauge or ruler to ensure an even hem allowance all around the kurti. For a professional finish, use a blind hem stitch on your machine, especially for dressier fabrics.
Step 9: Add Finishing Touches and Press
The final steps involve adding any embellishments and giving your kurti a professional press. This truly brings your garment to life.
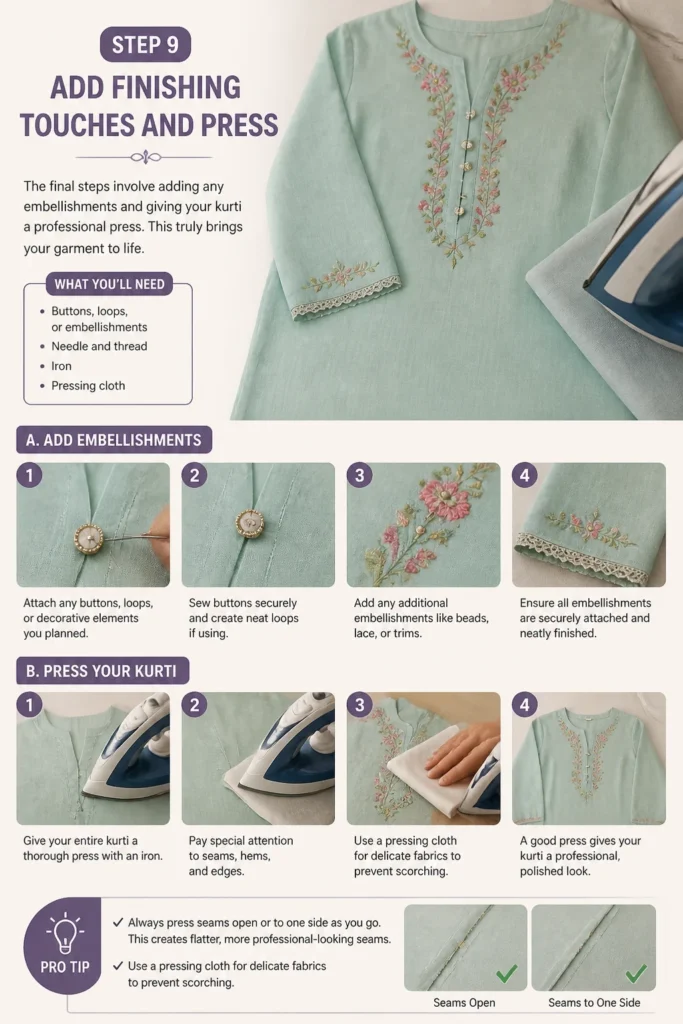
Attach any buttons, loops, or decorative elements you planned. Give your entire kurti a thorough press with an iron, paying special attention to seams and hems.
Pro Tip: Always press seams open or to one side as you go. This creates flatter, more professional-looking seams. Use a pressing cloth for delicate fabrics to prevent scorching.
Common Mistakes to Avoid
Skipping Pre-Washing Fabric
Many beginners are eager to start cutting, but skipping pre-washing can lead to disappointment. Fabric often shrinks in the first wash, meaning your perfectly stitched kurti might not fit properly afterwards. Always wash and dry your fabric as you intend to wash the finished garment before you even pick up your scissors.
Inaccurate Measurements and Cutting
A poorly measured or cut piece of fabric cannot be corrected later. Taking shortcuts here results in ill-fitting garments and wasted effort. Double-check all your measurements, use sharp scissors, and cut slowly and precisely. Remember, “measure twice, cut once” is a golden rule in sewing.
Neglecting Seam Finishes
Leaving raw edges unfinished can cause seams to fray and unravel over time, compromising the durability of your kurti. While topstitching looks clean, the inside needs attention too. Use zigzag stitches, a serger, or French seams to enclose raw edges, ensuring your kurti lasts longer and looks professional inside and out.
Rushing Through Steps
Sewing requires patience and attention to detail. Rushing can lead to crooked seams, missed steps, or errors that are time-consuming to fix. Take breaks when you feel frustrated, and approach each step methodically. Enjoy the process; it’s part of the craft.
Troubleshooting
Fabric Puckering at Seams
Puckering often happens when your thread tension is off or you’re using the wrong needle for your fabric. Check your sewing machine’s tension settings; too tight top tension or too loose bobbin tension can be culprits. Also, ensure your needle size and type are appropriate for the fabric you’re stitching. A ballpoint needle for knits or a sharp needle for wovens makes a big difference.
Uneven Hemline
An uneven hem can be caused by inaccurate cutting, not pressing the hem before stitching, or stretching the fabric while sewing. To fix this, unpick the existing hem. Re-measure the desired hem length from the floor while wearing the kurti (or have someone help you). Press the hem allowance carefully before stitching it back, using pins frequently to hold it in place.
Sleeves Don’t Fit Armholes Correctly
This usually indicates a mismatch in the sleeve cap and armhole curve, or improper easing. First, check your pattern pieces to ensure they are correctly sized. If the sleeve is too large, you might need to ease it more evenly using a basting stitch around the sleeve cap before attaching. If too small, you may need to adjust the pattern or re-cut a slightly larger sleeve.
Key Takeaways
- Accurate measurements are the most critical step for a well-fitting kurti.
- Pre-washing fabric prevents unexpected shrinkage after your garment is complete.
- Finishing seams and necklines professionally enhances both durability and appearance.
- Patience and attention to detail at each stage lead to successful and satisfying results.
- Don’t be afraid to unpick and re-stitch if something isn’t quite right; it’s part of learning.
- Always press your seams as you go for a crisp, store-bought finish.
Frequently Asked Questions
What type of fabric is best for a beginner to stitch a kurti?
For beginners, cotton or linen fabrics are ideal. They are stable, easy to cut, and don’t slip much under the sewing machine. Avoid very thin, stretchy, or slippery fabrics like silk or chiffon until you gain more experience.
Do I need a specific pattern, or can I draft my own?
While experienced sewers can draft their own patterns, beginners will find it much easier to use a commercial kurti pattern. These patterns include clear instructions, cutting layouts, and seam allowances, making the process more straightforward. You can find many patterns online or at fabric stores.
How do I choose the right needle for my sewing machine?
The right needle depends on your fabric type. A universal needle (size 80/12 or 90/14) works for most woven cottons. For knits, use a ballpoint or stretch needle to prevent skipped stitches and fabric damage. For heavier fabrics like denim, use a denim needle. Always change your needle frequently, especially after a few projects, as dull needles can damage fabric.
What’s the best way to finish raw edges without a serger?
If you don’t have a serger, a zigzag stitch on your regular sewing machine is an excellent alternative. You can also use French seams for a very neat, enclosed finish, especially on lightweight fabrics. Hong Kong seams are another elegant option for unlined garments and heavier fabrics.
Our Top Recommended Finds
- Quality Fabric Shears: A sharp pair of fabric shears makes cutting effortless and precise, preventing frayed edges before you even start stitching.
- Good Quality All-Purpose Thread: Strong, consistent thread prevents breakage and ensures durable seams. Polyester thread is versatile and comes in many colors.
- Fabric Chalk or Disappearing Ink Pen: Essential for marking cutting lines, darts, and seam allowances accurately on your fabric without leaving permanent marks.
Your Next Stitching Adventure Awaits
You’ve now got the tools and knowledge to stitch your very own kurti. This journey from fabric to a finished garment is incredibly empowering and creative.
Don’t let initial challenges deter you; every stitch is a step towards mastery. Celebrate your progress and enjoy the unique satisfaction of wearing something you’ve made.
Why not pick out your favorite fabric today and begin crafting a kurti that reflects your personal style?
Beginner-friendly templates, step-by-step guides,
and weekly project ideas in your inbox.