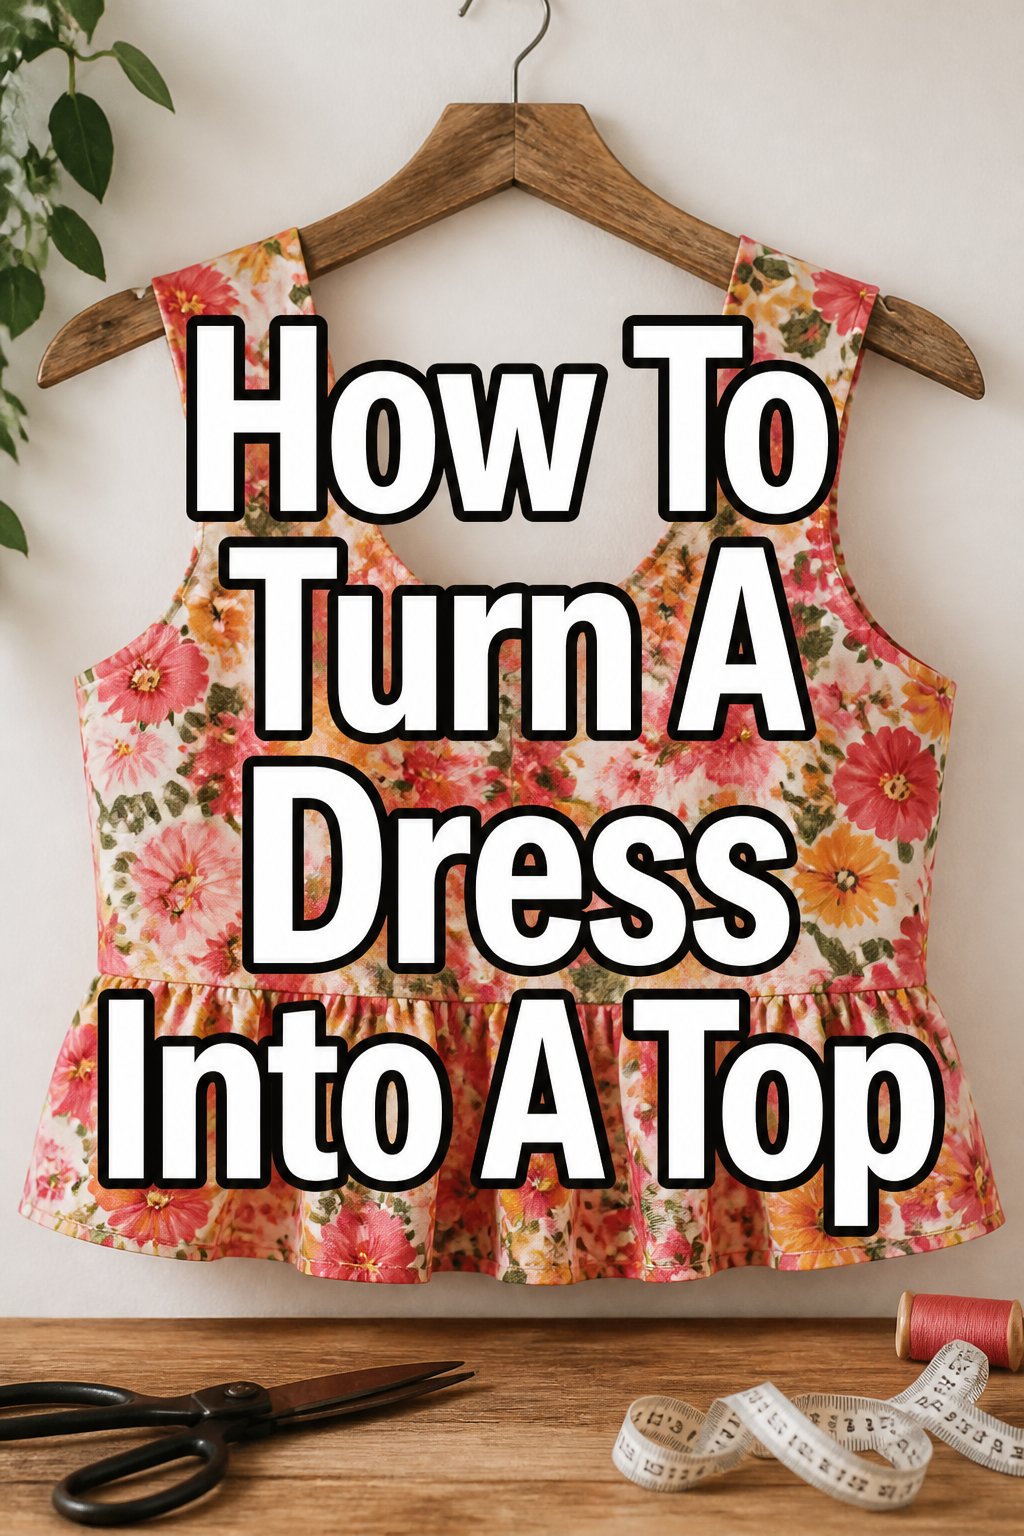
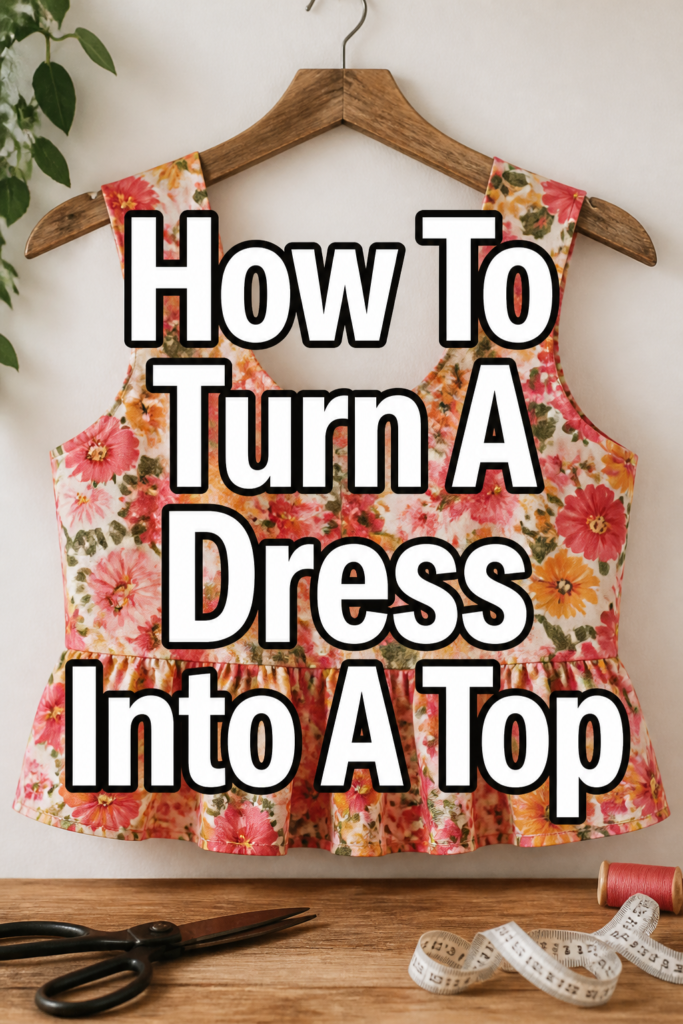
✂️ How To Turn A Dress Into A Top

Beginner-friendly templates, step-by-step guides,
and weekly project ideas in your inbox.
I remember staring at a beautiful dress in my closet, one I loved but never wore because the length just felt wrong. It was too formal for everyday, yet not quite right for special occasions anymore. I knew there had to be a way to give it a new life.
Transforming that dress into a stylish top was a revelation. It not only saved a beloved garment but also sparked a whole new appreciation for upcycling. This guide shares the exact steps I use to create new wardrobe staples from old favorites.
Quick Overview
Giving an old dress a fresh purpose as a top is a rewarding project. You’ll learn to confidently measure, cut, and finish your garment, resulting in a unique piece you’ll love to wear.
- Time needed: 2-4 hours (depending on finishing technique)
- Difficulty: Beginner to Intermediate
- What you’ll need: Dress, sharp scissors, measuring tape, fabric chalk/marker, pins, sewing machine (or needle & thread), iron.
Step-by-Step Instructions
Step 1: Choose Your Dress Wisely
The foundation of a great top is the right dress. Look for dresses with a flattering bodice and sleeves that you already love. Consider the fabric type too.
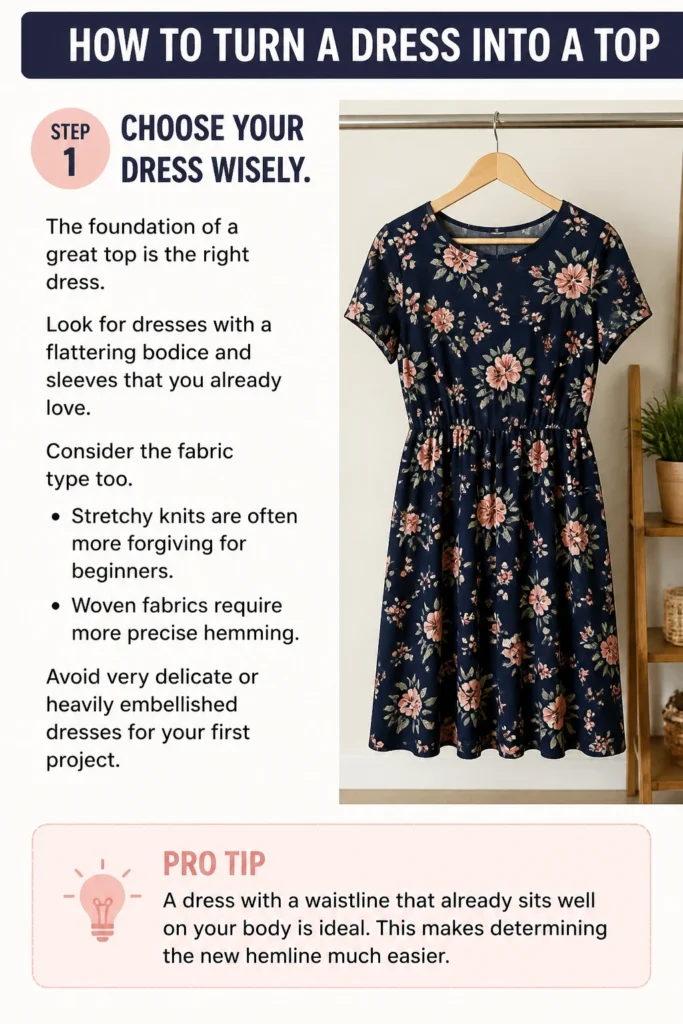
Stretchy knits are often more forgiving for beginners. Woven fabrics require more precise hemming. Avoid very delicate or heavily embellished dresses for your first project.
Pro Tip: A dress with a waistline that already sits well on your body is ideal. This makes determining the new hemline much easier.
Step 2: Prepare the Dress for Transformation
First, give your dress a good wash and iron. Any shrinking or stretching that might occur during laundry should happen before you cut. This ensures your measurements are accurate.
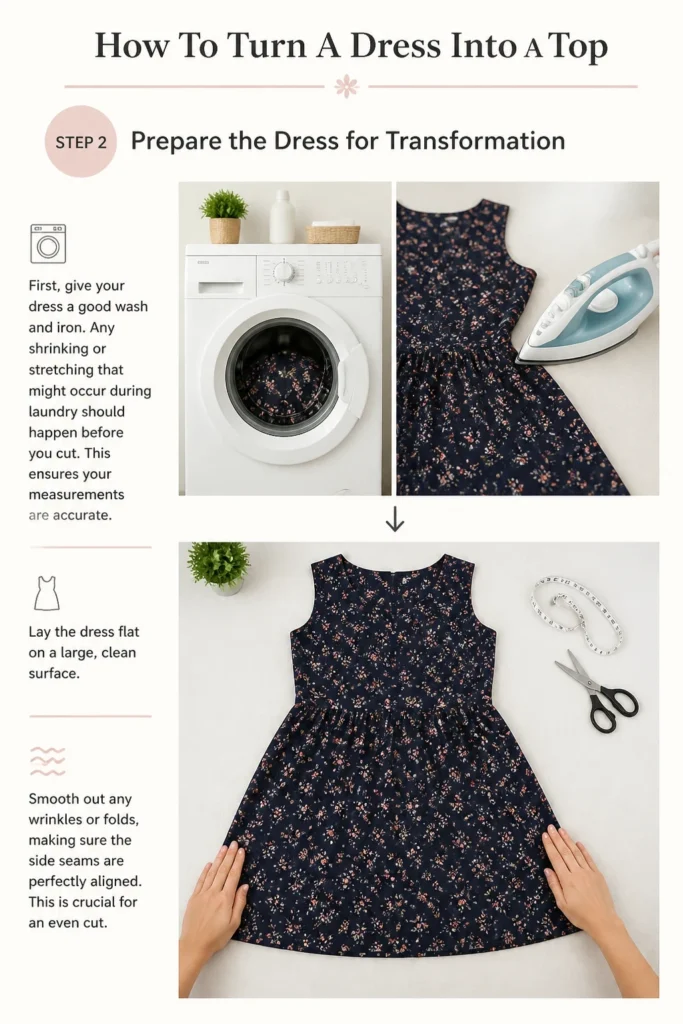
Lay the dress flat on a large, clean surface. Smooth out any wrinkles or folds, making sure the side seams are perfectly aligned. This is crucial for an even cut.
Step 3: Determine Your New Hemline
This is where the magic begins. Put on the dress and stand in front of a mirror. Decide where you want your new top to end.
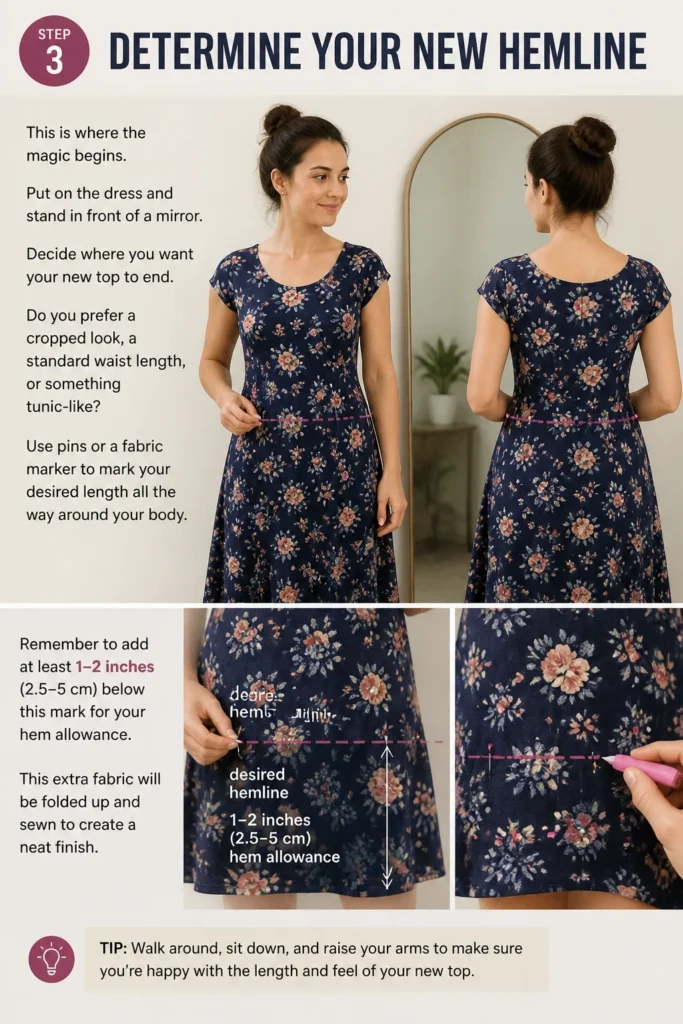
Do you prefer a cropped look, a standard waist length, or something tunic-like? Use pins or a fabric marker to mark your desired length all the way around your body. Remember to add at least 1-2 inches (2.5-5 cm) below this mark for your hem allowance. This extra fabric will be folded up and sewn to create a neat finish.
Step 4: Mark and Cut the Fabric
Carefully take off the dress. Lay it flat again, smoothing it out completely. Use your measuring tape to ensure your marked hemline is consistent across the front and back.
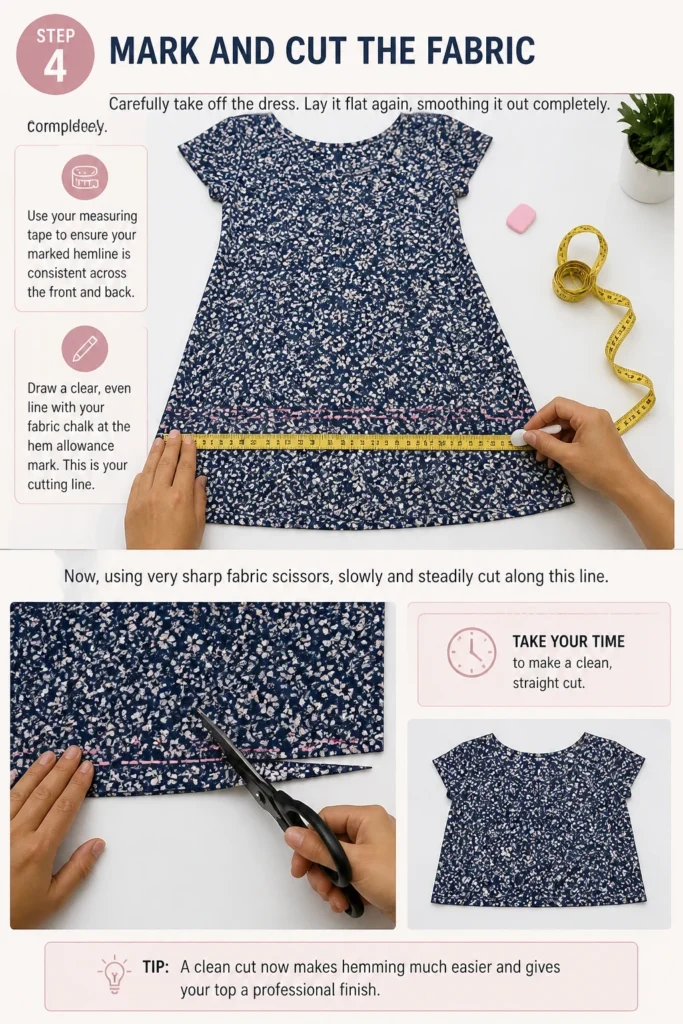
Draw a clear, even line with your fabric chalk at the hem allowance mark. This is your cutting line. Now, using very sharp fabric scissors, slowly and steadily cut along this line. Take your time to make a clean, straight cut.
Step 5: Decide on Your Hemming Technique
There are several ways to finish your new raw edge. The simplest is a basic folded hem. For stretchy fabrics, a twin needle on a sewing machine creates a professional, flexible finish.
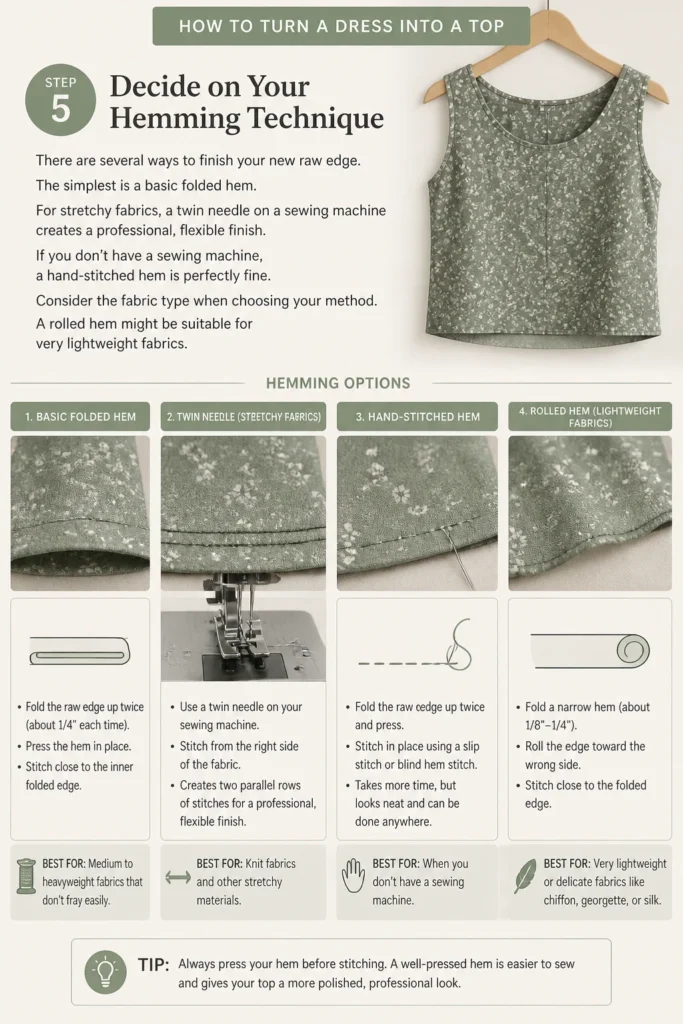
If you don’t have a sewing machine, a hand-stitched hem is perfectly fine. Consider the fabric type when choosing your method. A rolled hem might be suitable for very lightweight fabrics.
Step 6: Pin Your New Hem
Fold up the raw edge towards the inside of the garment by about 1/2 inch (1.25 cm). Press this fold with an iron to create a crisp edge. Then, fold it up again by another 1/2 to 1 inch (1.25-2.5 cm), fully enclosing the raw edge.
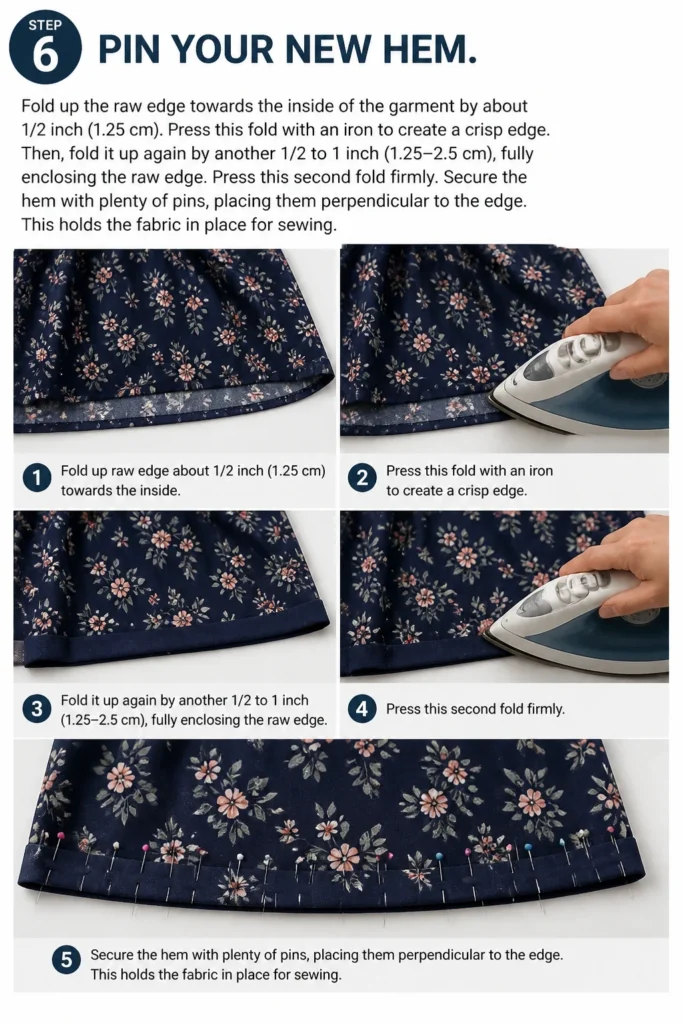
Press this second fold firmly. Secure the hem with plenty of pins, placing them perpendicular to the edge. This holds the fabric in place for sewing.
Step 7: Sew the Hem
If using a sewing machine, select a stitch appropriate for your fabric. A straight stitch works for most woven fabrics. For knits, a slight zig-zag or stretch stitch prevents popped seams.
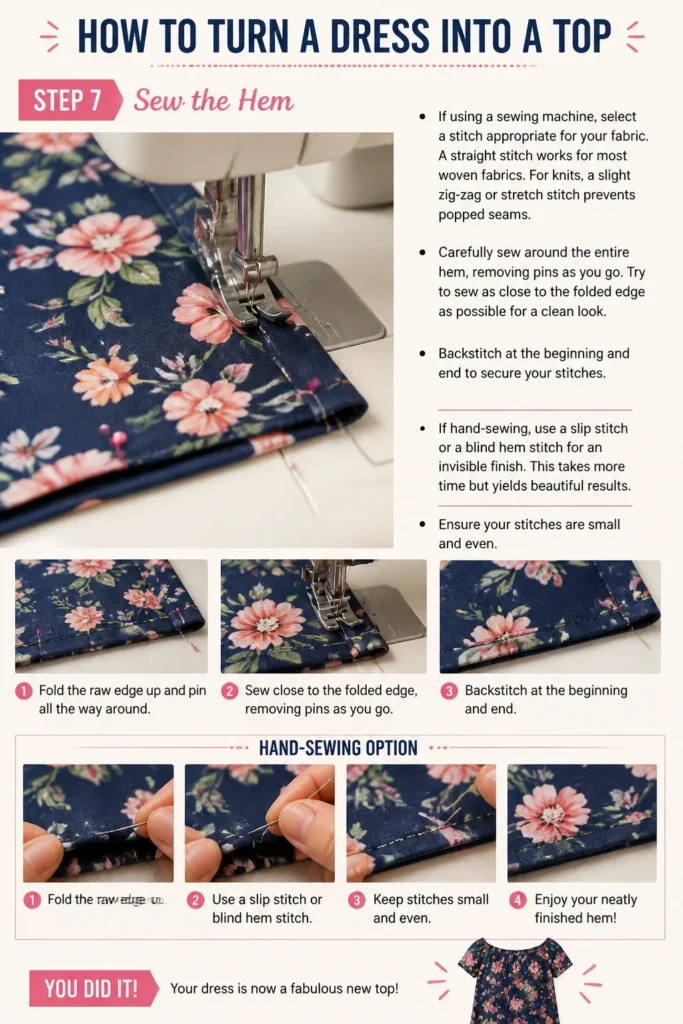
Carefully sew around the entire hem, removing pins as you go. Try to sew as close to the folded edge as possible for a clean look. Backstitch at the beginning and end to secure your stitches.
If hand-sewing, use a slip stitch or a blind hem stitch for an invisible finish. This takes more time but yields beautiful results. Ensure your stitches are small and even.
Step 8: Final Press and Try-On
Once your hem is sewn, give it a final press with a warm iron. This helps to set the stitches and give your new top a professional, crisp finish. Steam can also help smooth out any puckering.
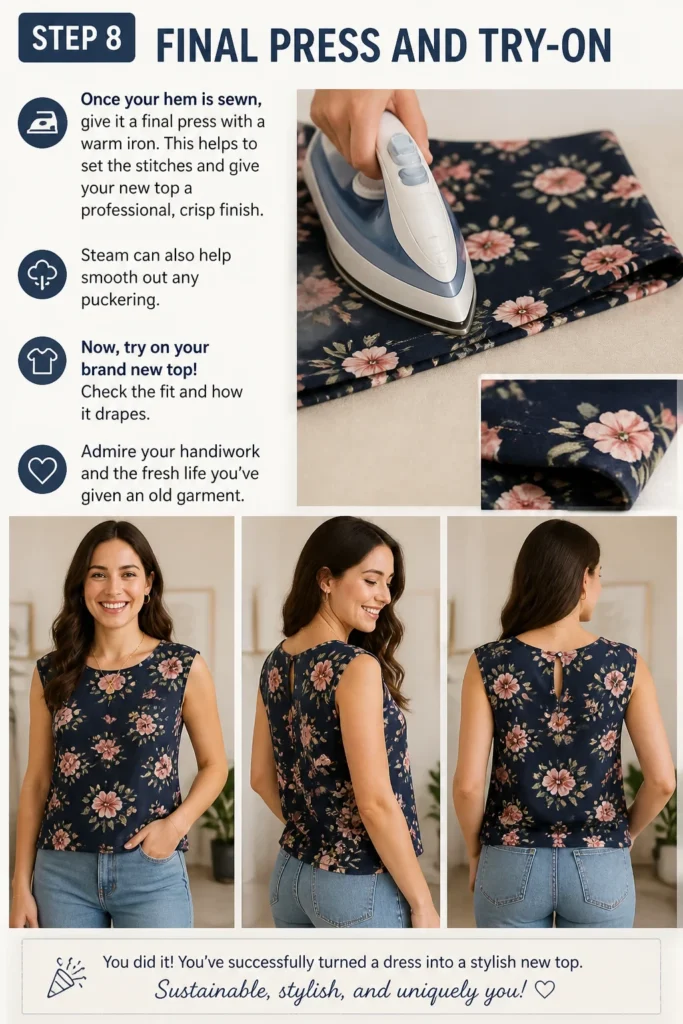
Now, try on your brand new top! Check the fit and how it drapes. Admire your handiwork and the fresh life you’ve given an old garment.
Common Mistakes to Avoid
Cutting Too Short
Many beginners get excited and cut too close to their desired finished length. Always remember to add enough fabric for your hem allowance, usually 1-2 inches. It’s much easier to trim a little more off than to add fabric back on.
Not Pressing Before Cutting
Skipping the pre-ironing step can lead to an uneven hem. Fabric can stretch or shrink slightly when washed or handled. Pressing ensures the fabric is in its true state before you make any permanent cuts. This creates a much more accurate and professional outcome.
Ignoring Fabric Type for Hemming
Using a straight stitch on a stretchy knit fabric is a common pitfall. This will cause the stitches to pop when the fabric stretches. Always choose a stitch that matches your fabric’s properties, like a zig-zag or stretch stitch for knits.
Rushing the Measuring and Marking
Accuracy is key in sewing. If your initial marking is uneven, your final hem will be uneven. Take your time to measure twice and mark clearly and consistently around the entire garment. This precision pays off in the end result.
Troubleshooting
My Hem is Uneven
This usually happens if the initial cut wasn’t perfectly straight or if the fabric shifted while marking. To fix it, try putting the top back on and re-marking the hem while wearing it. Carefully re-pin and sew. If the unevenness is slight, a good press with an iron can sometimes help to smooth it out.
The Fabric is Puckering Around the Hem
Puckering often indicates that your stitch tension is too tight for the fabric, or you might be pulling the fabric as you sew. Try loosening your machine’s tension slightly. Ensure you’re not stretching the fabric as it feeds through the machine. Use a walking foot if you have one, especially for knits.
The Raw Edge is Fraying After Cutting
Some fabrics, especially wovens, will fray if left unfinished. If you notice significant fraying, you might need to use a serger (overlocker) if available, or a zig-zag stitch along the raw edge before folding and hemming. This encloses the raw edge and prevents further unraveling.
Key Takeaways
- Always pre-wash and iron your dress for accurate measurements.
- Measure and mark carefully, adding a generous hem allowance.
- Use sharp fabric scissors for a clean, even cut.
- Press your hem folds before sewing for a crisp finish.
- Choose a sewing stitch appropriate for your fabric type.
- Don’t rush; precision leads to professional results.
Frequently Asked Questions
What kind of dress works best for this project?
Dresses with a well-fitting bodice and sleeves are ideal. Knit dresses are generally easier for beginners due to their stretch and less prone to fraying. Avoid dresses with complex bodices or very delicate fabrics for your first attempt.
Can I turn a dress into a top without a sewing machine?
Absolutely! While a sewing machine speeds up the process, you can hand-sew your hem. Use a strong needle and thread, and opt for a slip stitch or blind hem stitch for a neat, invisible finish. It will take more time, but the results can be beautiful.
What if the dress has a lining?
If your dress has a lining, you’ll need to treat it separately. Cut the lining about 1 inch (2.5 cm) shorter than your main fabric hem. You can then hem the lining separately using a simple turned-under method, or you can attach it to the main fabric’s hem by hand with a few loose stitches to keep it in place.
How do I choose the best length for my new top?
The best length depends on your personal style and what you plan to wear the top with. Try on the dress and experiment with different lengths using pins or clips. Consider where your natural waist is, or if you prefer a cropped look or a longer tunic style.
Our Top Recommended Finds
- Kai 7250 10-inch Professional Shears: Incredibly sharp and precise, these make cutting fabric a dream.
- Singer All-Purpose Sewing Kit: A comprehensive kit with needles, thread, pins, and a thimble, perfect for hand-sewing or quick fixes.
- Rowenta DW9280 SteamForce Iron: A high-quality iron with powerful steam helps achieve perfectly crisp hems and smooth out any wrinkles.
Reimagine Your Wardrobe Today
Giving a dress a new life as a top is more than just a sewing project; it’s an act of creative sustainability. You’re transforming something forgotten into a cherished piece. It’s an opportunity to express your unique style and reduce waste.
Why let that dress gather dust when it could be your new favorite top? Gather your tools, pick a dress, and start transforming your wardrobe. You’ll be amazed at what you can create with your own hands.
Beginner-friendly templates, step-by-step guides,
and weekly project ideas in your inbox.