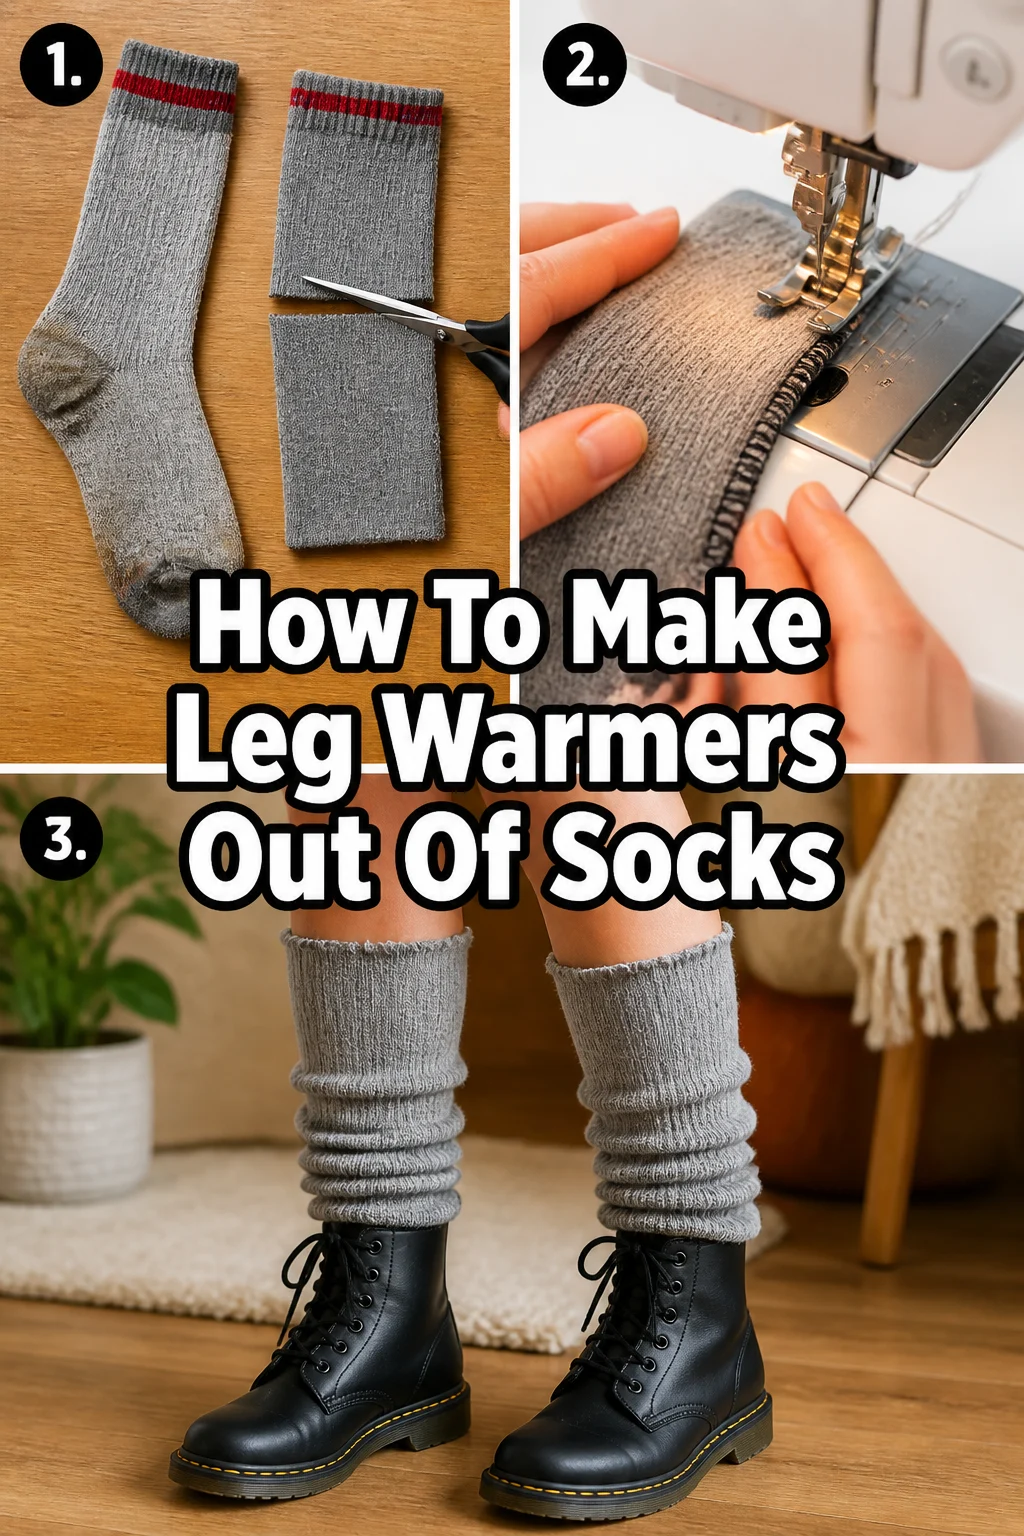
🧦 How To Make Leg Warmers Out Of Socks

Beginner-friendly templates, step-by-step guides,
and weekly project ideas in your inbox.
Do you have a drawer full of lonely socks missing their partners? Instead of tossing them, imagine transforming those single socks into a stylish new accessory. This guide will show you how to give them a fabulous second life.
I’ve personally upcycled countless socks over the years, turning forgotten textiles into cozy, fashionable leg warmers. You’re about to learn my simple, effective methods for creating your own unique pair.

Quick Overview
You’re about to embark on a fun, creative project that breathes new life into old socks. By the end, you’ll have a custom pair of leg warmers perfect for warmth, style, or a thoughtful gift.
- Time needed: 30-60 minutes
- Difficulty: Beginner
- What you’ll need: Old socks, scissors, measuring tape, pins, needle and thread or sewing machine.
Step-by-Step Instructions
Step 1: Gather Your Materials
First, collect your chosen socks. Look for knee-high or crew socks made from comfortable materials like cotton, wool, or blends. Thicker socks generally make warmer, more substantial leg warmers.
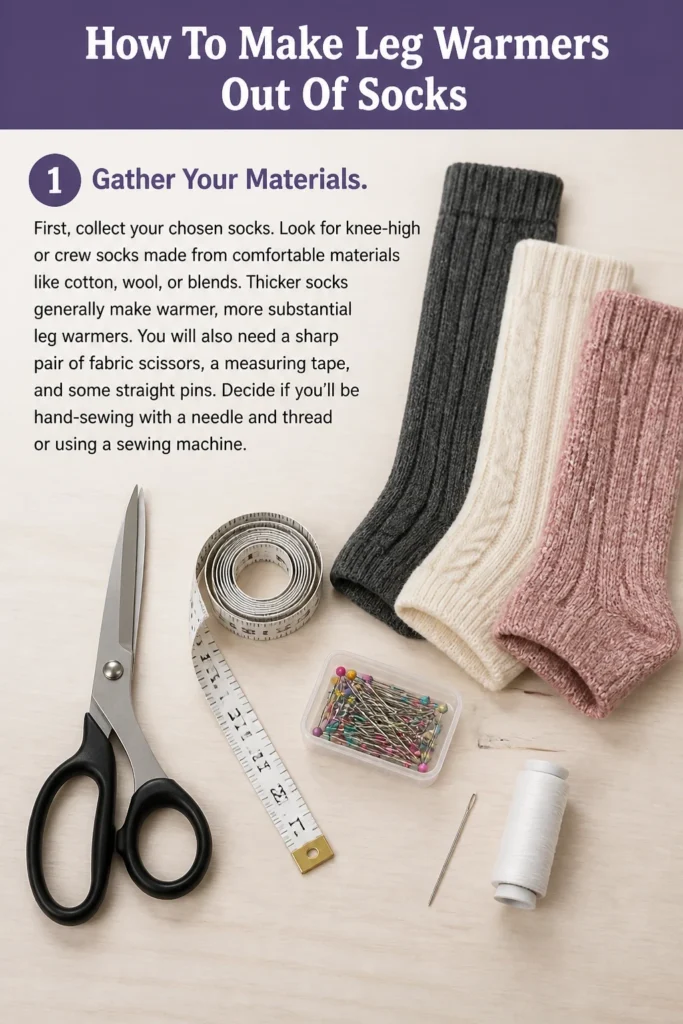
You will also need a sharp pair of fabric scissors, a measuring tape, and some straight pins. Decide if you’ll be hand-sewing with a needle and thread or using a sewing machine.
Step 2: Prepare Your Socks
Next, wash and thoroughly dry the socks you plan to use. This ensures they are clean and pre-shrunk before you start cutting. Lay them flat and smooth out any wrinkles.
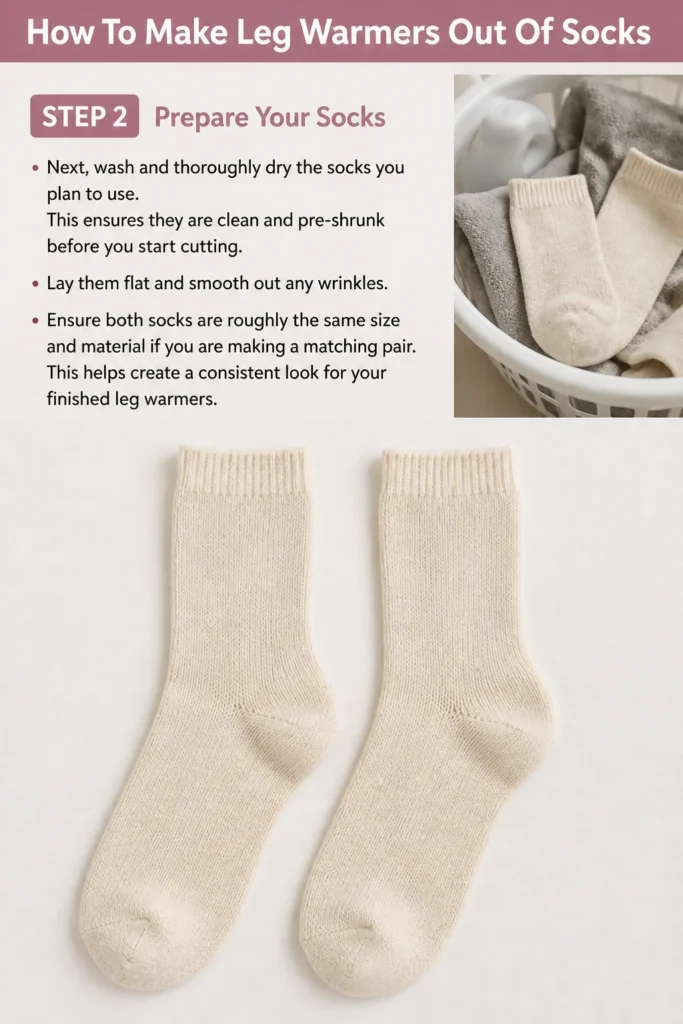
Ensure both socks are roughly the same size and material if you are making a matching pair. This helps create a consistent look for your finished leg warmers.
Step 3: Determine Your Length
Now, measure your legs to decide how long you want your leg warmers to be. Hold a sock up to your leg, from just below your knee or wherever you want the top to sit, down to your ankle. Mark this desired length with a pin.
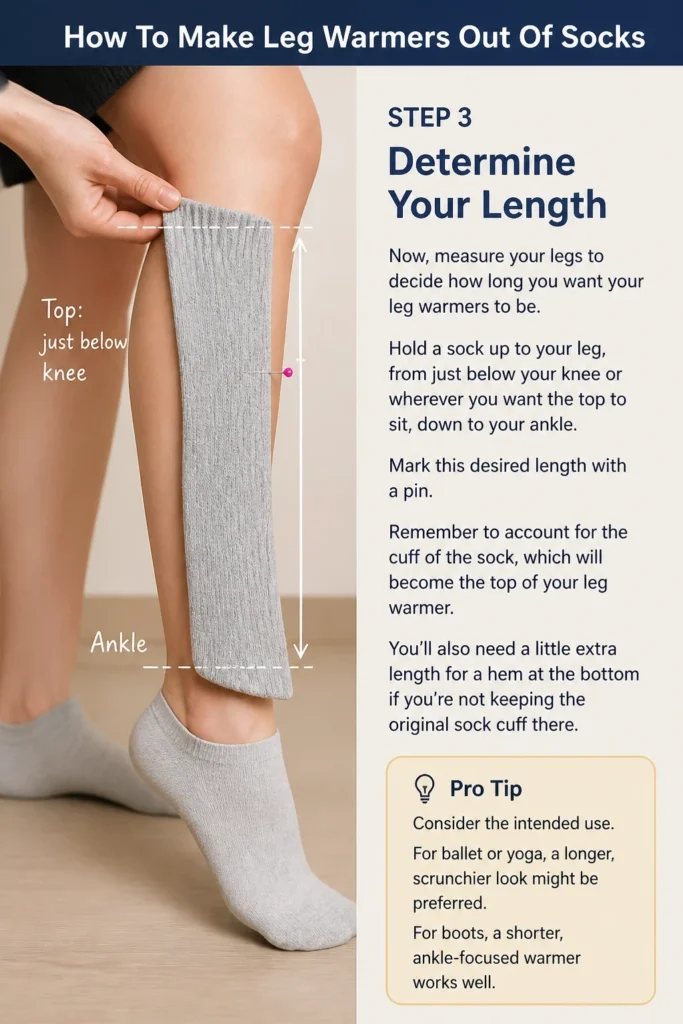
Remember to account for the cuff of the sock, which will become the top of your leg warmer. You’ll also need a little extra length for a hem at the bottom if you’re not keeping the original sock cuff there.
Pro Tip: Consider the intended use. For ballet or yoga, a longer, scrunchier look might be preferred. For boots, a shorter, ankle-focused warmer works well.
Step 4: Mark Your Cut Line
With your desired length in mind, lay the sock flat and smooth on a cutting surface. Using your measuring tape and a fabric marker or chalk, draw a clear line across the sock where you intend to cut. This line should be straight and even.
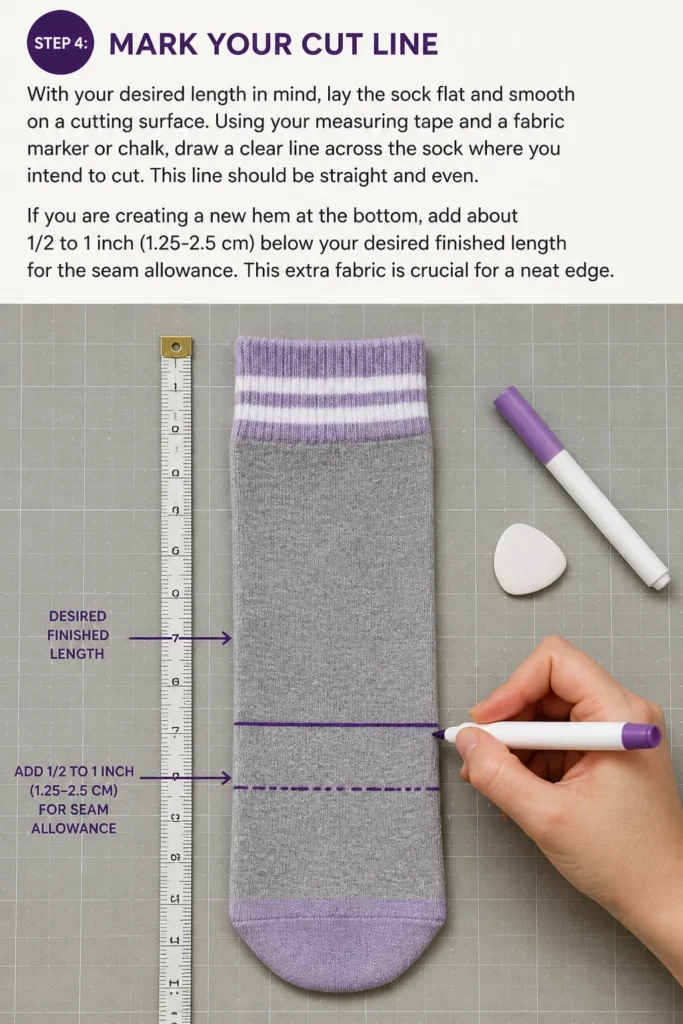
If you are creating a new hem at the bottom, add about 1/2 to 1 inch (1.25-2.5 cm) below your desired finished length for the seam allowance. This extra fabric is crucial for a neat edge.
Step 5: Make the Cut
Carefully cut along the marked line. Use sharp fabric scissors to ensure a clean, straight edge. This prevents fraying and makes the hemming process much easier.
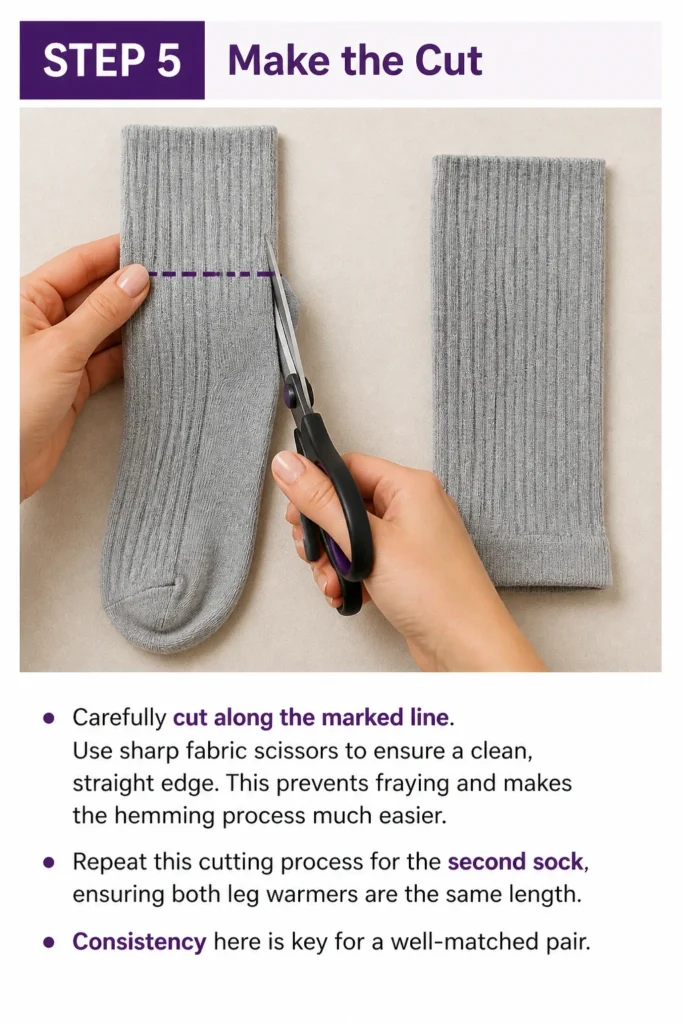
Repeat this cutting process for the second sock, ensuring both leg warmers are the same length. Consistency here is key for a well-matched pair.
Step 6: Create the Bottom Hem (Optional)
If you cut off the original sock cuff and need a new bottom edge, fold the raw edge up by about 1/4 inch (0.6 cm) and press it flat. Then, fold it up again by another 1/4 to 1/2 inch (0.6-1.25 cm). This creates a neat double-fold hem.
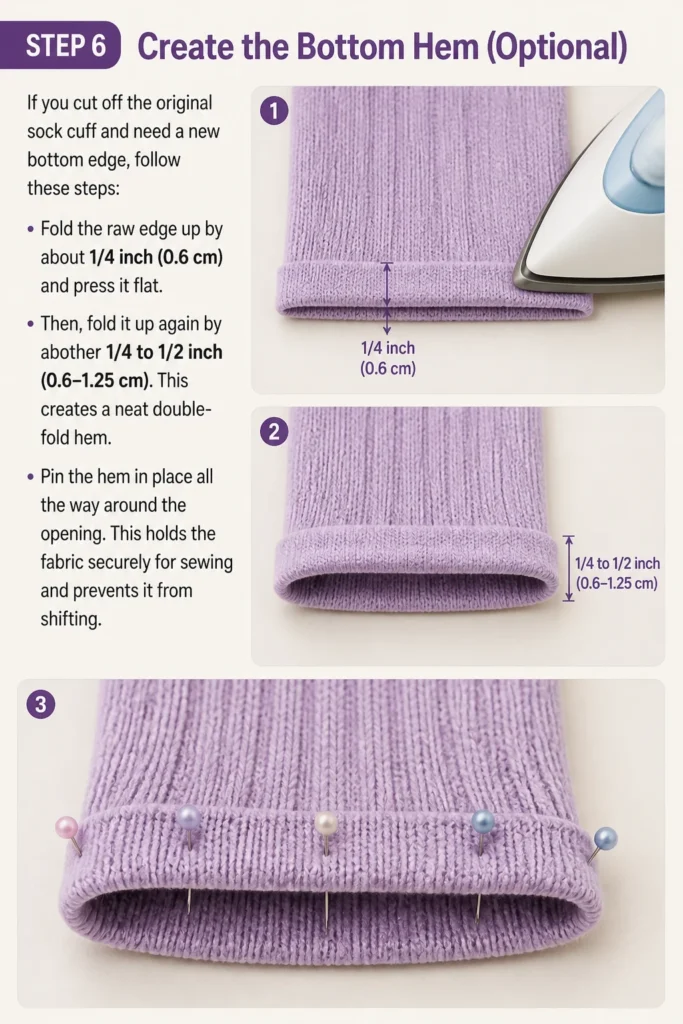
Pin the hem in place all the way around the opening. This holds the fabric securely for sewing and prevents it from shifting.
Step 7: Sew the Hem
Now it’s time to sew your hem. If hand-sewing, use a simple running stitch or a blind stitch for a less visible finish. Work your way around the entire opening, removing pins as you go.
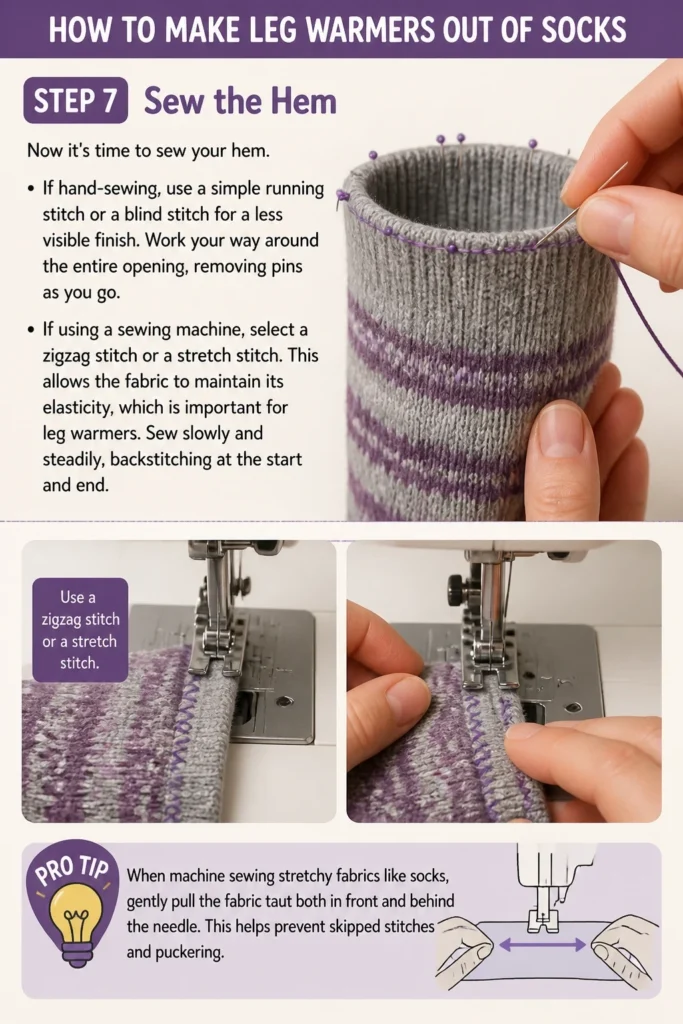
If using a sewing machine, select a zigzag stitch or a stretch stitch. This allows the fabric to maintain its elasticity, which is important for leg warmers. Sew slowly and steadily, backstitching at the start and end.
Pro Tip: When machine sewing stretchy fabrics like socks, gently pull the fabric taut both in front and behind the needle. This helps prevent skipped stitches and puckering.
Step 8: Finish the Edges (Optional, but Recommended)
For extra durability and to prevent fraying, consider finishing any raw edges. If you have a serger, this is the perfect time to use it for a professional-looking finish.
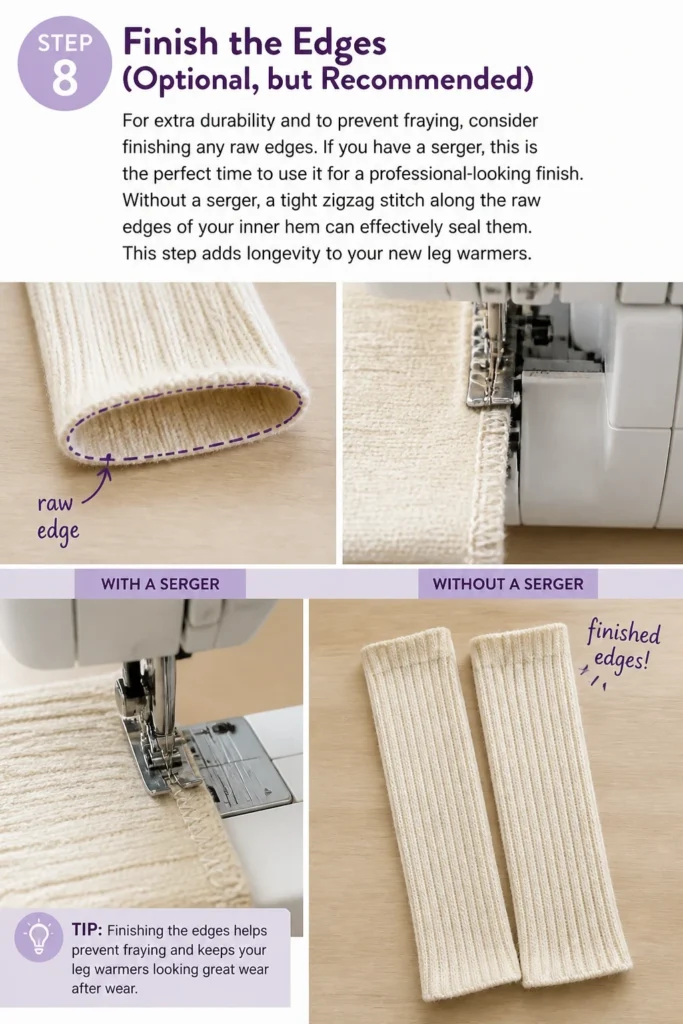
Without a serger, a tight zigzag stitch along the raw edges of your inner hem can effectively seal them. This step adds longevity to your new leg warmers.
Step 9: Try Them On and Adjust
Once both leg warmers are sewn, try them on. Check for comfort, fit, and overall appearance. Do they sit at the right height? Are they snug enough without being too tight?
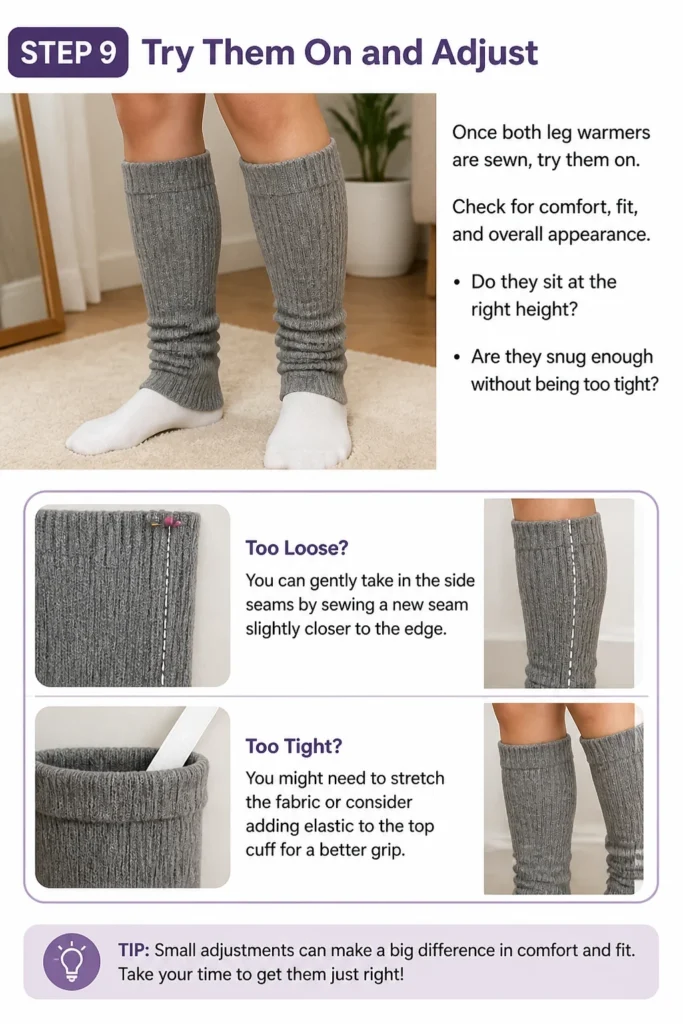
If they feel too loose, you can gently take in the side seams by sewing a new seam slightly closer to the edge. If they feel too tight, you might need to stretch the fabric or consider adding elastic to the top cuff for a better grip.
Step 10: Embellish (Optional)
Finally, personalize your new leg warmers! You can add decorative elements like buttons, lace trim, or embroidered patches. This is where your creativity can truly shine.
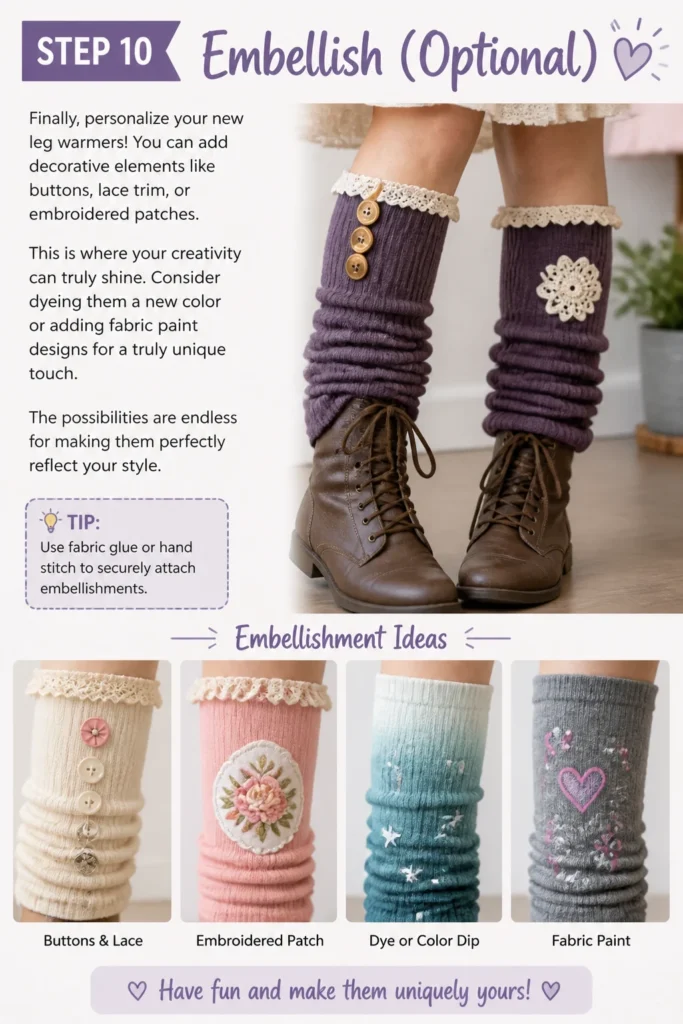
Consider dyeing them a new color or adding fabric paint designs for a truly unique touch. The possibilities are endless for making them perfectly reflect your style.
Common Mistakes to Avoid
Cutting Too Short
Many people get excited and cut their socks without enough allowance. If you cut too short, you might not have enough fabric to create a comfortable hem, leading to a raw edge or a leg warmer that constantly slips down. Always measure twice and cut once, adding that extra inch for hemming.
Using Dull Scissors
Dull scissors can snag and fray the fabric, especially with knit materials like socks. This results in uneven cuts and a messy finish that’s difficult to sew neatly. Invest in a good pair of fabric scissors and keep them sharp for clean, precise cuts.
Skipping the Hem
While tempting for a quick finish, skipping the hem on a raw edge will almost certainly lead to fraying. The material will unravel over time, making your leg warmers look worn out very quickly. A proper hem, even a simple one, significantly extends the life and appearance of your creation.
Not Using a Stretch Stitch
If you’re machine sewing, using a straight stitch on a stretchy sock fabric can cause the seams to pop or pucker when worn. The fabric needs to be able to stretch without breaking the thread. Always opt for a zigzag or a dedicated stretch stitch for flexibility.
Troubleshooting
Leg Warmers Keep Slipping Down
If your leg warmers aren’t staying up, the top cuff might not be tight enough. You can try sewing a thin piece of elastic into the top hem. Measure the elastic around your leg where the top of the warmer sits, ensuring it’s snug but comfortable, then sew it into the folded hem.
Alternatively, if the entire warmer feels too wide, you can carefully take in the side seams. Try them on, pin the excess fabric along the side, then sew a new seam slightly inward.
Edges are Fraying
Fraying edges usually mean the raw cut edge wasn’t properly finished. You can reinforce these by going back and adding a zigzag stitch very close to the edge. If the fraying is extensive, you might need to trim it neatly and re-hem the area with a double fold.
For future projects, remember to always finish raw edges immediately after cutting. A serger or a tight zigzag stitch are your best friends here.
Stitches are Breaking
If your seams are popping or stitches are breaking when you stretch the leg warmers, you likely used a straight stitch on stretchy fabric. The solution is to unpick the problematic seam and re-sew it using a zigzag stitch or a stretch stitch on your machine. This allows the seam to move with the fabric.
Ensure you are also using a good quality polyester thread, which has some natural stretch, rather than cotton thread which can be more rigid.
Key Takeaways
- Old socks are excellent resources for creative upcycling projects like leg warmers.
- Accurate measuring and a clean cut are essential for a professional finish.
- Always add seam allowance for hemming to ensure a neat, durable edge.
- A zigzag or stretch stitch is crucial for sewing stretchy fabrics to maintain elasticity.
- Properly finishing raw edges prevents fraying and extends the life of your leg warmers.
- Don’t be afraid to personalize your leg warmers with embellishments for a unique touch.
Frequently Asked Questions
Can I use any type of sock for this project?
While you can technically use any sock, knee-high or crew socks made of cotton, wool, or acrylic blends work best. Thinner dress socks might not provide enough warmth or structure. Avoid very delicate or sheer materials as they might not hold up well to cutting and sewing.
Do I need a sewing machine?
No, a sewing machine is not strictly necessary. You can absolutely hand-sew your leg warmers using a needle and thread. A simple running stitch or a backstitch for durability will work perfectly. A machine simply makes the process faster and often results in neater, more consistent stitches.
How do I make sure both leg warmers are the same size?
The best way to ensure consistent sizing is to prepare and cut both socks at the same time. Lay one sock flat, mark your cut line, then place the second sock directly on top, aligning all edges. Cut both layers simultaneously for identical pieces.
Can I make leg warmers for children using this method?
Yes, this method works wonderfully for children’s leg warmers too! Just adjust your measurements according to the child’s leg length. Smaller socks will naturally yield shorter leg warmers, perfect for little ones.
Our Top Recommended Finds
- Sharp Fabric Scissors: A dedicated pair of fabric scissors makes all the difference for clean cuts and prevents fraying.
- Fabric Chalk or Marker: Essential for marking clear, visible cut lines on your socks without damaging the fabric.
- All-Purpose Polyester Thread: This type of thread has a slight stretch, making it ideal for sewing knit fabrics and ensuring durable seams.
Transform Your Socks Today
You now have all the knowledge and steps needed to turn those lonely socks into stylish, functional leg warmers. This project is not just about crafting; it’s about giving new purpose to forgotten items and expressing your unique style.
Why wait? Pick out a pair of socks from your drawer and start your upcycling adventure this afternoon. You’ll be amazed at how quickly you can create something beautiful and practical. Consider making a few pairs for different outfits or as thoughtful, handmade gifts for friends.
Beginner-friendly templates, step-by-step guides,
and weekly project ideas in your inbox.