
🔥 How To Make Pine Look Like White Oak

Beginner-friendly templates, step-by-step guides,
and weekly project ideas in your inbox.
Transforming common pine into the sophisticated aesthetic of white oak is a rewarding woodworking challenge.
I’ve personally experimented with numerous finishing techniques over the years, and this guide distills the most effective methods I’ve found.
You’re about to learn a practical, step-by-step process to achieve that distinctive, elegant look right in your own workshop.

Quick Overview
This guide will walk you through preparing pine, applying specific conditioning and staining layers, and sealing your project to mimic the sought-after grain and color of white oak. You’ll gain the skills to elevate your pine pieces significantly.
- Time needed: 2-3 days (including drying and curing times)
- Difficulty: Intermediate
- What you’ll need: Orbital sander, various grit sandpaper, wood conditioner, gray and brown water-based stains, white pickling wash or liming wax, brushes, rags, protective topcoat.
Step-by-Step Instructions
Step 1: Prepare Your Workspace and Materials
Start by setting up a clean, well-ventilated area for your project. Dust and debris are the enemies of a smooth finish. Ensure good lighting so you can clearly see your work.
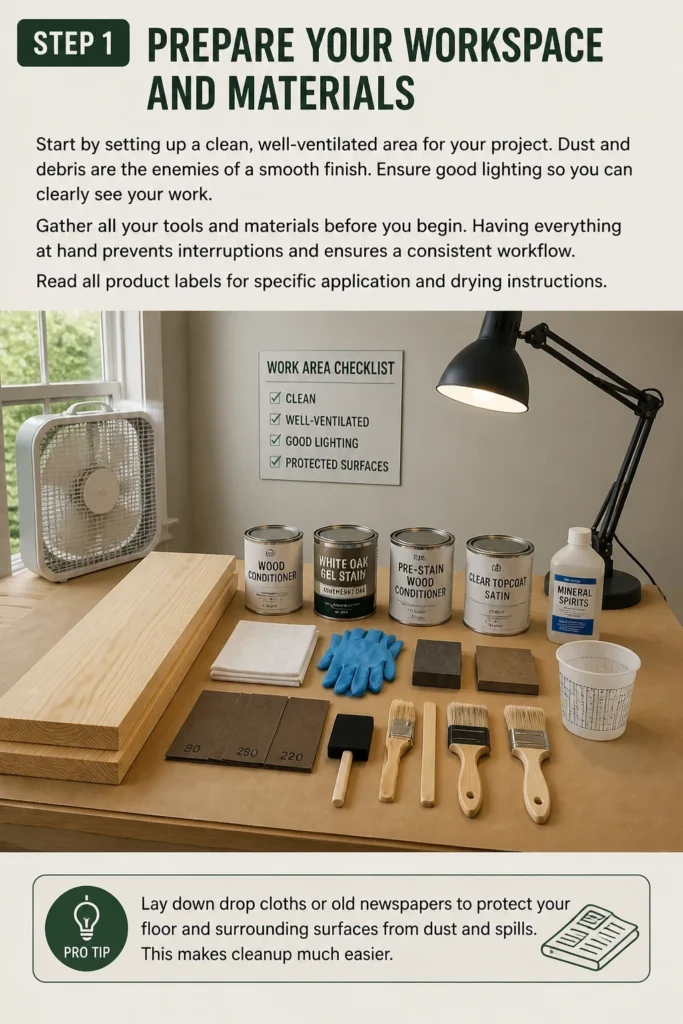
Gather all your tools and materials before you begin. Having everything at hand prevents interruptions and ensures a consistent workflow. Read all product labels for specific application and drying instructions.
Pro Tip: Lay down drop cloths or old newspapers to protect your floor and surrounding surfaces from dust and spills. This makes cleanup much easier.
Step 2: Thoroughly Sand the Pine
Proper sanding is the foundation of any great finish, especially when working with pine. Begin with 120-grit sandpaper to remove any existing finish, mill marks, or imperfections. Work systematically across the entire surface.
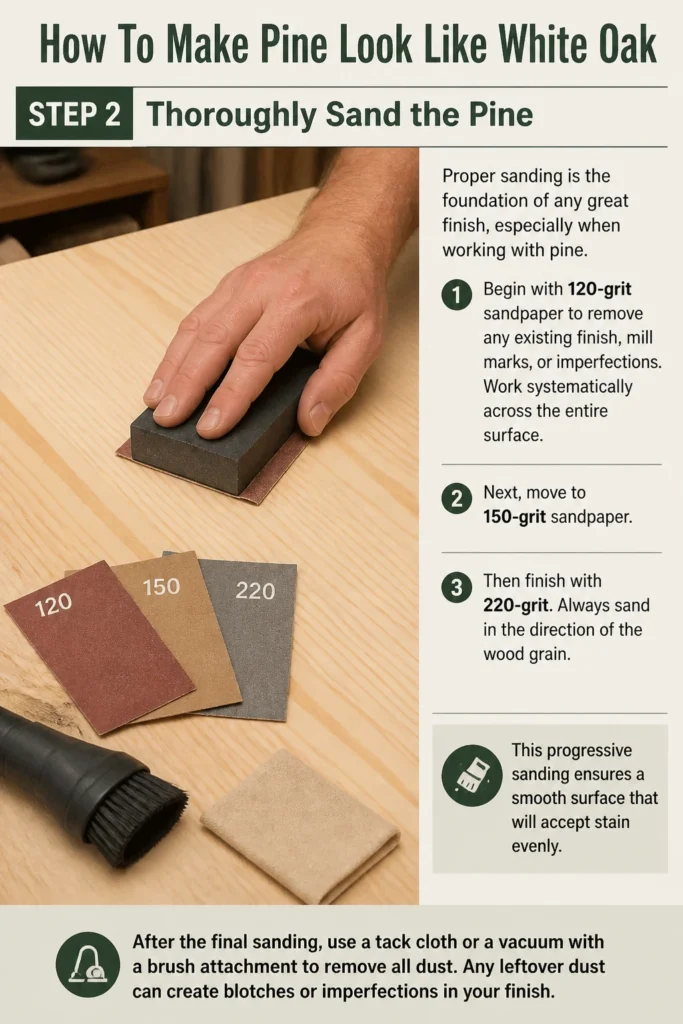
Next, move to 150-grit sandpaper, then finish with 220-grit. Always sand in the direction of the wood grain. This progressive sanding ensures a smooth surface that will accept stain evenly.
After the final sanding, use a tack cloth or a vacuum with a brush attachment to remove all dust. Any leftover dust can create blotches or imperfections in your finish.
Step 3: Apply Wood Conditioner (Crucial for Pine)
Pine is notorious for staining unevenly due to its varied density, leading to a blotchy appearance. A pre-stain wood conditioner is essential to mitigate this. Apply a generous, even coat of wood conditioner to all surfaces.
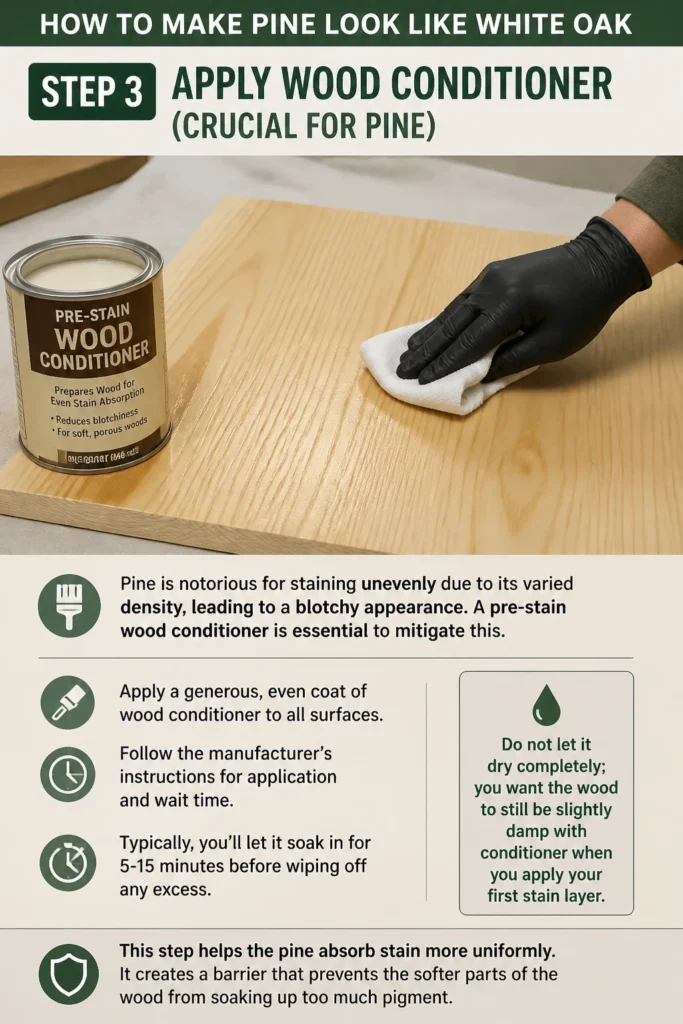
Follow the manufacturer’s instructions for application and wait time. Typically, you’ll let it soak in for 5-15 minutes before wiping off any excess. Do not let it dry completely; you want the wood to still be slightly damp with conditioner when you apply your first stain layer.
This step helps the pine absorb stain more uniformly. It creates a barrier that prevents the softer parts of the wood from soaking up too much pigment.
Step 4: Create the Base Layer: Light Gray Wash
White oak often has subtle cool, grayish undertones. To replicate this, you’ll apply a very diluted, light gray water-based stain or a gray pickling wash. Mix your gray stain with water (start with a 1:1 ratio and test on scrap wood) to create a translucent wash.
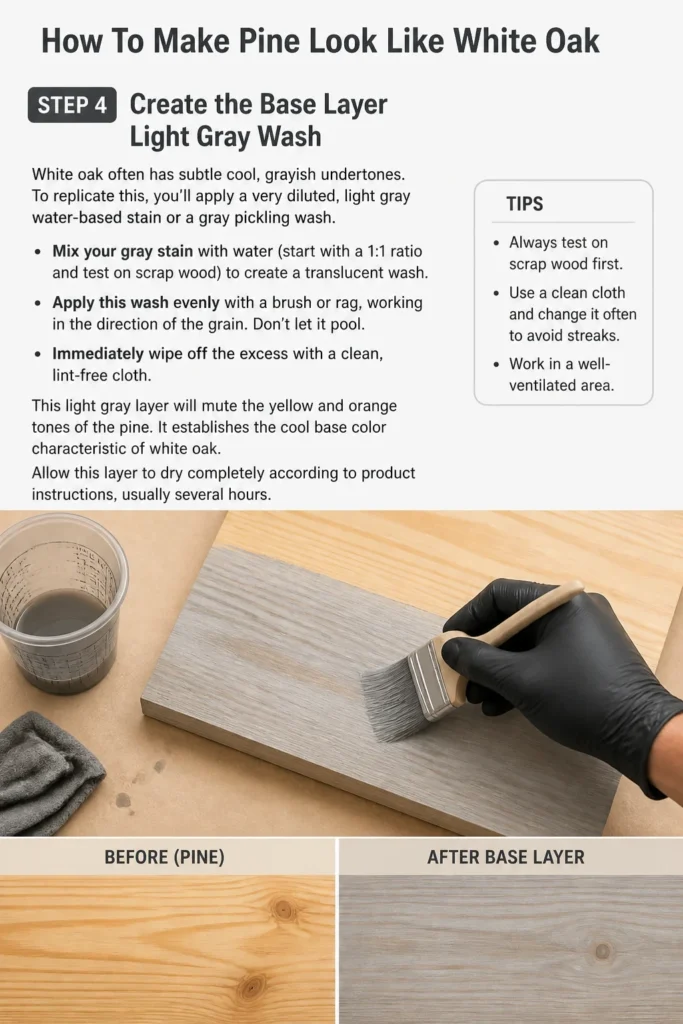
Apply this wash evenly with a brush or rag, working in the direction of the grain. Don’t let it pool. Immediately wipe off the excess with a clean, lint-free cloth.
This light gray layer will mute the yellow and orange tones of the pine. It establishes the cool base color characteristic of white oak. Allow this layer to dry completely according to product instructions, usually several hours.
Step 5: Introduce the “Grain” Layer: Darker Gray/Brown Stain
White oak’s beauty lies in its distinct open grain pattern. To bring this out, you’ll use a slightly darker, more opaque stain. Choose a water-based stain that is a cool-toned light brown or a medium gray-brown.
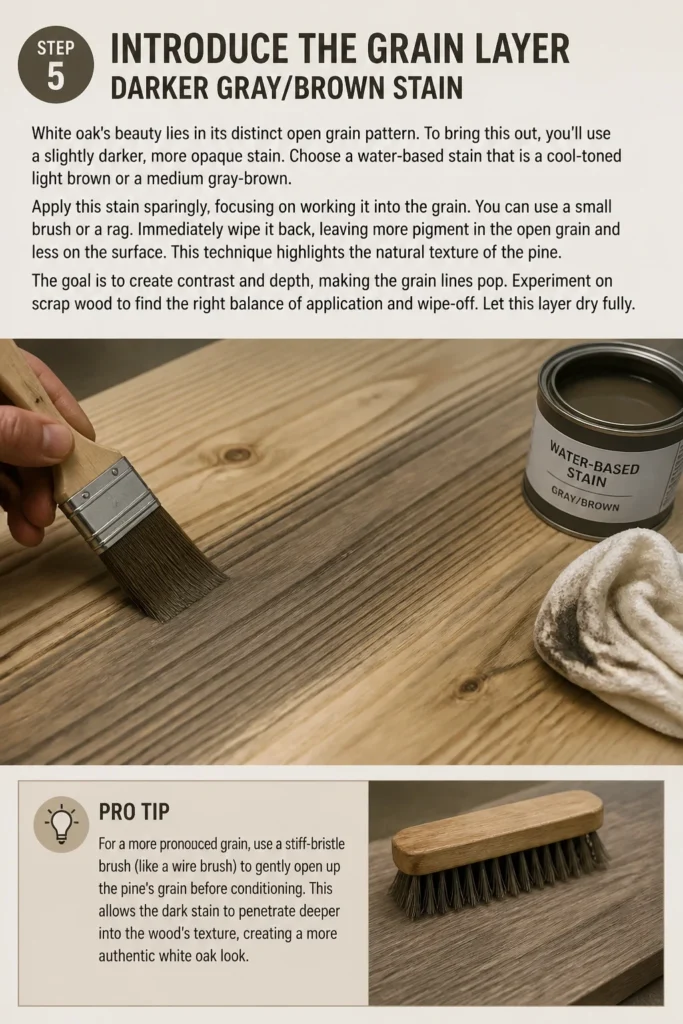
Apply this stain sparingly, focusing on working it into the grain. You can use a small brush or a rag. Immediately wipe it back, leaving more pigment in the open grain and less on the surface. This technique highlights the natural texture of the pine.
The goal is to create contrast and depth, making the grain lines pop. Experiment on scrap wood to find the right balance of application and wipe-off. Let this layer dry fully.
Pro Tip: For a more pronounced grain, use a stiff-bristle brush (like a wire brush) to gently open up the pine’s grain before conditioning. This allows the darker stain to penetrate deeper into the new texture.
Step 6: Apply a White Pickling or Liming Wax (Optional but Effective)
This step is where the “white” in white oak truly comes through. A white pickling wash or liming wax creates a subtle, hazy, almost bleached effect. It softens the overall color and further enhances the grain.
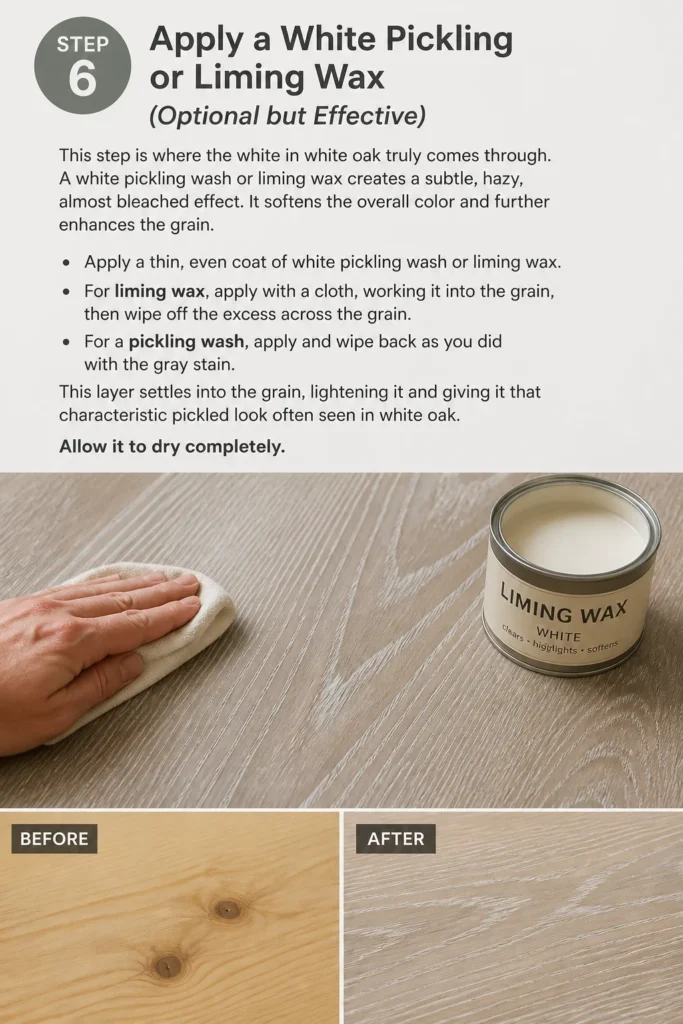
Apply a thin, even coat of white pickling wash or liming wax. For liming wax, apply with a cloth, working it into the grain, then wipe off the excess across the grain. For a pickling wash, apply and wipe back as you did with the gray stain.
This layer settles into the grain, lightening it and giving it that characteristic “pickled” look often seen in white oak. Allow it to dry completely.
Step 7: Seal with a Protective Topcoat
Once all your stain and wash layers are thoroughly dry, it’s time to protect your work. A clear, water-based polyurethane or polycrylic is an excellent choice. Water-based options tend to be clearer and less likely to yellow over time, preserving your carefully crafted white oak look.
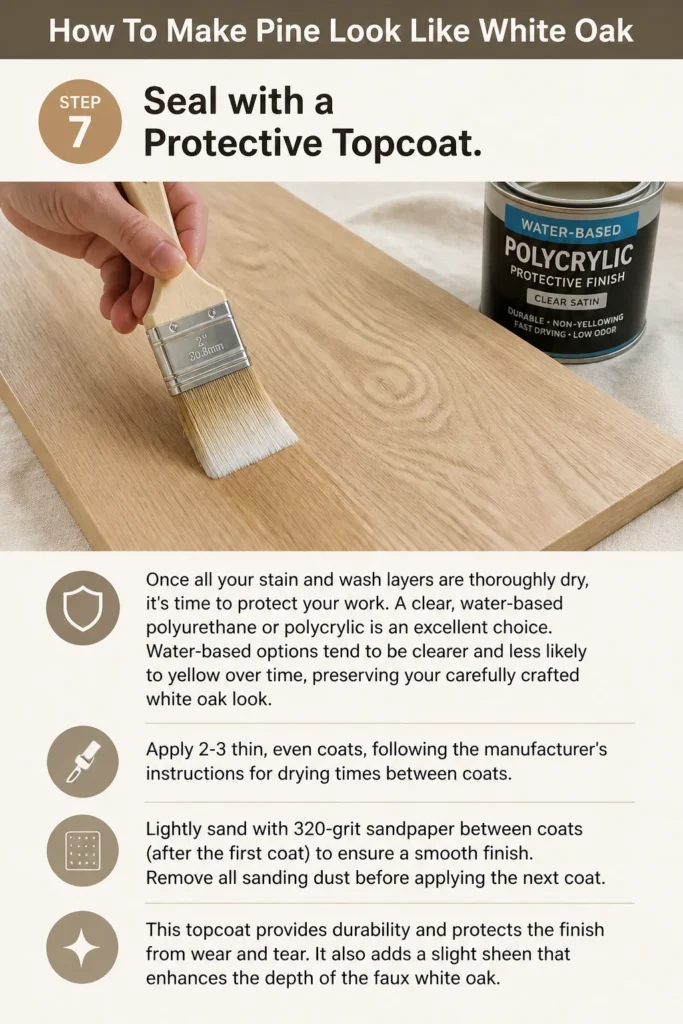
Apply 2-3 thin, even coats, following the manufacturer’s instructions for drying times between coats. Lightly sand with 320-grit sandpaper between coats (after the first coat) to ensure a smooth finish. Remove all sanding dust before applying the next coat.
This topcoat provides durability and protects the finish from wear and tear. It also adds a slight sheen that enhances the depth of the faux white oak.
Step 8: Final Curing and Inspection
While the topcoat may feel dry to the touch in a few hours, it needs time to fully cure and harden. This can take several days to a few weeks, depending on the product and humidity. Avoid heavy use during this curing period.
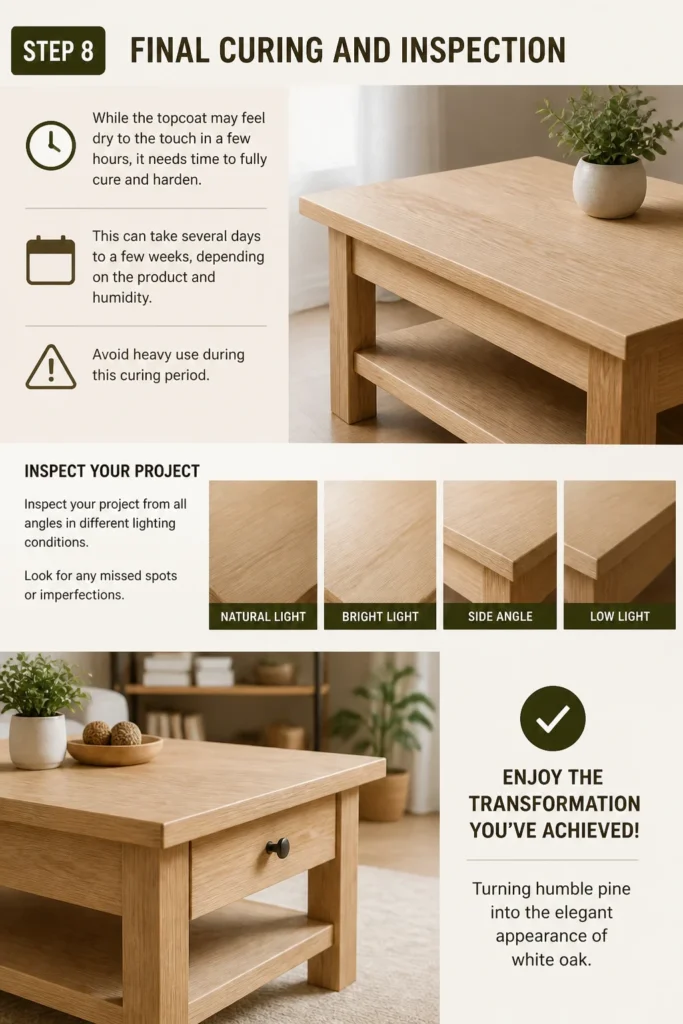
Inspect your project from all angles in different lighting conditions. Look for any missed spots or imperfections. Enjoy the transformation you’ve achieved, turning humble pine into the elegant appearance of white oak.
Common Mistakes to Avoid
Skipping Wood Conditioner
Many DIYers rush to stain, but pine requires special treatment. Skipping wood conditioner almost guarantees a splotchy, uneven finish. Pine’s soft and hard growth rings absorb stain differently, leading to an unsightly patchwork. Always apply conditioner to ensure uniform stain absorption and a professional result.
Not Sanding Properly
Inadequate sanding leaves behind mill marks, scratches, or uneven surfaces. These imperfections become glaringly obvious once stain is applied, as pigment settles into every divot. Take your time with progressive sanding, ensuring a perfectly smooth and clean surface before any finish goes on.
Applying Too Much Stain at Once
It’s tempting to try and achieve the desired color in one heavy coat. However, this often leads to a muddy, opaque finish that obscures the grain. It can also cause pooling and uneven drying. Always apply thin, even coats and build the color gradually, wiping back excess immediately.
Ignoring Drying Times
Patience is key in woodworking. Rushing the process by applying subsequent layers before previous ones are fully dry can lead to adhesion issues, bubbling, or a tacky finish. Always consult product labels for recommended drying times and allow adequate time for each layer to cure.
Troubleshooting
Splotchy Stain
If your stain has dried splotchy, the most common culprit is either insufficient wood conditioning or improper sanding. To fix it, you may need to sand back the affected areas down to bare wood. Re-apply wood conditioner, ensuring even coverage and proper absorption time, then re-stain with thin, even coats.
Too Dark/Too Light Finish
If your finish is too dark, you might be able to lighten it slightly by gently scrubbing with mineral spirits or a wood cleaner, though this might also remove some of your carefully applied layers. If it’s too light, you can apply another thin wash of your darker gray-brown stain, being careful to wipe back thoroughly. Always test on an inconspicuous area first.
Rough Finish
A rough or “fuzzy” finish after staining is often due to “grain raising.” Water-based products can cause the wood fibers to swell and stand up. To prevent this, after your initial sanding and before conditioning, you can “water pop” the grain by lightly dampening the wood, letting it dry, then doing a final light sand with 220-grit. If it’s already rough, a very light sanding with 320 or 400-grit sandpaper after the first topcoat can smooth it out before applying subsequent topcoats.
Key Takeaways
- Proper sanding and wood conditioning are non-negotiable for success with pine.
- Building the white oak look involves multiple thin layers of cool-toned gray and brown stains.
- A white pickling wash or liming wax is crucial for achieving the characteristic “white” aspect.
- Always work in a clean, well-ventilated area and allow ample drying time between coats.
- Water-based stains and topcoats are recommended to maintain the cool, non-yellowing aesthetic.
- Practice on scrap wood to perfect your technique before tackling your main project.
Frequently Asked Questions
Can I do this on old pine furniture?
Yes, this technique works well on old pine furniture, but you must first strip or thoroughly sand off any existing finish down to bare wood. Any remaining finish will prevent the wood conditioner and stains from penetrating properly. Ensure the surface is completely clean and smooth before beginning.
What if I don’t want a gray tone?
The gray tones are key to mimicking white oak, which naturally has cooler undertones compared to red oak. If you prefer a warmer look, you could adjust the gray wash to be a very diluted light tan or omit the gray wash and focus on very light brown stains. However, the result might look more like a light natural oak rather than white oak.
How long will the finish last?
With proper application of a durable topcoat like polyurethane, your finish can last for many years. The longevity depends on the amount of wear and tear the piece receives and how well it’s maintained. Regular cleaning and avoiding harsh chemicals will help preserve the finish.
Is this technique suitable for outdoor use?
This specific technique using interior stains and topcoats is not recommended for outdoor use. Exterior projects require specialized outdoor-rated stains and sealers that can withstand UV exposure, moisture, and temperature fluctuations. The colors may also fade or yellow differently outdoors.
Our Top Recommended Finds
- Orbital Sander: Essential for efficient and even sanding, saving you significant time and effort.
- High-Quality Wood Conditioner: A good conditioner is the secret weapon against blotchy pine stain, ensuring a professional finish.
- Water-Based Polyurethane: Provides durable protection without yellowing, preserving the cool tones of your faux white oak.
Your Pine Project Awaits Its Transformation
You now possess the knowledge and step-by-step instructions to turn humble pine into a sophisticated white oak lookalike. This process isn’t just about applying products; it’s about understanding wood and layering finishes to create an illusion of depth and elegance.
Imagine the satisfaction of showcasing a piece that belies its simple origins. Don’t let your pine projects settle for a basic stain. Take the plunge, gather your materials, and begin your transformation today. Your next stunning piece of furniture is within reach.
Beginner-friendly templates, step-by-step guides,
and weekly project ideas in your inbox.