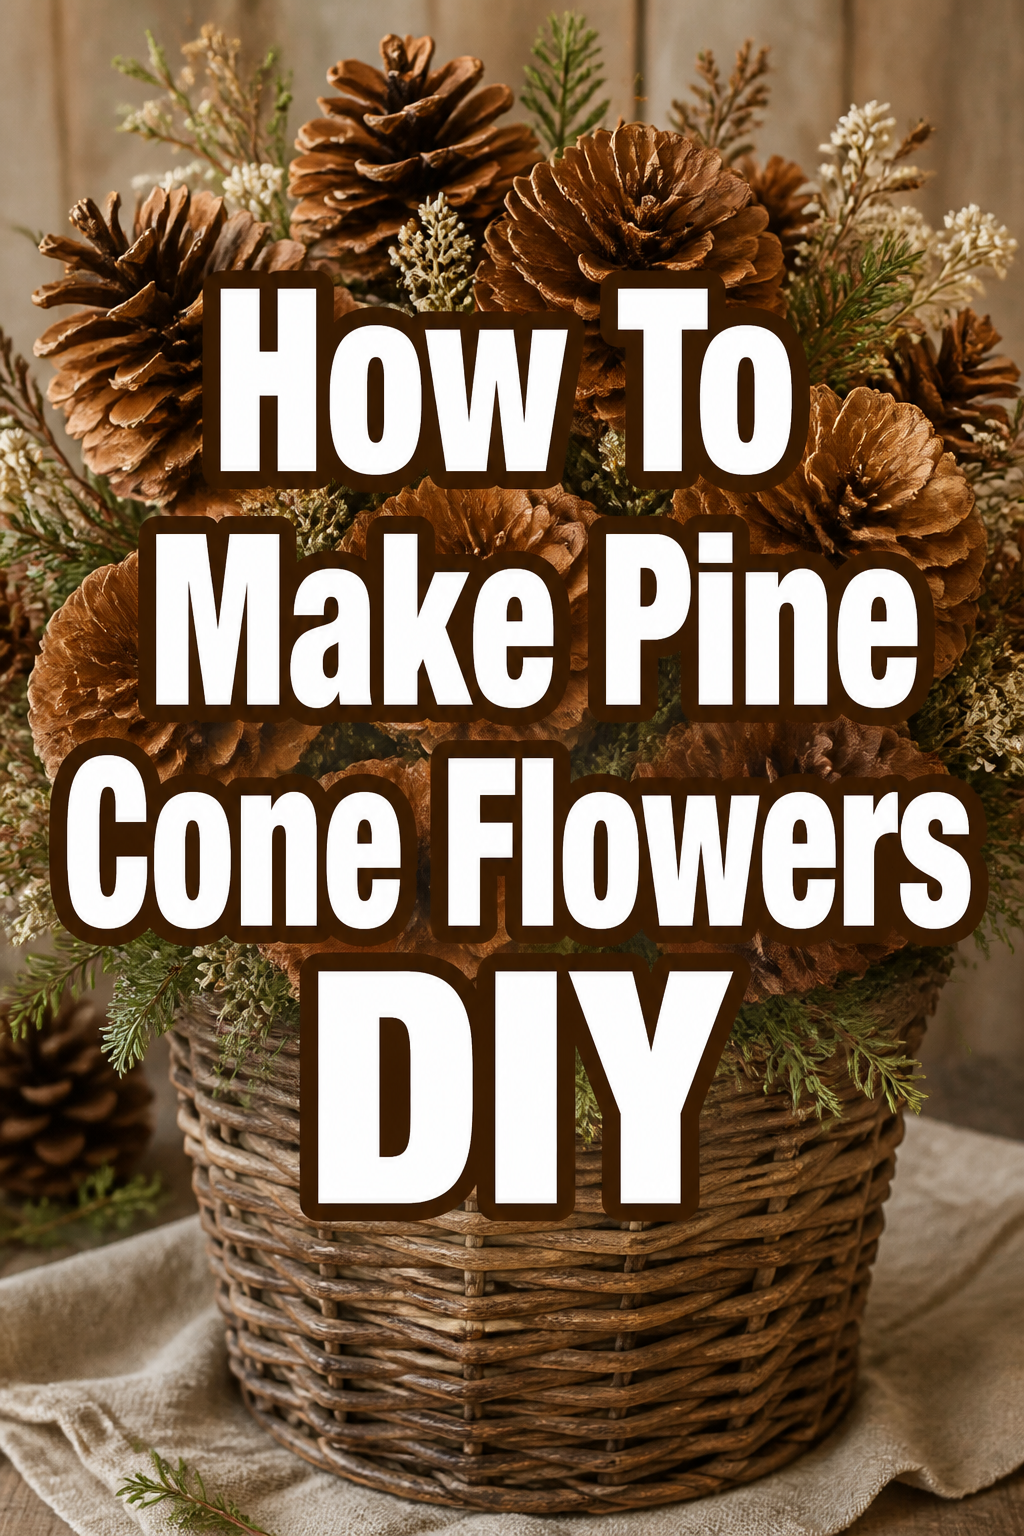
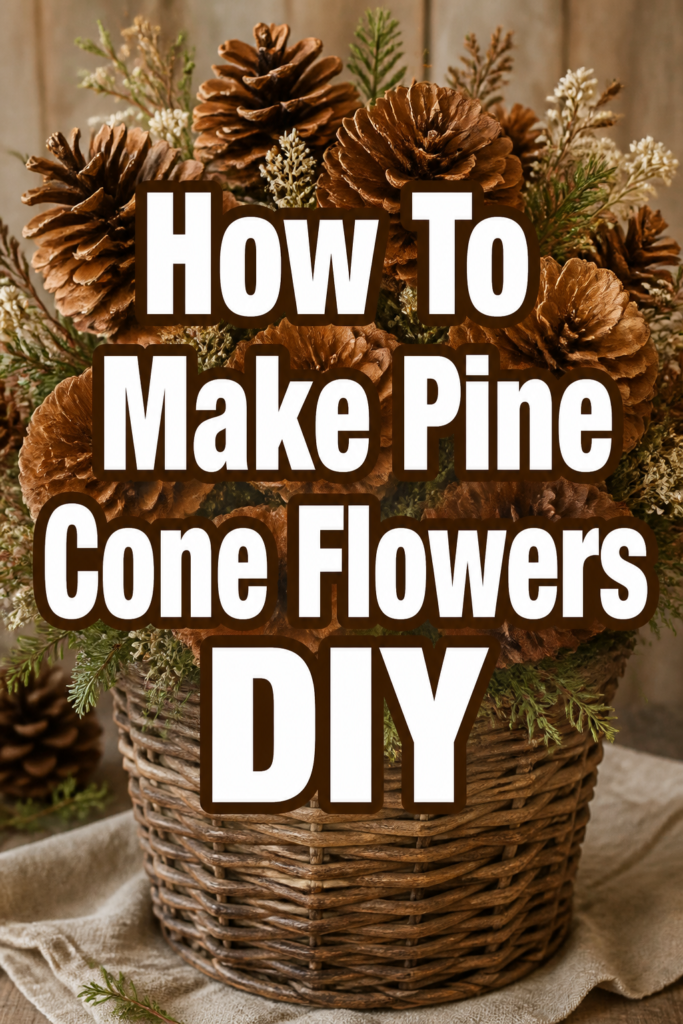
🌲 How To Make Pine Cone Flowers DIY

Beginner-friendly templates, step-by-step guides,
and weekly project ideas in your inbox.
Transforming humble pine cones into beautiful, lasting flowers is a wonderfully rewarding craft. I discovered this simple joy many years ago, looking for unique home decor that connected with nature. This guide shares my tried-and-true method, ensuring your pine cone flowers turn out perfectly every time.
You’ll create stunning, rustic blooms that bring a touch of the outdoors inside.
Quick Overview
This guide will walk you through crafting charming pine cone flowers, perfect for wreaths, centerpieces, or standalone decorations. You’ll learn how to clean, cut, and paint your way to beautiful, natural art.
- Time needed: 2-4 hours (including drying time)
- Difficulty: Beginner
- What you’ll need: Pine cones, pruning shears, protective gloves, paint, paintbrushes, clear sealant.
Step-by-Step Instructions
Step 1: Gather Your Pine Cones
Head outdoors to collect a variety of pine cones. Look for different sizes and shapes to give your “bouquet” dimension. Freshly fallen cones are often the best.
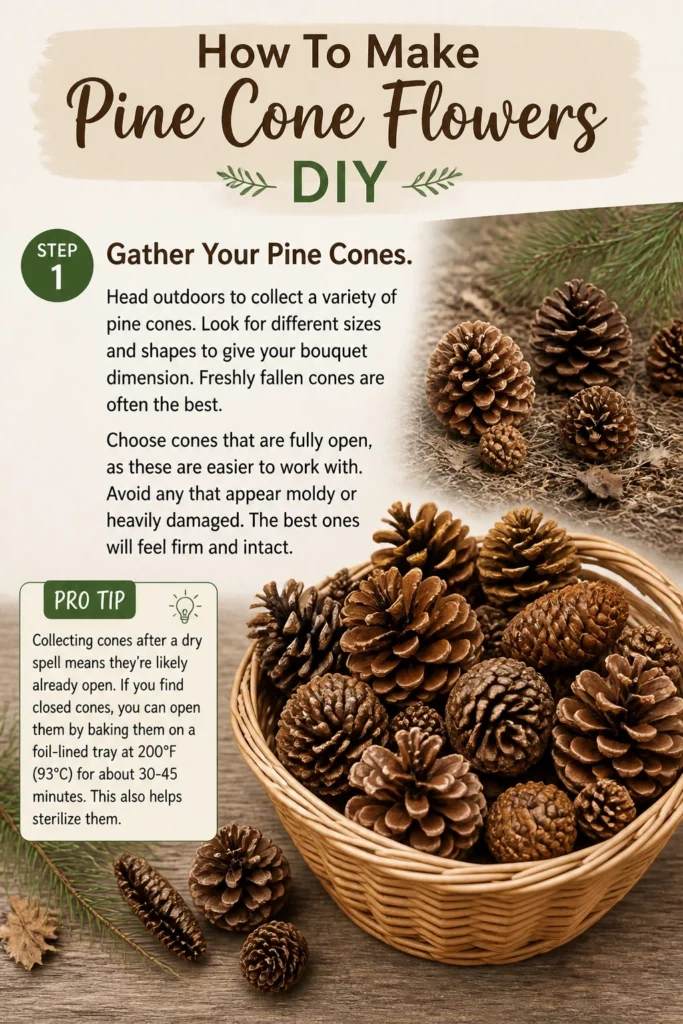
Choose cones that are fully open, as these are easier to work with. Avoid any that appear moldy or heavily damaged. The best ones will feel firm and intact.
Pro Tip: Collecting cones after a dry spell means they’re likely already open. If you find closed cones, you can open them by baking them on a foil-lined tray at 200°F (93°C) for about 30-45 minutes. This also helps sterilize them.
Step 2: Clean and Prepare Your Cones
Brush away any loose dirt, needles, or debris from your collected pine cones. A stiff brush or old toothbrush works well for this. You want a clean surface for painting.
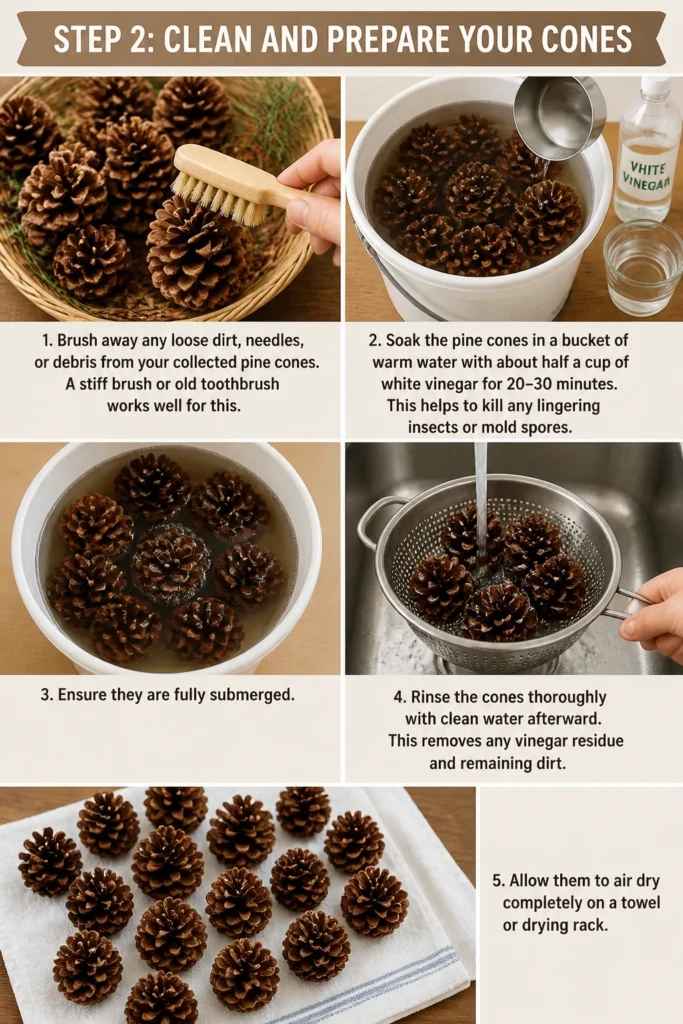
Soak the pine cones in a bucket of warm water with about half a cup of white vinegar for 20-30 minutes. This helps to kill any lingering insects or mold spores. Ensure they are fully submerged.
Rinse the cones thoroughly with clean water afterward. This removes any vinegar residue and remaining dirt. Allow them to air dry completely on a towel or drying rack.
Step 3: Trim the Base
Wear sturdy work gloves to protect your hands during this step. Pine cones can be surprisingly sharp and rough. Safety is key when using tools.
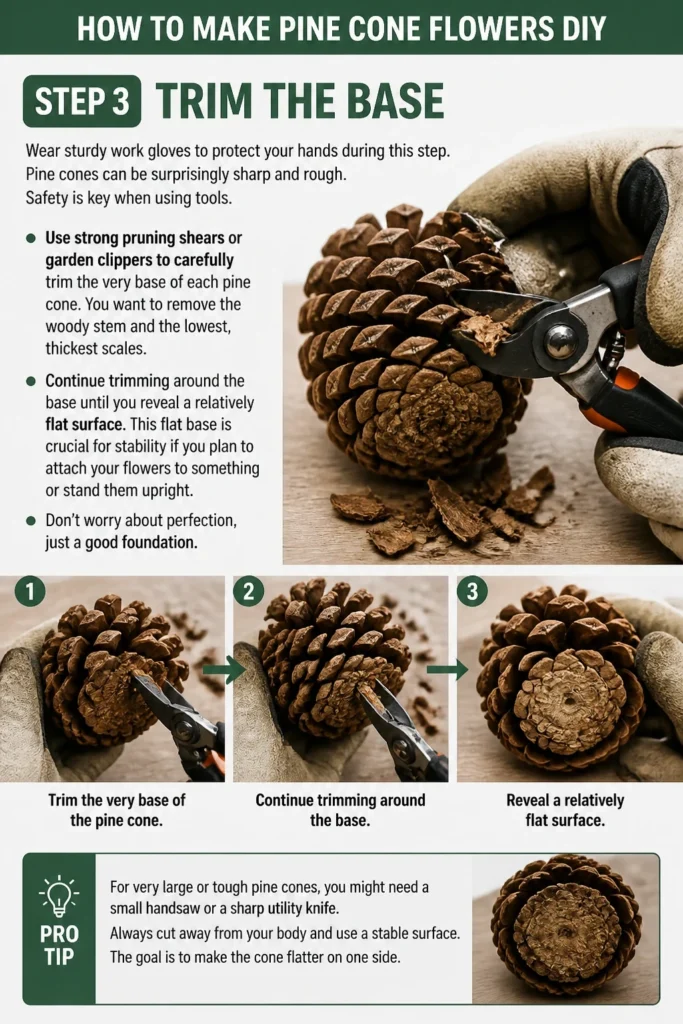
Use strong pruning shears or garden clippers to carefully trim the very base of each pine cone. You want to remove the woody stem and the lowest, thickest scales. This creates a flatter base.
Continue trimming around the base until you reveal a relatively flat surface. This flat base is crucial for stability if you plan to attach your “flowers” to something or stand them upright. Don’t worry about perfection, just a good foundation.
Pro Tip: For very large or tough pine cones, you might need a small handsaw or a sharp utility knife. Always cut away from your body and use a stable surface. The goal is to make the cone flatter on one side.
Step 4: Cut the “Petals”
Identify the scales you want to keep as your “petals.” These are typically the scales closer to the top of the cone, which are often thinner and more delicate. Imagine the shape of a blooming flower.
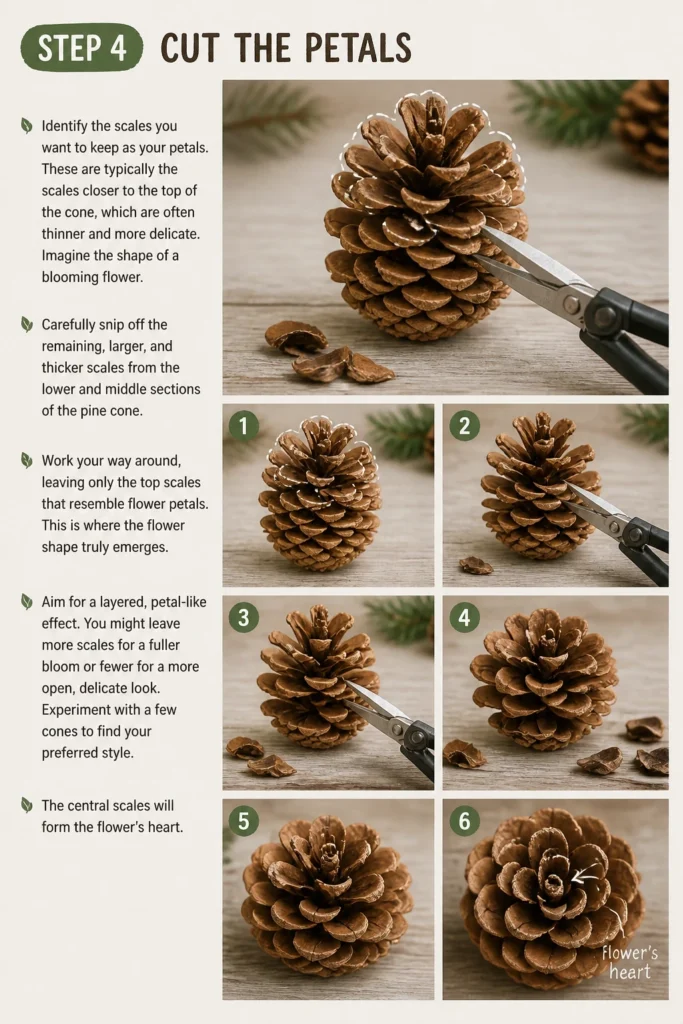
Carefully snip off the remaining, larger, and thicker scales from the lower and middle sections of the pine cone. Work your way around, leaving only the top scales that resemble flower petals. This is where the flower shape truly emerges.
Aim for a layered, petal-like effect. You might leave more scales for a fuller bloom or fewer for a more open, delicate look. Experiment with a few cones to find your preferred style. The central scales will form the flower’s heart.
Step 5: Refine the Shape
Examine your trimmed pine cone from all angles. Do any “petals” look out of place or too long? Use your shears to gently trim and shape them. A slight curve can enhance the floral appearance.
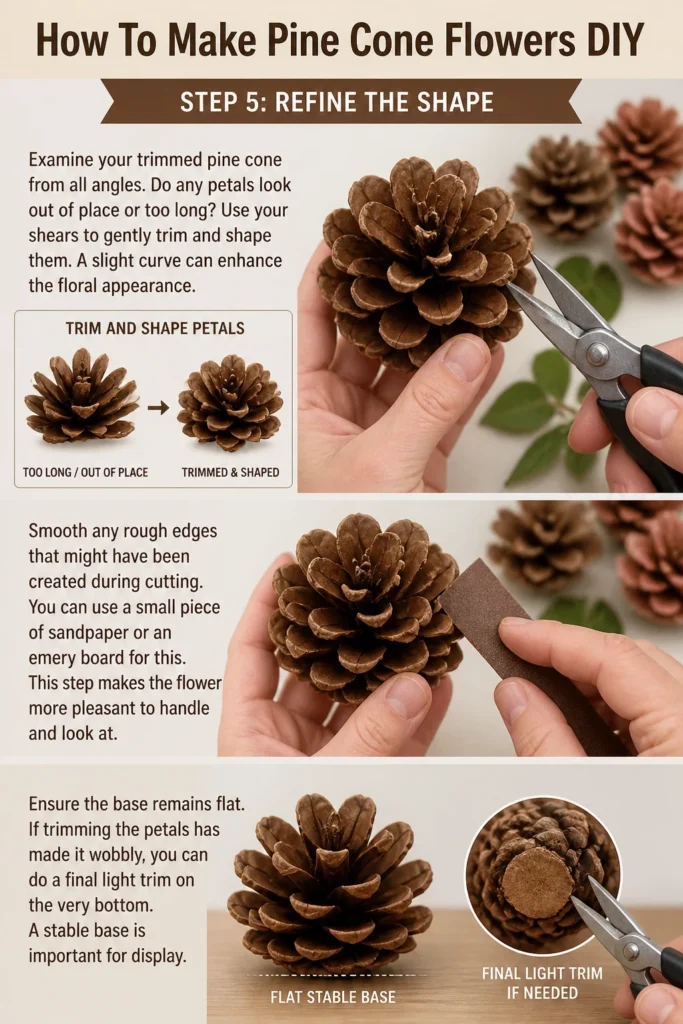
Smooth any rough edges that might have been created during cutting. You can use a small piece of sandpaper or an emery board for this. This step makes the flower more pleasant to handle and look at.
Ensure the base remains flat. If trimming the petals has made it wobbly, you can do a final light trim on the very bottom. A stable base is important for display.
Step 6: Paint Your Flowers
Gather your paints. Acrylic craft paints work wonderfully for this project. Choose colors that evoke real flowers, or go for whimsical, vibrant hues. Metallic paints can also add a special touch.
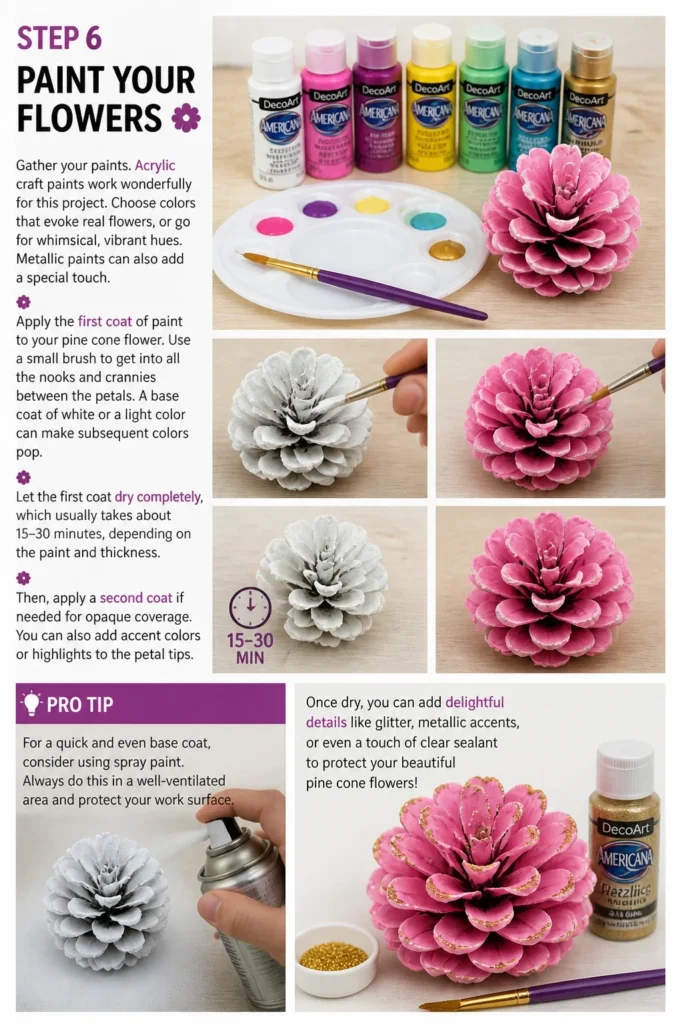
Apply the first coat of paint to your pine cone flower. Use a small brush to get into all the nooks and crannies between the “petals.” A base coat of white or a light color can make subsequent colors pop.
Let the first coat dry completely, which usually takes about 15-30 minutes, depending on the paint and thickness. Then, apply a second coat if needed for opaque coverage. You can also add accent colors or highlights to the petal tips.
Pro Tip: For a quick and even base coat, consider using spray paint. Always do this in a well-ventilated area and protect your work surface. Once dry, you can add detail with a brush.
Step 7: Add Details and Embellishments
Consider adding a contrasting color to the very center of your pine cone flower. A dab of yellow or gold paint can mimic a flower’s stamen. This small detail truly brings the flower to life.
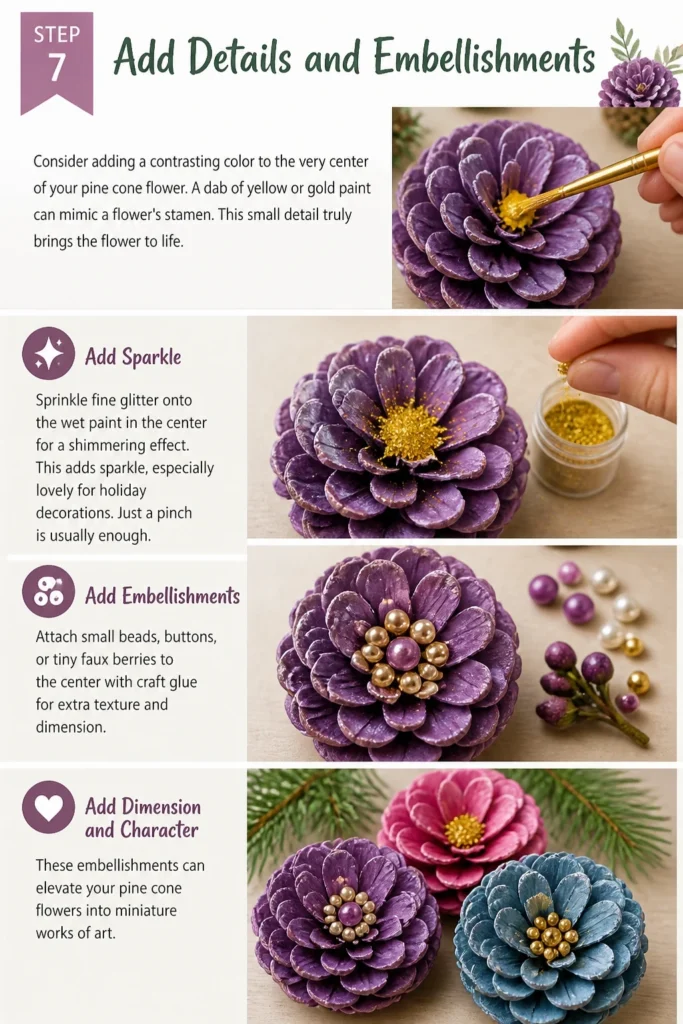
Sprinkle fine glitter onto the wet paint in the center for a shimmering effect. This adds sparkle, especially lovely for holiday decorations. Just a pinch is usually enough.
Attach small beads, buttons, or tiny faux berries to the center with craft glue for extra texture and dimension. These embellishments can elevate your pine cone flowers into miniature works of art.
Step 8: Seal and Protect
Ensure all paint and embellishments are completely dry before proceeding. Rushing this step can lead to smudges or a cloudy finish. Patience is key for a lasting result.
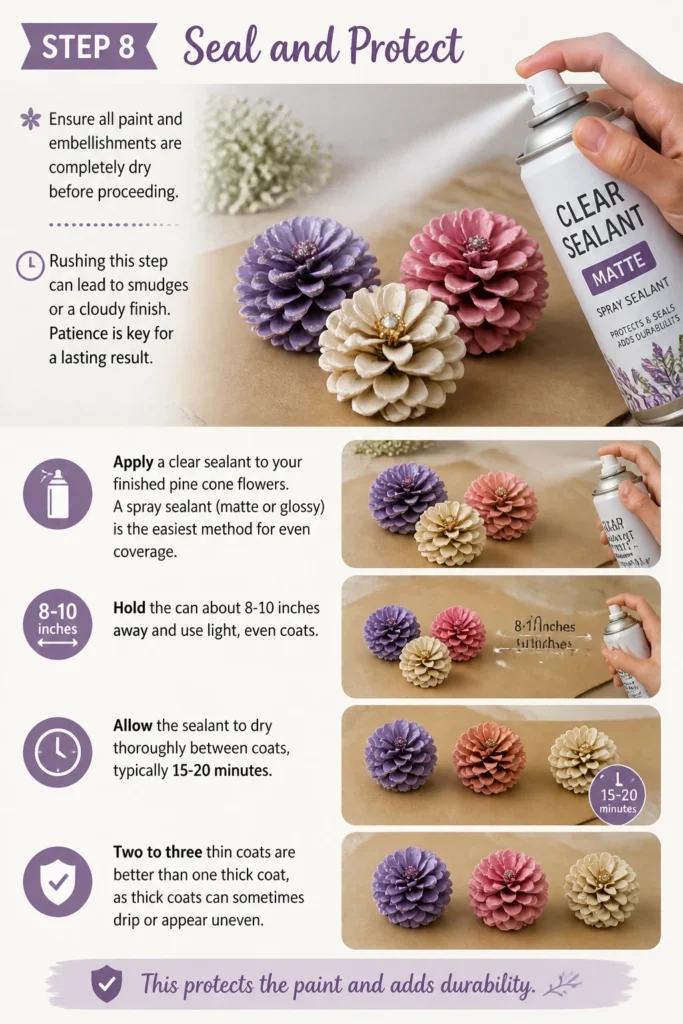
Apply a clear sealant to your finished pine cone flowers. A spray sealant (matte or glossy) is the easiest method for even coverage. Hold the can about 8-10 inches away and use light, even coats.
Allow the sealant to dry thoroughly between coats, typically 15-20 minutes. Two to three thin coats are better than one thick coat, as thick coats can sometimes drip or appear uneven. This protects the paint and adds durability.
Step 9: Display Your Creations
Arrange your pine cone flowers in a decorative bowl or basket for a charming centerpiece. They look lovely nestled among other natural elements like moss or river stones.
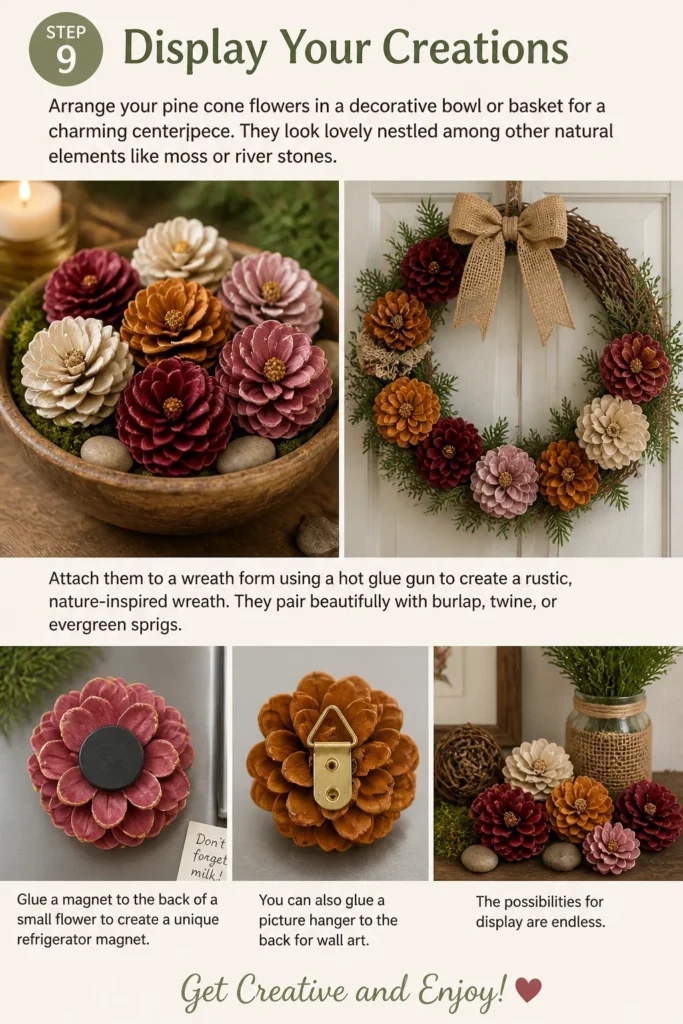
Attach them to a wreath form using a hot glue gun to create a rustic, nature-inspired wreath. They pair beautifully with burlap, twine, or evergreen sprigs.
Glue a magnet to the back of a small flower to create a unique refrigerator magnet. You can also glue a picture hanger to the back for wall art. The possibilities for display are endless.
Common Mistakes to Avoid
Not Cleaning Pine Cones Properly
If you skip the cleaning and sterilizing steps, you risk bringing insects or mold into your home. This can damage your craft project and potentially spread pests. Always soak and bake your cones to ensure they are fully clean and dry before you begin cutting and painting.
Using Dull Tools
Trying to cut pine cones with dull pruning shears or clippers is incredibly frustrating and potentially dangerous. Dull tools require more force, increasing the chance of slipping and injuring yourself. Always use sharp, heavy-duty tools that are appropriate for cutting tough, woody material.
Over-Painting
Applying too much paint in one thick layer can obscure the natural texture of the pine cone scales, making them look less like petals. It can also lead to drips and a prolonged drying time. Instead, apply multiple thin coats, allowing each to dry fully, to build up color while preserving detail.
Skipping the Sealant
While pine cone flowers look great freshly painted, skipping the sealant means your hard work won’t last as long. The paint can chip, fade, or get scuffed over time, especially if handled frequently or exposed to dust. A good clear sealant protects the finish, enhances durability, and makes cleaning easier.
Troubleshooting
Pine Cone Flowers Look Unnatural
If your pine cone flowers don’t quite capture the organic look you envisioned, it might be due to uniform cutting or too much paint. Try varying the length and angle of your “petals” slightly. Also, consider dry brushing a lighter or darker shade over the base color to add dimension and mimic natural shadows.
Paint Isn’t Sticking Well
Paint adherence issues often stem from insufficient cleaning or an oily residue on the cones. Ensure your cones are thoroughly cleaned, rinsed, and completely dry before painting. If using a glossy paint, a light sanding of the scales before painting can also help the paint grip better. A primer specifically for natural materials can also be a good solution.
Flower Base Isn’t Stable
A wobbly base makes your pine cone flowers difficult to display. Re-examine the bottom of the cone. You might need to trim a bit more off the very center, or even use a sandpaper block to level it out. For very stubborn cones, you can glue a small, flat wooden disc or a piece of thick felt to the bottom for added stability.
Key Takeaways
- Choose open, healthy pine cones for the best crafting experience.
- Clean and sterilize your cones thoroughly to prevent pests and mold.
- Use sharp, appropriate tools for safe and efficient cutting.
- Trim the base first to create a stable foundation for your flower.
- Shape the scales carefully to achieve a natural, layered petal effect.
- Apply paint in thin, even coats to highlight the cone’s texture.
- Seal your finished flowers to protect the paint and ensure longevity.
- Experiment with colors and embellishments to personalize each bloom.
Frequently Asked Questions
Can I use any type of pine cone?
Yes, most pine cones can be used, but some varieties work better than others. Wider, flatter cones like those from ponderosa pines or sugar pines often yield more distinct “petals.” Smaller, rounder cones like those from jack pines can make charming miniature blooms. Experiment to see what you like best.
What kind of paint is best for pine cone flowers?
Acrylic craft paints are ideal because they are water-based, easy to clean up, and come in a vast array of colors. They adhere well to the woody surface of pine cones. For outdoor display, ensure your paint and sealant are rated for exterior use to withstand the elements.
How do I make the flowers stand upright?
To make them stand, ensure the very bottom of the pine cone is as flat as possible. You might need to trim it down significantly. If it’s still wobbly, hot glue a small, flat wooden slice, a cork, or a bottle cap to the base. This provides a wider, more stable platform.
Can I make these with kids?
Yes, this can be a fun craft for children, especially the painting and decorating steps. However, the cutting process should be done by an adult due to the use of sharp pruning shears. Kids can help gather cones, paint, and add glitter or other embellishments safely.
Our Top Recommended Finds
- Heavy-Duty Pruning Shears: Essential for clean, safe cuts through tough pine cone scales. Look for a pair with comfortable grips.
- Acrylic Craft Paint Set: A diverse set of colors allows for endless creative possibilities, from natural tones to bright, whimsical hues.
- Clear Matte or Glossy Sealant Spray: Protects your finished flowers from wear and tear, ensuring their beauty lasts.
Bring Nature’s Beauty Indoors
You now have all the knowledge to transform simple pine cones into magnificent, lasting flowers. This project is more than just a craft; it’s a way to connect with the natural world and bring its serene beauty into your home. Each pine cone holds the potential for a unique, artful bloom.
Gather your supplies, step outside, and let your creativity blossom. Imagine the wreaths, centerpieces, or thoughtful gifts you can create. Start your first pine cone flower today and enjoy the rewarding process of crafting something truly special.
Beginner-friendly templates, step-by-step guides,
and weekly project ideas in your inbox.