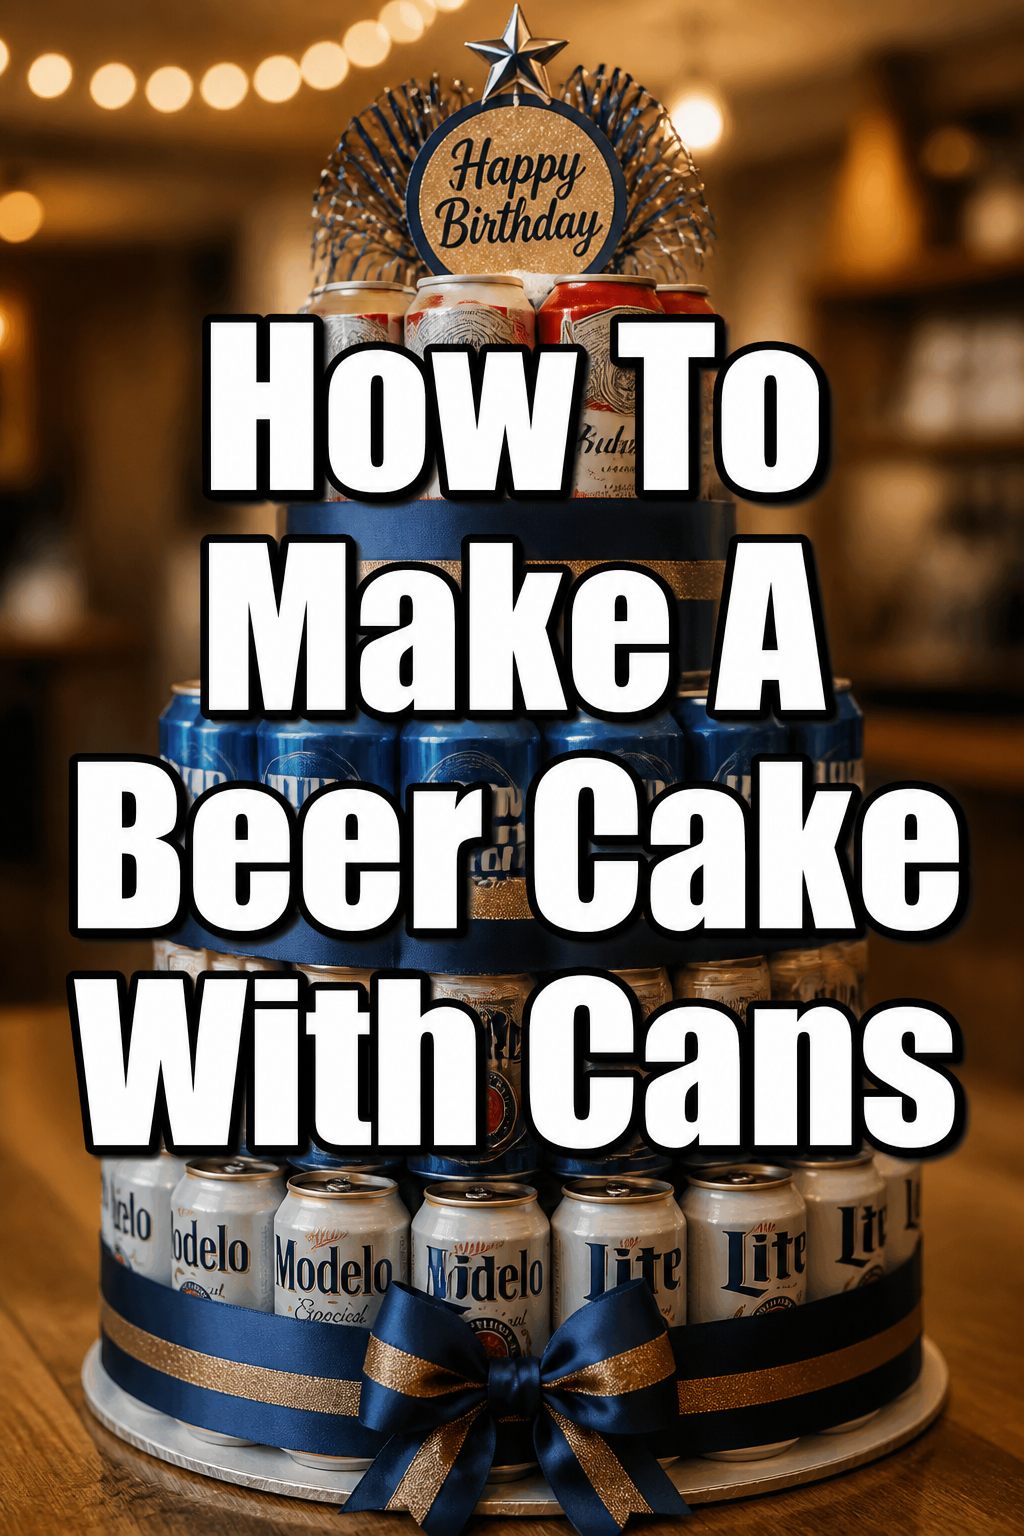
🍺 How To Make A Beer Cake With Cans

Beginner-friendly templates, step-by-step guides,
and weekly project ideas in your inbox.
Imagine the look on their face when they see a towering “cake” made entirely of their favorite brews. This creative gift or party centerpiece is surprisingly simple to construct. It’s a fantastic way to celebrate a birthday, graduation, or any special occasion.
Having built several of these for friends’ birthdays and celebrations, I’ve learned the best ways to make them sturdy and impressive. This guide shares all the practical tips and tricks I’ve picked up along the way. You’ll create a memorable beer cake that stands tall and looks fantastic.
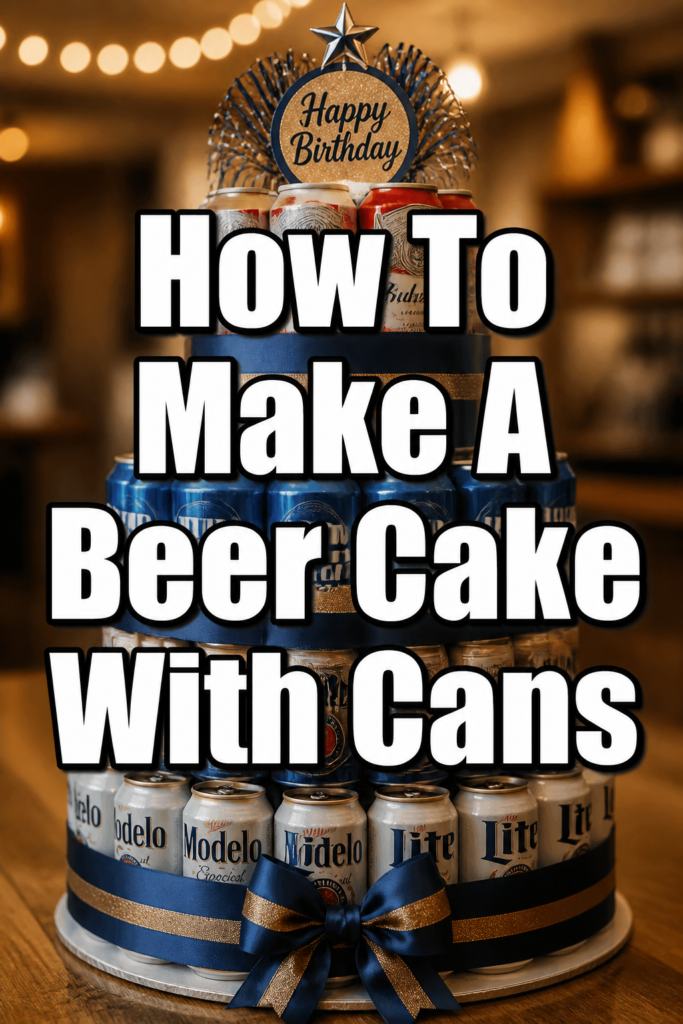
Quick Overview
Creating a beer cake with cans is a fun project that results in a unique and impressive gift. You’ll assemble a multi-tiered structure using beer cans, then adorn it with ribbons and small celebratory items. It’s a personalized touch that shows real thought and effort.
- Time needed: 1-2 hours (depending on complexity and decoration)
- Difficulty: Beginner
- What you’ll need: Beer cans, sturdy cardboard, double-sided tape, craft glue, ribbon, and various decorative items.
Step-by-Step Instructions
Step 1: Gather Your Supplies
Before you begin building, collect everything you’ll need. This prevents interruptions and ensures a smooth process. Make sure you have enough beer cans for your desired number of tiers.
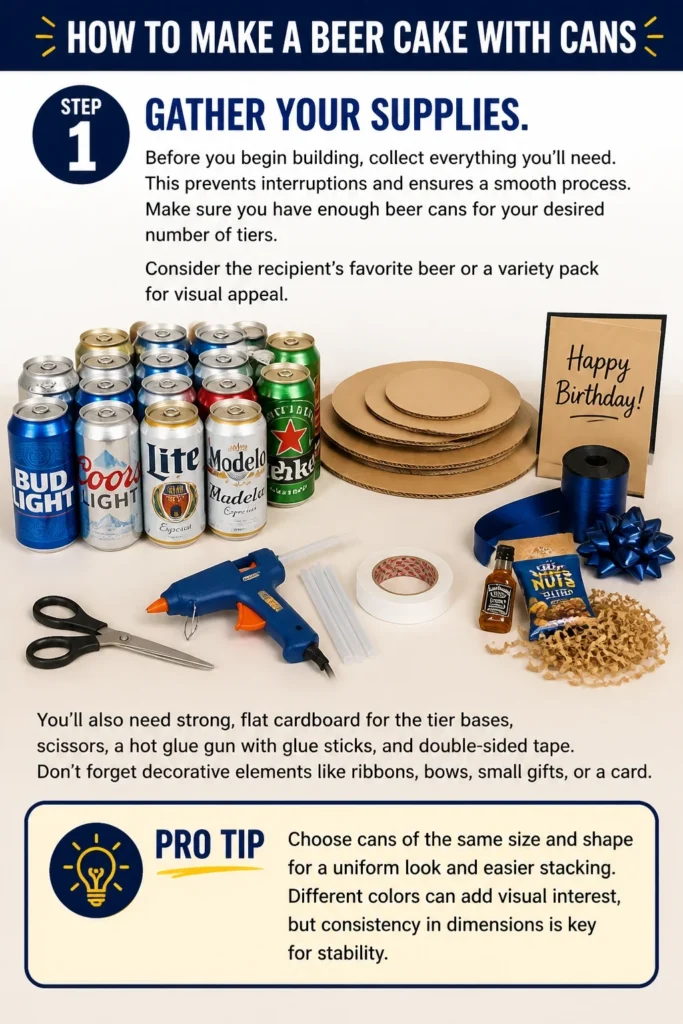
Consider the recipient’s favorite beer or a variety pack for visual appeal. You’ll also need strong, flat cardboard for the tier bases, scissors, a hot glue gun with glue sticks, and double-sided tape. Don’t forget decorative elements like ribbons, bows, small gifts, or a card.
Pro Tip: Choose cans of the same size and shape for a uniform look and easier stacking. Different colors can add visual interest, but consistency in dimensions is key for stability.
Step 2: Plan Your Design and Calculate Cans
Decide how many tiers your beer cake will have. A common design is three tiers, similar to a traditional wedding cake. Sketch out your idea, noting how many cans will form the base of each tier.
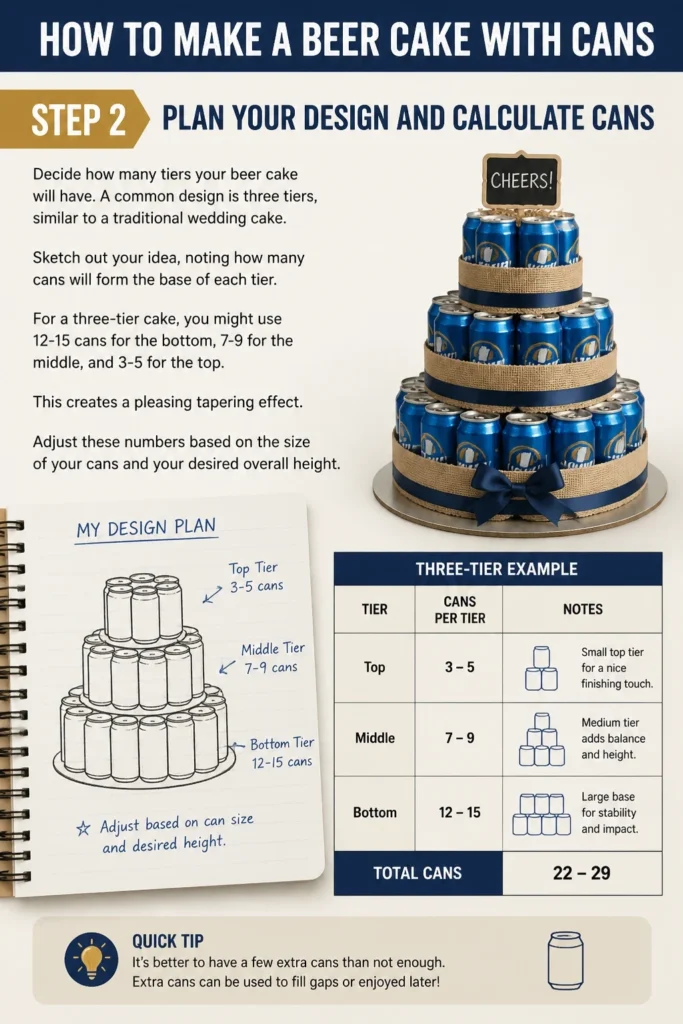
For a three-tier cake, you might use 12-15 cans for the bottom, 7-9 for the middle, and 3-5 for the top. This creates a pleasing tapering effect. Adjust these numbers based on the size of your cans and your desired overall height.
Step 3: Build the Base Tier
Start by cutting a large, sturdy cardboard circle for your bottom tier. This circle should be slightly larger than the diameter of your assembled base of cans. This provides a stable platform for the entire structure.
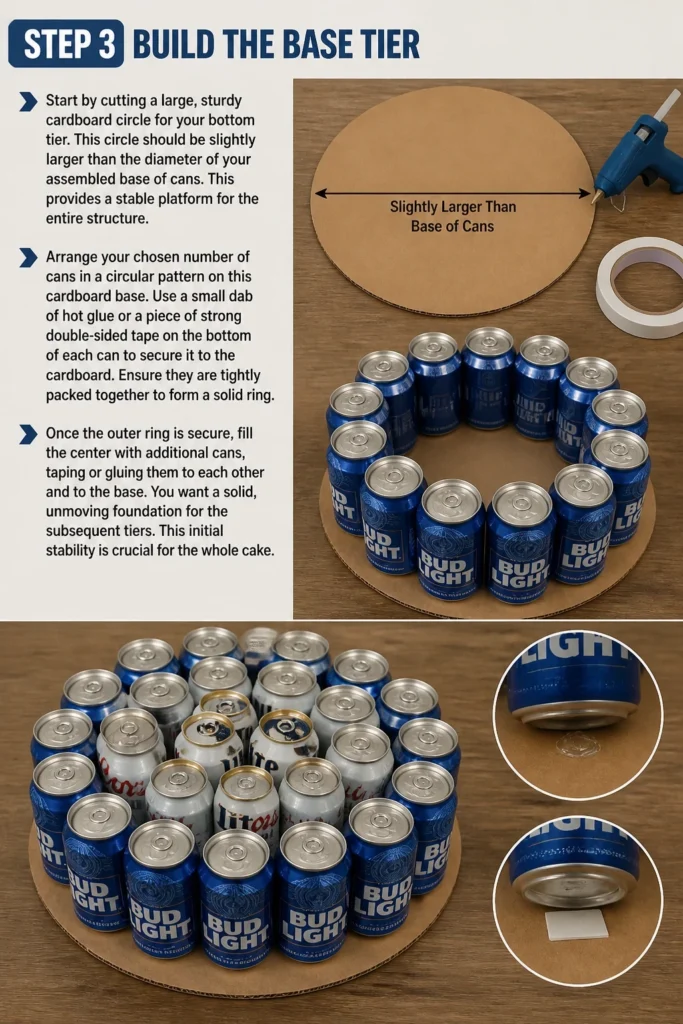
Arrange your chosen number of cans in a circular pattern on this cardboard base. Use a small dab of hot glue or a piece of strong double-sided tape on the bottom of each can to secure it to the cardboard. Ensure they are tightly packed together to form a solid ring.
Once the outer ring is secure, fill the center with additional cans, taping or gluing them to each other and to the base. You want a solid, unmoving foundation for the subsequent tiers. This initial stability is crucial for the whole cake.
Step 4: Create Mid-Tier Support
After your base tier of cans is firmly in place, you need to create a platform for the next tier. Cut another cardboard circle, this one sized to fit perfectly on top of your assembled first tier of cans. It should rest evenly across the can tops.
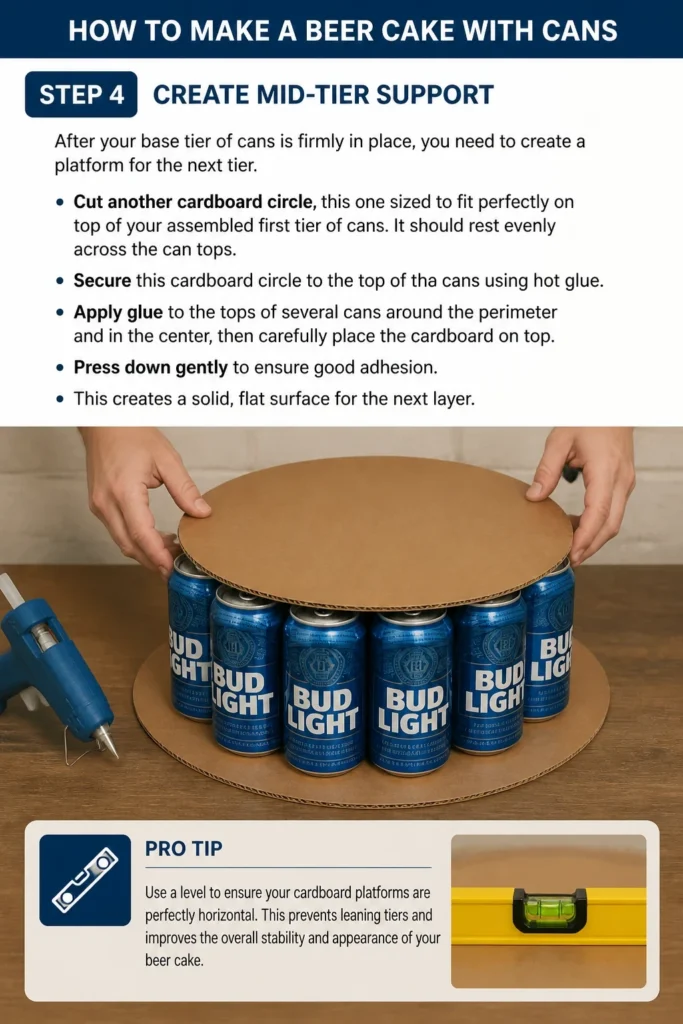
Secure this cardboard circle to the top of the cans using hot glue. Apply glue to the tops of several cans around the perimeter and in the center, then carefully place the cardboard on top. Press down gently to ensure good adhesion. This creates a solid, flat surface for the next layer.
Pro Tip: Use a level to ensure your cardboard platforms are perfectly horizontal. This prevents leaning tiers and improves the overall stability and appearance of your beer cake.
Step 5: Construct Subsequent Tiers
With your first support platform in place, you can now build the second tier. Repeat the process from Step 3, arranging fewer cans in a smaller circular pattern on the new cardboard platform. Again, secure each can to the platform with glue or tape.
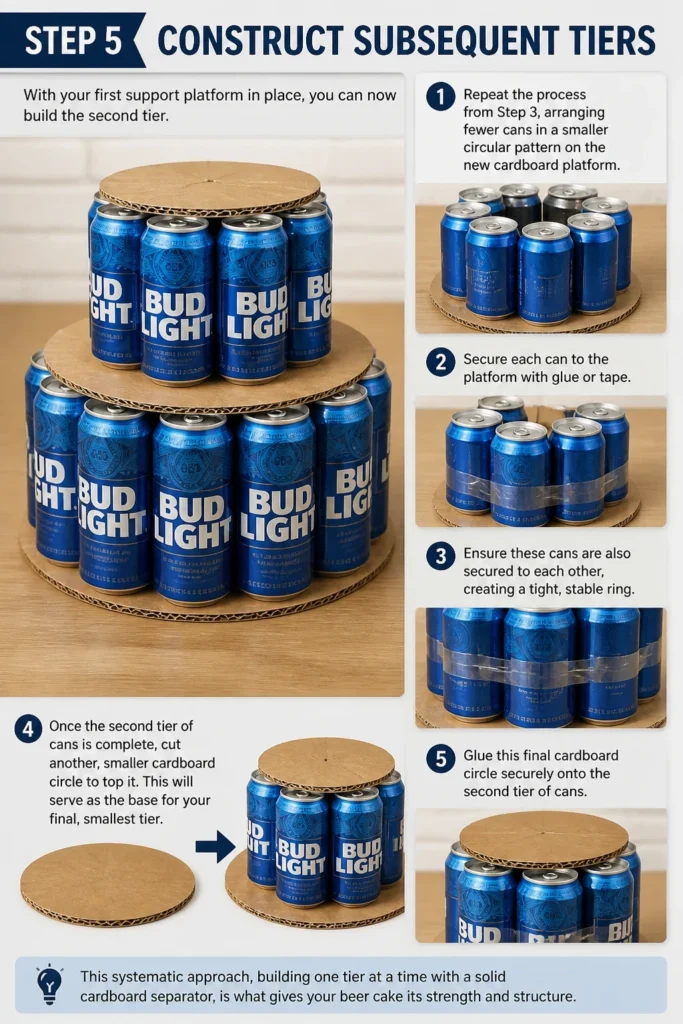
Ensure these cans are also secured to each other, creating a tight, stable ring. Once the second tier of cans is complete, cut another, smaller cardboard circle to top it. This will serve as the base for your final, smallest tier.
Glue this final cardboard circle securely onto the second tier of cans. This systematic approach, building one tier at a time with a solid cardboard separator, is what gives your beer cake its strength and structure.
Step 6: Secure the Structure
Once all your tiers are built and topped with their respective cardboard platforms, it’s time for a final security check. Go around each tier and ensure all cans are firmly attached to their base and to each other. Add more glue or tape if anything feels loose.
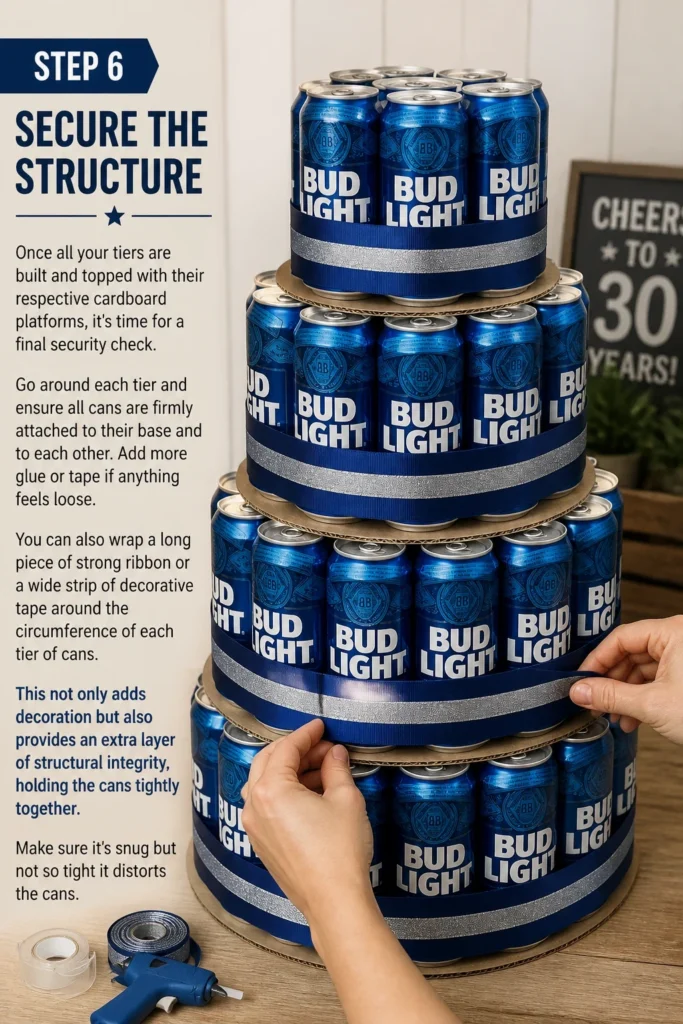
You can also wrap a long piece of strong ribbon or a wide strip of decorative tape around the circumference of each tier of cans. This not only adds decoration but also provides an extra layer of structural integrity, holding the cans tightly together. Make sure it’s snug but not so tight it distorts the cans.
Step 7: Decorate Your Cake
Now for the fun part: making your beer cake look festive! This is where you can truly personalize it for the recipient. Start by wrapping decorative ribbon around the base of each tier. Use a dab of hot glue or double-sided tape to secure the ribbon ends neatly.
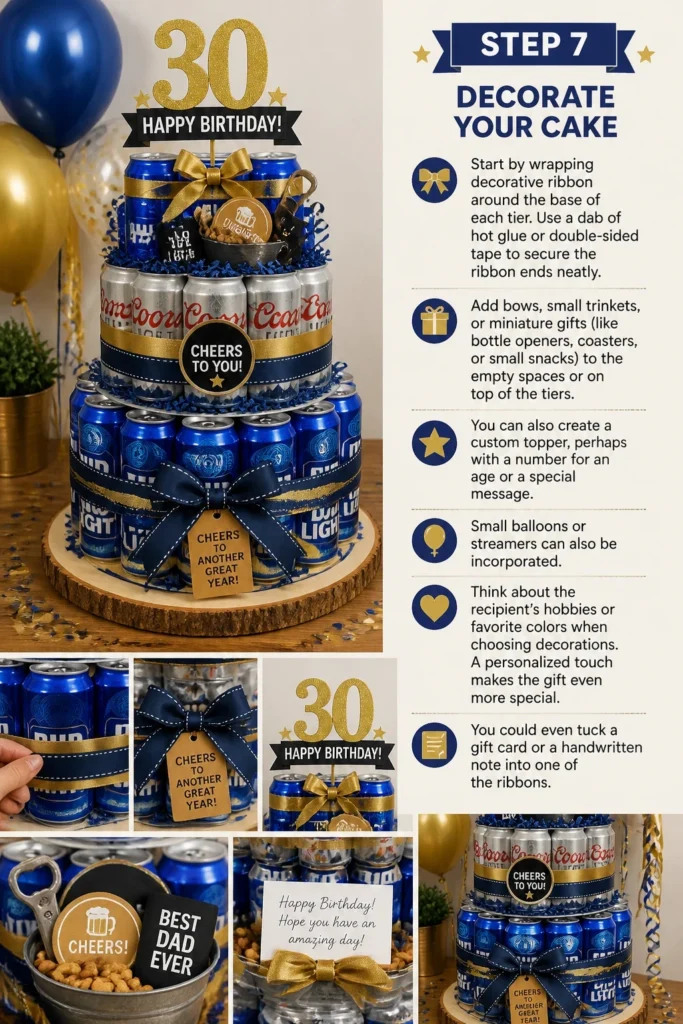
Add bows, small trinkets, or miniature gifts (like bottle openers, coasters, or small snacks) to the empty spaces or on top of the tiers. You can also create a custom topper, perhaps with a number for an age or a special message. Small balloons or streamers can also be incorporated.
Think about the recipient’s hobbies or favorite colors when choosing decorations. A personalized touch makes the gift even more special. You could even tuck a gift card or a handwritten note into one of the ribbons.
Step 8: Final Checks and Placement
Before presenting your beer cake, give it one last stability test. Gently jiggle it to ensure no cans are loose or wobbly. Make any necessary adjustments by adding more adhesive or tightening ribbons.
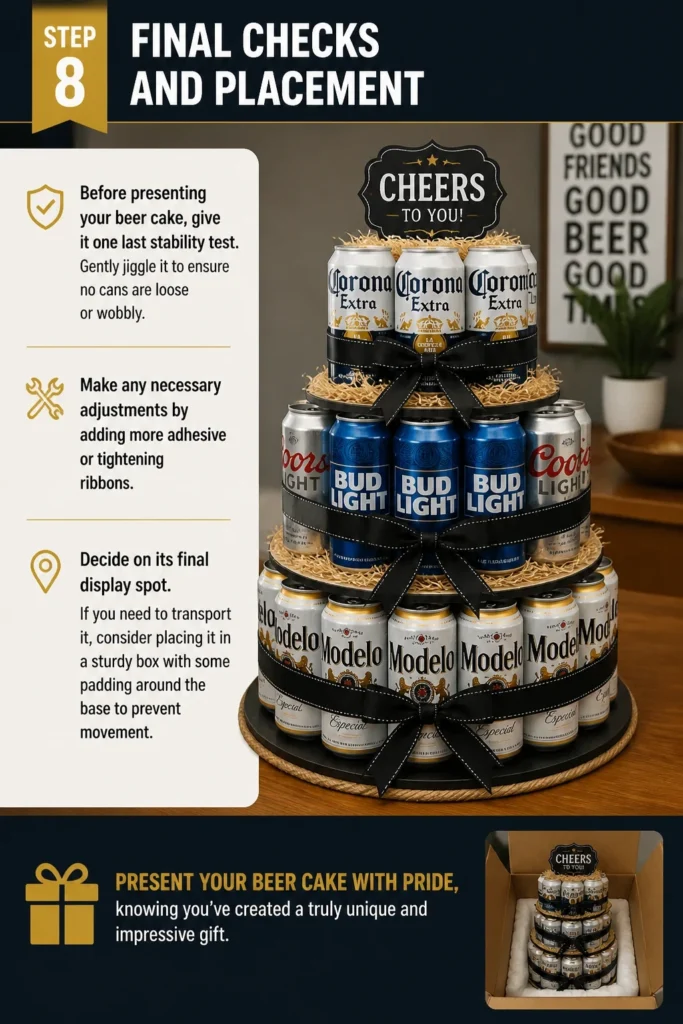
Decide on its final display spot. If you need to transport it, consider placing it in a sturdy box with some padding around the base to prevent movement. Present your beer cake with pride, knowing you’ve created a truly unique and impressive gift.
Common Mistakes to Avoid
Insufficient Base Stability
A common pitfall is not making the base tier strong enough. If the bottom layer of cans or the cardboard platform beneath it is weak, the entire structure will be prone to collapse. Always use thick, sturdy cardboard for the very bottom, and ensure every can in the base tier is securely glued or taped down to both the cardboard and its neighboring cans.
Underestimating Can Count
Starting your project without enough cans can lead to frustration and delays. It’s better to have a few extra cans on hand than to run out midway through construction. Plan your tiers and count your cans carefully before you begin assembling. This saves you a trip to the store and keeps your creative flow going.
Neglecting Structural Support
Skipping the cardboard separators between tiers is a major mistake. Without these sturdy platforms, the weight of the upper tiers will rest directly on the can tops below, making the structure unstable and prone to buckling. Always use appropriately sized cardboard circles, firmly glued to the top of each completed can tier, to provide a solid foundation for the next level.
Over-Decorating
While decorating is fun, it’s possible to go overboard. Too many ribbons, bows, or trinkets can obscure the beer cans themselves, which are the main feature of this “cake.” Keep decorations tasteful and balanced, enhancing the structure without hiding it. The goal is to highlight the beer, not bury it under excessive ornamentation.
Troubleshooting
Cake Feels Wobbly
If your finished beer cake feels unstable, the problem usually lies in insufficient adhesion or loose cans. Gently inspect each tier, pressing on individual cans. If you find any that shift easily, add more hot glue between them and to the cardboard base. You can also reinforce the entire structure by wrapping a wide, strong ribbon or a strip of craft tape tightly around the circumference of each tier, securing it with glue.
Cans Keep Sliding
Cans sliding during assembly often means the adhesive isn’t strong enough or hasn’t had time to set. Use a strong, quick-drying adhesive like hot glue for immediate hold, or apply generous amounts of strong double-sided tape. When placing cans, hold them firmly in position for a few seconds to allow the adhesive to bond. Ensure the surfaces are clean and dry before applying any tape or glue.
Gaps Between Cans
Small gaps between cans can make the structure look less cohesive and potentially reduce stability. To minimize this, arrange cans as tightly as possible when building each tier. If gaps appear, you can strategically place small, rolled-up pieces of paper or foam between cans before you secure them with ribbon. For purely aesthetic gaps, a wider ribbon or a well-placed decorative item can often conceal them effectively.
Key Takeaways
- Planning your design and calculating your can needs ahead of time is essential for a smooth building process.
- Stability is paramount; ensure each can is securely attached to its base and to its neighbors.
- Use sturdy cardboard platforms between each tier to distribute weight evenly and prevent wobbling.
- Decorate thoughtfully, enhancing the beer cake’s appearance without overwhelming the main feature.
- Personalize the cake with the recipient’s favorite brews and themed decorations for an extra special touch.
- Always perform a final stability check before presenting or transporting your creation.
Frequently Asked Questions
Can I use bottles instead of cans?
While possible, using bottles is generally more challenging due to their varying shapes and heavier weight. Cans offer a uniform shape, lighter weight, and easier adhesion, making them ideal for this type of project. If you use bottles, you’ll need even sturdier cardboard, more powerful adhesive, and likely a different stacking strategy to ensure stability.
How many cans do I need?
The number of cans depends on your desired number of tiers and the size of each tier. A popular three-tier design might use roughly 12-15 cans for the bottom, 7-9 for the middle, and 3-5 for the top. This totals around 22-29 cans. Always buy a few extra just in case.
How do I transport it?
Transporting a beer cake requires care. Place the finished cake on a large, sturdy piece of cardboard or a flat tray. Surround the base with towels, foam, or crumpled newspaper to prevent it from sliding during transit. Drive slowly and avoid sudden stops or turns. For very large cakes, it might be safer to transport the tiers separately and assemble them at the destination.
What kind of beer should I use?
Choose the recipient’s favorite brand or style of beer for a personalized touch. You can also use a variety of craft beers for a more diverse selection and visual interest. Ensure all cans are the same standard size (e.g., 12 oz or 16 oz) for easy stacking and a uniform appearance.
Our Top Recommended Finds
- Strong Craft Glue: A reliable hot glue gun with plenty of sticks provides quick and secure adhesion for cans and cardboard.
- Heavy-Duty Double-Sided Tape: Excellent for initial placement of cans and securing ribbons, offering a strong bond without the mess of liquid glue.
- Assorted Ribbon Pack: A multi-color pack allows for versatile decoration, matching any theme or recipient’s preference.
Celebrating Your Craft
You’ve now got all the knowledge to construct an impressive beer cake with cans. This isn’t just a gift; it’s a statement, a centerpiece, and a testament to your thoughtfulness. Each tier you build, each ribbon you tie, adds to a truly memorable present.
Don’t hesitate to put your own spin on it. Experiment with different beer selections, unique decorations, or even a creative topper. The joy is in the making, and the delight is in the giving. So, gather your supplies, put on some music, and start building your masterpiece today!
Beginner-friendly templates, step-by-step guides,
and weekly project ideas in your inbox.