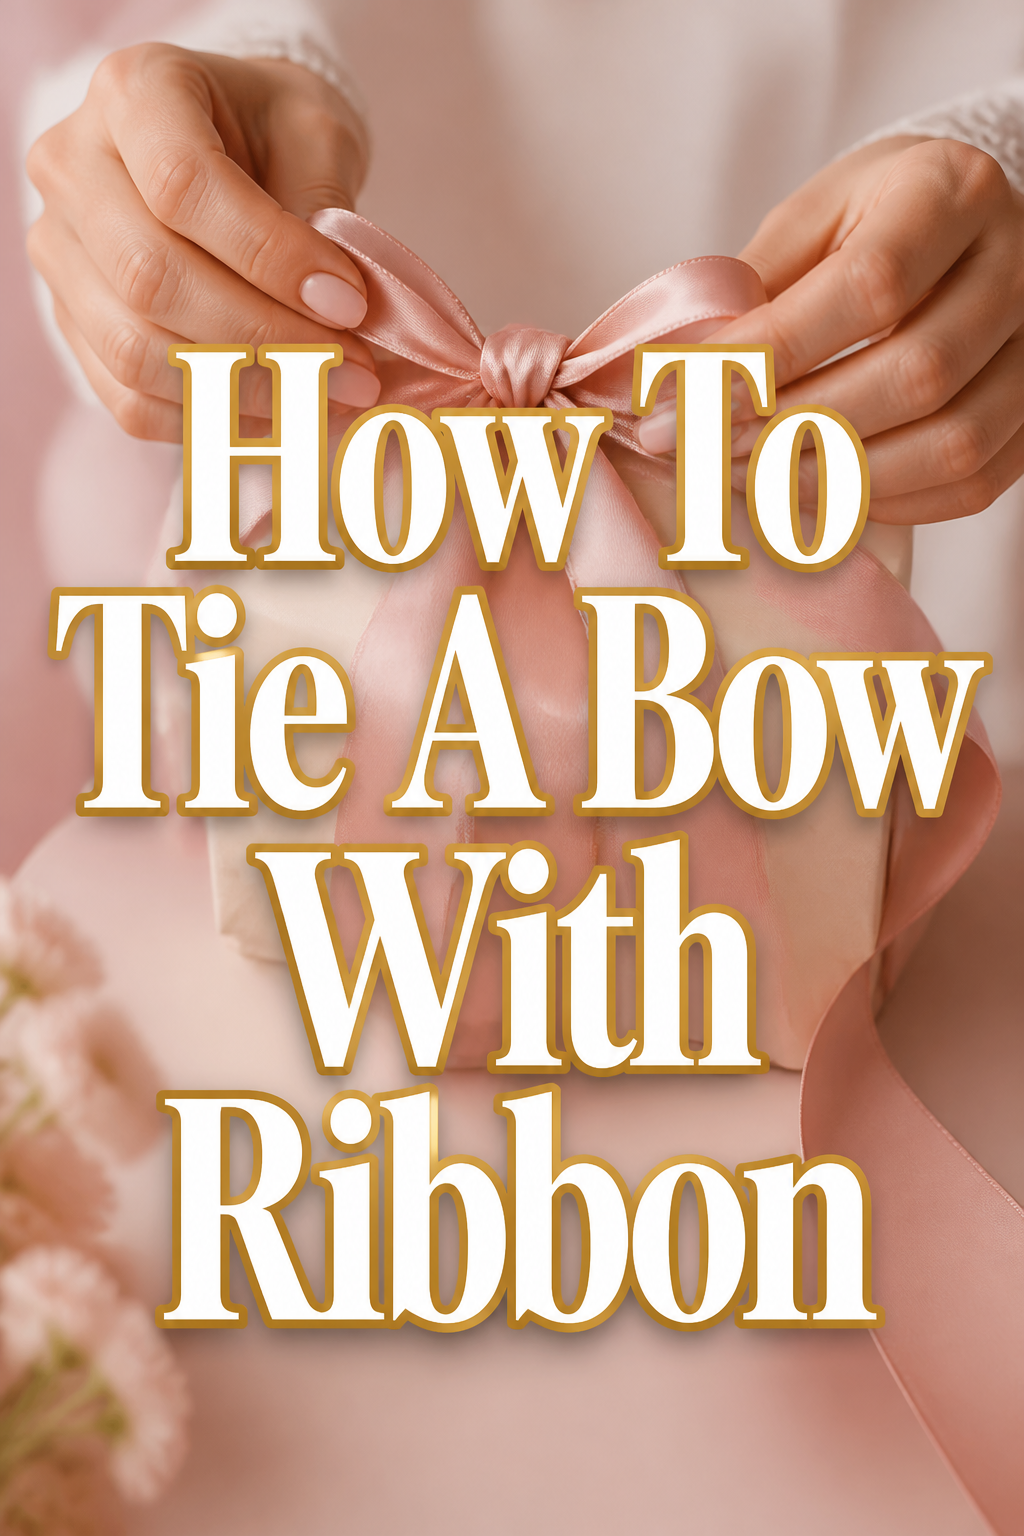
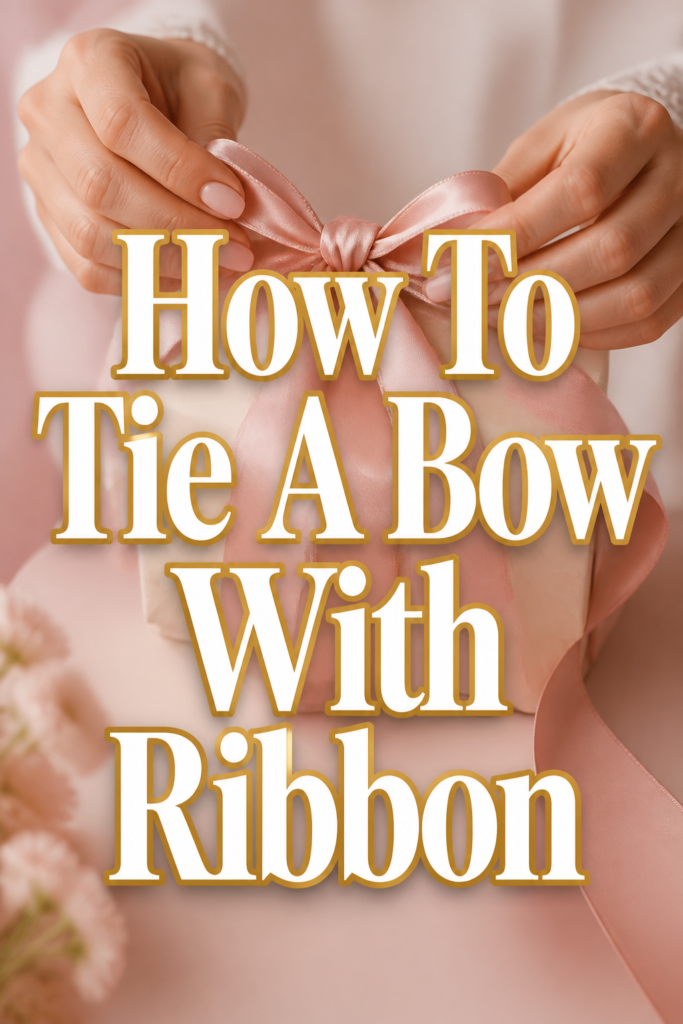
🎀 How To Tie A Bow With Ribbon

Beginner-friendly templates, step-by-step guides,
and weekly project ideas in your inbox.
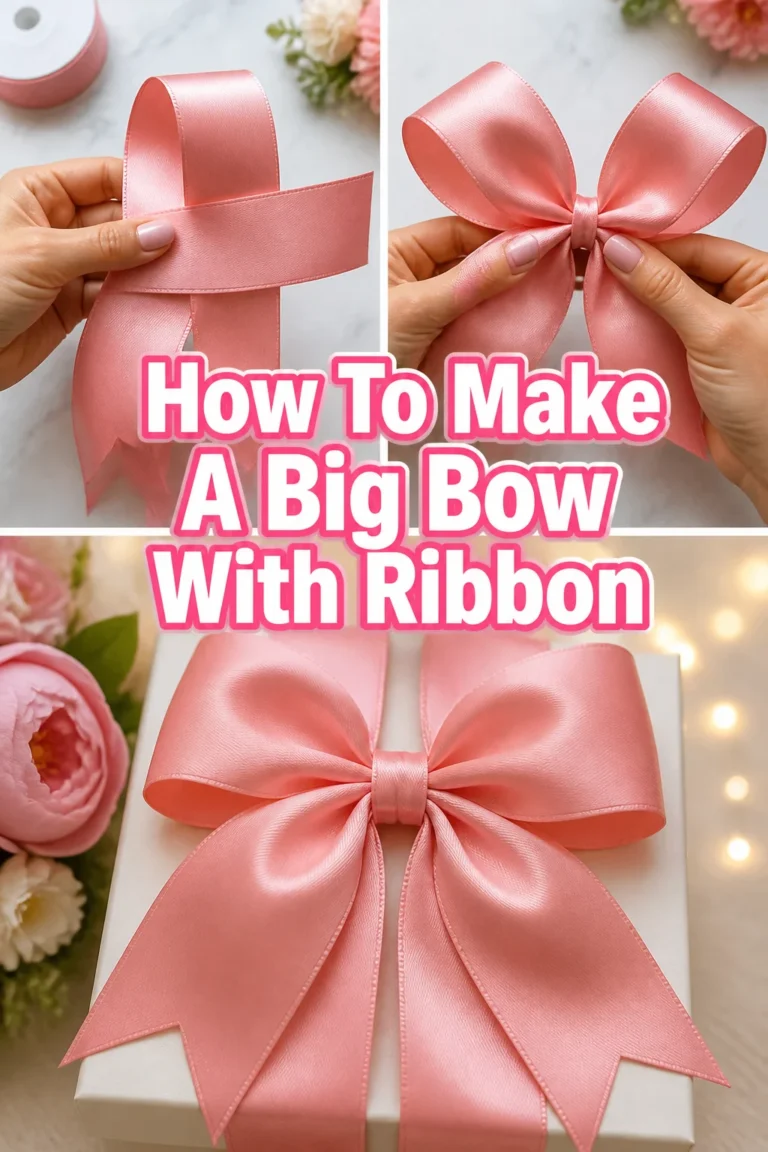
Learning to tie a beautiful bow can transform an ordinary gift into something truly special.
It adds a touch of elegance and thoughtfulness to any package, craft project, or even hair accessory.
Through years of wrapping countless gifts and crafting various decorations, I’ve refined the simple art of bow tying, and I’m ready to share those insights with you.
Quick Overview
This guide will walk you through creating a classic, elegant bow that holds its shape and impresses.
- Time needed: 5-10 minutes
- Difficulty: Beginner
- What you’ll need: Ribbon, sharp scissors, a flat surface
Step-by-Step Instructions
Step 1: Choose Your Ribbon Wisely
The type of ribbon you select significantly impacts your final bow. Consider the material, width, and texture.
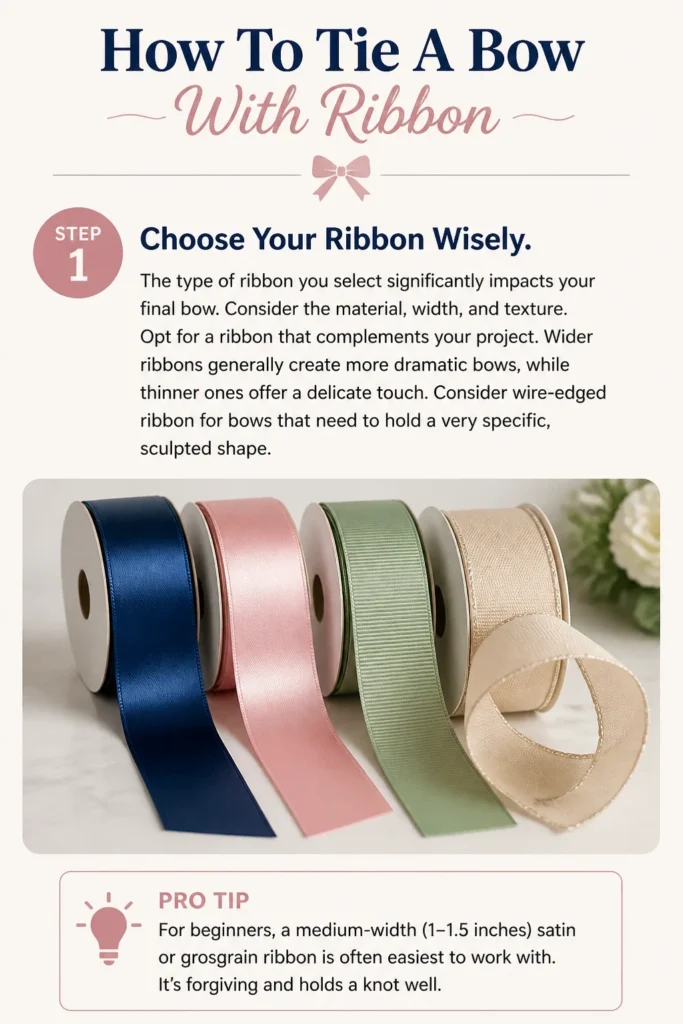
Opt for a ribbon that complements your project. Wider ribbons generally create more dramatic bows, while thinner ones offer a delicate touch.
Consider wire-edged ribbon for bows that need to hold a very specific, sculpted shape.
Pro Tip: For beginners, a medium-width (1-1.5 inches) satin or grosgrain ribbon is often easiest to work with. It’s forgiving and holds a knot well.
Step 2: Measure and Cut Your Ribbon Length
Estimating the correct ribbon length is crucial to avoid running short or having excessive waste.
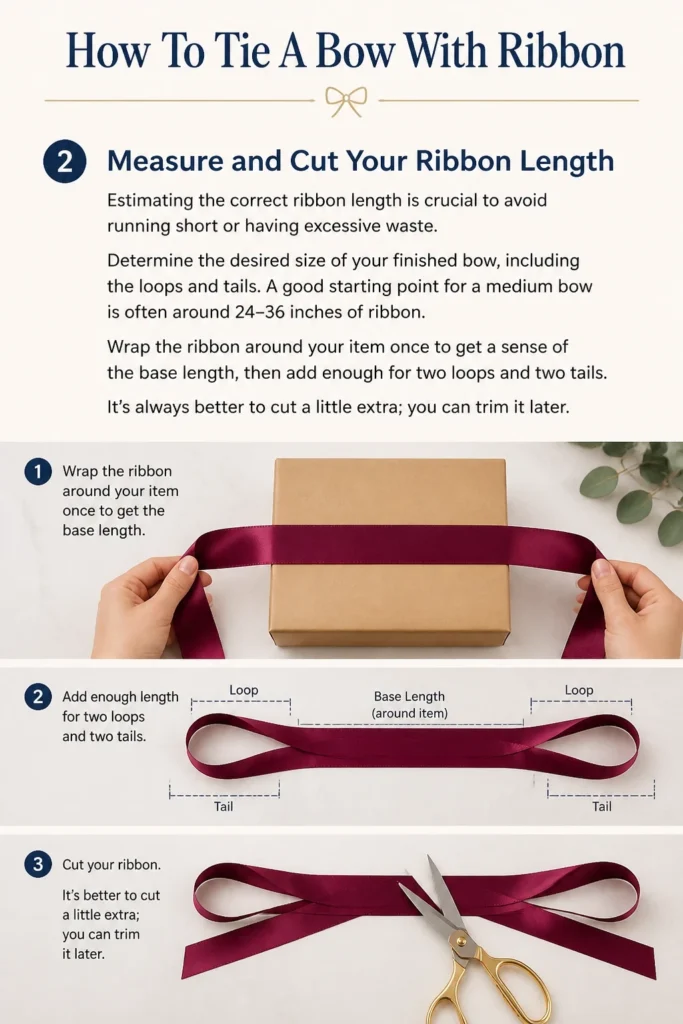
Determine the desired size of your finished bow, including the loops and tails. A good starting point for a medium bow is often around 24-36 inches of ribbon.
Wrap the ribbon around your item once to get a sense of the base length, then add enough for two loops and two tails. It’s always better to cut a little extra; you can trim it later.
Step 3: Create the First Loop
This initial loop forms one side of your bow and sets the foundation for its symmetry.
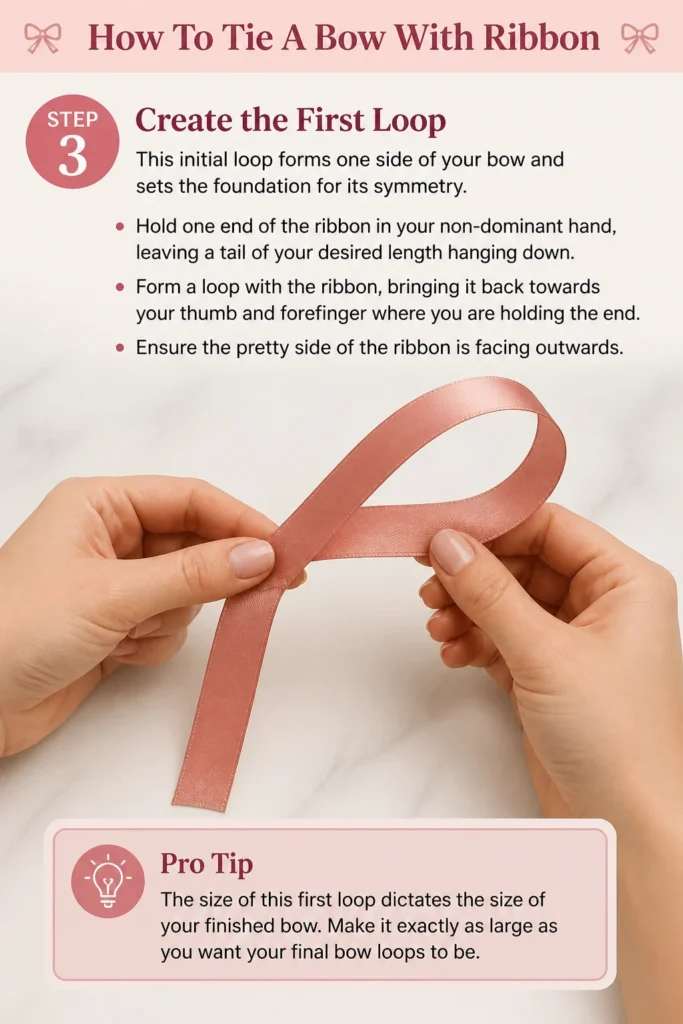
Hold one end of the ribbon in your non-dominant hand, leaving a tail of your desired length hanging down.
Form a loop with the ribbon, bringing it back towards your thumb and forefinger where you are holding the end. Ensure the “pretty” side of the ribbon is facing outwards.
Pro Tip: The size of this first loop dictates the size of your finished bow. Make it exactly as large as you want your final bow loops to be.
Step 4: Form the Second Loop
Now you’ll mirror the first loop, ensuring your bow starts to take a balanced shape.
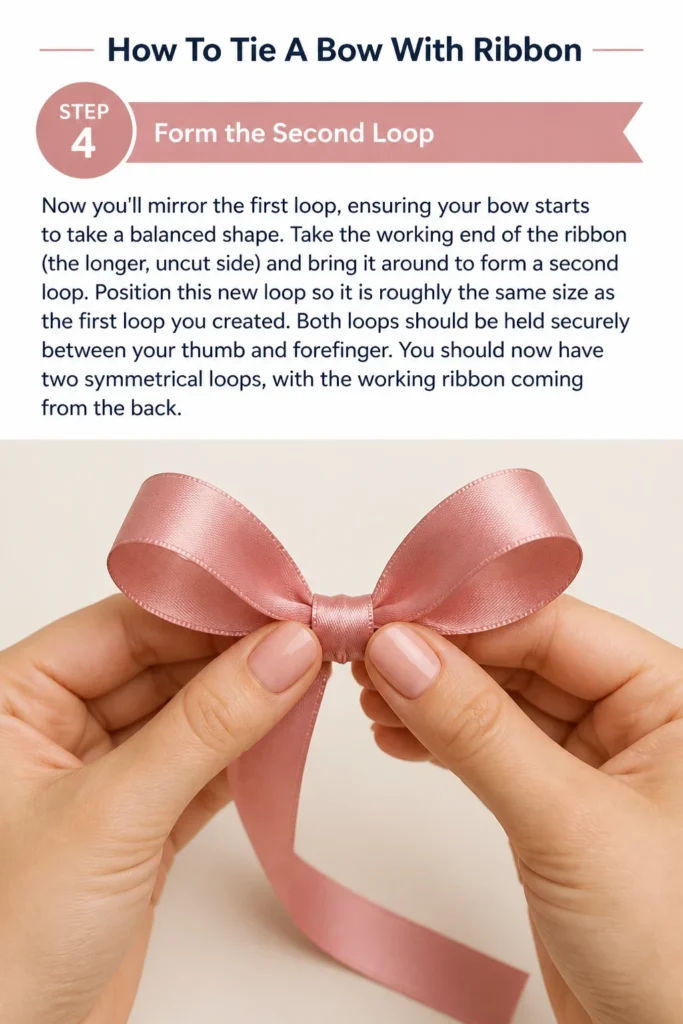
Take the working end of the ribbon (the longer, uncut side) and bring it around to form a second loop.
Position this new loop so it is roughly the same size as the first loop you created. Both loops should be held securely between your thumb and forefinger.
You should now have two symmetrical loops, with the working ribbon coming from the back.
Step 5: Cross the Working Ribbon Over
This step begins to secure the loops in place and prepares for the central knot.
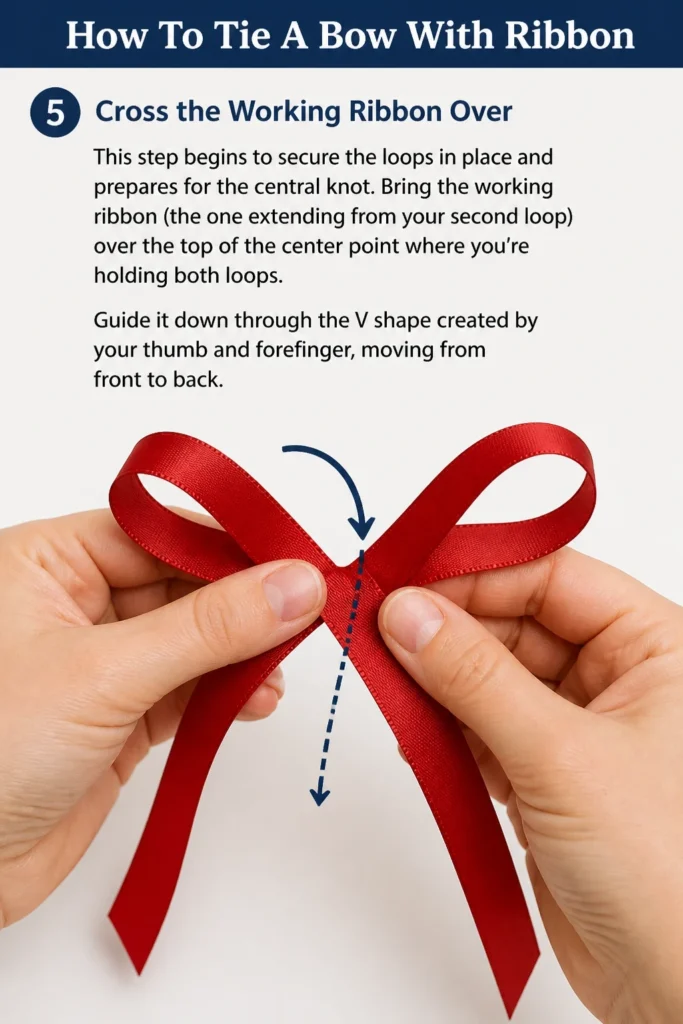
Bring the working ribbon (the one extending from your second loop) over the top of the center point where you’re holding both loops.
Guide it down through the “V” shape created by your thumb and forefinger, moving from front to back.
Step 6: Feed Through the Center
This action forms the knot that holds your bow together.
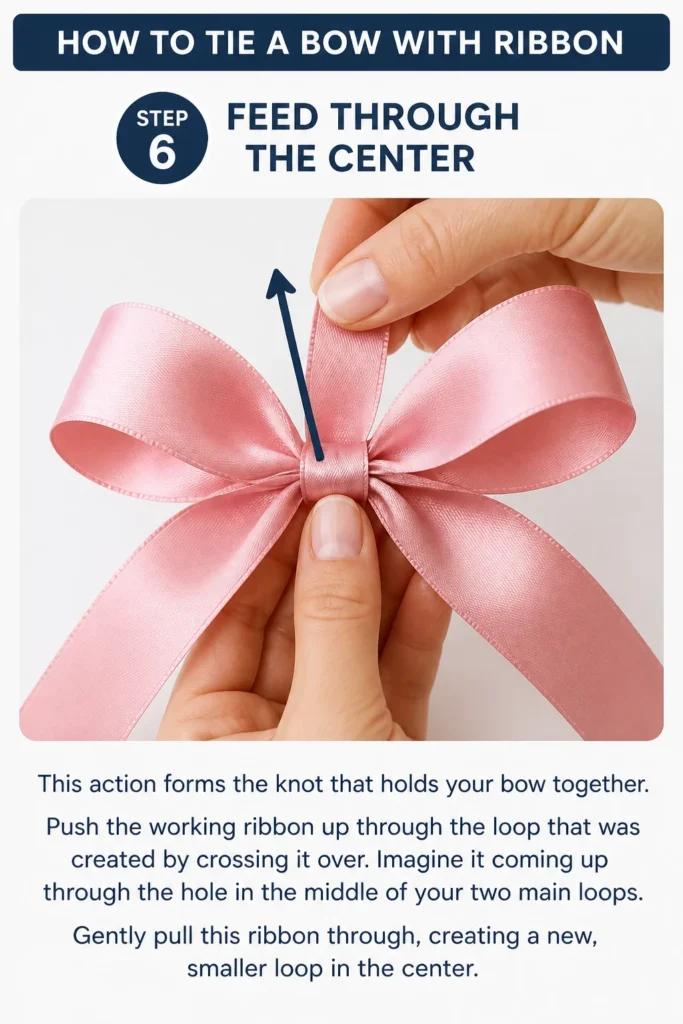
Push the working ribbon up through the loop that was created by crossing it over. Imagine it coming up through the “hole” in the middle of your two main loops.
Gently pull this ribbon through, creating a new, smaller loop in the center.
Step 7: Tighten and Adjust the Knot
Achieving the right tension is key for a crisp, well-formed bow.
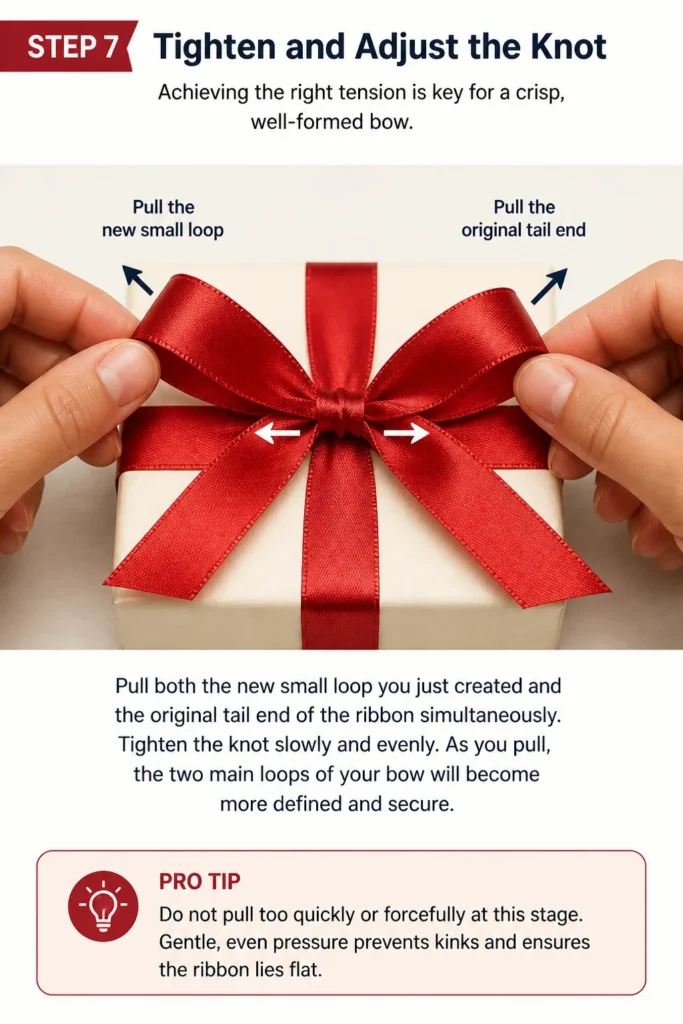
Pull both the new small loop you just created and the original tail end of the ribbon simultaneously.
Tighten the knot slowly and evenly. As you pull, the two main loops of your bow will become more defined and secure.
Pro Tip: Do not pull too quickly or forcefully at this stage. Gentle, even pressure prevents kinks and ensures the ribbon lies flat.
Step 8: Shape and Fluff Your Loops
This is where your bow truly comes to life and gains its volume.
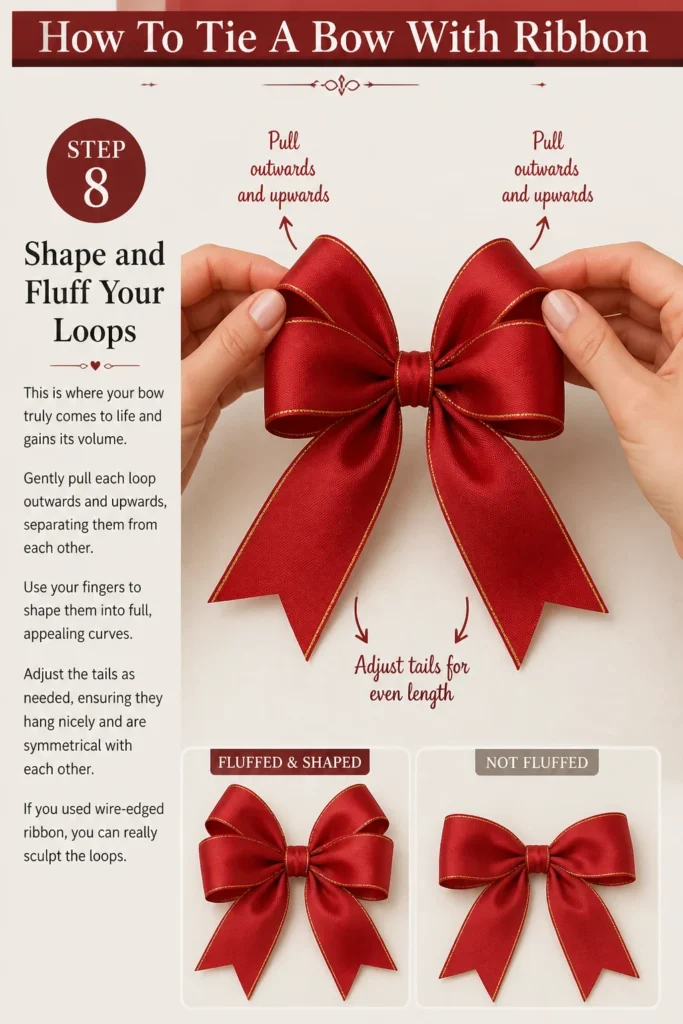
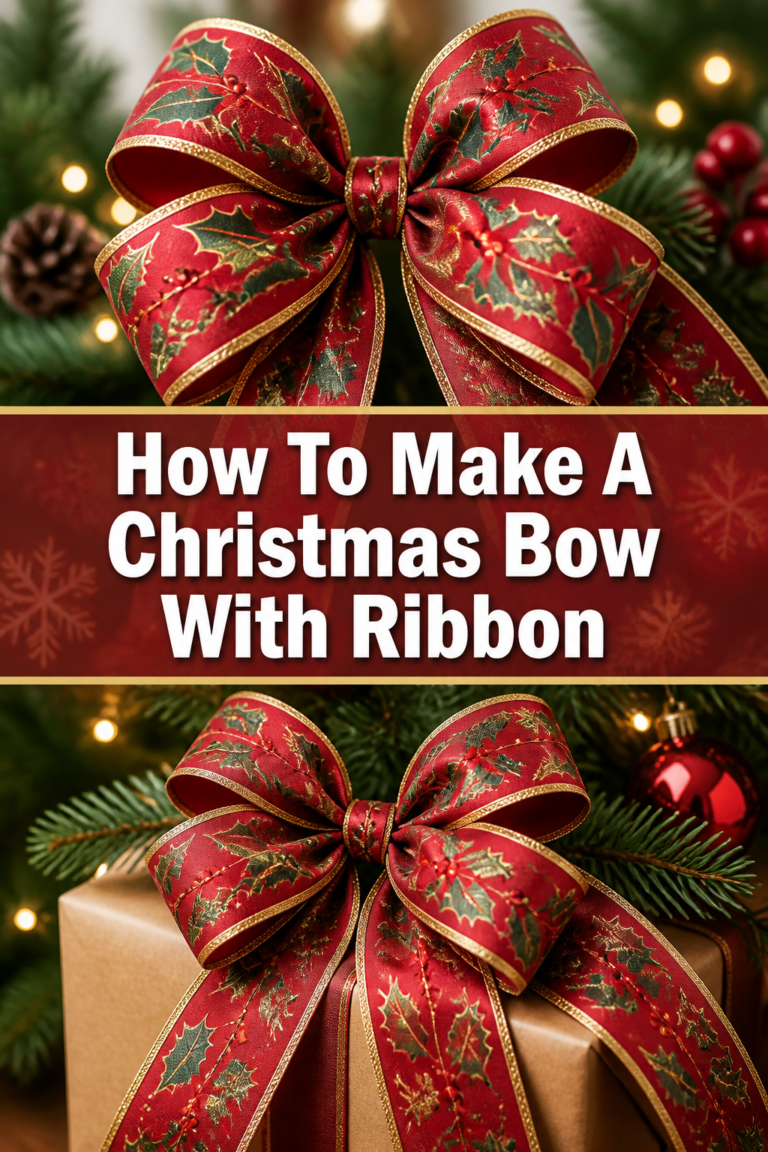
Gently pull each loop outwards and upwards, separating them from each other. Use your fingers to shape them into full, appealing curves.
Adjust the tails as needed, ensuring they hang nicely and are symmetrical with each other. If you used wire-edged ribbon, you can really sculpt the loops.
Step 9: Trim the Tails
The final touch involves neatening the tails for a polished look.
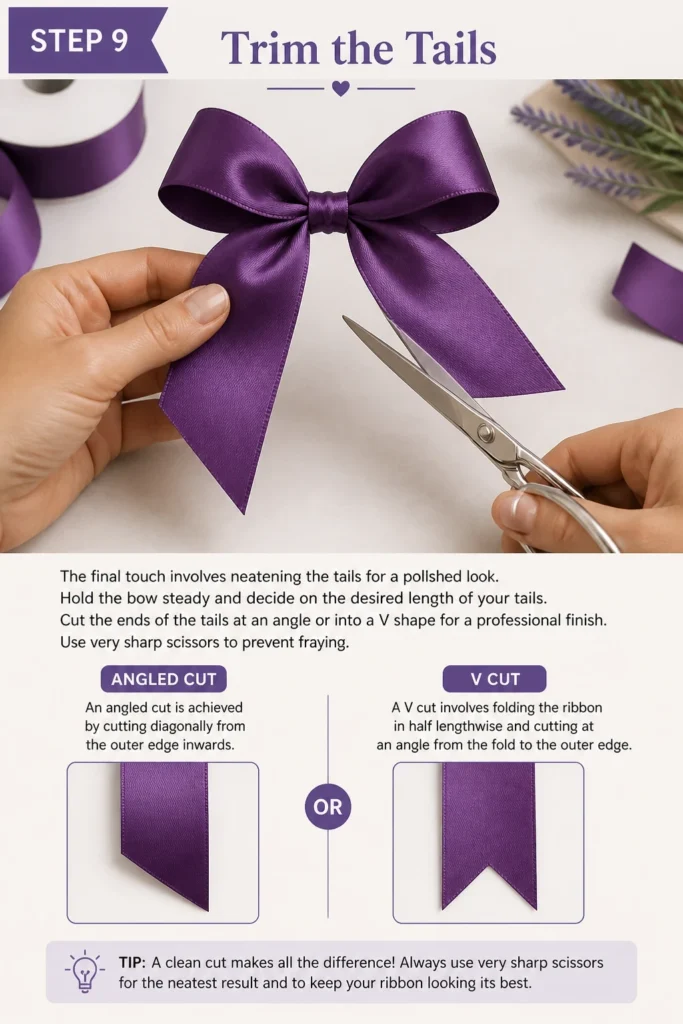
Hold the bow steady and decide on the desired length of your tails.
Cut the ends of the tails at an angle or into a “V” shape for a professional finish. Use very sharp scissors to prevent fraying.
An angled cut is achieved by cutting diagonally from the outer edge inwards. A “V” cut involves folding the ribbon in half lengthwise and cutting at an angle from the fold to the outer edge.
Common Mistakes to Avoid
Using Too Little Ribbon
Many beginners underestimate the amount of ribbon needed, leading to small, stunted loops or tails that are too short.
A bow requires enough material to form full loops and graceful tails. If you start with too little, you’ll struggle to make the loops full or symmetrical, and the knot will be difficult to tie properly.
Always err on the side of cutting a bit more ribbon than you think you’ll need. You can always trim excess, but you can’t add more once it’s cut.
Uneven Loop Sizes
One of the most common issues is having one loop significantly larger or smaller than the other.
This creates a lopsided and unprofessional-looking bow. Symmetry is key for an elegant appearance.
When forming your first two loops, take a moment to visually compare their sizes before tightening the knot. Adjust them carefully until they appear balanced.
Pulling the Knot Too Hard or Too Fast
While you need to tighten the knot, excessive force or speed can damage the ribbon and distort the bow’s shape.
Pulling too aggressively can crease or wrinkle delicate ribbons, especially satin. It can also cause the loops to twist out of shape or the knot to become uneven.
Tighten the knot slowly and with gentle, consistent pressure. This allows the ribbon to settle into place smoothly and helps maintain the integrity of the loops.
Ignoring Ribbon Orientation
Many ribbons have a “right” side and a “wrong” side, especially those with patterns or a sheen.
If you don’t pay attention to which side is facing out during the looping process, your finished bow might have the dull or plain side visible in places, diminishing its appeal.
Always ensure the decorative or “pretty” side of the ribbon is facing outwards as you form your loops and tie the knot. This ensures a consistent, polished look from every angle.
Troubleshooting
My Bow Looks Lopsided or Uneven
This usually happens if the initial loops weren’t perfectly matched in size or if the knot wasn’t tightened evenly.
Solution: Before tightening the knot completely, gently loosen it slightly. Adjust the loops by pulling them individually until they are symmetrical.
Then, retighten the knot slowly and carefully, ensuring even tension on both sides. For wire-edged ribbon, you can often reshape loops even after the knot is tight.
The Ribbon Slips and Doesn’t Hold Its Shape
This can occur with very slick ribbons like smooth satin or if the knot isn’t secure enough.
Solution: Ensure your knot is firm but not overly tight to prevent damage. For slippery ribbons, try a double knot to add extra security, or consider using a small piece of clear tape on the underside of the bow to anchor it to your item.
Using a ribbon with a slightly textured finish, like grosgrain, can also help prevent slippage in future bows.
My Bow Loops Look Flat and Lifeless
A flat bow often results from not enough shaping after the knot is tied or using a very limp ribbon.
Solution: After tying the knot, take the time to “fluff” each loop. Gently pull them apart and shape them with your fingers, coaxing them into full, rounded forms.
If your ribbon is very soft, consider using a wider ribbon or one with more body, such as wired ribbon, for a more voluminous effect.
Key Takeaways
- Ribbon Choice Matters: Select ribbon type and width based on desired bow look and ease of handling.
- Measure Generously: Always cut more ribbon than you think you need to ensure full loops and tails.
- Symmetry is Key: Pay close attention to making your initial loops even in size for a balanced bow.
- Gentle Tension: Tighten the knot slowly and evenly to prevent kinks and maintain ribbon integrity.
- Fluff and Shape: Take time to adjust and shape loops after tying for a professional, voluminous finish.
- Practice Makes Perfect: Don’t get discouraged if your first few bows aren’t flawless; practice improves technique.
Frequently Asked Questions
What type of ribbon is best for beginners?
For beginners, grosgrain or a medium-weight satin ribbon (around 1 to 1.5 inches wide) is highly recommended.
These ribbons are relatively easy to handle, hold their shape well, and aren’t too slippery, making the tying process smoother.
How do I make a really large, voluminous bow?
To create a large, voluminous bow, start with a much longer piece of wider ribbon, ideally a wired ribbon.
You can also create multiple loops on each side instead of just one, stacking them as you tie. After tying, spend extra time shaping and “fluffing” each individual loop to maximize volume.
Can I reuse ribbon for bows?
Absolutely! Reusing ribbon is a great way to be sustainable and cost-effective. Carefully untie or cut the bow from its previous use.
Smooth out any creases by gently running it between your fingers or even lightly pressing it with a cool iron (test on an inconspicuous spot first). Store it neatly rolled to prevent new wrinkles.
How do I attach a bow to a gift without it slipping off?
The most secure way is to tie the bow directly around the gift. If that’s not possible, use a small piece of double-sided tape or a dot of hot glue (for non-delicate items) on the underside of the bow to adhere it to the package.
You can also thread a thin piece of floral wire or string through the back of the bow’s knot and use that to attach it to your item.
Our Top Recommended Finds
- High-Quality Grosgrain Ribbon Set: Excellent for practice and versatile for many projects, offering good grip and shape retention.
- Premium Wire-Edged Satin Ribbon: Perfect for creating bows that demand a sculpted, elegant look and hold their form beautifully.
- Fabric Scissors with Sharp Blades: Essential for clean, fray-free cuts, ensuring your bow tails look professional every time.
Embrace the Art of the Perfect Bow
Tying a beautiful bow is a skill that brings joy and elegance to so many aspects of life.
From wrapping presents to decorating your home or adding a flourish to an outfit, a well-tied bow speaks volumes.
Take these steps, grab your favorite ribbon, and start practicing today. You’ll be amazed at how quickly you master this charming craft.
Beginner-friendly templates, step-by-step guides,
and weekly project ideas in your inbox.