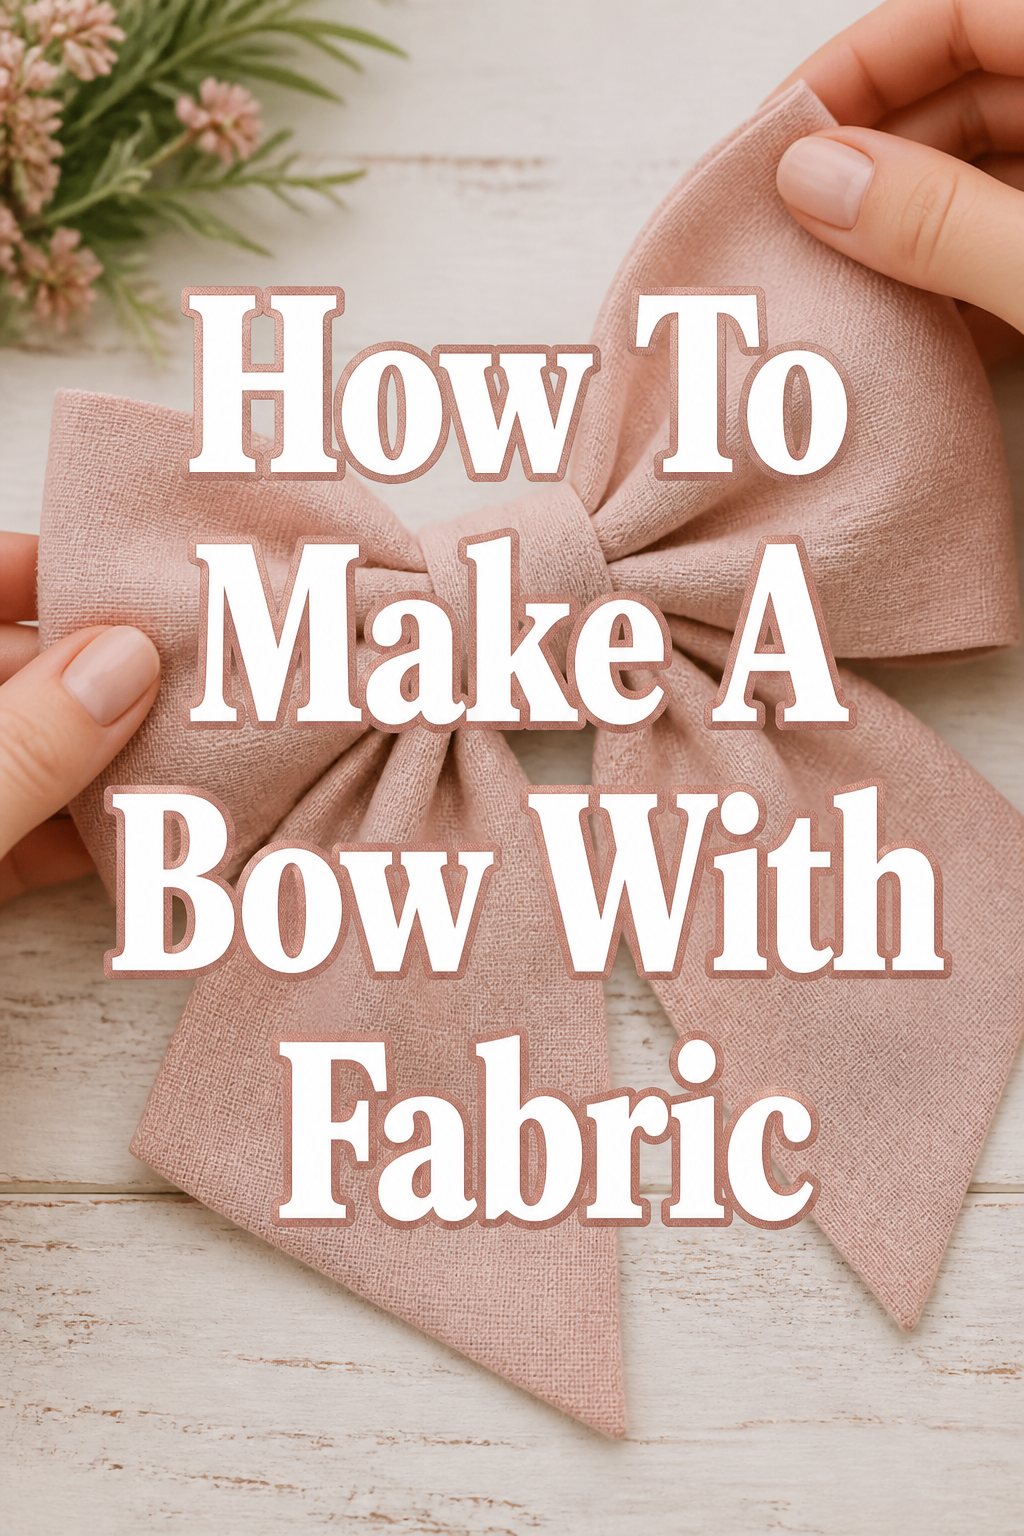
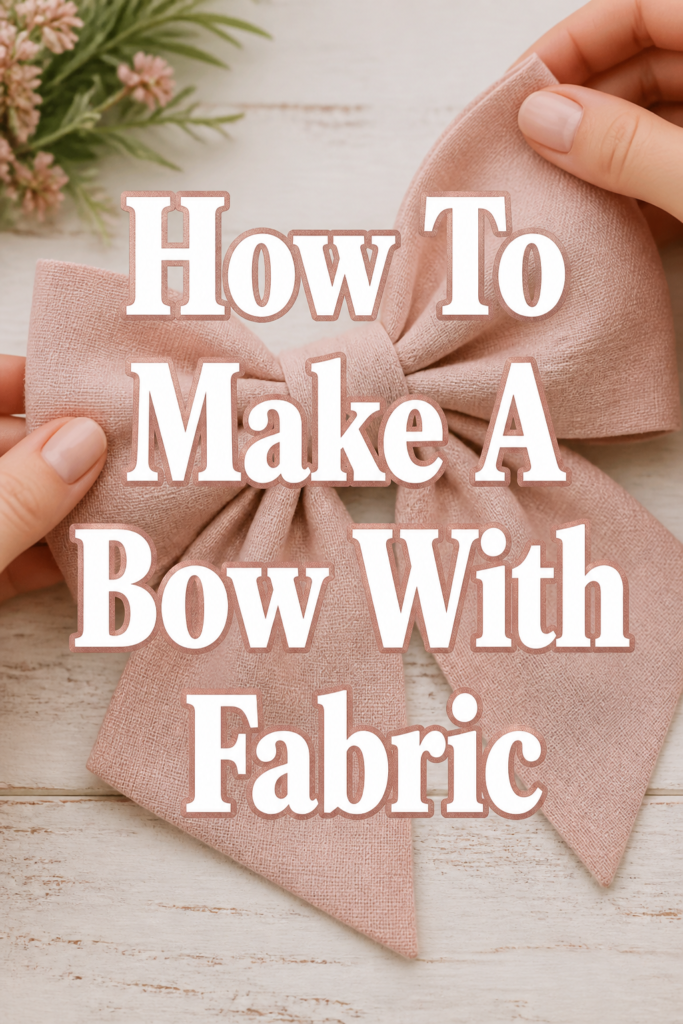
🎀 How To Make A Bow With Fabric

Beginner-friendly templates, step-by-step guides,
and weekly project ideas in your inbox.
Creating beautiful fabric bows is a skill I’ve honed over many years, adding a touch of handmade charm to countless gifts and projects. There’s a unique satisfaction in transforming a simple piece of fabric into something elegant and eye-catching. This guide shares my tried-and-true methods, ensuring you can craft perfect bows every time.
Quick Overview
You’re about to learn how to make a versatile fabric bow, perfect for gifts, hair accessories, or home decor. This guide breaks down the process into simple, manageable steps, suitable for anyone eager to get crafty.
- Time needed: 45-75 minutes (depending on complexity and finishing details)
- Difficulty: Beginner
- What you’ll need: Fabric, scissors, measuring tool, needle and thread or fabric glue, iron.
Step-by-Step Instructions
Step 1: Gather Your Materials and Tools
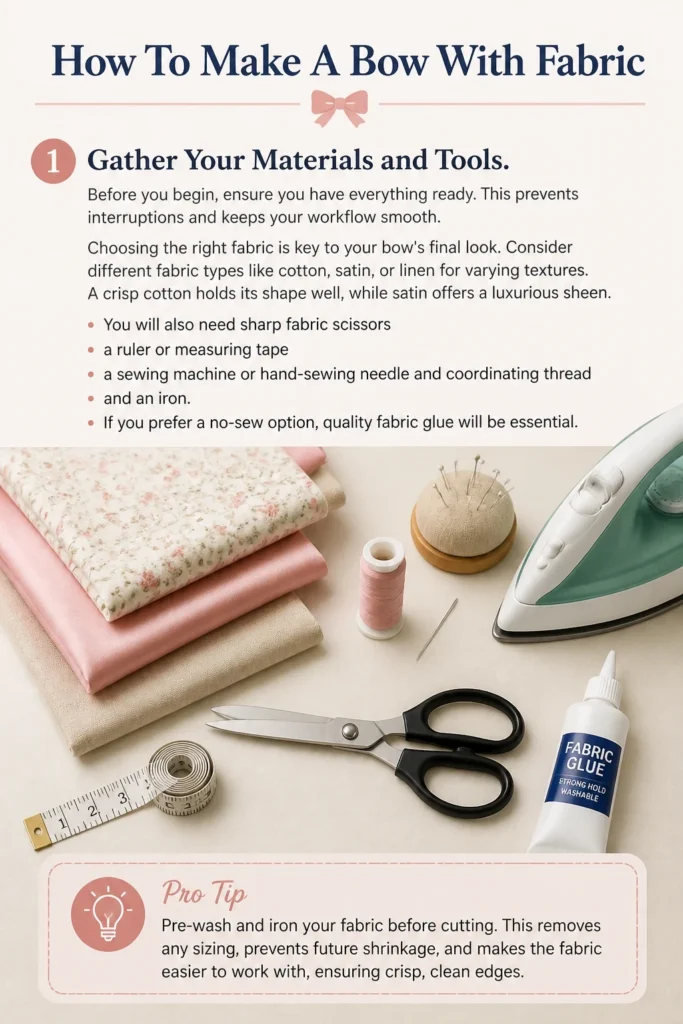
Before you begin, ensure you have everything ready. This prevents interruptions and keeps your workflow smooth. Choosing the right fabric is key to your bow’s final look.
Consider different fabric types like cotton, satin, or linen for varying textures. A crisp cotton holds its shape well, while satin offers a luxurious sheen. You will also need sharp fabric scissors, a ruler or measuring tape, a sewing machine or hand-sewing needle and coordinating thread, and an iron. If you prefer a no-sew option, quality fabric glue will be essential.
Pro Tip: Pre-wash and iron your fabric before cutting. This removes any sizing, prevents future shrinkage, and makes the fabric easier to work with, ensuring crisp, clean edges.
Step 2: Cut Your Fabric Pieces
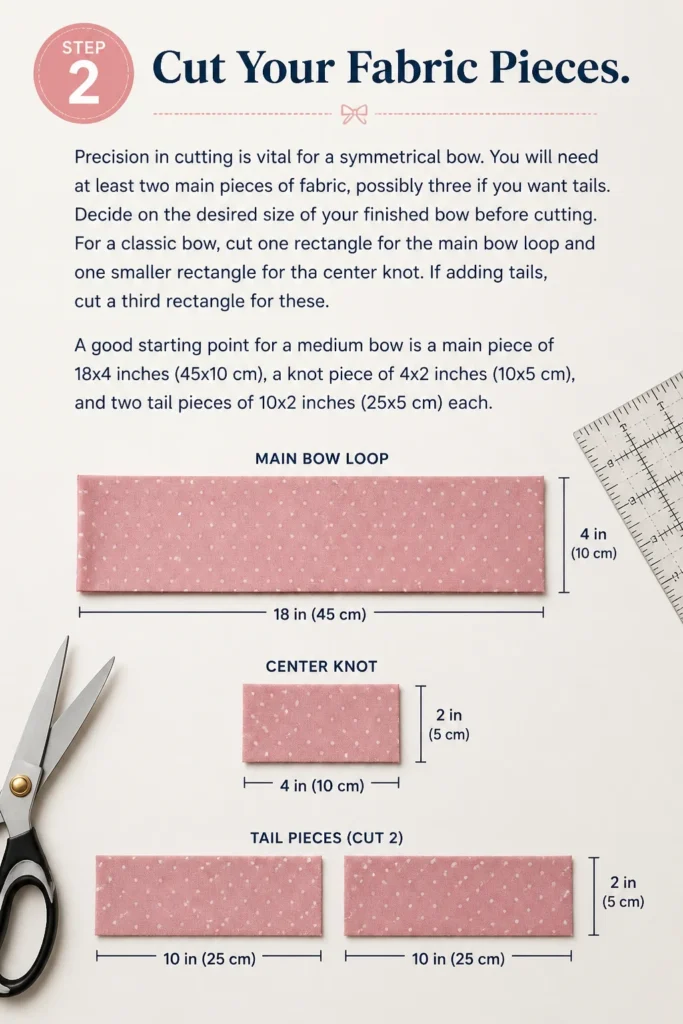
Precision in cutting is vital for a symmetrical bow. You will need at least two main pieces of fabric, possibly three if you want tails. Decide on the desired size of your finished bow before cutting.
For a classic bow, cut one rectangle for the main bow loop and one smaller rectangle for the center knot. If adding tails, cut a third rectangle for these. A good starting point for a medium bow is a main piece of 18×4 inches (45×10 cm), a knot piece of 4×2 inches (10×5 cm), and two tail pieces of 10×2 inches (25×5 cm) each.
Step 3: Prepare the Main Bow Loop
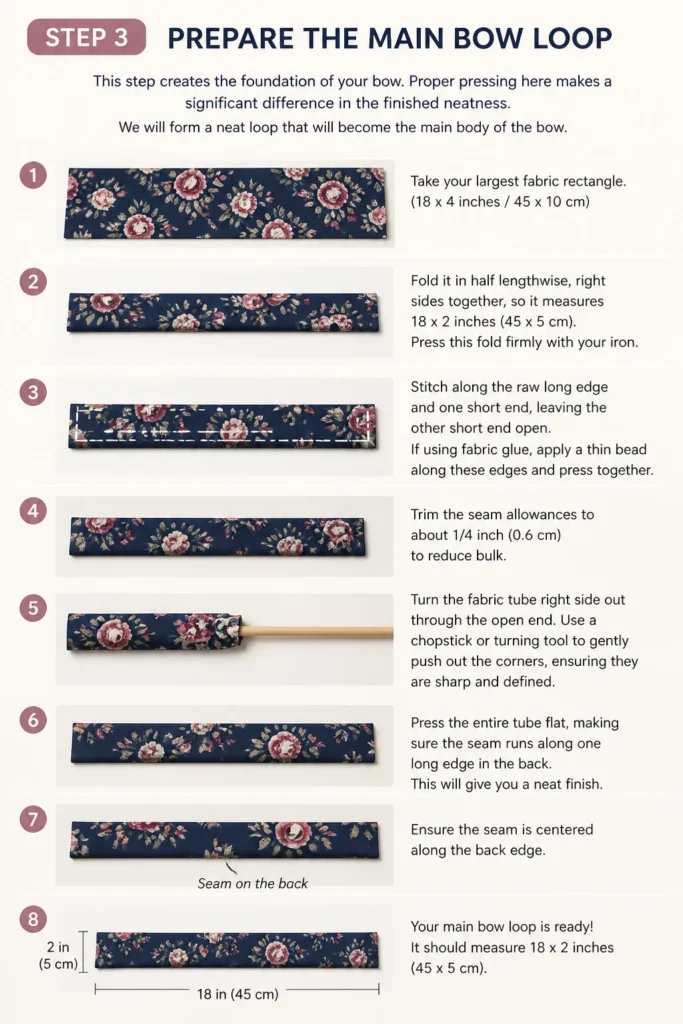
This step creates the foundation of your bow. Proper pressing here makes a significant difference in the finished neatness. We will form a neat loop that will become the main body of the bow.
Take your largest fabric rectangle. Fold it in half lengthwise, right sides together, so it measures 18×2 inches (45×5 cm). Press this fold firmly with your iron. Stitch along the raw long edge and one short end, leaving the other short end open. If using fabric glue, apply a thin bead along these edges and press together.
Trim the seam allowances to about 1/4 inch (0.6 cm) to reduce bulk. Turn the fabric tube right side out through the open end. Use a chopstick or turning tool to gently push out the corners, ensuring they are sharp and defined. Press the entire tube flat, making sure the seam runs along one edge.
Step 4: Form the Bow Shape
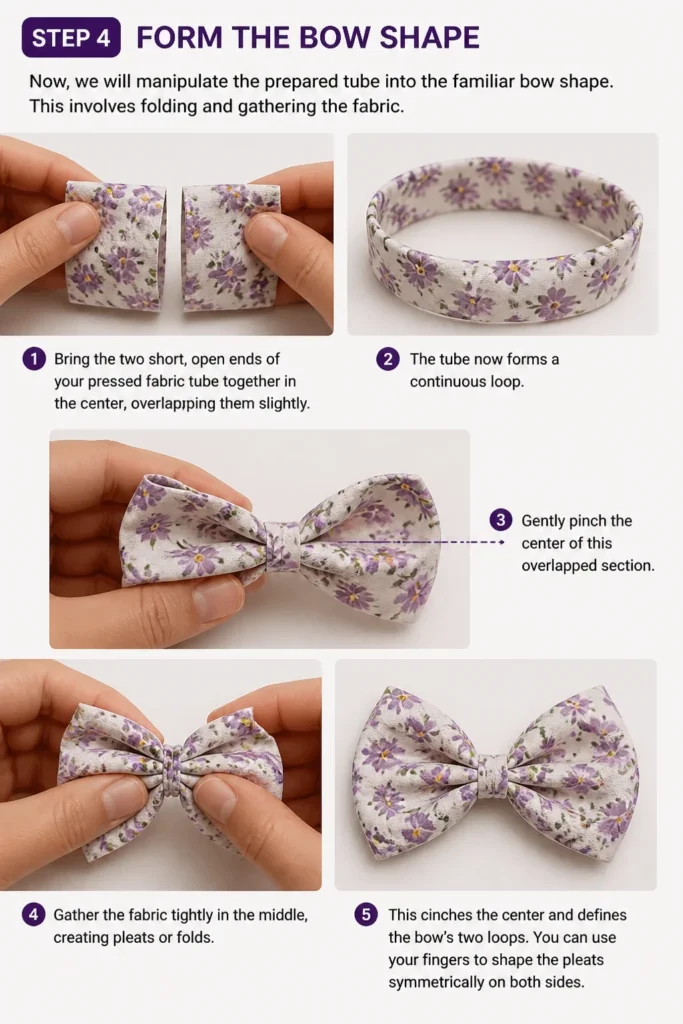
Now, we will manipulate the prepared tube into the familiar bow shape. This involves folding and gathering the fabric. The goal is to create two distinct loops.
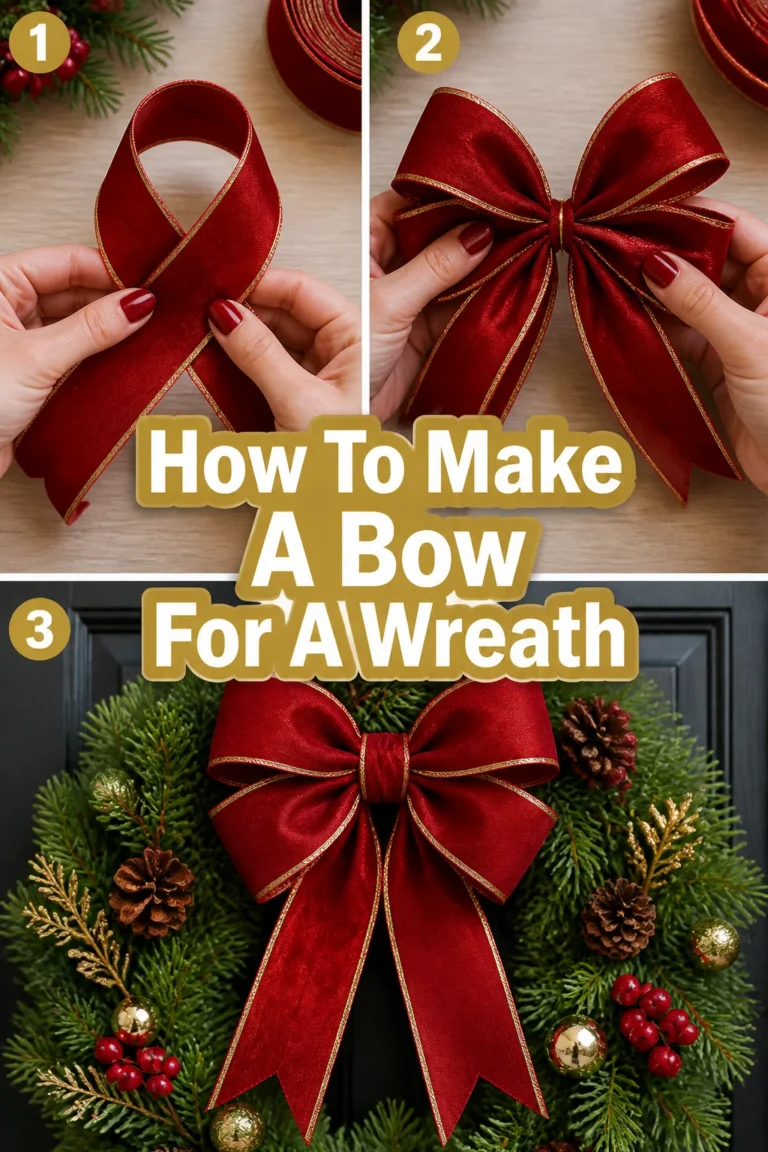
Bring the two short, open ends of your pressed fabric tube together in the center, overlapping them slightly. The tube now forms a continuous loop. This forms the basic shape of the bow. Gently pinch the center of this overlapped section.
Gather the fabric tightly in the middle, creating pleats or folds. This cinches the center and defines the bow’s two loops. You can use your fingers to shape the pleats symmetrically on both sides.
Step 5: Create the Center Knot
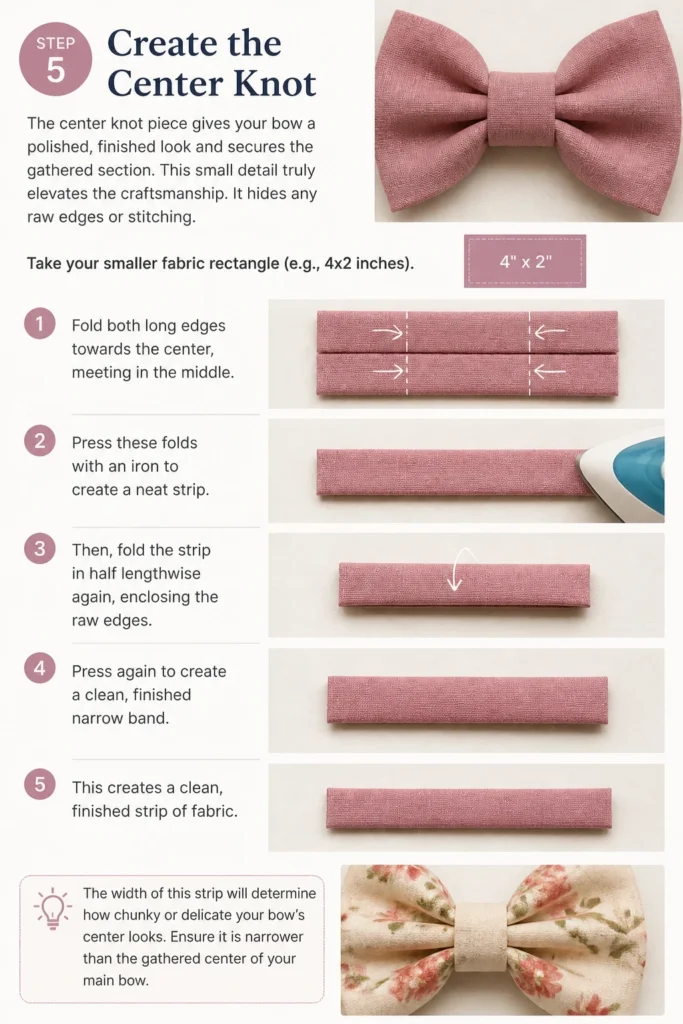
The center knot piece gives your bow a polished, finished look and secures the gathered section. This small detail truly elevates the craftsmanship. It hides any raw edges or stitching.
Take your smaller fabric rectangle (e.g., 4×2 inches). Fold both long edges towards the center, meeting in the middle. Press these folds with an iron to create a neat strip. Then, fold the strip in half lengthwise again, enclosing the raw edges, so it forms a narrow band.
This creates a clean, finished strip of fabric. The width of this strip will determine how chunky or delicate your bow’s center looks. Ensure it is narrower than the gathered center of your main bow.
Step 6: Secure the Knot and Finish the Bow
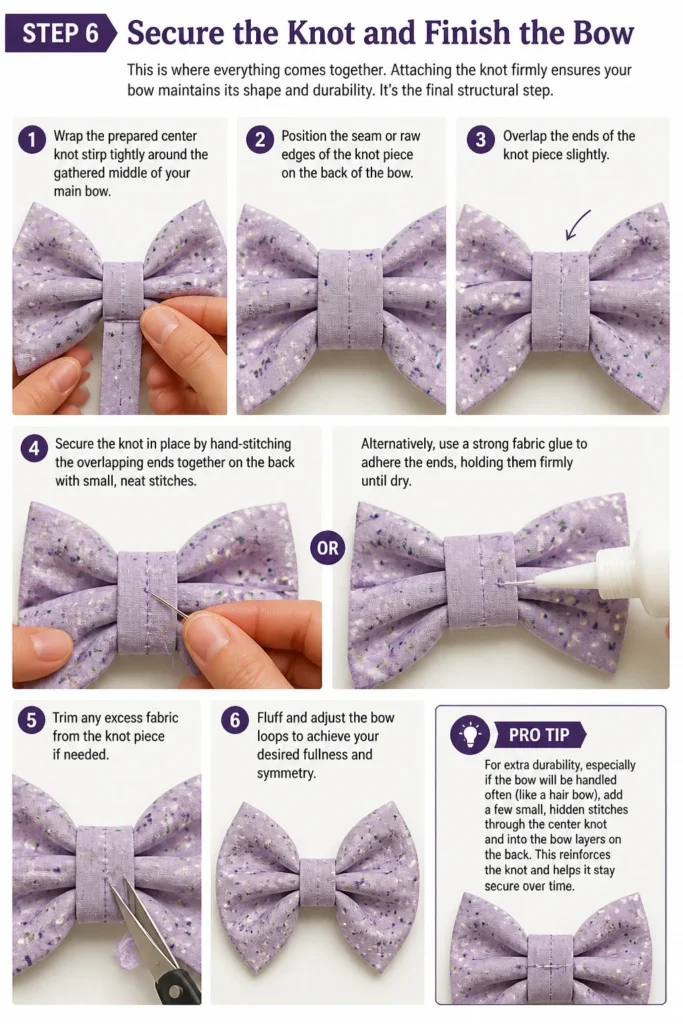
This is where everything comes together. Attaching the knot firmly ensures your bow maintains its shape and durability. It’s the final structural step.
Wrap the prepared center knot strip tightly around the gathered middle of your main bow. Position the seam or raw edges of the knot piece on the back of the bow. Overlap the ends of the knot piece slightly.
Secure the knot in place by hand-stitching the overlapping ends together on the back with small, neat stitches. Alternatively, use a strong fabric glue to adhere the ends, holding them firmly until dry. Trim any excess fabric from the knot piece if needed. Fluff and adjust the bow loops to achieve your desired fullness and symmetry.
Pro Tip: For extra durability, especially if the bow will be handled often (like a hair bow), add a few small stitches through the knot and into the main bow body on the back. This permanently secures the center.
Step 7: Add Tails (Optional)
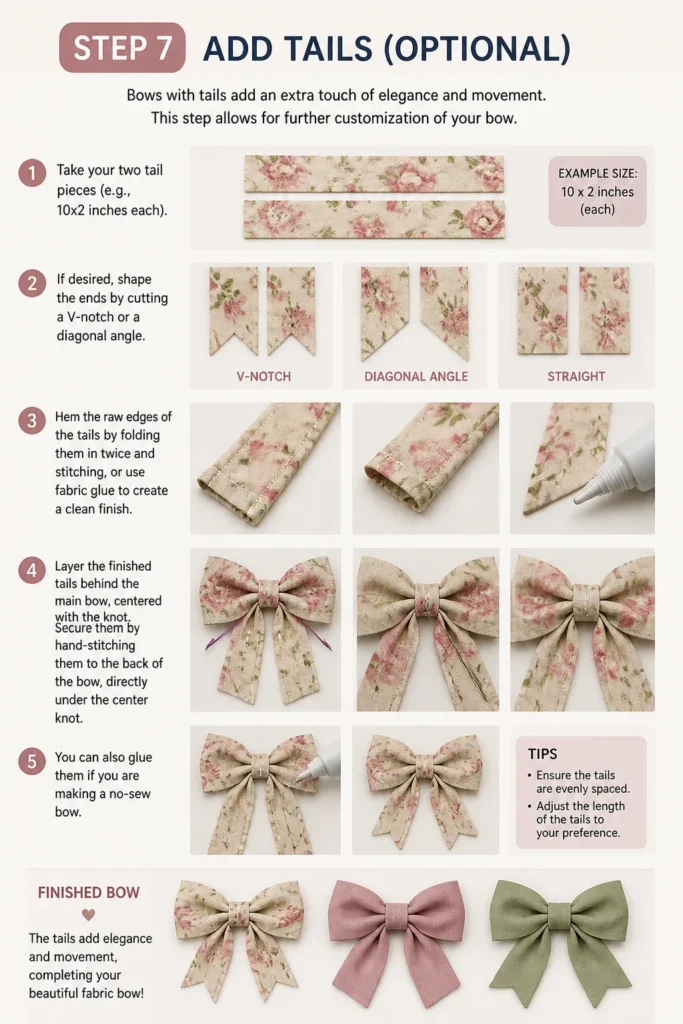
Bows with tails add an extra touch of elegance and movement. This step allows for further customization of your bow. Tails can be straight, pointed, or swallow-tailed.
Take your two tail pieces (e.g., 10×2 inches each). If desired, shape the ends by cutting a V-notch or a diagonal angle. Hem the raw edges of the tails by folding them in twice and stitching, or use fabric glue to create a clean finish.
Layer the finished tails behind the main bow, centered with the knot. Secure them by hand-stitching them to the back of the bow, directly under the center knot. You can also glue them if you are making a no-sew bow. Ensure they are evenly spaced and hang attractively.
Step 8: Refine and Finalize
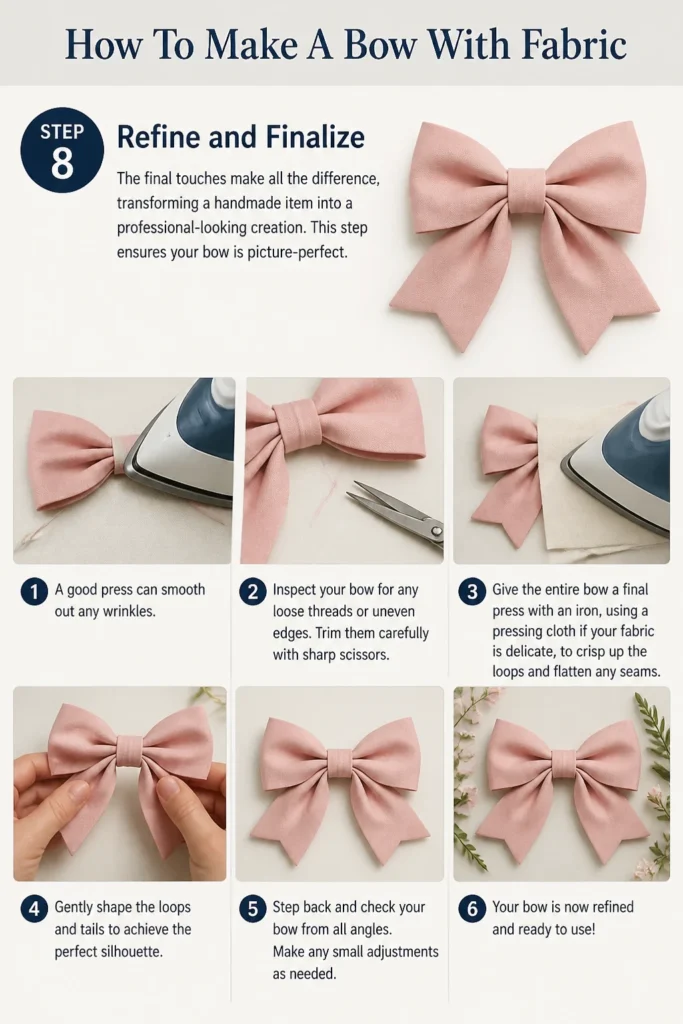
The final touches make all the difference, transforming a handmade item into a professional-looking creation. This step ensures your bow is picture-perfect. A good press can smooth out any wrinkles.
Inspect your bow for any loose threads or uneven edges. Trim them carefully with sharp scissors. Give the entire bow a final press with an iron, using a pressing cloth if your fabric is delicate, to crisp up the loops and flatten any seams. Gently shape the loops and tails to achieve the perfect silhouette.
Common Mistakes to Avoid
Using the Wrong Fabric
Some fabrics are simply not suited for bow making. Very thin, flimsy fabrics like chiffon can be difficult to manage and may not hold their shape well, resulting in a limp bow. Conversely, overly thick or stiff fabrics like heavy upholstery fabric can be challenging to gather and may create a bulky, unrefined center. Always choose fabrics with a good drape that also have enough body to hold a shape, such as quilting cottons, satin, linen blends, or even some lighter denims.
Imprecise Measurements and Cuts
Eyeballing measurements or making uneven cuts can lead to a lopsided or asymmetrical bow. Even a slight discrepancy in length or width can throw off the entire balance. Always use a ruler or measuring tape and mark your cutting lines clearly before cutting. Taking the time to be precise in this initial stage saves a lot of frustration later on when trying to achieve a perfectly symmetrical bow.
Skipping Pressing Steps
Ironing might seem like an extra, time-consuming step, but it is crucial for a professional-looking bow. Skipping pressing after each fold or seam can leave your fabric looking wrinkled, bulky, and messy. Pressing helps to set seams, create crisp folds, and flatten the fabric, making it much easier to work with and resulting in a much neater, more refined final product. A well-pressed bow always looks superior.
Over-tightening the Center Knot
While you want the center knot to be snug, pulling it too tight can distort the bow’s loops. It can squish the fabric excessively, making the loops appear flat and less voluminous. It can also make it difficult to adjust the loops later. Aim for a firm, secure wrap that holds the gathered center without crushing it. The goal is to define the center, not to choke the bow.
Troubleshooting
My Bow Looks Lopsided
If your bow appears uneven, it often stems from inconsistent gathering in the center or uneven loops. First, gently loosen the center knot if it’s not permanently secured. Try to redistribute the fabric within the loops, pulling a little more fabric into the smaller loop to even it out. Ensure your initial fabric cuts were perfectly symmetrical. If the knot is sewn, you might need to carefully unpick a few stitches to make adjustments.
The Center Knot Won’t Stay Tight
A loose center knot can make the bow look messy and fall apart. This usually happens if the knot piece wasn’t wrapped tightly enough or if the securing stitches/glue didn’t hold. If sewn, ensure you are using small, strong stitches, perhaps even going through the layers of the main bow for extra security. If glued, use a strong fabric glue and hold the pieces firmly in place until completely dry. Sometimes, a tiny bit of fray check on the knot’s raw edges before securing can help prevent slippage.
My Fabric Frays Too Much
Some fabrics, especially linens and looser weaves, are prone to fraying, making neat edges difficult. To combat this, you can use a product called “Fray Check” along the raw edges before you begin sewing or gluing. Alternatively, consider using French seams for your main bow loop, which fully encloses raw edges. For no-sew bows, ensure you’re using very sharp scissors for clean cuts and rely heavily on fabric glue to seal all raw edges securely.
Key Takeaways
- Choosing the right fabric is fundamental for a well-structured and aesthetically pleasing bow.
- Precise measuring and cutting are essential steps to ensure your bow is symmetrical and balanced.
- Pressing your fabric at each stage creates crisp edges and a professional, polished finish.
- The center knot should be secured firmly but without over-tightening to maintain the bow’s volume.
- Don’t be afraid to experiment with different fabric types, sizes, and tail designs to customize your bows.
- Practice makes perfect; your bows will improve with each one you create.
Frequently Asked Questions
What type of fabric is best for making bows?
Medium-weight fabrics with some body are generally best. Quilting cottons are an excellent choice for beginners due to their ease of handling and ability to hold shape. Satin, grosgrain ribbon (which is essentially a pre-cut fabric strip), linen blends, and even some lightweight denim can also create beautiful bows with different textures and finishes. Avoid very stretchy or extremely thin, slippery fabrics.
Can I make a no-sew bow with fabric?
Absolutely! Fabric glue is your best friend for a no-sew bow. Instead of stitching, you’ll apply a thin, even bead of strong fabric glue along the raw edges and seams, pressing them firmly together until dry. This method works particularly well for simpler bow designs and can be very quick. Just ensure you allow ample drying time for the glue.
How do I attach my finished fabric bow to other items?
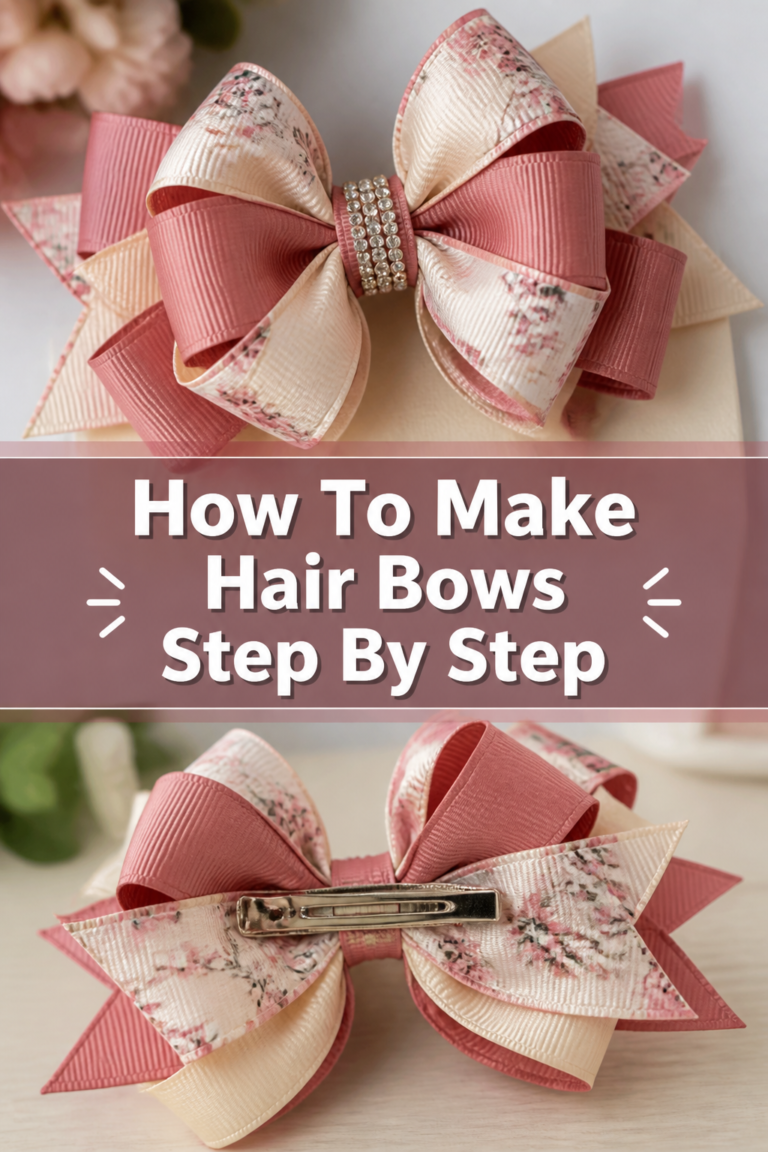
There are several ways to attach your bow. For hair accessories, you can hot glue it to a hair clip, headband, or elastic. For gifts, simply tie it on with ribbon or use a dab of hot glue to secure it. If you want it removable, you can sew a small safety pin or a brooch pin onto the back of the bow, allowing you to attach it to clothing, bags, or other items.
How do I care for my fabric bow?
Care instructions depend heavily on the fabric you used. For most cotton bows, gentle hand washing or spot cleaning with mild soap and cold water is usually sufficient. Reshape the bow while wet and lay it flat to air dry. Iron on a low setting if needed. For delicate fabrics like satin, dry cleaning or very careful spot cleaning might be necessary. Always test any cleaning method on an inconspicuous area first.
Our Top Recommended Finds
- Sharp Fabric Shears: A dedicated pair of fabric scissors makes all the difference for clean, precise cuts, preventing fraying and uneven edges.
- Fabric Glue: For quick, no-sew options or securing small details, a high-quality fabric glue like “Fabri-Tac” is invaluable.
- Measuring Mat and Rotary Cutter: These tools provide unparalleled precision and speed for cutting fabric rectangles, especially helpful for multiple bows.
Craft Your Signature Style Today!
Now that you have the steps and insights, there’s nothing stopping you from creating a stunning fabric bow. Imagine the joy of adding a custom-made touch to a carefully chosen gift, or the charm of a unique hair accessory. This simple craft opens up a world of creative possibilities.
Take your favorite fabric scraps and transform them into something beautiful. Start with a classic design, then experiment with different sizes, colors, and textures. Your next crafting adventure is waiting. Dive in and let your creativity flourish!
Beginner-friendly templates, step-by-step guides,
and weekly project ideas in your inbox.