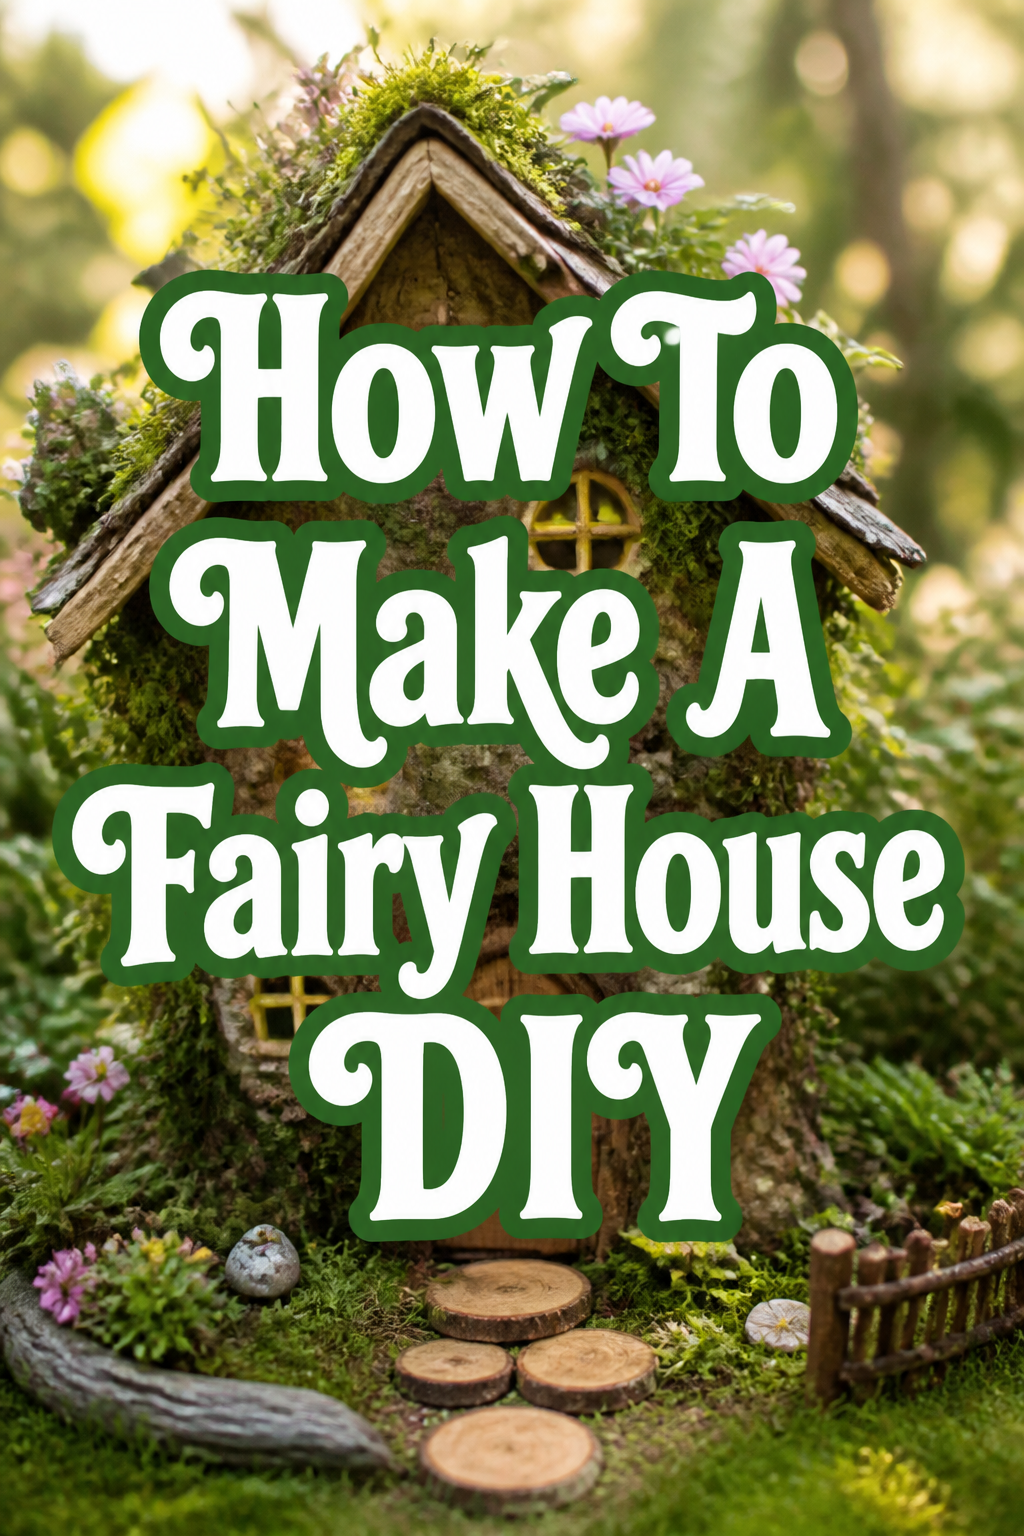
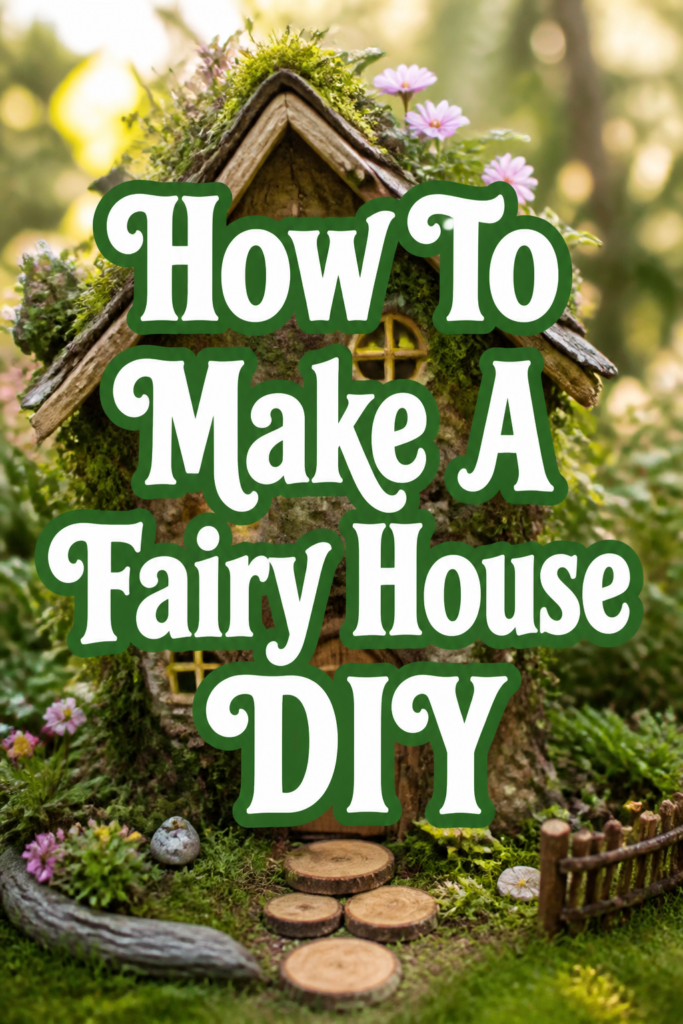
⭐ How To Make A Fairy House DIY

Beginner-friendly templates, step-by-step guides,
and weekly project ideas in your inbox.
There’s something truly enchanting about creating a miniature world, especially one designed for tiny, magical inhabitants.
I remember spending countless afternoons as a child, meticulously arranging twigs and pebbles, dreaming of the fairies who might visit.
This guide draws on years of crafting joy to help you build your very own whimsical fairy house, step by step.
Quick Overview
You’re about to embark on a delightful journey, transforming simple materials into a charming dwelling fit for any fairy. Get ready to tap into your inner child and unleash your creativity.
- Time needed: 2-4 hours (plus drying time)
- Difficulty: Beginner
- What you’ll need: Natural elements, craft glue, a sturdy base, small tools
Step-by-Step Instructions
Step 1: Gather Your Magical Supplies
Collect a variety of natural elements from your garden, a local park, or even a craft store. Look for small twigs, interesting stones, dried leaves, bark pieces, acorns, seed pods, and soft moss.
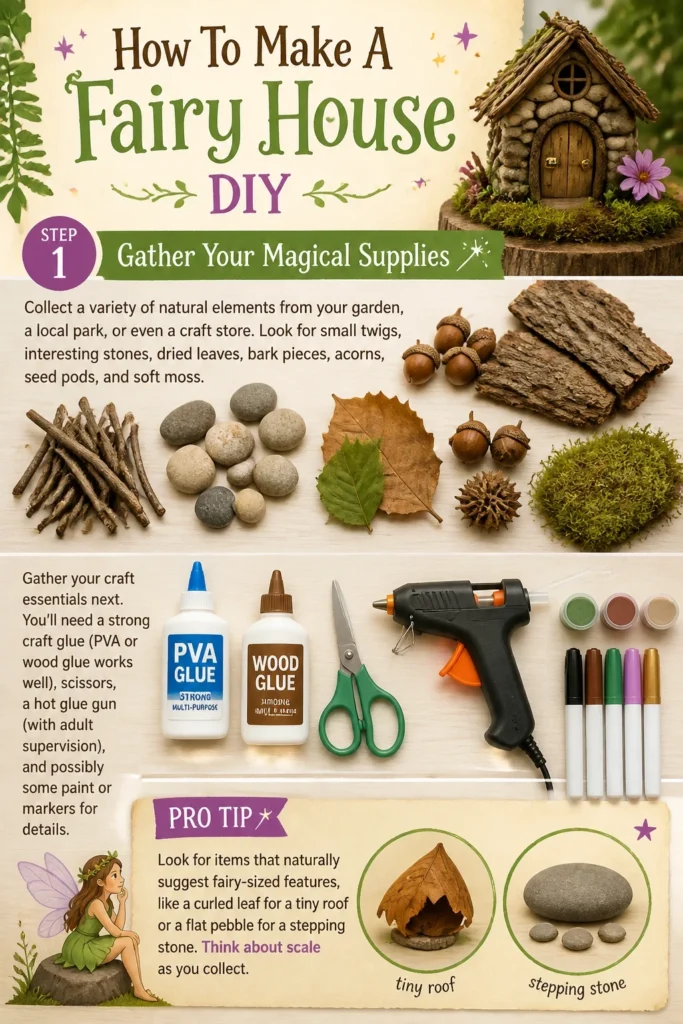
Gather your craft essentials next. You’ll need a strong craft glue (PVA or wood glue works well), scissors, a hot glue gun (with adult supervision), and possibly some paint or markers for details.
Pro Tip: Look for items that naturally suggest fairy-sized features, like a curled leaf for a tiny roof or a flat pebble for a stepping stone. Think about scale as you collect.
Step 2: Choose and Prepare Your Base
Select a sturdy foundation for your fairy house. A flat piece of wood, a thick slice of tree trunk, a large, stable stone, or even a sturdy plastic container lid can serve as an excellent base.
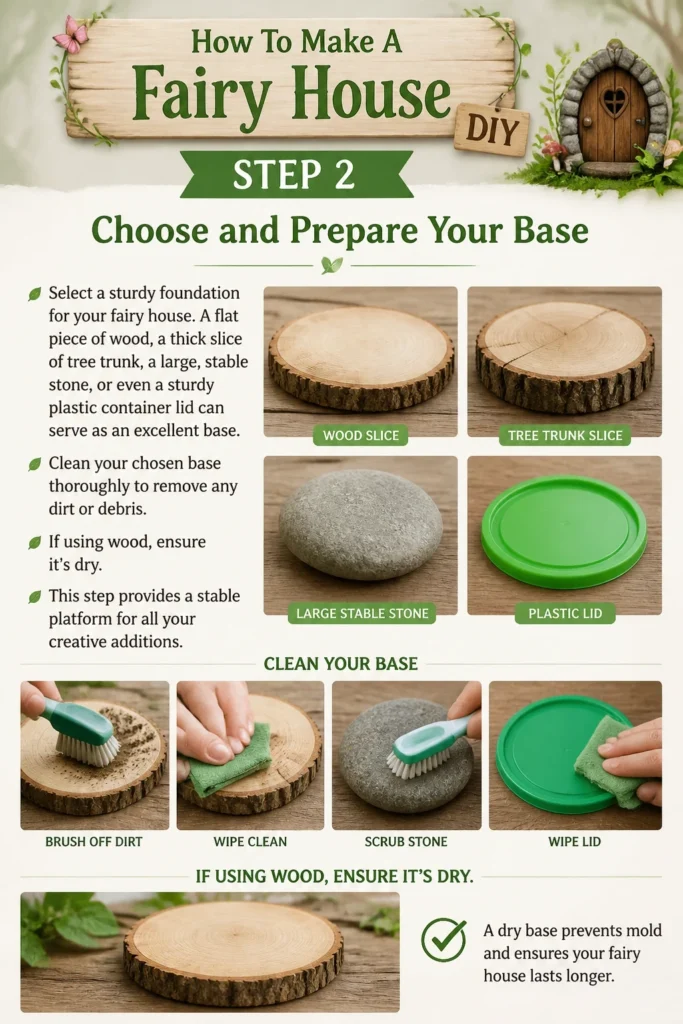
Clean your chosen base thoroughly to remove any dirt or debris. If using wood, ensure it’s dry. This step provides a stable platform for all your creative additions.
Step 3: Construct the Main Structure
Build the primary walls of your fairy house. You can use several methods for this. One popular option is to form a cylinder or square with cardboard or a plastic bottle, then cover it.
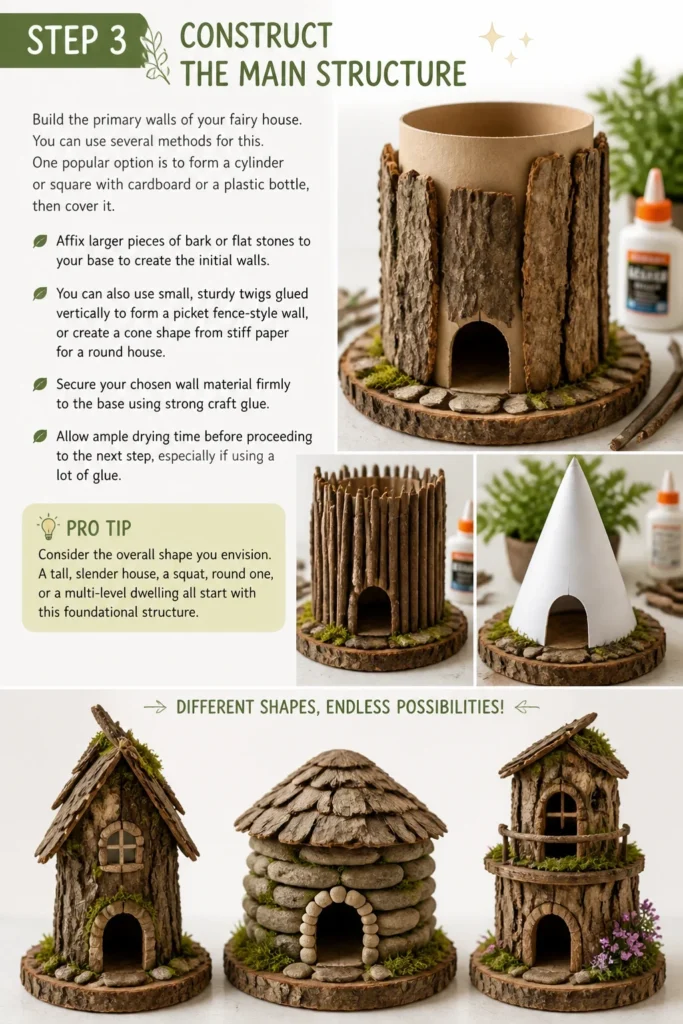
Affix larger pieces of bark or flat stones to your base to create the initial walls. You can also use small, sturdy twigs glued vertically to form a picket fence-style wall, or create a cone shape from stiff paper for a round house.
Secure your chosen wall material firmly to the base using strong craft glue. Allow ample drying time before proceeding to the next step, especially if using a lot of glue.
Pro Tip: Consider the overall shape you envision. A tall, slender house, a squat, round one, or a multi-level dwelling all start with this foundational structure.
Step 4: Design and Attach the Roof
Craft a charming roof for your fairy house. A simple method is to cut a circle from cardboard, then cut a slit to the center and overlap the edges to form a cone shape. For a gabled roof, use two rectangles joined at the top.
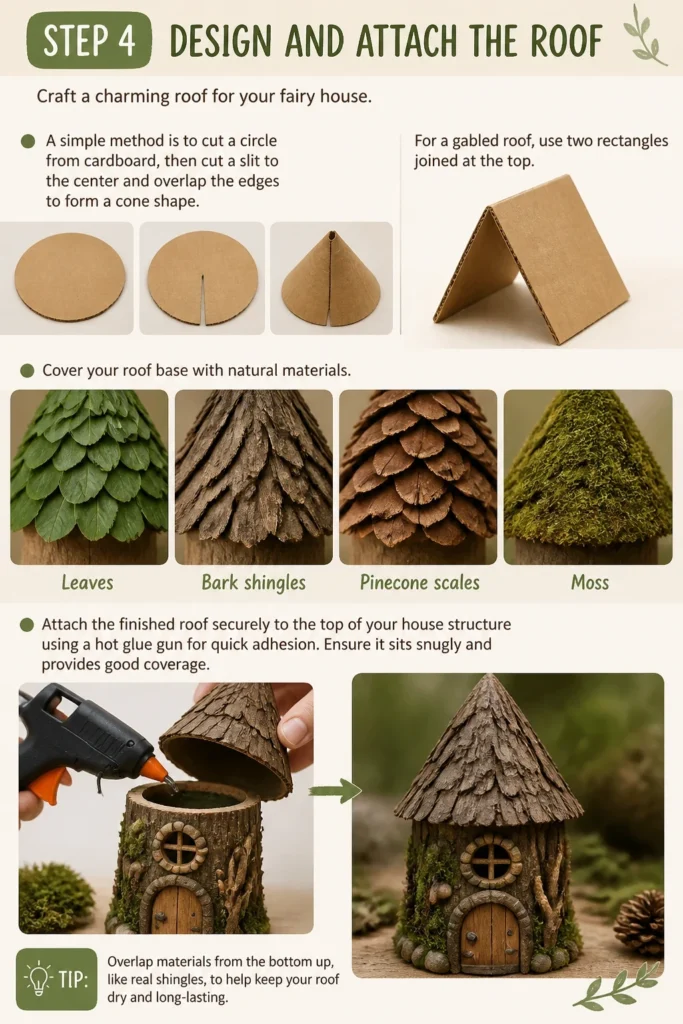
Cover your roof base with natural materials. Overlap small leaves, bark shingles, or even pinecone scales to create a textured, weather-resistant look. Moss also makes a lovely, soft roof covering.
Attach the finished roof securely to the top of your house structure using a hot glue gun for quick adhesion. Ensure it sits snugly and provides good coverage.
Step 5: Add Doors and Windows
Create a tiny door that truly welcomes fairies. You can cut a small arch from bark, a flat pebble, or even a piece of polymer clay. Adorn it with a tiny twig handle or a bead.
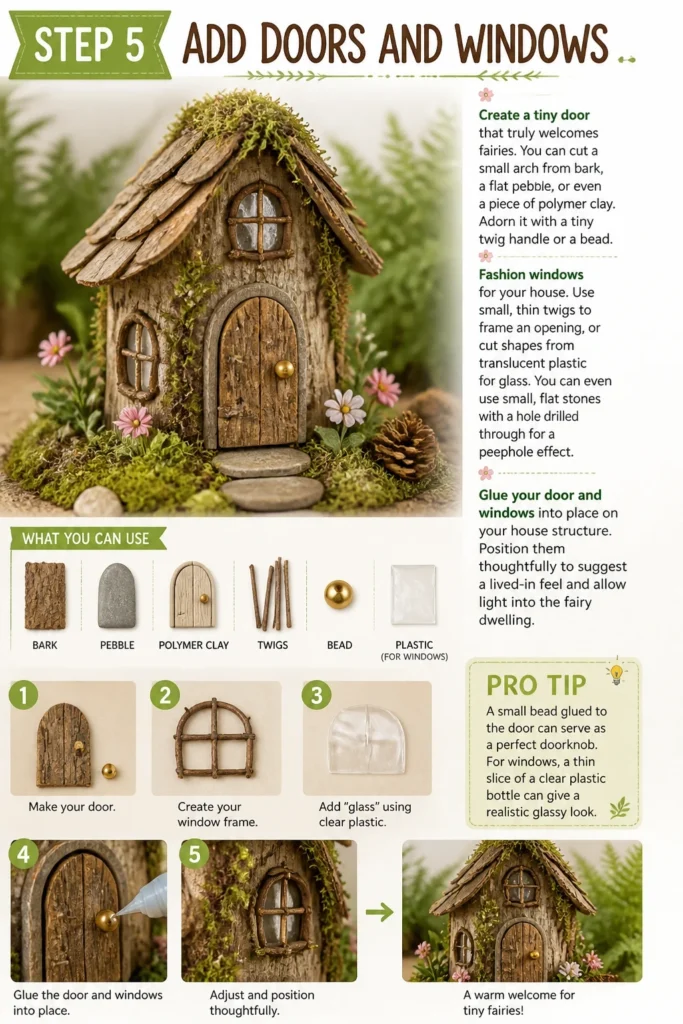
Fashion windows for your house. Use small, thin twigs to frame an opening, or cut shapes from translucent plastic for “glass.” You can even use small, flat stones with a hole drilled through for a peephole effect.
Glue your door and windows into place on your house structure. Position them thoughtfully to suggest a lived-in feel and allow light into the fairy dwelling.
Pro Tip: A small bead glued to the door can serve as a perfect doorknob. For windows, a thin slice of a clear plastic bottle can give a realistic glassy look.
Step 6: Decorate with Natural Elements
Embellish the exterior of your fairy house with smaller, intricate details. Attach tiny pebbles around the base for a stone foundation, or line the corners with thin twigs for structural accents.
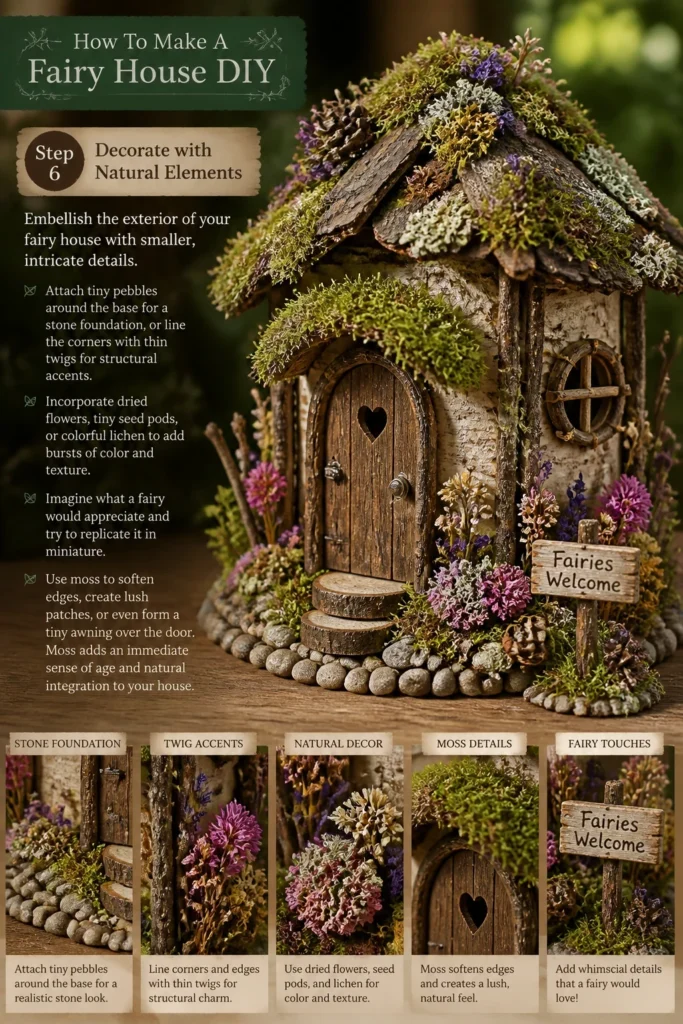
Incorporate dried flowers, tiny seed pods, or colorful lichen to add bursts of color and texture. Imagine what a fairy would appreciate and try to replicate it in miniature.
Use moss to soften edges, create lush patches, or even form a tiny awning over the door. Moss adds an immediate sense of age and natural integration to your house.
Step 7: Create a Welcoming Garden and Path
Design a miniature garden around your fairy house. Use small pebbles to create a winding path leading to the door. Line the path with tiny twigs or more moss.
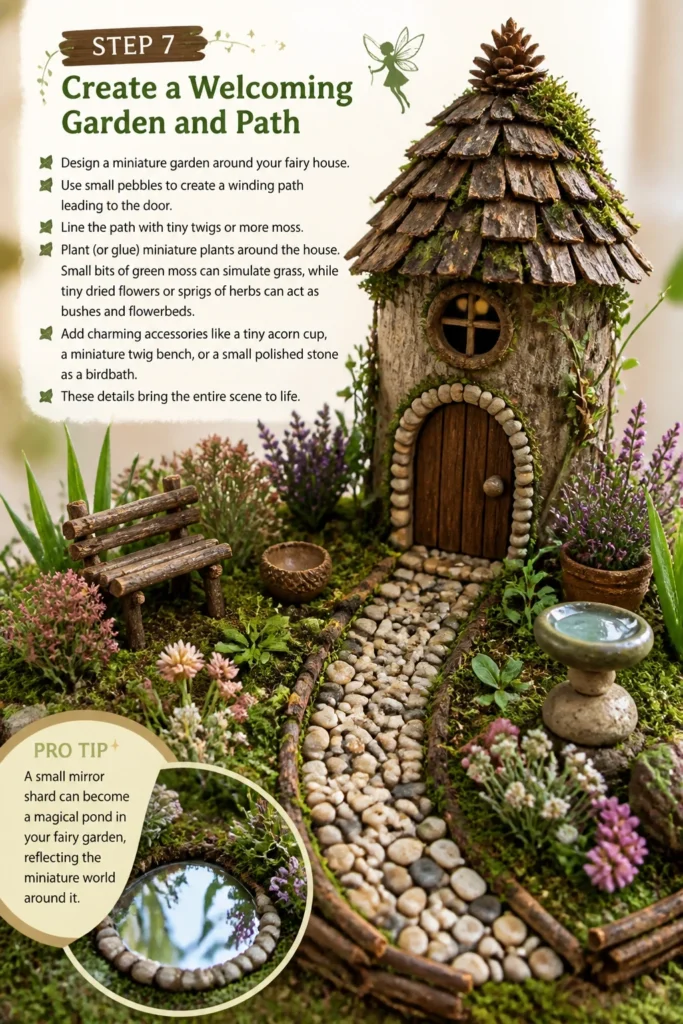
Plant (or glue) miniature plants around the house. Small bits of green moss can simulate grass, while tiny dried flowers or sprigs of herbs can act as bushes and flowerbeds.
Add charming accessories like a tiny acorn cup, a miniature twig bench, or a small polished stone as a birdbath. These details bring the entire scene to life.
Pro Tip: A small mirror shard can become a magical pond in your fairy garden, reflecting the miniature world around it.
Step 8: Seal and Protect (Optional)
Consider sealing your fairy house if you plan for it to live outdoors. A clear, non-toxic outdoor sealant or varnish will protect it from the elements and extend its lifespan.
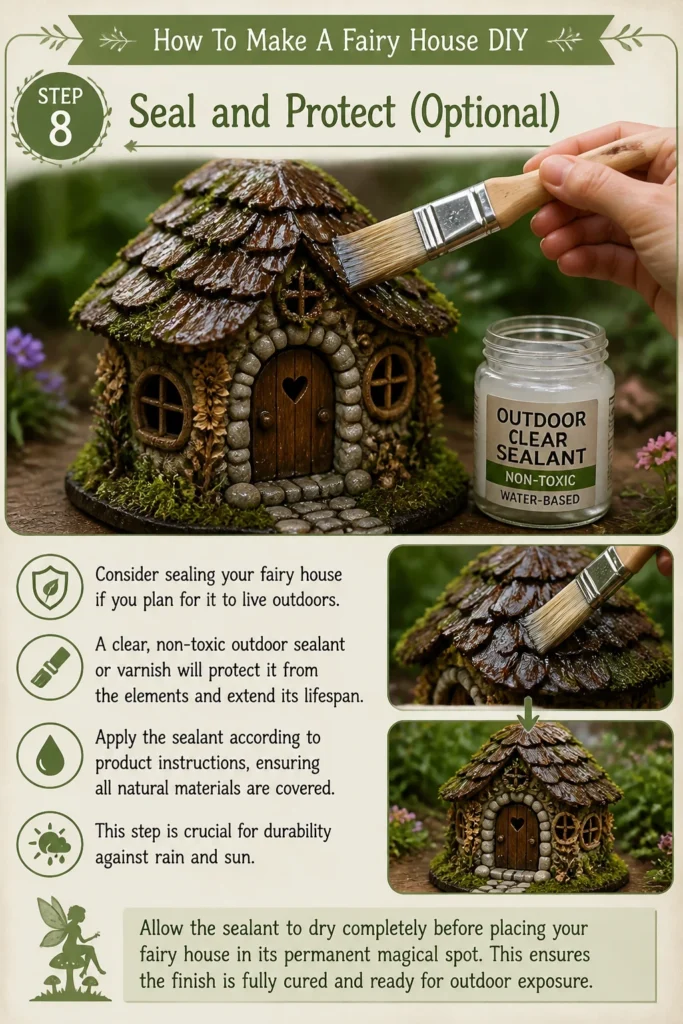
Apply the sealant according to product instructions, ensuring all natural materials are covered. This step is crucial for durability against rain and sun.
Allow the sealant to dry completely before placing your fairy house in its permanent magical spot. This ensures the finish is fully cured and ready for outdoor exposure.
Common Mistakes to Avoid
Rushing the Drying Process
Many crafters get excited and try to move on too quickly. Not allowing glue to fully dry between steps can lead to parts shifting, falling off, or the entire structure becoming unstable. Patience ensures a durable and beautiful fairy house.
Overloading with Decorations
While it’s tempting to add every beautiful natural find, too many decorations can make your fairy house look cluttered rather than charming. Step back periodically and assess if each addition truly enhances the overall design or detracts from it.
Ignoring the Base
Sometimes the base is an afterthought, but a wobbly or undersized base can ruin an otherwise perfect house. Ensure your base is stable, level, and large enough to support the house and any surrounding garden elements you plan to add.
Using Non-Durable Materials for Outdoors
If your fairy house is destined for the garden, using materials that degrade quickly (like fresh leaves or unsealed bark) will result in a short-lived creation. Opt for dried, sturdy elements and consider sealing them for longevity.
Troubleshooting
My House is Wobbly
If your fairy house feels unstable, the initial base or the wall attachments might not be secure enough. Reinforce the connection points with more strong glue, or add small, flat stones around the interior base of the walls for added weight and stability. Ensure you’re allowing adequate drying time for all adhesives.
Decorations Keep Falling Off
This usually indicates insufficient glue or an unsuitable type of glue for the material. For heavier items or smoother surfaces, a hot glue gun provides quick, strong adhesion. For delicate items like moss, a craft glue designed for fabric or porous materials might work best. Hold pieces firmly in place until the glue begins to set.
Moss is Turning Brown
If you used fresh moss, it will naturally dry out and change color. For outdoor houses, this is part of its natural cycle. For indoor houses, you can use preserved or artificial moss, which retains its vibrant green color. If using fresh, a light misting of water might keep it green a bit longer, but it’s often temporary.
Key Takeaways
- Gathering diverse natural materials is key to a unique fairy house.
- A strong, stable base is crucial for the longevity of your creation.
- Patience with drying times ensures a durable and well-constructed house.
- Thoughtful placement of doors, windows, and decorations enhances charm.
- A miniature garden brings the entire fairy scene to life.
- Sealing your house is essential for outdoor display and protection.
Frequently Asked Questions
What kind of glue is best for a fairy house?
A strong, waterproof craft glue like wood glue or PVA glue is excellent for primary construction. For quick adhesion and attaching smaller, lighter elements, a hot glue gun is very effective. For outdoor houses, ensure your chosen glue is suitable for exterior use.
Can I make a fairy house with kids?
Absolutely! Fairy house crafting is a wonderful activity for children. Supervise them closely, especially with hot glue guns or sharp tools. Focus on the gathering of materials and the creative decorating aspects, allowing them to express their imagination freely.
How long will a fairy house last outdoors?
The lifespan of an outdoor fairy house varies depending on the materials used, the climate, and whether it was sealed. With sturdy materials and a good sealant, it can last several years. Without sealing, natural elements will decompose more quickly, becoming part of the natural cycle of your garden.
Where should I place my finished fairy house?
Choose a spot that feels magical and inviting. Tucked amongst flowers, under a favorite tree, or nestled in a quiet corner of your garden are ideal locations. If indoors, a bookshelf, a windowsill, or a special display table works perfectly. Consider a spot where you can easily admire your creation.
Our Top Recommended Finds
- Strong Craft Glue: Essential for building a durable structure that withstands time and elements.
- Miniature Accessory Kit: Small resin animals, tiny benches, or miniature gardening tools can add charming details to your fairy scene.
- Clear Outdoor Sealant: Protects your natural materials from weather damage, preserving your hard work for longer enjoyment.
Unleash Your Inner Architect
Creating a fairy house is more than just a craft project; it’s an invitation to connect with nature and rekindle your sense of wonder.
Each twig, stone, and leaf you incorporate tells a story, building a tiny realm of magic right in your own space.
So, gather your supplies, let your imagination guide you, and start building that enchanting home today. Who knows what tiny visitors might arrive?
Beginner-friendly templates, step-by-step guides,
and weekly project ideas in your inbox.