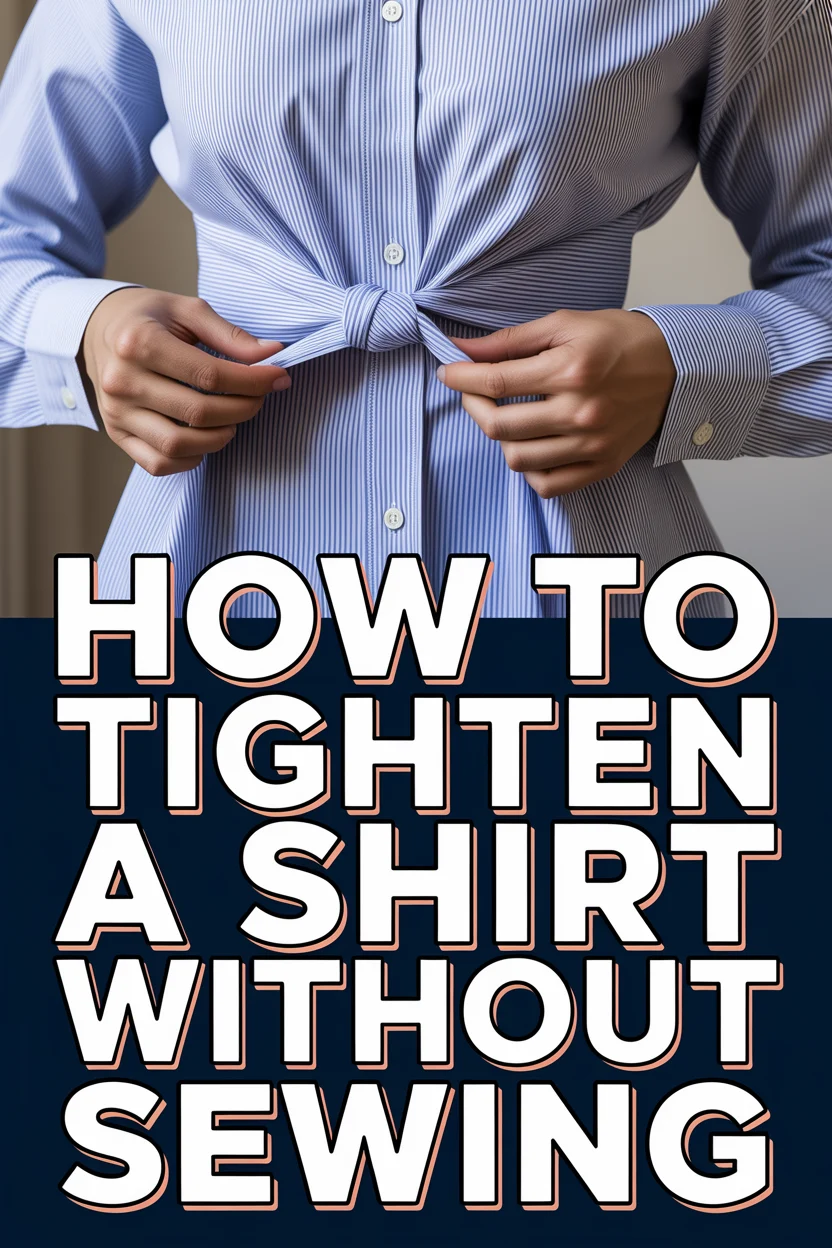
👕 How To Tighten A Shirt Without Sewing

Beginner-friendly templates, step-by-step guides,
and weekly project ideas in your inbox.
Ever found a shirt you love, only to discover it’s a little too baggy? I’ve been there countless times, feeling frustrated by ill-fitting tops. This guide shares the tried-and-true methods I’ve used to rescue my favorite shirts, no needle and thread required.
Quick Overview
You’re about to learn how to transform a loose-fitting shirt into a perfectly tailored piece using simple, no-sew techniques. These methods are quick, effective, and easily reversible.
- Time needed: 5-15 minutes (per shirt, depending on method)
- Difficulty: Beginner
- What you’ll need: Rubber bands, safety pins, hair ties, fabric clips, an iron, starch (optional), a belt or scarf.
Step-by-Step Instructions
Step 1: Assess Your Shirt and Desired Fit
Before you begin any tightening, wear the shirt you want to adjust. This helps you understand exactly where it feels too loose.
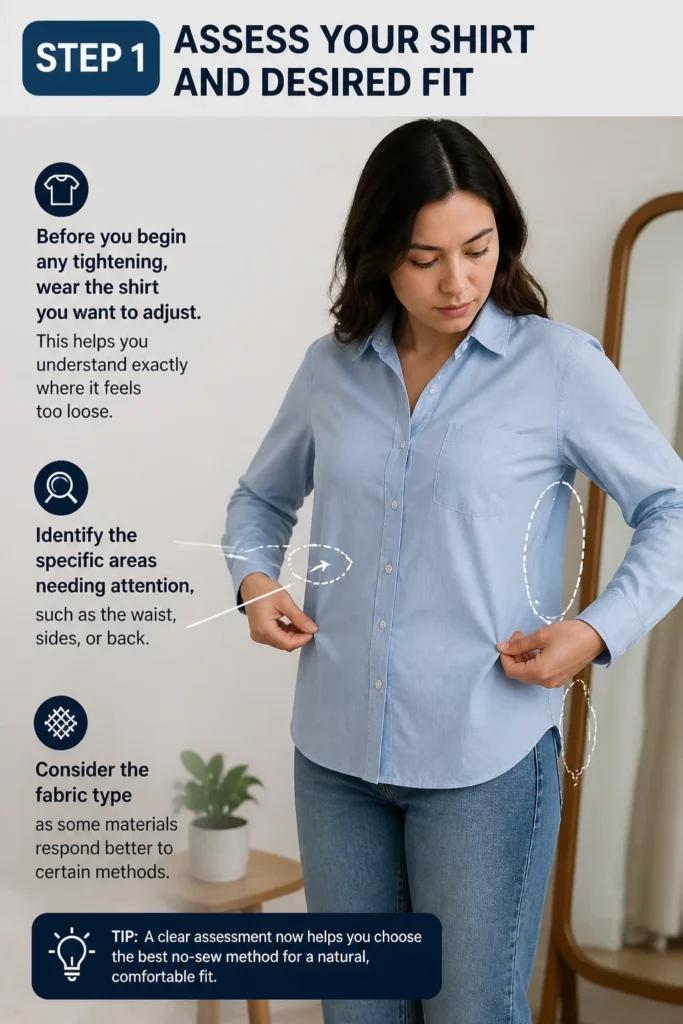
Identify the specific areas needing attention, such as the waist, sides, or back. Consider the fabric type as some materials respond better to certain methods.
Step 2: The Classic Knot Technique (For Hems)
This is a popular and stylish way to tighten the bottom of a shirt. It works especially well for t-shirts and casual tops.
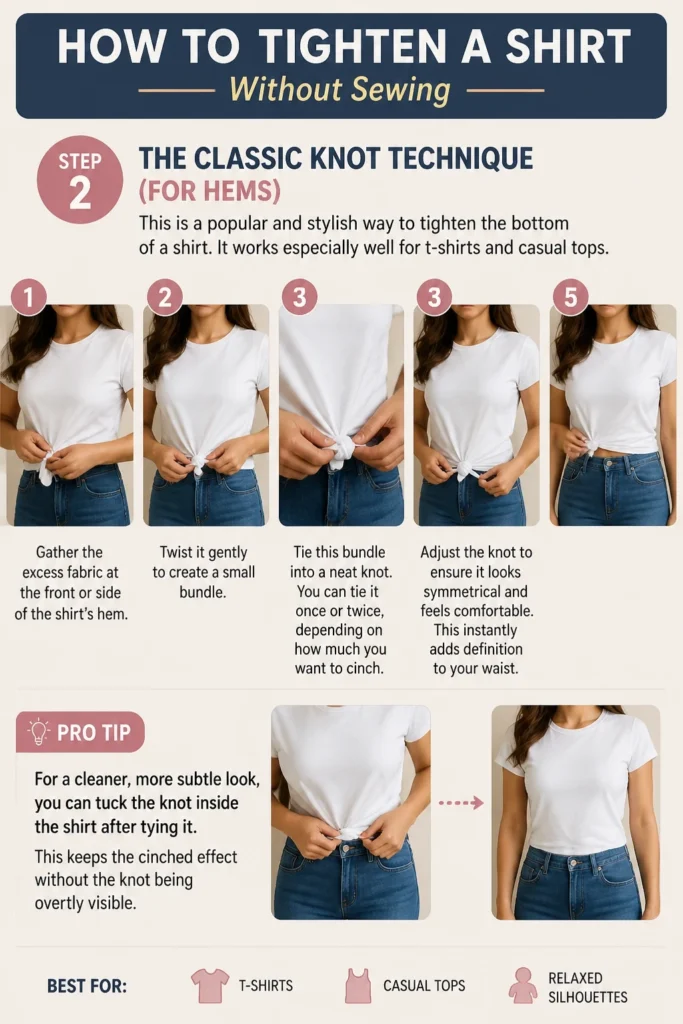
Gather the excess fabric at the front or side of the shirt’s hem. Twist it gently to create a small bundle.
Tie this bundle into a neat knot. You can tie it once or twice, depending on how much you want to cinch.
Adjust the knot to ensure it looks symmetrical and feels comfortable. This instantly adds definition to your waist.
Pro Tip: For a cleaner, more subtle look, you can tuck the knot inside the shirt after tying it. This keeps the cinched effect without the knot being overtly visible.
Step 3: The Rubber Band or Hair Tie Method (For Waist/Sides)
This technique is excellent for tightening the sides or back of a shirt discreetly. It’s best used on the inside of the garment.
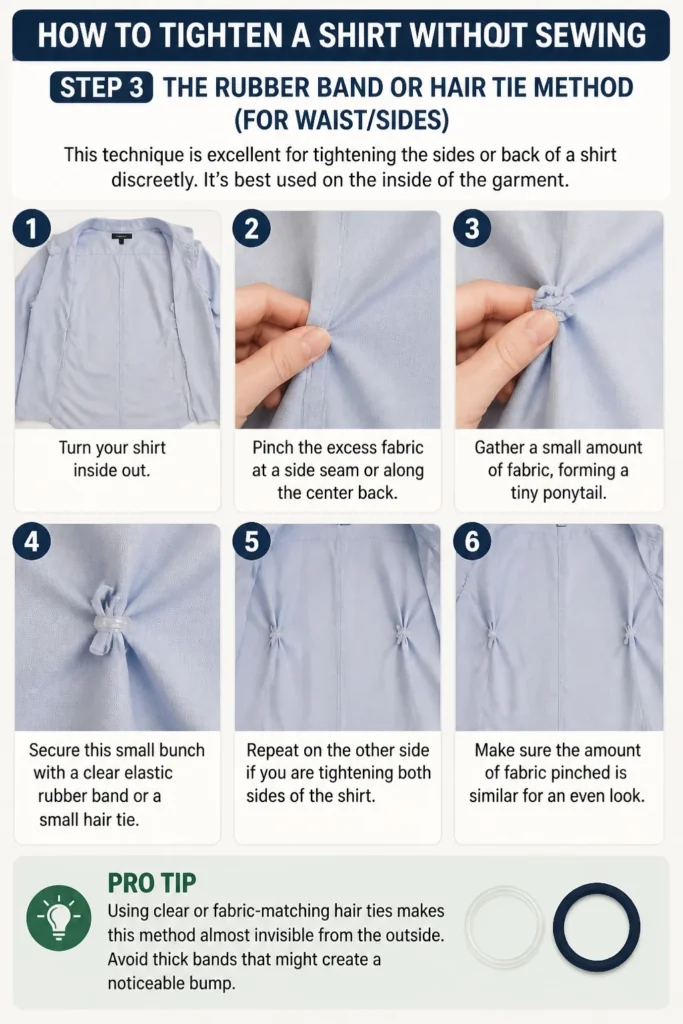
Turn your shirt inside out. Pinch the excess fabric at a side seam or along the center back.
Gather a small amount of fabric, forming a tiny ponytail. Secure this small bunch with a clear elastic rubber band or a small hair tie.
Repeat on the other side if you are tightening both sides of the shirt. Make sure the amount of fabric pinched is similar for an even look.
Pro Tip: Using clear or fabric-matching hair ties makes this method almost invisible from the outside. Avoid thick bands that might create a noticeable bump.
Step 4: The Safety Pin Secret (For Discreet Tightening)
Safety pins are your best friend for subtle, hidden adjustments. They work well for small amounts of excess fabric.
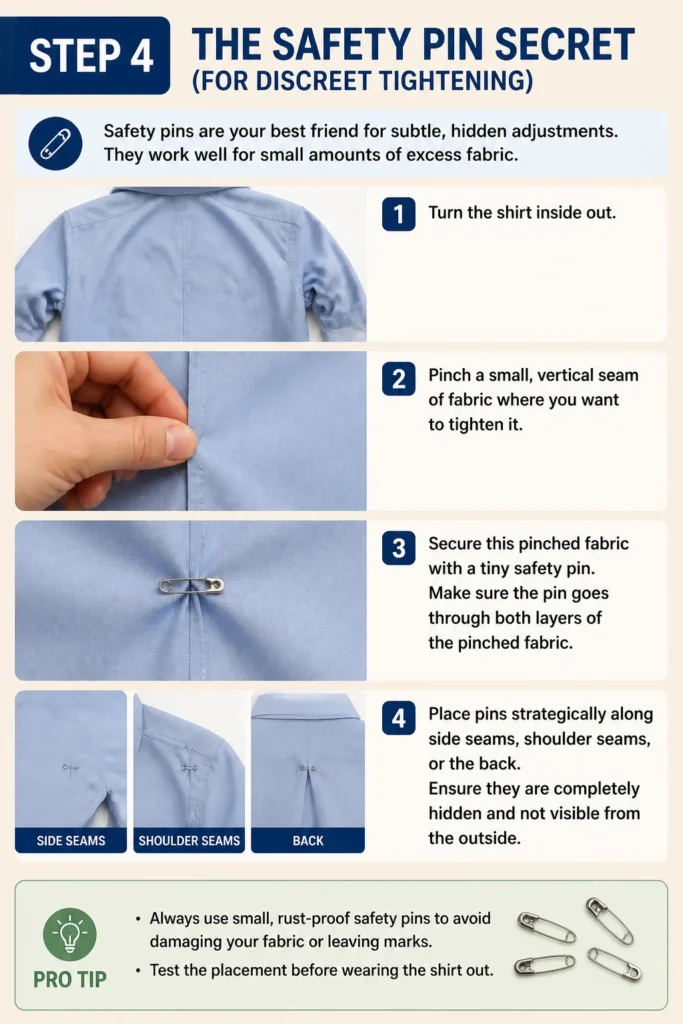
Turn the shirt inside out. Pinch a small, vertical seam of fabric where you want to tighten it.
Secure this pinched fabric with a tiny safety pin. Make sure the pin goes through both layers of the pinched fabric.
Place pins strategically along side seams, shoulder seams, or the back. Ensure they are completely hidden and not visible from the outside.
Pro Tip: Always use small, rust-proof safety pins to avoid damaging your fabric or leaving marks. Test the placement before wearing the shirt out.
Step 5: The Fabric Clip or Brooch Hack (For Style and Fit)
This method offers a dual benefit: tightening your shirt and adding a decorative element. It’s perfect for dressier occasions or to add flair.
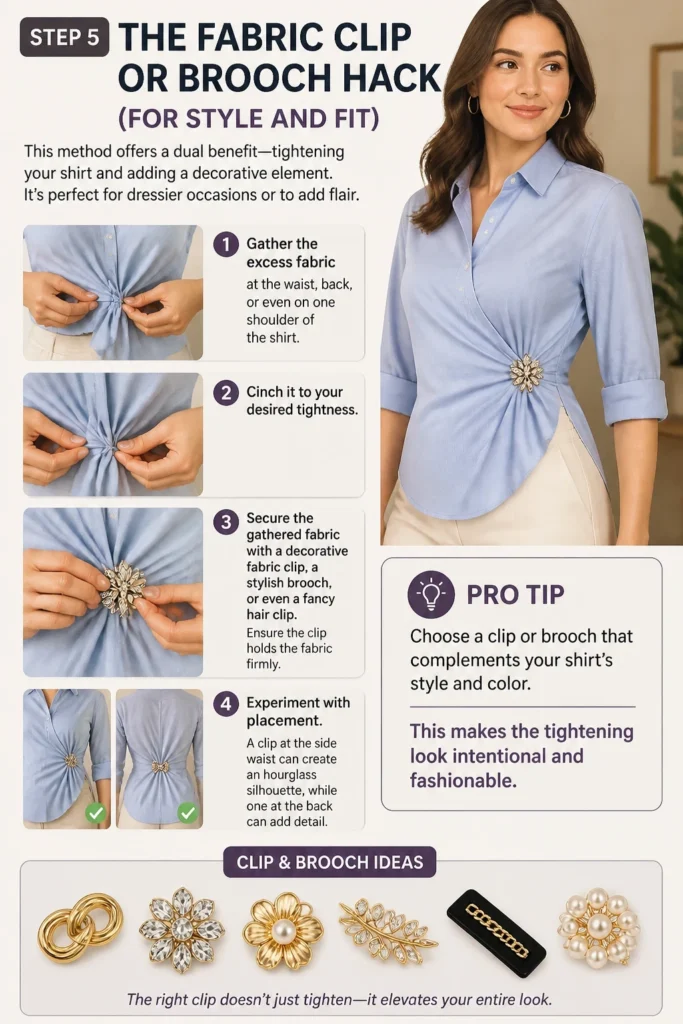
Gather the excess fabric at the waist, back, or even on one shoulder of the shirt. Cinch it to your desired tightness.
Secure the gathered fabric with a decorative fabric clip, a stylish brooch, or even a fancy hair clip. Ensure the clip holds the fabric firmly.
Experiment with placement. A clip at the side waist can create an hourglass silhouette, while one at the back can add detail.
Pro Tip: Choose a clip or brooch that complements your shirt’s style and color. This makes the tightening look intentional and fashionable.
Step 6: Ironing and Starching (For a Crisper, Tighter Feel)
While not directly cinching, ironing with starch can give your shirt a crisper, more structured feel, making it appear tighter. This is particularly effective for cotton and linen shirts.
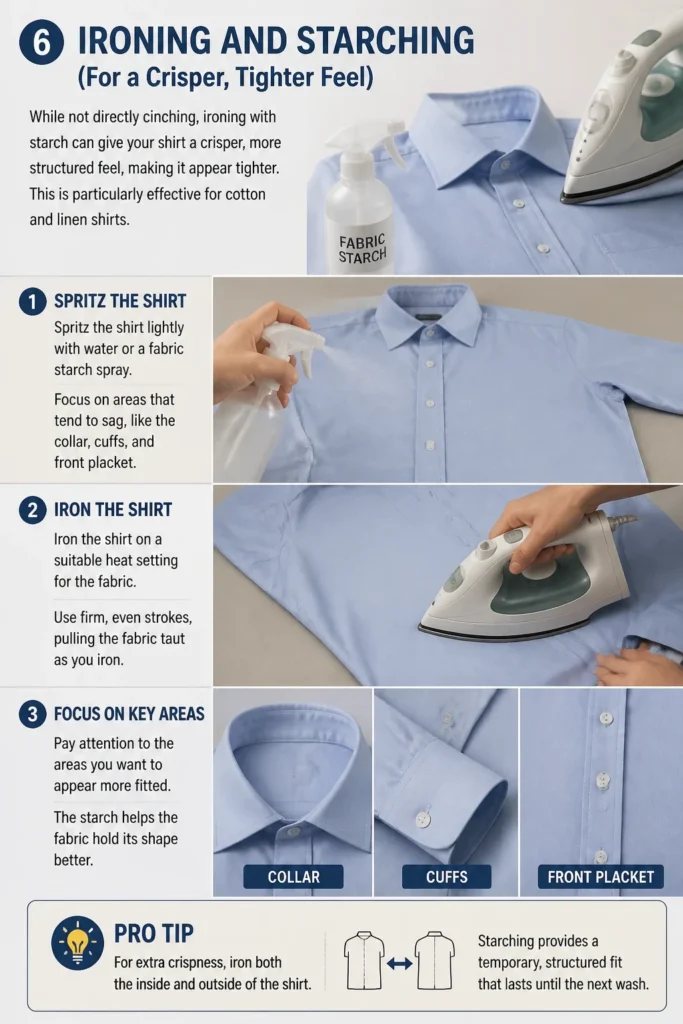
Spritz the shirt lightly with water or a fabric starch spray. Focus on areas that tend to sag, like the collar, cuffs, and front placket.
Iron the shirt on a suitable heat setting for the fabric. Use firm, even strokes, pulling the fabric taut as you iron.
Pay attention to the areas you want to appear more fitted. The starch helps the fabric hold its shape better.
Pro Tip: For extra crispness, iron both the inside and outside of the shirt. Starching provides a temporary, structured fit that lasts until the next wash.
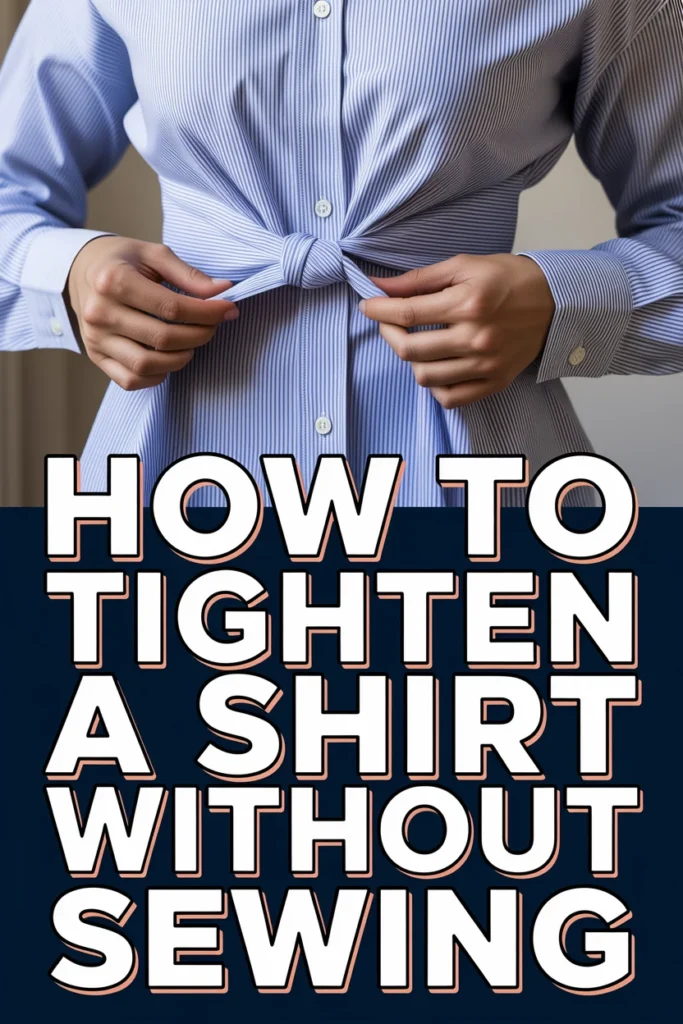
Step 7: The Belt or Scarf Cinch (For Waist Definition)
This is one of the easiest and most effective ways to define your waist and tighten a loose shirt, especially longer tunics or button-downs.
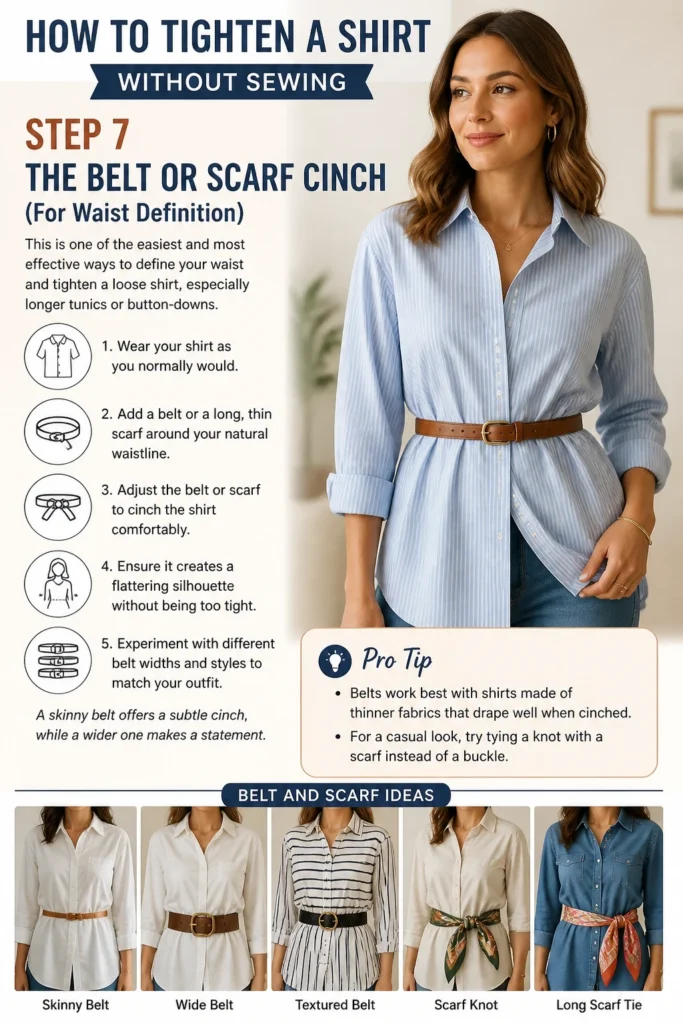
Wear your shirt as you normally would. Add a belt or a long, thin scarf around your natural waistline.
Adjust the belt or scarf to cinch the shirt comfortably. Ensure it creates a flattering silhouette without being too tight.
Experiment with different belt widths and styles to match your outfit. A skinny belt offers a subtle cinch, while a wider one makes a statement.
Pro Tip: Belts work best with shirts made of thinner fabrics that drape well when cinched. For a casual look, try tying a knot with a scarf instead of a buckle.
Step 8: Layering Smartly (For an Illusion of Fit)
Layering can create the illusion of a tighter fit by adding structure and minimizing excess fabric. This is a versatile styling technique.
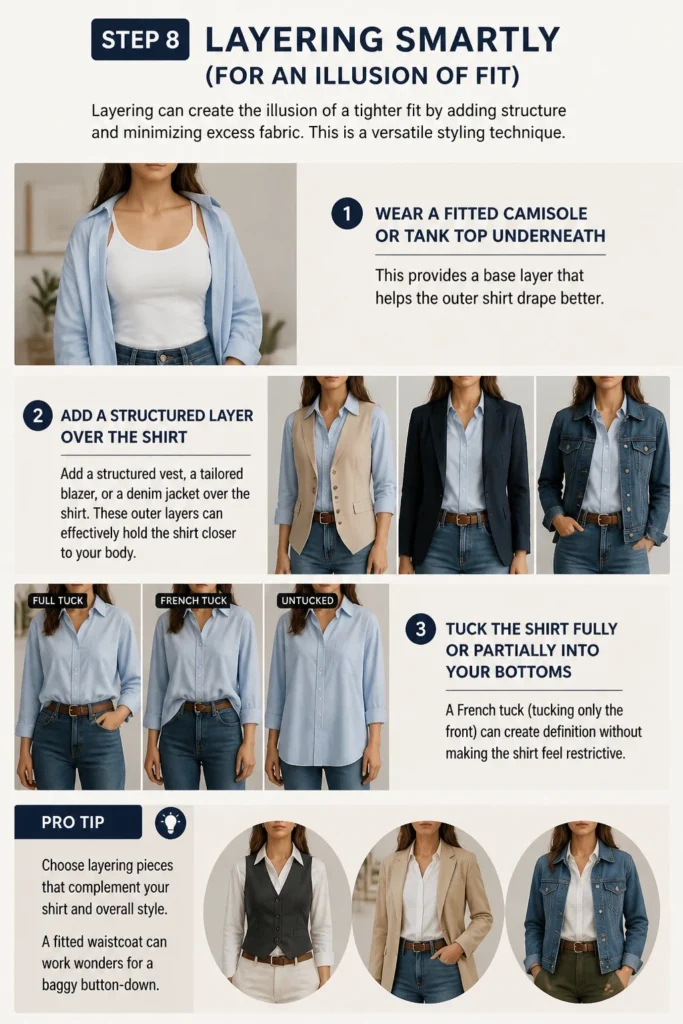
Wear a fitted camisole or tank top underneath your loose shirt. This provides a base layer that helps the outer shirt drape better.
Add a structured vest, a tailored blazer, or a denim jacket over the shirt. These outer layers can effectively hold the shirt closer to your body.
Tuck the shirt fully or partially into your bottoms. A French tuck (tucking only the front) can create definition without making the shirt feel restrictive.
Pro Tip: Choose layering pieces that complement your shirt and overall style. A fitted waistcoat can work wonders for a baggy button-down.
Common Mistakes to Avoid
Over-Tightening
Attempting to cinch your shirt too much can lead to discomfort and a strained, unnatural appearance. It might also cause the fabric to pull awkwardly. Always check for your range of motion and ensure the shirt still feels comfortable.
Using Visible Fasteners
Obvious rubber bands, large safety pins, or bulky clips detract from the polished look you’re trying to achieve. Prioritize discreet placement for all hidden fasteners. If using decorative clips, ensure they enhance the shirt, not just hold it.
Ignoring Fabric Type
Different fabrics react differently to tightening methods. Delicate materials like silk or chiffon can easily be snagged or damaged by pins. Stretchy knits might show cinching more obviously than woven fabrics. Always consider the material before choosing a technique.
Uneven Cinching
Failing to tighten both sides of a shirt equally can result in an awkward, lopsided appearance. When using methods like the rubber band or safety pin, ensure you pinch and secure similar amounts of fabric on each side for a balanced look.
Troubleshooting
Shirt Still Feels Baggy
If one method isn’t quite enough, try combining a few. For instance, use a hidden safety pin at the back combined with a front knot. Sometimes a belt over a subtly cinched shirt provides the perfect level of tightness.
Fasteners Show Through
If your rubber bands or pins are visible, switch to smaller, clear elastic bands. For safety pins, ensure they are tiny and placed deep within a seam or fold of fabric. Always turn the shirt inside out for hidden adjustments.
Fabric Wrinkles Excessively
When you cinch fabric, some wrinkling is natural. To minimize this, gently pull and smooth the fabric around the tightened area after securing it. A light spritz of water and a quick pass with an iron can also help smooth out any unwanted creases.
Key Takeaways
- No-sew shirt tightening methods are quick, practical, and easily reversible.
- Techniques range from simple knots and hidden fasteners to stylish clips and belts.
- Always consider your shirt’s fabric type and your desired comfort level before choosing a method.
- Discretion, symmetry, and strategic placement are crucial for a polished, natural-looking fit.
- Experiment with different techniques to find the best approach for each individual shirt and occasion.
- Layering and starching can also contribute to a seemingly tighter or more structured fit.
Frequently Asked Questions
Can these methods damage my shirt?
Generally, these methods are safe for most fabrics if done carefully. Avoid pulling too hard on delicate materials and always use rust-proof safety pins to prevent staining. Test on an inconspicuous area first if you’re concerned.
How long do these tightening methods last?
Most of these no-sew adjustments are temporary. They will typically hold for a day’s wear or until the shirt is washed. Starching effects last until the next laundry cycle. You’ll likely need to re-adjust them each time you wear the shirt.
Will these techniques work on all shirt types?
They work best on woven fabrics like cotton, linen, and blends. Stretchy knit fabrics (like t-shirt material) can be tightened, but the cinching might be more noticeable, and the fabric might stretch back slightly over time.
Are there any permanent no-sew options?
No, all the methods discussed are temporary adjustments. For permanent tightening, sewing is required. These no-sew hacks are designed for quick fixes and styling versatility without altering the garment permanently.
Our Top Recommended Finds
- Clear Elastic Hair Ties: These tiny, transparent bands are perfect for discreetly cinching fabric on the inside of your shirt.
- Assorted Safety Pins: A variety pack ensures you have the right size, from tiny ones for delicate fabrics to slightly larger ones for heavier materials.
- Fabric Starch Spray: An easy way to add temporary crispness and structure to cotton or linen shirts, making them feel and look more tailored.
Embrace Your Perfect Fit Today
No more letting slightly oversized shirts gather dust in your closet. With these simple, no-sew techniques, you can easily transform your wardrobe and wear every shirt with confidence.
Grab a few tools and start experimenting – your perfectly fitted style awaits! You might even discover new ways to personalize your favorite pieces.
Beginner-friendly templates, step-by-step guides,
and weekly project ideas in your inbox.