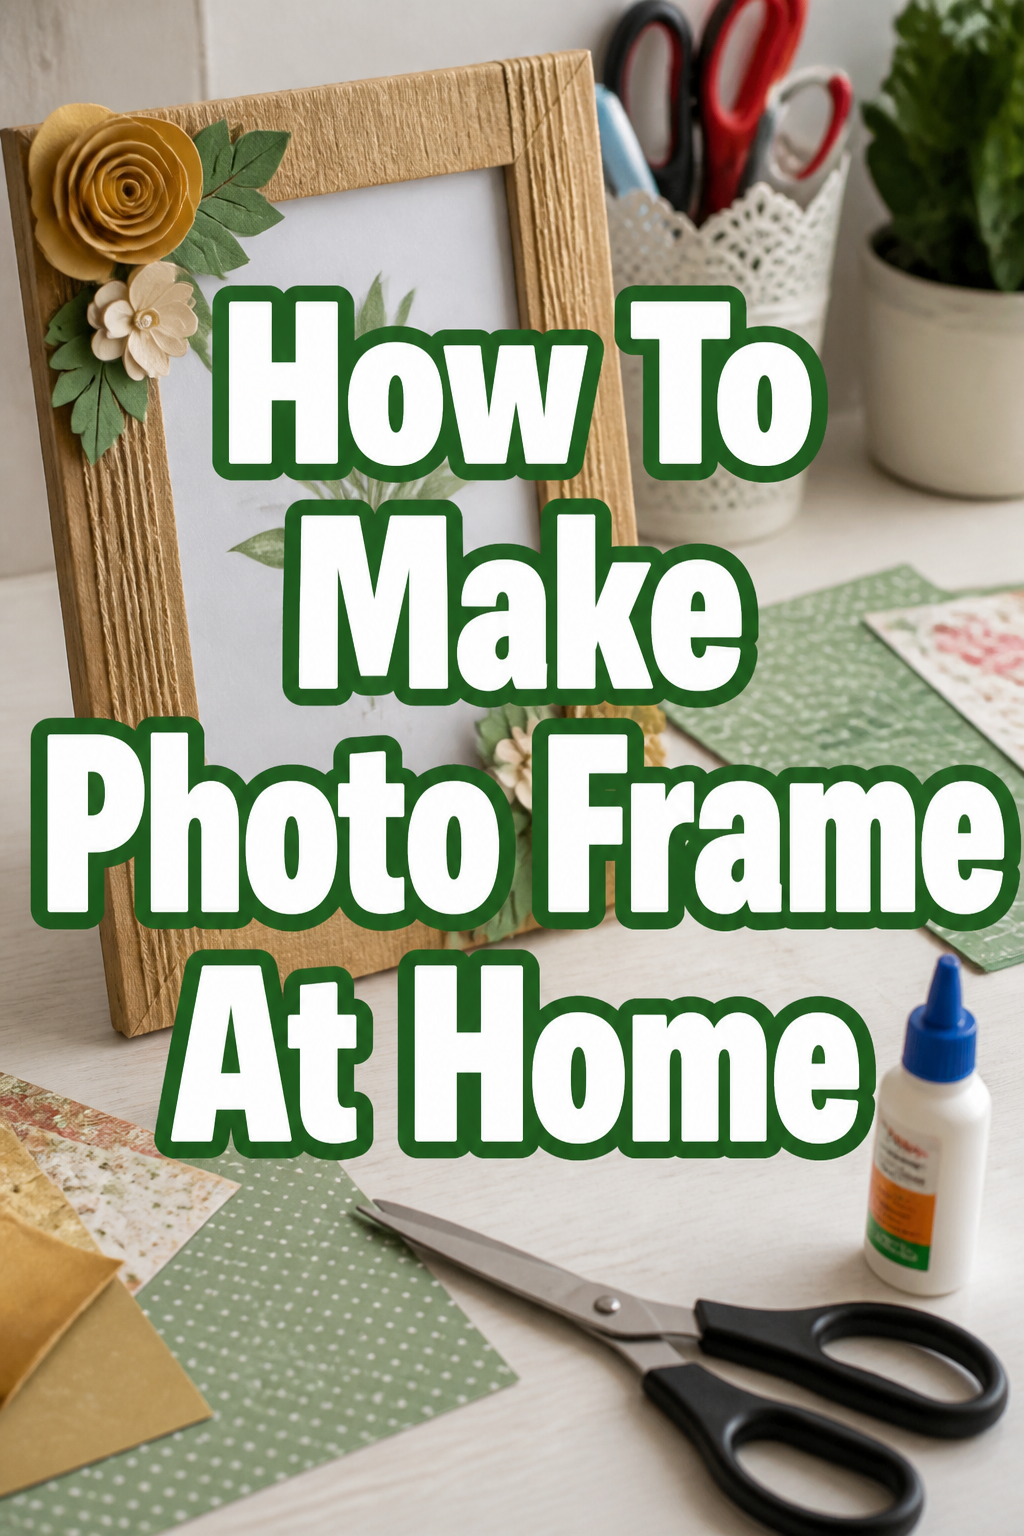
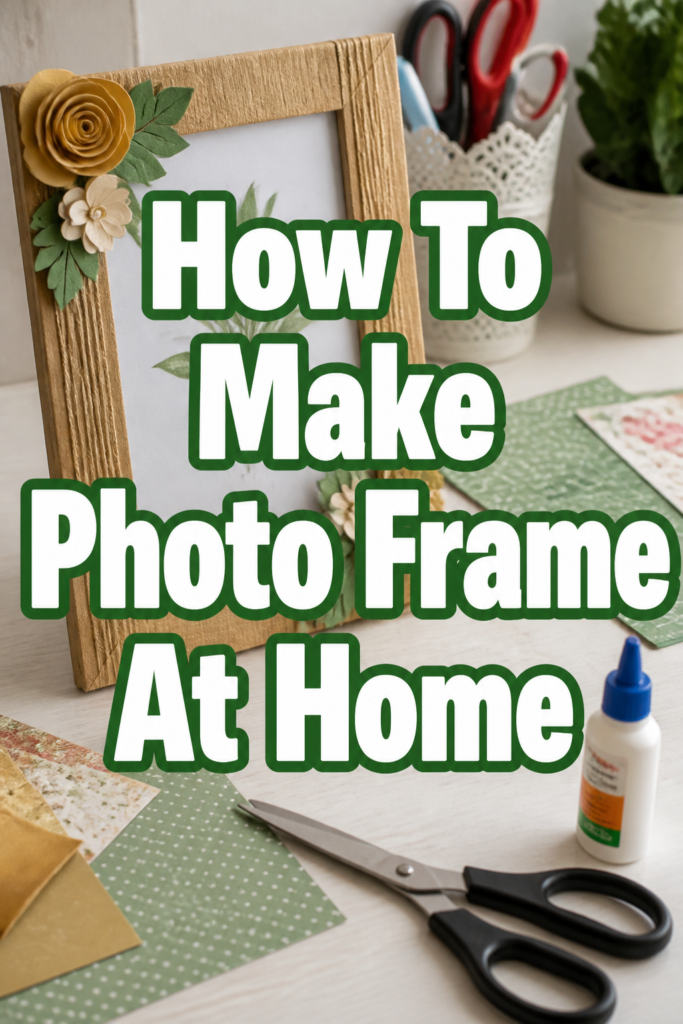
🖼️ How To Make Photo Frame At Home

Beginner-friendly templates, step-by-step guides,
and weekly project ideas in your inbox.
Do you have cherished photos tucked away, waiting for their moment in the spotlight?
Transforming those precious memories into tangible art is a joy I’ve experienced many times.
This guide shares the practical steps I use to create beautiful, personalized photo frames right from my home.
Quick Overview
Crafting your own photo frame is a rewarding project that adds a unique touch to your decor.
You’ll learn to measure, cut, assemble, and decorate a custom frame for your favorite pictures.
- Time needed: 2-4 hours (including drying time)
- Difficulty: Beginner
- What you’ll need: Cardboard, craft knife, ruler, glue, decorative items
Step-by-Step Instructions
Step 1: Gather Your Materials and Tools
Collect all your supplies before you begin. This helps keep your workspace organized and prevents interruptions.
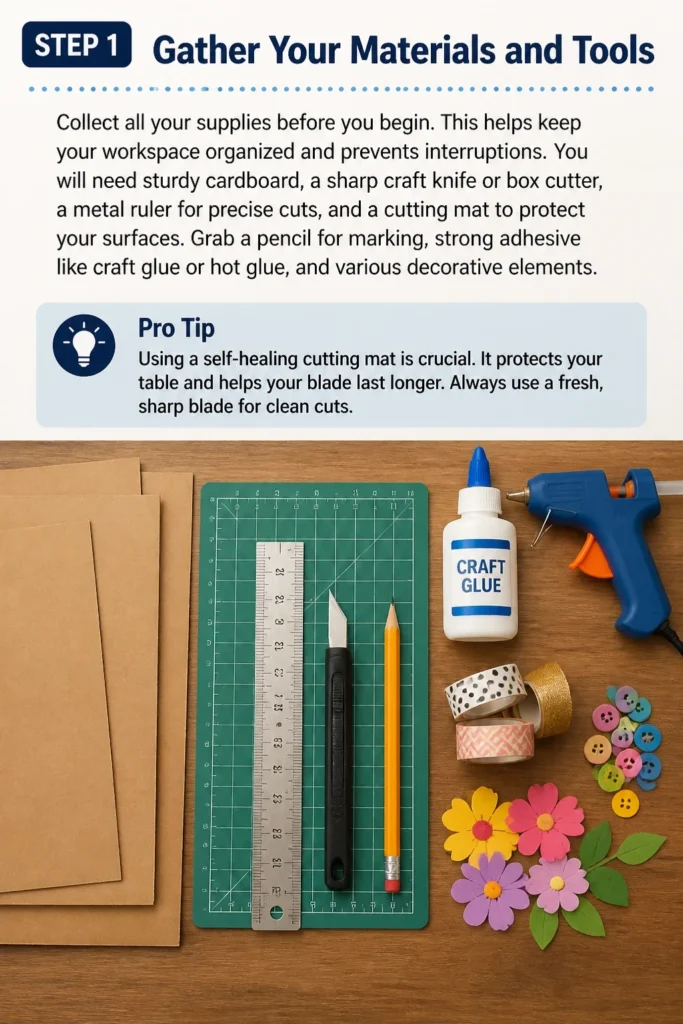
You will need sturdy cardboard, a sharp craft knife or box cutter, a metal ruler for precise cuts, and a cutting mat to protect your surfaces.
Grab a pencil for marking, strong adhesive like craft glue or hot glue, and various decorative elements.
Pro Tip: Using a self-healing cutting mat is crucial. It protects your table and helps your blade last longer. Always use a fresh, sharp blade for clean cuts.
Step 2: Measure and Mark Your Frame Base
Decide on the size of your photo. This will determine the inner opening of your frame.
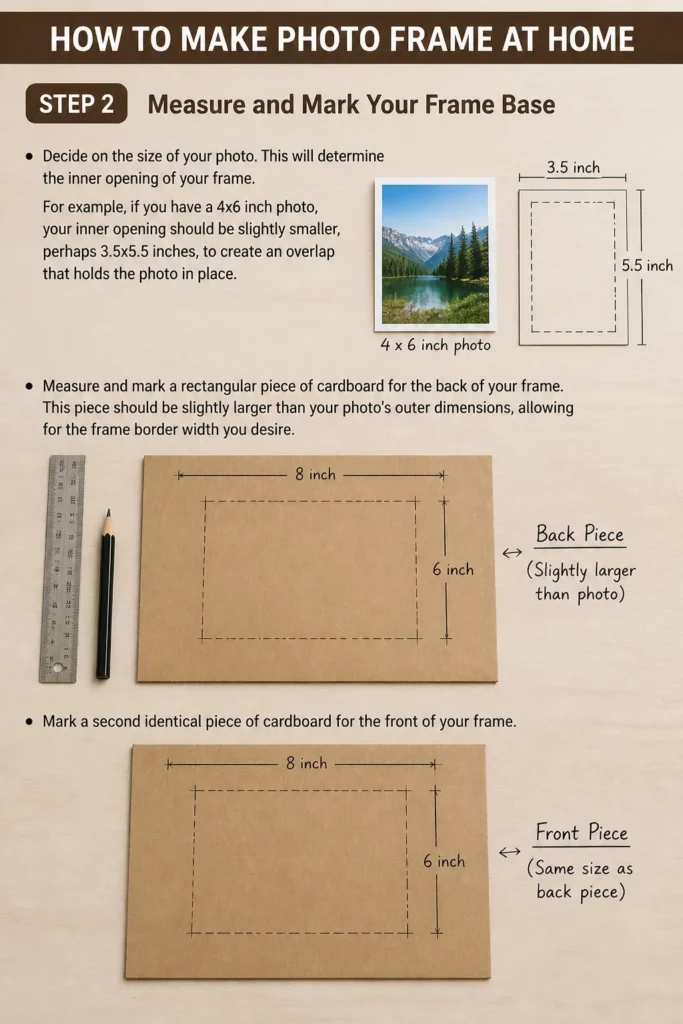
For example, if you have a 4×6 inch photo, your inner opening should be slightly smaller, perhaps 3.5×5.5 inches, to create an overlap that holds the photo in place.
Measure and mark a rectangular piece of cardboard for the back of your frame. This piece should be slightly larger than your photo’s outer dimensions, allowing for the frame border width you desire.
Mark a second identical piece of cardboard for the front of your frame.
Step 3: Cut Out Your Frame Pieces
Carefully cut out both marked cardboard rectangles using your craft knife and metal ruler.
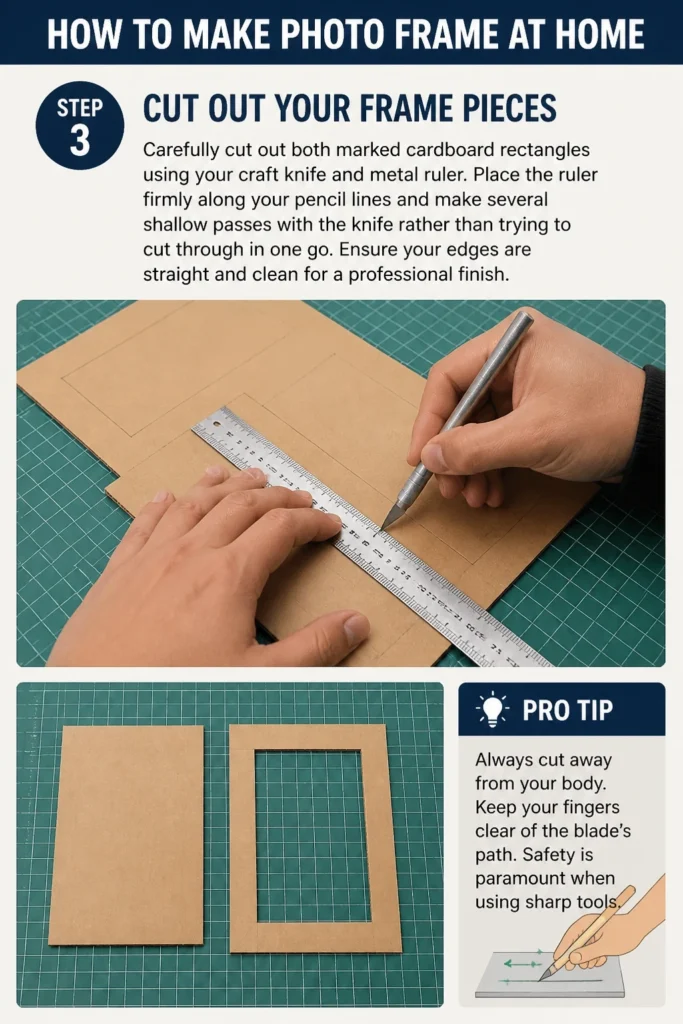
Place the ruler firmly along your pencil lines and make several shallow passes with the knife rather than trying to cut through in one go.
Ensure your edges are straight and clean for a professional finish.
Pro Tip: Always cut away from your body. Keep your fingers clear of the blade’s path. Safety is paramount when using sharp tools.
Step 4: Create the Photo Opening
Take the cardboard piece designated for the front of your frame. This is where your photo will show through.
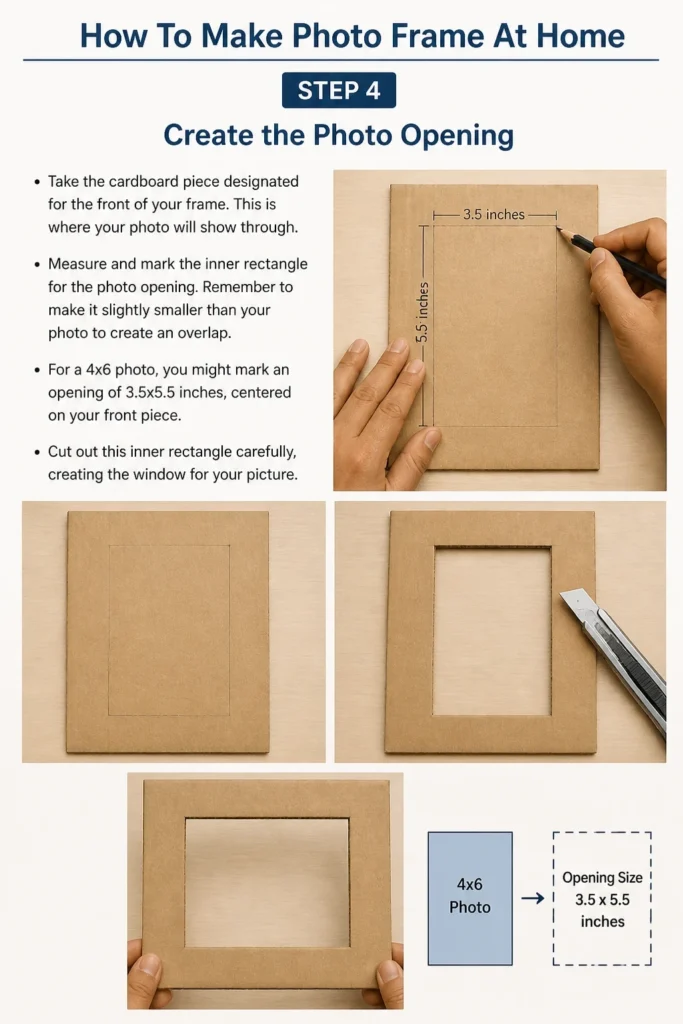
Measure and mark the inner rectangle for the photo opening. Remember to make it slightly smaller than your photo to create an overlap.
For a 4×6 photo, you might mark an opening of 3.5×5.5 inches, centered on your front piece.
Cut out this inner rectangle carefully, creating the window for your picture.
Step 5: Assemble the Frame Layers
Apply a generous, even layer of glue along the outer edges of the front frame piece, leaving the bottom edge unglued for now.
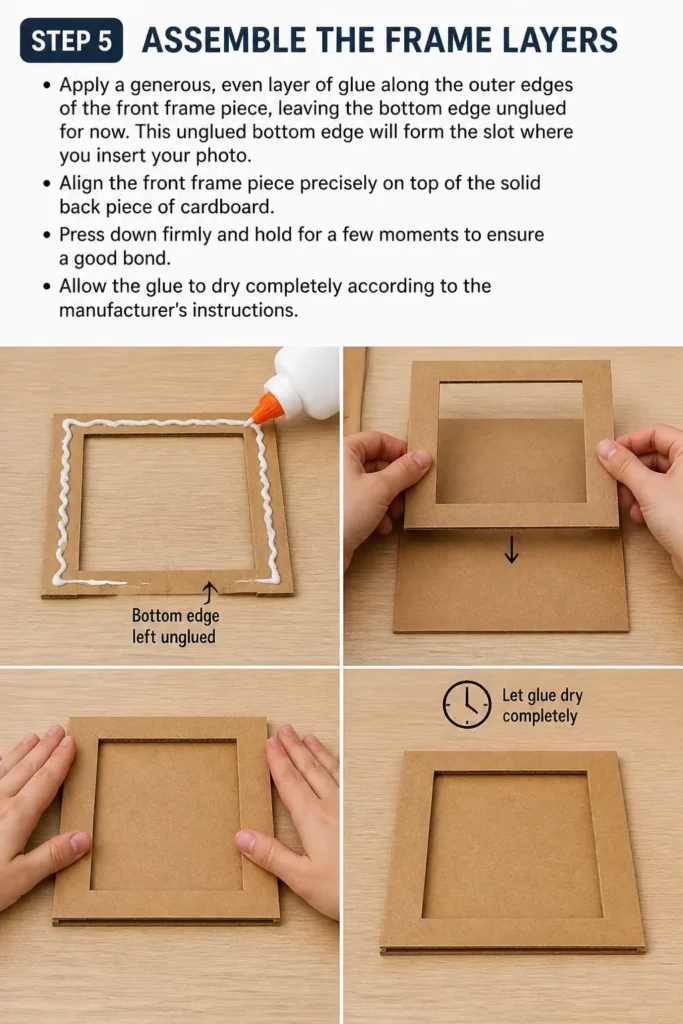
This unglued bottom edge will form the slot where you insert your photo.
Align the front frame piece precisely on top of the solid back piece of cardboard.
Press down firmly and hold for a few moments to ensure a good bond.
Allow the glue to dry completely according to the manufacturer’s instructions.
Step 6: Add a Backing and Hanger (Optional)
If you want a more robust backing, cut another piece of cardboard slightly smaller than your frame’s outer dimensions.
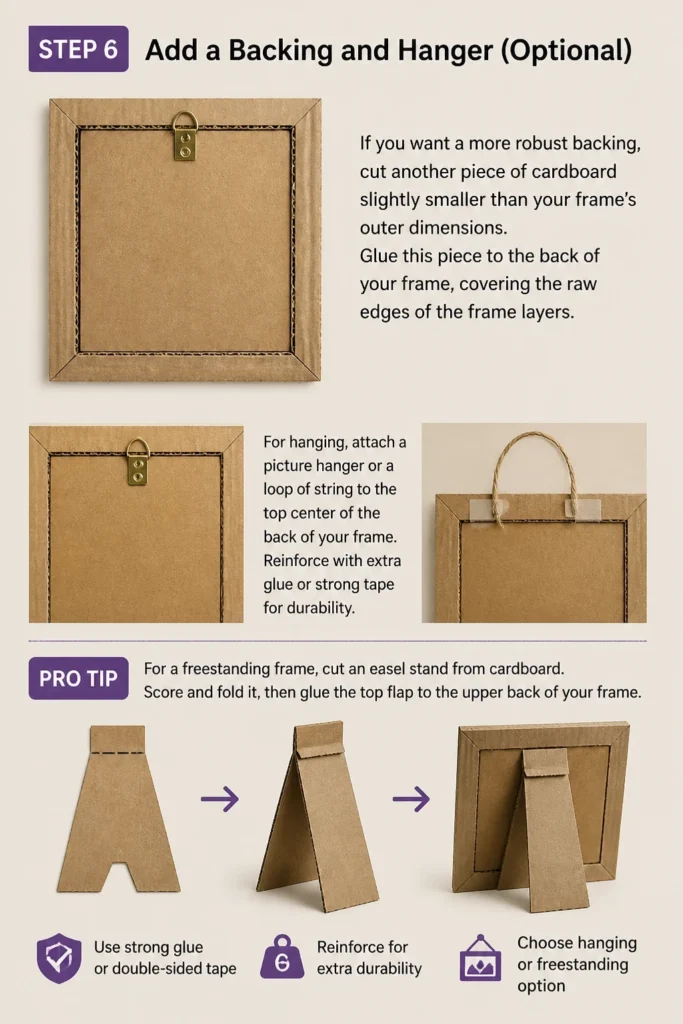
Glue this piece to the back of your frame, covering the raw edges of the frame layers.
For hanging, attach a picture hanger or a loop of string to the top center of the back of your frame.
Reinforce with extra glue or strong tape for durability.
Pro Tip: For a freestanding frame, cut an easel stand from cardboard. Score and fold it, then glue the top flap to the upper back of your frame.
Step 7: Decorate Your Frame
Now comes the fun part: personalization!
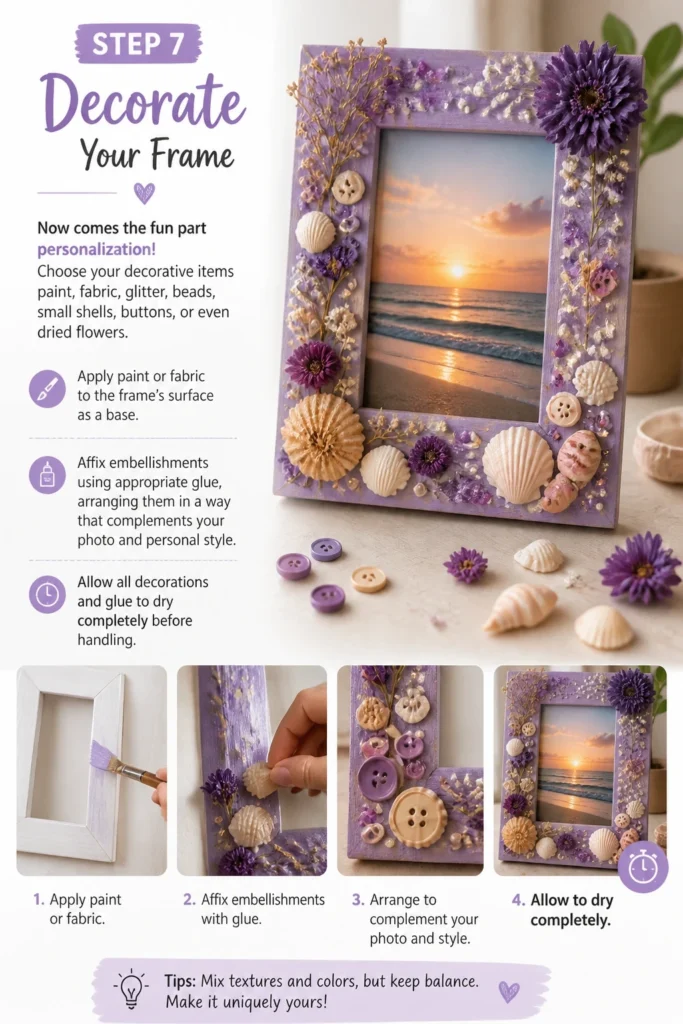
Choose your decorative items: paint, fabric, glitter, beads, small shells, buttons, or even dried flowers.
Apply paint or fabric to the frame’s surface as a base.
Affix embellishments using appropriate glue, arranging them in a way that complements your photo and personal style.
Allow all decorations and glue to dry completely before handling.
Step 8: Insert Your Photo and Display
Once everything is dry and secure, slide your chosen photo into the slot you left open at the bottom of the frame.
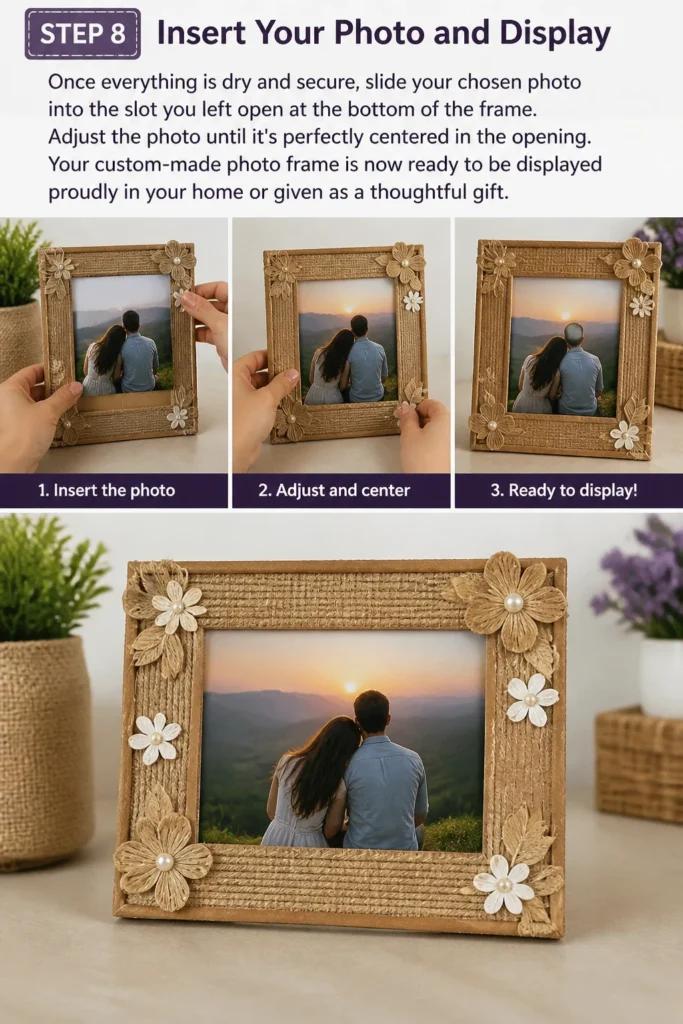
Adjust the photo until it’s perfectly centered in the opening.
Your custom-made photo frame is now ready to be displayed proudly in your home or given as a thoughtful gift.
Common Mistakes to Avoid
Incorrect Measurements
Many people rush through the measuring stage, leading to crooked frames or openings that don’t fit the photo.
Always double-check your measurements and use a metal ruler for accuracy. A slight error here can ruin the entire frame’s appearance.
Rushing Glue Drying Time
Impatience with glue can cause layers to shift or decorations to fall off.
Always allow ample drying time for each adhesive application, especially between structural layers. Rushing leads to weak bonds and a less durable frame.
Over-Decorating
While decorating is exciting, it’s easy to go overboard, making the frame distract from the photo.
Aim for balance. Let the photo be the star, and use embellishments to enhance, not overshadow, its beauty. Sometimes, less is more.
Using Flimsy Materials
Opting for thin or weak cardboard can result in a flimsy frame that warps easily.
Invest in sturdy, thick cardboard or foam core for the base structure. This ensures your frame is durable and holds its shape over time.
Troubleshooting
Frame Warping
If your frame starts to bend or warp, it’s often due to moisture or uneven drying.
Try placing the frame under heavy books on a flat surface for a day or two. Ensure you’re using appropriate glue for cardboard and allowing full drying time in a dry environment.
Photo Slipping
If your photo keeps slipping out of the bottom slot, the opening might be too wide, or the frame isn’t thick enough to hold it securely.
You can add a small piece of tape to the back of the photo, attaching it to the inner back of the frame, or glue a thin strip of cardboard along the inside bottom edge to create a tighter fit.
Decorations Falling Off
This usually happens if the wrong type of glue was used or not enough was applied.
Ensure you’re using a strong craft glue suitable for the materials you’re attaching. For heavier items, hot glue can provide a quicker, stronger bond. Clean surfaces before gluing for better adhesion.
Key Takeaways
- Accurate measuring and cutting are fundamental for a professional-looking frame.
- Always allow glue to dry completely between steps to ensure structural integrity.
- Choose sturdy cardboard or foam core for a durable and long-lasting frame.
- Personalize your frame with decorations that complement your photo, not overpower it.
- Safety first: always use a cutting mat and cut away from your body with sharp tools.
- Don’t be afraid to experiment with different materials and designs to find your unique style.
Frequently Asked Questions
What’s the best type of cardboard to use?
For a sturdy frame, corrugated cardboard from shipping boxes or foam core board works best. These materials offer good rigidity and are easy to cut. Avoid very thin or flimsy cardstock.
Can I use a different material instead of cardboard?
Absolutely! You can adapt these steps for materials like thin wood, craft foam, or even recycled plastic sheets. Just ensure you have the appropriate tools for cutting and gluing your chosen material.
How can I make my frame waterproof or more durable?
To add durability and some water resistance, you can seal your finished frame with a clear craft sealant spray or a coat of Mod Podge. This protects the decorations and the cardboard from moisture and wear.
How do I clean a homemade photo frame?
Gently dust your frame with a soft, dry cloth. If it’s sealed, you can lightly wipe it with a slightly damp cloth, but avoid excessive moisture. For unsealed frames, stick to dry dusting to prevent damage.
Our Top Recommended Finds
- Self-Healing Cutting Mat: Essential for protecting your work surface and prolonging blade life.
- Precision Craft Knife Set: A good set with various blades allows for detailed cuts and clean edges.
- Strong Multi-Purpose Craft Glue: A reliable adhesive is crucial for ensuring your frame holds together and decorations stay put.
Start Framing Your Story Today
Crafting a photo frame at home is more than just a DIY project; it’s a way to celebrate your memories and express your creativity.
The satisfaction of seeing your favorite picture beautifully framed in a piece you made yourself is truly unmatched.
Why not gather your materials and embark on this rewarding journey this weekend?
Beginner-friendly templates, step-by-step guides,
and weekly project ideas in your inbox.